SONICAKE MATRIBOX II User manual

ForFirmwareV1.0.3
USER‘S MANUAL
※ In the interest of product improvement, the specifications and/or the content of products (including but not limited to
appearances, packaging design, manual content, accessories, size, parameters and display screen), are subject to change
without prior notice. Please check with local supplier for exact offers. Specifications and features (including but not limited
to appearances, colors and size) may vary by model owing to environmental factors, and all images are illustrative.

ATTENTION ····················································1
OVERVIEW····················································2
PANEL INTRODUCTION···········································3
MAIN MENU···················································5
EFFECTS EDITING···············································6
SAVE MENU···················································10
TUNER·······················································10
LOOPER·····················································11
DRUM······················································11
Global Settings················································12
Input/Output·················································12
USB Audio···················································13
Footswitch ················································14
EXP Calibrate················································16
EXP 2 / Footswitch············································16
MIDI·······················································17
Display·····················································17
Auto CAB Match ···············································18
Global EQ····················································18
About·······················································18
Factory Reset················································19
Compatible software···········································19
EFFECT LIST··················································20
FX1 & FX2 modules·············································20
AMP modules·················································25
NR modules ··················································28
CAB modules·················································29
EQ modules··················································32
MOD modules·················································32
DLY modules··················································34
RVB modules·················································36
SND / RTN / VOL modules········································37
MIDI Control Information List·····································38
Troubleshooting···············································42
Specifications················································43
TABLE OF CONTENTS

Handling
Connecting the power and input/output jacks
Always turn OFF the power to the unit and all other equipment before
connecting or disconnecting any cables.
Also make sure to disconnect all connection cables and the AC adapter
before moving the unit.
Cleaning
Clean only with a dry cloth.
Alterations
Do not open the unit.
Do not attempt to service the unit yourself.
Opening the chassis for any reason will void the manufacturer’s warranty.
AC Adapter Operation
Always use a DC9V center negative 1000mA AC adapter. Use of an
adapter other than that specified could damage the unit or cause
malfunction and pose a safety hazard. Always connect the AC adapter to
an AC outlet that supplies the rated voltage required by the adapter.
Unplug the unit during lightning storms or when unused for long periods of
time.
Malfunction
If the unit should malfunction, disconnect the AC adapter and turn
the power OFF immediately. Then, disconnect all other connected
cables.
Prepare information including the model name, serial number,
specific symptoms related to the malfunction and contact
SONICAKE support (support@sonicake.com).
ATTENTION
Do not get the unit wet. If liquid is spilled on the unit, shut it off immediately.
Do not block any of the ventilation openings.
Keep away from heat sources.
Disconnect the unit during storms to prevent damage.
Operation of this unit within significant electromagnetic fields should be
avoided.
1
ATTENTION

OVERVIEW
Matribox II is Sonicake’s second-generation multi-effect processor,
inheriting the rich technical accumulation of the first-generation products
and making further breakthroughs in technology and quality. The new
hardware platform and digital modeling technology can perfectly
reproduce every detail of the sound, and perform more accurately, clearly
and with high fidelity, meeting various creative needs.
Compared with the first-generation product, Matribox II has a more user-
friendly and easy-to-understand operating interface, and its humanized
design allows you to control it more freely. It provides a wider range of
amplifier and effect models, and also provides you with more freedom to set
the effect parameters, allowing you to adjust various sounds as you like. In
terms of hardware, the interaction module of Matribox II and the design of
I/O ports have outstanding performance and quality.
Therefore, Matribox II can be said to be the overall evolution of the first-
generation product, and its outstanding performance makes it a full-
featured inspiration shaping device. Whether in the studio or live
performances, musicians and artists can rely on it to achieve better sound
and expression. It is a revolution in the Sonicake, a breakthrough in music and
technology, and the best choice for creating personalized music and
unleashing creativity!
2
OVERVIEW

12
3
4567
8 8 8
9
10
1Controls the master volume
To display preset information and other operational information
Can be turned or pressed to adjust parameters or change menus
Press to enter the Global menu
Press to turn on/off the drum machine, hold to enter the Drum menu
Press to return to the previous menu
Press to enter the Save menu to store changed parameters, rename or
copy presets
2
To adjust the parameters at the bottom of the screen, each menu has
different functions
Press to enter this effect module edit menu, press and hold to turn on/off
module
3
4
5
6
7
8
9
To control effect parameters or volume, and press the toe hard to switch
the pedal function
10
10 10
11
To switch presets, control modules on/off, etc.
11
PANEL INTRODUCTION
3
PANEL INTRODUCTION

1/4” TRS for connecting an external expression pedal or footswitch
controller
1/4” TS mono input jack for plugging in your instrument
1/8” TRS stereo input for connecting external devices (phone, MP3 player)
2×1/4” TS jacks for inserting external effect pedals into your signal chain
2×1/4” stereo output jacks, compatible with balanced (TRS) and
unbalanced (TS) outputs, for plugging in amps or other equipment
1/8” TRS stereo output for plugging in headphones
12
13
14
15
16
17
4
2×1/8” TRS jacks for connecting MIDI devices
USB Type-C connects to computer for use with supporting edit software
or connects to computer/phone as an audio interface
Plug in the DC 9V (1000mA) center negative power jack
18
19
20
PANEL INTRODUCTION
PANEL INTRODUCTION
12 13 14 15
19
15 16 16 20
181817

MAIN MENU
After startup, Matribox II defaults to the main menu, which has two display modes:
one focused on the effects chain and the other focused on the footswitch
function. These two display modes correspond to two footswitch modes under
default settings: Preset mode and Stomp mode.
AInput Level Monitor: monitors the input level. When the progress bar turns
red, it means the level has reached its peak
Output Level Monitor: monitors the output level. When the progress bar
turns red, it means the level has reached its peak
Preset Number: from 01-A to 66-C, where the number represents the preset
group, and each preset group is divided into three presets: A, B, and C
Preset Name
Preset State: if it appears, this preset has been changed
Footswitch Mode: indicates the current working status of the footswitch,
whether it is in preset mode or stomp mode
EXP 1 Status: indicates the status of the built-in expression pedal A/B
Drum Status: this icon lights up or goes off to indicate the on/off status of
the drum machine
B
C
D
E
F
G
H
Matribox II*
Preset Volume: indicates the preset volume of the current preset, ranging
from 0-100
Preset Speed: indicates the preset speed of the current preset, ranging
from 40-250
Effect Chain: indicates the order of the effect modules and the on/off
status of each module in the current preset’s effect chain
Parameter Bar: indicates the three quick-adjust parameters controlled by
the three knobs below the screen that correspond to the current preset.
The controlled parameters can be customized and are further described
in P08
I
J
K
L
A
B
C
D
E
F
G H
I J
K
L
PRESET MODE
5
MAIN MENU
Preset Mode
Preset VOLGainTone

6
MAINMENU/EFFECTSEDITING
STOMP MODE
In stomp mode, the display content is similar to the preset mode, but it will not
display the preset effect chain and instead show the footswitch functions.
In stomp mode, the default functions of the A, B, and C footswitches are CTRL 1,
CTRL 2, and CTRL 3, respectively. Simultaneously pressing the A and B footswitches
will enter the tuner, and simultaneously pressing the B and C footswitches will enter
the looper menu. Long-pressing the A footswitch will switch to the tap tempo
function (long-press again to exit), and long-pressing the C footswitch will switch to
the preset mode.
EFFECTS EDITING
Edit presets and effects using the effects chain editing menu, effect module
editing menu, preset setting menu, and save menu.
Press the PARA knob on the main menu to enter the effects chain editing menu.
EFFECTS CHAIN EDITING MENU
This menu will display the complete effects chain, including the effect loop nodes,
as well as the order and on/off status of the modules.
In preset mode, from left to right, A, B, and C footswitch functions are defaulted to
switch to the previous preset, switch to the next preset, and CTRL 1, respectively.
Simultaneously press the A and B footswitches will enter the tuner, while
simultaneously pressing the B and C footswitches will enter the looper menu. Long-
pressing the C footswitch will switch to stomp mode.
MAIN MENU
Stomp Mode
Preset VOLGainTone
TUNER LOOPER
Preset Settings
Current EffectON/OFF
ON
Position

7
When the PARA knob is set to “FX 1”, “FX 2”, “AMP”, “NR”, “CAB”, “EQ”, “MOD”,
“DLY”, or “RVB” modules, you can use the knobs below the screen to adjust
the module on/off switch, current effect, and module position. Pressing the
PARA knob will take you to the effect module editing manu for more detailed
adjustment of module effects and parameters.
When the PARA knob is set to “VOL”, you can use the knobs below the screen
to adjust the module on/off switch, volume, and module position. However,
unlike the other modules, this module is not in the effect module editing menu.
It’s recommended to link this module to a EXP to simulate a volume pedal in
the effects chain. Please refer to P09 for more details.
When the PARA knob is set to ”Preset Settings”, you can use the knobs below
the screen to adjust the preset volume and BPM. Pressing the PARA knob will
take you to the preset settings menu for further control over the presets.
EFFECTSEDITING
EFFECTS EDITING
Preset Settings
Preset Settings
Preset Settings
Current EffectON/OFF Position
ON/OFF Position
ON
ON
BPMPreset VOL

8
EFFECT MODULE EDITING MENU
To enter the effect module editing menu, select the effect module in the
effect chain editing menu and press the PARA button, or simply press the
effect module button on the main menu.
In this menu, you can rotate the PARA knob to select the effect, and press the
PARA knob to confirm the current effect selection. After selecting the effect,
you can press the PARA knob again to flip through the effect parameter
pages, and the upper right corner of the parameter bar will display the
current page number.
PRESET SETTING MENU
To enter the preset setting menu, select “Preset Settings” in the effects chain
editing menu and press the PARA knob.
Press
PARA
The send and return nodes of the effect loop are not part of the effect
modules and are also not on the effect module editing menu. When the PARA
knob is set to the send node, you can use the knobs below the screen to
adjust the send volume and send node position. When the PARA knob is set to
the return node, you can use the knobs below the screen to adjust the return
volume, mix, and return node position. The mix is the ratio between the effect
loop signal and the original effect chain signal. When the mix is at its
maximum, the effect chain and effect loop are connected in series.
EFFECTS EDITING
MixReturn Level PositionSend Level Position
Preset SettingsPreset Settings
Preset Settings
BPMPreset VOL Knob 1 Para 1
Knob Settings
EXP Settings
CTRL Settings
Preset Settings
EFFECTSEDITING

9
To enter the CTRL settings menu, rotate the PARA knob to select “CTRL
Settings” while in the preset settings menu, and press the PARA knob.
Matribox II supports three CTRL functions, and each CTRL can be associated
with the on/off status of multiple effect modules. Use the first knob to the left
of the screen to select CTRL 1/2/3, and use the PARA knob to rotate and
press it to associate the selected modules.
After entering this menu, the cursor is set to “Knob Settings” by default,
where you can set the quick adjustment parameters of the parameter bar in
the main menu. Use the knobs below the screen to select the controlled
module and controlled parameter, not only module parameters, but also
controlled parameters can be set as preset volume or BPM. Press the PARA
knob at this time to flip through and set the controlled parameters of the
other two knobs.
To enter the EXP settings menu, rotate the PARA knob to select “EXP
Settings” while in the preset settings menu, and press the PARA knob.
In the EXP settings menu, you can set the control parameters of the built-in
pedal EXP 1 and the external pedal EXP 2. EXP 1’s A/B status and EXP 2 can
control three effect parameters respectively.
Knob Settings
EXP Settings
CTRL Settings
Press PARA to Enter
EXP 1 -A
EXP 1 -B
EXP 2
Para 1
Para 2
Para 3
Max: 100 Min: 0
Max: 100 Min: 0
Max: OFF Min: OFF
OFF
Module Para
Preset Settings - EXP SettingsPreset Settings
Preset Settings Preset Settings - CTRL Settings
Press PARA to Enter ON/OFF
OFF
Select Module
Knob Settings
EXP Settings
CTRL Settings
EFFECTSEDITING
EFFECTS EDITING

TUNER
10
Under default settings, pressing both footswitches A and B simultaneously will
enter the tuner.
Tuner mode can be set to Mute (for silent tuning), Bypass (for dry signal through)
and Thru (for effect signal through).
Tuner pitch calibration can be set from 435Hz to 445Hz, default is 440Hz.
SAVE MENU
Press the SAVE button on any menu to enter the save menu.
After entering this menu, the cursor is first in the left area. Use the PARA knob
to select the preset location by rotating and pressing it.
After selecting the preset location, use the three knobs at the bottom of the
screen to edit the preset name: Knob 1 selects the character, Knob 2 selects
the cursor position, Knob 3 deletes the character at the cursor position.
After editing the preset name, press the SAVE button again to confirm the
storage, or press the EXIT button to abandon the storage and return to the
previous menu.
Save to..
Letter Cursor
Pitch
Mode
Mute
SAVE MENU / TUNER

11
Pressing the PARA knob allows you to flip through the parameter bar.
Enabling “Drum Sync” and start recording when the drum machine reaches
the beginning of a bar. The recording will be slightly adjusted to align with the
drum machine.
When the auto recording is enabled, pressing the footswitch A will not start
recording immediately. Instead, recording will start automatically when you
start playing.
LOOPER
Pressing footswitch A starts recording, pressing it again starts playback, and
pressing footswitch A during playback starts overdubbing:
Pressing footswitch B stops recording or playback, while holding it down
clears all recorded phrases.
Pressing footswitch C performs undo/redo for the last looped overdub
phrase, while holding it down exits the looper menu.
The preset can be switched by turning the PARA knob.
Looper has two modes:
Pre mode, the looper will record mono audio without any effects, up to 90
seconds;
Post mode, the looper will record stereo audio with effects, up to 45 seconds.
Recording Playing overdubbing
Under default settings, pressing both footswitches B and C simultaneously
will enter the looper.
Rec VOL
Play VOL Position
Pre
REC/PLAY Stop
Clear Exit
Undo/Redo
Empty
Drum Sync Auto Rec
OFF
REC/PLAY Stop
Clear Exit
Undo/Redo
Empty
OFF
LOOPER

GlobalSettings
Press GLOBAL button to enter the global setting. In this menu, rotate the
PARA knob to move the cursor, and press the PARA knob to go to the next
page or turn the page for the parameter below.
Input Mode: Input Mode: to adjust the impedance, including acoustic guitars
(4.7MΩ), electric guitars (1MΩ) and line in ( 10kΩ), default is E.GT.
Input Level:You can adjust the value to get the bestexperience based on
varied instruments, ranged from -20dB to +20dB
No CAB mode(L/R): By activating no CAB mode onMono left or right,you can
get the audio effectwhere there is no CAB module simulation in theanalog
output.
Input/Output
12
DRUM
Long press the DRUM button to enter the drum machine menu, where you can
set the rhythm style, tempo, synchronization switch, and volume of the drum
machine.
When the “Sync” switch is turned on, the drum machine tempo can be
synchronized with the preset BPM.
⿎机
Sync
BPM Volume
OFF
Style Genre
No CAB Mode(L)
Input Mode Input Level
No CAB Mode(R)
OFF
OFFE.GT
IN/OUT USB Audio Footswitch
Global EQ
EXP 2 /
Footswitch
Auto CAB
Match
Display
EXP
Calibrate
DRUM / GLOBAL SETTINGS

13
Using Matrixbox II as an audio interface
When used as a USB audio interface, the Matribox II will be recognized by the
system as a 6-in/4-out USB device. Here we will show you how to use this
function through listing two scenarios.
Scene 1: Using the built-in re-amp function in the DAW to record or adjust the
tone
1. Set the Mono L and Mono R’s output to “Dry” in the Global Settings-USB Audio
2. In the DAW, create two new Tracks A and B, and import/record a dry guitar
Track in A
3. Set Track A output to Output 3-4, set Track B input to Input 3-4, keep Track B’s
monitoring OFF
4. Play the dry track in DAW, and now you can hear the effect sound of the
processed dry track file in Matribox II
5. Activate “Record” in Track B on the recording software, then you’ll get to
record the Track with eect after re-amp on Track B.
Scene 2: Using LOOPBACK function to record, combining the audio from
multiple sources on your computer
1. In the DAW, create a new stereo audio track
2. Set the input to Input 5-6
3. Start recording in the DAW
4. By playing other audio sources on your computer, you can record them in the
track now
Rec Level:To control the master volume of the recording, ranged from -20dB
to +20dB.
Rec Mode L/R: When recording via USB, you can choose to use the left/right
channel for dry signal or effect signal.
AUX To USB: When activating, audios from AUX IN can be recorded in USB
devices
Monitor Level: To control the volume of playback through USB, ranged from
-20dB to +20dB.
USB mode:switch to a multi-channel USB output.The 6-in-4-out mode
includes MIDI information and can be selected when using the device as an
audio interface. The 2-in-2-out mode does not include MIDI information and is
suitable for most mobile systems with OTG functionality, but it cannot connect
to computer software .
USB Audio
GlobalSettings
Rec Mode(R)
Rec Level Rec Mode(L)
Wet0dB
IN/OUT USB Audio Footswitch
Global EQ
EXP 2 /
Footswitch
Auto CAB
Match
Display
EXP
Calibrate
Wet
USB Mode
Aux To USB Monitor Level
6-In 4-OutON 0dB
GLOBAL SETTINGS

14
Use PARA knob or tap the corresponding footswitch to position the
footswitch to which the function is to be assigned.
Tap/Hold: Used to assign the function of the selected footswitch when
tap/hold.
When the last option “Settings” is selected, the corresponding options are:
Current Mode:This option is used to select the footswitch function mode,
which is divided into Preset mode and STOMP mode. The default mode is
Preset mode.
EditPresetMode/StompMode:Turn the quick adjustment knob 2 or 3 at the
bottom of the screen to enter the interface of editing preset mode or STOMP
mode.
Footswitch
•Bank Sel Mode: The parameters are “Wait” and “Initial”. If you select “Initial”,
the bank will jump immediately when switching, and if you select “Wait”, the
bank will not jump directly when switching, but will enter the Wait Mode
screen.
GlobalSettings
Current FS Mode
Preset Mode
IN/OUT USB Audio Footswitch
Global EQ
EXP 2 /
Footswitch
Auto CAB
Match
Display
EXP
Calibrate
Edit Preset Mode Edit Stomp Mode
Tap
Preset -
Hold
Preset -
Preset -
Preset -
Preset +
Preset + FS Mode
LOOPER
TUNER
Setting
Footswitch - Edit Preset Mode Footswitch - Edit Preset Mode
Preset -
Preset -
Preset +
Preset + FS Mode
LOOPER
TUNER
Setting
Bank Sel Mode Display Mode
Initial Effects Chain
Reset
BANK+BANK-
GLOBAL SETTINGS

•Display Mode: Choose to display the “effect chain“ or “Footswitch
function“ in the main interface, as follows:
•Reset: Rotate the quick adjust knob3 to reset the footswitchs’ function in
current page to factory default setting, as follows:
15
Footswitchfunctionsinclude:
Bank:Enter bank selecting menu
Bank+/Bank-:Load the latter /former adjacent bank
Preset +/Preset -:Load the latter/former adjacent preset
A/B/C: Load the A/B/C preset
LOOPER: Enter the Looper
DRUM: Play/stop the drum
Drum Preset+/-:Load the latter/former adjacent drum patch
EXP 1A/B: Switch between A/B of EXP 1
FS Mode: Switch footswitch mode to "Preset Mode" or “Stomp Mode”
TUNER: Enter the tuner
CTRL1/2/3: Execute CTRL 1/2/3’s function
Tap Tempo: Use Tap Tempo
None: Nofunction
Matribox II*
Preset Mode
Stomp Mode
TUNER LOOPER
Effect Chain Footswitch Function
GlobalSettings
Reset footswitch settings.
Are you sure to continue?
CANCEL OK
GLOBAL SETTINGS

16
EXP2/Footswitch
Mode: Select the type of external
device to be connected to the EXP/FS
jack.
When the connected device is
expressionpedal,select"EXP"option,
thenthe parameters of EXP control
can be set in “Preset Settings - EXP
Settings - EXP 2“
When the connected device issingle
ordualfootswitch,select“SingleFS“
or“DualFS“option.
As shown, turn Quick Access Knob 1 or 2 to calibrate EXP 1 or 2.
EXP Calibrate
GlobalSettings
IN/OUT USB Audio Footswitch
Global EQ
EXP 2 /
Footswitch
Auto CAB
Match
Display
EXP
Calibrate
Lift the pedal fully up towards heel. Press the pedal fully down towards toe.
Press strongly. Complete!
EXP 1 EXP 2
IN/OUT USB Audio Footswitch
Global EQ
EXP 2 /
Footswitch
Auto CAB
Match
Display
EXP
Calibrate
EXP
Mode
Mode
Mode
Single FS
Dual FS
None
None None
EXT FS 1 Tap
EXT FS 1 Tap
EXT FS 2 Tap
GLOBAL SETTINGS

17
MIDI
MIDI In Source: Control where the MIDI message is coming from. The opion are
“TRS Only”(Only receiving MIDI messages from the MIDI IN), USBOnly (Only
receiving MIDI messages from the USB), Mixed (Receiving from both the MIDI IN
and the USB).
Input Ch (TRS) /Input Ch (USB) /Output Ch (TRS)/Output Ch (USB): For setting
up the channel of the USB input and the MIDI messages’ input and output,
rangefromOmni-1-16.
Clock Source: For choosing the source of the MIDI clock.Theopitionsare
Internal (Only receiving from the internal clock),TRSOnly(Only receiving the
clock messages from the MIDI IN),“USB Only”(Only receiving the clock
messages from the USB),"External"(Only receiving from the external clock),
"Mixed"(Receiving clock messages from the internal clock, MIDI In and USB. If
using dierent clock sources simultaneously).
Notes:
1. When “TRS Only” , “USB Only” or “External” is selected, the internal clock will not work and
the Tap Tempo will not function
2. If using dierent clock sources simultaneously, then the last message type the Matribox II
receives will cover previous ones
Clock Out (TRS)/Clock Out (USB):To control whether the MIDI OUT and USB
will send out MIDI clock messages.
Note: When turned ON, this unit will negate all input signals; Additionally, when your Clock
Source is set to “TRS Only” or “USB Only”, this unit will not send out MIDI clock messages.
GlobalSettings
Display
Brightness: For adjusting screen
brightness.
Display Time: The time MatriboxII
needs to enter sleepmode.
Language: For choosing your system
language.
IN/OUT USB Audio Footswitch
Global EQ
EXP 2 /
Footswitch
Auto CAB
Match
Display
EXP
Calibrate
MIDI In Source
Mixed
Input Ch(TRS) Input Ch(USB)
IN/OUT USB Audio Footswitch
Global EQ
EXP 2 /
Footswitch
Auto CAB
Match
Display
EXP
Calibrate
Brightness
50
Display Time
Always
Language
English
GLOBAL SETTINGS

18
Auto CAB Match
When turned ON, the effects in the
CAB module will correspondingly
change with the eects in the AMP
module.
Global EQ
Select this function and press the PARA knob to enter the global EQ edit
screen.
ON/OFF:On/O global EQ.
Level: Adjust the master volume of the global equalizer.Range: 0-100.
Low Cut: High pass filter to cut o low frequency signals.Range: OFF-20Hz-
20000Hz.
Bank1-4Frequency: To adjust the corresponding filter’s frequency.Range:
20Hz-20000Hz,Band 1-4’s default frequencies are accordingly 100Hz, 500Hz,
1000Hz and 5000Hz.
Band1-4 Q:Width. To adjust the width of the formant (slope of the filter), the
larger the number, the steeper the slope. Range:0.1-10.0,defaultis0.7.
Band1-4 Gain:Adjust the filter gain.Range:-20dB-+20dB,defaultis0dB.
High Cut: Low pass filter to cut o high frequency signals.Range:20Hz-20000Hz
-OFF.
GlobalSettings
About
This menu is to check the firmware
version.
IN/OUT USB Audio Footswitch
Global EQ
EXP 2 /
Footswitch
Auto CAB
Match
Display
EXP
Calibrate
ON/OFF
ON
IN/OUT USB Audio Footswitch
Global EQ
EXP 2 /
Footswitch
Auto CAB
Match
Display
EXP
Calibrate
Press PARA to Enter
ON/OFF
ON
Level
50
Low Cut
OFF
Global EQ
Global EQ
EXP 2 /
Footswitch
Auto CAB
Match
Display
EXP
Calibrate
About Factory
Reset
Firmware Version V1.0.3
©Sonicake All Rights Reserved
GLOBAL SETTINGS
Table of contents
Popular Computer Hardware manuals by other brands

CYP
CYP DS-VWC2-4K22 Operation manual
NETGEAR
NETGEAR MA521 - 802.11b Wireless PC Card installation guide
Measurement Computing
Measurement Computing DaqBoard/300o series user manual
Seagate
Seagate Ultra 160 product manual
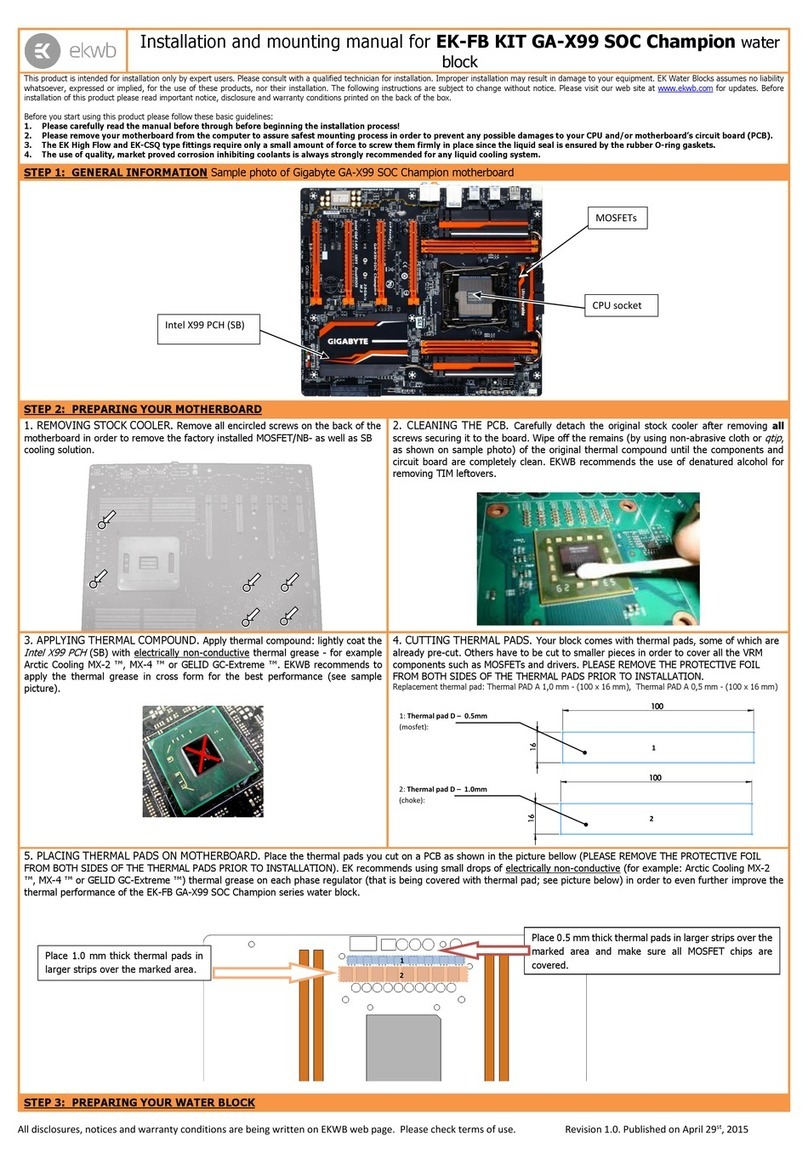
ekwb
ekwb EK-FB KIT GA-X99 SOC Champion Series INSTALLATION AND MOUNTING MANUAL
EK-Quantum
EK-Quantum Monoblock Series user guide
