SONIQ MB301-AU User manual
1 2
MB301-AU
Bluetooth®Speaker

1 2
SAFETY PRECAUTIONS
CAUTION: The marking information is located at the back of the apparatus.
TO PREVENT FIRE OR SHOCK HAZARD, DO NOT EXPOSE THE UNIT TO RAIN OR
MOISTURE.
Warnings:
• TheAC/DC adaptor is used as disconnect device and it should remain readily operable
duringintendedused.Inordertodisconnecttheapparatusfromthemainscompletely,the
AC/DCadaptorshouldbedisconnectedfromthemainssocketoutletcompletely.
• Minimum10cm(4inches)distancesaroundtheapparatusforsufcientventilation.
•Donotusetheunitinplacesthatareextremelyhot,cold,dustyorhumid.
•Donotrestricttheairowoftheunitbyplacingitinaplacewithpoorairow,bycoveringitwith
acloth,orbyplacingitoncarpeting.
•Theapparatusshallnotbeexposedtodrippingorsplashingandthatnoobjectslledwith
liquids,suchasvases,shallbeplacedonapparatus.
• Batteriesshallnotbeexposedtoexcessiveheatsuchassunshine,reorthelike.
• Theventilationshouldnotbeimpededbycoveringtheventilationopeningswithitemssuch
asnewspaper,table-cloths,curtains,etc.
• Nonakedamesourcessuchaslightedcandlesshouldbeplacedontheapparatus.
On Operation
Do not turn up the volume while listening to your device with no audio signals or very low level
inputs.Ifyoudoso,thespeakersmaybedamagedwhenthepeaklevelofthesoundisplayed.
On Use
Usetheunitinmoderateclimates.Neverusetheunitwhereitwouldbesubjectto:
- Heatsourcessuchasradiatorsorairducts.
- Directsunlight.
- Excessivedust.
- Moistureorrain.
- Mechanicalvibrationorshock.
- Unevensurface.
• Donotplaceanyheavyobjectsontopoftheunit.
• WhentheunitisusedwithanAC/DCpoweradaptor,donotwraptheunitinacloth,blanket,
etc..Ifyoudoso,thetemperatureinsideandoutsidetheunitmayriseconsiderably,resulting
in malfunctioning of the unit.
• Iftheunitisbroughtdirectlyfromacoldtoawarmlocation,orisplacedinaverydamproom,
themoisturemaycondenseonthelensinsidetheunit.Shouldthisoccur,theunitwillnot
operate.Inthiscase,removethediscandleavetheunitinawarmplaceforseveralhours
untilthemoistureevaporates.
• Fortheunittooperateatitsbest,itshouldnotbesubjecttotemperaturesbelow41°F(5°C)
orabove95°F(35°C).
1. Readtheseinstructions.
2. Keep these instructions.
3.Heedallwarnings.
4.Followallinstructions.
5.Donotusethisapparatusnearwater.
6.Cleanonlywithadrycloth.
7.Donotblockanyoftheventilationopenings.Installinaccordancewiththemanufacturer’s
instructions.
8.Donotinstallnearanyheatsourcessuchasradiators,heatregisters,stoves,orother
apparatus(includingampliers)thatproduceheat.
9.Donotdefeatthesafetypurposeofthepolarizedorgrounding-typeplug.Apolarizedplug
hastwobladeswithonewiderthantheother.Agroundingtypeplughastwobladesanda
thirdgroundingprong.Thewidebladeorthethirdprongisprovidedforyoursafety.When
theprovidedplugdoesnottintoyouroutlet,consultanelectricianforreplacementofthe
obsolete outlet.
10.Protectthepowercordfrombeingwalkedonorpinchedparticularlyatplugs,convenience
receptacles,andthepointwheretheyexitfromtheapparatus.
11.Onlyuseattachments/accessoriesspeciedbythemanufacturer.
12.Useonlywithacart,stand,tripod,bracket,ortablespeciedbythemanufacturer,
orsoldwiththeapparatus.Whenacartisused,usecautionwhenmovingthe
cart/apparatuscombinationtoavoidinjuryfromtip-over.
13.Unplugthisapparatusduringlightningstormsorwhenunusedforlongperiods.
14.Referallservicingtoqualiedservicepersonnel.Servicingisrequiredwhentheapparatus
hasbeendamagedinanyway,suchasthepower-supplycordorplugisdamaged,liquid
hasspilledorobjectshavefallenintotheapparatus,theapparatushasbeenexposedto
rainormoisture,doesnotoperatenormally,orhasbeendropped.
WARNING:
Shouldanytroubleoccur,disconnecttheAC/DCpoweradaptorandreferservicingtoa
qualiedtechnician.
The symbol means that the unit
complies with European safety and
electrical interference directives.
Waste electrical and electronic
products must not be disposed of
with household waste. Please refer
to the retailer from whom yo u
purchased this item for disposal
instructions.
IMPORTANT SAFETY INSTRUCTIONS
3 4
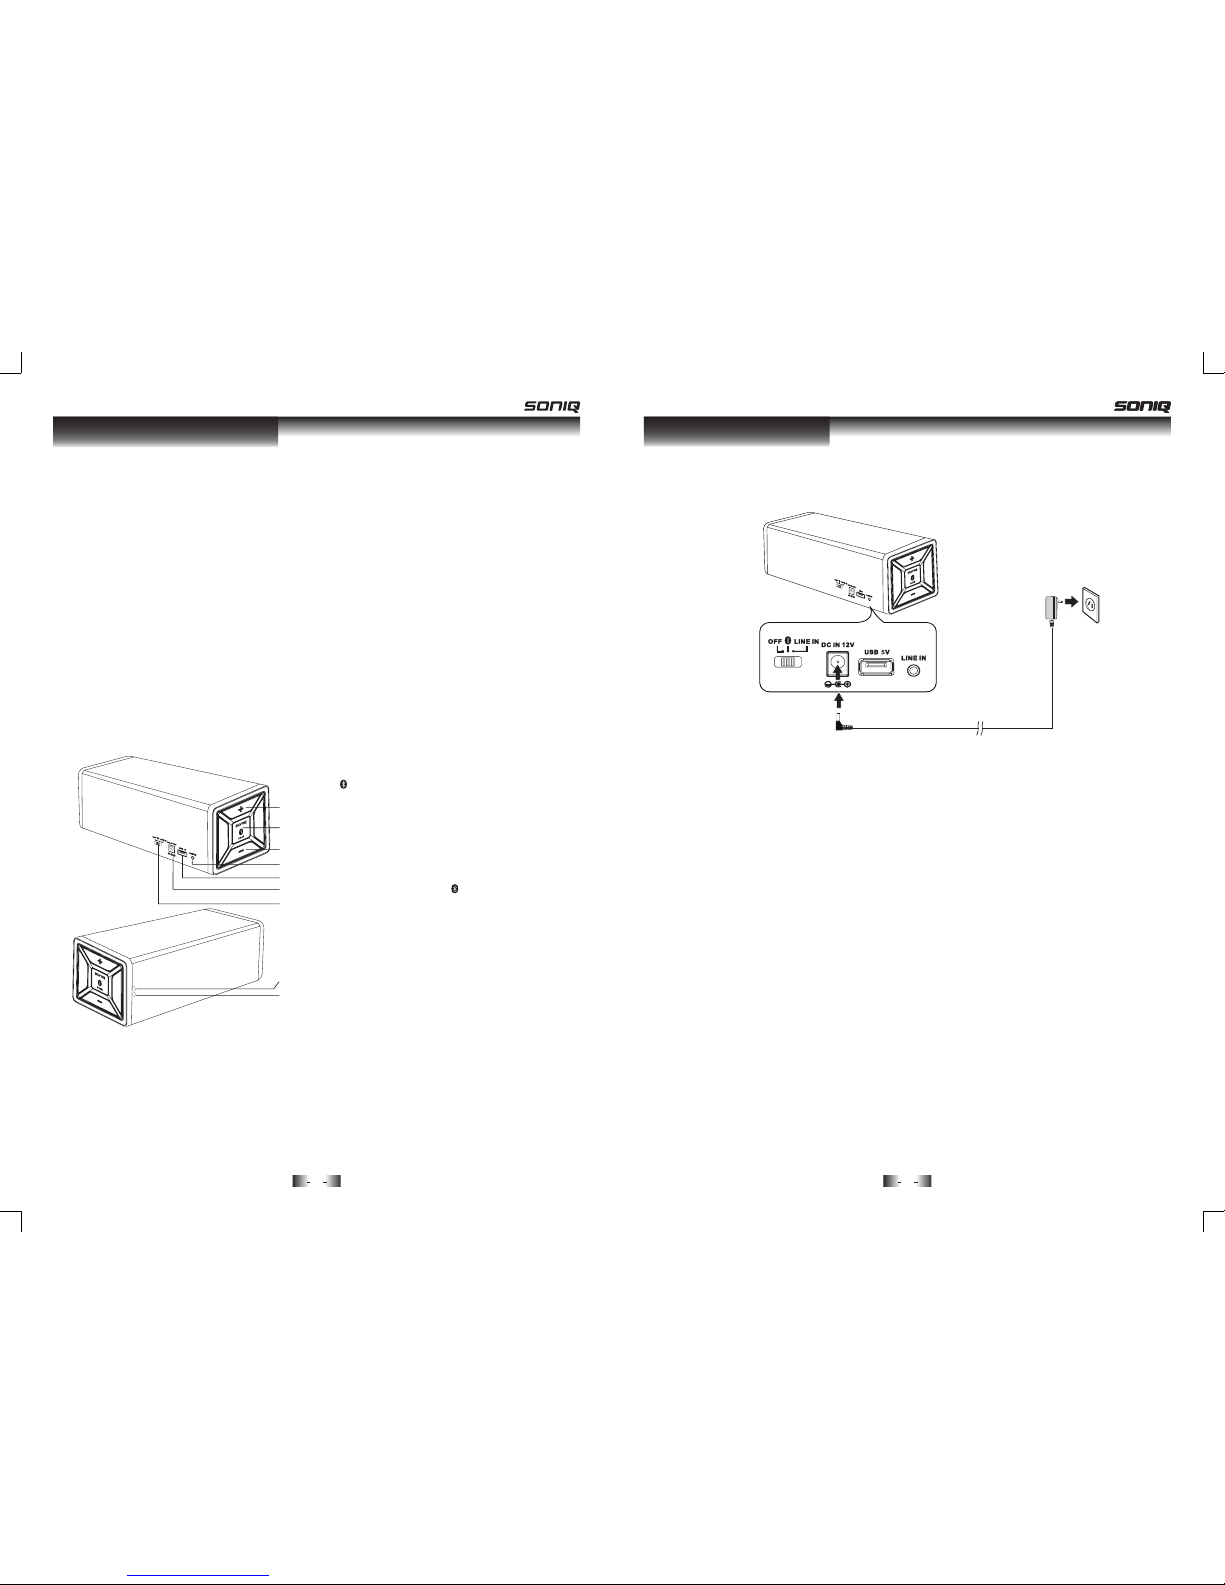
Using the power cord with AC/DC adaptor
ConnectthepowercordfromDC IN 12VjackofthebackoftheunittoACoutlet.
To AC outlet
AC/DC adaptor (Supplied)
CAUTIONS:
• UsinganAC/DCadaptorthatisnotsuppliedwiththeunitmaydamagetheunit.
• The supplied AC/DC adaptoroperatesonAC100V-240V~50/60Hz.Ensuretheratedvoltageof
theadaptormatchesyourlocalvoltagebeforeusing.
•ThesuppliedAC/DCadaptorisforusewiththisunitonly.Donotuseitwithotherequipment.
• Ifyouarenotgoingtousetheunitforalongtime,disconnecttheAC/DCadaptorfromthe
walloutlet.
• WhenevertheAC/DCadaptorispluggedintoawalloutlet,electricityisrunning throughthe
unit,evenitisinstandbymode.
POWER SUPPLY
To “DC IN 12V” jack
LOCATION OF CONTROLS
1.VOLUME +:Toincreasethevolume.
2. PAIR:Forpairingfeatureuse.
3.VOLUME -:Todecreasethevolume.
4.LINE IN jack: Ø3.5mm jack for external
audio sources.
5.USB 5Vport:Forchargingonly.
6. DC IN 12Vjack:ToconnecttoAC/DCadaptor.
7. Slide Switch (OFF//LINE IN):Toslide
horizontallytoselectLINEINandBluetooth®
modes, or turn off the unit.
8. Line In Indicator:Toturngreenwhenunit
isonLINEINmode.
9.Bluetooth®Indicator:Toturnbluewhen
theunit isonBluetooth® mode.Blinking
blue:readytopair.Solidblue:paired.
1
2
3
4
5
6
7
9
8
TABLE OF CONTENTS
Safety Precautions....................................................................................................................1
Important Safty Instructions......................................................................................................2
Location of Controls .................................................................................................................3
Power Supply ...........................................................................................................................4
EnjoyingAudioviaBluetooth®.....................................................................................................5
EnjoyingAudioviaLINEINjack................................................................................................6
Troubleshooting Guides..............................................................................................................6
Specication .............................................................................................................................6
AC/DC Adaptor....................................................................................................x 1
User Maunal...............................................................................................................x 1
ACCESSORIES
5 6
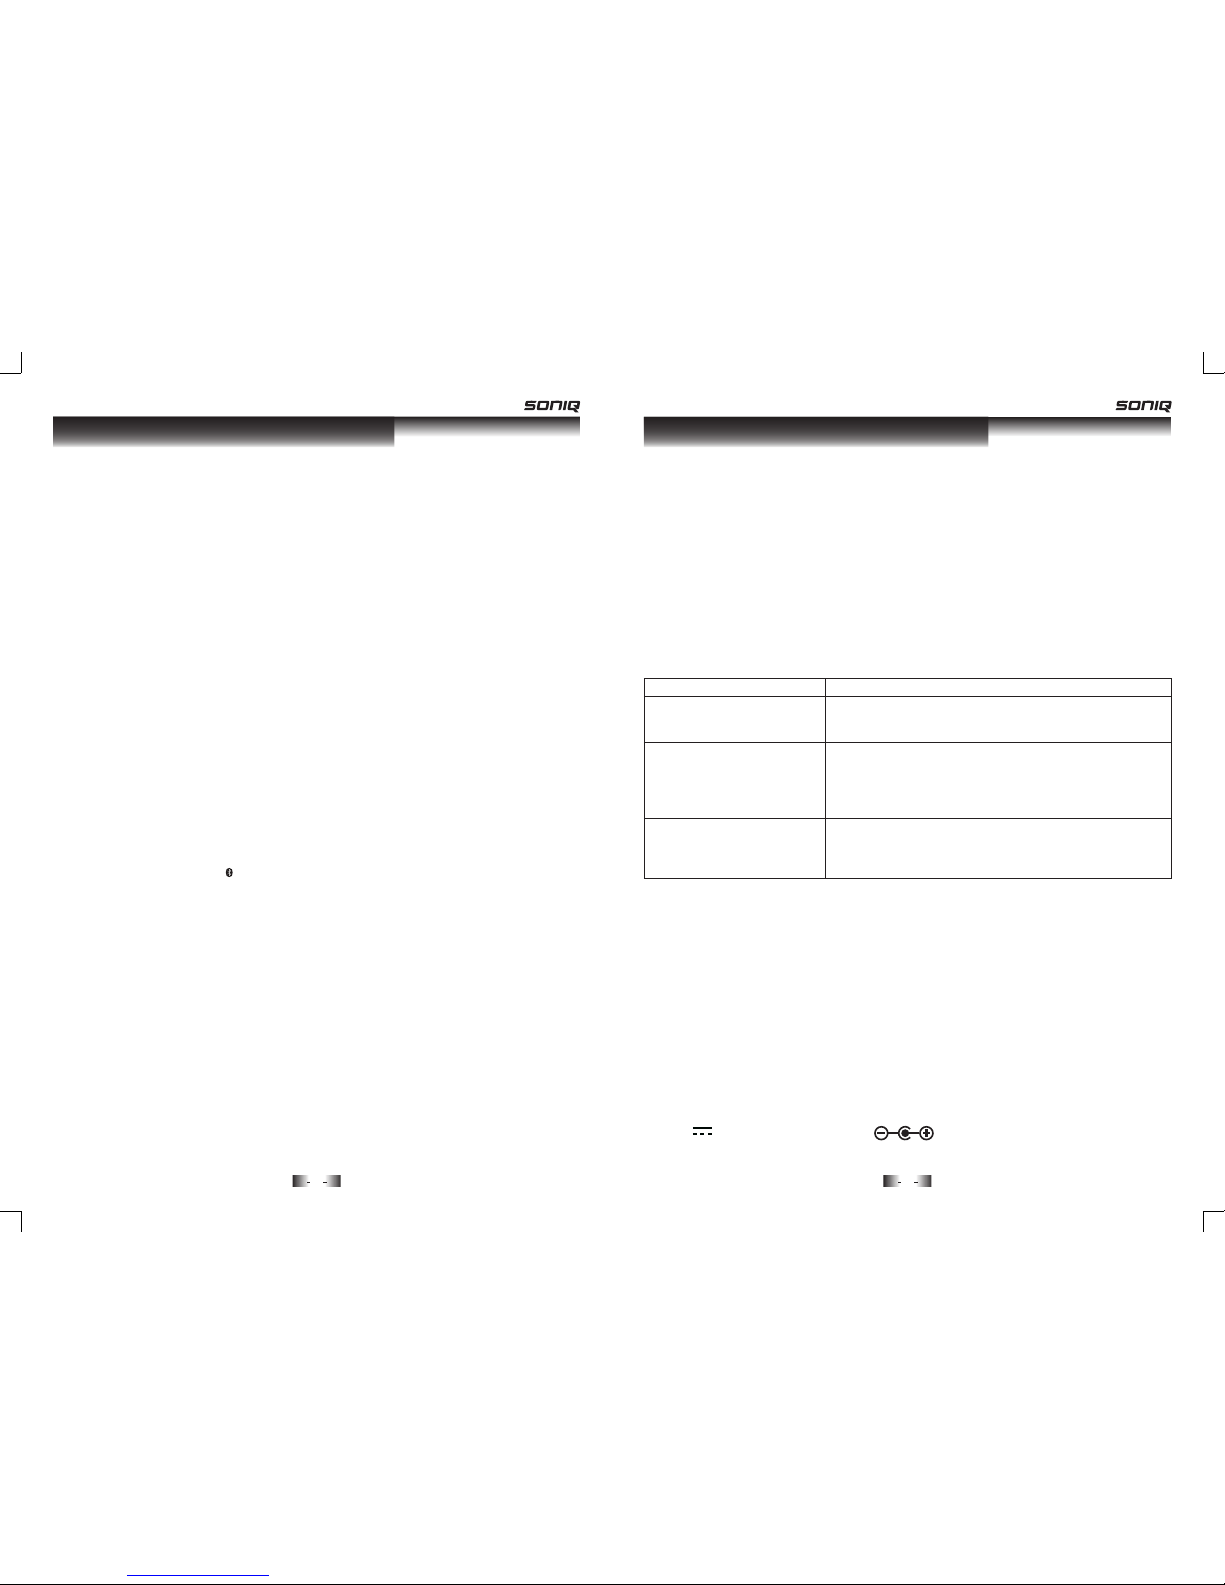
TROUBLESHOOTING GUIDES
SPECIFICATION
ESD Remark:
In case of malfunction due to electrostatic discharge just reset the product (disconnect and
reconnectofthepowersourcemayberequired)toresumenormaloperation.
Cleaning the surface of the unit
• DisconnectthesystemfromACpowerbeforecleaningthe surfaceoftheunitwithasoft
dust cloth.
• Cleanthesurfacewithasoftcleanclothorslightlymoistenedchamoisleather.DONOT
usesolventsas itmaycausedamagetotheunit.
The descriptions and displays in this owner’s manual are for the purpose of
general reference only and not as a guarantee. In order to provide you with the
highest quality product, we may make changes or modications without prior notice.
DC12V2.0AExternalDCSupply
YoucanenjoymusicviatheLINE IN jackoftheunit.
1.ConnecttheLINE INjackon thebacktotheLineOutor Earphonejackof theother
devices(suchasyourPC)usingtheLine-incable(notsupplied).
2.SlidehorizontallytheSlide SwitchonthebacktoswitchtoLINE IN mode.
The green indicator is highlighted.•
3.Turnontheaudiodeviceyouhaveconnected,andselectamusictoplayback.
4.Press+ or -buttonsontheup/downoftheunittoadjustthevolumeduringplayback.
Note:
SuggestusingØ3.5mmLINE INjackforthedeviceconnection.
ENJOYING AUDIO VIA LINE IN JACK
Pairing your device via Bluetooth®
1.SlidehorizontallytheSlide Switch onthebacktoselectBluetooth®mode.
•Theblueindicatorishighlightedandashesquicklywhichmeanstheunitisreadytopair.
2.TurnontheBluetooth®featureof your device (e.g. Smart mobile phone with Bluetooth®
function).
3.SearchandselectMB301onyourdevice;orselectMB301directlyifMB301autodisplay
onyourdevice.
•Theblueindicatorwillstopashingandstaylightingiftheyarepairedsuccessfully.
•Ifthepairingfails,trytopairagain.
•IfyourBluetooth®device(e.g.Smartmobilephoneetc.)needsthePINcodewhilepairing,please
enter4-digitnumber:0000.
Note:
This unit auto searches for the last paired Bluetooth® device in memory when you start
pairing,and will be auto connected. If automaticconnection does not happen, please try to
operateonyourpaireddevicemanually.
Enjoying music via this unit
Afterpairingissuccessful,youcanstartenjoyingmusicfromthisunit.
1.Operateyourpaireddevicetoselectadesiredmusic.
2. Press + or -buttonsontheup/downoftheunittoadjustthevolumeduringplayback.
3.Operateyourpaireddevicetoplayorpausemusic.
Switch the unit to receive another Bluetooth®device
1.DisconnectthepairedBluetooth®devicebyoneoftwomethodsbelow:
•You can closetheBluetooth®featureofpaireddevicedirectly.Thentheblueindicatorashes
slowlywhichmeanstheunitisreadytopairanotherdevice.
•Youcanalsopressandhold PAIR buttontodisconnectyourBluetooth®devicepaired(e.g.
Smart phone etc.) from the unit.Then the blue indicator ashes quickly again which also
meanstheunitisreadytopair.
2.Turn on the Bluetooth® mode of your other device withBluetooth® feature (e.g. Smart
phoneetc.),thensearchandselectMB301.Thecurrentdevicewillpromptyouifpairingis
successful.
Now, you can enjoy the music using current Bluetooth®device.
Note:
For details, please refer to the user manual ofyour Bluetooth® device.The unit can onlybe
paired with one Bluetooth® device. If the unit is already paired with one Bluetooth® device,
you will not allow to pair other Bluetooth® device. Even you nd the name “MB301” in the
device.
ENJOYING AUDIO VIA BLUETOOTH®
PROBLEMS SOLUTIONS
System can not be turned on •Makesurethatthepoweroutletcansupplypower.
•Check if the power cord is properly pluged into power
outlet.
Bluetooth®devices doesn’t
pair with this unit.
•Makesureyourbluetooth®deviceisworkingproperly.
•Check if the slide switch on the back is slided to position
of bluetooth mode.
•Checkyourdevice’smanualfordetailsonBluetooth®
pairing and linking.
No sound •Makesurethecurrentmodeiscorrect.
•Makesureyou’veturnedontheconnecteddevice,and
musicarebeingplayedback.
•Checkifvolumeissettozero.
Table of contents
Other SONIQ Speakers manuals

SONIQ
SONIQ MB405-AU User manual

SONIQ
SONIQ MB410-AU User manual

SONIQ
SONIQ MB206K-AU User manual

SONIQ
SONIQ MB101K User manual

SONIQ
SONIQ MB412-AU User manual

SONIQ
SONIQ MB415-AU User manual

SONIQ
SONIQ i303 User manual

SONIQ
SONIQ CSA51-AU User manual

SONIQ
SONIQ CSA31-AU User manual

SONIQ
SONIQ CSA50-AU User manual


