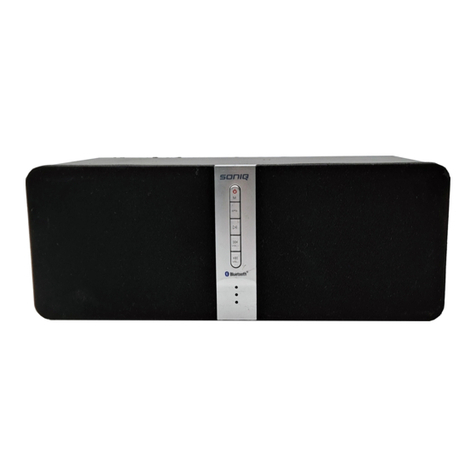
SONIQ MB402-AU User manual

MB402-AU
HOTLINE
AUSTRALIA :1300765 663
NEW ZEALAND:0800 100 236
www.soniq.com
MD140320-01
Printed in China
Portable Bluetooth Speaker

When used in the directed manner, this unit has been designed and manufactured to
ensure your personal safety. However, improper use can result in potential electrical
shock or fire hazards. Please read all safety and operating instructions carefully before
installation and use, and keep these instructions handy for future reference. Take special
note of all warnings listed in these instructions and on the unit.
Water and Moisture
The unit should not be used near water or wet space. Such as bathtub, washbowl, kitchen
sink, laundry tub, swimming pool or basement.
Ventilation
The unit should be situated in the location or position which places won't interfere its proper
ventilation. For example, it should not be situated on a bed, sofa, rug or similar surface that
may block the ventilation openings. Also, it should not be placed in a built-in installation, such
as a bookcase or cabinet, which may impede the flow of air through the ventilation openings.
Heat
The unit should be situated away from heat sources such as radiators, heat registers, stoves
or other appliances (including amplifiers) that produce heat.
Power Charger
The unit should be connected to a power charger(not included) only of the type described in
the operating instructions or as marked on the appliance.
Cleaning
The unit should be cleaned only as recommended. See the section « Care and Maintenance »
of this manual for cleaning instructions.
Object and Liquid Entry Care should be taken so that objects do not fall and liquids are not
spilled into any openings or vents located on the product.
Damage Requiring Service
This unit should be serviced by qualified service personnel when:
Objects have fallen into or liquid has been spilled into the enclosure.
The unit has been exposed to rain.
The unit has been dropped or the enclosure damaged.
The unit exhibits a marked change in performance or does not operate normally.
Periods of Nonuse
If the unit is to be left unused for an intended period of time, such as a week or longer, the USB
charging cable should be unplugged from the unit to prevent damage or corrosion.
Servicing
The user should not attempt to service the unit beyond those methods described in the user's
operating instructions.
Service methods not covered in the operating instructions should be referred to qualified service
personnel.
CAUTION:
Danger of explosion if battery is incorrectly replaced.
Replace only with the same or equivalent type.
WARNING:
◆ Batteries shall not be exposed to excessive heat such as sunshine, fire or the like.
◆ To reduce the risk of fire or electric shock, do not expose this apparatus to rain or moisture.
The apparatus shall not be exposed to dripping or splashing and that objects filled with
liquids, such as vases, shall not be placed on apparatus.
CARE AND MAINTENANCE
◆ Do not subject the unit to excessive force, shock, dust or extreme temperature.
◆ Do not tamper the internal components of the unit.
◆ Clean the unit with a damp (never wet) cloth except metal contact or speaker grille,
Solvent or detergent should never be used.
◆ Avoid leaving your unit in hot, humid or dusty places.
◆ Keep your unit away from heating appliances and sources of electrical noise such as
fluorescent lamps or motors.
◆ Always keep your finger dry and clear before touching all the buttons.
◆ Do not dispose of batteries in fire, batteries may explode or leak.
IMPORTANT SAFETY INSTRUCTIONS
IMPORTANT SAFETY INSTRUCTIONS

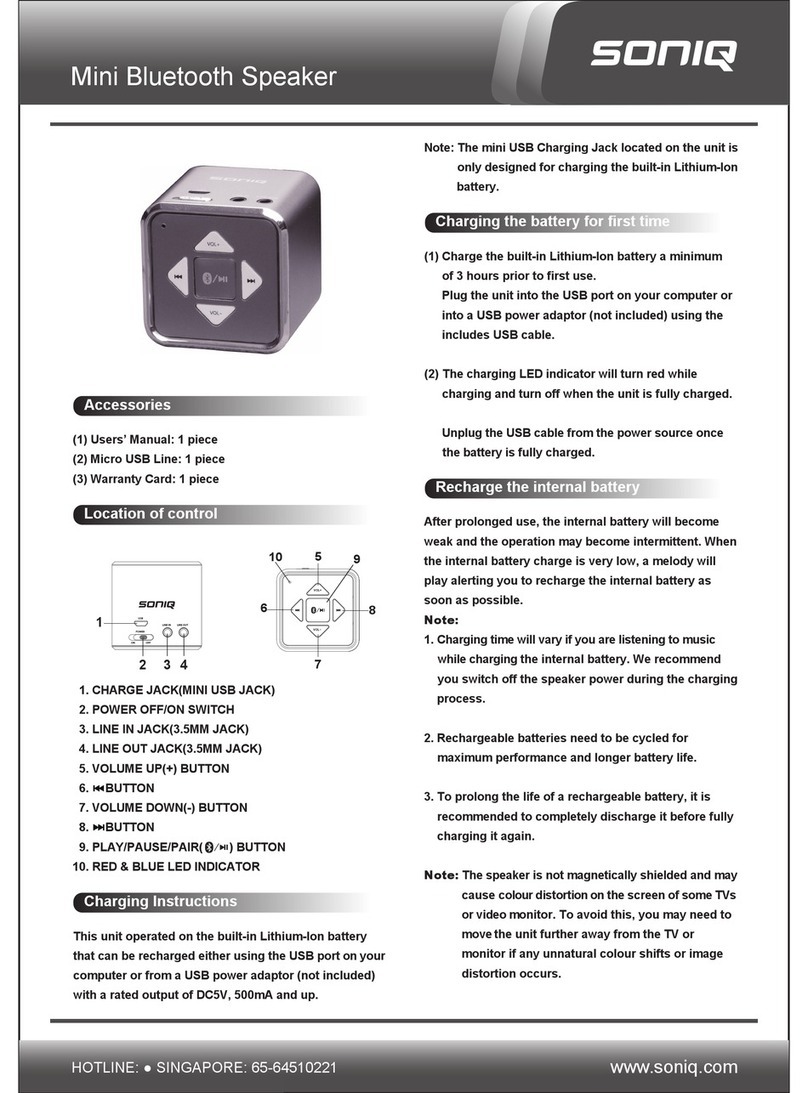
Top View
1
Press this button to adjust volume level down.
2.+ Button
Press this button to adjust volume level up
3. Button
·Press this button once to return to the beginning of current track or
previous track.
4. Button
Press this button once to advance to the next track.
5. Power On/Standby Button
6. Battery charging Indicator (Red color)
·Rapid flashing =low battery
While charging :
·Flashing =charging
·Steady Red= full charged
Operating mode indicator (Blue/Green)
Blue color =Bluetooth mode
Green=Aux-in mode
7.Built-in Microphone
8. Button
While unit is in Bluetooth Playback mode, press once to play or
pause the current track.
In Bluetooth mode, when receiving an incoming call on your cell phone,
tap this button once to answer the phone, press this button again or
press and hold this button to end the call or ignore the incoming call.
9. Mini USB Charging jack
10. Aux-In Jack
11. USB port (for charging external devices only)
.-Button
LOCATION OF CONTROLS
This unit operates on a built-in Li-ion battery that can be recharged either using the USB port on
your computer or from a USB power adaptor (not included) with a rated output of DC 5V 500mA
and up.
Note: The mini USB CHARGING JACK located on this unit is only designed for charging the
built-in Li-ion battery.
CHARGING THE BATTERY FOR FIRST TIME
1. Charge the built-in Li-ion battery a minimum of 4 hours prior to first use.
Plug the unit into the USB port on your computer or into a USB power adaptor (not included)
using the included USB cable.
2. The battery charging indicator flashes while charging and it stops flashing when the unit is
fully charged.
Unplug the USB cable from the power source once the battery is fully charged.
RECHARGING THE INTERNAL BATTERY
After prolonged use, the internal battery will become weak and the operation may become
intermittent. When the internal battery capacity is very low, the battery Indicator will rapidly
flash in red to alert you to recharge the internal battery as soon as possible.
Plug the speaker into a USB port on your computer by using the included USB cable or into
a DC 5V, 500mA and up USB power adaptor (not included). Disconnect the USB cable from
the speaker as soon as it is fully charged.
Notes:
1.Charging time will vary if you are listening to music while charging the internal battery.
We recommend you switch off the speaker power during the charging process.
2. To prolong the life of a rechargeable battery, it is recommended to completely discharge
it before fully charging it again.
3.Rechargeable batteries need to be cycled for maximum performance and longer battery
life. If you don't use the player that often, be sure to recharge the battery at least once a
month in order to keep the internal battery working properly.
Battery Note and Care
Do not burn or bury batteries.
Do not puncture or crush.
Do not disassemble.
Li-ion batteries must be recycled. Do not dispose of in the trash.
Use only chargers rated for Li-ion cells. Be sure the charger's voltage and current settings are
correct for the battery pack being charged.
Charge batteries on a fireproof surface and away from flammable items or liquids. Batteries
should NEVER be left unattended while charging. Only adults should charge the batteries.
Unplug the charger when the battery is charged or not in use.
Note: The speaker is not magnetically shielded and may cause color distortion on the screen
of some TVs or video monitors. To avoid this, you may need to move the unit further away from
the TV or monitor if an unnatural color shifts or image distortion occurs.
TURN THE SPEAKER POWER ON/OFF
1.Press the Power ON/OFF button on the top of the unit to turn the unit on,a voice prompt
“Power on” and a beep sound is heard in 2-3 seconds. Meanwhile, the Operating mode
indicator will flash in blue.
2.Press the Power ON/OFF button again to turn the unit off.
BATTERY CHARGING INSTRUCTION
BATTERY CHARGING INSTRUCTION

OPERATING THE SPEAKER IN BLUETOOTH MODE
Bluetooth involves a technology for wireless radio connection of devices over a short distance.
Devices with Bluetooth standard are transmitting between 2.402 and 2.480 GHz in the ISM band
(Industrial, Scientific and Medical). Interference can be caused, for example by WLAN-networks,
DAB radios, cordless phones, or microwave ovens which work on the same frequency band.
This speaker offers you the possibility to use a Bluetooth enabled device. The functional radius
is limited to approx.10 metres depending on the surroundings and the unit used.
If your playing device supports the A2DP profile (Advanced Audio Distribution Profile) and has
a music-player function, then you can also wirelessly transfer music to the device. The A2DP
profile involves a multi-vendor Bluetooth profile. By streaming, stereo-audio signals are wirelessly
transferred between the playing device (source) and the receiving device.
Due to the different device manufacturers, models, and software versions, a full functionality
cannot be guaranteed.
Pairing (Linking) A Bluetooth Enabled Cell Phone Or Other Bluetooth Enabled Device To
The Speaker
If the speaker has never been paired with a Bluetooth device before . You need to follow the
pairing instructions below to link the speaker with your Bluetooth device .
1.When the speaker turned on, the Operating mode Indicator flashes in blue. The speaker is
ready to pair (link) with your Bluetooth device .
2.Activate Bluetooth on the compatible device, and set it to search for compatible devices.
3.Select the speaker name:”MB402” from the list of found devices.
Tips: Only one playback unit can be connected to the speaker. If the speaker is already connected
to another playback unit, the speaker will not appear in the BT selection list.
4. If your device asks for a passkey (depending on the device manufacturers, model, and software
version), then enter digits “0000”(four zeros) and press OK.
If pairing has been carried out successfully, a voice prompt “Pairing completed” and a beep sound
is heard, meanwhile, the Blue color indicator stops flashing.
If the speaker has ever been paired with a Bluetooth device before. You need to follow the
pairing instructions below to link the speaker with your Bluetooth device .
1.After turning on the speaker, the speaker will search for the last paired device . The operating
mode indicator will flash in blue. If the unit finds the paired Bluetooth device , a beep sound is
heard and operating mode indicator will keep in blue and stop flashing .
2.After successfully pairing (linking) , you can begin playing music from your Bluetooth device
wirelessly to the speaker.
3.Press the + / - button on the speaker to adjust to the desired volume level.
Using The Speaker as a Handfree Bluetooth Speakerphone
1.Link your cell phone to the speaker via Bluetooth as described above.
2.When receiving an incoming call on your cell phone , tap.
3.Adjust the volume control of your cell phone to obtain the desired sound level.
4.To endthe call, just tap the button again, a short beep sound will be heard and the call will end.
If you were playing music from your cell phone to the speaker before answering the call, the music
will automatically resume playingwhen you hang up.
5.To ignore an incoming call, simply press and hold the button on the speaker for about 2 seconds,
a beep sound will be heard and the call will be ignored.
·
·
·
OPERATING THE SPEAKER IN BLUETOOTH MODE
If you are using an iPod, MP3/MP4 player or other mobile phone which can not connect this
unit via bluetooth directly, you can still play it on the speaker via an audio connecting cable.
1.Plug one end of the 3.5mm audio cable (included) into the headphone or line out jack on
your player, plug the other end of cable into the unit AUX-IN jack of the speaker.
2.Turn on the external audio source and play your device.
3.Press the Power ON/OFF button to turn on the unit, the operating mode indicator will light
up in Green.
4.The volume level can now be controlled through the main unit. Operate all other functions
on the external device as usual.
Notes:
1. If you're connected to the Line out Jack of your external device, then you only need to
adjust the volume control of this speaker. If you're connected to the Headphone Jack of your
external device, then you may need to adjust both the volume control of your external device
and the volume control of this unit to find the most desirable volume setting.
2. Press the Power ON/OFF button to turn off the unit when you finish listening.
Don't forget to switch off the power of your external device as well.
Fault Cause Solution
No Charging
The USB power adaptor
(not included) is not
plugged into a wall outlet
or the USB cable
(included)is not plugged
into the mini USB jack on
the MB402
Plug the USB power adaptor
(not included) into a wall
outlet and plug the USB
cable (included) into the
mini USB jack on the
MB402
Wall outlet is not
functioning.
Plug another device into
the same outlet to confirm
the outlet is working.
Computer USB port is
not function.
Make sure your computer
power is turned on and try
another USB port.
Troubleshooting Guide
OPERATING THE SPEAKER IN AUX-IN MODE
OPERATING THE SPEAKER IN AUX-IN MODE

NO Sound
The built-in battery is dead.
The MB402 is not linked
with the cell phone.
Volume set too low.
Recharge the battery.
Go through “Speaker
Operations” process to link
the speaker.
Increase the volume of
your device.
No audio signal via
the Bluetooth
connection
Speaker is not paired to
the audio source.
Volume too low
Increase the volume on
the audio source.
Increase the volume
on the speaker
Check whether a
connection exists.
If necessary, pair the
speaker again to the
audio source.
Speaker cannot be
connected
Pairing does not work Check whether the audio
source supports the A2DP
protocol
Audio source
is switched off Switch on the audio source
Bluetooth is switched off
at the audio source.
Switch on the Bluetooth
function in the audio source.
Use a different playback unit.
Bluetooth version is not
supported.
Poor sound quality from a
Bluetooth® device
Bluetooth device is almost
out of range of the MB402
Move your Bluetooth device
closer to the MB402
Battery capacity (included): 1600 mAH
Charging Voltage: DC 5V, 500mA and up
Max Play Time: 4 Hours
Working Temperature: -5℃~+ 40℃
Working Humidity: 0%~80%
The right to make technical and design modifications in the course of
Continuous product development remains reserved.
2
SPECIFICATIONS
TROUBLESHOOTING GUIDE/SPECIFICATIONS

Table of contents
Other SONIQ Speakers manuals

SONIQ
SONIQ iQS Zeno User manual

SONIQ
SONIQ MB200-AU User manual
SONIQ
SONIQ MB410-AU User manual
SONIQ
SONIQ QAS50K User manual

SONIQ
SONIQ i303 User manual

SONIQ
SONIQ MB412-AU User manual
SONIQ
SONIQ i304-Au User manual
SONIQ
SONIQ CSA32-AU User manual

SONIQ
SONIQ MB405-AU User manual

SONIQ
SONIQ MB415-AU User manual
