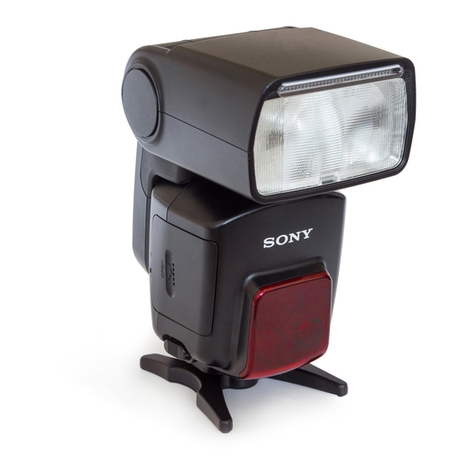
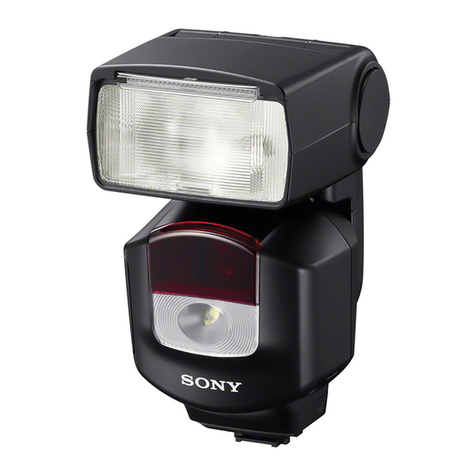
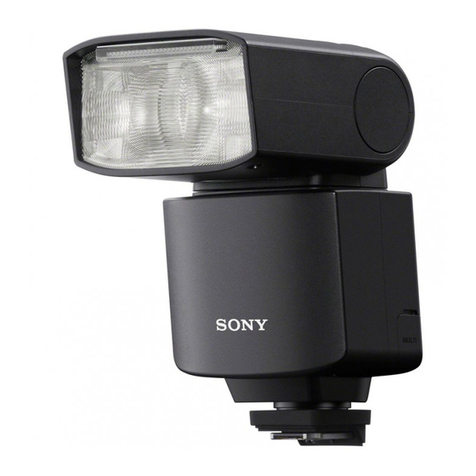
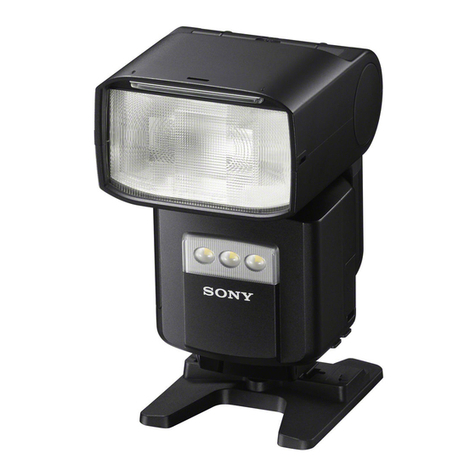
Sony HVL-F60RM2 Reference guide

Help Guide
Flash
HVL-F60RM/HVL-F60RM2/HVL-F46RM
Use this Help Guide when you have issues or questions on how to use your flash unit.
HVL-F60RM: Compatible cameras
For camera models compatible with the HVL-F60RM flash unit, view here. (Another window will open.)
HVL-F60RM2: Compatible cameras
For camera models compatible with the HVL-F60RM2 flash unit, view here. (Another window will open.)
HVL-F46RM: Compatible cameras
For camera models compatible with the HVL-F46RM flash unit, view here. (Another window will open.)
Configuring the flash unit for radio wireless flash photography
For radio wireless flash photography, specify the flash unit attached to the camera as the commander unit; and the off-
camera flash unit of which flash operation is wirelessly triggered as the receiver unit.
About this Help Guide
Locating parts and controls/on-screen indicators
Locating parts and controls (HVL-F60RM/HVL-F60RM2)
Locating parts and controls (HVL-F46RM)
Basic operations
Using the control wheel
Using the Quick Navi screen
Using the MENU screen
Direct setting (HVL-F60RM/HVL-F60RM2)
On-screen indicators (HVL-F60RM/HVL-F60RM2)
On-screen indicators (HVL-F46RM)
Preparations
Unpacking
Inserting batteries
Attaching/removing the flash unit to/from the camera
Attaching and removing the mini-stand
Removing/attaching the dust and moisture resistant cover (HVL-F60RM2/HVL-F46RM)
Turning on the power to the flash unit (HVL-F60RM/HVL-F60RM2)
1

Turning on the power to the flash unit (HVL-F46RM)
Pairing with a radio wireless commander/receiver <for radio wireless flash photography>
Photographing
TTL flash photography <TTL>
Manual flash photography <MANUAL>
High-speed sync photography <HSS>
Multiple flash photography <MULTI>
Firing a test-flash
Selecting the wireless type for controlling wireless flash photography <radio or optical> (HVL-F60RM)
Radio wireless flash photography
Configuring the flash unit for radio wireless flash photography
Wireless flash photography <with the receiver unit>
Multiple radio wireless flash photography with flash power level ratio control
Multiple wireless flash photography <group flash photography>
Remote release photography (HVL-F60RM/HVL-F60RM2)
Changing the settings of individual receiver units <RECEIVER SET>
Notes on radio wireless flash photography
Optical wireless flash photography (HVL-F60RM)
Configuring the flash unit for optical wireless flash photography (HVL-F60RM)
Wireless flash photography <with the remote unit> (HVL-F60RM)
Multiple optical wireless flash photography with flash power level ratio control (HVL-F60RM)
Notes on optical wireless flash photography (HVL-F60RM)
Using the sync terminal for flash photography (HVL-F60RM/HVL-F60RM2)
Using the LED light for video shooting (HVL-F60RM)
Selecting the flash coverage automatically <auto zoom>
Selecting the flash coverage manually <manual zoom>
Bounce flash photography
Adjusting the bounce flash angle
Using the quick shift bounce function (HVL-F60RM/HVL-F60RM2)
Using the bounce adaptor (HVL-F60RM/HVL-F60RM2)
Close-up flash photography <downward bounce flash photography>
Tips on the AF illuminator (HVL-F60RM)
Using color filters (HVL-F60RM/HVL-F60RM2)
Connecting an external power source (HVL-F60RM/HVL-F60RM2)
2

4-735-263-12(1) Copyright 2018 Sony Corporation
Customizing
Registering/calling up a preference <MEMORY>
Customizing the button assignment <CUSTOM KEY>
Viewing the version information of this flash unit/the receiver unit <VERSION>
Resetting the settings for the Quick Navi screen <RESET>
Restoring the factory default settings <INITIALIZE>
Notes on using/cleaning the flash unit
Notes on use
Specifications
Specifications
Guide number (HVL-F60RM/HVL-F60RM2)
Guide number (HVL-F46RM)
Radio wireless features
Trademarks
Troubleshooting
Warning indications
3

Help Guide
Flash
HVL-F60RM/HVL-F60RM2/HVL-F46RM
Locating parts and controls (HVL-F60RM/HVL-F60RM2)
Flash unit (front side)
Flash unit (back side)
Built-in wide panel1.
Flashlamp2.
LED light unit/AF illuminator (HVL-F60RM)3.
Wireless control signal receiver (for optical wireless communications) (HVL-F60RM)4.
Multi Interface foot5.
DC IN terminal
Connect the External Battery Adaptor (not supplied) to this terminal.
6.
Sync terminal7.
Multi/Micro USB terminal8.
Bounce sheet9.
Bounce indicator (upper/lower angle)1.
LINK lamp2.
5

Mini-stand
Controls on the operation console
About the LCD backlight
Every time you press one of the buttons or use the control wheel on the operation console, the backlights for the LCD panel and the buttons
(HVL-F60RM) light according to the backlight setting. While the backlights are lit, you can keep them lit longer by pressing any button or using
the control wheel once again. To change the backlight setting, select [BACKLIGHT] on the MENU screen. You can select one of the following
setting options.
AUTO1 (HVL-F60RM):
When you press one of the buttons or use the control wheel, the backlight for the LCD panel lights for 8 seconds. The backlights for the LEVEL
-/+, Fn, and MENU buttons stay lit. (factory default setting)
AUTO2 (HVL-F60RM)/AUTO (HVL-F60RM2):
When you press one of the buttons or use the control wheel, the backlight for the LCD panel lights for 8 seconds.
LCD panel3.
Operation console4.
Dust and moisture resistant cover (HVL-F60RM2)5.
Lock lever6.
Release button7.
Battery chamber door8.
Shoes for the Multi Interface foot1.
Tripod attachment hole2.
LEVEL -/+ button
By using either button, you can quickly adjust the flash compensation and the flash power level.
1.
TEST button2.
Control wheel3.
Center button4.
Direction buttons5.
Power switch
By selecting “LOCK,” you can disable the control wheel and the buttons on the flash unit to prevent unintentional operations.
6.
MENU button7.
Fn button8.
6

ON:
HVL-F60RM: The backlights for the LCD panel and the LEVEL -/+, Fn, and MENU buttons stay lit.
HVL-F60RM2: The backlight for the LCD panel stays lit.
OFF:
All the backlights stay unlit.
4-735-263-12(1) Copyright 2018 Sony Corporation
7

Help Guide
Flash
HVL-F60RM/HVL-F60RM2/HVL-F46RM
Locating parts and controls (HVL-F46RM)
Flash unit (front side)
Flash unit (back side)
Built-in wide panel1.
Flashlamp2.
Multi Interface foot3.
Multi/Micro USB terminal4.
Bounce sheet5.
Bounce indicator (upper/lower angle)1.
LINK lamp2.
LCD panel3.
Operation console4.
Dust and moisture resistant cover5.
Lock lever6.
8

Mini-stand
Controls on the operation console
About the LCD backlight
Every time you press one of the buttons or use the control wheel on the operation console, the backlight for the LCD panel lights according to
the backlight setting. While the backlight is lit, you can keep it lit longer by pressing any button or using the control wheel once again. To
change the backlight setting, select [BACKLIGHT] on the MENU screen. You can select one of the following setting options.
AUTO:
When you press one of the buttons or use the control wheel, the backlight for the LCD panel lights for 8 seconds. (factory default setting)
ON:
The backlight for the LCD panel stays lit.
OFF:
The backlight stays unlit.
4-735-263-12(1) Copyright 2018 Sony Corporation
Release button7.
Battery chamber door8.
Shoes for the Multi Interface foot1.
Tripod attachment hole2.
Fn button1.
TEST button2.
Control wheel3.
Center button4.
Direction buttons5.
Power switch
By selecting “LOCK,” you can disable the control wheel and the buttons on the flash unit to prevent unintentional operations.
6.
MENU button7.
9

Help Guide
Flash
HVL-F60RM/HVL-F60RM2/HVL-F46RM
Using the control wheel
By rotating the control wheel or pressing the direction buttons, you can move the focus or change the setting item value on the Quick Navi
screen or the MENU screen. Select the setting item of your choice and press the center button to enable the setting option.
Note
The illustrations used in this topic are of the HVL-F60RM flash unit.
To the direction buttons and the control wheel, the following functions are assigned at shipment.
Hint
To the control wheel, the individual direction button, and the center button, you can assign the function of your choice.
Related Topic
Customizing the button assignment <CUSTOM KEY>
4-735-263-12(1) Copyright 2018 Sony Corporation
Operations Functions Descriptions
Up ZOOM Changes the flash coverage (zoom).
Down MODE Changes the flash mode.
Left (HVL-F60RM/HVL-
F60RM2) -No function is assigned to this button at shipment. You can assign a function of your choice to
the button.
Left (HVL-F46RM) /LEVEL Changes the flash compensation/power level.
Right WL MODE Changes the wireless mode.
Control wheel - No function is assigned to this button at shipment. You can assign a function of your choice to
the button.
10

Help Guide
Flash
HVL-F60RM/HVL-F60RM2/HVL-F46RM
Using the Quick Navi screen
You can press the Fn button on the flash unit to change the settings for photography, such as the selected flash mode, in accordance with the
on-screen indications. Select the setting item of your choice and rotate the control wheel to change the setting option.
On the Quick Navi screen, you can change the following setting options.
Press the Fn button.
1
Select the setting item of your choice with the direction buttons.
Pressing the center button following the above operation displays the specific screen for setting the selected item.
2
Rotate the control wheel to change the setting option.
3
Press the Fn button.
4
Setting items Descriptions Setting options
Flash mode setting TTL(*)/MANUAL/MULTI/flash off/GROUP
Wireless mode setting
HVL-F60RM:
WL OFF(*)/CMD/RCV(radio control)
WL OFF(*)/CTRL/RMT(optical control)
HVL-F60RM2/HVL-F46RM:
WL OFF(*)/CMD/RCV(radio control)
High-speed sync setting
HVL-F60RM: ON(*)/OFF
HVL-F60RM2/HVL-F46RM: ON/OFF(*)
Flash coverage (zoom) setting
HVL-F60RM/HVL-F60RM2: AUTO(*)/20-200
HVL-F46RM: AUTO(*)/24-105
Calling up pre-registered settings OFF(*)/MR1/MR2
Flash compensation setting -3.0 - +3.0
Flash power level setting
HVL-F60RM/HVL-F60RM2: 1/1 - 1/256, OFF, CMD LINK
HVL-F46RM: 1/1 - 1/128, CMD LINK
Flash frequency setting for MULTI flash mode 1 - 100
Flash count setting for MULTI flash mode 2 - 100, --
11

Note
The items and options available for setting vary depending on the flash mode.
4-735-263-12(1) Copyright 2018 Sony Corporation
Setting items Descriptions Setting options
CMD flash setting (radio control)
CTRL flash setting (optical control) (HVL-F60RM) ON(*)/OFF
Lighting ratio setting ON/OFF(*)
Flash power level ratio setting OFF/1(*) - 16
Receiver remote setting ON/OFF(*)
Wireless group setting
HVL-F60RM:
OFF/A(*)/B/C/D/E(radio control)
RMT(*)/RMT2(optical control)
HVL-F60RM2/HVL-F46RM:
OFF/A(*)/B/C/D/E(radio control)
Factory default setting
*
12

Help Guide
Flash
HVL-F60RM/HVL-F60RM2/HVL-F46RM
Using the MENU screen
You can press the MENU button on the flash unit to change the settings on the MENU screen. Move the focus to the setting item of your choice
with the direction buttons, and then press the center button to select the item.
On the MENU screen, you can the following setting options.
Press the MENU button.
1
Move the focus to the setting item of your choice with the direction buttons, and then press the center button.
2
Change the setting option with the direction buttons and press the center button.
3
Groups Setting items Descriptions Setting options
FLASH DISTRIBUT. Flash distribution setting STD(*)/CENTER/EVEN
LIGHT MODE (HVL-F60RM) LED light ON/OFF setting -
MEMORY Registration of the desired modes and settings MR1/MR2
AF LED LEVEL (HVL-F60RM) AF illuminator level setting HIGH/LOW(*)
CHARGE SET (HVL-F60RM/HVL-
F60RM2)
Flash charge-up setting when the External Battery
Adaptor is connected EXT.+INT.(*)/EXT.
TEST Test-flash setting GROUP/1TIME(*)/3TIMES/4SEC
TTL LEVEL MEMORY (HVL-
F60RM/HVL-F60RM2) TTL level memory setting ON(*)/OFF
LEVEL STEP Step of flash power level setting 0.3EV(*)/0.5EV
CUSTOM KEY Custom key settings -
/ SELECT (HVL-F60RM) Wireless control type setting (*)/
RECEIVER SET Receiver settings -
CH SET Channel setting (radio control) AUTO(*)/CH1 - CH14
CH SET (HVL-F60RM) Channel setting (optical control) CH1(*) - CH4
REMOTE RELEASE (HVL-
F60RM/HVL-F60RM2) Remote release mode setting ON/OFF(*)
WITH RELEASE (HVL-
F60RM/HVL-F60RM2) Remote release sync flash setting ON/OFF(*)
PAIRING Pairing -
PAIRED DEVICE List of the paired devices -
13

4-735-263-12(1) Copyright 2018 Sony Corporation
Groups Setting items Descriptions Setting options
WL READY LAMP (HVL-F60RM) Wireless flash ready lamp setting ON/OFF(*)
BACKLIGHT LCD backlight setting
HVL-F60RM:
AUTO1(*)/AUTO2/ON/OFF
HVL-F60RM2/HVL-F46RM:
AUTO(*)/ON/OFF
BEEP (HVL-F60RM/HVL-
F60RM2) Beep sound setting ON/OFF(*)
m/ft Flash range unit setting m(*)/ft
POWER SAVE Power-saving timer setting 30SEC/3MIN(*)/30MIN/OFF
WL POWER SAVE Wireless flash power-saving timer setting 60MIN(*)/240MIN/OFF
VERSION Displays the version for this product's / RCV software -
RESET Resets settings for the Quick Navi screen -
INITIALIZE Restores settings to their defaults -
Factory default setting
*
14

Help Guide
Flash
HVL-F60RM/HVL-F60RM2/HVL-F46RM
Direct setting (HVL-F60RM/HVL-F60RM2)
You can directly modify the flash compensation and the flash power level simply by pressing the LEVEL -/+ button ( ).
Hint
If you assign “ POS SELECT” to a button of your choice, you can select a wireless group simply with the button when you use the LEVEL -/+ button to
modify the flash compensation or the flash power level for the group that you use, for example, for multiple wireless flash photography.
Related Topic
Customizing the button assignment <CUSTOM KEY>
4-735-263-12(1) Copyright 2018 Sony Corporation
15

Help Guide
Flash
HVL-F60RM/HVL-F60RM2/HVL-F46RM
On-screen indicators (HVL-F60RM/HVL-F60RM2)
The following screen images are given as examples and may look different from what you actually see on the LCD panel.
TTL flash mode
MANUAL flash mode
MULTI flash mode
Flash mode1.
Wireless mode (HVL-F60RM2)2.
High-speed sync setting3.
Flash range4.
Memory Recall5.
External Battery Adaptor state6.
Bounce flash7.
Beep sound setting8.
Ready to fire9.
Internal temperature state10.
Attached to camera11.
Flash distribution setting12.
Flash compensation13.
Flash coverage (zoom)14.
Wireless mode (HVL-F60RM2)1.
Low-battery indicator2.
Bounce adaptor3.
Flash power level4.
16

Wireless commander mode (radio control)
Wireless receiver mode (radio control)
Wireless controller mode (optical wireless communications) (HVL-F60RM)
Wireless remote mode (optical wireless communications) (HVL-F60RM)
Wireless mode (HVL-F60RM2)1.
Flash frequency in MULTI flash mode2.
Flash count in MULTI flash mode3.
Overheat indicator4.
Color filter5.
Wireless mode1.
Lighting ratio control setting2.
Wireless channel3.
Flash distribution setting
Commander/Control unit flash setting (HVL-F60RM)
Commander unit flash setting (HVL-F60RM2)
4.
Lighting ratio5.
Wireless mode1.
Receiver remote setting2.
Wireless group setting3.
17

4-735-263-12(1) Copyright 2018 Sony Corporation
18

Help Guide
Flash
HVL-F60RM/HVL-F60RM2/HVL-F46RM
On-screen indicators (HVL-F46RM)
The following screen images are given as examples and may look different from what you actually see on the LCD panel.
TTL flash mode
MANUAL flash mode
MULTI flash mode
Flash mode1.
Wireless mode2.
High-speed sync setting3.
Flash range4.
Memory Recall5.
Low-battery indicator6.
Overheat indicator7.
Bounce flash8.
Flash distribution setting9.
Flash coverage (zoom)10.
Flash compensation11.
Wireless mode1.
Ready to fire2.
Attached to camera3.
Flash power level4.
Wireless mode1.
Flash frequency in MULTI flash mode2.
Flash count in MULTI flash mode3.
19

Wireless commander mode (radio control)
Wireless receiver mode (radio control)
4-735-263-12(1) Copyright 2018 Sony Corporation
Wireless mode1.
Lighting ratio control setting2.
Wireless channel3.
Flash distribution setting/Commander unit flash setting4.
Lighting ratio5.
Wireless mode1.
Receiver remote setting2.
Wireless group setting3.
20
Other manuals for HVL-F60RM2
1
This manual suits for next models
2
Table of contents
Other Sony Camera Flash manuals

Sony
Sony HVL-F42AM - Hot-shoe clip-on Flash User manual

Sony
Sony HVL-F42AM - Hot-shoe clip-on Flash User manual

Sony
Sony HVL-F56AM User manual

Sony
Sony HVL-F56AM User manual

Sony
Sony HVL-F56AM User manual

Sony
Sony HVL-F20S User manual

Sony
Sony HVL-F42AM - Hot-shoe clip-on Flash User manual

Sony
Sony HVL-F36AM - Flash For Alpha DSLR User manual

Sony
Sony HVL-F46RM User manual

Sony
Sony HVL-F36AM - Flash For Alpha DSLR User manual