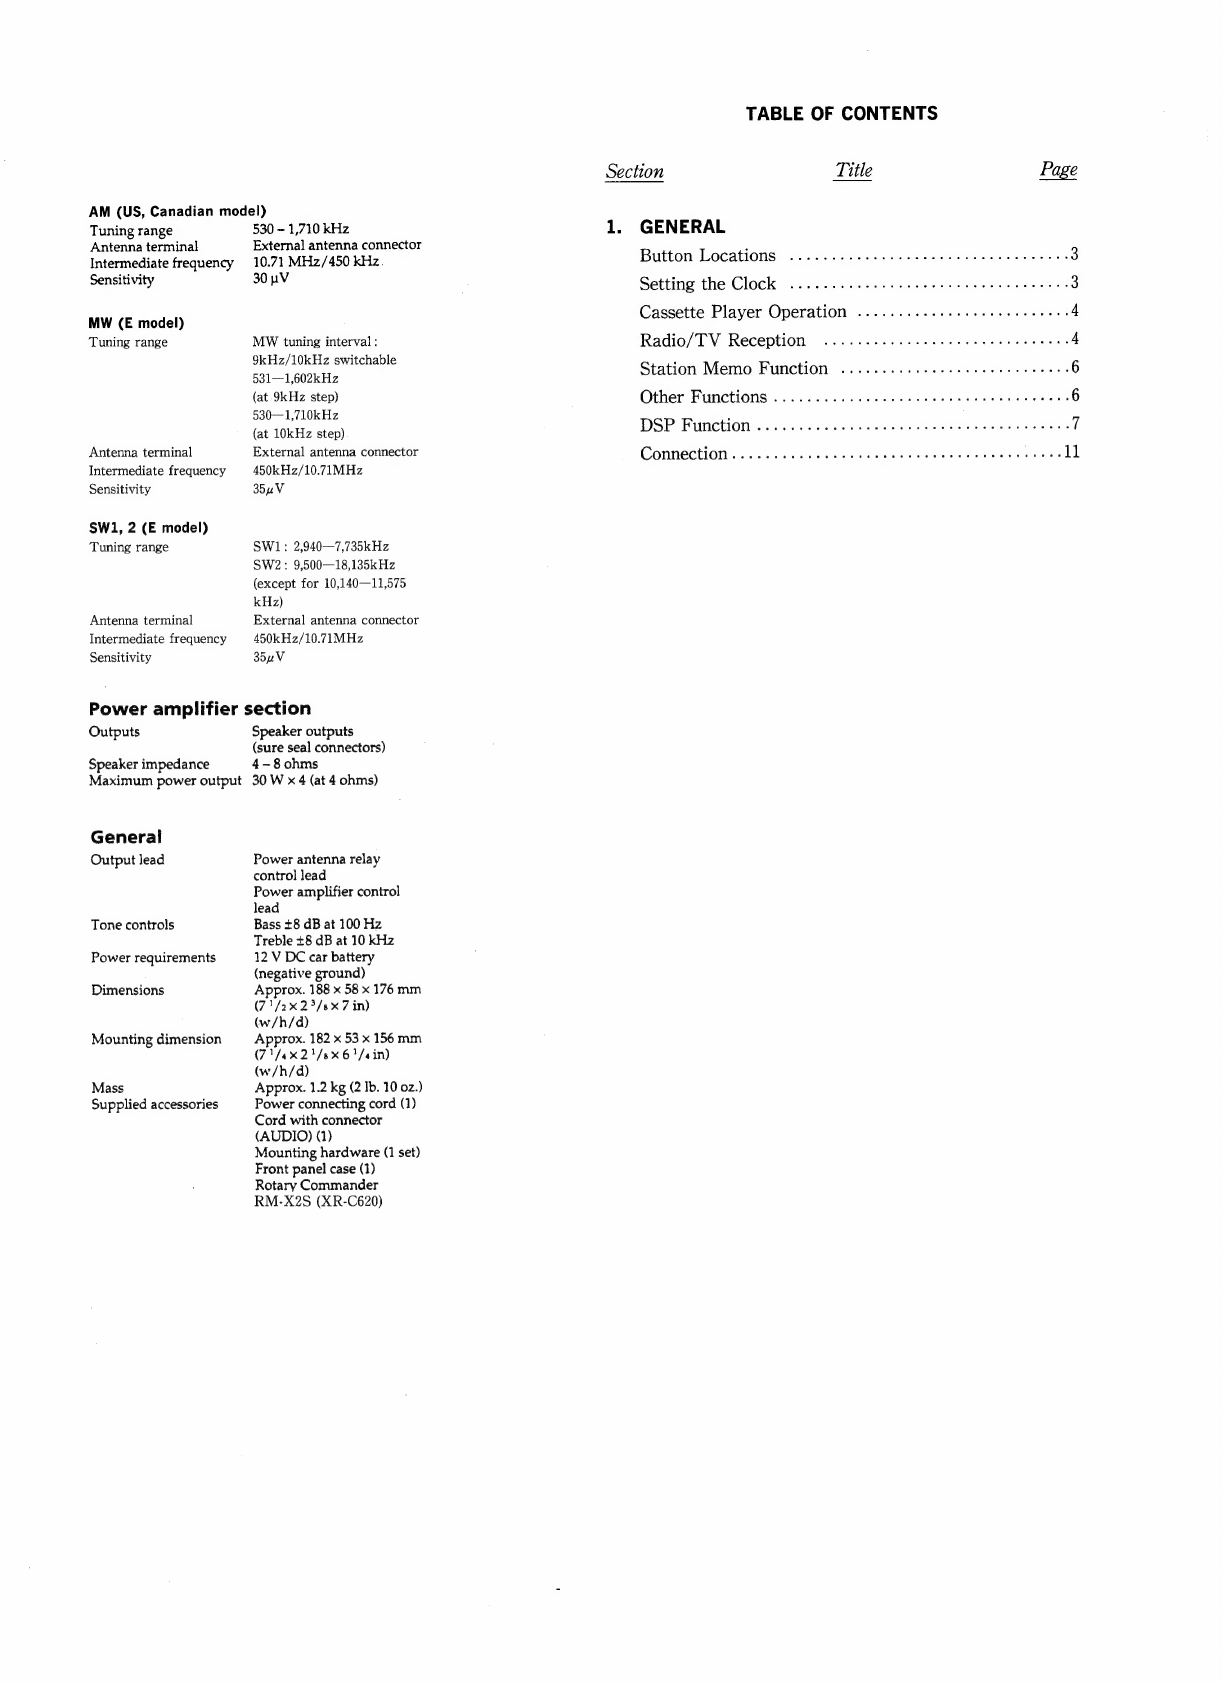
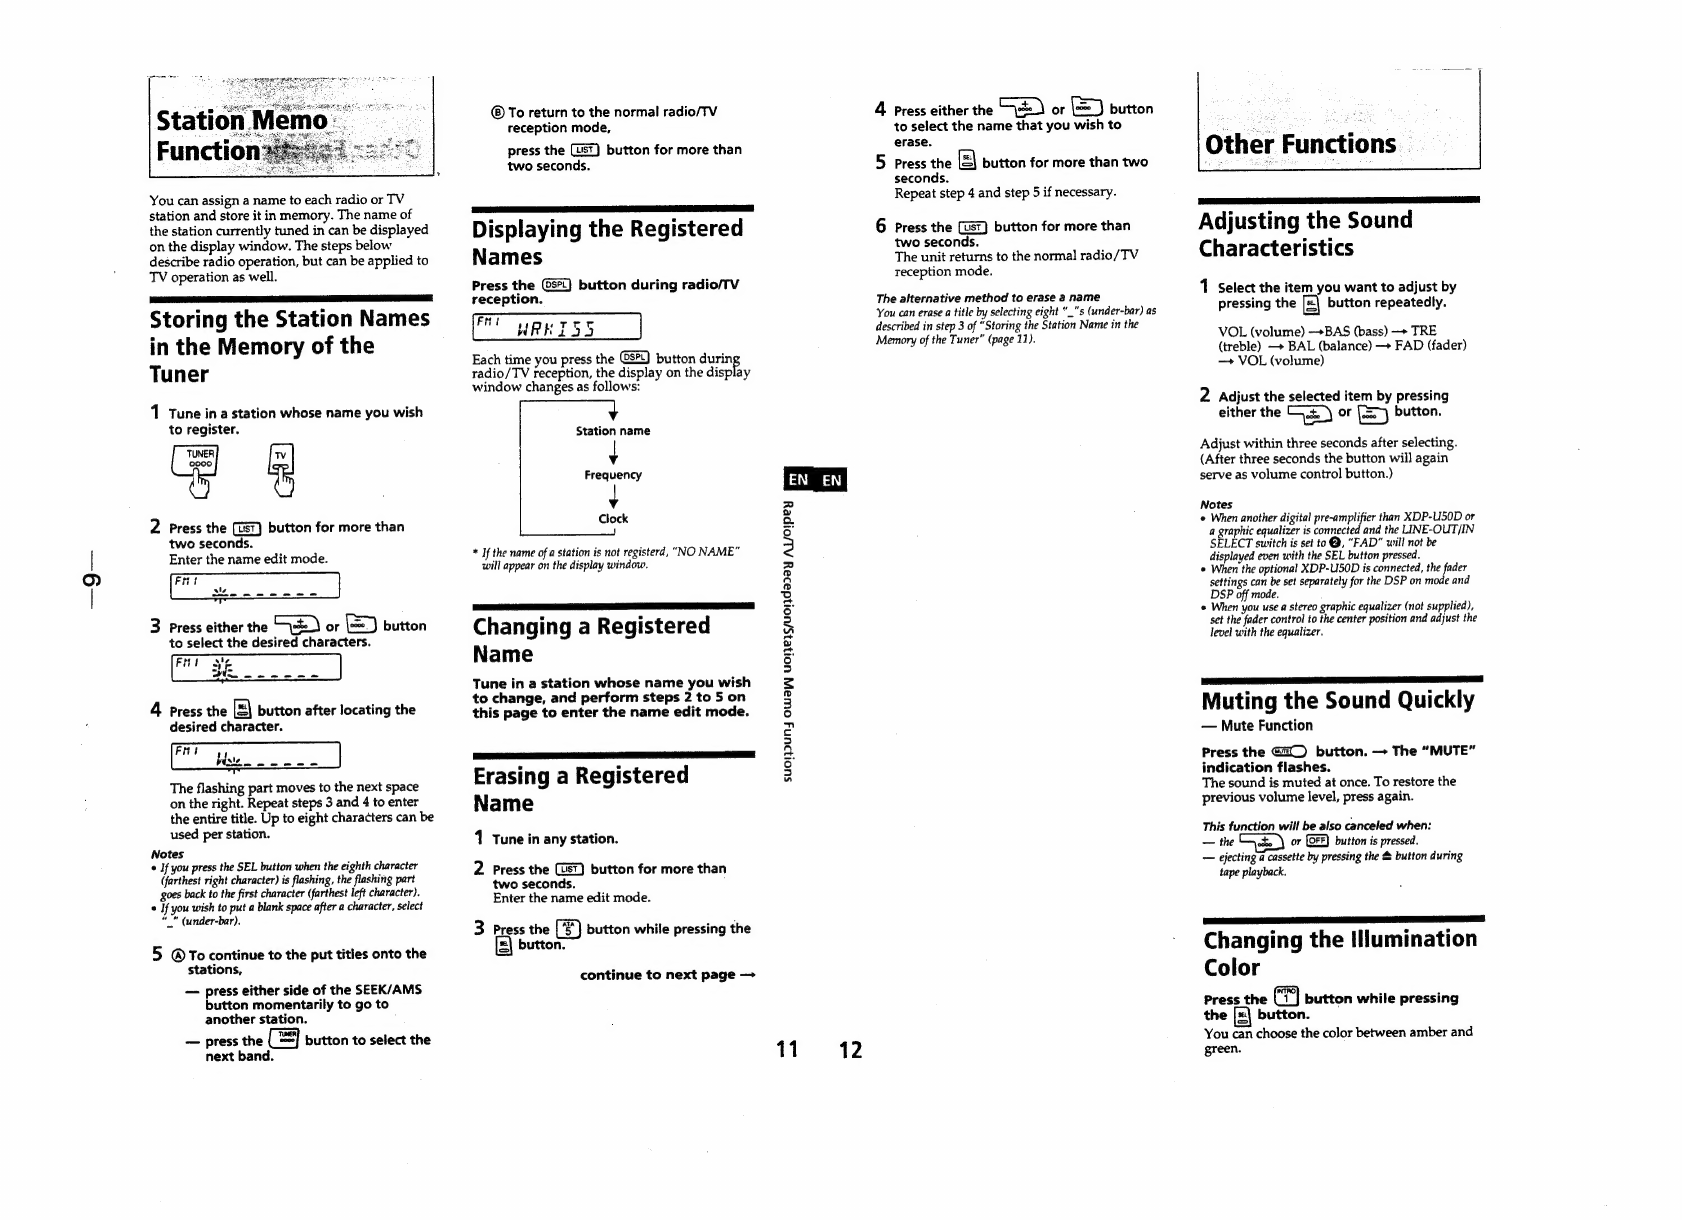
Sony XR-C610 User manual
Other Sony Car Receiver manuals

Sony
Sony CDXM50IP - Marine CD Receiver Slot User manual

Sony
Sony CXS-GT3516F - Fm/am Compact Disc Player Product guide

Sony
Sony XR-C7220 User manual

Sony
Sony ST-SDB900 User manual

Sony
Sony CDX-M8805X Operating Instructions (English, Espanol,... User manual

Sony
Sony CDX-C6850R User manual

Sony
Sony XR-CA665EE User manual

Sony
Sony MEX-IHD User manual

Sony
Sony CDX-CA750 User manual

Sony
Sony CDX-L490EE User manual

Sony
Sony MEX-GS820BT User manual

Sony
Sony CDX-F5000 - Fm/am Compact Disc Player User manual

Sony
Sony AVD-S50ES - Single Disc Dvd/sacd™/cd... User manual

Sony
Sony Sony Car Stereo System XR-M510 Product guide

Sony
Sony CDX-CA850 Instruction Manual

Sony
Sony HCD-VR50 User manual

Sony
Sony XR-F21RDS User manual

Sony
Sony MEXBT2600 - Bluetooth CD Receiver User manual

Sony
Sony ST-JX661 User manual

Sony
Sony CDX-GT420U User manual


 User manual")