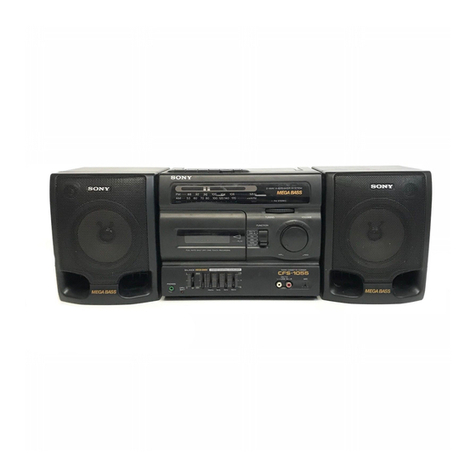
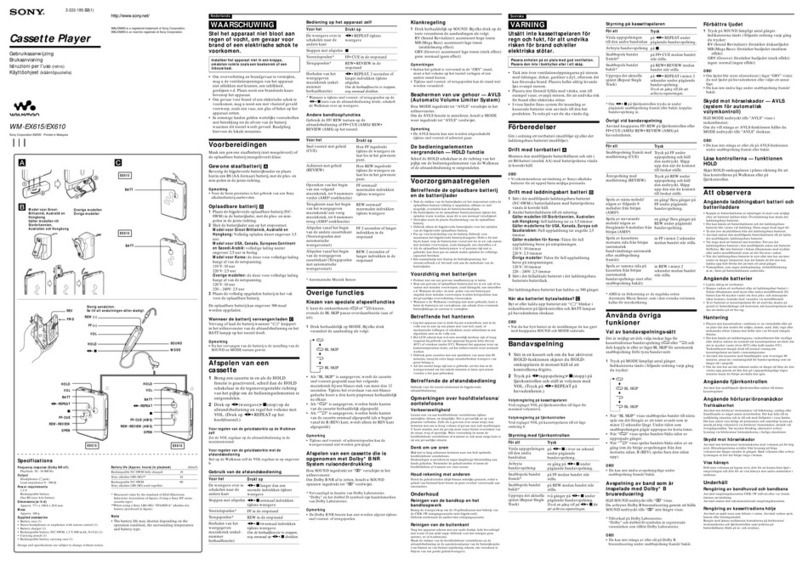
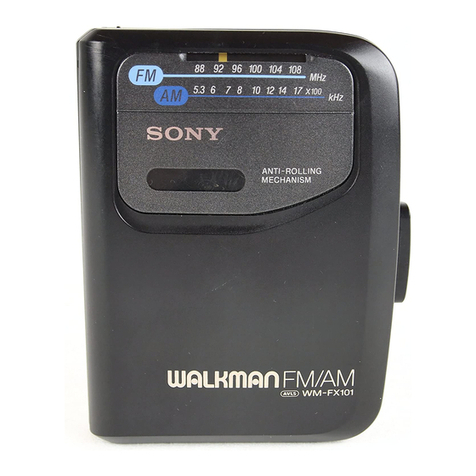
Sony Walkman WM-DD 3 User manual

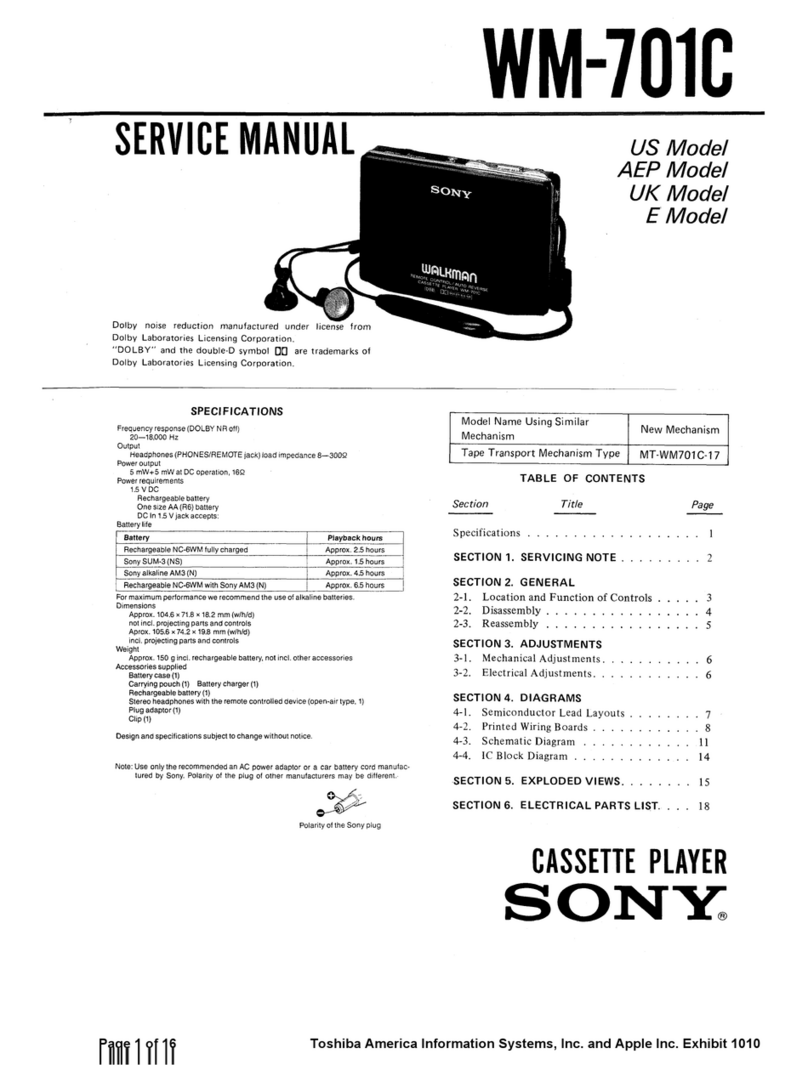
SERVICE
MANUAL
HEADPHONES jacks (stereo minijacks)
REW
11+
(rewind) button
~
FF (fast forward) button
~
PLAY button
• STOP button
Dolby
noise
reduction
manufactured
under
license
from
Dolby
Laboratories
Licensing
Corporation.
"DOLBY"
and
the
double-D
symbol
DO
are
trademarks
of
Dolby
Laboratories
Licensing
Corporation.
WM-DDill
Refer t MDR-15L Service Manual issued previously
for informati n
of
headphones supplied
with
this set.
PHOTO:
BLACK
TYPE
AEP
Model
VOLUME control
BATTERY indicator
DOLBY
NR
switch
TAPE selector
SPECIFICATIONS Similar Mechanism
Set
WM-00
Tape track
4-track 2-channel stereo
Fast winding
time
Approx. 2 min.
with
Sony Cassette C-60
Frequency response
40-15,000
Hz
Wow and
flutter
±0.13% (DIN)
0.08% WRMS (NAB)
Power
output
Headphones:
20
mW
+
20
mW (at 10% harmonic distortion)
load impedance
32
ohms
at
DC
operation
Outputs
Two HEADPHONES jacks (stereo minijacks)
load impedance
8-300
ohms
Power requirements
3V
DC,
two
R6
(size AA) batteries
DC
IN
3V jack accepts:
EBP-500 battery case (optional) for use on
two
R20
(size
D)
batteries
AC-D2M
AC
power adaptor (optional) for use
on
220
V
AC,
50
Hz
DCC-70 or DCC-127A car battery cord (optional) for use with
12
V
car battery
(For connection
with
the DCC-127A, the optional
PC-200
DC
plug
adaptor is required.)
Battery
life
Batteries
Continuous
playback hours
Sony batteries SUM-3 (NS) Approx. 4
Sony alkaline batteries AM3 Approx. 9
For maximum performance we recommend the use
of
alkaline
batteries.
Tape Transport Mechanism
Type
Dimensions
Approx.
79.7x110x32.8mm
(w/h/d)
(3
1
/4
x43fax
15
/16 inches)
incl.
projecting
parts and
controls
Weight
Approx.
290
g (10.3
oz)
incl. batteries,
not incl.
other
accessories
00-100
Note: If a car battery cord or
an
AC poweradaptor not manufactured by Sony
is used, a fuse
must
be installed in the battery
cord
or
the
AC
power
adaptor and the polarity
of
the plug must
be
as illustrated.
FEATURES
• Disc Drive system assures accurate and stable tape trans-
port, greatly reducing wow and flutter.
• Dolby
NR
system reduces tape hiss noise.
• Tape selector for optimum playback with standard tapes
as well as high-performance tapes.
• Two HEADPHONES jacks allow two persons to listen
to
tape playback together.
STEREO
CASSETTE
PLAYER
SONY.
Apple Inc., et al.
Exhibit 1010
Apple Inc., et al. v. Global Touch Solutions, Inc.
IPR2015-01174
Exhibit 1010, Page 001
f
Find authenticated court documents without watermarks at docketalarm.com.

WM-DDm
Replacing chip components
All
chip components should be connected and disconnect-
ed, using a tapered soldering iron [temperature
of
the
iron
tip: less than 280°C
(536°F)],
a pair
of
tweezers and braid-
ed
wire.
Precautions for replacement
1.
Do
not
disconnect
the
chip component forcefully.
Otherwise, the pattern may peel off.
2. Never re-use a disconnected chip component. Dispose
of
all old chip components.
3.
To protect the chip component, heating time for attach-
ing the component should be within 3 seconds.
o Removing chip components
(l)
Removing solder at electrode
Remove the solder
at
the
electrode, using a thin
braided wire. Do not remove the solder
of
the part
(chip component) attached adjacent
to
the electrode.
Braided wire
(2) Disconnecting chip components
Turn the tweezers with
the
soldering iron alternately
applied
to
both
electrodes, and the chip component
will be disconnected. Take careful precautions while
disconnecting, because
if
the
chip component is force-
fully removed the land may peel off.
Never re-use a disconnected chip component.
(3)
Smoothing the soldered surface
After disconnecting the chip component, remove the
solder
by
using a braided wire
to
sinooth
the
land
surface.
o Connecting chip components
The value
of
chip components
is
not
displayed
on
the
main body. Take due precautions to avoid mixing new
chip components with other ones.
(1) Applying
s<>lder
to
land
on
one side
Apply a thin layer
of
solder
to
the land
on
one side
where
the
chip component
is
to
be connected. Too
much solder may cause bridging.
(2) Speedy soldering
Hold the chip component at the desired position,
using tweezers, and apply the soldering iron in the
arrow-marked direction. To protect
the
chip compo-
nent,
heating time should be within 3 seconds.
~~~,~-------------
\
~
I \
Land
Printed
circuit
board
(3) Speedy soldering
of
electrode
on
the other side
Solder
the
electrode on the other side in the same
way as in
(2)
above.
-2-
Exhibit 1010, Page 002
f
Find authenticated court documents without watermarks at docketalarm.com.

SECTION
1
MECHANICAL
OPELATION
MECHANICAL OPERATION
in
this
set
is
the
same
as
that
of
model WM-DD, so refer
to
WM-DD service
manual previously issued
for
MECHANICAL OPERA-
TION. SECTION 2
DISASSEMBLY
Note:
Follow
the
disassembly
procedure
in
the
numerical
order
given.
Cassette Panel Control Panel
WM-DDm
0 panelscrew 0 precision screw
Note:
Control panel can be removed with
cassette panel installed.
8 Remove cassette panel.
8 panelscrew
Note
for
reassembling:
(A)
(Installing
the
compression spring)
P
1.4x
2.5, TYPE 1
I
8
Push
FF,
REW
buttons. 8 precision screw
P
1.4x
2.5, TYPE 1
Chassis
(B)
Lift
the take up reel side
of
control
panel
the mechanism
block
in
the beginning.
A)
Insert the
portion
(A)
of
DOLBY
BUTTON
and
TAPE
BUTTON
into
the
slit
as
shown.
B) Set the
control
panel up. Set
DOLBY
SWITCH
and
TAPE
SWITCH on the main board
at
OFF
position
and
METAL.
Then
put
the mechanical
unit
into
the
control
panel
following the
numbers(])
and
@ .
-3-
WM-DDm
Main B ard 8 precision screw
M1.4x3,
TYPE3
Lift
up
main board
in
the
direction
of
arrow
taking care
not
to
break lead wires.
Cassette
holder
Turn cassette
holder
a
half
turn
in
the
direction
of
arrow
and
remove
it
taking
care the projectingparts.
~,,_
""'
Be
careful
not
to~XJ)~'--7:r.!'"v"-."1-
lose these parts. / . .
/ pro1ectmg
precision screw parts
Motor
precision screw
P
1.4x
1.8, TYPE 3
motor
Chassis
0 precision screw
P
1.4x
5,
TYPE3
chassis
8
chassis
panel
,.
Remove
mechBIIism
deck.
8 precision screw
P
1.4x
2.5, TYPE 1
~/
p
t.4x
2
,5,
TYPE 1 cassette
holder
Pinch roller
and
head
can
be
replaced.
-4-
Exhibit 1010, Page 003
f
Find authenticated court documents without watermarks at docketalarm.com.

WM-DDm
PRECAUTION
SECTION
3
ADJUSTMENTS
1. Clean
the
following
parts
with
a
denatured-
alcohol-moistened
swab:
playback
head
capstan
pinch
roller
2.
Demagnetize
the
playback
head
with
a
head
demagnetizer.
3.
Do
not
use a
magnetized
screwdriver
for
the
adjustments.
4.
After
the
adjustments,
apply
suitable
locking
compound
to
the
parts
adjusted.
5.
The
adjustments
should
be
performed
with
the
rated
power
supply
voltage unless
otherwise
noted.
3-1. MECHANICAL ADJUSTMENT
Torque
Measurement
Perform
with
2.5 V DC
power.
Torque
Meter
reading
meter
22-46
g•cm
FWD CQ-102C
(0.3-
0.63 oz•inch)
FF,
REW CQ-201B More than
65
g·cm
(More than 9.04 oz•inch)
Back CQ-102C
1-
3.5 g•cm
Tension
(0.01-
0.05 oz•inch)
Tape Pull- CQ-403 More than 80 g•cm
ing Force (More than
11.12oz•inch)
Pinch Roller Pressure Adjustment
-Playback Mode -
1. Pull
the
spring scale in
the
direction
shown
by
the
arrow.
2. Slowly
return
the
pinch
roller
and
read
the
spring scale
just
when
the
pinch
roller
starts
rotating.
p
S
'f'
, I • 1
pect
tcahon:
'~:.
-:._"~
__
-~
170 ± 20 g (5.3
"'6.7
oz)
-5-
Head Height Adjustment
1.
Prepare
an
adjustment
cassette
as
shown
below.
C-120
tape cassette Cut
out
hatched
portions.
2. In
playback
mode
and
viewing
from
the
front,
adjust
the
head
heights
to
eliminate
tape
curl
and
tape
twist
at
portions
shown
by
the
arrow.
playback
head
~-A
~
T~
~
~~
3-578-138-01
(t
= 0.1)
3-578-138-11
(t
=0.2)
Shim, head height
adjustment
3.
If
necessary,
adjust
the
height
of
the
tape-guide
by
turning
the
adjustment
screw.
adjustment
screw
4.
Apply
locking
compound
on
adjustment
screw.
Exhibit 1010, Page 004
f
Find authenticated court documents without watermarks at docketalarm.com.

WM-DDm
1. Motor section installation
Tighten loosely.
8 Tighten firmly.
2.
Wow
& flutter and motor position
1. Adjust with
the
adjustment screw so
that
rotor
thrust play
is
within O.lmm. (When confirming
play, press
motor
down so
that
the
motor
pulley and
rotor
rubber section do
not
touch.)
2.
Wow
& flutter adjustment
Setting:
Power supply voltage: 2.5V
Tape: Adjust by using end
portion
of tape.
VOLUME control: mechanical mid
TAPE SELECT switch: NORM
DOLBY NR switch:
OFF
Procedure:
CD
Mode: playback
HEADPHONES
wow
&
flutter
meter
Turn
the
adjustment screw so
that
the wow
and flutter meter reads minimum (less
than
0.12% W·RMS).
~
At 2V power supply voltage, confirm
normal
FWD
operation.
® When
CD
and
(2)
are
not
satisfied, repeat
adju1)t-
ment again starting with
"Motor
Section
Installation".
Motor
-6-
0 Tighten screw loosely.
8 Tighten screw while pressing
the
motor
section
lightly
in
the direction
of
the arrow.
0 Tighten the screw.
Press
down
adjustmentscrew
(wow
& flutter)
Exhibit 1010, Page 005
f
Find authenticated court documents without watermarks at docketalarm.com.

2-2. ELECTRICAL ADJUSTMENTS
Tape
Speed
Adjustment
Setting:
VOLUME control: mechanical mid
TAPE SELECT switch: NORM
DOLBY NR switch:
OFF
Procedure:
Mode: playback digital frequency
test tape
WS-48A
(3kHz, OdB)
counter
set
·k~
~
HEADPHONES
1.
Open the solder bridge shown below.
2.
Turn RV601 so
that
frequency reading be-
comes in
3090Hz±
10Hz.
(at
the
ending
part
of
the test tape)
3. Resolder the adjustment patterns opened
in
step 2 above. Now frequency reading should be-
comes in 3000
Hz
± 9 Hz.
Specification:
Digital
frequency
counter
3000Hz±
9Hz
Adjustment Location:
-main
board-
Adjustment
patterns
RV601
WM-DDm WM-DDm
Playback Head
Azimuth
Adjustment
Setting:
VOLUME control: mechanical mid
TAPE SELECT switch:
NORM
DOLBY NR switch:
OFF
Procedure:
1.
Mode: playback
32n.
HEADPHONES
VTVM
El
2.
Turn the adjustment screw for the maximum
output
levels.
If
these levels do
not
match,
turn
the adjustment screw until
both
of
output
levels match together within 1 dB.
L·CH
~;
~~:;
@hk
Screw peak
position
3. Phase Check
Mode: playback
test tape
P-4-A063
(6.3kHz,
-10d8)
.-_.----'-within
--::~~-+---:~_...-~or-
1dB
L·CH
peak R·CH
peak
-angle
L-CH
320
HEADPHONES
Screen pattern
0@@(§)Q
lin
phase
45'
90°1 t
135'
18CfJ
~------v----J
good wrong
Adjustment Location: adjustmentscrew
-7-
Playback Level
Adjustment
Setting:
VOLUME control: mechanical mid
TAPE SELECT switch: NORM
DOLBY NR switch:
OFF
Procedure:
Mode: playback
test
tape
P-4-L300
(315Hz,
OdB)
DOLBY
out
VTVM
(Refer
to
the
following
figure)
for
DOLBY
out
point.
Specification:
DOLBY
out
level: 0.073 V (
-20.5
± 0.2 dB)
1)
If
necessary, adjust
RV
101 (L-CH) and RV201
(R-CH) for the specification.
2) Confirm
that
the
output
level
of
DOLBY
out
is
not changed when. repeating playback and
stop.
Adjustment Location:
-main board -
IR26
UI!
RV101
(L-CH)
;.__,_..-..._
RV201
(R-CH)
R-CH
DOLBY
out
-8-
Exhibit 1010, Page 006

SECTION 4
DIAGRAMS
Semiconductor
Lead
Layouts
MSM58141RS BA3304F
NJM2063AM
8 7 6 5 TA7688F
0 CX20084
I 2 3 4
"~·
(Top
view)
2SA812 1 8
2SC1623
2SB624-BV4
2SD596
Q 2SB798
~
E
E
8 c B
FMW1 182837
3~
ca!hode
2 1
"A
~:[1
I~
anode
3 2 anode
SR506D RD7.5M-B1
clldlodo
~
f 1
ri
•c
onodo 1 ] I
Semiconductor Location
Ref. N Descripti n R f. No. Description
0301
0-18
0302
K-13
0302
J-15
0303
0-10
0303
0-10
0304
P-10
0701
P-5
0305
N-11
0601 R-6
IC301 M-17
0602
N-9
IC302
0-14
0701
P-5
IC303 L-12
0702
U-5
IC601
0-7
0703
0-5
IC602 N-6
N te:
o--
: parts
extracted
from
the
component
side.
•
e-
: parts
extracted
from
the
conductor
side.
• • :
part
mounted
on
the
conductor
side.
® : Through hole.
tt:::::::;:;:::::
component-side
pattern.
-9-
-10-
Exhibit 1010, Page 007

A
8
c
D
E
F
G
H
J
WM-DDm
WM-DDm
1 2 3 4 5 6 7 9 10
11
12
13 14 15
3-2.
SCHEMATIC DIAGRAM
PB
HEAD
HP901-1
r------
-
------
-
------
-
------
-
------
-
------
-
------
-
------
-
------
-
------
-
~
-
------
-
------
-
------
-
------
-
------
-
------
-
------
-
------
-
------
-
------
-
[ MAIN
BOARD
1
RVIOI
2.
2k
IOBl
.n
1.
_i
I
'•
16
1"',.'--1.._
4
_._---Jif----,
jPB
LEVELj
'•,"-
C103
~
12.
••
RI03
0.
0039
•••• 15.,_6_ao_k.._-w.-__.
n8~
1.4
3 "
R104
33k
39k-I1
t----+-1•.
_4
'"'~'
13
R105
~
~
ITAPEI
C102
10
4V
+
C301
T ' I
C301
2
r
~
86
~.L
BA3304F
_ 5
(PRE
AMPl
12
8301-1
INORMI--
8301-2
METAL
Cr
02
6
11
D
Cl04
3. 3
4V
R313
10
2.
~
16
R106
47k
C302
220
4V
~1.
4
15
R110
5.
6k
C108
2~8~
:l;l108
~01--33-+--4-------.3.
3k
C106
C119
3. 3
25~
C109
0.68
0.
0068
20V
RI09
o~68h
47k~
f---4~-----<~H+....__.
C105
o.
047
1.~
1'1.45
1.25
~1.06
1.4
13
12
II
10
9
I
C302
NJM2063
AM
IDOLBY
AMPl
;
~
..............................
;
' 5
I.
4•
C205
o. 047
6 7 8
I.
45
~I.
25
~I.
06
~
C305
to+
6.
3V
r
R,V301-1
IOK
(Cl
VR301
IVOLUMEI
Rill
I.
5k
R211
1.
5k
C111
1
C211
C320
lOOP
C319
lOOp
C306
0.01
,j,.
(
CHASSIS)
EARTH
IHEADPHONESI
C307
T
,.--------E-.t./1.'\
.,'uv'~
J301-1
~
,j,.
1.4
3.3
C113
.1J;l113
4v +
o.
22
1.
5k
R114
330 T
C311
o.
001
~
cNo
4
lt--41------ldis
4V
0.001
R112.r.-..++f--_.--+----+----+-+-t-----lcl
ls
3. 9 o.
001
t2.
3
~2.
3
1.4
(
CHASSIS)
EARTH
16
15
~3
13
12
II
10
\,
~-,.
m •
~
.,.,,.,.~
~
~
~.,
~-
_..,._
~.,"'
...
.,
~"',.
..
,.
,.,.
..
,.
,.
.,
,.
.,.,
"',.
,.,.,..,
..
,.,.,.,.1
IC303
TA7688F
CHEAD
PHONE
AMPl
+
C317
1
16V
.__
___
.......
-e-___.:AV~
J301-2
1m
~
.......................................................................................................
:
I 2 6 7
I
C312
o.
001
I
I.
4
5
~0
"2. 3
~1.
4 (
CHASSIS)
EARTH
R303
22k
R212
3. 9
PB
HEAD
7
10~.
4 33k
R202
•
4V
R204
Cf.
0
3
4
'JL
HP901-2
C20~201
•
_,
••••••
R203
Rl~k5
150k
R206
47k
4---i
1--+--i
p+~
C207
R20k
9
C209
B~~~
0. 0047
47
0. 0068 20V
RV301-2
!OK
!Cl
I.
3~
~1.
36
+
C308
22
4V
C214
220
4V
Q305
~-
o. 00
47k
""
680k
:_.'!"=
l+~f=o~-.tr-=""*'=*--....__==f=l
.=·_it(
8 ••••
>..:---..---11---::-'
R301
C208
o. 033
D302
R215 R115
1S2r-83_7__,..--~471r-k--r-lf?~
~
47k
R21
6
~¥2
l
;;.
.-Rw.l3.-101_--,~...__
N te:
I
I
I
I
9
·~1.
35
C203
~
8302 lk
'-----'
o. 0039
~
c202
IDOLBY
NRI
R602
2.
2k
.n
1e
'------R-IV2~0-I
...__+...t,.f--J
IQITJ-
[illj]
R601
!OK
2.
2k
IOBl
o.
65
R207
430k
R208
3.
3k
.-----+---+--+----_._-+-----'C210
C303
+
C304
C321
0.1 , g
lOOp
Q60
1
2SB798
C6lo
SWITCHING
Jv
+
/REGULATOR
:0.
R
611
0 3·3K
C616
R210
5.
6k
R610
lOOK
.,
-~
0.047
1.
45
C609
•-H-
5~M
~~
t----~~~~
R612
220k
...
R609
150k
C612
o.
01
C61~
o.
01
3. 3
25V
R614
!OK
~o
o'~~
R302
Q302
lOOk
FMWI
MUTING
~
0.
16
9
8 7 6 5
R605
15
U
13 12
II
10
Q703
1M
·~I
2SC1623
R304
lOOk
~
C309
33+
4V
8~~}-~~~~
T701
DC-DC
L701
27P
I
~6.
5
:l
~2.
4
~2.
3
.to.
06
~o.
45
~o.
s
~
o
T
IC602
MSM58141RS
IC601
CX20084
NOTE
R701
RECTIFIER
I
1
2Vp-p
CPLLl
PLL
ON/OFF
AP
CSERVO
AMP>
:.·
:k
,?.
8
)r-
.....
•r;,_
3
,_---f----:.T.:.:.:tR~
330 3
lg~+L...t\,_1*-:I:+H--t
RW
M\
\;;,IX'
2.
45
C310
3iJ
Q305
MUTING
D301
SR506D
IBATTERYI
Q303
2SB624
REGULATOR
2.
25
-+--"11~-t
R308
330
R307
22k
R309
47k
R310
2.
2M
1
C313
o.
1
I"'"
o.
125
1 2 3 4
/"
!
AT
2 3 , 5 6 1 8 u l
·~
I
~
36pS
__j
I
~~~
!!81
•3
3 .._6_.
4---1--'
V
\/
.
'1':605
I
icl06
I.
25
•o.
8
~
~,:,
3 3
'"
,.,?,',1,1.,
I r lUI .
1-----
lmS
H
0.015
0.0018 62k
RE2GSQUlLP6A12T30R
.----+'-"-----~-6-8~-0-.-3-7.....
0303
o.
7
I
~/~9~Hz
6<11
Q602
RAOJ
I'
RV601
~ /.'1R704 'R702
~
82837 y
o.
6
R604
--Q:
2SC1623
R606
1
22k
tOBl
~
";\
4.
7k
470 Cj83 + Clz'o\
r-._l-1-'
--+--0'"'-HJ-
~
+
1M
SWITCHING
2.
4k
~
C701
,...
0.
(!:)/
-.0.
35
4V 4V
•
~
j +
C33.134
~
0.
7
Cl4zV106
1.
85
.---o---"'·~1...0.
CNJ301
~~--~----[DC
IN
3VI
®-.-e
I
./_..--PLAY
76mA
""
FF
SOmA
REW
65mA
I
C
16
~P
1
WP
2
~
630
P
3
~86~
C604
+
C615 C607
+
C608
SPEED
1160
V +
cr:r
5:~
4
~1
2
~~~
6
m~
~---
4V
Q304
FMWI
o.
1 '
g5~
o.
otT
T
6
:gv
DE-sDc
-=DRY
BATTERY
L
'----..._
_
___.
__
...._
____..,___f-----+-----41-----f---.--_.
_____
.._l_
_.
__________
--+---------
.....
----t_-..._
__
_.
___
c
__
_.
___
--4.,___.._-t----_..---
..
Ao-U-T_o_oF_F_._+---<;r---'T
SIZE"AA''
L....---------1-------l------l------+----------------------------------------~----------------------------------------------------~
(IEC
DE~:NATION)
-
------
-
------
-
------
-
------
-
----~--~r--~r---¢----
-
------
-
------
-
------
-
------
-
------
-
------
-
------
-
------
-
------
-
------
-
------
-
------
-
-----~
2PCS
3V
l®--
M901
MNR-1601A
MOTOR
L@-
FG901
FG
COl L *1
All capacitors
are
in
,uF
unless
otherwise noted.
pF:
.u.uF
50WV
or
less
are not indicated except
for
electrolytics
and tantalums.
•
-=
B+bus.
c=J
:
adjustment
for
repair.
Power
voltage
is
3 V
and
fed
with
regulated de
power
supply
from
Waveforms
are
taken
to
ground
in
PLAY
mode
by
using
oscilloscope.
Voltage
variations
may
be
noted
due
to
normal
produc-
tion
tolerances.
• Touching the pin No.
11
of
IC601 with the tester probe
causes
an
extra vibration inside the IC, which will
be
heard from the phones
as
a high-pitched sound.
All
resistors
are in n and
1/
4
W or
less
unless
otherwise
specified. L-CH signal
path
-•
......
: R-CH signal
path
-11-
Voltage
variations
may
be
noted
due
to
normal
produc-
tion
tolerances. Switches:
Ref.
No.
S301
S302
S901
Switch
TAPE
DOLBY
NR
POWER
Positi n
NORM
OFF
ON
•
If
the pin No.
11
of
IC601
is
touched
with
the tester
probe, the voltage there will increase, and after about 1
seco11d
it
will
get
higher than O.SV,
so
that
the motor
M901 will stop.
-12-
Exhibit 1010, Page 008

WM-DDm
IC BLOCK DIAGRAMS
IC301 BA3304F IC601 CX20084
1-
1-
:z :z
1-
!!':
!!':
1-
i
~
:::>
:::::>
I + 0
LL
0
a:
LL
! E !
....
0
0
<(
LL
.... ....
~
u
LL
~
:IE
:z:
:::>
<!)
0
CD
;::
IC302 NJM2063AM
!!': !!':
,_
,_
CJ
,_
!!':
LL
:::>
:z
....
:::>
LL
>
+ 0 i
!::;!0
-'
0
!
E"
-'
-'
:z
a:
!
co
Cl. 0
0
<(
t;
a:
,_
,_
<!) <!) <!)
....
w
~
:z
LL
LL LL
~
1-
i
:IE
:::::>
;::
0
;3
1-
(.!)
:::::>
:z
1-
0
~
....
:::>
u
c...
~
>
:z
....
a:
> •IC602 MSM58141RS
GND
4/5
SELECT
PC.OUT
8
'C
....
"'
"' N N 0
<=CJ
00
1-
,_
1-
a:
1-
....
:z
u..."'
:::::>
:::::>
:::>
~
:z
...1
(.!)
u..."-'
c...
0 0
~
<(
CD
~~
:z
u
a:
1-
<(
0
en
0::
~
1-
:z
a:O
:z
0 ;;
<..:>
:z~
0
<!)
w
.,
....
::;; z
:IE
~
~
;::
4
OSC2
OSC3
Bt
IC303 TA7688F
-13-
Exhibit 1010, Page 009

WM-DD.
I SECTION 5
jREVISEDI
EXPLODED
VIEWS
AND
PARTS LIST
--
NOTE:
·The
mechani
ca
1 parts with
no
reference
number
in
the
exploded
views
are
not
supplied.
·Items
marked
11
*
11
are
not
stocked since
they
are
seldom
required for routine
service.
Some
delay
should
be
antici-
pated
when
ordering these items.
5-1.
--not supplied--
•The
construction parts of
an
assembled
part are indicated with a collation
number
in the
remark
column.
16
·Color Indication of
Appearance
Parts
Example:
(RED)
.....
KNOB,
BALANCE
l
(WH~TE)
Cabinet's
Color
Parts'
Color
20
~7
No.
Part
No.
rJescription
Remarks
No.
Part
No.
Description
Remarks
X-3310-950-1
(SILVER)
•••
PANEL
ASSY,
CONTROL
15
3-578-232-00
(SILVER)
•••
ORNA14ENT,
ADJUSTMENT
HOLE
X-3310-951-1
(BLACK)
••.•
PANEL
ASSY,
CONTROL
3-578-232-11
(RED)
••.•••
ORNAMENT,
ADJUSTMENT
HOLE
X-3310-952-1
(RED)
••••••
PANEL
ASSY,
CONTROL
3-578-232-21
(BLACK)
••••
ORNAMENT,
ADJUSTMENT
HOLE
2 3-704-246-31
(SILVER)
••••••
SCREW
(P1.4X2.5)
16
X-3310-953-1
(SILVER)
•••
PANEL
ASSY,
CASSETTE
3-704-246-32
(BLACK,RED)
•••
SCREW
(P1.4X2.5)
X-3310-954-1
(BLACK)
••••
PANEL
ASSY,
CASSETTE
X-3310-955-1
(RED)
•••••.
PANEL
ASSY,
CASSETTE
3 3-310-947-00
SPRING,
COMPRESSION
4 3-310-983-02
BUTTON,
LOCK
17
3-578-101-00
PLATE,
ORNAMENTAL
18
*3-701-999-00
LABEL,
SERIAL
NUMBER
5 a
3~4
495
et
!5ftrE~.~E~)
..•
t~B~t~
~
not
supp
Ii
ed--
20
3-578-236-00
SPRING
(BATTERY)
3
324
436
11
(
BLAGK)
••••••••
LP.BEL
,
Bt
__
00
t
supp
Ii
ed--
21
3-578-115-00
LID,
BATTERY
CASE
6 *3-324-430-01
(SILVER)
••••••
LABEL,
MODEL
NUMBER
22
*3-324-415-01
CUSHION
*3-324-430-11
(BLACK,RED)
•••
LABEL,
MODEL
NUMBER
23
3-578-114-0D
PANEL,
CHASSIS
24
7-627-850-58
SCREW,
PRECISION
+P
1.4X3.5
7 3-307-831-00
SCREW,
PANEL
25
3-324-431-01
KNOB,
VOL
8 3-335-797-21
SCREW
(M1.4X3),
TOOTHED
LOCK
9 3-831-441-11
CUSHION
(B)
26
3-310-979-01
BUTTON,
SELECTION,
TAPE
10
9-911-838-XX
CUSHION,
METER
27
3-310-978-01
BUTTON,
SELECTION,
NR
(DOLBY)
901
A-3216-178-A
PC
BOARD
ASSY,
MAIN
11
9-911-816-01
CLOTH,
DRAWER,
BATTERY
12
3-831-441-XX
SPACER
13
3-703-710-01
STICKER,
SONY
SYMBOL
(12)
14
3-578-109-00
CONTACT
-14-
Exhibit 1010, Page 010

Benefits
Combine Services: Docket Alarm
does the work of multiple ser-
vices in one package.
Uber-Fast: Search with speed.
Alerts up to 16 times a day to get
filings in real-time.
Search You Know: Support for
both terms and connectors and
natural language searching.
Bulk Downloads: Download hun-
dreds of filings in seconds.
Reports: Easily export reports
from your research.
API: Integrate our data into your
app with our API.
User Friendly: Our service is
beautiful and, yes, fun to use.
Getting Started with Docket Alarm
Search, Track, and Analyze
cases on PACER, the ITC, the
PTAB, and State Courts
Comprehensive Search: Over 170
million cases, including PACER, state
courts, the Supreme Court, ITC,
TTAB, PTAB and trademark prose-
cution history.
Real-Time Alerts: Never check the
court docket again. We integrate
with ECF systems so you get alerts
and documents immediately.
Powerful Analytics: Our case pre-
dictor can tell you the likelihood of
winning by judge, firm, or party. See
a firm’s clients or a party’s outside
counsel.
Some of Our Clients
docketalarm.com
Table of contents
Other Sony Cassette Player manuals

Sony
Sony CFD-V77S User manual

Sony
Sony TC-RX60ES User manual

Sony
Sony TCM-AP5V User manual

Sony
Sony CFS-W338 User manual

Sony
Sony TC-WE305 User manual

Sony
Sony Pressman TCM-465V User manual

Sony
Sony SERVICE MANUAL User manual

Sony
Sony CFS-W338 User manual

Sony
Sony Walkman WM-FX491 User manual

Sony
Sony TCS-580V User manual

Sony
Sony Walkman WM-EX9 User manual

Sony
Sony CFS-E2 Operating Instructions (primary... User manual

Sony
Sony TC-KA6ES User manual

Sony
Sony CFS-616S User manual

Sony
Sony TC-WE405 User manual

Sony
Sony Walkman WM-EX621 User manual

Sony
Sony Walkman WM-EX615 User manual

Sony
Sony TC-WR10ES User manual

Sony
Sony Walkman WM-GX221 User manual

Sony
Sony WM-FS555J - Walkman User manual