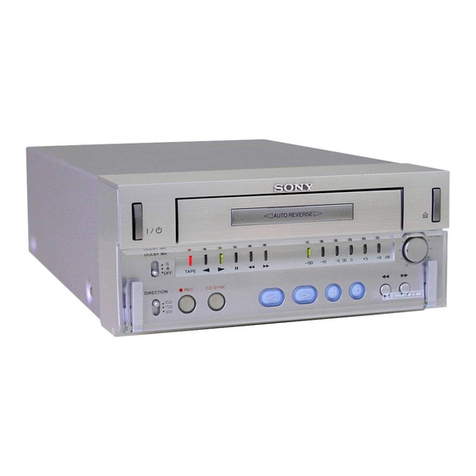
Sony TC-RX60ES User manual

Ss
O
N
Y.
3-769-978-11
(1)
Stereo
Cassette
Deck
TC-RX60ES
Operating
Instructions
page
2
Before
operating
the
unit,
please
read
this
manual
thoroughly
and
retain
it
for
future
reference.
Mode
d’emploi
_
page
22
Avant
la
mise
en
service
de
l'appareil,
priére
de
lire
attentivement
ce
mode
d’emploi
que
l’on
conservera
pour
toute
référence
ultérieure.
Manual
de
instrucciones
pagina
42
Antes
de
utilizar
la
unidad,
lea
este
manual
detenidamente
y
consérvelo
para
futuras
referencias.
©
+1988
by
Sony
Corporation

WARNING
To
prevent
fire
or
shock
hazard,
do
not
expose
the
unit
to
rain
or
moisture.
To
avoid
electrical
shock,
do
not
open
the
cabinet.
Refer
servicing
to
qualified
personnel
only.
Features
NOTICE
FOR
THE
CUSTOMERS
IN
THE
UNITED
KINGDOM
IMPORTANT
The
wires
in
this
mains
lead
are
coloured
in
accordance
with
the
following
code:
Blue:
Neutral
Brown:
Live
As
the
colours
of
the
wires
in
the
mains
lead
of
this
apparatus
may
not
correspond
with
the
coloured
markings
identifying
the
terminals
in
your
plug
proceed
as
follows:
The
wire
which
is
coloured
blue
must
be
connected
to
the
terminal
which
is
marked
with
the
letter
N
or
coloured
black.
The
wire
which
is
coloured
brown
must
be
connected
to
the
terminal
which
is
marked
with
the
letter
L
or
coloured
red.
The
TC-RX60ES
is
an
auto-reverse
cassette
deck
equipped
with
a
laseramorphous
magnetic
alloy
head
using
LC-OFC
winding
for
recording
and
playback,
and
features
the
following
functions.
®
Quick-reverse
function
prevents
tape
transport
on
the
leader
tape.
e
The
Dolby
HX
PRO*
system
improves
the
linearity
of
the
tape’s
high
range
response
during
recording.
e
Easy-to-read
digital
linear
counter
shows
the
elapsed
recording
or
playback
time.
e
AMS,
blank
skip
and
music
scan
functions
provide
easy
access
to
a
desired
selection.
*
Dolby
noise
reduction
and
HX
Pro
headroom
extension
manufactured
under
license
from
Dolby
Laboratories
Licensing
Corporation.
HX
Pro
originated
by
Bang
&
Olufsen.
“DOLBY”’,
the
double-D
symbol
00
and
“HX
PRO”
are
trademarks
of
Dolby
Laboratories
Licensing
Corporation.

Biele)()
of
Contents
FOAtUICS
..ccccccccesscccccesscsececssusseccssuecesecnceecseesnseseneeeeeeueasasescasennecnenseaeesseuseesaeeaesanesersoesanentoeesentenses
PLOCAUTIONS
...0.ccccscececcsseeseecesaessssseeeececessncescceeecceeessaaeeseaeaeessneeseessaesenseasersenueeserentieeesieaueeaseeenset
Operating
Voltage
........cceceesseeessssesseeeeseseseseenscsensnecsneenceeseneracsetsnsaserseseenecseeeenegenseenseseneceuaanenenes
IAStall
ation
s.cdccczenceceiesacaseessbecueecnsecencevenseasecesvenasscezestagsesvegseecis
COMMECHIONS
wcsccssciccedcvcesescesoudcetestessoda
cdecdeccoiveseuecUcbelansacdssanceasuacosd
seastouadedesssaavesdenasestteeatsneressoee
Parts
identification
of
the
rear
panel
NoteS
ON
CONNECTIONS
2.0...
ccceecceeecsseeesecceeeeseeecoeseeueesaeeseaessceeueeseessaeesseeeesneeestaaeresessaneananenses
BaSiC
CONNECTION
.......ccccecccsssssccecsecesssceeseeccsaeeeserececesssesncuseasseaueucaneguanssasaeeesensoeeessonoussneutenes
Location
Of
CONTIOIS
....c.cccceeccesssecsceccsescesceseeceeccsecesceeseeeeeasseeeseseeeeeeeceanssesseseesaeceeerinsersanenes
Playback
.........ccccccecssseseeeeesssesssssesseesesesssenescsssnesessaeseaeacasscseasseasesenesesesanececaenenenanececeneanneaenenets
10
Locating
the
beginning
of
a
selection
during
playback
—Automatic
Music
Sensor
(AMS)
.......:cceseeessssssseceeeseesseseneeseeceeenauergeesnenneeenneneuennens
11
Skipping
a
blank—Blank
SKID
.........cecsesesseseseeneeeeecteeeeeeneterensteetscarssersesssenaeeeeesenenensseretees
11
Playing
only
the
beginning
of
each
selection—MusiC
SCAN
........seeseeeseeeeseeneeeetees
12
Playing
back
automatically
after
fast
winding—Auto
play
...........sseceeseeeeeeeeeneeeees
12
Locating
a
desired
position
using
the
counter—Memory
play
...........ssssseeserereeseesetens
13
RECOIING
........csesccesesseteteseseseessessessasaeceseeesesesesesnecssenenensnessnacseeeseecssacatansesesesenenecanessnessaneneacacies
14
Recording
level
adjuStMent
..........:ccseceeeeneee
s
sevaasabudesdabdeaduotaadogedveasdaaaetiavsnlestestetenseed
15
NoteS
OM
CASSEtEOS
occ
cccesscccesseceesssseeessscecseeecsneceresaeenecseeesnesuenersuerecesansseseesaeestesseanasnnantons
15
Inserting
a
blank
space
during
recording—ReCord
MUtING........sseecersseeetetetteeeeneees
16
Synchronized
recording
with
a
turntable
SYSteIM.........
ccs
eeeteeeeteeeeteenee
tenets
reeneaey
16
Timer-activated
playback
and
reCOrding
........seesccsesssesseeeseeetesetenetenersteetsenenaseessnensesasneasnees
18
Maintenance
.......cceccccsesccssecceccsssssecsneecseesesseeseessnesaseasenesnessanesseusseegeseeseneesseesearscaeeaeseesanoeeaaets
19
Specifications
......secsecsceeseceesseseeesesseseceeeeeseecetsnenseseessnersnsnenenessesneseaeceesenesenecaneanegnenenaeneetts
20
Troubleshooting
QUIGE
«2.0.2...
eeceecsscesesesereeseteeecnecnsseeeeseteaeetsesatseratsetatsaneavanesssaneseeneeaeenenenany
21

ed
g=vors
lbp
i(e)
ats
On
safety
¢
Before
operating
the
unit,
make
sure
that
the
operating
voltage
of
your
unit
is
identical
with
that
of
your
local
power
supply.
¢
Should
anything
fall
into
the
cabinet,
unplug
the
unit
and
have
it
checked
by
qualified
personnel
before
operating
it
any
further.
e
Unplug
the
unit
from
the
wall
outlet
if
it
will
not
be
used
for
a
long
time.
To
disconnect
the
cord,
pull
it
out
by
grasping
the
plug.
Never
pull
the
cord
itself.
¢
The
unit
is
not
disconnected
from
the
AC
power
source
(mains)
as
long
as
it
is
connected
to
the
wall
outlet,
even
if
the
unit
itself
has
been
turned
off.
¢
The
nameplate
indicating
operating
voltage,
power
consumption,
etc.
is
located
on
the
rear.
On
operation
e
When
the
unit
is
not
used,
turn
the
power
off,
to
conserve
energy
and
to
extend
the
useful
life
of
your
unit.
*
Because
of
the
safety
mechanism,
the
function
buttons
will
not
operate
if
the
cassette
holder
is
not
completely
closed,
if
there
is
no
cassette,
or
if
a
cassette
has
been
incorrectly
inserted
into
the
cassette
holder.
On
head
cleaning
The
heads
and
tape
path
should
be
cleaned
after
10
hours
of
operation.
Dirty
heads
and
a
dirty
tape
path
may
cause:
Loss
of
high
frequency
response
Loss
of
sound
volume
Sound
drop-out
‘If
you
have
any
questions
or
problems
concerning
your
unit,
please
contact
your
nearest
Sony
dealer.
Operating
Voltage
Before
connecting
the
unit
to
the
power
source,
check
that
the
operating
voltage
of
your
unit
is
the
same
as
the
local
power
line
voltage.
|
Where
purchased
|
Operating
European
countries
(or
240
V
AC
adjustable
by
authorized
Sony
personnel),
50/60
Hz
Operates
on
240
V
AC
(or
220
V
AC
adjustable
by
authorized
Sony
personnel),
50
Hz
United
Kingdom
Canada
Operates
on
120
V
AC,
60
Hz

Tiksvecliestereyal
Neel
CioMeliMlatsy)
clicchecere
Place
the
unit
in
a
location
with
adequate
Do
not
place
the
unit
on
a
soft
surface,
such
as
a
rug
that
would
air
circulation
to
prevent
internal
heat
block
the
ventilation
holes
on
the
bottom.
build-up
in
the
unit.
\\
oF
|
AWK
Ga
Install
the
unit
with
the
front
panel
facing
toward
you.
Do
not
install
the
unit:
—near
heat
sources
such
as
radiators
or
air
ducts.
—in
a
place
subject
to
direct
sunlight,
excessive
dust,
mechanical
vibration
or
shock.
—in
an
inclined
position.
rd
Do
not
throw
away
the
carton
and
the
packing
material!
They
make
an
ideal
container
when
transporting
the
unit
or
shipping
it
for
servicing.

rey
alacsveri(e)ats
Parts
Identification
of
the
Rear
Panel
LINE
IN
(line
input)
jacks
(phono
jacks)
Connect
to
the
tape
outputs
(recording
outputs)
of
an
amplifier
for
tape
recording.
SYNC
connector
(3-pin)
For
synchronized
recording
with
a
turntable,
connect
to
the
SYNC
connector
of
the
Sony
turntable
system.
For
further
details,
refer
to
the
instruction
manual
of
the
optional
Sony
turntable
system
equipped
with
the
SYNC
connector.
LINE
OUT
(line
output)
jacks
(phono
jacks)
Connect
to
the
tape
inputs
of
an
amplifier
for
playback.
Notes
on
Connections
__
oD
|
AC
power
cord
CONTROL
§
connectors
(4-pin)
IN:
Connect
to
the
optional
Sony
RM-88
wireless
remote
control
unit
or
the
CONTROL
S
OUT
connector
of
another
piece
of
Sony
equipment.
OUT:
Connect
to
the
CONTROL
§
IN
connector
of
another
piece
of
Sony
equipment.
e
Turn
off
the
power
to
all
equipment
before
making
any
connection.
e
Note
that
the
red
plug
of
the
supplied
connecting
cord
is
for
right-channel
(R)
connection
and
the
white
plug
for
left-channel
(L)
connection.
LC
pao
R
C—_
anf
fheip
—p>@)
R
e
The
connecting
cords
should
be
fully
inserted
into
the
jacks.
A
loose
connection
may
cause
hum
pick-up.
|
Flat
cord
connection
—
Remote
control
cord
Synchro
remote
control
4-pin
2
cord
(3-pin
(4-pin)
RQ
(3-pin)
Supplied
with
the
optional
;
Sony
turntable
(Supplied)
system
[Fo
ai
Be
sure
to
insert
the
cord
firmly.
i
This
way.
Not
this
way.
o
disconnect
the
cord,
pull
out
the
connector.
Do
not
pull
the
cord
itself.
is

Basic
connection
REC
OUT
©®O
——_Asy
|
_
28
ee
gio
ole!
©9O9O
©
O|©
©
TAPE
INPUT
()
for
playback
LINE
OUT
Amplifier
==>
to
a
wall
outlet
Z—
Signal
flow
TC-RX60ES
LINE
IN
Connection
for
tape
dubbing
LINE
OUT
7
TC-RX60ES
from
another
}
tape
deck
LINE
IN
onto
another
tape
deck
LINE
OUT
Another
tape
deck
to
an
AC
outlet
to
an
AC
outlet
an,
==>
to
an
AC
outlet
Connection
for
synchronized
operation
with
a
turntable
system
Turntable
system
to
an
AC
outlet
to
a
wall
outlet
{
TC-RX60ES
to
an
AC
outlet

Mover:
(ela
Mme)
Mmere)alige)
ts
Refer
to
the
pages
indicated
in
@
for
details.
DISPLAY
window
PEAK
LEVEL
METERs
LINEAR
COUNTER
DIRECTION
indicators
TAPE
OPERATION
indicators
TAPE
TYPE
indicators
—
||°
O
POWER
switch
pmo
|
:
TIMER
switch
®
t
inl
(eject)
button
Cassette
holder
COUNTER
RESET
and
MEMORY
buttons
©—_-—_—___------___--—___—-----—-

Tape
operation
buttons
and
indicators
<4
(leftward
fast
winding)
button
bP
(rightward
fast
winding)
button
&
(forward
play)
button
and
indicator
<@
(reverse
play)
button
and
indicator
@
(stop)
button
Il
(pause)
button
and
indicator
©
REC
MUTE
(record
muting)
button
J)
@
REC
(record)
button
and
indicator
DOLBY
NR
switches
({),
Q)
REC
LEVEL
(recording
level)
controls
J)
PHONES
LEVEL
(headphones
level)
contro!
PHONES
(headphones)
jack
(stereo
phone
jack)
DIRECTION
MODE
selector
10}
@
TAPE
OPERATION
button
@.
@

Playback
Set
the
amplifiers
function
to
tape
monitor.
Stopping
play
To
stop
play
Press
@.
Press
Ul.
To
restart
play,
press
#1
again.
To
stop
for
a
moment
during
play
How
to
set
DIRECTION
MODE
selector
“|
Selector
position
To
play
back
one
side
of
the
Oo
==
(released)
cassette
To
play
back
both
sides
=
C—
(depressed)
continuously
*
*
After
playing
back
five
times,
play
stops
automatically.
1
Press
&
to
open
the
cassette
holder
and
insert
a
recorded
cassette.
2
Start
playback.
From
the
front
side
Press
>.
From
the
reverse
side
Press
<@
How
to
use
DOLBY
NR
switches
Set
the
DOLBY
NR
switches
to
the
same
position
as
was
used
when
recording
the
cassette.
Dolby
NR
system
|
Dolby
OFF
|
Dolby
B
_|
Dol
Oo
OFF
Either
position
Switch
setting
O
B-TYPE
|
2
C-TYPE
Side
of
the
cassette
being
played
back
or
recorded
The
DIRECTION
indicator
illuminates
to
indicate
the
side
of
the
cassette
being
played
back
or
recorded.
Reverse
side
DIRECTION
REVERSE
FORWARD
Front
side
DIRECTION
REVERSE
FORWARD
The
head
is
reversed
immediately
when
The
leader
tape
of
the
cassette
is
detected
by
the
unit’s
infrared
sensor.
(Quick
reverse
function)
In
the
following
cases,
the
quick
reverse
function
may
not
operate
correctly
©
Recording
or
playback
is
started
within
10
seconds
before
the
leader
tape.
©
The
leader
tape
is
striped
or
is
such
a
dark
color
that
infrared
rays
cannot
pass
through,
or
the
cassette
has
no
leader
tape.
©
The
magnetically
coated
base
tape
is
very
thin,
as
in
a
C-120
cassette.
10
Is
it
necessary
to
set
the
tape
type
being
used?
No.
Because
the
deck
has
an
automatic
tape type
cetection
system.
In
recording
or
playback
of
TYPE
|
(normal),
TYPE
Il
(CrO,)
and
TYPE
IV
(metal)
cassette
tapes,
this
systen
automatically
adjusts
the
equalization
and
bias
currint
to
the
optimum
setting
for
the
type
of
cassette
used.
The
turrent
tape
selection
is
indicated
by
the
TAPE
TYPE
indicaor.
To
switch
to
the
recording
mode
during
playback
Keeping
<4
or
®
pressed,
press
@.
This
is
useful
wie
editing
previously
recorded
material.
The
TIMER
switch
must
be
set
to
OFF
because...
The
TIMER
switch
makes
the
system
ready
for
the
imer
recording
and
playback
using
the
optional
timer.
If
t
iss
not
set
to
OFF,
recording
or
playback
will
start
automaticaly
when
the
power
is
turned
on.
What
is
Dolby
NR
system?
The
Dolby
NR
(noise
reduction)
system
reduces
tap¢
h
iss
noise
in
low
level
high
frequency
signals.
The
systen
Roosts
these
signals
in
recording
and
lowers
them
in
playtuck.

Locating
the
Beginning
of
a
Selection
during
Playback
—Automatic
Music
Sensor
(AMS)
1
Make
sure
that
the
MEMORY
indicator
is
not
displayed.
If
it
is,
press
MEMORY.
2
Press
TAPE
OPERATION
so
that
the
AMS/BLANK
SKIP
indicator
lights
up.
3
Check
the
DIRECTION
indicator
and
press
<q
or
PP.
;
DIRECTION|
Desired
selection
_
“Indieator
"Next
|Current
a
|
selection
|
selection
—
Skipping
a
Blank—Blank
Skip
This
function
is
useful
when
the
cassette
to
be
played
back
has
unnecessary
blank
portions.
What
is
AMS?
It
detects
the
blank
space
between
selections
and
locates
the
beginning
of
a
selection
during
playback.
To
assure
correct
operation
of
the
AMS,
there
must
be
a
blank
of
4
seconds
or
longer
between
selections.
If
the
pp
or
<<
button
is
pressed
immediately
before
the
following
selection
The
AMS
may
locate
the
selection
after
the
one
immediately
following.
The
AMS
may
not
operate
—if
there
is
noise
in
the
space
between
selections
—if
the
space
is
less
than
4
seconds
long.
1
Make
sure
that
the
MEMORY
indicator
is
not
displayed.
If
it
is,
press
MEMORY.
2
Press
TAPE
OPERATION
so
that
the
AMS/BLANK
SKIP
indicator
lights
up.
3
Press
<4
or
>.
The
deck
automatically
goes
into
the
fast
winding
mode
where
there
is
a
blank
of
about
10
seconds
or
more.
The
AMS
will
treat
the
following
as
blanks:
—a
long
pause
in
the
music
—a
passage
of
low
frequencies
or
very
low
volume
—a
passage
of
gradual
increase
or
decrease
of
volume
Should
the
above
happen,
press
TAPE
OPERATION
to
turn
off
the
AMS/BLANK
SKIP
indicator.
Note
on
the
optional
Sony
RM-88
remote
control
unit
Q
button
of
the
RM-88
functions
as
the
TAPE
OPERATION
button
on
the
unit,
as
long
as
it
is
not
used
with
@
button.
11

Playback
Beginning
of
Each
Selection—Music
Scan
Playing
Back
Automatically
after
Fast
Winding—Auto
Play
1
Make
sure
that
the
MEMORY
indicator
is
not
displayed.
If
it
is,
press
MEMORY.
2
Press
TAPE
OPERATION
so
that
the
MUSIC
SCAN
indicator
lights
up.
The
beginning
of
each
selection
will
be
played
back
for
10
seconds
one
after
another.
1
Make
sure
that
the
MEMORY
indicator
is
not
displayed.
If
it
is,
press
MEMORY.
2
Press
TAPE
OPERATION
so
that
neither
the
AMS/BLANK
SKIP
nor
the
MUSIC
SCAN
indicator
lights
up.
3
To
play
from
the
Keeping
»
beginning
of
the
front
|
pressed,
side
of
the
cassette
press
<Q.
To
play
from
the
Keeping
<@
beginning
of
the
pressed,
reverse
side
of
the
press
PP.
cassette
After
the
tape
is
completely
rewound,
the
deck
will
automatically
start
playback.
The
indicator
on
the
®
or
<
button
blinks
during
music
scan
and
shows
the
following
While
fast
winding,
the
indicator
blinks
rapidly.
And
while
playing
back,
it
blinks
slowly.
If
you
find
the
desired
selection
during
music
scan
Press
B
or
«<q
while
the
indicator
on
the
®
or
<¢
bution
is
blinking
slowly.
And
the
playback
starts.
ne
Music
scan
functions
only
on
one
side
of
a
cassette
Even
if
you
select
the
=
position
with
the
DIRECTION
MODE
selector,
the
unit
will
automatically
shut
off
at
the
beginning
or
the
end
of
the
side
of
the
cassette
on
which
the
music
scan
function
began.
If
playback
starts
in
the
middle
of
the
tape
when
you
do
auto
play
If
the
MEMORY
indicator
is
displayed,
press
MEMORY
to
turn
the
indicator
off.

Locating
a
Desired
Position
using
the
Counter—Memory
Play
1
Press
COUNTER
RESET
at
the
desired
point
while
playing.
The
counter
will
be
set
to
0.00.
2
Press
MEMORY.
The
MEMORY
indicator
will
be
displayed.
3
When
you
want
to
return
to
the
desired
point
during
playback,
press
the
following:
DIRECTION
indicator
|Operation
Press
<q
and
Bm.
Press
PR
and
<4.
The
tape
will
be
rewound
to
around
0.00
and
playback
will
start.
Do
not
turn
the
power
off
while
using
the
counter
When
you
turn
the
power
off,
the
counter
is
reset
to
0.00.
When
you
press
only
the
<<
or
B®
button
when
locating
the
desired
point
The
tape
will
be
rewound
and
the
unit
will
stop
at
around
0.00.
(Memory
stop)
The
accuracy
of
the
counter
This
counter
is
not
actually
a
digital
clock,
and
thus
the
displayed
figures
are
not
exactly
equal
to
the
actual
elapsed
time.
The
accuracy
will
vary
depending
on
the
type
of
tape
being
used.
This
counter
has
been
designed
using
Sony
cassette
tapes
as
a
standard.
C80
(thin
hub)
C54
(thin
hub)
*
C46
(thick
hub)
*
C60,
C90
(thin
hub)
C46
(thin
hub)
minute
—1
0
+1
+2
+3
The
counter
indication
The
counter
indication
is
less
than
the
actual
is
more
than
the
actual
tape
running
time.
tape
running
time.
Notes
on
the
counter
°
lf
necessary,
verify
the
accuracy
of
the
counter
when
using
cassette
tapes
other
than
Sony’s,
or
tapes
of
a
special
length.
*
Pay
attention
to
the
length
of
the
leader
tape
when
recording.
13

a{-yore)
gellar
When
the
deck
functions
in
the
recording
mode,
previously
recorded
material
will
be
erased.
The
indicator
on
the
»
or
<4
button
blinks
when
@
is
pressed...
Recording
is
possible
only
on
the
side(s)
shown
by
the
blinking
indicator(s).
If
the
cassette
tab
has
been
removed
for
the
prevention
of
accidental
erasure,
the
indicator
does
not
blink.
If
the
side
whose
tab
has
been
removed
is
selected
for
recording
The
deck
will
start
playback
instead
of
recording.
14
1
Press
&
and
insert
a
cassette
on
which
to
record.
2
Select
the
desired
DOLBY
NR
system
setting.
(See
page
10.)
3
Select
the
side(s)
to
be
recorded:
To
record
on
one
side
To
record
on
both
sides
(from
front
side
to
reverse
side)
continuously
4
Adjust
the
recording
level.
1)
Press
@.
2)
Play
the
program
source
to
be
recorded.
3)
Adjust
the
recording
level
with
REC
LEVEL
controls.
(See
next
page.)
5
Start
recording.
Side
to
be
recorded
Both
sides
or
only
front
side
Buttons
pressed
To
stop
recording,
press
Mf.
Only
reverse
side
When
you
select
C>
with
the
DIRECTION
MODE
switch
for
recording
The
deck
always
stops
at
the
end
of
the
reverse
side
of
the
tape,
even
if
you
select
the
C=
position
with
the
DIRECTION
MODE
switch.

Recording
Level
Adjustment
Adjust
the
recording
level
according
to
tape
type
by
observing
the
PEAK
LEVEL
METERs,
referring
to
the
following
diagram.
Recommended
maximum
PEAK
LEVEL
METER
reading
TYPE
|
(normal),
TYPE
li
(CrO,)
TYPE
IV
(metal)
tapes
tapes
dB
==
-2
a)
~10
a4
mo
Bl
eB
nn
3
oe
ovudo
“TT
=
Adjust
the
recording
level
as
high
as
possible
without
causing
distortion
in
the
recorded
sound.
\f
the
recording
level
setting
is
too
high,
the
recording
will
be
distorted;
if
it
is
too
low,
the
tape
will
produce
a
hissing
sound.
If
the
program
source
to
be
recorded
has
many
high
frequency
signals,
set
the
level
to
a
relatively
low
position.
Notes
on
Cassettes
To
prevent
accidental
erasure
To
protect
side
A
To
reuse
a
cassette
recording
Cover
each
slot
with
Break
out
the
tab
plastic
tape.
of
side
A.
Side
ae
Kec
e)
aS)
When
using
TYPE
I!
(CrOz)
or
TYPE
IV
(metal)
cassettes
Be
careful
not
to
cover
the
detector
slots
which
are
necessary
for
automatic
tape
type
detection.
Tab
of
side
Bo
Tab
of
side
A
TYPE
Il
ome
TYPE
IV
(metal)
Detector
slots
Detector
slots
How
to
start
recording
more
precisely
1
Press
#1
after
playing
the
program
source
to
be
recorded.
2
Keeping
@
pressed,
press
B®
for
front
side
recording
or
<@
for
reverse
side
recording.
3
Adjust
the
recording
level.
4
Press
If
again
when
you
want
to
start
recording.
Recording
will
start.
The
TIMER
switch
must
be
set
to
OFF
because...
The
TIMER
switch
makes
the
system
ready
for
the
timer
recording
and
playback
using
the
optional
timer.
If
it
is
not set
to
OFF,
recording
or
playback
will
start
automatically
when
the
power
is
turned
on.
C-120
cassettes
are
not
recommended
except
when
necessary
for
long
continuous
recording
and
playback
C-120
cassettes
use
extremely
thin
tape
which
tangles
easily
when
the
tape
transport
is
stopped
and
started
frequently.
Cassette
care
¢
Avoid
touching
the
tape
surface
of
a
cassette,
as
any
dirt
or
dust
will
contaminate
the
heads.
¢
Keep
cassettes
away
from
equipment
with
magnets,
such
as
speakers
and
amplifiers,
as
erasure
or
distortion
on
the
recorded
tape
could
occur.
¢
Do
not
expose
cassettes
to
direct
sunlight,
extremely
cold
temperatures
or
moisture.
To
check
the
approximate
remaining
recording
time
on
the
tape
1
Press
COUNTER
RESET
to
set
the
counter
to
0.00.
2
Advance
the
tape
to
its
end
using
the
appropriate
fast
winding
button.
The
figure
on
the
linear
counter
shows
the
approximate
time
remaining
on
the
tape.
ac)

sXcrerelgoltale
|
Tattcva
clive
Mee
Mm
adel
@es)ex-(oomelllalare
Matcrere)
collars
beatae
co
milaiire|
You
can
insert
a
blank
space
in
a
tape
to
help
you
locate
a
selection
(AMS
function,
see
page
11).
In
addition,
you
can
eliminate
the
unwanted
portions
of
the
recording
material.
Synchronized
recording
can
be
performed
with
a
Sony
turntable
system
equipeed
with
the
SYNC
connector.
For
connection,
see
the
connection
diagram
on
page
7.
16
Synchronized
Recording
with
a
Turntable
System
1
While
recording,
press
QO
REC
MUTE.
If
you
want
the
blank
to
be
four
seconds
long,
press
and
release
immediately.
If
you
want
it
to
be
longer,
keep
pressing
for
as
long
as
you
want.
The
#f
indicator
flickers.
No
incoming
signals
are
recorded
on
the
tape.
The
tape
stops
automatically,
and
the
indicator
lights
up.
2
Press
§f
to
resume
recording.
1
Prepare
the
turntable
and
amplifier
for
playing
a
record.
2
Prepare
the
deck
for
recording.
(See
page
14)
3
Press
II.
4
Set
the
deck
in
the
record
stand-by
mode.
To
record
on
the
front
Keeping
@
pressed,
side
press
>
To
record
on
the
reverse
|
Keeping
@
pressed,
side
press
<.
When
the
tonearm
lowers
onto
the
record,
recording
begins.
When
the
tonearm
is
lifted
up,
the
deck
automatically
enters
the
record
muting
mode
for
four
seconds
and
returns
to
the
record
pause
mode.
For
details,
see
the
instruction
manual
of
the
turrtable
system.

DOLBY
HX
PRO
system
This
system
provides
improved
linearity
in
high-range
frequency
response
during
recording.
Tapes
recorded
with
this
system
retain
the
same
high
quality
even
when
played
back
on
other
tape
decks.
L_
High
|
Distortion
Output
315Hz
6.3kKHz
aN
*
40kHz
i
{
\
|
|
|
|
\
|
315Hz
distortion
L
|
Bias
current
—
High
Established
bias
current
As
shown
above,
characteristics
such
as
output
level
and
distortion
differ
widely
according
to
the
bias
(high-
frequency)
current.
In
conventional
system,
the
bias
current
is
susceptible
to
variations
in
certain
recording
signals
(see
diagram
below),
and
this
can
cause
fluctuations
in
frequency
response,
distortion,
or
other
unwanted
characteristics.
=
High
Output
Fluctuation
Frequency
——=>
High
_
With
the
Dolby
HX
PRO
System,
the
effective
bias
amount
added
to
the
bias
current
is
controlled
in
millisecond
units
to
greatly
reduced
distortion,
improving
linearity
in
high-range
response
and
ensuring
high-
intensity
recording
with
minimal
distortion
and
noise.

Timer-Activated
Playback
and
Recording
By
connecting
a
commercially
available
timer,
automatic
playback
or
recording
can
be
performed
at
a
preset
time.
J
to
an
AC
outlet
Amplifier
to
the
switched
outlet
of
the
timer
2
+
to
a
wall
outlet
When
the
timer-activated
operation
is
completed
Set
the
TIMER
switch
on
the
unit
to
OFF.
If
the
TIMER
switch
is
left
at
REC,
the
unit
will
automatically
enter
the
recording
mode
the
next
time
the
power
is
turned
on,
and
the
previously
recorded
material
may
be
erased.
Keep
the
POWER
switch
depressed
on
the
tape
deck
When
the
timer
is
set,
the
power
of
the
deck
will
be
cut
off.
However,
be
sure
to
leave
the
POWER
switch
depressed
on.
18
1
Prepare
the
equipment
for
playback
or
recording
following
the
steps
shown
on
page
10
or
14.
2
Set
the
timer
to
the
desired
time.
3
Set the
unit’s
TIMER
switch
to
PLAY
or
REC.
Playback
or
recording
will
start
at
the
preset
time.
Check
the
direction
mode
indicator
Timer-activated
operation
will
start
on
the
side
shown
by
DIRECTION
indicator.

WiFelialcclarclacers
j
Cleaning
the
Heads
and
Tape
Path
Clean
all
surfaces
over
which
the
tape
travels
after
every
10
hours
of
operation.
However,
cleaning
before
every
recording
is
recommended
to
obtain
high
quality
recording
sound.
1
Press
&
to
open
the
cassette
holder.
2
Wipe
the
heads,
the
pinch
rollers
and
the
capstans
with
a
cleaning
tip
slightly
moistened
with
tape
cleaning
fluid
or
alcohol.
Erase
head
Record/Playback
head
Demagnetizing
the
Heads
|
After
20
or
30
hours
of
use,
or
when
you
notice
hiss
1
Turn
off
POWER.
|
andior
loss
of
high
frequencies,
the
residual
magnetism
|
built
up
on the
heads
should
be
removed.
2
Demagnetize
the
heads
with
any
commercially
available
demagnetizer.
Refer
to
the
instruction
manual
of
the
demagnetizer
for
detailed
instructions.
Cleaning
the
Cabinet
|
Clean
the
cabinet,
panel
and
controls
with
a
soft
cloth
important
slightly
moistened
with
a
mild
detergent
solution.
Do
not
use
any
type
of
abrasive
pad,
scouring
powder
or
solvents
such
as
alcohol
or
benzine.

Specifications
Recording
system
4-track
2-channel
stereo
Fast-forward
and
rewind
time
Approx.
90
sec.
(with
HF-60
cassette)
Bias
AC
Bias
Signal-to-noise
ratio
(NAB,
at
peak
level)
Dolby
NA
switch)
ore
|
B-TYPE
ON
|
C-TYPE
ON
Cassette
TYPE
IV
(Sony
METAL-ES)
TYPE
I!
(Sony
UX-S)
TYPE
|
(Sony
HF-S)
59
dB
58
dB
66
dB
65
dB
61
dB
Total
harmonic
distortion
1.0
%
(with
Sony
METAL-ES
cassettes)
Frequency
response
(DOLBY
NR
OFF)
30—20,000
Hz
(+3
dB,
DIN)
30—15,000
Hz
(+3
dB
OVU
recording)
30-17,000
Hz
(+3
dB,
DIN)
TYPE
IV
cassette
(Sony
METAL-ES)
TYPE
II
cassette
(Sony
UX-S)
TYPE
|
cassette
(Sony
HF-S)
30-15,000
Hz
(+3
dB,
DIN)
Wow
and
flutter
0.05%
WRMS
(NAB)
+0.14%
(DIN)
Inputs
Line
inputs
Sensitivity
(phono
jacks)
77.5
mV
(—20
dB)
50
kilohms
Input
impedance
Outputs
Line
outputs
Rated
output
level
(phono
jacks)
0.44
V
(-5
dB)
ata
load
impedance
at
47
kilohms
Over
10
kilohms
Variable
from
—20
dB
to
—o
dB
at
load
impedance
8
ohms
Load
impedance
Headphone
output}
Output
level
(stereo
phone
jack)
20
General
Power
requirements
Model
for
European
countries
220
V
AC
(or
240
V
AC
adjustable
by
Sony
personnel),
50/60
Hz
Model
for
the
United
Kingdom
240
V
AC
(or
220
V
AC
adjustable
by
Sony
personnel),
50
Hz
Model
for
Canada
120
V
AC,
60
Hz
Power
consumption
Model
for
European
countries
and
for
the
United
Kingdom:
21
W
Model
for
Canada:
19
W
Dimensions
Approx.
430
x
118
x
285
mm
(w/h/d)
(17
x
43/,x
11/,
inches)
including
projecting
parts
and
controls
Weight
Approx.
4.8
kg
(10
ibs
10
02)
Supplied
accessories
Audio
connecting
cord
(2)
Remote
control
cord
with
4-pin
connectors
(1)
Design
and
specifications
subject
to
change
without
notice.
Optional
accessory
Wireless
remote
control
unit
RM-88
Note
This
appliance
conforms
with
EEC
Directives
76/889
and
82/499
regarding
interference
suppression.
Your
dealer
may
not
handle
the
above
listed
optional
accessory.
Please
ask
the
dealer
for
detailed
information
about
the
optional
accessories
available
in
your
country.
Table of contents
Other Sony Cassette Player manuals

Sony
Sony TC-FX45 User manual

Sony
Sony TC-WE425 - Dual Auto Reverse Cassette User manual

Sony
Sony TC-K370 User manual

Sony
Sony TC-WR901ES User manual

Sony
Sony Walkman WM-FX277 User manual

Sony
Sony WALKMAN WM-9 User manual

Sony
Sony TCM-500DV User manual

Sony
Sony Walkman WM-FX290 User manual

Sony
Sony MEGA BASS CFS-720 User manual

Sony
Sony TC-KA1ESA - Cassette Deck User manual

Sony
Sony TCM-343 User manual

Sony
Sony TC-W365 User manual

Sony
Sony TCW-E475 User guide

Sony
Sony CFS-W501L/S User manual

Sony
Sony Walkman WM-FX491 User manual
Sony
Sony Sports Walkman WM-FS499 User manual

Sony
Sony Walkman WM-EX900 User manual

Sony
Sony Walkman WM-FX481 User manual

Sony
Sony TC-K750ES User manual

Sony
Sony TC-150 User manual