manuals.online logo
Brands
  1. Home
  2. •
  3. Brands
  4. •
  5. Sony
  6. •
  7. Digital Camera
  8. •
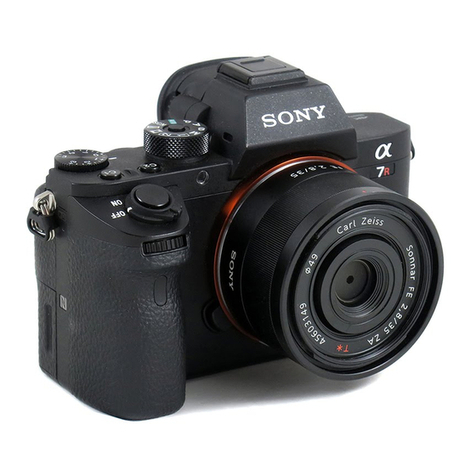
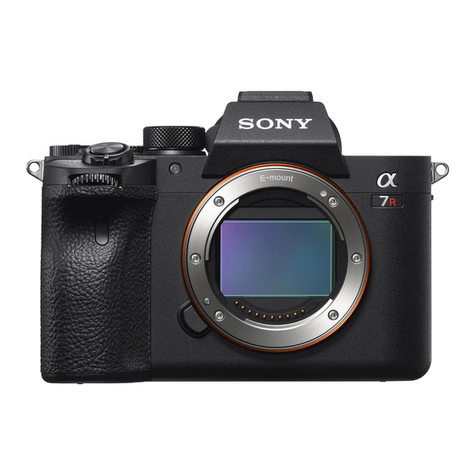
  9. Sony NEX-7/7K User manual

Sony NEX-7/7K User manual

Other Sony Digital Camera manuals

Sony DSC-W830 User manual

Sony

Sony DSC-W830 User manual

Sony DSC-TX66 User manual

Sony

Sony DSC-TX66 User manual

Sony Cyber-shot DSC-S600 User manual

Sony

Sony Cyber-shot DSC-S600 User manual

Sony Cyber-Shot DSC-RX10M4 Reference guide

Sony

Sony Cyber-Shot DSC-RX10M4 Reference guide

Sony Alpha SLT-A99V User manual

Sony

Sony Alpha SLT-A99V User manual

Sony Cyber-shot DSC-S600 User manual

Sony

Sony Cyber-shot DSC-S600 User manual

Sony Cyber-Shot DSC-KW11 User guide

Sony

Sony Cyber-Shot DSC-KW11 User guide

Sony Cyber-shot DSC-S5000 User manual

Sony

Sony Cyber-shot DSC-S5000 User manual

Sony DSC-W180/R User manual

Sony

Sony DSC-W180/R User manual

Sony Cyber-shot DSC-W310 User manual

Sony

Sony Cyber-shot DSC-W310 User manual

Sony Handycam DCR-SX22E Installation instructions manual

Sony

Sony Handycam DCR-SX22E Installation instructions manual

Sony Cyber-shot DSC-W510 User manual

Sony

Sony Cyber-shot DSC-W510 User manual

Sony Cyber-shot DSC-RX100M4 User manual

Sony

Sony Cyber-shot DSC-RX100M4 User manual

Sony ILCE-6000 User manual

Sony

Sony ILCE-6000 User manual

Sony DSC-P100/P120 User manual

Sony

Sony DSC-P100/P120 User manual

Sony Cyber-shot DSC-F55V User manual

Sony

Sony Cyber-shot DSC-F55V User manual

Sony Cyber-shot DSC-RX1 User manual

Sony

Sony Cyber-shot DSC-RX1 User manual

Sony ILCE-7RM3 User manual

Sony

Sony ILCE-7RM3 User manual

Sony Cyber-Shot DSC-RX10M2 User manual

Sony

Sony Cyber-Shot DSC-RX10M2 User manual

Sony DSC-H1 User manual

Sony

Sony DSC-H1 User manual

Sony Syber-shot DSC-L1 User manual

Sony

Sony Syber-shot DSC-L1 User manual

Sony DSC-WX1 User manual

Sony

Sony DSC-WX1 User manual

Sony Cyber-shot DSC-WX7 User manual

Sony

Sony Cyber-shot DSC-WX7 User manual

Sony Cyber-shot 3-700-781-61(1) User manual

Sony

Sony Cyber-shot 3-700-781-61(1) User manual

Popular Digital Camera manuals by other brands

Canon WP-DC35 user guide

Canon

Canon WP-DC35 user guide

Xiaomi 70mai Dash Cam Lite user manual

Xiaomi

Xiaomi 70mai Dash Cam Lite user manual

Samsung PL70 Quick start manual

Samsung

Samsung PL70 Quick start manual

GE E1680W user manual

GE

GE E1680W user manual

Canon EOS 1200D instruction manual

Canon

Canon EOS 1200D instruction manual

Tevion MD 86497 user guide

Tevion

Tevion MD 86497 user guide

Exakta VX Features

Exakta

Exakta VX Features

Kodak Digital Science DC120 user guide

Kodak

Kodak Digital Science DC120 user guide

Nikon FM3A Specifications

Nikon

Nikon FM3A Specifications

Vectra Fitness H1 Quick reference guide

Vectra Fitness

Vectra Fitness H1 Quick reference guide

Nikon COOLPIX 775 quick start guide

Nikon

Nikon COOLPIX 775 quick start guide

Olympus IR 500 - 4MP Digital Solutions Camera Manuel de Référence

Olympus

Olympus IR 500 - 4MP Digital Solutions Camera Manuel de Référence

Samsung EC-L100ZBBA brochure

Samsung

Samsung EC-L100ZBBA brochure

FujiFilm FINEPIX BL01124-201 owner's manual

FujiFilm

FujiFilm FINEPIX BL01124-201 owner's manual

Panasonic DMC-L10KPP Service manual

Panasonic

Panasonic DMC-L10KPP Service manual

Hyundai Electric HYU-CC-CHBF12001 Quick installation guide

Hyundai Electric

Hyundai Electric HYU-CC-CHBF12001 Quick installation guide

Nikon Nuvis S - Point & Shoot instruction manual

Nikon

Nikon Nuvis S - Point & Shoot instruction manual

Olympus CAMEDIA C-3030ZOOM overview

Olympus

Olympus CAMEDIA C-3030ZOOM overview

manuals.online logo
manuals.online logoBrands
  • About & Mission
  • Contact us
  • Privacy Policy
  • Terms and Conditions

Copyright 2025 Manuals.Online. All Rights Reserved.

NEX-7/7K_L2 Sony Corporation
SERVICEMANUAL
Revision History
SERVICE NOTE (Check the following note before the service.)
LEVEL 2
983461835 .pdf
2012G08-1
© 2012.07
Published by Sony Techno Create Corporation
Ver. 1.4 2012.07
INTERCHANGEABLELENSDIGITALCAMERA
US Model
Canadian Model
AEP Model
UK Model
E Model
Australian Model
Chinese Model
Korea Model
Japanese Model
Tourist Model
1-1. PRECAUTION ON REPLACING THE SY-296 BOARD
1-2. PRECAUTION ON REPLACING THE CABINET FRONT
9-834-618-35
Photo: NEX-7/Black
[About the service of this model]
wNEX-7K is commodity that packed the Interchangeable Lens Digital Camera and Interchangeable Lenses.
Refer to each following service manual the Interchangeable Lens kit, when you repair.
wWhen replacing a part of lens (SEL1855), do not replace the part of silver model with the one for black model and vice versa.
Model Lens Service Manual of Lens
NEX-7 No supplied lens No supplied lens
NEX-7K SEL1855 (E 18-55mm F3.5-5.6 OSS) 9-852-799-1[]
– ENGLISH –
– JAPANESE –
1-1. 4:,X¦õÌw«
 ²©ßÏɿĦõÌw«
Ver.Date History Contents S.M. Rev.
issued
1.0 2011.10 Official Release — —
1.1 2012.01 Revised-1
(A1 11-323) • Correction of REPAIR PARTS LIST.
Page
2-8
• Addition of ASSEMBLY.
Page
3-2
Yes
1.2 2012.02 Revised-2
(A2 11-353) • Correction of ACCESSORIES.
Page
2-12 Yes
1.3 2012.04 Revised-3
(A3 12-056) • Correction of REPAIR PARTS LIST.
Page
2-4,2-6,2-7
• Correction of ACCESSORIES.
Page
2-12
Yes
1.4 2012.07 Revised-4
(A4 12-190) • Correction of REPAIR PARTS LIST.
Page
2-9 Yes
The components identified
by mark 0or dotted line with
mark 0are critical for safety.
Replaceonlywithpartnumber
specified.
Les composants identifiés par
une marque 0sont critiques
pour la sécurité.
Ne les remplacer que par une
pièce portant le numéro spécifié.
NEX-7/7K
Revised-4
Replace the previously issued
SERVICE MANUAL 9-834-618-34
with this Manual.
NEX-7/7K_L2 – 2 –
SPECIFICATIONS
– ENGLISH – – JAPANESE –
t7
.
¦ܧ
§Ýå»ÓèﶦõÜô»ç§
Ýå
;èï¶EÚ¢ïÄèï¶
¦qþæ§
Ý´·ï±23.5 ·15.6 mm
¢APS-C±¶£zCMOSÝ´·
ï±
ïhÉ:ÿ24 700 000hÉ
§Ýå®hÉ:ÿ24 300 000hÉ
¦ï½¼µÄ§
³µÂÜ3?w¯ÄS|Ò;þ
ütï½¼µÄ;ó
¦¦ÄÑ¥§µ§
Ü¯ïÄåµÄUZMÜ
UZKScEV0EV20¢ISO 100ì
pzF2.8èï¶;Ì£
¦ÐZM§
«MÜÝ´·ï±t
1 200üÂ«
«cEV0EV20¢ISO 100ìpz
F2.8èï¶;Ì£
ISOòS¢*Ы¦:£¦Äz
ISO100 16000
ÐZ4Y¶5.0EV¢1/3µÂ¿Ó£
¦³ß¿»§
Ü?MÜNøÑ¥§çÓ
èï³ß¿»
³ß¿»µÐÅc1/4000 
30 µzÌçÒ¢1/3µÂ¿Ó£
Ñ忳áÐS1/160µ
¦GåÝÃ§
ÝÞæµÂ¿« PRO Ãᦡz
SD§Å
¦Ñï¼§
Ü?ÜÏáÑï¼¢;
EL£
hر¶1.3 cm¢0.5£
ïÅ¿Ä:2 359 296Å¿Ä
¹úpÿ100%
p1.09¢50 mmèï¶zÁvz¹
Sµ1 mµ1Ì£
ÙïÄ74«¶ØTÿ
23 mmzîTÿ21 mm¢¹
Sµ1 mµ1Ì£
¹SÐTµ4.0 mµ1´1.0 mµ1
¢Ã
¦Ó»£
¦÷¥ÞÇ»§
Ü7.5 cm¢3.0£TFTæ
Å¿Ä:921 600¢640·3¢RGB£·
480£Å¿Ä
¦ÖZz§
USBzminiB
HDMIzHDMI»ÓCÛÇz
¦?o§
Ì¿Âææ½ß´ßÒçÌ¿Â
æÍ¿«NP-FW50
¦fw§
Exif Print0
PRINT Image Matching III0
GO¢CIPAj£
ÿ119.9 mm·66.9 mm·
42.6 mm¢ï·ô^·æV£
.í¢CIPAj£
ÿ350 g¢Ì¿ÂæzÝÞæµ
Â¿« PRO Ãᦡ£
ÿ291 g¢.w£
^9S0Æ 40Æ
GåMÜ
ihGåMÜ
JPEG¢DCF Ver.2.0zExif Ver.2.3z
MPF Baseline£jzDPOF0
3DihGåMÜMPO¢MPF
Extended
¢q.¹££j
hGåMÜ¢AVCHDMÜ£
AVCHDF¨Ver.2.0j
éþMPEG-4 AVC/H.264
;`Dolby Digital 2ch
ÅçÏô»çµÂ覫æ¤
»eL
wÅçÏåØåÄæ¶Twî
ªVt,nVa^oMb{
hGåMÜ¢MP4MÜ£
éþMPEG-4 AVC/H.264
;`MPEG-4 AAC-LC 2ch
USBèôHi-Speed USB¢USB2.0£
¦Ñ忳á§
¨ÅÆïÌ6¢ISO100~m£
F?Ìÿ4µ
°ù¯18 mmèï¶§Ì¢èï
¶¯Gw¯:m£
Ы4Y¶3EV¢1/3µÂ¿Ó£
Ñ忳á«w§Xm(m)
ISO F2.8 F3.5 F5.6
100 1 2.1 1 1.7 1 1.1
200 1 312.4 1 1.5
400 1.4 4.3 1.1 3.4 1 2.1
800 2 6.1 1.6 4.8 1 3
Ì¿Âæ½ß´ß
#$78
¨ÖAC100 V – 240 Vz
50 Hz/60 Hzz4.2 W
¨ZDC 8.4 Vz0.28 A
^9S0Æ 40Æ
-9Sµ20Æ´60Æ
7GGOÿ63·95·32 mm¢ï
·ô^·æV£
.íÿ85 g
æ½ß´ßÒçÌ¿Âæ
Í¿«/1'8
;?æ½¢Ü¦ï?
7G?yDC 8.4 V
¬¶?yDC 7.2V
0¬¶0 7.7 Wh¢1 080 mAh£
¨¢7£07.3 Wh¢1 020 mAh£
7GGOÿ31.8·18.5·45 mm
¢ï·ô^·æV£
.íÿ57 g
Camera
[System]
Camera type: Interchangeable lens
digital camera
Lens: E-mount lens
[Image sensor]
Image sensor: 23.5 × 15.6 mm (APS-C
format) CMOS image sensor
Total pixel number of image sensor:
Approx. 24 700 000 pixels
Effective pixel number of camera:
Approx. 24 300 000 pixels
[Anti-dust]
System: Charge protection coating on
Optical Filter and ultrasonic
vibration mechanism
[Auto focus system]
System: Contrast detection system
Sensitivity range: EV0 to EV20 (at ISO
100 equivalent, with F2.8 lens)
[Exposure control]
Metering method: 1 200-segment
metering by the image sensor
Metering range: EV0 to EV20 (at ISO
100 equivalent, with F2.8 lens)
ISO sensitivity (Recommended
exposure index): Auto, ISO 100 to
16000
Exposure compensation: ±5.0 EV (1/3
EV step)
[Shutter]
Type: Electronically-controlled,
vertical-traverse, focal-plane type
Speed range: 1/4000 second to 30
seconds, BULB (1/3 EV step)
Flash sync speed: 1/160 second
[Recording media]
“Memory Stick PRO Duo” media,
SD card
[Electronic viewfinder]
Type: Electronic viewfinder (Organic
Electro-Luminescence)
Screen size: 1.3 cm (0.5 type)
Total number of dots: 2 359 296 dots
Frame coverage: Approx. 100%
Magnification: 1.09 × with 50 mm lens
at infinity, –1 m–1 (diopter)
Eye point: Approx. 23 mm from the
eyepiece, 21 mm from the eyepiece
frame at –1 m–1
Dioptor adjustment: –4.0 m–1 to
+1.0 m–1 (diopter)
[LCD monitor]
LCD panel: 7.5 cm (3.0 type) TFT
drive
Total number of dots: 921 600 (640 × 3
(RGB) × 480) dots
[Input/output terminals]
USB: miniB
HDMI: HDMI type C minijack
[Power]
Used battery pack: Rechargeable
battery pack NP-FW50
[Others]
Exif Print: Compatible
PRINT Image Matching III:
Compatible
Dimensions (CIPAcompliant):
Approx. 119.9 mm × 66.9 mm ×
42.6 mm (4 3/4 inches × 2 3/4
inches × 1 11/16 inches) (W/H/D)
Mass (CIPAcompliant):
Approx. 350 g (12.3 oz)
(including battery and “Memory
Stick PRO Duo” media)
Approx. 291 g (10.3 oz)
(camera only)
Operating temperature: 0°C to 40°C
(32°F to 104°F)
File format:
Still image: JPEG (DCF Ver. 2.0,
Exif Ver. 2.3, MPF Baseline)
compliant, DPOF compatible
3D still images: MPO (MPF
Extended (Disparity Image))
compliant
Movie (AVCHD format):
AVCHD format Ver.2.0
compatible
Video: MPEG-4 AVC/H.264
Audio: Dolby Digital 2ch
Dolby Digital Stereo Creator
• Manufactured under license from
Dolby Laboratories.
Movie (MP4 format):
Video: MPEG-4 AVC/H.264
Audio: MPEG-4 AAC-LC 2ch
USB communication: Hi-Speed USB
(USB 2.0)
[Flash]
Flash guide number: GN 6 (in meters at
ISO 100)
Recycling time: Approx. 4 seconds
Flash coverage: Covering 18 mm lens
(focal length that the lens indicates)
Flash compensation: ±3.0 EV (1/3 EV
step)
Flash range (m):
ISO F2.8 F3.5 F5.6
100 1 - 2.1 1 - 1.7 1 - 1.1
200 1 - 3 1 - 2.4 1 - 1.5
400 1.4 - 4.3 1.1 - 3.4 1 - 2.1
800 2 - 6.1 1.6 - 4.8 1 - 3
Flash range (feet):
ISO F2.8 F3.5 F5.6
100 3.3 - 6.9 3.3 - 5.6 3.3 - 3.6
200 3.3 - 9.8 3.3 - 7.9 3.3 - 4.9
400 4.6 - 14 3.6 - 113.3 - 6.9
800 6.6 - 20 5.2 - 16 3.3 - 9.8
Battery charger BC-VW1
Input rating: 100 V– 240 VAC,
50 Hz/60 Hz, 4.2 W
Output rating: 8.4 VDC, 0.28 A
Operating temperature range: 0°C to
40°C (32° to 104°F)
Storage temperature range: –20°C to
+60°C (–4°F to +140°F)
Maximum dimensions: Approx. 63 ×
95 × 32 mm (2 1/2 × 3 3/4 × 1 5/16
inches) (W/H/D)
Mass: Approx. 85 g (3 oz)
Rechargeable battery pack
NP-FW50
Used battery: Lithium-ion battery
Maximum voltage: DC 8.4 V
Nominal voltage: DC 7.2 V
Maximum charge voltage: DC 8.4 V
Maximum charge current: 1.02A
Capacity: Typical 7.7 Wh (1 080 mAh)
Minimum 7.3 Wh (1 020 mAh)
Maximum dimensions:
Approx. 31.8 × 18.5 × 45 mm
(1 5/16 × 3/4 × 1 13/16 inches)
(W/H/D)
Mass: Approx. 57 g (2.1 oz)
Model information table
Model NEX-7 NEX-7K
Destination US, CND, AEP, UK, E, KR, AUS, CH, J US, CND, AEP, UK, E, KR, AUS, CH, JE, J
Lens E 18-55mm F3.5-5.6 OSS
KAbbreviation
AUS : Australian model
CND : Canadian model
CH : Chinese model
J : Japanese model
JE : Tourist Model
KR : Korea model
NEX-7/7K_L2 – 3 –
SAFETY-RELATED COMPONENT WARNING!!
COMPONENTS IDENTIFIED BY MARK 0OR DOTTED LINE WITH
MARK 0ON THE SCHEMATIC DIAGRAMS AND IN THE PARTS LIST
ARE CRITICAL TO SAFE OPERATION. REPLACE THESE COMPO-
NENTS WITH SONY PARTS WHOSE PART NUMBERS APPEAR AS
SHOWN IN THIS MANUAL OR IN SUPPLEMENTS PUBLISHED BY
SONY.
ATTENTION AU COMPOSANT AYANT RAPPORT
À LA SÉCURITÉ!
LES COMPOSANTS IDENTIFIÉS PAR UNE MARQUE 0SUR LES
DIAGRAMMES SCHÉMATIQUES ET LA LISTE DES PIÈCES SONT
CRITIQUES POUR LA SÉCURITÉ DE FONCTIONNEMENT. NE REM-
PLACER CES COMPOSANTS QUE PAR DES PIÈCES SONY DONT
LES NUMÉROS SONT DONNÉS DANS CE MANUEL OU DANS LES
SUPPLÉMENTS PUBLIÉS PAR SONY.
Caution
Danger of explosion if battery is incorrectly replaced.
Replace only with the same or equivalent type.
Dispose of used batteries according to the instructions.
Caution
?w¦õx|Y`XæsMq¾bªUKb{
?¦õbÔùtxcaÊw?¢xs¼q
¦õ`oXi^M{
;A?x|{¦ÔtHlorü`oXi^M{
CHEMICALS
Some chemicals used for servicing are highly volatile.
Their evaporation caused by improper management affects your health
and environment, and wastes resources.
Manage the chemicals carefully as follows.
• Store chemicals sealed in a specific place to prevent from exposure
to high temperature or direct sunlight.
•Avoid dividing chemicals into excessive numbers of small containers
to reduce natural evaporation.
• Keep containers sealed to avoid natural evaporation when chemicals
are not in use.
• Avoid using chemicals as much as possible. When using chemicals,
divide only required amount to a small plate from the container and
use up it.
EXTERIOR PARTS
Be careful to the following points for plastic parts used in this unit.
• Use a piece of cleaning paper or cleaning cloth for cleaning plastic
parts. Avoid using chemicals.
Even if you have to use chemicals to clean heavy dirt, don’t use paint
thinner, ketone, nor alcohol.
• Insert the specific screws vertically to the part when installing a
plastic part.
Be careful not to tighten screws too much.
SAFETY CHECK-OUT
After correcting the original service problem, perform the following
safety checks before releasing the set to the customer.
¤¼w{MtmMo
qO;^oM¼w¤tx4CQwôM¼K
b{
fÆ;t{MàC^do`Oq|¥HÁ
è¹)Qh|¿owÁ,Mtsb{
¤¼x|<Gw:t«`o{loXi^M{
~-Ôt|ô9tslhÚùÔ«wphsMÔ
ttµ`o-`oXi^M{
~üZ¢ËïÅå¿Ós£b:xA7vty|0+
t×µàCwMpXi^M{
~^Àt;`sMÌx|c©ß¿Ós`o×µàC
wMpXi^M{
~¼;bs:ÃsX`|;bÔùx;
biZ0+Z`o!Z|t^sMOt`oX
i^M{
%·%æ¼w{MtmMo
;t;^oM%·%wæ¼x|<Gw:t«`o
{loXi^M{
~Zßtx¼;dc|Zß´ZßÍ;`oXi
^M{
cU{rXo¼;bÔùx|³ï
Æ|Äï|¤Âçx;`sMpXi^M{
~¤æ¼wÇZtx¦^hva;`|æ¼t0
`o(ÚtÇZoXi^M{
h|vaÇZÌx|ÁgsCQsMpXi
^M{
±ϵ|:UÌtxÍw\qt]«Xi^M{
– ENGLISH – – JAPANESE –
1. Check the area of your repair for unsoldered or poorly-soldered
connections. Check the entire board surface for solder splashes and
bridges.
2. Check the interboard wiring to ensure that no wires are “pinched”
or contact high-wattage resistors.
3. Look for unauthorized replacement parts, particularly transistors,
that were installed during a previous repair. Point them out to the
customer and recommend their replacement.
4. Look for parts which, through functioning, show obvious signs of
deterioration. Point them out to the customer and recommend their
replacement.
5. Check the B+ voltage to see it is at the values specified.
6. Flexible Circuit Board Repairing
• Keep the temperature of the soldering iron around 350°C during
repairing.
•Donottouch the soldering iron on the same conductor of the circuit
board (within 3 times).
• Be careful not to apply force on the conductor when soldering or
unsoldering.
UNLEADED SOLDER
This unit uses unleaded solder.
Boards requiring use of unleaded solder are printed with the lead free
mark (LF) indicating the solder contains no lead.
(Caution: Some printed circuit boards may not come printed with the
lead free mark due to their particular size.)
: LEAD FREE MARK
Be careful to the following points to solder or unsolder.
• Set the soldering iron tip temperature to 350°C approximately.
If cannot control temperature, solder/unsolder at high temperature
for a short time.
Caution: The printed pattern (copper foil) may peel away if the
heated tip is applied for too long, so be careful!
Unleaded solder is more viscous (sticky, less prone to
flow) than ordinary solder so use caution not to let solder
bridges occur such as on IC pins, etc.
• Be sure to control soldering iron tips used for unleaded solder and
those for leaded solder so they are managed separately. Mixing
unleaded solder and leaded solder will cause detachment phenom-
enon.
 «ÄòSXi^M{
±ϵwqVt«AbxttmMox|©ßÏ
É¿Ä|³ß³|æ¼srtåÕçÀ¹p«Äò
¯Ô`oMb{\w«{VS|{Ì{sw
«ÄòcSXi^M{
 ¦æ¼w];
·¿Äwæ¼xÉéQ1?ysr¶ÍwQËlh
wqsloMb{Hlo¦õæ¼x|;^oMh
wqaQwæ¼;`oXi^M{tsÏ$|
漯t0¹p¦^oM¶ÍOAsæ¼xc¦
ww];Xi^M{
 æ¼wÇZ¢w¾V`xqrSt
¶Í|½áÒÂÓsrwP;`h|
ÓæïÄ,XTÔT`oÇZhæ¼UKb{h
ºæ¢x¾V`«åïÍtloCäæ¼ôy
æ¼tÙ`sMO^oMbwp|\x
cqrSt`oXi^M{
 ±ϵx¶:U
±ϵwht`hÉ´|æ¼|¢UqrS
tsloMT|h±ϵ`hxtw*%¼=^d
o`lhq\UsMTsr:U`|¶QU¬-^
oM\q¬Ý`oXi^M{
 ½¿Ó漦õÌw«
~`hæ¼x6;`sMpXi^M{
~»ï»ç¯ïÃï±wÚƵxätMh¦õÌ
x«`oXi^M{
 Ñ詳ÒçÓæïÄ,Xw{MtmMo
~\o9SÿÆt`oæloXi^M{
~°Í»ït?S\oposMpXi^M{
  ¢sº£
~Í»ïtUCsMO«`oXi^M{
ÁR>tmMo
;txÁR>U;^oMb{
ÁR>;`oM,Xtx|Á¢-FBE'SFF£¯b
è¿ÅÑæÚ«UÓæïÄ^oMb{
¢«,X±¶tlox|ÁR>;`oMo
è¿ÅÑæÚ«UÓæïÄ^oMsMwUK
b£
è¿ÅÑæÚ«
ÁR>x|<Gw:t«`o;`oXi^M{
~R>\ow\o9SxÿÆt`oXi^M{
9SÐUÁgsÔùx|ô9yÌp^ÀæloXi
^M{
«R>\oÕXpobWq|,XwÍ»
ï¢)£UxUo`O\qUKbwp|«
`oXi^M{h|HRwR>êQU§
Mh|*$zsrUR>Òæ¿´`sMOt«
`oXi^M{
~R>\ow\ox|cÁR>;qR>;tüZ
og`oXi^M{
ÁR>qR>UObq#mqÅUC\`o`
Mb{
NEX-7/7K_L2 1-1E
1. SERVICE NOTE
1-1. PRECAUTION ON REPLACING THE SY-296 BOARD
Destination Data
When you replace to the repairing board, the written destination data of repairing board also might be changed to original setting.
USB Serial No.
The set is shipped with a unique ID (USB Serial No.) written in it.
This ID has not been written in a new board for service, and therefore it must be entered after the board replacement.
1-2. PRECAUTION ON REPLACING THE CABINET FRONT
Perform the following procedures for each of the three washers.
Note: Measure the dimensions before replacement of the Cabinet Front according to procedures (1) to (3).
(1) Remove the Imager Block Assy and the IM Adjust Washers (A, B, C).
(2) Measure the dimensions (A) of the removed IM Adjust Washers.
A+B
BA
(3) Measure the distance (B) between the surface of the screw hole where the IM Adjust Washers were set and the surface of the E-Mount.
(4) Likewise, measure the dimensions (B’) of each location where IM Adjust Washers of new Cabinet Front are installed.
(5) Calculate the dimension of (A’) of new IM Adjust Washer by using the formula below, and select the washers.
Dimension (A+B) before replacement – Dimension (B’) of new Cabinet Front
= Dimension (A’) of IM Adjust Washer after replacement
(6) Assemble the imager, using the selected IMAdjust Washers.
(7) After assembling is completed, perform the test shooting and confirm that no blur is observed in the peripheral area of shot.
– ENGLISH –
 4:,X¦õÌw«
²ZÃ»
4.;,Xq¦õbÌz4.;,Xt{ToM²ZÃ»xiwq§loMÔùUKb{
64#³æç/P
·¿ÄxzFts{w*%¢64#4FSJBM/P£{VizZY^oMb{
ý¼w4.;,Xtxz\w*%U{VoMsMwp|,X¦õt*%ÖbAUKb{
 ²©ßÏɿĦõÌw«
<wqxUtfgæloXi^M{
«²©ßÏÉ¿Äw¦õæO²tzqTto¦õ²wGO`oXi^M{
Ý´ß "TTZz*.ÐTë¿³ß "#$`oXi^M{
`h*.ÐT뿳ßwGO¢A£`oXi^M{
A+B
BA
*.ÐT뿳ßUÇMoMhϵ@zØT&.PVOUzØpwGO¢B£`oXi^M{
ý¼w²©ßÏÉ¿Äw¤*.ÐT뿳ßÇZætmMo7tGO¢B£`oXi^M{
<wÜýht;b*.ÐT뿳ßwGO¢A£Z`z뿳ßw¬æloXi^M{
¦õ²wGO¢AB£µý²©ßÏÉ¿ÄwGO¢B£¦õw*.ÐT뿳ßGO¢A£
¬`h*.ÐT뿳ß;`oÝ´ßÊÇZoXi^M{
ÊqìRz¼`qæM*%ØswÆéùUÁM\q¬Ý`oXi^M{
– JAPANESE –
NEX-7/7K_L2 2-1
2. REPAIR PARTS LIST
Follow the disassembly in the numerical order given.
IDENTIFYING PARTS
Link
• Abbreviation
AUS : Australian model
CH : Chinese model
CND : Canadian model
J : Japanese model
JE : Tourist model
KR : Korea model
(ENGLISH)
NOTE:
• -XX, -X mean standardized parts, so they may have some differences from the original one.
• Items marked “” are not stocked since they are seldom required for routine service. Some delay
should be anticipated when ordering these items.
• The mechanical parts with no reference number in the exploded views are not supplied.
• Due to standardization, replacements in the parts list may be different from the parts specified
in the diagrams or the components used on the set.
(JAPANESE)
²;Íw«³
w 999xªj=æ¼wh·¿ÄtÇMoMæ¼qsÔùUKb{
w ¹wæ¼x×O`oSd{
w\\tGL^oMæ¼x4.;æ¼pKhsÏ$t|·¿ÄtÇMoMæ¼q
sÔùUKb{
$Øjøpæ¼¦bqVx,XÊ
¢xÒé¿«do¦`oXi^M{
S&M
• Color Indication of Appearance Parts
Example:
(SILVER) : Cabinet’s Color
(Silver) : Parts Color
w ÷æ¼í¯Ô
«
4*-7&3·¿Äwí¯b{
4JMWFS æ¼wí¯b{
The components identified by mark 0or
dotted line with mark 0are critical for safety.
Replace only with part number specified.
Les composants identifiés par une marque
0sont critiques pour la sécurité.
Ne les remplacer que par une pièce portant
le numéro spécifié.
0¹wæ¼|hx0¹Çw:¢p
hæ¼x|¶Q¡Ëbht|
OAsæ¼pb{
Hlo¦õÌx|c¦wæ¼;
`oXi^M{
Whenindicatingpartsbyreferencenumber,
please include the board name.
View Position
Right View
Left View
Front View
Bottom View
Top View
Back View
ACCESSORIES ASSEMBLY
1Top Section
3LCD Block
• LC-098 Flexible Board
• RK-002 Flexible Board
• RL-116 Flexible Board
• ST-265 Flexible Board
8JC Base Section
2Cabinet (Rear) Block
6SY-296 Board
5BT Lid Block
4VF Block
qa Imager Unit
7Shoe Block
9RL Block
q; BT Block
qs MB Charge Unit
qd Shutter Unit
qf Cabinet (Front) Section
• CN-474 Board
• BT-074 Flexible Board
• FP-1451 Flexible Board
DISCHARGING OF THE CHARGING CAPACITOR
NEX-7/7K_L2 2-2
– ENGLISH – – JAPANESE –
NOTE FOR REPAIR
• Make sure that the flat cable and flexible board are not cracked
of bent at the terminal.
Do not insert the cable insufficiently nor crookedly.
• When remove a connector, don’t pull at wire of connector. It is
possible that a wire is snapped.
• When installing a connector, don’t press down at wire of con-
nector.
It is possible that a wire is snapped.
• Do not apply excessive load to the gilded flexible board.
Cut and remove the part of gilt
which comes off at the point.
(Be careful or some
pieces of gilt may be left inside)
Cut and remove the part of gilt
which comes off at the point.
(Be careful or some
pieces of gilt may be left inside)
DISCHARGING OF THE CHARGING
CAPACITOR (C901)
The charging capacitor is charged up to the maximum 330 V
potential.
There is a danger of electric shock by this high voltage when the
capacitor is handled by hand. The electric shock is caused by the
charged voltage which is kept without discharging when the main
power of the unit is simply turned off. Therefore, the remaining
voltage must be discharged as described below.
Preparing the Short Jig
To preparing the short jig, a small clip is attached to each end of
a resistor of 1 k:/1 W(1-215-869-11).
Wrap insulating tape fully around the leads of the resistor to
prevent electrical shock.
1kΩ/1 W
Wrap insulating tape.
1kΩ/1 W
Wrap insulating tape.
R:1 k:/1 W
Note: High-voltage cautions
Discharging the Capacitor
Short-circuit between two points with
the short jig about 10 seconds.
(Part code: 1-215-869-11)
ST-265 Flexible Board
C901
.gÌw«
wÑå¿ÄÒçS|Ñ詳Òç,XwzØt=Z|
sUsM\q¬Ýb{
h|¯É«»wx|)`Æü)`ts
sMOt«b{
w¯É«»bÌt|¢Pæ¢ÃI£Ëlo¾lÁq
¢bªUKbwp|0t¢Pæ¢ÃI£Ëlo
¾lÁsMpXi^M{
w¢Pæ¢ÃI£!^QsU¯É«»)`q|¢Pæ
¢ÃI£U¢bªUKbwp|0t¢Pæ¢ÃI£
txÛrTZsMpXi^M{
wÚÝ¿©^oMÑ詳Òç,Xtx|§MÛrTZ
sMpXi^M{
55éøÇÚT6 ñê6;Òá
°ðÒáÊÛп•
ÔT6 •Ç&@"2]æwÞá¿
•'ý½éâHçÒáÊÛпÕ
55éøÇÚT6 ñê6;Òá
°ðÒáÊÛп•
ÔT6 •Ç&@"2]æwÞá¿
•'ý½éâHçÒáÊÛпÕ
µÄéØ;F?¯ïÃï±¢$£wL?
µÄéØ;F?¯ïÃï±x7G7w?ypF?^
oMb{
\wô?ypF?^h¯ïÃï±tîhÔù|
?>³ã¿«!Zb{\wô?ytxot·¿Äw
?o~lhiZpxL?^c|y`oMb{\
wh|<GwMOpy?yL?`oXi^M{
³ãÄÏéwj
³ãÄÏéxL8Å¢£
w«æ¿Ó`o^R`b{
Å+xÂÓpì¶tôM?>³ã¿«!Zs
MOt`oXi^M{
1kΩ/1 W
Ø<9oJâÎÊ
1kΩ/1 W
Ø<9oJâÎÊ
R:1 k:/1 W
¯ïÃï±wL?
Ñ忳áâÇ¿Äw?o¯ïÃï±
wz³ãÄÏépÿø÷µ
b{
(Part code: 1-215-869-11)
ST-265 Flexible Board
C901
NEX-7/7K_L2 2-3
2-1. EXPLODED VIEWS
2-1-1. REAR SECTION
DISASSEMBLY
1. Remove to numerical order (1to 4) in the left figure.
2-2
2-1
Right View Bottom View
Top View Back View
#242 #242
#242 #242
Screw
Ref. No. Part No. Description Ref. No. Part No. Description
1 4-300-399-01 BUTTON (SK) (600)
2 4-300-387-01 SHEET (SK BUTTON) (600)
3 X-2582-867-1 CABINET (REAR) ASSY (600)
4 4-300-405-01 SHEET (SK CAP) (600)
5 4-300-400-01 CAP (SK BUTTON) (600)
6 4-292-101-01 BUTTON, REC (Note)
7 4-400-730-01 COVER (600), SHOE
#242 4-178-124-81 SPECIAL (M1.4 (D2.75))
2#242 X 1 :Popup the Strobo (2-1) :#242 X 3 :Open the BT Lid (2-2) :#242 X 2
3.5
1.4
#242: M1.4 X 3.5
(Black)
4-178-124-81
2-2
4-2
2-1
4-1
#242
#242
#242
#242
#242
#242
#242
43
17
1
2
4
6 (Note)
2Top Section
(See page 2-4)
LCD Section
(See page 2-5) 3
5
Be careful not to make scars on the unit with a
screwdriver when removing the Top Section.
Adjust the position.
3
DISCHARGING OF THE CHARGING CAPACITOR µÄéØ;F?¯ïÃï±wL?
4-1
4-2
Right View Right View
Open LCD at the angle
shown below.Remove Cabinet (Rear) Assy
while turning it in the
direction indicated by arrows.
Bottom View
#242
#242
#242
4Open the HDMI Lid (4-1) :#242 X 1 :Open the BT Lid (4-2) :#242 X 3
Note
Note: Refer to "Assembly-9:Installation Cautions of the Rec
Button." when you assemble. Note:ÊqÌxlAssembly-9:Installation Cautions of the Rec But-
ton.z°`oXi^M{
NEX-7/7K_L2 2-4
2-1-2. TOP SECTION
ns: not supplied DISASSEMBLY
1. The meaning of the sign in left figure is as follows. Be careful when it removes.
Ö: Solder
Ref. No. Part No. Description Ref. No. Part No. Description
51 4-300-360-01 SLIDER (PW) (600)
52 4-300-359-01 PLATE (PW) (600), CLICK
53 X-2583-801-1 BASE (GUIDE RL) (600)ASSY
54 4-186-500-01 SHEET, RL BUTTON ADHESIVE
55 4-300-372-01 BUTTON (FN) (600)
56 4-300-405-01 SHEET (SK CAP) (600)
57 4-300-400-01 CAP (SK BUTTON) (600)
58 4-300-364-01 SHEET (FN) (600), ADHESIVE
59 4-300-368-01 KNOB (PW) (600)
60 4-300-383-01 SHEET (PW KNOB) (600),ADHESIVE
61 4-300-367-01 CAP (PW RING) (600)
62 X-2582-857-1 GUIDE (RL) ASSY (600)
63 4-300-370-01 BUTTON (RL) (600)
64 4-300-369-01 CAP (RL) (600)
65 1-489-953-11 ST UNIT (75600)
66 X-2582-860-1 DIALASSY (600)
67 4-300-356-01 CABINET (UPPER) (600)
68 4-300-357-01 ORNAMENT (VF) (600)
69 4-300-362-01 SHEET (VF ORNAMENT) (600)
70 4-186-543-01 PLATE, LOGO
71 4-300-410-01 INSULTING SHEET (CAB TOP) (600)
72 4-410-556-01 SHEET (DIAL) (600)
73 4-300-408-01 PLATE (DIAL) (600)
74 1-489-939-11 SWITCH BLOCK, CONTROL (TD75600)
75 1-820-649-11 HOUSING, CONNECTOR 2P (Red)
76 1-820-649-21 HOUSING, CONNECTOR 2P (Yellow)
77 4-186-501-01 SHEET, RL GUIDE ADHESIVE
78 4-186-497-01 SPRING, RL
#76 2-666-551-11 SCREW, TAPPING, P2
#242 4-178-124-81 SPECIAL (M1.4 (D2.75))
#76
#76
#76
#242
#242
51
52
53
59
61
60
65
(Note)
66
76
75
67
Gray
Brown
White
68
62
63
64
54
77
78
55
56
57
58
69
70
71
74
73
72
‘
ns
ns
Adjust the position.
Screw
#76:M1.7 X4.0 (Tapping)
(Silver)
2-666-551-11
4.0
1.7
3.5
1.4
#242: M1.4 X 3.5
(Black)
4-178-124-81
Note
Note: Refer to "Assembly-8:Installation Cautions of the ST Unit
(75600)." when you assemble. Note:ÊqÌxlAssembly-8:Installation Cautions of the ST Unit
(75600).z°`oXi^M{
The changed portions from
Ver. 1.2 are shown in blue.
Ver. 1.3 2012.04
NEX-7/7K_L2 2-5
2-1-3. LCD SECTION
ns: not supplied DISASSEMBLY
1. Remove to numerical order (1) in the left figure.
Screw
Ref. No. Part No. Description Ref. No. Part No. Description
101 X-2582-862-1 HOOK (L) ASSY (600), STRAP
102 4-293-878-01 EYELET TRIANGLE STOPPER
103 4-300-406-01 CAP (LC) (600), FLEXIBLE
104 4-300-373-01 FRAME (MAIN) (600)
105 X-2582-861-1 HOOK (G) ASSY (600), STRAP
106 4-293-878-01 EYELET TRIANGLE STOPPER
107 A-1847-878-A RK-002 FLEXIBLE BOARD, COMPLETE
108 1-489-775-41 SWITCH BLOCK, CONTROL(600)
109 4-297-178-01 COVER (R) (600), HINGE
110 4-297-177-01 COVER (L) (600), HINGE
111 4-300-377-01 SHEET (MAIN FRAME) (600)
112 4-300-397-01 LIGHT (LC) (600), GUIDE,
113 A-1847-880-A LC-098 FLEXIBLE BOARD, COMPLETE
114 X-2582-868-1 HINGE ASSY (600) (Note)
115 4-300-404-01 RETAINER (LC) (600), FLEXIBLE
116 4-300-402-01 CLAW (LC), LOCK
117 4-300-403-01 HOLDER (LC) (600), LOCK
*
118 1-471-549-11 MAGNET (ND7.9X2.9X1.2)
119 4-300-401-01 CABINET (LC REAR) (600)
120 4-300-388-01 PLATE (LC REAR) (600)
121 4-300-376-01 SHEET (LC) (600), INTERCEPTION
122 4-416-468-01 SHEET (LC FLEXIBLE) (600)
123 4-419-209-01 TAPE (SW) (600)
LCD901 A-1857-130-A LCD BLOCK ASSY (SERVICE) (Note)
#196 4-178-124-01 SPECIAL (M1.4 (D2.75))
#239 4-287-435-11 SCREW (M1.4 EUROPE) TYPE
#242 4-178-124-81 SPECIAL (M1.4 (D2.75))
#196:
2.0
1.4
M1.4 X 2.0
(Black)
4-178-124-01
#239
#19
6
LCD901
(Note 1)
#196
#196
ns
#196
#196
#196
#242
#242
#196
1104
Main Board Section
(See page 2-6)
102
110
111
109
101
103
ns
106
105
107
108
115
(Note 2)
123
113
121
112
122
114
(Note 1)
119
118
120
117
116
(Note 3)
Right View Left View Bottom View Back View
#242 #242
#196
#196
#196
1#196X 1
:
#242 X 2
:
#196 X 4
#239:
1.4
1.4
M1.4 X 1.4
(Red)
4-287-435-11
3.5
1.4
#242: M1.4 X 3.5
(Black)
4-178-124-81
Note
Note 1: When treating the LCD Flexible Board,
handle it with caution not to make scars
on the LCD Flexible Board with the
Hinge Assy (600).
Hinge Assy (600)
LCD Flexible Board
Note 1: LCD Flexible Board rgbqVxz
Hinge Assy (600) pLCD Flexible Board
mZsMOt«`oXi^M{
Hinge Assy (600)
LCD Flexible Board
Note 2: Refer to "Assembly-6:Installation Cautions of the Flexible
Retainer (LC) (600)." when you assemble. Note 2:ÊqÌxlAssembly-6:Installation Cautions of the Flexible
Retainer (LC) (600).z°`oXi^M{
Note 3: Refer to "Assembly-7:Installation Cautions of the Lock Claw
(LC)." when you assemble. Note 3:ÊqÌxlAssembly-7:Installation Cautions of the Lock Claw
(LC).z°`oXi^M{
NEX-7/7K_L2 2-6
DISASSEMBLY
1. Remove to numerical order (1to 5) in the left figure.
2. The meaning of the sign in left figure is as follows. Be careful when it removes.
Ö: Solder
2-1-4. MAIN BOARD SECTION
Screw
#177: M1.4 X2.5
(Red)
3-208-537-21
2.5
1.4
3.5
1.4
#242: M1.4 X 3.5
(Black)
4-178-124-81
4#177 X 4
Back View
#177
3#242 X 11#242 X 1
Back View
#242 Back View
#242
Ref. No. Part No. Description Ref. No. Part No. Description
151 4-186-476-01 SHAFT, BT LID
152 4-300-394-01 BASE (BT LID) (600)
153 4-300-396-01 LIGHT (MS) (600), GUIDE,
154 4-300-395-01 SPRING (BT LID OPEN) (600)
155 X-2582-866-1 LID ASSY (600), BT
156 4-410-824-01 LABEL (MS) (600)
157 4-300-398-01 PLATE (SP) (600), GROUND
158 4-300-380-01 PLATE (SY) (600), RADIATION
159 4-300-365-01 INSULATING SHEET (SY) (600)
160 A-1853-412-A SY-296 BOARD, COMPLETE (SERVICE)
161 X-2582-865-1 FRAME (VF) ASSY (600)
162 X-2582-570-2 VF ASSY
163 CAUTION SHEET (930), PROTECTION
164 4-281-580-01 GASKET (SH)
LCD902 8-753-369-90 ECX331AA-1
SP901 1-858-343-31 LOUDSPEAKER (1.0CM)
#177 3-208-537-21 0+Z M1.4X2 NEW TORASUTA
#242 4-178-124-81 SPECIAL (M1.4 (D2.75))
#177
#242
SP901
#242
#177
1162
5160
4158
2157
3152
159
161
LCD902
SY-296
164
151
153
154
156
Over All Section
(See page 2-7)
155
‘
163
(Size: 15mm X 5mm)
CAUTION
For the part of 163 : SHEET (930), PROTECTION, cut NON WOVEN
(T0.25) (3-076-631-01) into the desired length and use it.
«
4)&&51305&$5*0/xz/0/807&/5
~lo;b\q{
Note
Ver. 1.3 2012.04