4
Table of Contents
Welcome ! . . . . . . . . . . . . . . . . . . . . . . . . . . . . . 6
Copyrights . . . . . . . . . . . . . . . . . . . . . . . . . . . 7
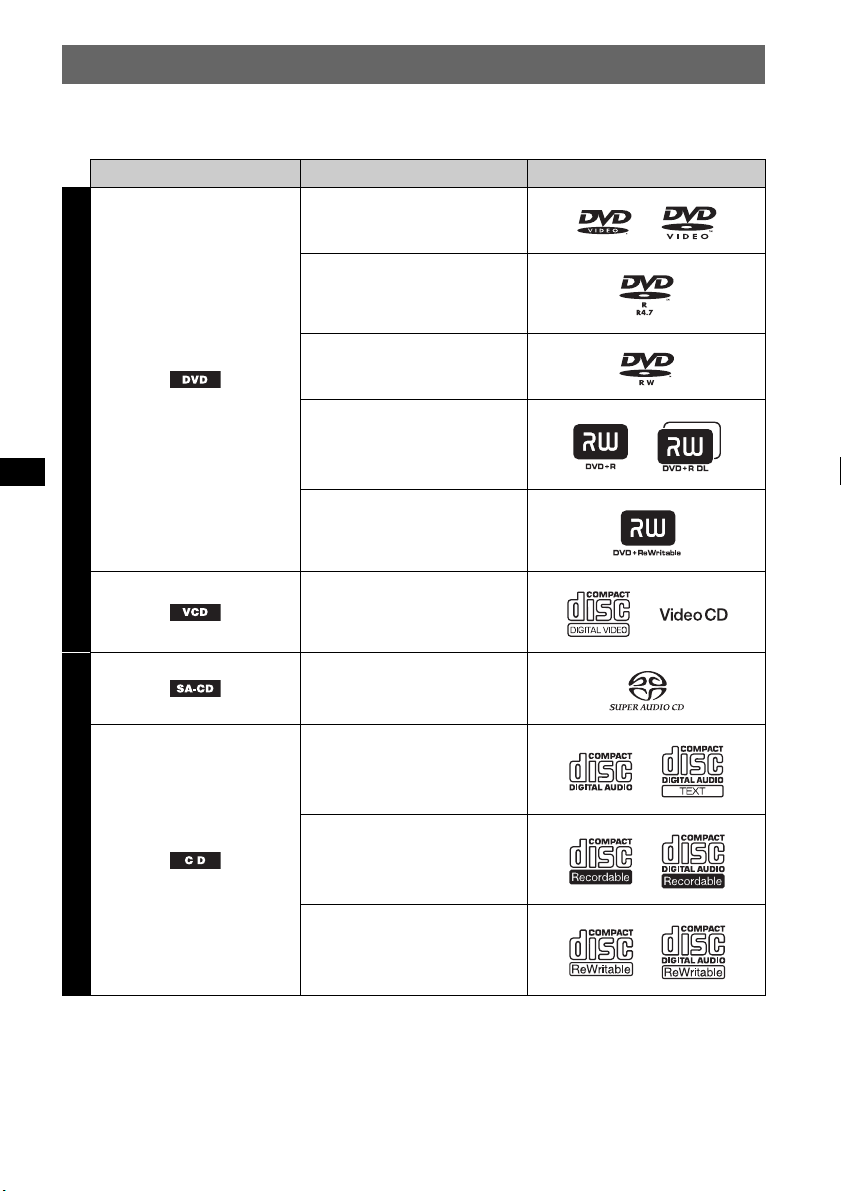
Playable discs and symbols used in this
manual . . . . . . . . . . . . . . . . . . . . . . . . . . . . . . . .8
Location and function of controls . . . . . . . . . .10
Main unit . . . . . . . . . . . . . . . . . . . . . . . . . . .10
Card remote commander RM-X162 . . . . . .12
Getting Started
Installing the unit and an optional
monitor . . . . . . . . . . . . . . . . . . . . . . . . . . 14
Resetting the unit. . . . . . . . . . . . . . . . . . 14
Performing initial setup . . . . . . . . . . . . . 14
Preparing the card remote
commander. . . . . . . . . . . . . . . . . . . . . . . 15
Detaching the front panel . . . . . . . . . . . 15
Attaching the front panel. . . . . . . . . . 15
Basic Operations
Playing video discs . . . . . . . . . . . . . . . . 16
Playing audio discs . . . . . . . . . . . . . . . . 18
Listening to the radio. . . . . . . . . . . . . . . 20
Enjoying Surround Sound
Creating an ideal field for multi-channel
sound . . . . . . . . . . . . . . . . . . . . . . . . . . . . . . . . 21
Advanced Operations — Discs
Playing DivX®/JPEG files . . . . . . . . . . . . . . . .22
DivX®video playback. . . . . . . . . . . . . . . . .22
JPEG image playback . . . . . . . . . . . . . . . . .22
Using PBC functions — Playback control. . . .23
Using play mode menu. . . . . . . . . . . . . . . . . . .23
Viewing time/text information of the disc . . . .25
Configuring audio settings . . . . . . . . . . . . . . . . 26
Changing the audio language/format. . . . . . 26
Checking the program format . . . . . . . . . . . 26
Adjusting the audio output level
— DVD level. . . . . . . . . . . . . . . . . . . . . . . .27
Magnifying pictures . . . . . . . . . . . . . . . . . . . . . 27
Adjusting the picture quality
— Picture EQ . . . . . . . . . . . . . . . . . . . . . . . . . 28
Customizing the picture quality . . . . . . . . . 28
Locking discs — Parental control . . . . . . . . . . 29
Activating parental control . . . . . . . . . . . . . 29
Changing the area and its movie rating
level. . . . . . . . . . . . . . . . . . . . . . . . . . . . . . . 29
Repeat and shuffle play . . . . . . . . . . . . . . . . . . 30
Direct search play . . . . . . . . . . . . . . . . . . . . . . 31
Multi-channel output of 2-channel sources
— Pro Logic II. . . . . . . . . . . . . . . . . . . . . . . . . 32
Enjoying karaoke. . . . . . . . . . . . . . . . . . . . . . . 33
Listing up tracks/images/video files
— LIST . . . . . . . . . . . . . . . . . . . . . . . . . . . . . . 34
Selecting a track/image/video file. . . . . . . . 34
Selecting a file type. . . . . . . . . . . . . . . . . . . 34
Viewing audio disc information . . . . . . . . . . . 34
Configuring playback settings for Super Audio
CD . . . . . . . . . . . . . . . . . . . . . . . . . . . . . . . . . . 35
Selecting a playback layer . . . . . . . . . . . . . 35
Selecting the sound quality. . . . . . . . . . . . . 36
Advanced Operations — Radio
Storing and receiving stations . . . . . . . . . . . . . 36
Storing automatically — BTM . . . . . . . . . . 36
Storing manually. . . . . . . . . . . . . . . . . . . . . 36
Receiving stored stations . . . . . . . . . . . . . . 37
RDS . . . . . . . . . . . . . . . . . . . . . . . . . . . . . . . . . 37
Overview. . . . . . . . . . . . . . . . . . . . . . . . . . . 37
Setting AF and TA . . . . . . . . . . . . . . . . . . . 37
Selecting PTY . . . . . . . . . . . . . . . . . . . . . . . 38
Setting CT. . . . . . . . . . . . . . . . . . . . . . . . . . 38