manuals.online logo
Brands
  1. Home
  2. •
  3. Brands
  4. •
  5. Sony
  6. •
  7. Home Theater System
  8. •
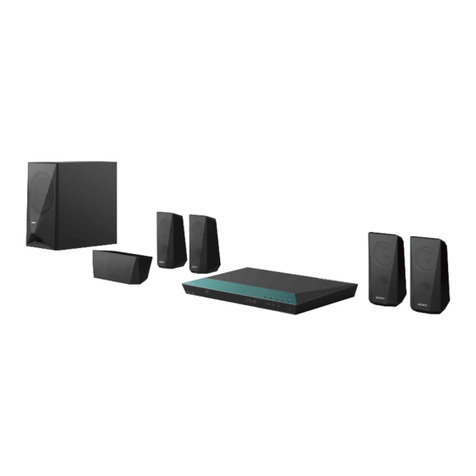
  9. Sony BDV-E500W User manual

Sony BDV-E500W User manual

Other manuals for BDV-E500W

4

Other Sony Home Theater System manuals

Sony HT-IV300 User manual

Sony

Sony HT-IV300 User manual

Sony HT-6900DP User manual

Sony

Sony HT-6900DP User manual

Sony HT-DDW780 Instruction manual

Sony

Sony HT-DDW780 Instruction manual

Sony HT-SF1000 User manual

Sony

Sony HT-SF1000 User manual

Sony HT-XT1 User manual

Sony

Sony HT-XT1 User manual

Sony DAV-DZ730 User manual

Sony

Sony DAV-DZ730 User manual

Sony 4-178-247-13(2) User manual

Sony

Sony 4-178-247-13(2) User manual

Sony JIG-XT3 User manual

Sony

Sony JIG-XT3 User manual

Sony DAV-DX155 User manual

Sony

Sony DAV-DX155 User manual

Sony DAV-SB200 User manual

Sony

Sony DAV-SB200 User manual

Sony HT-K250 User manual

Sony

Sony HT-K250 User manual

Sony HT-DDW700 Instruction manual

Sony

Sony HT-DDW700 Instruction manual

Sony DAV-HDX587WC - Bravia Theater System User manual

Sony

Sony DAV-HDX587WC - Bravia Theater System User manual

Sony HT-SS370 - 10htib User manual

Sony

Sony HT-SS370 - 10htib User manual

Sony DAV X1G User manual

Sony

Sony DAV X1G User manual

Sony BRAVIA BDV-E370 User manual

Sony

Sony BRAVIA BDV-E370 User manual

Sony DAV-DX375 - Integrated Home Theater System User manual

Sony

Sony DAV-DX375 - Integrated Home Theater System User manual

Sony SA-VE145 User manual

Sony

Sony SA-VE145 User manual

Sony BDV-IS1000 User manual

Sony

Sony BDV-IS1000 User manual

Sony HT-DDW3000 User manual

Sony

Sony HT-DDW3000 User manual

Sony DAV-DZ555M User manual

Sony

Sony DAV-DZ555M User manual

Sony SAVA-D900 User manual

Sony

Sony SAVA-D900 User manual

Sony DAV-DZ230 User manual

Sony

Sony DAV-DZ230 User manual

Sony HT-DDW685 User manual

Sony

Sony HT-DDW685 User manual

Popular Home Theater System manuals by other brands

Samsung HT-DL200 instruction manual

Samsung

Samsung HT-DL200 instruction manual

Samsung HT-ES6600 user manual

Samsung

Samsung HT-ES6600 user manual

Curtis DVD6010 instruction manual

Curtis

Curtis DVD6010 instruction manual

Philips MCD716/12 user manual

Philips

Philips MCD716/12 user manual

Sherwood ST-4108 operating instructions

Sherwood

Sherwood ST-4108 operating instructions

Philips HTS5520/12 quick start

Philips

Philips HTS5520/12 quick start

LG HT503PHW owner's manual

LG

LG HT503PHW owner's manual

Samsung HT-ES4200K user manual

Samsung

Samsung HT-ES4200K user manual

Samsung HT-P10 instruction manual

Samsung

Samsung HT-P10 instruction manual

Philips HTS5131 User manaul

Philips

Philips HTS5131 User manaul

Goodmans GDVD19SWS user manual

Goodmans

Goodmans GDVD19SWS user manual

Moxi media center user guide

Moxi

Moxi media center user guide

Samsung HT-EM35 user manual

Samsung

Samsung HT-EM35 user manual

Manta GK-500 user manual

Manta

Manta GK-500 user manual

Sharp SBW800 user manual

Sharp

Sharp SBW800 user manual

Philips HTS3541 user manual

Philips

Philips HTS3541 user manual

LG LHT799 specification

LG

LG LHT799 specification

Samsung HT-TWZ415 user manual

Samsung

Samsung HT-TWZ415 user manual

manuals.online logo
manuals.online logoBrands
  • About & Mission
  • Contact us
  • Privacy Policy
  • Terms and Conditions

Copyright 2025 Manuals.Online. All Rights Reserved.

SUBWOOFER
SUR L
SUR R
FRONT R
CENTER
FRONT L
Main unit/
Unité principale
Surround amplifier/
Amplificateur surround
4-147-260-21(1)
©2009 Sony Corporation Printed in Malaysia
(1)
Quick Setup Guide/Guide d’installation rapide
BDV-E500W
1
Connect the speakers/Raccordez les enceintes
Connect the speaker cords to match the color of the SPEAKER jacks of the unit.
Raccordez les cordons d’enceinte aux prises SPEAKER de couleur correspondante sur l’appareil.
Rear panel of the main unit/
Panneau arrière de l’unité principale
SPEAKER
FRONT R
FRONT L
CENTER SUBWOOFER
DC5V
700mA MAX
SPEAKER
LAN(100)
Red
Rouge
White
Blanc
Green
Vert
Purple
Violet
Rear panel of the surround amplifier/
Panneau arrière de l’amplificateur
surround
R
SURROUND SELECTOR
S-AIR ID
SPEAKER
SURROUND
PAIRING
C
B
A
SURROUND
BACK
L
Blue
Bleu
Gray
Gris
To connect speaker cords to the speaker/Raccordement des cordons d’enceinte à l’enceinte
Rear of the speaker/Arrière de l’enceinte
2
Connect your TV/Raccordez le téléviseur
Depending on the jacks on your TV, select the video and audio connection method.
Selon les prises disponibles sur votre téléviseur, sélectionnez la méthode de connexion vidéo et audio.
Video connection method/Méthode de connexion vidéo
Method 1/Méthode 1 Method 2/Méthode 2 Method 3/Méthode 3
ANTENNA
AUDIO
DIGITALIN
DMPORT
HDMI OUT
COMPONENT VIDEO OUT
VIDEO OUT
S-AIR ID
AUDIO IN AUDIO IN
A. CAL MIC
ECM-AC2
SPEAKER
Y
P
B
/ C
B
P
R
/ C
R
FM
AM
COAXIAL 75
COAXIAL
OPTICAL
R
L
R
L
FRONT R
FRONT L
EXT
DC5V
700mA MAX
EZW-RT10
TV
TV
DIGITALIN
SAT/CABLE
ABC
DC5V
500mA MAX
LAN(100)
P
B
/C
B
P
R
/C
R
Y
COMPONENT VIDEO IN
HDMI IN
AUDIO OUT L
R
TV/VIDEO
DIGITALOUT
COAXIAL
OPTICAL
TV
VIDEO IN
VIDEO IN
Video cord
Cordon vidéo
HDMI cable*
Câble HDMI*
ANTENNA
AUDIO
DIGITALIN
DMPORT
HDMI OUT
COMPONENT VIDEO OUT
VIDEO OUT
S-AIR ID
AUDIO IN AUDIO IN
A. CAL MIC
ECM-AC2
SPEAKER
Y
P
B
/ C
B
P
R
/ C
R
FM
AM
COAXIAL 75
COAXIAL
OPTICAL
R
L
R
L
FRONT R
FRONT L
EXT
DC5V
700mA MAX
EZW-RT10
TV
TV
DIGITALIN
SAT/CABLE
ABC
DC5V
500mA MAX
LAN(100)
P
B
/C
B
P
R
/C
R
Y
COMPONENT VIDEO IN
AUDIO OUT L
R
TV/VIDEO
DIGITALOUT
COAXIAL
OPTICAL
TV
VIDEO IN
HDMI IN
VIDEO IN
HDMI IN
Video cord
Cordon vidéo
ANTENNA
AUDIO
DIGITALIN
DMPORT
HDMI OUT
COMPONENT VIDEO OUT
VIDEO OUT
S-AIR ID
AUDIO IN AUDIO IN
A. CAL MIC
ECM-AC2
SPEAKER
Y
P
B
/ C
B
P
R
/ C
R
FM
AM
COAXIAL 75
COAXIAL
OPTICAL
R
L
R
L
FRONT R
FRONT L
EXT
DC5V
700mA MAX
EZW-RT10
TV
TV
DIGITALIN
SAT/CABLE
ABC
DC5V
500mA MAX
LAN(100)
HDMI IN
AUDIO OUT L
R
TV/VIDEO
DIGITALOUT
COAXIAL
OPTICAL
TV
VIDEO IN
P
B
/C
B
P
R
/C
R
Y
COMPONENT VIDEO IN
VIDEO IN
PB/CBPR/CRY
COMPONENT VIDEO IN
Video cord
Cordon vidéo
Component video cable*
Câble vidéo composant*
*Not supplied/Non fourni
Audio connection method/Méthode de connexion audio
Method 1/Méthode 1 Method 2/Méthode 2
ANTENNA
AUDIO
DIGITALIN
DMPORT
HDMI OUT
COMPONENT VIDEO OUT
VIDEO OUT
S-AIR ID
AUDIO IN AUDIO IN
A. CAL MIC
ECM-AC2
SPEAKER
Y
P
B
/ C
B
P
R
/ C
R
FM
AM
COAXIAL 75
COAXIAL
OPTICAL
R
L
R
L
FRONT R
FRONT L
EXT
DC5V
700mA MAX
EZW-RT10
TV
TV
DIGITALIN
SAT/CABLE
ABC
DC5V
500mA MAX
LAN(100)
COAXIAL
DIGITALOUT
AUDIO OUT L
R
TV/VIDEO
HDMI IN
P
B
/C
B
P
R
/C
R
Y
COMPONENT VIDEO IN
VIDEO IN
OPTICAL
DIGITALOUT
OPTICAL
DIGITAL OUT
Digital optical cord*
Cordon optique numérique*
ANTENNA
AUDIO
DIGITALIN
DMPORT
HDMI OUT
COMPONENT VIDEO OUT
VIDEO OUT
S-AIR ID
AUDIO IN AUDIO IN
A. CAL MIC
ECM-AC2
SPEAKER
Y
P
B
/ C
B
P
R
/ C
R
FM
AM
COAXIAL 75
COAXIAL
OPTICAL
R
L
R
L
FRONT R
FRONT L
EXT
DC5V
700mA MAX
EZW-RT10
TV
TV
DIGITALIN
SAT/CABLE
ABC
DC5V
500mA MAX
LAN(100)
OPTICAL
DIGITALOUT
COAXIAL
DIGITALOUT
HDMI IN
P
B
/C
B
P
R
/C
R
Y
COMPONENT VIDEO IN
VIDEO IN
L
R
AUDIO OUTPUT
LR
AUDIO OUTPUT
Audio cord*
Cordon audio*
*Not supplied/Non fourni
You can confirm that the System and TV are connected correctly
using the Setup Disc.
Vous pouvez vérifier que le système et le téléviseur sont
correctement raccordés en utilisant le Disque d’installation.
For details, refer to the Operating Instructions.
Pour plus d’informations, reportez-vous au Mode d’emploi.
Continued/Suite 
3
Enable wireless transmission/
Activez la transmission sans l
1. Insert the wireless transceivers into both the main unit and surround amplifier.
Insérez les émetteurs-récepteurs sans fil dans l’unité principale et dans l’amplificateur
surround.
ANTENNA
AUDIO
DIGITALIN
DMPORT
HDMIOUT
COMPONENTVIDEO OUT
VIDEOOUT
S-AIRID
AUDIOIN AUDIOIN
A.CAL MIC
ECM-AC2
SPEAKER
Y
P
B
/C
B
P
R
/C
R
FM
AM
COAXIAL75
COAXIAL
OPTICAL
R
L
R
L
FRONTR
FRONTL
CENTER SUBWOOFER
EXT
DC5V
700mA MAX
EZW-RT10
TV
TV
DIGITALIN
SAT/CABLE
ABC
DC5V
500mA MAX
SPEAKER
LAN(100)
R
SURROUNDSELECTOR
S-AIR ID
SPEAKER
SURROUND
PAIRING
C
B
A
SURROUND
BACK
L
EZW-RT
10
Insert securely until they click.
Insérez-les à fond jusqu’à ce que vous
entendiez un déclic.
2. Set the S-AIR ID switches to“A.”
Réglez les interrupteurs S-AIR ID sur « A ».
ANTENNA
AUDIO
DIGITALIN
DMPORT
HDMIOUT
COMPONENTVIDEO OUT
VIDEOOUT
S-AIRID
AUDIOIN AUDIOIN
A.CAL MIC
ECM-AC2
SPEAKER
Y
P
B
/C
B
P
R
/C
R
FM
AM
COAXIAL75
COAXIAL
OPTICAL
R
L
R
L
FRONTR
FRONTL
CENTER SUBWOOFER
EXT
DC5V
700mA MAX
EZW-RT10
TV
TV
DIGITALIN
SAT/CABLE
ABC
DC5V
500mA MAX
SPEAKER
LAN(100)
R
SURROUNDSELECTOR
S-AIR ID
SPEAKER
SURROUND
PAIRING
C
B
A
SURROUND
BACK
L
EZW-RT
10
S-AIR ID
A B C
S-AIR ID
C
B
A
The S-AIR IDs on the main unit and surround amplifier are set to “A”at the factory.
Les interrupteurs S-AIR ID de l’unité principale et de l’amplificateur surround sont réglés sur « A » au départ de
l’usine.
3. Connect the AC power cords (), and turn on the power ().
Raccordez les cordons d’alimentation (), puis mettez sous tension ().


POWER

 

4
Perform “Easy Setup”/
Exécutez « Régl. facile »
Do not insert a disc before performing the “Easy Setup”.
N’insérez pas de disque avant l’exécution de « Régl. facile ».
1. Insert batteries into the remote.
Insérez les piles dans la télécommande.
2. Switch the input selector on your TV
so that system screens like the ones
below appear on the TV screen.
Commutez le sélecteur d’entrée du
téléviseur afin que des écrans du
système similaires à ceux ci-dessous
apparaissent sur l’écran du téléviseur.
“Easy Setup” screen/
Ecran « Régl. facile »
Starting up/
Mise en route
3. Perform basic settings by following
the on-screen instructions in “Easy
Setup” using ///and .
Définissez les paramètres de base en
vous conformant aux instructions
affichées dans « Régl. facile » à l’aide
de ///et .
///,
[Easy Setup is now complete.] appears when “Easy
Setup” is complete.
Le message [Le Réglage facile est maintenant
terminé.] s’affiche une fois l’opération « Régl. facile »
terminée.
5
Play a disc/
Lisez un disque
321
654
987
0


1. Press , and place a disc on the tray.
Appuyez sur et posez un disque sur
le plateau.
2. Press to close the disc tray.
Playback starts. When playback does not start,
press .
Appuyez sur pour fermer le plateau
de lecture.
La lecture démarre. Si la lecture ne démarre pas,
appuyez sur .
Enjoying more BD functions
Refer to“Enjoying BonusView/BD-Live”in the
Operating Instructions.
Utilisation d’autres fonctions BD
Reportez-vous à la section « Utilisation de
BonusView/BD-Live » du Mode d’emploi.