3
Enable wireless transmission/
Activez la transmission sans l
1. Insert the wireless transceivers into both the main unit and surround amplifier.
Insérez les émetteurs-récepteurs sans fil dans l’unité principale et dans l’amplificateur
surround.
Insert securely until they click.
Insérez-les à fond jusqu’à ce que vous entendiez un déclic.
SURROUNDSELECTOR
SURROUNDBACK
IMPEDANCEUSE
3-16
SURROUND
LR
EZW-RT10
ABCPAIRING
S-AIR ID
ABC
EZW-RT10
S-AIR ID
2. Set the S-AIR ID switches to“A.”
Réglez les interrupteurs S-AIR ID sur « A ».
ABC
EZW-RT10
S-AIR ID
SURROUNDSELECTOR
SURROUNDBACK
IMPEDANCEUSE
3-16
SURROUND
LR
EZW-RT10
ABCPAIRING
S-AIR ID
A B C PAIRING
S-AIR ID
A B C
S-AIR ID
The S-AIR IDs on the main unit and surround amplifier are set to “A”at the factory.
Les interrupteurs S-AIR ID de l’unité principale et de l’amplificateur surround sont réglés sur « A » au départ de
l’usine.
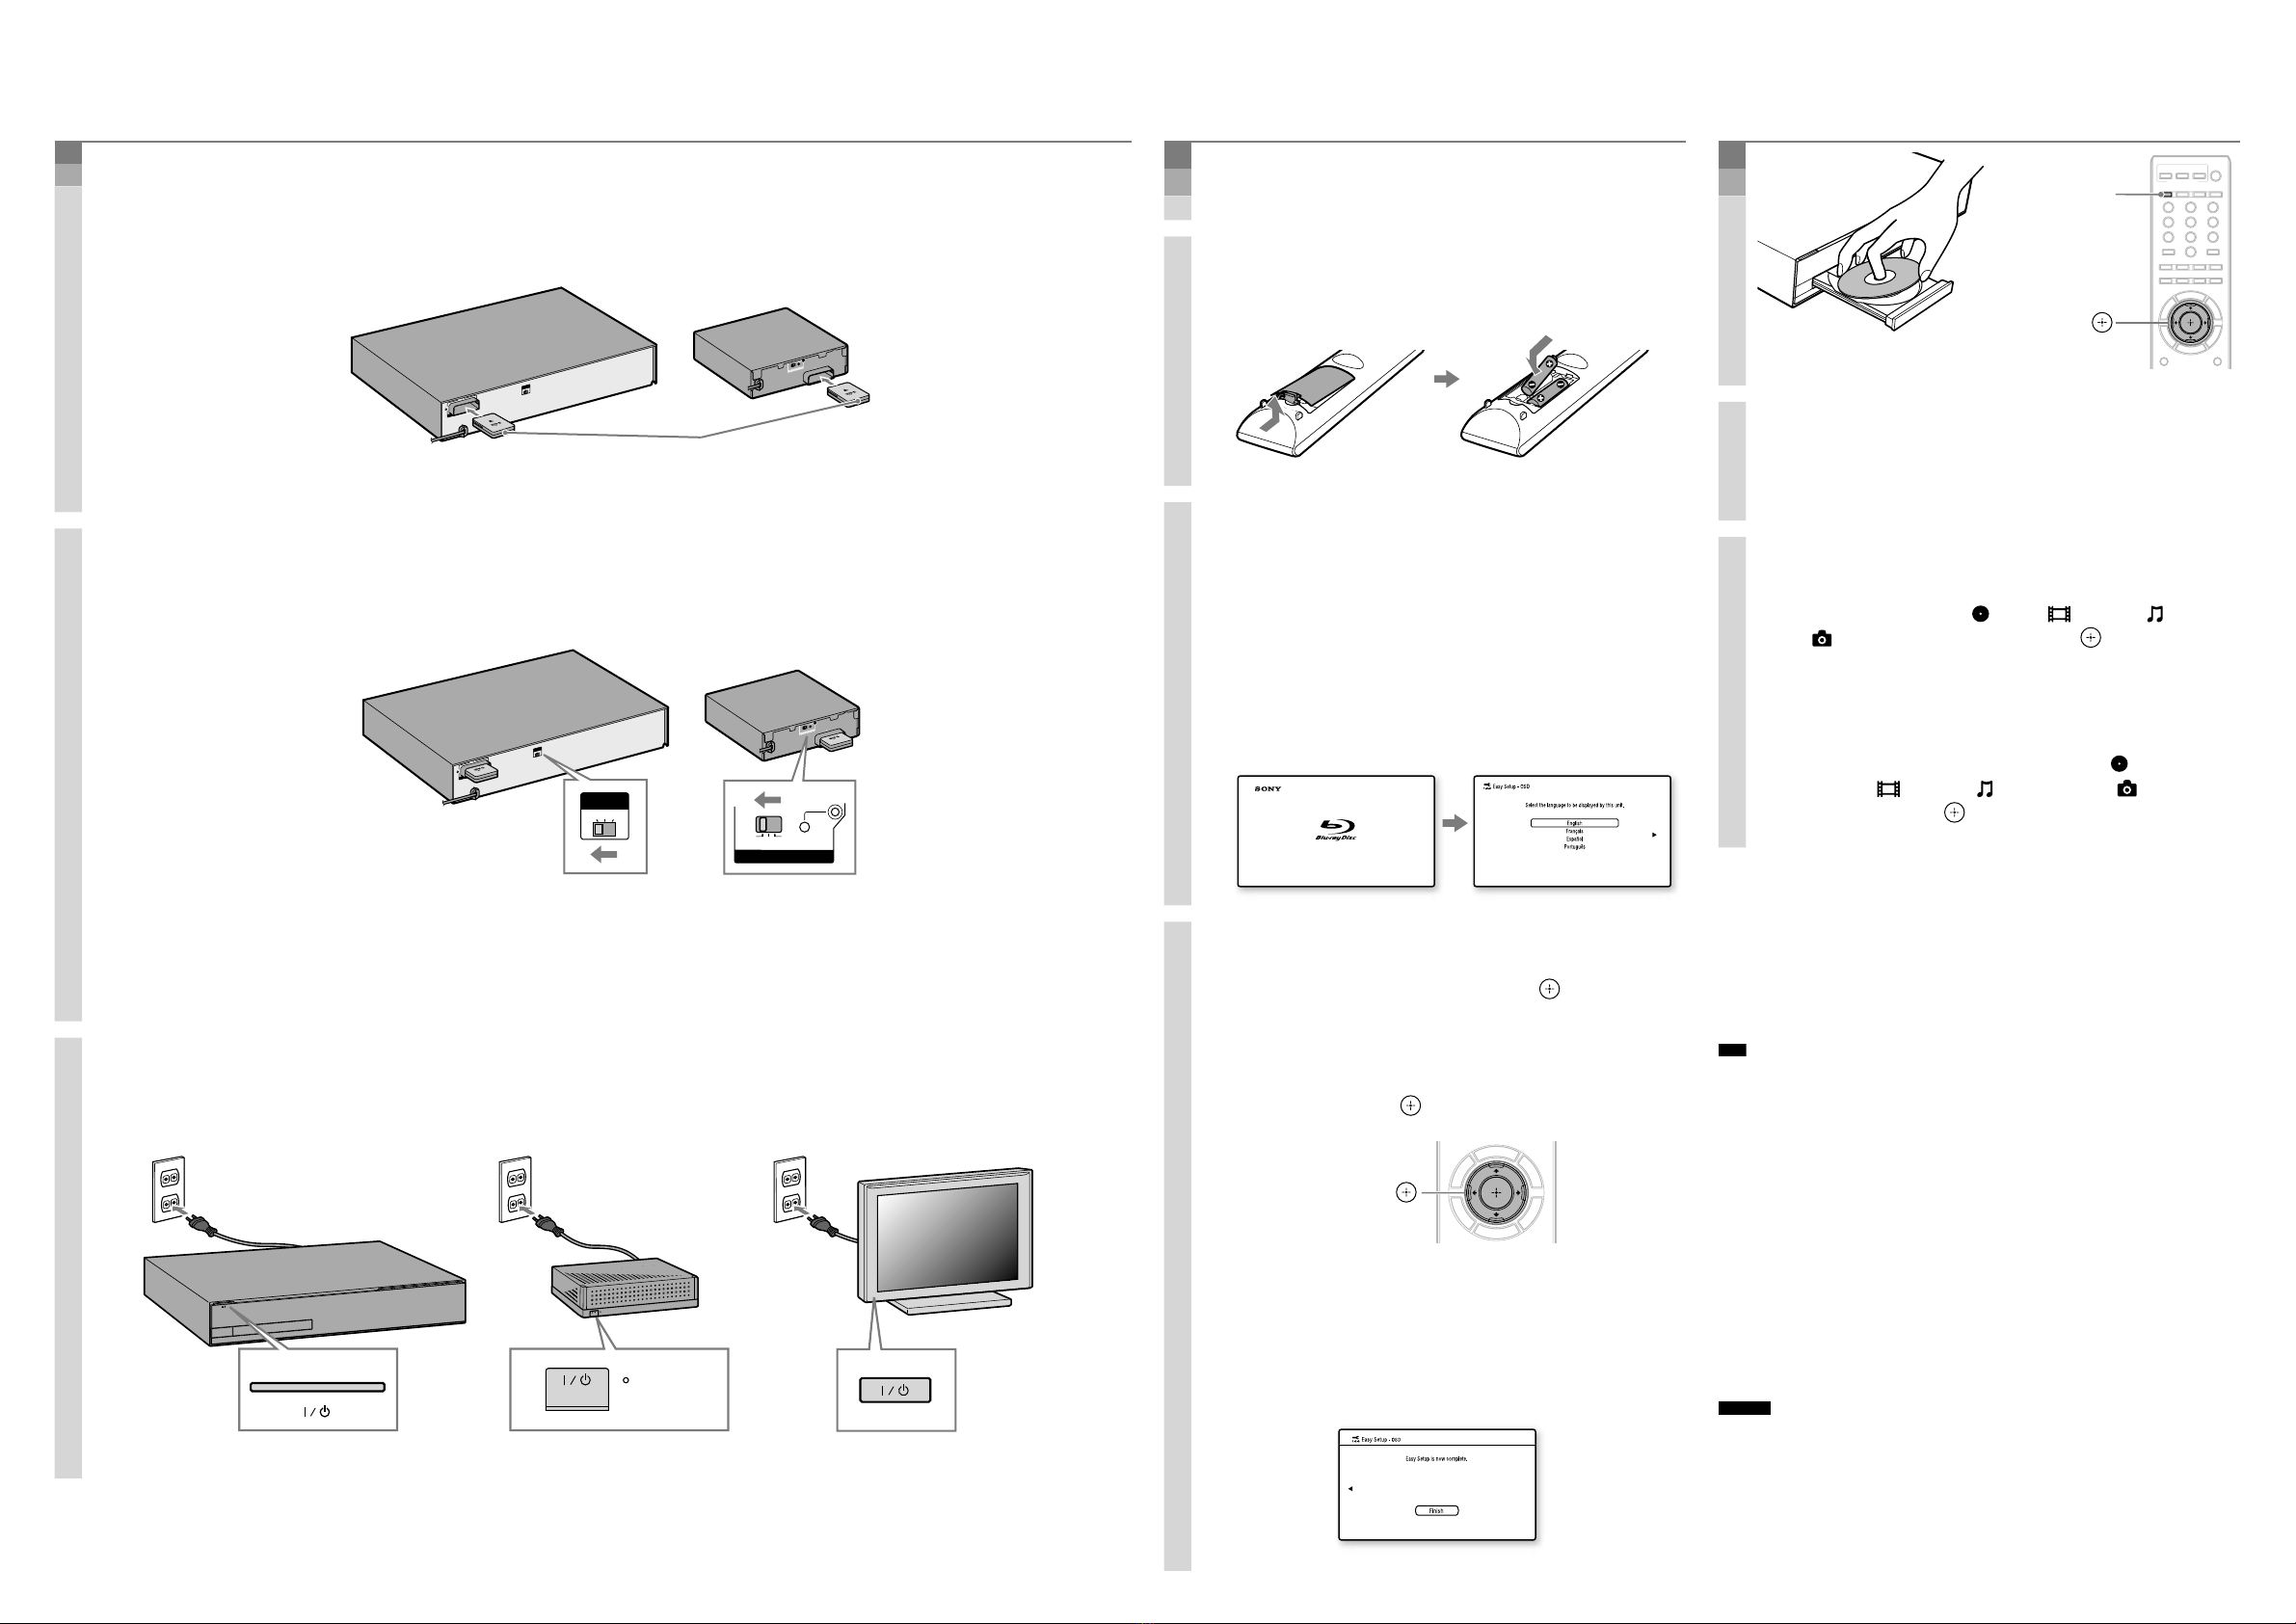
3. Connect the AC power cords (), and turn on the power ().
Raccordez les cordons d’alimentation (), puis mettez sous tension ().
S-AIR/STANDBY
S-AIR/STANDBY
4
Perform “Easy Setup”/
Exécutez « Régl. facile »
Do not insert a disc before performing the “Easy Setup”.
N’insérez pas de disque avant l’exécution de « Régl. facile ».
1. Insert batteries into the remote.
Insérez les piles dans la télécommande.
2. Switch the input selector on your TV
so that system screens like the ones
below appear on the TV screen.
Commutez le sélecteur d’entrée du
téléviseur afin que des écrans du
système similaires à ceux ci-dessous
apparaissent sur l’écran du téléviseur.
“Easy Setup” screen/
Ecran « Régl. facile »
Starting up/
Mise en route
3. Perform basic settings by following
the on-screen instructions in “Easy
Setup” using ///and .
Définissez les paramètres de base en
vous conformant aux instructions
affichées dans « Régl. facile » à l’aide
de ///et .
///,
[Easy Setup is now complete.] appears when “Easy
Setup” is complete.
Le message [Le Réglage facile est maintenant
terminé.] s’affiche une fois l’opération « Régl. facile »
terminée.
5
Play a disc/
Lisez un disque
///,
1. Press , and place a disc on the tray.
Appuyez sur , et posez un disque sur
le plateau.
2. Press to close the disc tray.
Playback starts. If playback does not start
automatically, select in the [Video], [Music],
or [Photo] category, and press .
Appuyez sur pour fermer le plateau
de lecture.
La lecture commence. Si la lecture ne commence
pas automatiquement, sélectionnez dans la
catégorie [Vidéo], [Musique] ou [Photo],
puis appuyez sur .
Updating to the latest software version
By connecting the system to the Internet, you can
update your system’s software to the latest version. For
details on how to connect the system to the Internet,
refer to“Step 3: Connecting to the Network”in the
Operating Instructions.
During a software update, “UPDATING”is displayed in the front
panel display and video signals via HDMI may not be displayed.
After the update completes, the main unit automatically shuts
off. Please wait for the software update to complete; do not turn
the main unit on or off, or operate the main unit or TV.
Mise à jour vers la version la plus récente du
logiciel
Connecter le système à Internet permet de mettre à
jour le logiciel du système vers la version la plus
récente. Pour plus d’informations sur la connexion du
système à Internet, reportez-vous à l’« Etape 3 :
Connexion au réseau » du Mode d’emploi.
Pendant une mise à jour du logiciel,
«
UPDATING
»
apparaît sur
l’affichage du panneau frontal et il n’est pas possible d’afficher des
signaux vidéo transmis via HDMI. Une fois la mise à jour terminée,
l’unité principale s’éteint automatiquement. Attendez que la mise
à jour du logiciel soit terminée, sans mettre l’unité principale sous
ou hors tension, sans l’utiliser et sans employer le téléviseur.


 User manual")


 User manual")


