manuals.online logo
Brands
  1. Home
  2. •
  3. Brands
  4. •
  5. Sony
  6. •
  7. Home Theater System
  8. •
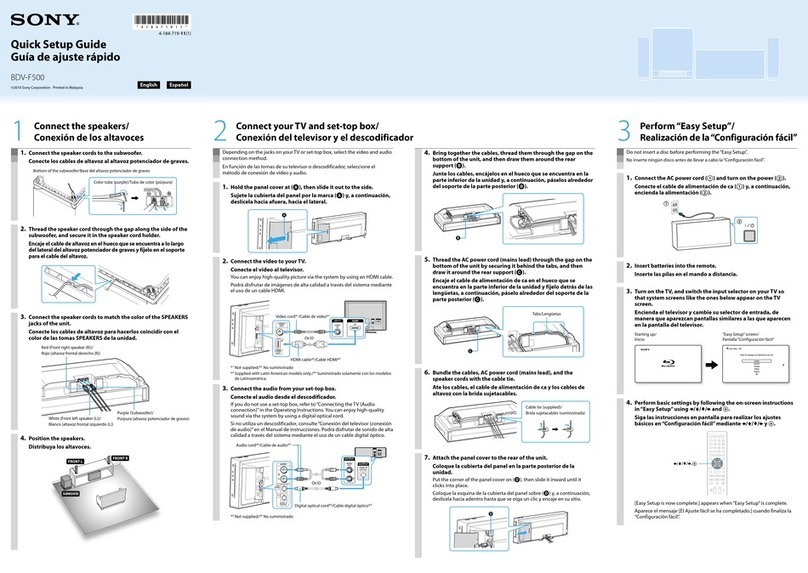
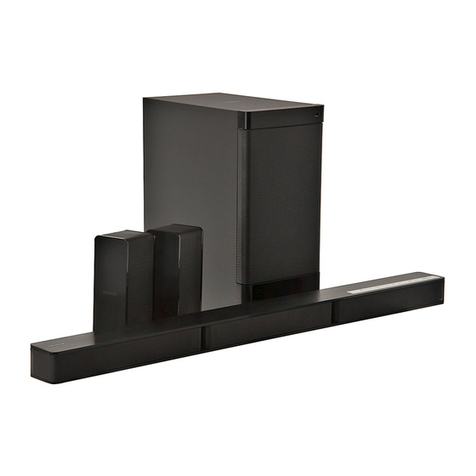
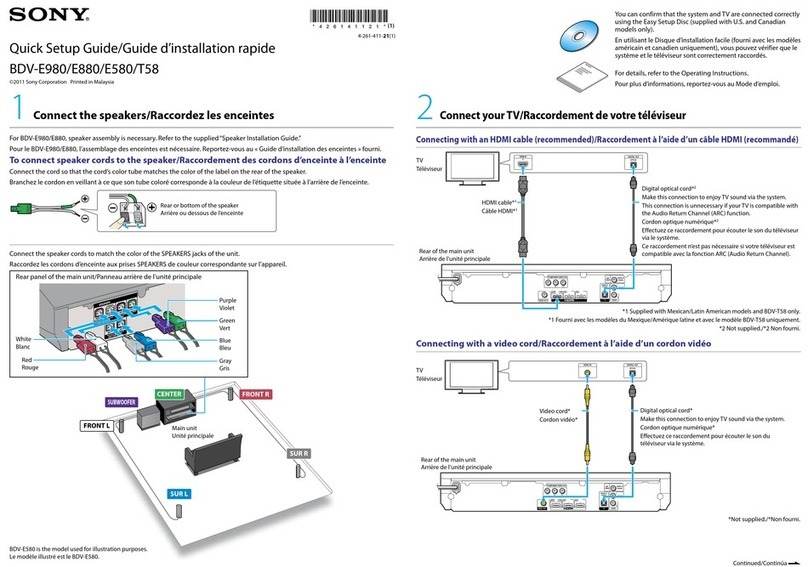
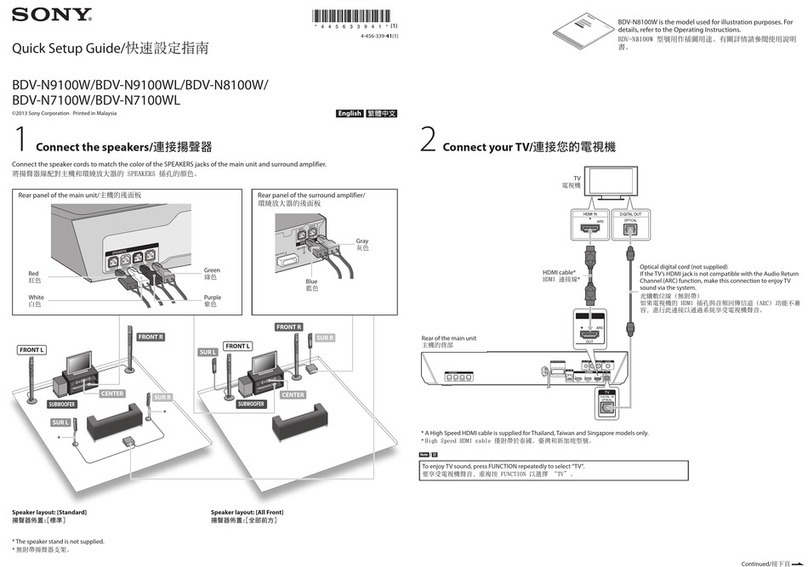
  9. Sony HT-AS5 User manual

Sony HT-AS5 User manual

This manual suits for next models

1

Other Sony Home Theater System manuals

Sony DAV-S888 User manual

Sony

Sony DAV-S888 User manual

Sony STR-K675P  (For HT-DDW675) User manual

Sony

Sony STR-K675P (For HT-DDW675) User manual

Sony HT-DDW675 User manual

Sony

Sony HT-DDW675 User manual

Sony BDV-E6100 User manual

Sony

Sony BDV-E6100 User manual

Sony DAV-FX100W - Wireless Dvd Dream System Quick start guide

Sony

Sony DAV-FX100W - Wireless Dvd Dream System Quick start guide

Sony WAHT-SA20 User manual

Sony

Sony WAHT-SA20 User manual

Sony DAV-JZ8888K User manual

Sony

Sony DAV-JZ8888K User manual

Sony RHT-S10 User manual

Sony

Sony RHT-S10 User manual

Sony DAV-DZ230 User manual

Sony

Sony DAV-DZ230 User manual

Sony HT-XT1 User manual

Sony

Sony HT-XT1 User manual

Sony HT-V1000D - Dvd/vcr Combo User manual

Sony

Sony HT-V1000D - Dvd/vcr Combo User manual

Sony DAV-TZ210 User manual

Sony

Sony DAV-TZ210 User manual

Sony HT-DDW670 User manual

Sony

Sony HT-DDW670 User manual

Sony BDV-EF220 User manual

Sony

Sony BDV-EF220 User manual

Sony HT-RT4 User manual

Sony

Sony HT-RT4 User manual

Sony BDV-NF720 User manual

Sony

Sony BDV-NF720 User manual

Sony HT-DDW840 - Fm Stereo / Fm-am Receiver User manual

Sony

Sony HT-DDW840 - Fm Stereo / Fm-am Receiver User manual

Sony DAV-LF1H User manual

Sony

Sony DAV-LF1H User manual

Sony BDV-N990W User manual

Sony

Sony BDV-N990W User manual

Sony HT-DDW3000 User manual

Sony

Sony HT-DDW3000 User manual

Sony SA-VE312 User manual

Sony

Sony SA-VE312 User manual

Sony BDV-T79 User manual

Sony

Sony BDV-T79 User manual

Sony BDV-E800W User manual

Sony

Sony BDV-E800W User manual

Sony DAV-DZ555K User manual

Sony

Sony DAV-DZ555K User manual

Popular Home Theater System manuals by other brands

Samsung HT-DL200 instruction manual

Samsung

Samsung HT-DL200 instruction manual

Samsung HT-ES6600 user manual

Samsung

Samsung HT-ES6600 user manual

Curtis DVD6010 instruction manual

Curtis

Curtis DVD6010 instruction manual

Philips MCD716/12 user manual

Philips

Philips MCD716/12 user manual

Sherwood ST-4108 operating instructions

Sherwood

Sherwood ST-4108 operating instructions

Philips HTS5520/12 quick start

Philips

Philips HTS5520/12 quick start

LG HT503PHW owner's manual

LG

LG HT503PHW owner's manual

Samsung HT-ES4200K user manual

Samsung

Samsung HT-ES4200K user manual

Samsung HT-P10 instruction manual

Samsung

Samsung HT-P10 instruction manual

Philips HTS5131 User manaul

Philips

Philips HTS5131 User manaul

Goodmans GDVD19SWS user manual

Goodmans

Goodmans GDVD19SWS user manual

Moxi media center user guide

Moxi

Moxi media center user guide

Samsung HT-EM35 user manual

Samsung

Samsung HT-EM35 user manual

Manta GK-500 user manual

Manta

Manta GK-500 user manual

Sharp SBW800 user manual

Sharp

Sharp SBW800 user manual

Philips HTS3541 user manual

Philips

Philips HTS3541 user manual

LG LHT799 specification

LG

LG LHT799 specification

Samsung HT-TWZ415 user manual

Samsung

Samsung HT-TWZ415 user manual

manuals.online logo
manuals.online logoBrands
  • About & Mission
  • Contact us
  • Privacy Policy
  • Terms and Conditions

Copyright 2025 Manuals.Online. All Rights Reserved.

HT-AF5/HT-AS5 (GB/FR/ES/DE) 4-166-573-11(1)
©2010 Sony Corporation Printed in Malaysia
4-166-573-11 (1)
HT-AF5/HT-AS5
Quick Setup Guide/Guide d’installation rapide/
Guía de instalación rápida/Kurzanleitung
1Assembling the speakers/Assemblage des enceintes/
Montaje de los altavoces/Zusammenbauen der Lautsprecher
1
HT-AF5 only/HT-AF5 uniquement/HT-AF5 solamente/Nur HT-AF5
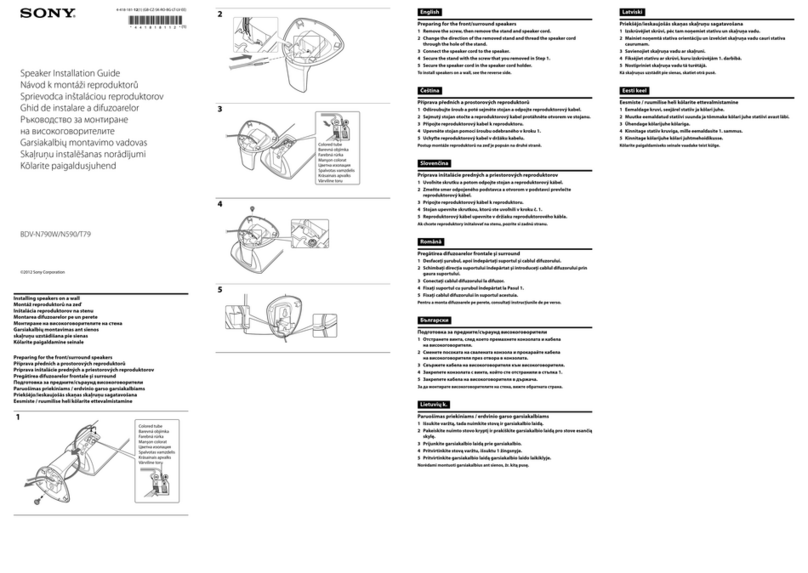
Spread a cloth on the floor to avoid damaging the speaker when
you attach the base to the speaker.
Thread the speaker cord through the top hole at the base.
Turn the speaker upside down.
Place the base at the bottom of the speaker.
Secure the base with three screws.
1
2
3
4
English
Extienda un mantel en el suelo para evitar dañar el altavoz al
colocar la base en el altavoz.
Pase el cable del altavoz por el orificio superior de la base.
Gire el altavoz boca abajo.
Coloque la base en la parte inferior del altavoz.
Fije la base con tres tornillos.
1
2
3
4
Español
Legen Sie ein Tuch auf den Boden, um zu verhindern, dass
die Lautsprecher beim Anbringen der Bodenplatte an den
Lautsprecher beschädigt werden.
Ziehen Sie das Lautsprecherkabel durch das obere Loch auf der
Bodenplatte.
Drehen Sie den Lautsprecher um.
Legen Sie die Bodenplatte auf die Unterseite des Lautsprechers.
Befestigen Sie die Bodenplatte mit drei Schrauben.
1
2
3
4
Deutsch
Recouvrez le sol d’un linge pour éviter d’endommager l’enceinte
lorsque vous fixez la base à l’enceinte.
Faites passer le cordon d’enceinte à travers l’orifice supérieur de
la base.
Retournez l’enceinte.
Placez la base en dessous de l’enceinte.
Fixez la base avec trois vis.
1
2
3
4
Français
2Setting up the speakers/Configuration des enceintes/
Ajuste de los altavoces/Einstellen der Lautsprecher
HT-AF5 only/HT-AF5 uniquement/
HT-AF5 solamente/Nur HT-AF5
HT-AS5 only/HT-AS5 uniquement/
HT-AS5 solamente/Nur HT-AS5
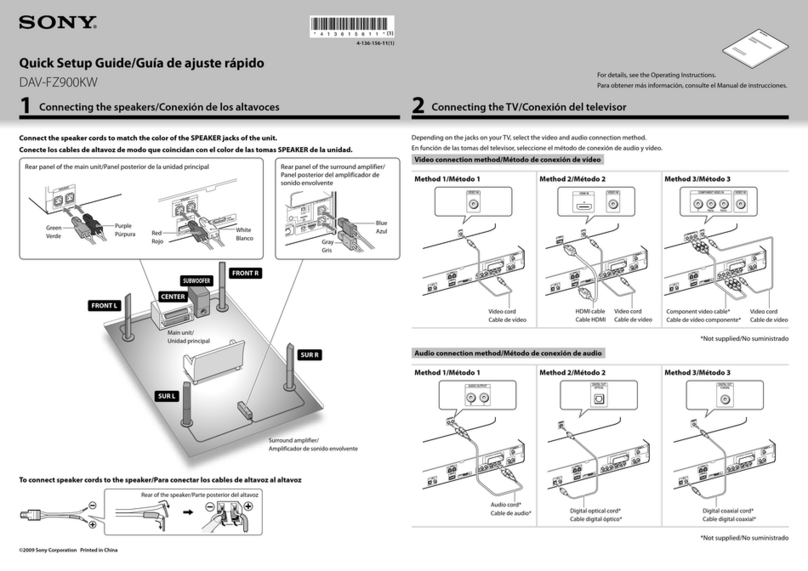
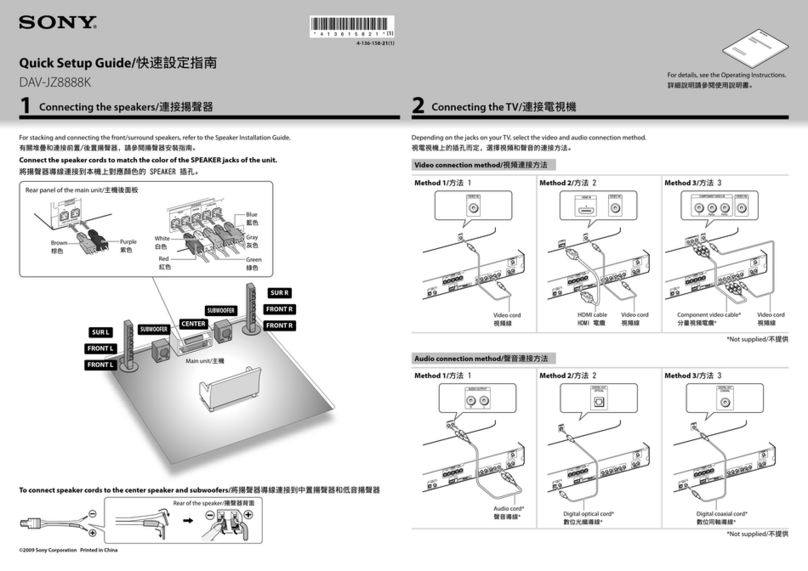
Connect the speaker cords by matching the colour of the SPEAKERS jack of the subwoofer./
Reliez les cordons d’enceinte en respectant la couleur de la prise des SPEAKERS du caisson de graves./
Conecte los cables de altavoz haciendo coincidir el color de la toma SPEAKERS del altavoz de graves./
Schließen Sie die Lautsprecherkabel so an, dass die Farbe der SPEAKERS-Buchse des Subwoofers mit der
des Kabels übereinstimmt.
Front speaker (left)/Enceinte avant (gauche)/
Altavoz frontal (izquierdo)/Frontlautsprecher
(links)
Front speaker (right)/Enceinte avant (droit)/
Altavoz frontal (derecho)/Frontlautsprecher
(rechts)
Center speaker/Enceinte centrale/
Altavoz central/Centerlautsprecher
Surround speaker (left)/Enceinte surround
(gauche)/Altavoz de sonido envolvente
(izquierdo)/Surroundlautsprecher (links)
Surround speaker (right)/Enceinte surround
(droit)/Altavoz de sonido envolvente (derecho)/
Surroundlautsprecher (rechts)
Subwoofer/Caisson de graves/Altavoz de graves/
Subwoofer
A
B
C
D
E
F
2
4
3
(1)
Speaker cord/Cordon d’enceinte/
Cable de altavoz/Lautsprecherkabel
Top of the base/Dessus de la
base/Parte superior de la base/
Oberseite der Bodenplatte
Speaker/
Enceinte/
Altavoz/
Lautsprecher
Speaker cord/
Cordon d’enceinte/
Cable de altavoz/
Lautsprecherkabel
Speaker/
Enceinte/
Altavoz/
Lautsprecher
Speaker/
Enceinte/
Altavoz/
Lautsprecher
Base/
Base/
Base/
Bodenplatte
Speaker/
Enceinte/
Altavoz/
Lautsprecher
Screws/
Vis/
Tornillos/
Schrauben
Bottom of the base/
Dessous de la base/
Parte inferior de la base/
Unterseite der Bodenplatte
BC
RT
Colour tube/
Tube de couleur/
Tubo de color/
Farbiger Draht
Connect the speaker cords to the speaker/
Raccordez les cordons d’enceinte à l’enceinte/
Conecte los cables del altavoz al altavoz/
Schließen Sie die Lautsprecherkabel an den
Lautsprecher an.
D
AE
Rear of the speaker/
Arrière de l’enceinte/
Parte trasera del altavoz/
Rückseite des Lautsprechers
Colour tube/
Tube de couleur/
Tubo de color/
Farbiger Draht
HT-AF5/HT-AS5 (GB/FR/ES/DE) 4-166-573-11(1)
3Connecting the audio/video components/Raccordement
d’appareils audio/vidéo/Conexión de componentes de vídeo/
audio/Anschließen der Audio/Video - Komponenten
4Performing the Auto Calibration/Exécution de l’auto-
calibration/Realización de la calibración automática/
Durchführen der automatischen Kalibrierung
1Conecte el micrófono optimizador y ajústelo en la posición de escucha.
2Pulse +/1 para encender el sistema.
3Pulse AMP MENU.
4Pulse V/vvarias veces hasta que aparezca “A.CAL MENU” y, a continuación,
pulse o b.
5Pulse V/vvarias veces hasta que aparezca “A.CAL START” y, a continuación,
pulse .
La medición comenzará transcurridos unos segundos.
El proceso de medición tarda 30 segundos aproximadamente en finalizar.
Una vez terminada la medición, sonará un pitido y aparecerá “SAVE EXIT” en la
pantalla.
6Pulse para guardar el resultado de la medición.
1Schließen Sie das mitgelieferte Optimierungsmikrofon an und stellen Sie es an der
Hörposition auf.
2Drücken Sie +/1, um das System einzuschalten.
3Drücken Sie AMP MENU.
4Drücken Sie wiederholt auf V/vbis „A.CAL MENU“ erscheint und drücken Sie
dann auf bzw. b.
5Drücken Sie wiederholt auf V/vbis „A.CAL START“ erscheint und dann auf .
Die Einmessung beginnt nach einigen Sekunden.
Die Einmessung dauert ca. 30 Sekunden.
Nach Abschluss der Messung ertönt ein Piepton und „SAVE EXIT“ erscheint auf
dem Display.
6Drücken Sie , um das Messergebnis zu speichern.
1Branchez le microphone optimiseur et réglez-le sur la position d’écoute.
2Appuyez sur +/1 pour mettre le système sous tension.
3Appuyez sur AMP MENU.
4Appuyez plusieurs fois sur V/vjusqu’à ce que « A.CAL MENU » s’affiche, puis
appuyez sur ou b.
5Appuyez plusieurs fois sur V/vjusqu’à ce que « A.CAL START » s’affiche, puis
appuyez sur .
La mesure commence au bout de quelques secondes.
La mesure prend environ 30 secondes.
Une fois la mesure terminée, un bip retentit et « SAVE EXIT » s’affiche.
6Appuyez sur pour sauvegarder le résultat de la mesure.
BD DVD SAT/
CATV
TV VIDEO SA-CD/
CD
DMPORT
TUNER
MENU
+/1
AMP
MENU
1Connect the optimizer microphone and set it at the listening position.
2Press +/1 to turn on the system.
3Press AMP MENU.
4Press V/vrepeatedly until “A.CAL MENU” appears, then press or b.
5Press V/vrepeatedly until “A.CAL START” appears, then press .
Measurement starts in a few seconds.
The measurement process will take approximately 30 seconds to complete.
When the measurement ends, a beep sounds and “SAVE EXIT” appears on the
display.
6Press to save the measurement result.
V/v/B/b,
Example: HT-AF5/
Exemple : HT-AF5/
Ejemplo: HT-AF5/
Beispiel: HT-AF5
For details, refer to the supplied operating instructions./Pour plus d’informations, reportez-vous au mode d’emploi fourni./
Para obtener más información, consulte el manual de instrucciones suministrado./Weitere Einzelheiten finden Sie in der
mitgelieferten Bedienungsanleitung.
EZW-T100
DMPORT
DIGITAL
ANTENNA
HDMI
0.7AMAX
DVDIN BDIN
FRONTR FRONTL SURR SURL
OPTIN COAXIN
VIDEO
CENTER
SAT/CATVIN TVOUT
ARC
DC5V
AUDIOIN AUDIOIN FM75
AM
COAXIAL
R
L
CALMIC
AUTO
SA-CD/CD TV
SAT/CATV TV
SPEAKERS
A HDMI cable (not supplied)/Câble HDMI (non fourni)/Cable HDMI (no suministrado)/HDMI-Kabel (nicht mitgeliefert)
AAA
A
Note on TV connection/Remarque sur le raccordement du téléviseur/
Nota sobre la conexión a un televisor/Hinweis zum TV-Anschluss
If your TV is compatible with Audio Return Channel (ARC) function, set “ARC”
to “ARC ON” in SET HDMI menu to listen to the sound output from the system’s
speaker. For details on the TV settings, refer to the operating instructions of your
TV. For other TV connection, refer to the supplied operating instructions.
Si votre téléviseur est compatible avec la fonction Audio Return Channel (ARC),
réglez « ARC » sur « ARC ON » dans le menu SET HDMI pour écouter la sortie
du son de l’enceinte du système. Pour plus de détails sur les réglages du téléviseur,
consultez le mode d’emploi fourni avec celui-ci. Pour en savoir plus sur le
raccordement du téléviseur, reportez-vous au mode d’emploi fourni.
Si su televisor es compatible con la función Audio Return Channel (ARC), ajuste
“ARC” en “ARC ON” en el menú SET HDMI para escuchar el sonido procedente
del altavoz del sistema. Para obtener más información acerca de la configuración
del televisor, consulte el manual de instrucciones correspondiente. Para obtener
información sobre otras conexiones de TV, consulte el manual de instrucciones
suministrado.
Wenn Ihr Fernseher mit der Funktion Audio Return Channel (ARC) kompatibel
ist, setzen Sie „ARC“ auf „ARC ON“ im Menü SET HDMI, damit der Ton über
den Lautsprecher des Systems ausgegeben wird. Einzelheiten zum Einstellen
des Fernsehgeräts finden sie in der mitgelieferten Bedienungsanleitung.
Weitere Hinweise zu anderen TV-Anschlüssen finden Sie in der mitgelieferten
Bedienungsanleitung.
English
Español
Deutsch
Français
DVD recorder/
Enregistreur DVD/
Grabadora de DVD/
DVD-Recorder
Blu-ray disc player/
Lecteur de disques Blu-Ray/
Reproductor de discos Blu-ray/
Blu-ray-Disc-Player
Satellite tuner or cable television tuner/
Tuner satellite ou tuner TV par câble/
Sintonizador de satélite o
sintonizador de televisión por cable/
Satellitentuner oder Kabelfernsehtuner
TV/
Téléviseur/
Televisor/
Fernsehgerät