Sony JIG-XT3 User manual

D:\NORM'S JOB\SONY HA\SO140084\JIG-
ST9\4569676311_GBFRESDENLITPL (CEL)\GB\010COV.fm
masterpage:
Right
JIG-ST9_NT3/JIG-XT3/JIG-CT780/JIG-CT380
4-569-676-31(1)
JIG-ST9_NT3/JIG-XT3/JIG-CT780/JIG-CT380
Operating Instructions GB
Mode d’emploi FR
Manual de instrucciones ES
Bedienungsanleitung DE
Gebruiksaanwijzing NL
Istruzioni per l’uso IT
Instrukcja obsługi PL
Home Theatre
System

2GB
JIG-ST9_NT3/JIG-XT3/JIG-CT780/JIG-CT380
4-569-676-31(1)
D:\NORM'S JOB\SONY HA\SO140084\JIG-
ST9\4569676311_GBFRESDENLITPL (CEL)\GB\020REG.fm
masterpage: Left
Do not install the appliance in a
confined space, such as a bookcase or
built-in cabinet.
To reduce the risk of fire, do not cover
the ventilation opening of the appliance
with newspapers, tablecloths, curtains,
etc.
Do not expose the appliance to naked
flame sources (for example, lighted
candles).
To reduce the risk of fire or electric
shock, do not expose this appliance to
dripping or splashing, and do not place
objects filled with liquids, such as vases,
on the appliance.
To prevent injury, this apparatus must
be securely placed on the cabinet in
accordance with the installation
instructions.
When unpacking or handling the
system, be sure to handle the system
with two or more persons. Dropping the
system may cause personal injury
and/or property damage.
Indoor use only.
On power sources
The unit is not disconnected from the
mains as long as it is connected to the
AC outlet, even if the unit itself has
been turned off.
As the main plug is used to disconnect
the unit from the mains, connect the
unit to an easily accessible AC outlet.
Should you notice an abnormality in
the unit, disconnect the main plug
from the AC outlet immediately.
Recommended cables
Properly shielded and grounded cables
and connectors must be used for
connection to host computers and/or
peripherals.
CAUTION
The use of optical instruments with this
product will increase eye hazard.
As the laser beam used in this Home
Theatre System is harmful to eyes, do
not attempt to disassemble the cabinet.
Refer servicing to qualified personnel
only.
Pick-up unit of this appliance is
classified as a CLASS 3R LASER product.
Visible and invisible laser radiation is
emitted when the laser protective
housing is opened, so be sure to avoid
direct eye exposure.
This marking is located on the laser
protective housing inside the enclosure
of the player in the Bar stand.
For customers in Europe and
United Arab Emirates
This appliance is classified as a CLASS 1
LASER product by IEC60825-1:2007. This
marking is located on the rear exterior of
the Bar stand.
WARNING

D:\NORM'S JOB\SONY HA\SO140084\JIG-
ST9\4569676311_GBFRESDENLITPL (CEL)\GB\020REG.fm
masterpage:
Right
3GB
JIG-ST9_NT3/JIG-XT3/JIG-CT780/JIG-CT380
4-569-676-31(1)
For customers in Europe
Disposal of Old
Electrical & Electronic
Equipment (Applicable
in the European Union
and other European
countries with separate
collection systems)
This symbol on the product or on its
packaging indicates that this product
shall not be treated as household waste.
Instead it shall be handed over to the
applicable collection point for the
recycling of electrical and electronic
equipment. By ensuring this product is
disposed of correctly, you will help
prevent potential negative
consequences for the environment and
human health, which could otherwise
be caused by inappropriate waste
handling of this product. The recycling
of materials will help to conserve natural
resources. For more detailed
information about recycling of this
product, please contact your local Civic
Office, your household waste disposal
service or the shop where you
purchased the product.
Notice for customers: the following
information is only applicable to
equipment sold in countries applying
EU directives.
This product has been manufactured by
or on behalf of Sony Corporation, 1-7-1
Konan Minato-ku Tokyo, 108-0075
Japan. Inquiries related to product
compliance based on European Union
legislation shall be addressed to the
authorized representative, Sony
Deutschland GmbH, Hedelfinger Strasse
61, 70327 Stuttgart, Germany. For any
service or guarantee matters, please
refer to the addresses provided in the
separate service or guarantee
documents.
This Home Theatre System is intended
for shop front demonstration at dealer.
This equipment has been tested and
found to comply with the limits set out
in the EMC regulation using a
connection cable shorter than 3 meters.
Copyrights and Trademarks
This system incorporates High-
Definition Multimedia Interface
(HDMI™) technology.
The terms HDMI and HDMI High-
Definition Multimedia Interface, and
the HDMI Logo are trademarks or
registered trademarks of HDMI
Licensing LLC in the United States and
other countries.
DVD Logo is a trademark of DVD
Format/Logo Licensing Corporation.
“Blu-ray Disc™”, “Blu-ray™”,
“Blu-ray 3D™”, and logos are
trademarks of the Blu-ray Disc
Association.
“Blu-ray Disc™”, “DVD+RW”,
“DVD-RW”, “DVD+R”, “DVD-R”, “DVD
VIDEO”, and “CD” logos are
trademarks.
The BLUETOOTH® word mark and
logos are registered trademarks
owned by Bluetooth SIG, Inc. and any
use of such marks by Sony Corporation
is under license. Other trademarks and
trade names are those of their
respective owners.
All other trademarks are trademarks of
their respective owners.
Other system and product names are
generally trademarks or registered
trademarks of the manufacturers. ™
and marks are not indicated in this
document.
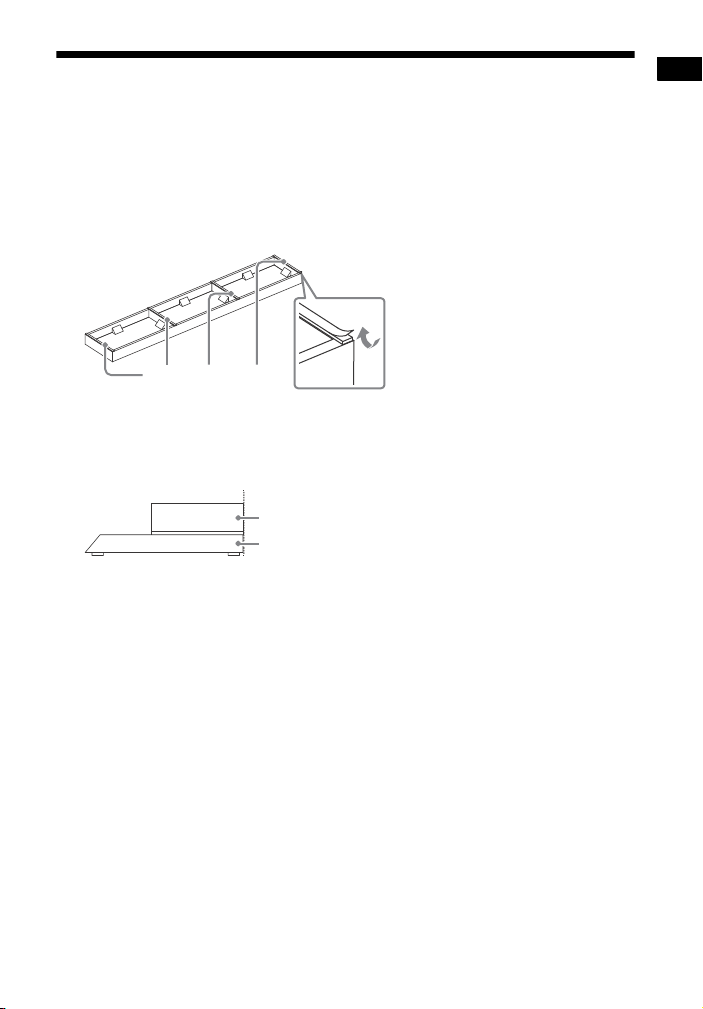
Region code (BD-ROM/DVD
VIDEO only)
Your system has a region code printed
on the rear exterior of the Bar stand and
will only play a BD-ROM/DVD VIDEO
(playback only) labeled with identical
region codes or .

4GB
JIG-ST9_NT3/JIG-XT3/JIG-CT780/JIG-CT380
4-569-676-31(1)
D:\NORM'S JOB\SONY HA\SO140084\JIG-
ST9\4569676311_GBFRESDENLITPL (CEL)\GB\010COVTOC.fm
masterpage: Left
Table of Contents
Unpacking ..................................5
Setting up
Step 1: Positioning the
System .................................. 7
Step 2: Inserting the POP
Label .....................................8
Step 3: Installing the TV stand
(JIG-ST9_NT3 only) ................9
Step 4: Connecting the Bar
stand ................................... 10
Step 5: Inserting the Demo
Disc ..................................... 13
How to Use
Button/Knob Specification ...... 14
Changing the POP Label .......... 15
Additional Information
Precautions .............................. 16
Notes about Discs .....................17
Troubleshooting ........................17
Specifications ........................... 18

5GB
JIG-ST9_NT3/JIG-XT3/JIG-CT780/JIG-CT380
4-569-676-31(1)
D:\NORM'S JOB\SONY HA\SO140084\JIG-
ST9\4569676311_GBFRESDENLITPL (CEL)\GB\030LIS.fm
masterpage:
Right
Unpacking
JIG-ST9_NT3
(Designed for HT-ST9/HT-NT3
models)
Bar stand (1)
TV stand (1)
Subwoofer stand (1)
High Speed HDMI cable (1)
Double-sided tapes (to attach the
Sound Bar to the Bar stand) (2)
Operating Instructions
JIG-XT3
(Designed for HT-XT3 model)
Bar stand (1)
High Speed HDMI cable (1)
Operating Instructions
JIG-CT780
(Designed for HT-CT780 model)
Bar stand (1)
Subwoofer stand (1)
High Speed HDMI cable (1)
Double-sided tapes (to attach the
Sound Bar to the Bar stand) (2)
Operating Instructions

6GB
JIG-ST9_NT3/JIG-XT3/JIG-CT780/JIG-CT380
4-569-676-31(1)
D:\NORM'S JOB\SONY HA\SO140084\JIG-
ST9\4569676311_GBFRESDENLITPL (CEL)\GB\030LIS.fm
masterpage: Left
JIG-CT380
(Designed for HT-CT380 model)
Bar stand (1)
Subwoofer stand (1)
High Speed HDMI cable (1)
Double-sided tapes (to attach the
Sound Bar to the Bar stand) (2)
Operating Instructions

7GB
JIG-ST9_NT3/JIG-XT3/JIG-CT780/JIG-CT380
4-569-676-31(1)
D:\NORM'S JOB\SONY HA\SO140084\JIG-
ST9\4569676311_GBFRESDENLITPL (CEL)\GB\030LIS.fm
masterpage:
Right
Setting up
Step 1: Positioning the System
The JIG-ST9_NT3 model is used as an example.
Setting up
TV (not supplied)
Bar stand
TV stand
Subwoofer stand Sound Bar (not supplied)
Subwoofer
(not supplied)

8GB
JIG-ST9_NT3/JIG-XT3/JIG-CT780/JIG-CT380
4-569-676-31(1)
D:\NORM'S JOB\SONY HA\SO140084\JIG-
ST9\4569676311_GBFRESDENLITPL (CEL)\GB\030LIS.fm
masterpage: Left
Step 2: Inserting the POP Label
Follow the step numbers in the diagrams below to dismantle the front panel. Then,
insert the POP label. Assemble the front panel by following the step numbers in
reverse order.
The JIG-ST9_NT3 model is used as an example.
Bar stand
Subwoofer stand
(HT-ST9_NT3/HT-CT780/HT-CT380 only)
Pop label
Pop label

9GB
JIG-ST9_NT3/JIG-XT3/JIG-CT780/JIG-CT380
4-569-676-31(1)
D:\NORM'S JOB\SONY HA\SO140084\JIG-
ST9\4569676311_GBFRESDENLITPL (CEL)\GB\030LIS.fm
masterpage:
Right
Setting up
Step 3: Installing the TV stand (JIG-ST9_NT3 only)
Install the supplied TV stand on the Bar stand so that the TV screen will not be
blocked by the Sound Bar.
1Turn the TV stand upside down.
2Remove the protection sheets from the four double-sided tapes at the
bottom of TV stand.
3Place the TV stand on the Bar stand by aligning their rear panels as shown
below.
Double-sided tape
TV stand
Bar stand
Side view

10GB
JIG-ST9_NT3/JIG-XT3/JIG-CT780/JIG-CT380
4-569-676-31(1)
D:\NORM'S JOB\SONY HA\SO140084\JIG-
ST9\4569676311_GBFRESDENLITPL (CEL)\GB\030LIS.fm
masterpage: Left
Step 4: Connecting the Bar stand
Do not connect the AC power cord (mains lead) of the Bar stand to a wall outlet
(mains) until all the other connections are made.
Follow the steps below.
1Connect the Bar stand to the HDMI IN 1 jack of the Sound Bar.
The JIG-ST9_NT3 and HT-NT3 models are used as an example.
2Use the High Speed HDMI cable (supplied) to connect the HDMI OUT jack of
the Sound Bar to the HDMI IN jack of the TV so that you can view the
demonstration.
3(JIG-ST9_NT3/JIG-CT780/JIG-CT380 only)
Use the two double-sided tapes (supplied) to attach the Sound Bar to the Bar
stand.
Remove the protection sheets on the double-sided tapes.
Sound Bar
AC power cord (mains lead)
Bar stand

11GB
JIG-ST9_NT3/JIG-XT3/JIG-CT780/JIG-CT380
4-569-676-31(1)
D:\NORM'S JOB\SONY HA\SO140084\JIG-
ST9\4569676311_GBFRESDENLITPL (CEL)\GB\030LIS.fm
masterpage:
Right
Setting up
Attach the double-sided tapes to the bottom of the Sound Bar.
We recommend you to attach the double-sided tapes to the location marked
in grey in the diagrams below.
For HT-ST9
For HT-NT3
For HT-CT780
For HT-CT380

12GB
JIG-ST9_NT3/JIG-XT3/JIG-CT780/JIG-CT380
4-569-676-31(1)
D:\NORM'S JOB\SONY HA\SO140084\JIG-
ST9\4569676311_GBFRESDENLITPL (CEL)\GB\030LIS.fm
masterpage: Left
Remove the protection sheet on the two double-sided tapes that you have
attached in step .
4Place the Sound Bar on the Bar stand.
5Connect the AC power cord (mains lead) of the Sound Bar and TV.
6Connect the AC power cord (mains lead) of the Bar stand.
(JIG-ST9_NT3/JIG-CT780/JIG-CT380 only)
Be sure to specify the wireless connection to link the Sound Bar to the subwoofer (Secure
Link or LINK function) before you insert the Demo Disc. For details on Secure Link or LINK
function, refer to the operating instructions supplied with the Sound Bar.
Note

13GB
JIG-ST9_NT3/JIG-XT3/JIG-CT780/JIG-CT380
4-569-676-31(1)
D:\NORM'S JOB\SONY HA\SO140084\JIG-
ST9\4569676311_GBFRESDENLITPL (CEL)\GB\030LIS.fm
masterpage:
Right
Setting up
Step 5: Inserting the Demo Disc
Back panel
1Turn on the Sound Bar and TV.
2Change the input of the TV to the input which the Sound Bar is connected.
The [Easy Initial Settings] screen appears on the TV screen after you turned on the Bar
stand and there is no disc in the disc tray. The [Easy Initial Settings] screen disappears
after the Demo Disc is inserted.
3Press , and place a Demo Disc on the disc tray.
4Press to close the disc tray.
Playback starts.
Do not forcibly push the disc tray to close it as this may cause a malfunction.
To reset the system when Demo Disc is played back, hold down (on/standby) for about
5 seconds.
Note
Note
Tip
Disc tray

14GB
JIG-ST9_NT3/JIG-XT3/JIG-CT780/JIG-CT380
4-569-676-31(1)
D:\NORM'S JOB\SONY HA\SO140084\JIG-
ST9\4569676311_GBFRESDENLITPL (CEL)\GB\030LIS.fm
masterpage: Left
Button/Knob Specification
JIG-ST9_NT3/JIG-XT3 only
JIG-CT780/JIG-CT380 only
DEMO button
Press to start playback the demonstration.
Hi-Res button (JIG-ST9_NT3/JIG-XT3 only)
Press to listen to Hi-Resolution sound.
Bluetooth button
Press to enjoy music via BLUETOOTH connection.
When you press Bluetooth, the BLUETOOTH function of the Sound Bar is
automatically activated.
Follow the steps below to pair your BLUETOOTH device to the Sound Bar.
Set your BLUETOOTH device in pairing mode.
For details on setting the pairing mode, refer to the operating instructions
supplied with your device.
Select the Sound Bar’s name (for example, “HT-NT3”) on your device’s
display.
Once pairing is completed, the device is automatically connected to the
Sound Bar.
BLUETOOTH playback screen appears on the TV screen.
Start playback on your device. Now you can enjoy the music via the system.
knob
Turn to adjust the volume level.
How to Use

15GB
JIG-ST9_NT3/JIG-XT3/JIG-CT780/JIG-CT380
4-569-676-31(1)
D:\NORM'S JOB\SONY HA\SO140084\JIG-
ST9\4569676311_GBFRESDENLITPL (CEL)\GB\030LIS.fm
masterpage:
Right
How to Use
About the LED indicators
White (on top and bottom of the front panel)
Blue (on the buttons)
When you insert the Demo Disc and demonstration starts, the white LED indicator
lights up and blue LED indicator flashes. If you press the button, the blue LED
indicator of the button lights up for about 5 minutes. Then the indicator continues
flashing.
All the LED indicators lights off when the disc tray is opened or no disc is inserted.
Changing the POP Label
You can change the POP label in the front panel of the Bar stand and subwoofer
stand.
See “Step 2: Inserting the POP Label” (page 8) to dismantle and assemble the front
panel.

16GB
JIG-ST9_NT3/JIG-XT3/JIG-CT780/JIG-CT380
4-569-676-31(1)
D:\NORM'S JOB\SONY HA\SO140084\JIG-
ST9\4569676311_GBFRESDENLITPL (CEL)\GB\040ADD.fm
masterpage: Left
Precautions
On safety
Should any solid object or liquid fall
into the cabinet, unplug the system
and have it checked by qualified
personnel before operating it any
further.
Do not touch the AC power cord
(mains lead) with wet hands. Doing so
may cause an electric shock.
Do not climb on the system, as you
may fall down and injure yourself, or
system damage may result.
Do not place anything other than a TV
and Sound Bar on the system.
On power sources
Before operating the system, check
that the operating voltage is identical
to your local power supply. The
operating voltage is indicated on the
nameplate at the rear of the system.
If you are not going to use the system
for a long time, be sure to disconnect
the system from the wall outlet. To
disconnect the AC power cord (mains
lead), grasp the plug itself; never pull
the cord.
On heat buildup
Although the system heats up during
operation, this is not a malfunction. If
you continuously use this system at a
large volume, the cabinet temperature
of the top, side and bottom rises
considerably. To avoid burning yourself,
do not touch the cabinet.
On placement
Place the system in a location with
adequate ventilation to prevent heat
build-up in the system.
Do not place the system on a soft
surface (rugs, blankets, etc.) or place
anything at the rear of the system that
might block the ventilation holes and
cause malfunctions.
Do not install the system near heat
sources such as radiators, air ducts, or
in a place subject to direct sunlight,
excessive dust, mechanical vibration,
or shock.
Do not install the system in an inclined
position. It is designed to be operated
in a horizontal position only.
Use caution when placing the system
on a surface that has been specially
treated (with wax, oil, polish, etc.), as
staining or discoloration of the surface
may result.
Take care to avoid any possible injury
from the corners of the system.
Keep the system and discs away from
components with strong magnets,
such as microwave ovens, or large
loudspeakers.
On operation
Before connecting other devices, be
sure to turn off and unplug the
system.
If the system is brought directly from a
cold to a warm location, or is placed in
a very damp room, moisture may
condense on the lenses inside the
player in the Bar stand. Should this
occur, the system may not operate
properly. In this case, remove the disc
and leave the system turned on for
about half an hour until the moisture
evaporates.
On cleaning
Clean the cabinet, panel, and controls
with a soft cloth slightly moistened with
a mild detergent solution. Do not use
any type of abrasive pad, scouring
powder or solvent such as alcohol or
benzine.
Additional Information

17GB
JIG-ST9_NT3/JIG-XT3/JIG-CT780/JIG-CT380
4-569-676-31(1)
D:\NORM'S JOB\SONY HA\SO140084\JIG-
ST9\4569676311_GBFRESDENLITPL (CEL)\GB\040ADD.fm
masterpage:
Right
Additional Information
Notes about Discs
Use only the Demo Disc supplied
separately.
On handling discs
To keep the disc clean, handle the disc
by its edge. Do not touch the surface.
Do not stick paper or tape on the disc.
Do not expose the disc to direct
sunlight or heat sources such as hot air
ducts, or leave it in a car parked in
direct sunlight as the temperature
may rise considerably inside the car.
After playing, store the disc in its case.
On cleaning
Before playing, clean the disc with a
cleaning cloth.
Wipe the disc from the center out.
Do not use solvents such as benzine,
thinner, commercially available
cleaners, or anti-static spray intended
for vinyl LPs.
Troubleshooting
If you experience any of the following
difficulties while using the system.
The button/knob (DEMO, Hi-Res,
Bluetooth, ) does not
function.
No output via HDMI connection.
Blue LED indicator does not light up.
Try the following:
Check that the HDMI cable is
connected correctly and securely.
Check that the Demo Disc is
inserted correctly.
Unplug the AC power cord (mains
lead), then plug in the AC power
cord (mains lead) again.
If the issue persists, check the
connections in the Bar stand.
Turn the Bar stand upside down.
Remove all the screws at the
bottom of the Bar stand.
Open the cover at the bottom of
the Bar stand.
Check that all the connections
are connected correctly and
securely.
Should any problem persist, consult
your nearest Sony marketing.

18GB
JIG-ST9_NT3/JIG-XT3/JIG-CT780/JIG-CT380
4-569-676-31(1)
D:\NORM'S JOB\SONY HA\SO140084\JIG-
ST9\4569676311_GBFRESDENLITPL (CEL)\GB\040ADD.fm
masterpage: Left
Specifications
Power requirements
220 V – 240 V AC, 50/60 Hz
Power consumption
On: 14 W
Standby:
0.5 W (at power saving mode)
Design and specifications are subject to change without notice.
Model Dimensions (w/h/d) (approx.) Mass (approx.)
JIG-ST9_NT3
Bar stand
TV stand
Subwoofer stand
1,200 mm
×
70 mm
×
396.5 mm
1,200 mm
×
60 mm
×
215 mm
250 mm
×
70 mm
×
464.1 mm
21.9 kg
3.7 kg
6 kg
JIG-XT3
Bar stand 900 mm
×
70 mm
×
396.5 mm 19.3 kg
JIG-CT780
Bar stand
Subwoofer stand
1,200 mm
×
70 mm
×
396.5 mm
200 mm
×
70 mm
×
434 mm
21.9 kg
5.3 kg
JIG-CT380
Bar stand
Subwoofer stand
900 mm
×
70 mm
×
396.5 mm
200 mm
×
70 mm
×
434 mm
19.3 kg
5.3 kg


2FR
JIG-ST9_NT3/JIG-XT3/JIG-CT780/JIG-CT380
4-569-676-31(1)
D:\NORM'S JOB\SONY HA\SO140084\JIG-
ST9\4569676311_GBFRESDENLITPL (CEL)\FR\020REG.fm
masterpage:
Gauche
N’installez pas l’appareil dans un
espace confiné, tel qu’une bibliothèque
ou un meuble encastré.
Pour réduire tout risque d’incendie, ne
couvrez pas les ailettes de ventilation de
cet appareil avec des papiers journaux,
des nappes, des rideaux, etc.
N’exposez pas l’appareil à des sources
de flammes nues (par exemple, des
bougies allumées).
Pour réduire tout risque d’incendie ou
de choc électrique, n’exposez pas
l’appareil à des gouttelettes ou à des
éclaboussures et ne posez pas d’objets
contenant du liquide, comme des vases,
sur l’appareil.
Pour éviter les blessures, cet appareil
doit être fermement installé sur le
boîtier, conformément aux instructions
d’installation.
Lors du déballage ou de la manipulation
du système, veillez à manipuler le
système à deux personnes ou plus. La
chute du système peut provoquer des
blessures corporelles et/ou des
dommages matériels.
Usage en intérieur uniquement.
Sources d’alimentation
L’appareil n’est pas débranché de la
source d’alimentation secteur tant
qu’il reste raccordé à la prise secteur,
même s’il est éteint.
La fiche principale étant utilisée pour
débrancher l’appareil de la source
d’alimentation secteur, raccordez
l’appareil sur une prise secteur
facilement accessible. Si vous
constatez que l’appareil ne fonctionne
pas normalement, débranchez
immédiatement la fiche principale de
la prise secteur.
Câbles recommandés
Des connecteurs et des câbles
convenablement protégés et reliés à la
terre doivent être utilisés pour le
raccordement aux périphériques et/ou
aux ordinateurs hôtes.
ATTENTION
L’utilisation d’instruments optiques
avec ce produit augmentera les risques
oculaires.
Le faisceau laser utilisé dans ce Home
Theatre System étant dangereux pour
les yeux, n’essayez pas de démonter le
boîtier.
Pour toute réparation, adressez-vous
exclusivement à un technicien qualifié.
L’unité de captage de cet appareil est
classée comme un produit CLASS 3R
LASER. Un rayonnement laser visible et
invisible est émis lors de l’ouverture du
boîtier protecteur du laser ; évitez donc
toute exposition directe des yeux.
Cette mention est indiquée sur le capot
de protection du laser, à l’intérieur du
boîtier du lecteur dans le support de la
barre.
Pour les clients en Europe et aux
Émirats arabes unis
Cet appareil est classé comme un
produit CLASS 1 LASER par l’IEC60825-
1:2007. Cette mention est indiquée au
dos à l’extérieur du support de la barre.
AVERTISSEMENT
This manual suits for next models
3
Table of contents
Languages:
Other Sony Home Theater System manuals

Sony
Sony DAV-FR9 - Dvd Dream System User manual

Sony
Sony BDV-N5200W User manual

Sony
Sony DAV-FXG99K User manual

Sony
Sony HT-DDW7000 User manual

Sony
Sony HT-RT3 User manual

Sony
Sony BDV-E500W User manual

Sony
Sony DAV-DZ270 User manual

Sony
Sony RHT-S10 User manual

Sony
Sony BDV-N9200WL User manual

Sony
Sony HT-SF2000 User manual