manuals.online logo
Brands
  1. Home
  2. •
  3. Brands
  4. •
  5. Sony
  6. •
  7. Laptop
  8. •
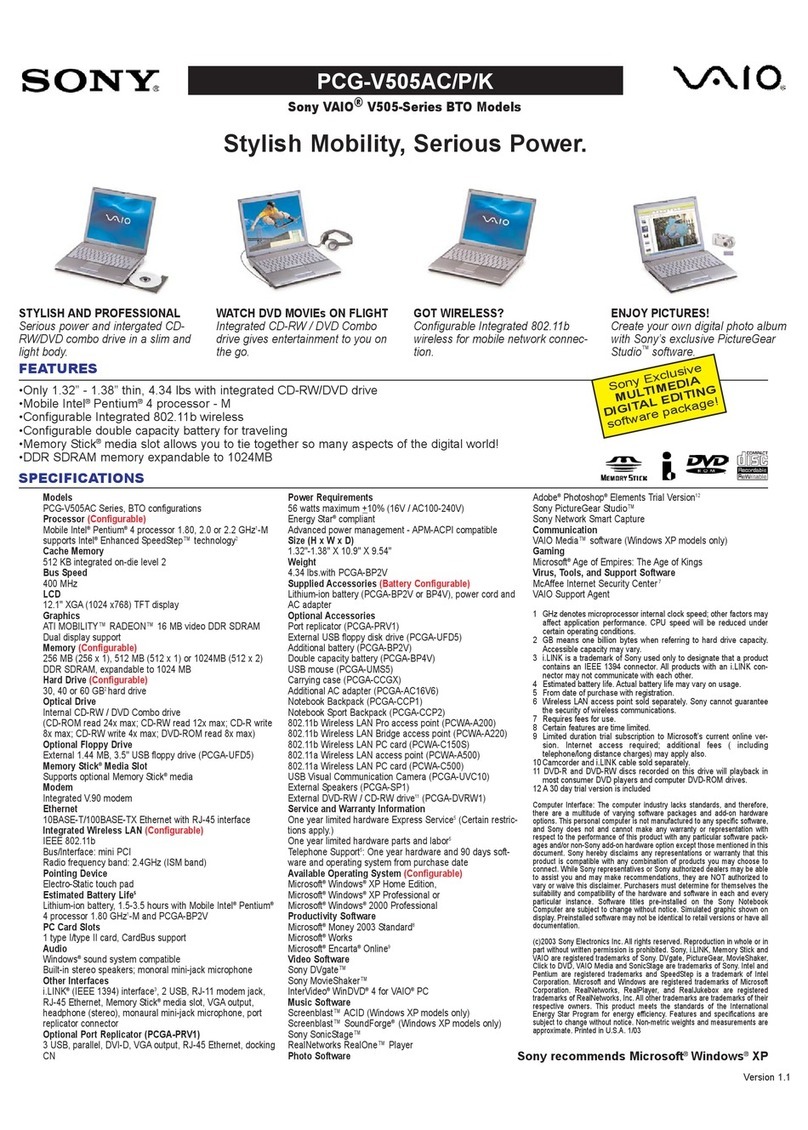
  9. Sony VGN TXN27CN - VAIO - Core Solo 1.33 GHz User manual

Sony VGN TXN27CN - VAIO - Core Solo 1.33 GHz User manual

2
1
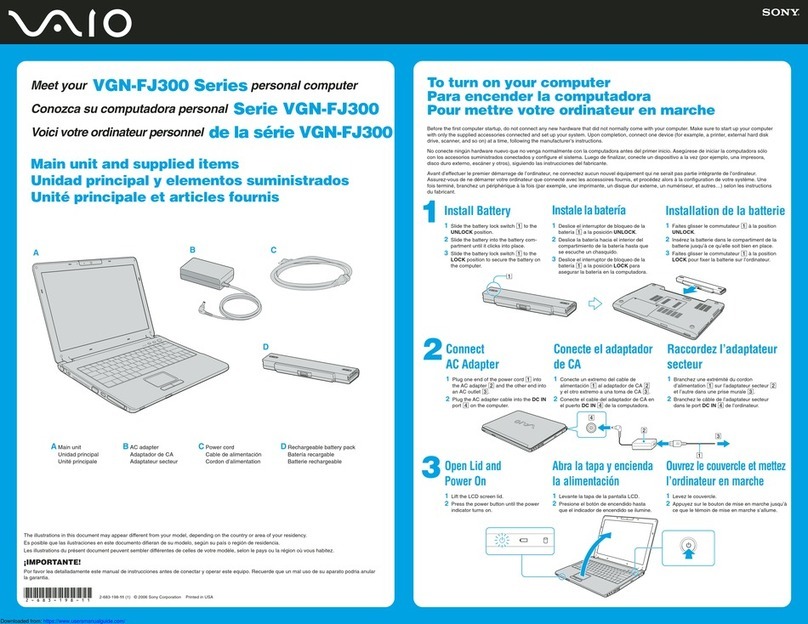
Meet your
VGN-TXN20 Series
personal computer
Conozca su computadora personal
Serie VGN-TXN20
Main unit and supplied items
Unidad principal y artículos suministrados
Install Battery Pack
1Slide the battery pack into the battery compartment until
it clicks into place.
Connect AC Adapter
1Plug one end of the power cord 1into the AC adapter
2and the other end into an AC outlet 3.
2Plug the AC adapter cable into the DC IN port 4on the
computer.
Open Lid and Power On
1Lift the LCD screen lid.
2Press the power button until the power indicator turns on.
3
1
4
2
AB
C
D
AMain unit
Unidad principal
BAC adapter
Adaptador de CA
3-093-623-11 (1) © 2007 Sony Corporation Printed in Japan
The illustrations in this document may appear different from your model, depending on the country or area of your residency.
Es posible que las ilustraciones de este documento difieran de su modelo, según su país o región de residencia.
¡IMPORTANTE!
Por favor lea detalladamente este manual de instrucciones antes de conectar y operar este equipo. Recuerde que un mal uso de su aparato podria anular la
garantia.
To turn on your computer
Para encender la computadora
Before starting your computer for the first time, do not connect any new hardware that did not originally come with your computer. Make sure to start up
your computer with only the supplied accessories connected and set up your system. Upon completion, connect one device (for example, a printer, an
external hard disk drive, a scanner, and so on) at a time, following the manufacturer’s instructions.
No conecte ningún hardware nuevo que no venga originalmente con la computadora antes del primer inicio. Asegúrese de iniciar la computadora sólo
con los accesorios suministrados conectados y configure el sistema. Una vez finalizado lo anterior, conecte un dispositivo (por ejemplo, impresora,
unidad de disco duro externa, escáner, etc.) a la vez, de acuerdo con las instrucciones del fabricante.
3
Instale la batería
1Deslice la batería hacia el interior del compartimiento de
la batería hasta que encaje en su lugar.
Conecte el adaptador de CA
1Conecte un extremo del cable de alimentación 1al adaptador de
CA 2y el otro extremo, a una toma de CA 3.
2Conecte el cable del adaptador de CA en el puerto DC IN 4de la
computadora.
Abra la tapa y encienda la unidad
1Levante la tapa de la pantalla LCD.
2Pulse el botón de encendido hasta que el indicador de encendido se
ilumine.
CPower cord
Cable de alimentación
DRechargeable battery pack
Batería recargable
EWWAN connector cap *
Tapa del conector de WWAN *
E
*On selected models only.
Sólo en modelos seleccionados.
FCarrying case *
Estuche de transporte *
F
Your computer is equipped with VAIO®Recovery Center, a utility
program that recovers your computer’s operating system and
preinstalled software to original factory-installed settings.
System and/or application recovery media are not delivered with your
computer.
For online information about hard disk
recovery:
1Click Start > Help and Support.
2Click Manuals & Specifications.
3Click VAIO Recovery Guide.
To access the VAIO Recovery Center
utility from the Windows Vista™ operating
system:
1Click Start > Help and Support.
2Click Backup and Recovery.
3Click VAIO Recovery Center.
Su computadora tiene instalado VAIO®Recovery Center, programa
utilitario que restablece el sistema operativo de la computadora y el
software preinstalado a los valores originales instalados de fábrica.
El sistema y/o medio de recuperación de aplicaciones no vienen con la
computadora.
Para obtener información en línea acerca
de la recuperación del disco duro:
1Haga clic en Inicio > Ayuda y soporte técnico.
2Haga clic en Manuales y especificaciones.
3Haga clic en Guía de la Recuperación.
Para acceder al programa utilitario VAIO
Recovery Center desde el sistema
operativo Windows Vista™:
1Haga clic en Inicio > Ayuda y soporte técnico.
2Haga clic en Copia de seguridad y recuperación.
3Haga clic en VAIO Recovery Center.
HDD recovery
Recuperación de la unidad de disco duro
1Haga clic en Inicio > Ayuda y soporte técnico.
2Haga clic en Manuales y especificaciones.
3Haga clic en Guía de Usuario de VAIO.
1Click Start > Help and Support.
2Click Manuals & Specifications.
3Click VAIO User Guide.
Locate the User Guide
Ubique la Guía del usuario
Troubleshooting
Resolución de problemas
What should I do if my computer does not
start?
The power indicator on your computer is off when the computer is not
securely attached to a source of power. Make sure the computer is
plugged into the AC adapter and the adapter is plugged into an outlet. If
you are using battery power, make sure the battery pack is installed
properly and charged. You may check the power source by
disconnecting the AC adapter and removing the battery pack. Wait three
to five minutes before reattaching the AC adapter and reinstalling the
battery pack.
Additional suggestions included:
■If your computer is plugged into a power strip or an uninterruptible
power supply (UPS), make sure the power strip or UPS is turned on
and working.
■If your computer is connected to an external display, such as a
multimedia monitor, make sure the display is plugged into a power
source and turned on. The brightness and contrast controls may
need to be adjusted. See the manual that came with your display for
more information.
■If your computer is starting from a floppy disk, eject the disk from the
floppy disk drive (if applicable).
■If you notice condensation on your computer, do not use the
computer for at least one hour. Condensation may cause the
computer to malfunction.
¿Qué debo hacer si la computadora no se
inicia?
El indicador de encendido de la computadora está apagado cuando la
computadora no está conectada a una fuente de alimentación en forma
segura. Asegúrese de que la computadora esté conectada al adaptador
de CA y que el adaptador esté conectado a una toma de corriente. Si
está usando energía de la batería, asegúrese de que esté
correctamente instalada y cargada. Puede verificar la fuente de
alimentación al desconectar el adaptador de CA y retirar la batería.
Espere de tres a cinco minutos antes de volver a conectar el adaptador
de CA y reinstalar la batería.
Sugerencias adicionales:
■Si la computadora está conectada a una regleta o fuente de
alimentación ininterrumpida (UPS), asegúrese de que la regleta o
UPS esté encendida y funcionando.
■Si la computadora está conectada a una pantalla externa, como un
monitor multimedia, asegúrese de que la pantalla esté conectada a
una fuente de alimentación y que esté encendida. Es posible que
deba ajustar los controles de brillo y contraste. Consulte el manual
que viene con la pantalla para obtener más información.
■Si la computadora se está iniciando desde un disquete, retire el
disco de la unidad (si corresponde).
■Si observa condensación en la computadora, no la use durante una
hora por lo menos. La condensación puede causar una falla de
funcionamiento en la computadora.
To start SmartWi™ Connection Utility
(selected models with the wireless WAN function only)
Para iniciar SmartWi™ Connection Utility
(sólo en modelos seleccionados con la función de WAN inalámbrica)
1Click the SmartWi Connection Utility icon in the taskbar to launch
the SmartWi Connection Utility.
2To launch the WWAN Connection Manager, click the wireless carrier
button.
3Go through the activation wizard to activate your WWAN device.
The SmartWi Connection Utility Guide provides detailed information
on how to use the SmartWi Connection Utility.
1Click Start > Help and Support.
2Click Manuals & Specifications.
3Click SmartWi Connection Utility Guide.
1Haga clic en el icono SmartWi Connection Utility en la barra de
tareas para iniciar SmartWi Connection Utility.
2Para iniciar el WWAN Connection Manager, haga clic en el botón
del portador inalámbrico.
3Siga al asistente de activación para activar el dispositivo WWAN.
SmartWi Connection Utility Guide proporciona información detallada
acerca de cómo usar SmartWi Connection Utility.
1Haga clic en Inicio > Ayuda y soporte técnico.
2Haga clic en Manuales y especificaciones.
3Haga clic en SmartWi Connection Utility Guide.
Other manuals for VGN TXN27CN - VAIO - Core Solo 1.33 GHz

1

This manual suits for next models

1

Other Sony Laptop manuals

Sony PCG-R505TE Primary User manual

Sony

Sony PCG-R505TE Primary User manual

Sony VGN-FZ190E User manual

Sony

Sony VGN-FZ190E User manual

Sony VAIO PCG-F690 User manual

Sony

Sony VAIO PCG-F690 User manual

Sony VPCEA36FX/WI User manual

Sony

Sony VPCEA36FX/WI User manual

Sony VGN-S570P User manual

Sony

Sony VGN-S570P User manual

Sony VAIO VPCSE2EFX/B User manual

Sony

Sony VAIO VPCSE2EFX/B User manual

Sony PCG-K23 - VAIO - Mobile Pentium 4 2.8 GHz User manual

Sony

Sony PCG-K23 - VAIO - Mobile Pentium 4 2.8 GHz User manual

Sony VGN-TT190NJB - VAIO TT Series Original instructions

Sony

Sony VGN-TT190NJB - VAIO TT Series Original instructions

Sony PCG-VX89 VAIO User Guide  (primary manual) User manual

Sony

Sony PCG-VX89 VAIO User Guide (primary manual) User manual

Sony PCG-GR250 User manual

Sony

Sony PCG-GR250 User manual

Sony VPCS13DGX/B User manual

Sony

Sony VPCS13DGX/B User manual

Sony VGN-P688E/R User manual

Sony

Sony VGN-P688E/R User manual

Sony SVS13A390X User manual

Sony

Sony SVS13A390X User manual

Sony VAIO VGN-Z790DAB User manual

Sony

Sony VAIO VGN-Z790DAB User manual

Sony VAIO VPCEB17FX/W User manual

Sony

Sony VAIO VPCEB17FX/W User manual

Sony VAIO VPCCW21FX/W User manual

Sony

Sony VAIO VPCCW21FX/W User manual

Sony VGN Z720D - VAIO Z Series User manual

Sony

Sony VGN Z720D - VAIO Z Series User manual

Sony VAIO PCG-505FX User manual

Sony

Sony VAIO PCG-505FX User manual

Sony VAIO VPCEE25FX/BI User manual

Sony

Sony VAIO VPCEE25FX/BI User manual

Sony VGN-FW550F User manual

Sony

Sony VGN-FW550F User manual

Sony VGN-FJ180P - VAIO - Pentium M 1.86 GHz User manual

Sony

Sony VGN-FJ180P - VAIO - Pentium M 1.86 GHz User manual

Sony VPCZ118GX User manual

Sony

Sony VPCZ118GX User manual

Sony VAIO VGN-SZ370P/C User manual

Sony

Sony VAIO VGN-SZ370P/C User manual

Sony SVE11135CXB VAIO User manual

Sony

Sony SVE11135CXB VAIO User manual

Popular Laptop manuals by other brands

Clevo 5600P Service manual

Clevo

Clevo 5600P Service manual

Acer eMachines E630 Series Service guide

Acer

Acer eMachines E630 Series Service guide

Dell NOT22169 Setup and specifications

Dell

Dell NOT22169 Setup and specifications

Winbook XL2 user manual

Winbook

Winbook XL2 user manual

Toshiba Satellite L550-ST5708 Specifications

Toshiba

Toshiba Satellite L550-ST5708 Specifications

Lenovo IDEAPAD Z460 Hardware Maintenance Manual

Lenovo

Lenovo IDEAPAD Z460 Hardware Maintenance Manual

Lenovo IdeaPad S205 Quick setup guide

Lenovo

Lenovo IdeaPad S205 Quick setup guide

HP Pavilion x360 13-s000 Maintenance and service guide

HP

HP Pavilion x360 13-s000 Maintenance and service guide

Dell Inspiron P03T Setup guide

Dell

Dell Inspiron P03T Setup guide

Toshiba Satellite P750 Series user manual

Toshiba

Toshiba Satellite P750 Series user manual

Lenovo THINKPAD X100E Hardware Maintenance Manual

Lenovo

Lenovo THINKPAD X100E Hardware Maintenance Manual

Dell 5530 Mono Laser Setup and speci?cations guide

Dell

Dell 5530 Mono Laser Setup and speci?cations guide

Mymaga MOVE S201 user guide

Mymaga

Mymaga MOVE S201 user guide

Samsung Geneva NP-R700 Series Service manual

Samsung

Samsung Geneva NP-R700 Series Service manual

Acer ASPIRE Aspire 3680 user guide

Acer

Acer ASPIRE Aspire 3680 user guide

Dell Latitude 5330 2in1 Service manual

Dell

Dell Latitude 5330 2in1 Service manual

IBM ThinkPad X20 Hardware Maintenance Manual

IBM

IBM ThinkPad X20 Hardware Maintenance Manual

HP ProBook 635 Aero G7 Product End-of-Life Disassembly Instructions

HP

HP ProBook 635 Aero G7 Product End-of-Life Disassembly Instructions

manuals.online logo
manuals.online logoBrands
  • About & Mission
  • Contact us
  • Privacy Policy
  • Terms and Conditions

Copyright 2025 Manuals.Online. All Rights Reserved.