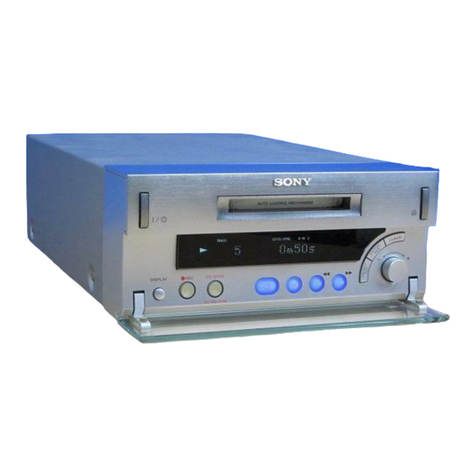
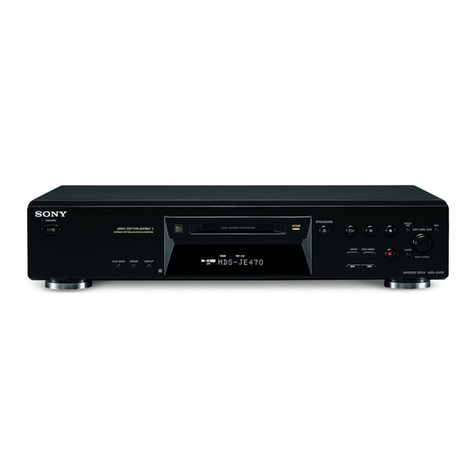
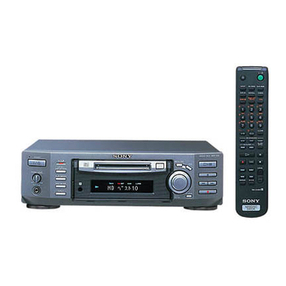
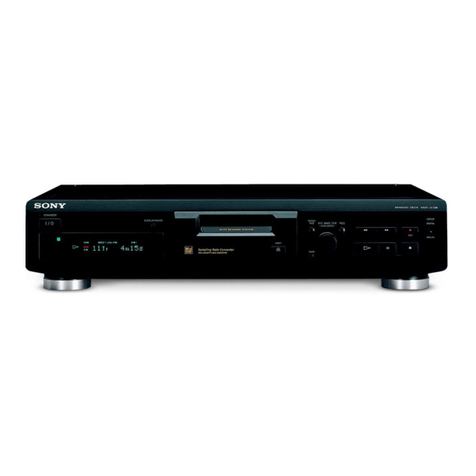
Sony MDS-JE480 User manual

masterpage:Right
ame[C:\Documents and Settings\pc13\Desktop\MDS-JE480 PMRF\Revise
d
el\J9060101_4238553151MDSJE480CEL\4238553151\GB01COV-CEL.fm]
model name1[MDS-JE770] model name 2 [MDS-JE480]
[4-238-553-15(1)]
©2002 Sony Corporation
4-238-553-15(1)
MiniDisc Deck
Operating Instructions
MDS-JE480
Owner’s Record
The model and serial numbers are located at the rear of the unit. Record the serial number in
the space provided below. Refer to them whenever you call upon your Sony dealer regarding
this product.
Model No.____________ Serial No.____________

masterpage:Left
(3 column)
lename[D:\Sony SEM_HA\PMRF_MDS-JE480\MDS-JE480
P
MRF\J9060101_4238553151MDSJE480CEL\4238553151\GB02REG-CEL.fm]
model name1[MDS-JE480]
[4-238-553-15(1)]
2GB
To reduce the risk of fire or electric
shock, do not expose this apparatus to
rain or moisture.
To prevent fire, do not cover the ventilation of the
apparatus with newspapers, table-cloths, curtains, etc.
And don’t place lighted candles on the apparatus.
To prevent fire or shock hazard, do not place objects
filled with liquids, such as vases, on the apparatus.
This appliance is classified
as a CLASS 1 LASER
product.
This marking is located on
the rear exterior.
The following caution label is located inside the
apparatus.
Don’t throw away the battery with
general house waste, dispose of it
correctly as chemical waste.
For customers in the U.S.A.
This symbol is intended to alert the user to
the presence of uninsulated “dangerous
voltage” within the product’s enclosure that
may be of sufficient magnitude to constitute
a risk of electric shock to persons.
This symbol is intended to alert the user to
the presence of important operating and
maintenance (servicing) instructions in the
literature accompanying the appliance.
CAUTION
You are cautioned that any changes or modifications
not expressly approved in this manual could void your
authority to operate this equipment.
WARNING
This equipment has been tested and found to comply
with the limits for a Class B digital device, pursuant to
Part 15 of the FCC Rules. These limits are designed to
provide reasonable protection against harmful
interference in a residential installation. This
equipment generates, uses, and can radiate radio
frequency energy and, if not installed and used in
accordance with the instructions, may cause harmful
interference to radio communications. However, there
is no guarantee that interference will not occur in a
particular installation. If this equipment does cause
harmful interference to radio or television reception,
which can be determined by turning the equipment off
and on, the user is encouraged to try to correct the
interference by one or more of the following
measures:
— Reorient or relocate the receiving antenna.
— Increase the separation between the equipment and
receiver.
— Connect the equipment into an outlet on a circuit
different from that to which the receiver is
connected.
— Consult the dealer or an experienced radio/TV
technician for help.
Notice for customers in the United Kingdom
A moulded plug complying with BS1363 is fitted to this
equipment for your safety and convenience.
Should the fuse in the plug supplied need to be replaced,
same rating fuse approved by ASTA or BSI to BS1362,
(i.e., marked with or mark) must be used.
If the plug supplied with this equipment has a detachable
fuse cover, be sure to attach the fuse cover after you change
the fuse. Never use the plug without the fuse cover. If you
should lose the fuse cover, please contact your nearest
Sony service station.
Controls in these instructions are those on the deck.
However, these may be substituted by controls on the
supplied remote that are similarly named, or, when
different, appear in the instructions within
parentheses.
WARNING
Do not install the appliance in a confined space, such
as bookcase or built in cabinet.
IN NO EVENT SHALL SELLER BE LIABLE
FOR ANY DIRECT, INCIDENTAL OR
CONSEQUENTIAL DAMAGES OF ANY
NATURE, OR LOSSES OR EXPENSES
RESULTING FROM ANY DEFECTIVE
PRODUCT OR THE USE OF ANY PRODUCT.
About this manual
GB02REG-CEL.fm Page 2 Thursday, March 16, 2006 2:16 PM
masterpage:Left
(3 column)
lename[C:\Documents and Settings\pc13\Desktop\MDS-JE480 PMRF\Revise
M
odel\J9060101_4238553151MDSJE480CEL\4238553151\GB02REG-CELTOC.fm]
model name1[MDS-JE480] [4-238-553-15(1)]
3GB
About this manual ................................... 2
Table of Contents....................................3
List of Button Locations and
Reference Pages
Main unit.................................................4
Remote control........................................5
Getting Started
Hooking up the audio components ......... 6
Recording to MDs
Recording to an MD................................8
Notes on recording..................................8
Recording tips
— Recording for long times/Marking
track numbers/Smart Space/Adjusting
the recording level/Checking the
remaining recordable time/Input
monitor..............................................9
Starting recording with 6 seconds of
prestored audio data
— Time Machine Recording ..........13
Synchro-recording with the audio
component of your choice
— Music Synchro-recording ..........13
Synchro-recording with a Sony CD player
— CD Synchro-recording...............13
Playing MDs
Loading an MD .....................................15
Playing an MD
— Normal Play/Shuffle Play/Repeat
Play .................................................15
Creating your own programme
— Programme Play ........................16
Editing Recorded MDs
Erasing recordings
— Erase Function........................... 18
Dividing recorded tracks
— Divide Function......................... 19
Combining recorded tracks
— Combine Function ..................... 20
Naming a track or an MD
— Name Function .......................... 21
Moving recorded tracks
— Move Function .......................... 21
Changing the recorded level after
recording
— S.F EDIT ................................... 23
Undoing the last edit
— UNDO ....................................... 24
Other Functions
Fading in and fading out....................... 25
Falling asleep to music
— Sleep Timer ............................... 25
Additional Information
Precautions............................................ 26
Note on MDs ........................................ 26
System limitations ................................ 26
Troubleshooting.................................... 28
Self-diagnosis function ......................... 28
Display messages.................................. 29
Setup menu table .................................. 30
Specifications........................................ 30
Table of Contents
List of Button Locations
and Reference Pages

masterpage:Left
(3 column)
lename[C:\Documents and Settings\pc13\Desktop\MDS-JE480 PMRF\Revise
M
odel\J9060101_4238553151MDSJE480CEL\4238553151\GB03PAR-CEL.fm]
model name1[MDS-JE480]]
[4-238-553-15(1)]
4GB
AMS
MDLP
lL
123 4 5 6 7 8 9
q; qa qs qf
qd qg qhqj qk ql
List of Button Locations and Reference Pages
How to use this page
Use this page to find the location and buttons and other
parts of the system that are mentioned in the text.
Main unit
AMS ql (10) (16) (18) (21) (23)
(25)
CLEAR qk (17) (22)
Display window qd
EJECT A4(8) (16) (17)
INPUT qf (8)
LEVEL/DISPLAY/CHAR qs (8)
(16) (21)
MD (insertion slot) 2
MDLP (indicator) 3(9) (16)
MENU/NO 8(9) (10) (11) (21)
PLAY MODE q; (15)
PUSH ENTER ql (10)
REC MODE qh (9) (16)
REC zqj (8)
REPEAT qa (15)
STANDBY (indicator) 1(8) (15)
YES 9(16)
?/1 (on/standby) 1(8) (15) (17)
H5(8) (15)
X6(8) (16)
x7(8) (16) (17)
m/M qg (16) (18)
ALPHABETICAL ORDER
A - M
P - Z BUTTON DESCRIPTIONS
0(15)
r
PLAY MODE
RR
Illustration number
Name of button/part Reference page

masterpage:Left
(3 column)
lename[C:\Documents and Settings\pc13\Desktop\MDS-JE480 PMRF\Revise
M
odel\J9060101_4238553151MDSJE480CEL\4238553151\GB03PAR-CEL.fm]
List of Button Locations and Reference Pages
model name1[MDS-JE480]
[4-238-553-15(1)]
5GB
AyB qs (15)
CD-SYNCHRO STANDBY 7(14)
CD-SYNCHRO START 7(14)
CD-SYNCHRO STOP 7(14)
CLEAR 6(17) (22)
DISPLAY ws (8) (12)
FADER 3(25)
GROUP ON/OFF 1) ql
GROUP SKIP 1) ql
INPUT wd (8)
Letter/number buttons 5(22)
LEVEL +/– qa (12)
MENU/NO w; (10) (17) (18)
MUSIC SYNC 8(13) (24)
NAME EDIT/SELECT wa (22)
PLAY MODE 2(15)
REC MODE wd (9) (16)
REPEAT qd (15)
SCROLL ws (16)
T.REC qj (13)
YES 4(10) (16) (18)
?/1 (on/standby) 1(8) (15) (17)
X9(8) (16)
x0(8) (16) (17)
m/M qf (16) (19)
./> qg (9) (12) (18)
zqh (8)
Hqk (8) (15)
Awf (8) (16) (17)
1) These features is not available for this model.
Remote control
A - L
M - Z
BUTTON DESCRIPTIONS
1
2
3
4
6
7
qs
qj
ql
5
8
qa
9
0
wa
ws
w;
wd
wf
qd
qf
qg
qh
qk
GROUP
ON/OFF SKIP
H
. >
m M
z x
X
A
` / 1

masterpage:Left
(3 column)
lename[C:\Documents and Settings\pc13\Desktop\MDS-JE480 PMRF\Revise
M
odel\J9060101_4238553151MDSJE480CEL\4238553151\GB04GET-CEL.fm]
model name1[MDS-JE480]
[4-238-553-15(1)]
6GB
Getting Started
Hooking up the audio components
AB
AC power cord
Amplifier, etc.
to a wall outlet
CD player, DBS
tuner
Required cords
AAudio connecting cords (2) (supplied)
When connecting an audio connecting cord, be sure to
match the color-coded pins to the appropriate jacks:
white (left) to white and red (right) to red.
BOptical cables (only one supplied)
•When connecting an optical cable, take the caps off
the connectors and insert the cable plugs straight in
until they click into place.
•Do not bend or tie the optical cables.
Hookup considerations
•Turn off the power of all components before
making any connections.
•Do not connect any AC power cord until all the
connections are completed.
•Be sure the connections are firm to prevent hum
and noise.
Jacks (connectors) for
connecting audio
components
White (L) White (L)
Red (R) Red (R)
Connect To the
Amplifiers ANALOG IN/OUT jacks
CD players or DBS
tuners
DIGITAL OPTICAL IN
connector

Getting Started
masterpage:Left
(3 column)
lename[C:\Documents and Settings\pc13\Desktop\MDS-JE480 PMRF\Revise
M
odel\J9060101_4238553151MDSJE480CEL\4238553151\GB04GET-CEL.fm]
model name1[MDS-JE480]]
[4-238-553-15(1)]
7GB
Other connections
To connect the AC power cord
Connect the AC power cord of the deck to a
wall outlet.
Notes
•If you use a timer, connect the AC power cord to the
outlet of the timer.
•Install this system so that the power cord can be
unplugged from the wall socket immediately in the
event of trouble.
Inserting batteries into the
remote
Insert two R6 (size-AA) batteries into the
battery compartment with the + and – properly
oriented to the markings. When using the
remote, point it at the remote sensor on the
deck.
Tip
When the remote no longer operates the deck, replace
both batteries with new ones.
Notes
•Do not leave the remote in an extremely hot or
humid place.
•Do not drop any foreign object into the remote
casing, particularly when replacing the batteries.
•Do not use a new battery with an old one.
•Do not expose the remote sensor to direct sunlight or
lighting apparatus. Doing so may cause a
malfunction.
•If you don’t use the remote for an extended period of
time, remove the batteries to avoid possible damage
from battery leakage and corrosion.

masterpage:Left
(3 column)
lename[C:\Documents and Settings\pc13\Desktop\MDS-JE480 PMRF\Revise
M
odel\J9060101_4238553151MDSJE480CEL\4238553151\GB05OPE-CEL.fm]
8GB
model name1[MDS-JE480]
[4-238-553-15(1)]
Recording to MDs
If the MD has been partially recorded,
recording starts after the recorded tracks.
1Turn on the amplifier and program
source, and select the source on the
amplifier.
2Press ?/1 to turn on the deck.
The STANDBY indicator turns off.
3Load a recordable MD into the slot
(page 15).
4Press INPUT repeatedly to select the
input jacks (connector) connected to
the program source.
5Press REC z.
The deck changes to recording pause.
6Adjust the recording level if necessary.
For details, see “Adjusting the recording
level” on page 12.
7Press Hor X.
Recording starts.
8Start playing the program source.
Operations you may want to do
during recording
1) The track number increases by one.
Recording to an MD
When the source is
connected to the
Set INPUT to
DIGITAL OPTICAL IN
connector
D-IN
ANALOG IN jacks A-IN
To Press
Stop recording x
Pause recording X
Resume recording after
pausing1)
Hor X
Eject the MD EJECT Aafter stopping
recording
To change the display while
recording
Press LEVEL/DISPLAY/CHAR (or DISPLAY)
repeatedly to change the display.
Each time you press the button, the display
changes cyclically as follows:
Track number and recorded time of the current
track tRemaining recordable time2) on the
MD tLevel of the input signal tTrack
name3)
2) Time shown in the display differs depending on
the setting of REC MODE.
3) “No Name” appears when the track has no name.
After recording
Press EJECT Ato remove the MD or press
?/1 to turn off the deck.
“TOC” or “TOC Writing” starts flashing. The
TOC is updated and recording is completed.
Before disconnecting the AC power
cord
MD recording is completed when the MD Table
of Contents (TOC) is updated. The TOC is
updated when you eject the MD or press ?/1 to
turn off the deck. Do not disconnect the AC
power cord before updating the TOC (while
“TOC” is lit) or while updating the TOC (while
“TOC Writing” is flashing) to ensure a
complete recording.
Automatic conversion of digital
sampling rates
A built-in sampling rate converter automatically
converts the sampling frequency of various
digital sources to the 44.1 kHz sampling rate of
the MD deck. This allows you to monitor and
record sources such as 32 or 48 kHz DAT tape
or satellite broadcasts, as well as the CDs and
MDs.
Notes on recording

Recording to MDs
lename[C:\Documents and Settings\pc13\Desktop\MDS-JE480 PMRF\Revise
M
odel\J9060101_4238553151MDSJE480CEL\4238553151\GB05OPE-CEL.fm]
model name1[MDS-JE480]
[4-238-553-15(1)]
masterpage:Left
(3 column)
9GB
To prevent accidental erasure of the
recorded material
To protect an MD recording, slide the record-
protect tab in the direction of the arrow (see
illustration below) to open the slot. To enable
re-recording, close the slot.
Recording for long times
This deck has two long time recording modes:
LP2 and LP4 (MDLP recording). When
recording in LP2 Stereo mode, you can record 2
times the normal recordable time, and in LP4
Stereo mode, you can record 4 times the normal
recordable time. In addition, the recordable
time for monaural recording is approximately
double the stereo recording time.
LP4 Stereo mode (4×long time recording
mode) achieves a long stereo recording time by
using a special compression system. When
placing emphasis on sound quality, Stereo
recording or LP2 Stereo recording (2×long
time recording mode) is recommended.
1Do steps 1 to 4 of “Recording to an MD”
on page 8.
2Press REC MODE repeatedly to select
the recording mode.
3Do steps 5 to 8 of “Recording to an MD”
on page 8.
Tips
•The MDLP indicator lights up when you select LP2
or LP4 in step 2 above.
•The deck is factory set to add “LP:” at the beginning
of a track name automatically. This indication is
displayed when the track is played on a deck that
does not support long-time recording.
To turn off this function, do the following procedure.
1While the deck is stopped, playing, or
paused, press MENU/NO.
2Turn AMS (or press ./> repeatedly)
until “Setup?” appears, then press PUSH
ENTER or YES.
3Turn AMS (or press ./> repeatedly)
until “LPstamp On” (factory setting)
appears, then press PUSH ENTER or
YES.
4Turn AMS (or press ./> repeatedly)
to select “LPstamp Off”, and then press
PUSH ENTER or YES.
5Press MENU/NO.
To add “LP:” automatically again, select “LPstamp
On” in step 4 above.
Notes
•The recorded “LP:” is a stamp which appears to
indicate that the track cannot be played back when
you try to play the track on a system that does not
support MDLP mode. It does not appear for systems
that support MDLP mode.
•When set to “On”, “LP:” is recorded as the track
name, so the number of characters that can be input
to an MD is reduced. If you divide an “LP:” track
using the Divide function, “LP:” is also added to the
latter track.
•The selected recording mode is kept even after
recording is completed, so be sure to check the
recording mode before recording.
•Tracks recorded in MDLP (LP2 or LP4) Stereo
mode cannot be played back on a system that does
not support MDLP mode.
•Even if you press REC MODE during recording,
you cannot change the recording mode.
•Even if you press REC MODE repeatedly to select
MONO, the monitor signal during recording does
not become monaural.
•You cannot use S.F Edit and some MD edit
functions for tracks recorded in MDLP mode.
Recording tips
— Recording for long times/Marking
track numbers/Smart Space/Adjusting
the recording level/Checking the
remaining recordable time/Input
monitor
To record in Set REC MODE to
Stereo Blank (No indicator)
LP2 Stereo LP2
LP4 Stereo LP4
Monaural MONO
Record-protect tab
Slide in the direction
of arrow
continued

masterpage:Left
(3 column)
lename[C:\Documents and Settings\pc13\Desktop\MDS-JE480 PMRF\Revise
M
odel\J9060101_4238553151MDSJE480CEL\4238553151\GB05OPE-CEL.fm]
model name1[MDS-JE480]
[4-238-553-15(1)]
10GB
Recording tips (continued)
Marking track numbers while
recording
— Manual/Automatic Track Marking
You can mark track numbers either manually or
automatically while recording. By marking
track numbers at specific points, you can easily
locate the points later or edit the MD.
Marking track numbers manually
(Manual Track Marking)
While recording, press REC zat the point
where you want to add a track number.
Marking track numbers automatically
(Automatic Track Marking)
When recording from a CD player or MD deck
connected to a DIGITAL IN connector, the deck
marks track numbers in the same sequence as
the source. When recording from other sources
connected to the DIGITAL IN connector or a
source connected to the ANALOG IN jacks, do
the procedure below to mark track numbers
automatically. However, you cannot mark track
numbers automatically if the sound of the
source to be recorded is noisy (e.g., tapes or
radio programs).
1While the deck is stopped, press MENU/
NO.
2Turn AMS (or press ./>
repeatedly) until “Setup?” appears,
then press PUSH ENTER or YES.
3Turn AMS (or press ./>
repeatedly) until “T.Mark LSyn”
appears, then press PUSH ENTER or
YES.
4Turn AMS (or press ./>
repeatedly) to select the setting, then
press PUSH ENTER or YES.
5Press MENU/NO.
When you set Automatic Track Marking to
on, “L.SYNC” lights up.
The deck marks a track number whenever
the input signal level drops to –50 dB1) (the
trigger level for Automatic Track Marking)
or below for at least 1.5 seconds.
1) Factory setting.
To change the trigger level for
Automatic Track Marking
Do the procedure below to change the signal
level that triggers Automatic Track Marking.
1While the deck is stopped, press MENU/
NO.
2Turn AMS (or press ./>
repeatedly) until “Setup?” appears,
then press PUSH ENTER or YES.
3Turn AMS (or press ./>
repeatedly) until “LS(T)” appears, then
press PUSH ENTER or YES.
4Turn AMS (or press ./>
repeatedly) to select the level, then
press PUSH ENTER or YES.
You can set the level at any value between
–72 dB and 0 dB, in 2 dB increments
(–50 dB is the factory setting).
5Press MENU/NO.
Tips for automatic track marking
•When recording from a CD player or an MD deck
connected to the DIGITAL IN connector, the entire
material might be recorded as a single track in the
following cases:
— When you consecutively record the same track
two or more times using single-track repeat play.
— When you consecutively record two or more
tracks with the same track number but from
different CDs or MDs.
— When you record tracks from certain CD or
multi-disc players.
To Select
Turn on Automatic
Track Marking
T.Mark LSyn (factory
setting)
Turn off Automatic
Track Marking
T.Mark Off

Recording to MDs
lename[C:\Documents and Settings\pc13\Desktop\MDS-JE480 PMRF\Revise
M
odel\J9060101_4238553151MDSJE480CEL\4238553151\GB05OPE-CEL.fm]
model name1[MDS-JE480]
[4-238-553-15(1)]
masterpage:Left
(3 column)
11GB
•A track number might not be marked for tracks less
than 4 seconds long (in Stereo mode, Monaural
mode, and LP2 Stereo mode) or 8 seconds long (in
LP4 Stereo mode) during recording.
•When recording from a component connected to the
ANALOG IN jacks with “T.Mark Off” selected or
when recording from a DAT deck or DBS tuner
connected to the DIGITAL IN connector, the entire
material may be recorded as a single track.
•When recording from a DAT deck or DBS tuner
connected to the DIGITAL IN connector, the deck
will mark a track number whenever the sampling
frequency of the input signal changes, regardless of
the track marking parameter setting (“T.Mark LSyn”
or “T.Mark Off”).
Tip
You can mark track numbers even after recording has
finished. See “Dividing recorded tracks” on page 19.
Erasing blank portions
automatically (Smart Space/
Auto Cut)
The Smart Space function lets you make the
blank spaces between tracks 3 seconds long
automatically. If the Smart Space function is on
and there is no sound input for about 3 seconds
or more (but less than 30 seconds) while
recording, the deck replaces this silence with a
blank space of about 3 seconds and continues
recording.
Auto Cut:When the Smart Space function is
on, if there is no sound input for 30 seconds or
more, the deck replaces this silence with a blank
space of about 3 seconds and enters recording
pause.
1While the deck is stopped, press MENU/
NO.
2Turn AMS (or press ./>
repeatedly) until “Setup?” appears,
then press PUSH ENTER or YES.
3Turn AMS (or press ./>
repeatedly) until “S.Space On” appears,
then press PUSH ENTER or YES.
4Turn AMS (or press ./>
repeatedly) to select the setting, then
press PUSH ENTER or YES.
5Press MENU/NO.
Notes
•Smart Space does not affect the order of the track
numbers being recorded, even if the blank space
occurs in the middle of a track.
•Auto Cut is automatically turned on or off in tandem
with Smart Space.
•If the deck continues recording pause for about
10 minutes after the Auto Cut is activated, recording
stops automatically.
No sound input for less than 30 seconds
Replaced with a blank space of 3 seconds
and recording continues
Off
On
To Select
Turn on Smart Space
and Auto Cut
S.Space On (factory
setting)
Turn off Smart Space
and Auto Cut
S.Space Off
continued
No sound input for 30 seconds or more
Replaced with a blank space of 3
seconds and recording pauses
Off
On

masterpage:Left
(3 column)
lename[C:\Documents and Settings\pc13\Desktop\MDS-JE480 PMRF\Revise
M
odel\J9060101_4238553151MDSJE480CEL\4238553151\GB05OPE-CEL.fm]
model name1[MDS-JE480]
[4-238-553-15(1)]
12GB
Recording tips (continued)
Adjusting the recording level
You can adjust the recording level for both
analog and digital recordings.
1Do steps 1 to 5 of “Recording to an MD”
on page 8.
2Play the portion of the program source
with the strongest output.
3Press LEVEL/DISPLAY/CHAR (or
DISPLAY) repeatedly until the level of
the input signal appears.
4While monitoring the sound, turn AMS
(or press LEVEL +/– repeatedly) to raise
the recording level to its highest level
without turning on the “OVER”
indicators on the peak level meters.
5Stop playing the program source.
6To start recording, continue from step 7
of “Recording to an MD” on page 8.
Tips
•You can adjust the recording level by pressing
LEVEL +/– on the remote repeatedly during
recording or recording pause.
•Peak hold function freezes the peak level meters at
the highest level reached by the input signal.
1While the deck is stopped, press MENU/
NO.
2Turn AMS (or press ./> repeatedly)
until “Setup?” appears, then press PUSH
ENTER or YES.
3Turn AMS (or press ./> repeatedly)
until “P.Hold Off” (factory setting) appears,
then press PUSH ENTER or YES.
4Turn AMS (or press ./> repeatedly)
to select “P.Hold On”, then press PUSH
ENTER or YES.
5Press MENU/NO.
To turn off the Peak Hold Function, select “P.Hold
Off” in step 4 above.
Note
The recording level can only be increased up to
+12.0 dB (for analog recording) or +18.0 dB (for
digital recording) (0.0 dB is the factory setting).
Therefore, if the output level of the connected
component is low, it may not be possible to set the
recording level to maximum.
Checking the remaining
recordable time on the MD
Press DISPLAY on the remote repeatedly.
For the information in stop mode, see page 16.
For the information during recording, see
page 8.
Monitoring the input signal
(Input Monitor)
You can monitor the selected input signal even
when you are not recording it.
1Press EJECT Ato eject the MD.
2Press INPUT repeatedly to select the
jacks (connector) where the signal you
want to monitor is being input.
3Press REC z.
When an analog input is selected
The analog signal input from the ANALOG
IN jacks is output to the ANALOG OUT
jacks after D/A conversion. “AD – DA”
appears in the display during this time.
When a digital input is selected
The digital signal input from the DIGITAL
IN connector is output to the ANALOG
OUT jacks after D/A conversion. “–DA”
appears in the display during this time.
To stop Input Monitor
Press x.
Avoid turning on these indicators

Recording to MDs
lename[C:\Documents and Settings\pc13\Desktop\MDS-JE480 PMRF\Revise
M
odel\J9060101_4238553151MDSJE480CEL\4238553151\GB05OPE-CEL.fm]
model name1[MDS-JE480]
[4-238-553-15(1)]
masterpage:Left
(3 column)
13GB
When recording from an FM or satellite
broadcast, the first few seconds of material are
often lost due to the time it takes you to
ascertain the contents and press the record
button. To prevent the loss of this material, the
Time Machine Recording feature constantly
stores the most recent audio data in a buffer
memory. This lets you record the sound 6
seconds before starting recording, as shown in
the illustration below:
1Do steps 1 to 5 of “Recording to an
MD”.
The deck changes to recording pause.
2Start playing the program source.
3Press PUSH ENTER (or T.REC) at the
point where you want to start recording.
Recording starts with the six seconds of
prestored data in the buffer memory, then
continues recording via the buffer memory
thereafter.
The Music Synchro-recording allows you to
automatically synchronize recording to the MD
deck with the playing of the selected program
source. The Track Marking Function, however,
will differ according to the program source. For
details, see “Marking track numbers while
recording” on page 10.
1Do steps 1 to 4 of “Recording to an
MD”.
2Press MUSIC SYNC on the remote.
The deck changes to recording pause.
3Start playing the program source.
Recording starts automatically.
Note
During Music Synchro-recording, Smart Space and
Auto Cut will operate regardless of their setting
(“S.Space On” or “S.Space Off”).
When the MD deck is connected to a Sony CD
player or Hi-Fi component system, you can
easily copy the contents of the CDs to the MD
using the MD’s remote. The MD remote
operates both the MD deck and the CD player
or CD player section of the components system.
Therefore, place the MD deck and the CD
player as close together as possible.
1Turn on the amplifier and the CD player,
and select CD on the amplifier.
2Do steps 2 to 4 of “Recording to an
MD”.
3Insert a CD into the CD player and
select the playing mode (Shuffle Play,
Program Play, etc.) on the CD player.
Starting recording with
6 seconds of prestored
audio data
— Time Machine Recording
When you press AMS
in step 3
End of the source
to be recorded
Time
6 seconds
Recorded
portion
Beginning of the source to
be recorded
Synchro-recording with
the audio component of
your choice
— Music Synchro-recording
Synchro-recording with a
Sony CD player
— CD Synchro-recording
continued

masterpage:Left
(3 column)
lename[C:\Documents and Settings\pc13\Desktop\MDS-JE480 PMRF\Revise
M
odel\J9060101_4238553151MDSJE480CEL\4238553151\GB05OPE-CEL.fm]
model name1[MDS-JE480]
[4-238-553-15(1)]
14GB
Synchro-recording with a Sony CD
player (continued)
4Press CD-SYNCHRO STANDBY on the
remote.
The CD player changes to play standby and
the MD deck changes to recording standby.
5Press CD-SYNCHRO START on the
remote.
The deck starts recording and the CD player
starts to play.
The track number and elapsed recording
time of the track appear in the display.
If the CD player does not start
playing
Some CD players may not respond when you
press CD-SYNCHRO START on the remote.
Press Xon the CD player’s remote instead to
start play on the CD player.
Operations you may want to do
during CD Synchro-recording
Tips
•You can use the remote of the CD player during CD
Synchro-recording
•During CD Synchro-recording, track numbers are
marked in the following ways:
— When the CD player is connected to the
DIGITAL IN connector, track numbers are
automatically marked as they appear on the CD.
— When the CD player is connected to the
ANALOG IN jacks, track numbers are
automatically marked when “T.Mark LSyn” has
been selected (page 10).
— When you resume recording after recording
pause, a new track number is automatically
marked, regardless of the track marking
parameter setting (“T.Mark LSyn” or “T.Mark
Off”).
•By reprograming the MD’s remote, you can use the
procedure above to perform synchro-recording with
a Sony video CD player.
Press 2 while holding down ?/1 on the remote.
Now you can operate both the MD deck and the
video CD player. To select the remote original
function, press 1 while holding down ?/1 on the
remote.
Notes
•When performing CD Synchro-recording with a CD
player with a mode selector, be sure to set the
selector to CD1.
•When you record tracks from certain CD or multi-
disc players, the entire material may be recorded as a
single track.
To Pre ss
Stop recording CD-SYNCHRO STOP on
the remote
Pause recording CD-SYNCHRO STANDBY
on the remote
Resume recording after
pausing
CD-SYNCHRO START on
the remote
Check the remaining
recordable time on the
MD
DISPLAY on the remote
(page 12)
Press To change the
deck to
And change the
CD player to
HRecording Play
xRecording pause Stop
XRecording pause Pause

masterpage:Left
(3 column)
lename[C:\Documents and Settings\pc13\Desktop\MDS-JE480 PMRF\Revise
M
odel\J9060101_4238553151MDSJE480CEL\4238553151\GB05OPE-CEL.fm]
model name1[MDS-JE480]
[4-238-553-15(1)]
Playing MDs
15GB
Playing MDs
Load an MD as illustrated below.
1Turn on the amplifier and select MD on
the amplifier.
2Press ?/1 to turn on the deck.
The STANDBY indicator turns off.
3Load an MD.
4Press PLAY MODE repeatedly until the
mode you want appears in the display.
5Press H.
The deck starts to play.
6Adjust the volume on the amplifier.
Loading an MD
Playing an MD
— Normal Play/Shuffle Play/Repeat
Play
To play Select
The MD in the original
order
Blank (no PLAY
MODE indication)
The tracks in random order SHUF
The tracks in the order you
want (“Creating your own
programme” on page 16)
PGM
With the label side up
With the arrow pointing
towards the deck
Repeat Play Operations
To Do this
Repeat only
one track
Press REPEAT repeatedly until
“REP1” lights up in the display.
Repeat all
tracks
Press REPEAT repeatedly until
“REP” lights up in the display.
Cancel Repeat
Play
Press REPEAT repeatedly until
“REP1” or “REP” disappears.
Repeat a
specific
portion within
a track (Repeat
A-B Play)
1While the deck is playing, press
AyBon the remote at the
starting point (point A) of the
portion to be played repeatedly.
“REP A-” lights up and “B”
flashes in the display.
2Continue playing the track or
press Mto locate the ending
point (point B), then press
AyB on the remote.
“REP A-B” lights up and Repeat
A-B Play starts.
Cancel Repeat
A-B Play
Press REPEAT or CLEAR.
continued

masterpage:Left
(3 column)
lename[C:\Documents and Settings\pc13\Desktop\MDS-JE480 PMRF\Revise
M
odel\J9060101_4238553151MDSJE480CEL\4238553151\GB05OPE-CEL.fm]
model name1[MDS-JE480]
[4-238-553-15(1)]
16GB
Playing an MD (continued)
Other Operations
1) Automatic Music Sensor
2) When you locate a point while monitoring the
sound.
3) When you locate by observing the time
indication.
Tips
•The MDLP indicator lights up when you select a
track recorded in LP2 or LP4 Stereo mode.
•When “– Over –” appears in the display, the MD has
reached the end while you’re pressing M. Turn
AMS counterclockwise (or press .) or press m
to go back.
Playing a track by entering the track
number
Press the number button(s) on the remote
to enter the track number of the track you
want to play.
To enter a track number over 10
1Press >10.
“-” equal to the number of digits for the number
of tracks recorded on the MD flashes.
2Enter the corresponding digits.
To enter 0, press 10/0 instead.
Examples:
•To select track number 30 on an MD recorded
with 50 tracks, press >10, then 3 and 10/0.
•To select track number 30 on an MD recorded
with 200 tracks, press >10, then 10/0, 3 and 10/0.
Using the MD display
Press LEVEL/DISPLAY/CHAR (or DISPLAY)
repeatedly.
The display changes cyclically as follows:
During playing
Track number and elapsed time of the current
track t Track number and remaining time of
the current track t Remaining time of all
recorded tracks t Track name1)
Tip
To check the track name during playing (only when
the track name is recorded), press SCROLL on the
remote.
The track name appears and scrolls. While the track
name is scrolling, press the button again to pause
scrolling, and again to continue scrolling.
In stop mode
Total number of tracks and total recorded time
tRemaining recordable time2) on the MD
(recordable MDs only) tDisc name1)
1) “No Name” appears when the disc or track has no
name.
2) Time shown in the display differs depending on
the setting of REC MODE.
You can pick out the tracks that you like and
specify the playing order in a programme
containing up to 25 tracks.
1While the deck is stopped, press PLAY
MODE repeatedly until “PGM” lights up
in the display.
2Turn AMS (or press ./>
repeatedly) until the track number you
want to add to the programme appears
(or use the number button(s) on the
remote to enter the track directly), then
press YES or PUSH ENTER.
“Step X (X: number of the entered tracks)”
appears, followed by total playing time of
the programme.
To Do this
Stop play Press x.
Pause play Press X.
Resume play
after pausing
Press Hor X.
Go to the next or
a succeeding
track during play
Turn AMS1) clockwise (or press
>repeatedly).
Go to a
preceding track
during play
Turn AMS counterclockwise (or
press .repeatedly).
Go to the
beginning of the
current track
during play
Turn AMS counterclockwise (or
press .once).
Go to a specific
track while the
deck is stopped
Turn AMS (or press ./>
repeatedly) until the track number
you want to go to flashes in the
display, then press PUSH ENTER
or H.
Find a point in a
track
Press down m/M during play2)
or play pause3). Release it when
you reach the desired point.
Eject the MD Press EJECT Aafter stopping
play.
Creating your own
programme
— Programme Play

Editing Recorded MDs
masterpage:Left
(3 column)
lename[C:\Documents and Settings\pc13\Desktop\MDS-JE480 PMRF\Revise
M
odel\J9060101_4238553151MDSJE480CEL\4238553151\GB05OPE-CEL.fm]
model name1[MDS-JE480]
[4-238-553-15(1)]
17GB
To clear the last entered track
Press CLEAR to erase the track number.
To enter a track number over 10
Use >10. See this page for details.
3Repeat step 2 to enter other tracks.
4Press N.
Programme Play starts.
To stop Programme Play
Press x.
To check the total of programme
tracks
While the deck is stopped and the “PGM” lights
up, press LEVEL/DISPLAY/CHAR repeatedly.
To check the contents of the
programme during Programme Play
Turn AMS (press ./> repeatedly).
To add a track to the end of the
programme
Do steps 2 above while the deck is stopped.
To erase all tracks in the programme
Press CLEAR repeatedly until all the track
numbers disappear.
To resume normal play
Press PLAY MODE repeatedly until “PGM”
turns off.
The programme remains even after
Programme Play ends or is stopped
Press Nto play the programme again.
Notes
•If you eject the MD, the programme will be lost.
•The display shows “- - - m - - s” when the total
playing time of the programme exceeds 1,000
minutes.
•“Step Full!” appears when you try to programme the
26th track.
Editing Recorded MDs
Before editing
You can edit an MD only when:
•The MD is recordable.
•The MD play mode is normal play.
To cancel the last edit
Use Undo Function to cancel the last edit and
restore the contents of the MD to the condition
before the edit.
To quit while editing
Press MENU/NO or x.
When “Tr Protected” appears
in the display
You cannot perform editing operations on
protected tracks (tracks checked out from a
USB connected computer using the Net MD
function, etc.) other than “Moving recorded
tracks” (page 21) and “Naming a track or an
MD” (page 21) using the deck.
After editing
Press EJECT Ato remove the MD or press
?/1 to turn off the deck.
“TOC” or “TOC Writing” starts flashing. The
TOC is updated and recording is completed.
Before disconnecting the AC power
cord
MD editing is completed when the MD Table of
Contents (TOC) is updated. The TOC is
updated when you eject the MD or press ?/1 to
turn off the deck. Do not disconnect the AC
power cord before updating the TOC (while
“TOC” is lit) or while updating the TOC (while
“TOC Writing” is flashing) to ensure a
complete editing.

masterpage:Left
(3 column)
lename[C:\Documents and Settings\pc13\Desktop\MDS-JE480 PMRF\Revise
M
odel\J9060101_4238553151MDSJE480CEL\4238553151\GB05OPE-CEL.fm]
model name1[MDS-JE480]
[4-238-553-15(1)]
18GB
The MD deck lets you erase unwanted tracks
quickly and easily.
The three options for erasing recordings are:
•Erasing a single track (Track Erase Function)
•Erasing all tracks (All Erase Function)
•Erasing a portion of a track (A-B Erase
Function)
Erasing a single track
— Track Erase Function
You can erase a track simply by selecting its
track number. When you erase a track, the total
number of tracks on the MD decreases by one
and all the tracks following the erased one are
renumbered.
Example: Erasing track 2.
1While the deck is stopped, playing, or
paused, press MENU/NO.
“Edit Menu” appears in the display.
2Turn AMS (or press ./>
repeatedly) until “Tr Erase?” appears,
then press PUSH ENTER or YES.
The deck starts to play the track indicated by
the number in the display.
3Turn AMS (or press ./>
repeatedly) until the track number you
want to erase appears.
4Press PUSH ENTER or YES.
“Complete!” appears. The track following
the erased track starts to play. If the erased
track is the last one on the MD, the track
preceding the erased track starts to play.
Erasing all the tracks
— All Erase Function
Do the procedure below to erase all the tracks,
track names, and disc name at once.
1While the deck is stopped, playing, or
paused, press MENU/NO.
“Edit Menu” appears in the display.
2Turn AMS (or press ./>
repeatedly) until “All Erase?” appears,
then press PUSH ENTER or YES.
“All Erase??” appears in the display.
3Press PUSH ENTER or YES.
“Complete!” appears.
Erasing a portion of a track
— A-B Erase Function
You can specify a portion within a track and
erase the portion with ease. You can shift the
desired portion by frame1), minute or second
intervals.
1) 1 frame is 1/86 second.
Example: Erasing a portion of track 2.
1While the deck is stopped, playing, or
paused, press MENU/NO.
“Edit Menu” appears in the display.
2Turn AMS (or press ./>
repeatedly) until “A-B Erase?” appears,
then press PUSH ENTER or YES.
Play starts.
3Turn AMS (or press ./>
repeatedly) until the number of the track
containing the portion to be erased
appears.
Erasing recordings
— Erase Function
1
12 3
23 4
A
AC D
BC D
Tr a c k
number
Erase track 2
After
ERASE
Original
tracks
12
12 3
3
T
rack
n
umber
Original
tracks
After A-B
ERASE
Point A Point B

Editing Recorded MDs
lename[C:\Documents and Settings\pc13\Desktop\MDS-JE480 PMRF\Revise
M
odel\J9060101_4238553151MDSJE480CEL\4238553151\GB05OPE-CEL.fm]
model name1[MDS-JE480]
[4-238-553-15(1)]
masterpage:Left
(3 column)
19GB
4While monitoring the sound, press
PUSH ENTER or YES at the starting
point of the portion to be erased (point
A).
“-Rehearsal-” and “Point A ok?” alternate in
the display and the deck repeatedly plays a
few seconds of the track before the point A.
5Press PUSH ENTER or YES again if
point A is correct.
“Point B set” appears in the display and
playback for setting the ending point of the
portion to be erased (point B) starts.
If point A is not correct, adjust point A by
turning AMS (or by pressing ./>
repeatedly) while monitoring the sound , and
then press PUSH ENTER or YES when you
locate the desired starting point. You can
shift the point by 1-frame2) intervals
(1 frame = 1/86 second).
6Continue playing the track or press M
to locate the ending point of the portion
to be erased (point B), then press PUSH
ENTER or YES.
“A-B Ers” and “Point B ok?” alternate in the
display and a few seconds of the track before
point A and after point B play back
repeatedly.
7Press PUSH ENTER or YES again if
point B is correct.
“Complete!” appears in the display for a few
seconds and then the portion between point
A and point B is erased.
If point B is not correct, adjust point B by
turning AMS (or by pressing ./>
repeatedly) while monitoring the sound, and
then press PUSH ENTER or YES when you
locate the desired ending point. You can
shift the point by 1-frame2) intervals
(1 frame = 1/86 second).
2) You can shift the point by 2-frame intervals on
the track recorded in Monaural mode or LP2
Stereo mode, and by 4-frame intervals on the
track recorded in LP4 Stereo mode.
Tip
In step 5 and 7, if you want to shift point A or point B
by a certain number of seconds or minutes, press
m/M repeatedly. You can change the unit by
which the counter advances when you turn AMS (or
press ./> repeatedly).
Note
If “Impossible” appears in the display, you cannot
erase a portion of a track. This happens when you have
edited the same track many times.
This is due to a technical limitation of the MD system
and is not a mechanical error.
You can use this function to mark track
numbers after recording. The total number of
tracks increases by one and all the tracks
following the divided ones are renumbered.
Example: Dividing track 2 into two tracks.
Dividing a track after
selecting the track
1While the deck is stopped, playing, or
paused, press MENU/NO.
“Edit Menu” appears in the display.
2Turn AMS (or press ./>
repeatedly) until “Divide?” appears,
then press PUSH ENTER or YES.
Play starts.
3Turn AMS (or press ./>
repeatedly) until the number of the track
you want to divide appears
4While monitoring the sound, press
PUSH ENTER or YES at the dividing
point.
“-Rehearsal-” appears in the display and the
deck repeatedly plays a few seconds of the
track before the dividing point.
Dividing recorded tracks
— Divide Function
continued
12 3
123 4
AB C D
AB C D
Tr a c k
number
Original
tracks
After
DIVIDE
Divide track 2 into
track B and C

masterpage:Left
(3 column)
lename[C:\Documents and Settings\pc13\Desktop\MDS-JE480 PMRF\Revise
M
odel\J9060101_4238553151MDSJE480CEL\4238553151\GB05OPE-CEL.fm]
model name1[MDS-JE480]
[4-238-553-15(1)]
20GB
Dividing recorded tracks (continued)
5Press PUSH ENTER or YES again if the
dividing point is correct.
“Complete!” appears and the deck starts to
play the newly created track. Note that new
track has no name. If the dividing point is
not correct, adjust the point by turning AMS
(or press ./>repeatedly) while
monitoring the sound, and then press PUSH
ENTER or YES when you locate the desired
dividing point. You can shift the point by 1-
frame1) intervals (1 frame = 1/86 second).
1) You can shift the point by 2-frame intervals
on the track recorded in Monaural mode or
LP2 Stereo mode, and by 4-frame intervals
on the track recorded in LP4 Stereo mode.
Tip
In step 5, if you want to shift the dividing point by a
certain number of seconds or minutes, press m/M
repeatedly. You can change the unit by which the
counter advances when you turn AMS (or press
./> repeatedly).
You can use this function to combine 2 tracks
into a single track. The total number of tracks
decreases by one and all tracks following the
combined ones are renumbered.
You can also use this function to erase
unnecessary track numbers.
Example: Combining track 3 to track 1.
Example: Combining track 1 to track 4.
1While the deck is stopped, playing, or
paused, press MENU/NO.
“Edit Menu” appears in the display.
2Turn AMS (or press ./>
repeatedly) until “Combine?” appears,
then press PUSH ENTER or YES.
3Turn AMS (or press ./>
repeatedly) until the number of the first
track of the two tracks to be combined
appears, then press PUSH ENTER or
YES.
The display for selecting a second track
appears and the deck plays the portion
where joining will occur (the end of the first
track and the beginning of the second track
following it) repeatedly.
4Turn AMS (or press ./>
repeatedly) until the number of the
second track of the two tracks to be
combined appears, then press PUSH
ENTER or YES.
“Complete!” appears and the deck starts to
play the combined track.
Notes
•Tracks recorded in different modes (stereo, MONO,
LP2 or LP4) cannot be combined.
•If both of the combined tracks have a track name,
the name of the second track is erased.
•If “Impossible” appears in the display, the tracks
cannot be combined because repeated editing has
been done to the track(s). This is a technical
limitation of the MD system and is not a mechanical
error.
Combining recorded
tracks
— Combine Function
12
12
43
3
A
ACBD
BC D
Tr a c k
number
Original
tracks
After
COMBINE
12
12
43
34
5
A
BC D A
BC D
Original
tracks
After
COMBINE
Other manuals for MDS-JE480
3
Table of contents
Other Sony Mini Disc Player manuals

Sony
Sony MZ-N10 User manual

Sony
Sony MZ-N10 User manual

Sony
Sony MDX-65 User manual

Sony
Sony MDS-JB940 User manual

Sony
Sony PMC-MD55 - Md Boombox User manual

Sony
Sony MD Walkman MZ-EP11 User manual

Sony
Sony Walkman MZ-G750PC User manual

Sony
Sony MINIDISC ZS-M35 User manual

Sony
Sony MD Walkman MZ-E35 User manual

Sony
Sony MDS-PC1 User manual

Sony
Sony Walkman MZ-E710 User manual

Sony
Sony Walkman MZ-E909 User manual

Sony
Sony MDX-C8900R User manual

Sony
Sony MDS-JS333ES User manual

Sony
Sony Walkman MZ-E707 User manual

Sony
Sony MZ-E501 User manual

Sony
Sony MDS-JB920 User manual

Sony
Sony MDS-PC2 User manual

Sony
Sony MDS-JE700 - Mini Disc Player User manual

Sony
Sony MDS-SD1 User manual