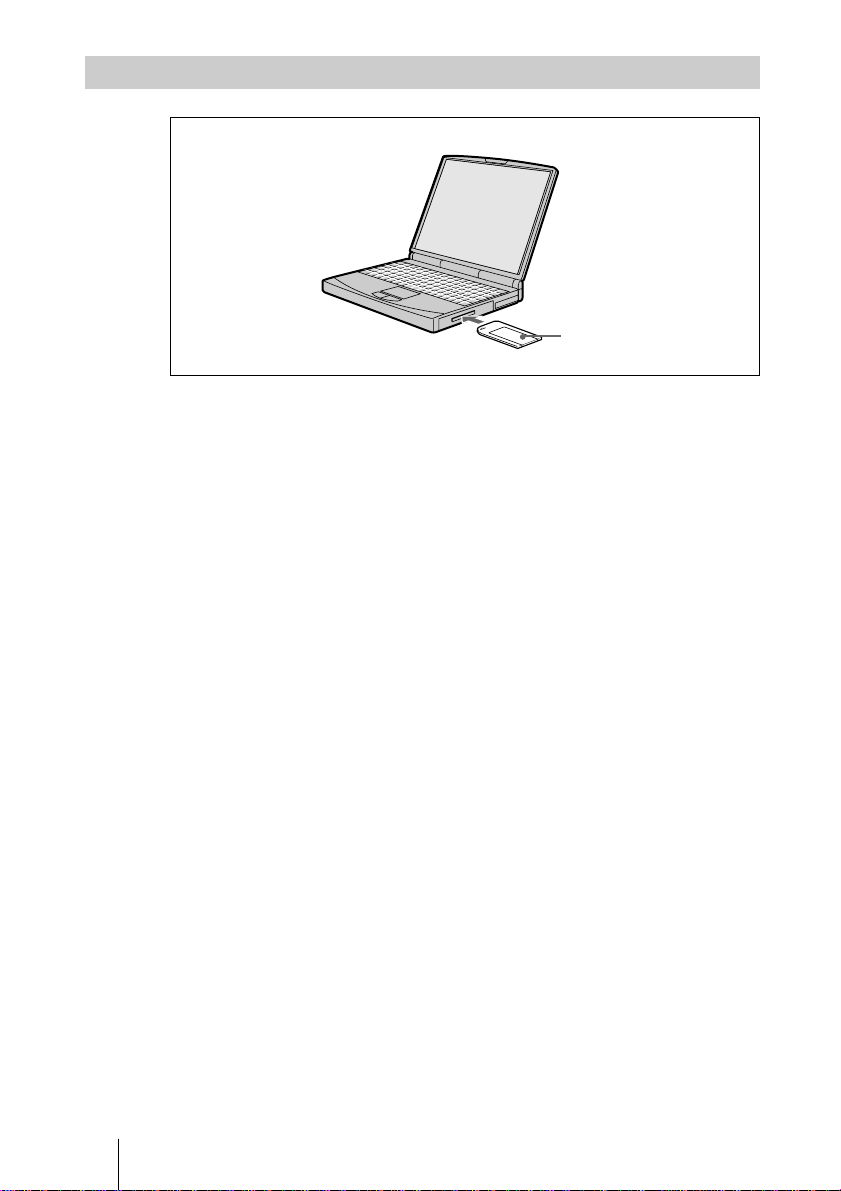
Sony VPL-CX3 - XGA LCD Projector User manual

4-083-790-11(1)
2001 Sony Corporation
Operating Instructions for Memory Stick
Mode d’emploi du Memory Stick
Manual de instrucciones de Memory Stick
VPL-CX3
LCD Data Projector
GB
FR
ES

GB 2

3GB
GB
Table of Contents
Overview
Features...............................................4
Precautions .........................................4
About This Manual.............................4
Using a Memory Stick.................. 5
Setting Up
Communicating Data by Using the
Memory Stick........................... 7
When Using the Projector’s
Memory Stick Slot..........7
When Using the Computer’s
Memory Stick Slot..........8
Making the Presentation .....................9
Operating the MS Home...................10
Viewing the Slide
Sliding Material for a Presentation
— Presentation Viewer .................11
Executing the Slide Show
Promptly ..........................13
Sliding a Picture File of the JPEG
Format — JPEG Viewer ...............14
Executing the Slide Show
Promptly ..........................16
Operating the Picture File.................17
Displaying the Picture File on the
Full Screen.......................18
Protecting an Important File .......18
Rotating a Picture File ................18
Registering a File as the
Startup Picture .................18
Deleting a Picture File ................18
Useful Settings
Starting a Presentation Automatically
— Autorun ....................................19
Projecting a Selected File When the
Power is Turned on — Startup.....20
Initializing
Initializing a Memory Stick..........21
Other
Troubleshooting................................22

GB 4
B
Overview
Features
When you memorize presentation material
converted by the Projector Station for
Presentation (supplied software) or the
picture file recorded by a digital camera in
the Memory Stick, you can easily make
effective presentations without a computer.
Presentation Viewer
After you have converted Microsoft
PowerPoint files by the Projector Station
for Presentation to the file which offers the
most advantages for projection on the
projector, you can make a slide show.
JPEG Viewer
You can make the slide show by using a
picture file (DCF 1)-compatible) recorded
by a digital camera. You can set the effect
when the slide is displayed, the way
(automatic or manual) the slide is
exchanged and the period for which one
slide is displayed.
1) DCF: Design rules for Camera File
systems
Autorun
When the Memory Stick with the picture
file for which the Autorun function is set by
the Projector Station for Presentation is
inserted in the Memory Stick Slot, the
input is automatically switched to MS and
the slide show starts.
Startup
When the power is turned on, the selected
picture file is projected for about 1 minute.
You can adjust the focus and zoom without
a signal from other equipment.
You can also select the original picture or
the registered picture file in the Memory
Stick.
Precautions
•To prevent data loss, make backup of
data frequently. In no event will Sony be
liable for any loss of data.
•Unauthorized recording may be contrary
to the provisions of copyright law.
•The Memory Stick application software
may be modified or changed by Sony
without prior notice.
AboutThis Manual
This manual explains the operations when
the Memory Stick is used.
For details on making the presentation
material, see the Operating Instructions of
the Projector Station for Presentation (CD-
ROM, supplied).
For operations other than by the
Memory
Stick
, see the supplied Operating
Instructions.
Features/Precautions/About This Manual
......................................................................
•Microsoft and PowerPoint are registered
trademarks and trademarks of the Microsoft
Corporation in the United States and/or
other countries.
•Adobe and Photoshop are either registered
trademarks or trademarks of Adobe Systems
Incorporated in the United States and /or
other countries.

5GB
Overview
Using a Memory
Stick
On Memory Sticks
Memory Stick is a new compact, portable
and versatile IC recording medium with a
data capacity that exceeds a floppy disk.
Memory Stick is specially designed for
exchanging and sharing digital data among
Memory Stick compatible products.
Because it is removable, Memory Stick
can also be used for external data storage.
Types of Memory Sticks
There are two types of Memory Sticks:
MagicGate Memory Sticks that are
equipped with the MagicGate copyright
protection technology and general
Memory Sticks. You can use both types
of Memory Stick with your projector.
However, because your projector does not
support the MagicGate standards, data
recorded with your projector is not subject
to MagicGate copyright protection.
On MagicGate
MagicGate is copyright protection
technology that uses encryption technology.
Format to save a file
Material for a presentation converted by the
Projector Station for Presentation is saved
in the following file formats in the
Memory Stick.
•Image files (DCF-compatible)
compressed in the JPEG (Joint
Photographic Experts Group) format
(extension .jpg).
•The Sony Projector presentation file (SPP
file), which is an original file format of
Sony. This file integrates information
such as the destination and the setting
information of the image file, etc.
Before using a Memory Stick
•You cannot record or erase still images
when the write-protect tab on the
Memory Stick is set to LOCK.
•We recommend backing up important
data.
•Image data may be damaged in the
following cases:
–If you remove the Memory Stick,
turn the power off, or detach the
battery for replacement when the
access lamp is flashing.
–If you use a Memory Stick near
static electricity or magnetic fields.
–If you disconnect the USB cable
while reading or writing a data.
Notes
•Prevent metallic objects or your finger
from coming into contact with the metal
parts of the connecting section.
•Do not attach any other material than the
supplied label onto the label space.
•Attach the label to the prescribed labeling
position. Make sure the label is attached
to the labeling position properly.
•Do not bend, drop or apply strong shock
to a Memory Stick.
•Do not disassemble or modify a Memory
Stick.
•Do not let the Memory Stick get wet.
•Do not use or keep a Memory Stick in
locations that are:
–Extremely hot such as in a car
parked in the sun or under the
scorching sun.
–Under direct sunlight.
–Very humid or subject to corrosive
gases.
•When you carry or store a Memory
Stick, put it in its case.
Terminal
Write-
protect
tab
Labeling
position
Using a Memory Stick

GB 6
About formatting Memory Sticks
When Memory Sticks are shipped from
the factory, they are already formatted to a
special standard format. When you format
Memory Sticks, we recommend
formatting them on this unit.
Caution when formatting Memory
Sticks on a personal computer
Pay attention to the following points when
formatting Memory Sticks on the
personal computer, for example, that you
are using.
Operation of Memory Sticks formatted
on the personal computer is not guaranteed
on this unit. To use a Memory Stick that
has been formatted on the personal
computer, the Memory Stick must be
reformatted on this unit. Note, that, in this
case all data stored on the Memory Stick
will be lost.
Notes on image data compatibility
Image data files saved to a Memory Stick
by using the software conform to the
Design Rules for Camera File Systems
universal standard established by JEITA
(Japan Electronics and Information
Technology Industries Association).
The JPEG file converted by Adobe
Photoshop, etc. must be converted to JPEG
format (DCF-compatible) again by the
Projector Station for Presentation.
Access Lamp
If the access lamp is turned on or is
flashing, data is being read from or written
to the Memory Stick. Do not shake the
computer or projector or subject them to
shock. Do not turn off the power of the
computer and projector, disconnect the
USB cable or remove the Memory Stick.
This may damage the data.
Using a Memory Stick
......................................................................
About the supplied Memory Stick
Sample data for a presentation is
memorized.
•Memory Stick and are trademarks
of Sony Corporation.
•MagicGate Memory Stick and are
trademarks of Sony Corporation.

7GB
Setting Up
B
Setting Up
Communicating Data by Using the
Memory Stick
When Using the Projector’s Memory Stick Slot
Connecting the projector and the computer by using the USB
cable
When you connect the computer and the projector
•Use a cable that has the correct connectors.
•To insert the Memory Stick, see “Making the Presentation”on page 9.
Notes
•If you turn on the computer while the projector and the computer are
connected to the USB cable, the computer may not start correctly. If this
happens, turn off the computer, disconnect the cable and restart the
computer.
•When the access lamp lights on, do not disconnect the USB cable. The data
may be damaged.
•There is no guarantee that all recommended computers will work properly.
Communicating Data by Using the Memory Stick
Projector
USB cable A type – B type
to USB connector
Computer
Memory Stick

GB 8
When Using the Computer’s Memory Stick Slot
For details, refer to your computer manual.
Communicating Data by Using the Memory Stick
Memory Stick
Computer with the
Memory Stick slot

9GB
Setting Up
Making the Presentation
Insert the Memory Stick into the Memory Stick slot on the side of the
projector.
To remove the Memory Stick
When the access lamp is turned off, press the Memory Stick and remove
your hand. As the lock is released, remove the Memory Stick.
Making the Presentation
Memory Stick
Insert the Memory Stick in the direction of
the arrow until it clicks.
INPUTA
AUDIO
INPUTA
AUDIO
Access lamp

GB 10
Operating the MS Home
The initial display for MS input is the MS home. The MS home is used for
setting and executing the event (e.g., selecting the viewer), setting the
Autorun and Startup and initializing the Memory Stick. The guide for the
key operation is displayed at the bottom of the MS home display. Use the
Remote Commander or the control panel for setting. The selected item is
displayed in yellow.
For details on each operation, see each page.
1Press the INPUT key to select MS.
The MS home appears.
Select:
EVENT
Presentation Viewer
Slide Show
Index
Select Contents
2Use the Mor mkey to select the item, then press the ENTER key.
3Use the Mor mkey to make the setting on an item, then press the
ENTER key.
Autorun:
SETTING
On
Startup: Original
On
Off
Operating the MS Home
EVENT
SETTING
MEMORY STICK
MS home mark
First two thumb nails
for the selected
contents
Title or folder name
for the selected
contents

11GB
Viewing the Slide
Sliding Material for a Presentation
— PresentationViewer
After you have converted Microsoft PowerPoint files by the Projector Station
for Presentation to the file which offers the most advantages for projection
on the projector, you can make a slide show.
For details on making the presentation material, see the Operating Instructions of the
Projector Station for Presentation (CD-ROM, supplied).
1Press the INPUT key to select MS.
The MS home appears.
Select:
EVENT
Presentation Viewer
Slide Show
Index
Select Contents
2Select “EVENT”, then press the ENTER key.
Select:
EVENT
Presentation Viewer
Slide Show
Index
Select Contents
B
Viewing the Slide
(Continued)
Sliding Material for a Presentation — Presentation Viewer

GB 12 Sliding Material for a Presentation — Presentation Viewer
3Press the ENTER key again.
Presentation Viewer
JPEG Viewer
Select:
EVENT
Presentation Viewer
Slide Show
Index
Select Contents
4Select “Presentation Viewer”, then press the ENTER key.
5Select “Select Contents”, then press the ENTER key.
3/10
Select:
EVENT
Presentation Viewer
Slide Show
Index
Select Contents
6Select the contents for the presentation, then press the ENTER key.
The title and first two thumb nails are displayed.

13GB
Viewing the Slide
7Select “Slide Show”, then press the ENTER key.
Execute
Return
Select:
EVENT
Presentation Viewer
Slide Show
Index
Select Contents
8Select “Execute”, then press the ENTER key.
To execute the slide show
When the slide show setting is set to “Auto” by the Projector Station for
Presentation, the slide show starts automatically. When you want to end the
slide show, press the MS SLIDE or ENTER key. When it is set to “Manual”,
press the following keys for the slide show.
,/m:to display the next slide
</M:to display the previous slide
MS SLIDE/ENTER: to end the slide show
To return to the MS home before executing the slide show
Select “Return”.
Executing the Slide Show Promptly
As the settings are memorized even if you change the input after the setting
of steps 1to 6, press the MS SLIDE key on the Remote Commander just as
you start the presentation. The input is changed to MS and the slide show
starts promptly. To end the slide show, press the MS SLIDE or ENTER key
again.
Sliding Material for a Presentation — Presentation Viewer

GB 14
Sliding a Picture File of the JPEG
Format —JPEG Viewer
You can make the slide show by using a picture file (DCF-compatible) of the
JPEG format recorded by a digital camera.
For operation of the index picture, see “Operate the Picture File” on page 17.
1Press the INPUT key to select MS.
The MS home appears.
Select:
EVENT
Presentation Viewer
Slide Show
Index
Select Contents
2Select “EVENT”, then press the ENTER key.
Select:
EVENT
Presentation Viewer
Slide Show
Index
Select Contents
3Press the ENTER key again.
Sliding a Picture File of the JPEG Format — JPEG Viewer

15GB
Viewing the Slide
4Select “JPEG Viewer”, then press the ENTER key.
Presentation Viewer
JPEG Viewer
Select:
EVENT
Presentation Viewer
Slide Show
Index
Select Contents
5Select “Select Contents”, then press the ENTER key.
0100MSDCF
0101MSDCF
0102MSDCF
0103MSDCF
0104MSDCF
0105MSDCF
DCIM
Select:
EVENT
JPEG Viewer
Slide Show
Index
Select Contents
6Select the folder for your presentation, then press the ENTER key.
Several JPEG files are included in the folder and they are called contents.
You must select content when you use the JPEG viewer.
When you want to select folder other than that displayed, select vor V, then
press the ENTER key.
7Press the ENTER key.
The folder name and the first two thumb nails are displayed.
When you want to view all of the selected contents, select “Index”.
When the JPEG files are saved in the current folder,
one of them is displayed.
Current folder
Sliding a Picture File of the JPEG Format — JPEG Viewer
(Continued)
to upper
stage
Folders
included in
the current
folder

GB 16
8Select “Slide Show”, then press the ENTER key.
9Select each item, then press the ENTER key.
10Set the item, then press the ENTER key.
Execute
Return
Effect
Advan.Slds.
Interval
Off
Auto
5 sec
DCIM
Select:
EVENT
JPEG Viewer
Slide Show
Index
Select Contents
Effect: set the effect when the slide is displayed.
Advan. Slids.: set the automatic or manual slide
Interval: set the period for which one slide is displayed. When “Advan.
Slids.” is set to “Manual”, it does not work. The time is about right.
11Select “Execute”, then press the ENTER key.
To execute the slide show
When the slide show setting is set to “Auto”, the slide show starts
automatically. When you want to end the slide show, press the MS SLIDE or
ENTER key. When it is set to “Manual”, press the following keys for the
slide show.
,/m:to display the next slide
</M:to display the previous slide
MS SLIDE/ENTER: to end the slide show
To return to the MS home before executing the slide show
Select “Return”.
Executing the Slide Show Promptly
As the settings are memorized even if you change the input after the setting
of steps 1to 10, press the MS SLIDE key on the Remote Commander just
as you start the presentation. The input is changed to MS and the slide show
starts promptly. To end the slide show, press the MS SLIDE or ENTER key
again.
Sliding a Picture File of the JPEG Format — JPEG Viewer

17GB
Viewing the Slide
Operating the Picture File
When the “Presentation Viewer” is selected, you can display the index
pictures or one of the index pictures on the full screen.
When the “JPEG Viewer” is selected, you can display the index screen or
one of the index pictures on the full screen, protect an important file or rotate
a picture file, register a file as the startup picture or delete a picture file.
To display the index screen, select “Index” in the MS home, then press the
ENTER key. Select the desired picture file and then press the ENTER key to
display the index menu. To return to the MS home, select “Return”.
Full Screen
No.: 5/32
Size: 1024x768
File: SPORTS
Close
Return
Protect
Rotate
Str.up
Delete
Reciipe
fl our - - - - 2
sugar- -- 1/2
sa lt - - - - -1 /2
bu tte r - - -1
When the picture files are more than 16 and you want to display index
pictures other than the displayed one, select vor V, then press the ENTER
key.
When the MS SLIDE key is pressed in the index screen, the slide show starts
from the selected picture.
Indicate when a file is registered
as the startup picture.
Indicate when the protect
function is set to a file.
Indicate when the “JPEG
Viewer” is selected.
Operating the Picture File
Order of the
contents
Total number of
content
Resolution
File name
(alphabet and
numbers only)
Index menu

GB 18
Displaying the Picture File on the Full Screen
Select the picture file and “Full Screen”, then press the ENTER key.
The selected picture is displayed on the full screen.
When you want to start the slide show from the selected picture, press the
following keys.
,/m:to display the next slide (the index screen is displayed after the last
picture file.)
</M:to display the previous slide (the index screen is displayed after the
first picture file.)
MS SLIDE/ENTER: to return to the index screen
Protecting an Important File
After selecting the file you want to protect, set “Protect” to “On” or “All
On”. When a file is protected, the protect mark is displayed.
Rotating a Picture File
After selecting the file you want to rotate, set “Rotate”. The picture rotates
90° every pressing of the ENTER key.
Registering a File as the Startup Picture
You can register a picture file in the Memory Stick as the startup picture
file which is displayed when the power is turned on.
Set “Str. up” to “Entry”. When the file is registered, the startup mark is
displayed.
When you want to use the registered picture file as the startup file, set
“Startup” of the SETTING screen to “Custom” (see page 20.)
Note
As the setting of “Custom” is memorized in the Memory Stick, when you
want to use the registered picture file as the startup file, insert the Memory
Stick in the projector before turning on the projector.
Deleting a Picture File
You can delete the selected picture file or all picture files of the selected
contents.
1Select “Delete”, then press the ENTER key.
2Select the item, then press the Mkey to delete the file(s).
Sel. Img.: delete the selected picture file
All Img.: delete all picture files of the selected contents
Close: when you do not delete the file
Operating the Picture File

19GB
Useful Settings
Starting a Presentation Automatically
—Autorun
When the Memory Stick with the picture file for which the Autorun
function is set by the Projector Station for Presentation is inserted in the
Memory Stick slot, the input is automatically switched to MS and the slide
show starts.
Setting the Autorun function
1Select “SETTING”in the MS home, then press the ENTER key.
2Select “Autorun”, then press the ENTER key.
Original
On
Off
Autorun:
SETTING
On
Startup:
3Select “On”, then press the ENTER key.
When you do not want to use the autorun function
Set “Autorun”to “Off”.
Notes
•When the autorun is not set to “On”by the Projector Station for
Presentation, you can not use the autorun function to start the slide show
even if you set “Autorun”to “On”in the MS home.
•When you want to use the autorun function for a picture file of the JPEG
format, make the presentation material by the Projector Station for
Presentation and set the autorun function to “On”.
Starting a Presentation Automatically —Autorun
B
Useful Settings

GB 20
Projecting a Selected FileWhen the
Power isTurned on —Startup
When the power is turned on, the selected picture file is projected for about
one minute.
When you want to use the registered picture file as the startup file, you must register a
picture file as the startup file in the index screen (see page 18.)
1Select “SETTING”in the MS home, then press the ENTER key.
2Select “Startup”, then press the ENTER key.
Original
Custom
Off
Autorun:
SETTING
On
Startup: Original
3Select the item, then press the ENTER key.
Original: select the original picture memorized in the projector.
The original picture cannot be changed.
Custom: select the picture file registered in the index screen which is saved
in the Memory Stick
Off: when you do not set the startup.
Notes
•When you want to clear the startup screen while displaying it, press the M/
m/</,or ENTER key.
•When you want to use the registered file, insert the Memory Stick where
the registered file is saved in the projector, then turn on the power.
•You can register one startup file per one Memory Stick.
Projecting a Selected File When the Power is Turned on —Startup
Other manuals for VPL-CX3 - XGA LCD Projector
2
Table of contents
Languages:
Other Sony Projector manuals

Sony
Sony VPL-SX535 User manual

Sony
Sony BRAVIA VPL-HW15 User manual

Sony
Sony VPL-GTZ240 User manual

Sony
Sony VPL-FX52 User manual

Sony
Sony VPL-CX20A User manual

Sony
Sony VPL-CX5 User manual

Sony
Sony VPL-CW275 User manual

Sony
Sony BRAVIA VPL-VW90ES User manual

Sony
Sony VPL-FHZ65 User manual

Sony
Sony VPL-CS20 User manual