4-194-205-11 (1)
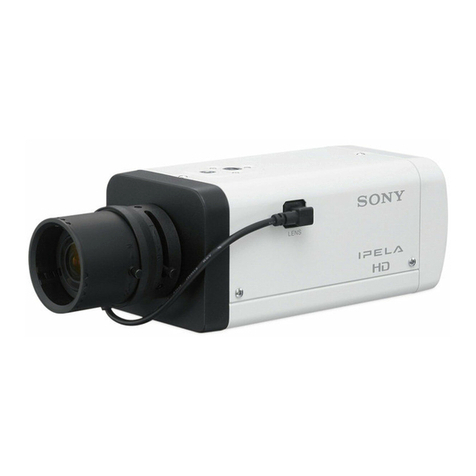
Network Camera
Installation Manual
Before operating the unit, please read this manual thoroughly and
retain it for future reference.
使⽤⼿册
使用产品前请仔细阅读本书,并请妥善保管。
SNC-CH210
English
Owner’s Record
The model and serial numbers are located on the top. Record these numbers
in the spaces provided below.
Refer to these numbers whenever you call upon your Sony dealer regarding
this product.
Model No. Serial No.
WARNING
To reduce a risk of fire or electric shock, do not expose
this product to rain or moisture.
To avoid electrical shock, do not open the cabinet. Refer
servicing to qualified personnel only.
WARNING
This installation should be made by a qualified service person and should
conform to all local codes.
WARNING (for Installers only)
Instructions for installing the equipment on the ceiling or the wall:
After the installation, ensure the connection is capable of supporting at least
a force of 50 Newtons (N) downwards.
CAUTION for LAN port
For safety reason, do not connect the LAN port to any network devices that
might have excessive voltage.
The LAN port of this unit is to be connected only to the devices whose power
feeding meets the requirements for SELV (Safety Extra Low Voltage) and
complies with Limited Power Source according to IEC 60950-1.
Use IEEE802.3af standard compliant devices.
For customers in the U.S.A.
This device complies with Part 15 of the FCC Rules. Operation is subject
to the following two conditions: (1) This device may not cause harmful
interference, and (2) this device must accept any interference received,
including interference that may cause undesired operation.
NOTE: This equipment has been tested and found to comply with the limits
for a Class A digital device, pursuant to part 15 of the FCC Rules. These limits
are designed to provide reasonable protection against harmful interference
when the equipment is operated in a commercial environment. This
equipment generates, uses, and can radiate radio frequency energy and, if
not installed and used in accordance with the instruction manual, may cause
harmful interference to radio communications. Operation of this equipment
in a residential area is likely to cause harmful interference in which case the
user will be required to correct the interference at his own expense.
You are cautioned that any changes or modifications not expressly approved
in this manual could void your authority to operate this equipment.
All interface cables used to connect peripherals must be shielded in order to
comply with the limits for a digital device pursuant to Subpart B or Part 15 of
FCC Rules.
For customers in Canada
This Class A digital apparatus complies with Canadian ICES-003.
Cet appareil numérique de la classe A est conforme à la norme NMB-003 du
Canada.
For the customers in Europe
The manufacturer of this product is Sony Corporation, 1-7-1 Konan, Minato-
ku, Tokyo, Japan.
The Authorized Representative for EMC and product safety is Sony
Deutschland GmbH, Hedelfinger Strasse 61, 70327 Stuttgart, Germany.
For any service or guarantee matters please refer to the addresses given in
separate service or guarantee documents.
For the customers in Europe, Australia and New Zealand
WARNING
This is a Class A product. In a domestic environment, this product may cause
radio interference in which case the user may be required to take adequate
measures.
In the case that interference should occur, consult your nearest authorized
Sony service facility.
This apparatus shall not be used in the residential area.
ATTENTION
The electromagnetic fields at specific frequencies may influence the picture
of the unit.
Notes on Use
Before Use
If you find condensation before use, leave the camera out for long enough
and do not turn on the power until the condensation disappear.
Remove static electricity before installation and operation.
Data and security
You should keep in mind that the images or audio you are monitoring
may be protected by privacy and other legal rights, and the responsibility
for making sure you are complying with applicable laws is yours alone.
Access to the images and audio is protected only by a user name and the
password you set up. No further authentication is provided nor should you
presume that any other protective filtering is done by the service. Since
the service is Internet-based, there is a risk that the image or audio you are
monitoring can be viewed or used by a third-party via the network.
SONY IS NOT RESPONSIBLE, AND ASSUMES ABSOLUTELY NO
LIABILITY TO YOU OR ANYONE ELSE, FOR SERVICE INTERRUPTIONS OR
DISCONTINUATIONS OR EVEN SERVICE CANCELLATION. THE SERVICE
IS PROVIDED AS-IS, AND SONY DISCLAIMS AND EXCLUDES ALL
WARRANTIES, EXPRESS OR IMPLIED, WITH RESPECT TO THE SERVICE
INCLUDING, BUT NOT LIMITED TO, ANY OR ALL IMPLIED WARRANTIES OF
MERCHANTABILITY, FITNESS FOR A PARTICULAR PURPOSE, OR THAT IT
WILL OPERATE ERROR-FREE OR CONTINUOUSLY.
Always make a test recording, and verify that it was recorded successfully.
SONY WILL NOT BE LIABLE FOR DAMAGES OF ANY KIND INCLUDING, BUT
NOT LIMITED TO, COMPENSATION OR REIMBURSEMENT ON ACCOUNT OF
FAILURE OF THIS UNIT OR ITS RECORDING MEDIA, EXTERNAL STORAGE
SYSTEMS OR ANY OTHER MEDIA OR STORAGE SYSTEMS TO RECORD
CONTENT OF ANY TYPE.
Always verify that the unit is operating properly before use. SONY WILL
NOT BE LIABLE FOR DAMAGES OF ANY KIND INCLUDING, BUT NOT
LIMITED TO, COMPENSATION OR REIMBURSEMENT ON ACCOUNT OF THE
LOSS OF PRESENT OR PROSPECTIVE PROFITS DUE TO FAILURE OF THIS
UNIT, EITHER DURING THE WARRANTY PERIOD OR AFTER EXPIRATION OF
THE WARRANTY, OR FOR ANY OTHER REASON WHATSOEVER.
If you lose data by using this unit, SONY accepts no responsibility for
restoration of the data.
Personal information
The images taken by the system using this device can identify individuals
and thus they fall under“personal information” stipulated in the“Act on
the Protection of Personal Information”. Please handle the video data
appropriately according to law.
Information recorded using this product may also be“personal information”.
Upon disposal, transfer, repair, or any other occasion where this product or
storage media is passed on to a third party, practice due care in its handling.
Operating or storage location
Avoid operating or storing the camera in the following locations.
Extremely hot or cold places (Operating temperature: 0°C to 50°C [32°F to
122°F])
Exposed to direct sunlight, or close to heating equipment (e.g., near heaters)
Close to sources of strong magnetism
Close to sources of powerful electromagnetic radiation, such as radios or TV
transmitters
Locations subject to strong vibration or shock
Humid or dusty locations
Locations exposed to rain
Locations under the influence of fluorescent light or reflection of a window
Under an unsteady light (The image will flicker.)
Ventilation
To prevent heat buildup, do not block air circulation around the camera.
Power supply
The power of this model is supplied by network cable.
Use the network cable UTP, category-5.
Damage to the network cable may result in fire or electric shock.
Transportation
Always turn off the power when carrying.
When transporting the camera, repack it as originally packed at the factory or
in materials of equal quality.
Cleaning
Use a blower to remove dust from the lens.
Use a soft, dry cloth to clean the external surfaces of the camera. Stubborn
stains can be removed using a soft cloth dampened with a small quantity of
detergent solution, then wipe dry.
Do not use volatile solvents such as alcohol, benzene or thinners as they may
damage the surface finishes.
Note on laser beams
Laser beams may damage image sensors. You are cautioned that the surface of image
sensors should not be exposed to laser beam radiation in an environment where a laser
beam device is used.
Phenomena Specific to Image Sensors
The following phenomena that may occur in images are specific to image
sensors. They do not indicate a malfunction.
White flecks
Although the image sensors are produced with high-precision technologies, fine
white flecks may be generated on the screen in rare cases, caused by cosmic rays,
etc.
This is related to the principle of image sensors and is not a malfunction.
The white flecks especially tend to be seen in the following cases:
- when operating at a high environmental temperature
- when you have raised the gain (sensitivity)
- when using the slow shutter
Aliasing
When fine patterns, stripes, or lines are shot, they may appear jagged or flicker.
About the Supplied Manuals
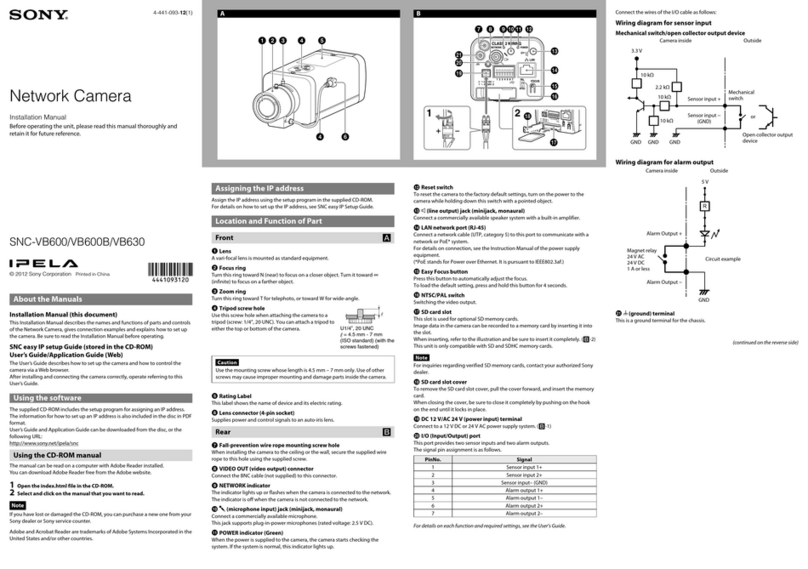
Installation Manual (this document)
This Installation Manual describes the names and functions of parts and controls
of the Network Camera, gives connection examples and explains how to set up
the camera. Be sure to read the Installation Manual before operating.
User’s Guide (stored in the CD-ROM)
The User’s Guide describes how to set up the camera and how to control the
camera via a Web browser.
After installing and connecting the camera correctly, operate referring to this
User’s Guide.
Using the CD-ROM Manuals
The supplied CD-ROM disc includes the User’s Guides for this unit in PDF format.
Preparations
The Adobe Reader Version 6.0 or higher must be installed on your computer in
order to use the guides stored in the CD-ROM disc.
Note
If Adobe Reader is not installed, it may be downloaded from the following URL:
http://www.adobe.com/
Reading the manual in the CD-ROM
1Insert the CD-ROM in your CD-ROM drive.
A cover page appears automatically in your Web browser.
If it does not appear automatically in the Web browser, double-click on the
index.htm file on the CD-ROM.
2Select and click on the manual that you want to read.
This opens the PDF file of the manual.
Clicking an item in the Table of Contents allows you jump to the relevant
page.
Notes
The files may not be displayed properly, depending on the version of Adobe
Reader. In this case, install the latest version, which you can download from
the URL mentioned in“Preparations”above.
If you have lost or damaged the CD-ROM, you can purchase replacement.
Contact your Sony service representative.
Adobe and Acrobat Reader are trademarks of Adobe Systems Incorporated in the
United States and/or other countries.
(continued on the reverse side)
中文
产品名称:网络摄像机
警告
为减少⽕灾或电击危险,请勿让本设备受到⾬淋或受潮。
为防⽌触电严禁拆开机壳,维修请咨询具备资格⼈⼠。
警告
本安装应该由有资格的服务⼈员进⾏,并须符合所有当地法规规定。
警告(仅限于安装⼈员)
有关在天花板或墙壁上安装设备的指示:
安装后,请确保该连接至少可承受向下 50 牛顿 (N) 的拉力。
局域网端口的注意事项
为安全起见,切勿将局域网端口连接到可能有过高电压的网络设备。
本机的局域网端口只能连接到供电符合 SELV(安全超低电压)要求和依照
IEC 60950-1 符合 Limited Power Source(有限电源)要求的设备。
使用 IEEE802.3af 标准兼容设备。
声明
此为 A 级产品,在⽣活环境中,该产品可能会造成⽆线电⼲扰。在这种情况
下,可能需要用户对其⼲扰采取切实可⾏的措施。
如果发⽣⼲扰,请咨询最近的 Sony 授权服务中⼼。
注意
某些特定频率的电磁场可能会⼲涉本装置的图像。
使⽤注意事项
使⽤前
如果在使用前发现有湿气凝结,请将摄像机长时间搁置,直到湿气凝结消
失后再打开电源。
请在安装和操作前先去除静电。
数据与安全
请注意,您所监视的图像或⾳频可能受到个⼈隐私和其它合法权利的保
护,并且您有责任确保您遵守相关法律。
对图像和⾳频的访问仅由您所设定的用户名和密码保护。除此之外未提供
其它⾝份验证⽅法,用户也不应该假定本服务提供了其它滤除功能。由于
本服务基于互联网,会有第三者经由网络观看或使用监视中的影像或⾳频
的危险。
SONY 对于服务中断、不连续、甚至服务取消不承担责任。本服务按照原
样提供,且 SONY 对于与服务相关的明示或暗示的保证不承担责任,包含
但不仅限于任何对适销性、对特定用途的适用性或⽆故障连续使用的所有
暗示保证。
在记录前,请始终进⾏记录测试,并确认记录是否成功。SONY 对任何损
坏概不负责。由于本机故障或由记录介质、外部存储系统或者任何其他介
质或储存系统记录的任何形式的记录内容的损害不作(包括但不限于)退
货或赔偿。
在使用前请始终确认本机运⾏正常。⽆论保修期内外或基于任何理由,
SONY 对任何损坏概不负责。由于本机故障造成的现有损失或预期利润损
失,不作(包括但不限于)退货或赔偿。
如果使用本机⽽造成数据丢失,SONY 不负责进⾏数据的恢复。
个⼈信息
使用本设备通过系统拍摄的影像能够识别个⼈,因此应归⼊“Act on the
Protection of Personal Information(个⼈信息保护法)”中规定
的“personal information(个⼈信息)”内。请按照法律正确处理视频
数据。
使用本产品记录的信息可能也是“personal information(个⼈信
息)”。丢弃、转让、维修时或在本产品或存储媒体转交给第三⽅的任何
其他场合,请⼩⼼处理。
操作或存放场所
避免在以下位置使用或存放摄像机。
极热或极冷的地⽅(操作温度:0℃ 至 50℃)
暴露于直射阳光下,或者靠近热源(⽐如加热器)的地⽅
靠近强磁源的位置
靠近⽆线电或电视发射器等强电磁辐射源的地⽅
易于受到强力振动或撞击的地⽅
潮湿或有灰尘的地⽅
暴露于雨水的地⽅
受到荧光灯或窗户反射光影响的地⽅
在不稳定光线的下面(图像会抖动。)
通风
为了避免热量积蓄,不要阻挡摄像机附近的通风。
电源
本型号的电源由网线提供。
使用 UTP、5 类网线。
网线损坏可能会造成起火或触电。
运送
携带时务必关闭电源。
当运送摄像机时,重新以出⼚时的包装进⾏包装,或用同等品质的材质包
装。
清洁
用吹灰器清除镜头灰尘。
使用柔软、⼲燥的布清洁摄像机的外表面。要清除顽固的污渍,请用少量
清洁剂蘸湿软布,然后擦⼲即可。
不要使用酒精、苯或稀释剂等挥发性溶剂,这些物质可能会破坏表面光洁
度。
有关激光束的注意事项
激光束可能会损坏影像传感器。请注意:在使用激光束设备的环境中,影像传
感器的表面不得暴露于激光束辐射中。
影像传感器特有的现象
影像中可能会出现以下影像传感器特有的现象。它们并⾮故障。
⽩斑
虽然图像传感器是采用高精度技术⽣产的,但由于宇宙射线等的影响,其屏
幕上可能会出现细⼩的⽩斑(极少数情况)。
这与图像传感器的原理有关,出现的⽩斑并不是故障。
在以下情况中,⽐较容易出现⽩斑:
- 在高温环境下进⾏操作时
- 提高倍率(灵敏度)时
- 当使用慢快门时
图形失真
拍摄微⼩的图案、条纹或线条时,它们可能呈锯齿状或出现闪烁现象。
关于随附⼿册
使⽤⼿册(本文档)
本使用⼿册介绍网络摄像机各部件和控制器的名称和功能,连接示例和摄像
机的设定⽅法。操作前请务必先阅读使用⼿册。
⽤户指南(存储在 CD-ROM 中)
用户指南介绍如何设定摄像机和如何通过网络浏览器控制摄像机。
正确安装和连接摄像机后,请参照本用户指南操作。
使⽤ CD-ROM ⼿册
随附 CD-ROM 光盘包括 PDF 格式的本机用户指南。
准备⼯作
若要使用存储在 CD-ROM 光盘中的用户指南,则必须在电脑上安装 Adobe
Reader 6.0 或更高版本。
注意
如果未安装 Adobe Reader,可从下列 URL:http://www.adobe.com/ 下载。
读取 CD-ROM 中的⼿册
1 将 CD-ROM 插⼊ CD-ROM 驱动器。
会在网络浏览器中⾃动出现封面页。
如果没有在网络浏览器中⾃动出现封面页,请双击 CD-ROM 上的
index.htm ⽂件。
2 选择并单击您要读取的⼿册。
这样即打开⼿册的 PDF ⽂件。
单击⽬录上的项⽬可让您跳到相关页面。
注意
视 Adobe Reader 版本⽽定,可能⽆法正确显示⽂件。在此情况下,请安
装最新版本,可从上述“准备⼯作”中提到的 URL 下载。
如果您丢失或损坏 CD-ROM,可购买替换光盘。请联系您的 Sony 服务代
表。
Adobe 和 Adobe Reader 是 Adobe Systems Incorporated 在美国和/或其他
国家的商标。
(
接反面
)
2010 Sony Corporation Printed in China
