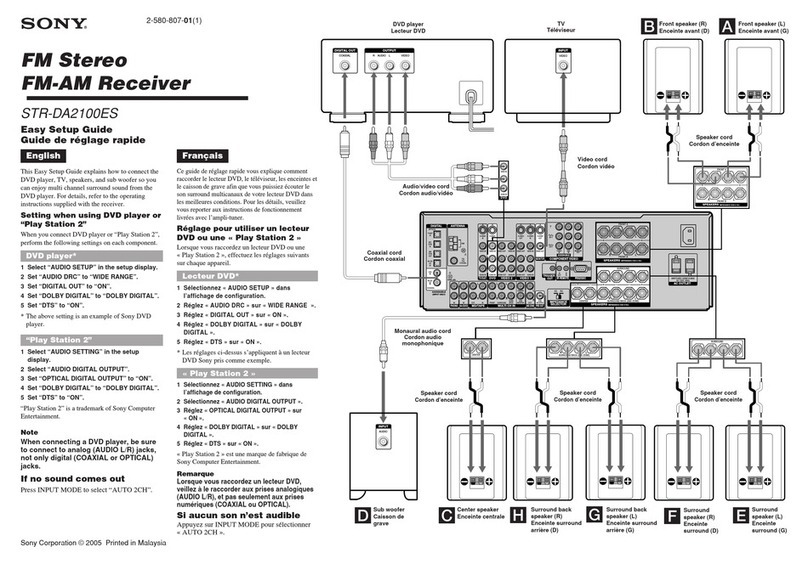
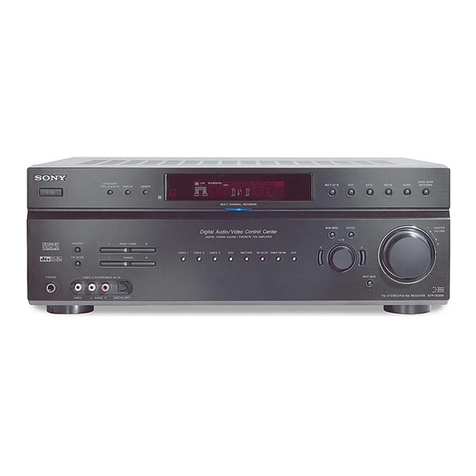
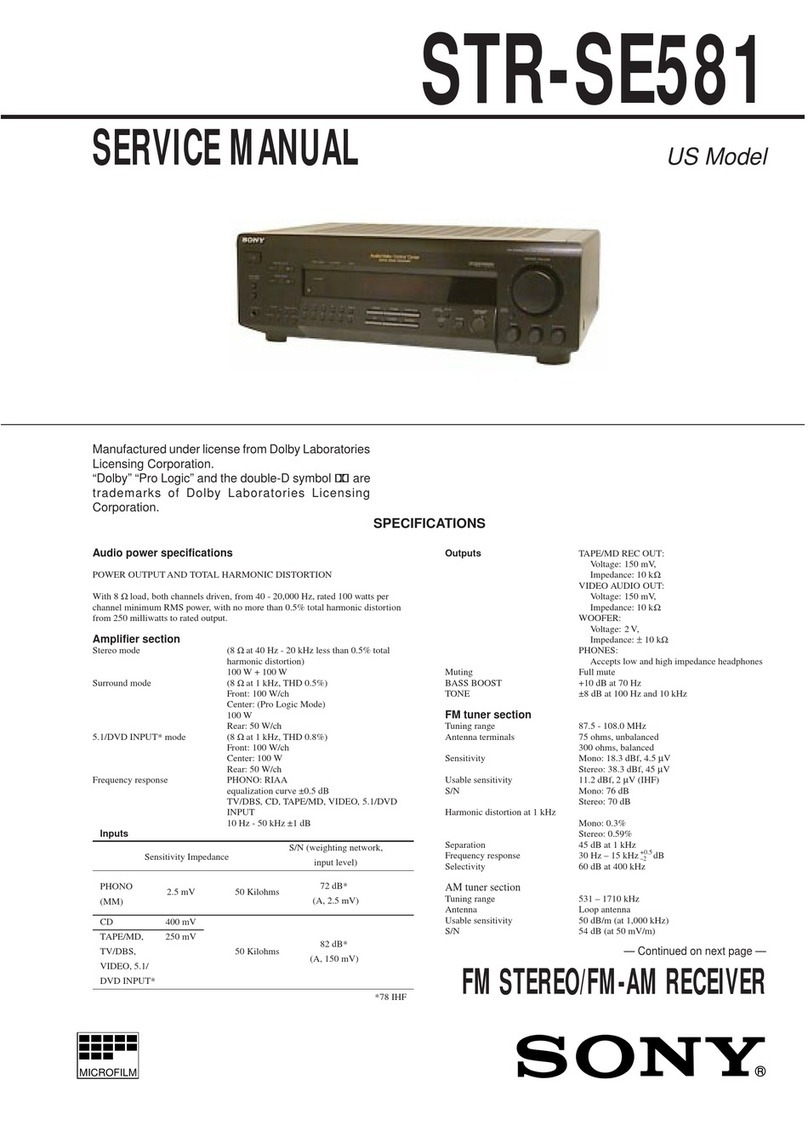
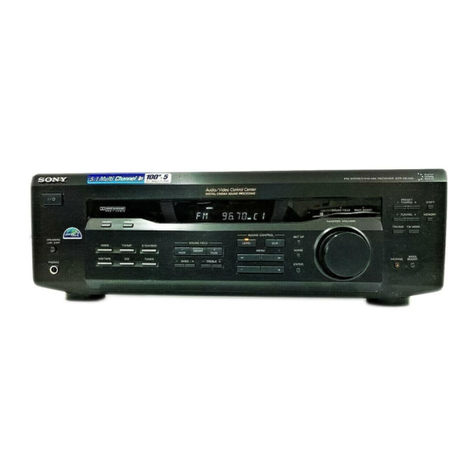
Sony STR-AZ3000ES User guide

SONY.
Multi Channel
AV
Receiver
Recepteur
AV
Multicanal
Startup Guide
Guide de demarrage
Gufa
de
inicio
STR-AZ3000ES
Supplied accessories:
Accessoires
fournis:
Accesorios suministrados:
-
-
-
5-037-015-11(1)
II
II
111111111111111111111111
503701511
□
□
□ □
Remote control
(1)
R03
(size AAA) batteries (2)
AC
power
co
rd
(mains lead)
(1)
FM
wire antenna (aerial)
(1)
Telecommande
(1)
Piles
R03
(taille AAA) (2) Cordon d'alimentation secteur
(1)
Antenne
fil
FM
(1)
Mando a distancia
(1)
Pilas
R03
(tamano AAA) (2) Cable de alimentaci6n
de
CA
(1)
Antena
FM
de cable
(1)
□
□
□
□
Calibration microphone
(1)
Mic stand
top
(1
)*
1 Mic s
tand
pillar
(1)*
1 Mic s
tand
bottom
(1)*
1
Microphone de calibrage
(1)
Partie superieure
du
socle Calonne du socle
pour
micro
(1)*
1 Partie inferieure
du
socle
Micr6fono
de
calibraci6n
(1)
pour
micro
(1)*
1 Columna del soporte del
pour
micro
(1)
*1
Parte superior del soporte
micr6fono
(1)*
1
Base
del soporte del
del micr6fono
(1)*
1
micr6fono
(1)*
1
□
Front cover
(1)
Capot avant
(1)
Cubierta frontal
(1)
*1 For
ho
w
to
assemble
the
calibration mic stand, refer
to
the Operating Instructions.
*1 Pour savoir
comment
assembl
er
le
socle
pour
micro de calibrage, reportez-vous
au
mode d'emploi.
*1
Para
verc6mo
montar
el
soporte del micr6fono de
ca
libr
aci6n, consulte el manual
de
instruccione
s.
You will also need
(not
supplied):
Autres accessoires necessaires
(non
fournis):
Tambien necesitara (no suministrado):
□
Speaker cables
Cables d'enceinte
Cables
de
altavoz
□
□
HDMI cables*2
Cables HDMl*2
Cables HDMln
□
□
LAN
cable*3
Cable LAN*3
Cable LAN*3
Monaural audio cable Optical digital cable*3
Cable
audio
mono
Cable de audio
monof6nico
Cable
optique
numerique*
3
Cable digital 6ptico*3
*2 For
the
types
of
HDMI cables
to
use, visit
the
Help Guide.
*2 Pour les types
de
cables HDMI autiliser, consultez le Guide d
'a
ide
.
n
Para
ver
los tipos
de
cables HDMI
que
se pueden utilizar,visite la Gufa de ayuda.
*3 These cables
may
not
be needed depending on
your
connection.
*3
11
est possible
que
ces
cables ne soient pas necessaire selon votre connexion.
*3 Puede que estos cables
no
sean necesarios dependiendo del
tipo
de
conexi6n.

Example of a 7.1.2 channel speaker system configuration
Exemple d’une configuration de systèmes d’enceintes 7.1.2 canaux
Ejemplo de configuración de un sistema de altavoces de 7.1.2 canales
Go to back page for step .
Consultez le verso pour l’étape .
Vaya al dorso para consultar el paso .
Speaker cables
Câbles d’enceinte
Cables de altavoz
CENTER
SURROUND R SURROUND BACK R SURROUND BACK L
FRONT R SURROUND LFRONT L
SUBWOOFER
TOP FRONT R TOP FRONT L Monaural audio cable
Câble audio mono
Cable de audio monofónico
Speaker cables
Câbles d’enceinte
Cables de altavoz
Speaker cable
Câble d’enceinte
Cable del altavoz
Installing and connecting the speakers
Installation et raccordement des enceintes
Instalación y conexión de los altavoces
1
Sony Corporation © 2022 Printed in Malaysia / Imprimé en Malaisie
FRONT L FRONT R
CENTER
SURROUND L SURROUND R
SUBWOOFER
TOP FRONT L TOP FRONT R
Visit the Help Guide for complete instructions and information including
more examples of speaker system configurations and connections.
Consultez le Guide d’aide pour des instructions et des informations
complètes, notamment des exemples supplémentaires de configurations
et de connexions de systèmes d’enceintes.
Visite la Guía de ayuda para ver instrucciones completas e información
incluyendo más ejemplos de configuraciones y conexiones del sistema de
altavoces.
https://rd1.sony.net/help/ha/straz305070/h_uc/
10mm (13/32")
Improper connection may result in fatal
damage to the receiver.
Un raccordement incorrect peut entraîner
une détérioration irrémédiable de l’ampli-
tuner.
Una conexión incorrecta puede resultar en
un daño fatal para al receptor.
Note / Remarque / Nota
Connect speaker cables properly with the
polarities (ñ/×) matched between the
speaker cables and the SPEAKERS terminals.
Connectez correctement les câbles
d’enceintes en faisant correspondre les
polarités (ñ/×) des câbles d’enceintes et
des bornes SPEAKERS.
Conecte los cables de altavoz correctamente
haciendo coincidir las polaridades (ñ/×)
entre los cables de altavoz y los terminales
de SPEAKERS.
SURROUND BACK L SURROUND BACK R

Connecting to a TV and AV devices
Raccordement d’un téléviseur et de périphériques AV
Conexión de un televisor y dispositivos AV
2
TV
Téléviseur
Televisor
HDMI cable
Câble HDMI
Cable HDMI
Optical digital cable
Câble optique numérique
Cable digital óptico
HDMI cable
Câble HDMI
Cable HDMI
If your TV is compatible with eARC (Enhanced Audio Return Channel) or ARC (Audio Return
Channel) function, connecting the optical digital cable is not necessary.
Si votre téléviseur est compatible avec la fonction eARC (Enhanced Audio Return Channel) ou
ARC (Audio Return Channel), la connexion du câble optique numérique est superflue.
Si su televisor es compatible con la función eARC (Enhanced Audio Return Channel) o ARC
(Audio Return Channel), no necesitará conectar el cable digital óptico.
HDMI IN jack/Prise HDMI IN/Toma HDMI IN Devices to be connected/Appareils à connecter/Dispositivos que conectar
IN 1
8K
4K/120
Connect a device that supports video signals of 8K or up to 4K/120p.
Connectez un appareil qui prend en charge les signaux vidéo de 8K ou jusqu’à 4K/120p.
Conecte un dispositivo que admita señales de video de 8K o de hasta 4K/120p.
IN 2
IN 3
IN 4
IN 5
4K
Connect a device that supports video signals up to 4K/60p.
Connectez un appareil qui prend en charge les signaux vidéo jusqu’à 4K/60p.
Conecte un dispositivo que admita señales de video de hasta 4K/60p.
IN 6
• Select [HDMI Signal Format] settings suitable for the video formats of the connected devices in the menu on the receiver. For details, visit the Help Guide.
• Sélectionnez les paramètres [Format du signal HDMI] adaptés aux formats vidéo des appareils connectés dans le menu sur l’ampli-tuner. Pour des informations détaillées,
consultez le Guide d’aide.
• Seleccione en el menú del receptor los ajustes de [Formato de señal HDMI] apropiados para los formatos de video de los dispositivos conectados. Para obtener detalles,
consulte la Guía de ayuda.
Connecting to a network
Connexion à un réseau
Conexión a una red
– When using a wired connection
– Avec une connexion filaire
– Cuando se utiliza una conexión con cable
– When using a wireless connection
– Avec une connexion sans fil
– Cuando se utiliza una conexión inalámbrica
Router
Routeur
Enrutador
Router
Routeur
Enrutador
LAN cable
Câble LAN
Cable LAN

Easy Setup
Language, Auto Calibration, Internet Settings
Input Settings
Icon, Name, Watch / Listen, Show / Hide, HDMI, OPTICAL/COAX, VIDEO IN,
AUDIO IN, Input Mode, Preset Sound Field, In-Ceiling Speaker Mode, A/V Sync,
Subwoofer Low Pass Filter, Subwoofer Level, Preset Gain Level, Trigger
Speaker Settings
Speaker Configuration Selection, Speaker Configuration Information,
Auto Calibration Settings, Manual Speaker Settings, Wireless Speaker Settings,
TV/Screen Center Settings
Network Settings
Wi-Fi Connection, Internet Settings, Network Connection Status,
Software Update Notification, Auto Update Settings, Privacy Setting,
Chromecast built-in, Works with Sonos
HDMI Settings
4K/8K Upscaling, Control for HDMI, Standby Linked to TV, Standby Through,
Audio Return Channel, Audio Out, Zone2 Audio Out, Subwoofer Level,
HDMI OUT B Mode, Monitor Information, Fast View, HDMI Signal Format,
Video output for PIP/PBP-displayed TV
Audio Settings
Sound Field, 360 Spatial Sound Mapping,
SpeakerRelocation/PhantomSurroundBack, DSD Native, Pure Direct,
Subwoofer Low Pass Filter, A/V Sync, Dual Mono, Audio DRC, Upmixer, Virtualizer,
IMAX Mode, IMAX Adjustment
Zone Settings
Zone2 Settings, Zone3 Settings, Main Preset Volume, Main Max Volume,
Zone2 Preset Volume, Zone2 Max Volume, Zone2 Line Out, Zone3 Preset Volume,
Zone3 Max Volume, Zone3 Line Out
Bluetooth Settings
Bluetooth Mode, Device List, Bluetooth Connection Quality,
Wireless Playback Quality
System Settings
Language, Auto Display, Network/Bluetooth Standby, Auto Standby,
Volume Display, Dimmer, Device Name Setting, System Information,
Software License Information, FM Tuner Settings
Install Settings
External Control, Test Picture for HDMI OUT A, Test Picture for HDMI OUT B,
Settings Lock, Trigger, Save/Load
Software Update
Network Update, USB Update, Wireless Speakers Update
Resetting
All Settings, Sound Settings, Network Settings, Music Services
GAME SAT/CATV
MEDIA BOX VIDEO
BD/DVD TV
AUX USB
SA-CD/CD Spotify
Bluetooth Audio Chromecast built-in
FM TUNER 360 Reality Audio
1: Movie 2: Music
Sound Field In-Ceiling Speaker Mode
Equalizer Pure Direct
360SSM
Zone2 Power Zone3 Power
Zone2 Input Zone3 Input
Zone2 Volume Zone3 Volume
GUI Menu List/Liste du menu de la GUI/Lista del menú de la interfaz gráfica de usuario
Note / Remarque / Nota
• The item names shown below are examples in English.
• Les noms des éléments indiqués ci-dessous sont des exemples en anglais.
• Los nombres de elementos mostrados a continuación son ejemplos en inglés.

STR-AZ7000ES/STR-AZ5000ES/STR-AZ3000ES
Operating Instructions EN
Mode d’emploi FR
Manual de instrucciones ES
Multi Channel AV Receiver
Récepteur AV Multicanal
STR-AZ7000ES/STR-AZ5000ES/STR-AZ3000ES

2EN
STR-AZ7000ES/STR-AZ5000ES/STR-AZ3000ES
5-037-019-11(1)
Owner’s Record
Record the serial number in the space provided below. Refer to them
whenever you call upon your Sony dealer.
Model No. STR-AZ7000ES/STR-AZ5000ES/STR-AZ3000ES
Serial No.
The model and serial numbers are located on the following:
•The rear of the unit
Do not install the product in a confined space, such as a bookcase or
built-in cabinet.
To reduce the risk of fire, do not cover the ventilation opening of the unit
with newspapers, tablecloths, curtains, etc. Do not expose the unit to
naked flame sources (for example,lighted candles).
To reduce the risk of fire or electric shock, do not expose this product to
dripping or splashing, and do not place objects filled with liquids, such as
vases, on the product.
The unit is not disconnected from the AC power source (mains) as long
as it is connected to the wall outlet, even if the unit itself has been turned
off.
As the power cord is used to disconnect the unit from the mains,
connect the unit to an easily accessible AC outlet. Should you notice an
abnormality in the unit, disconnect the power cord from the AC outlet
immediately.
For Remote Commander
CAUTION
Risk of explosion if battery is replaced by an incorrect type.
Dispose of used batteries according to the instructions.
Do not expose the batteries (battery pack or batteries installed) to
excessive heat, such as sunshine, fire or the like for a long time.
CAUTION
Hot surface
Do not touch
For customers in the U.S.A.
NOTE:
This unit has been tested and found to comply with the limits for a Class
B digital device, pursuant to Part 15 of the FCC Rules. These limits are
designed to provide reasonable protection against harmful interference
in a residential installation. This unit generates, uses, and can radiate
radio frequency energy and, if not installed and used in accordance
with the instructions, may cause harmful interference to radio
communications.
However, there is no guarantee that interference will not occur in a
particular installation. If this unit does cause harmful interference to radio
or television reception,which can be determined by turning the unit off
and on, the user is encouraged to try to correct the interference by one or
more of the following measures:
•Reorient or relocate the receiving antenna.
•Increase the separation between the unit and receiver.
•Connect the unit into an outlet on a circuit different from that to which
the receiver is connected.
•Consult the dealer or an experienced radio/TV technician for help.
Properly shielded and grounded cables and connectors must be used for
connection to host computers and/or peripherals in order to meet FCC
emission limits.

3EN
STR-AZ7000ES/STR-AZ5000ES/STR-AZ3000ES
5-037-019-11(1)
If you have any questions about this product:
Visit: https://www.sony.com/electronics/support
Contact:Sony Customer Information Service Center at 1-800-222-7669
Write:Sony Customer Information Service Center 12451 Gateway Blvd.,
Fort Myers, FL 33913
Supplier’s Declaration of Conformity
Trade Name: SONY
Model: STR-AZ7000ES/STR-AZ5000ES/STR-AZ3000ES
Responsible Party: Sony Electronics Inc.
Address:16535 Via Esprillo,San Diego, CA 92127 U.S.A.
Telephone Number: 858-942-2230
This device complies with Part 15 of the FCC Rules. Operation is subject to
the following two conditions:
(1) this device may not cause harmful interference,and
(2) this device must accept any interference received,including
interference that may cause undesired operation.
You are cautioned that any changes or modifications not expressly
approved in this manual could void your authority to operate this unit.
This unit must not be co-located or operated in conjunction with any
other antenna or transmitter.
This unit complies with FCC radiation exposure limits set forth for an
uncontrolled environment and meets the FCC radio frequency (RF)
Exposure Guidelines.This unit should be installed and operated keeping
the radiator at least 20 cm or more away from person’s body.
Compliance with FCC requirement 15.407(c)
Data transmission is always initiated by software, which is passed down
through the MAC, through the digital and analog baseband, and finally
to the RF chip.Several special packets are initiated by the MAC. These are
the only ways the digital baseband portion will turn on the RF transmitter,
which it then turns off at the end of the packet. Therefore, the transmitter
will be on only while one of the aforementioned packets is being
transmitted. In other words, this unit shall automatically discontinue
transmission in case of either absence of information to transmit or
operational failure.
Frequency Tolerance: ±20 ppm
For customers in Canada
This unit contains licence-exempt transmitter(s)/receiver(s) that comply
with Innovation,Science and Economic Development Canada’s licence-
exempt RSS(s). Operation is subject to the following two conditions:
(1) This unit may not cause interference; and
(2) This unit must accept any interference, including interference that
may cause undesired operation of the unit.
This unit complies with ISED radiation exposure limits set forth for an
uncontrolled environment and meets RSS-102 of the ISED radio frequency
(RF) Exposure rules.This unit should be installed and operated keeping
the radiator at least 20 cm or more away from person’s body.
5 150 MHz – 5 350 MHz band is restricted to indoor operations only.
Data transmission is always initiated by software, which is passed down
through the MAC, through the digital and analog baseband, and finally
to the RF chip.Several special packets are initiated by the MAC. These are
the only ways the digital baseband portion will turn on the RF transmitter,
which it then turns off at the end of the packet. Therefore, the transmitter
will be on only while one of the aforementioned packets is being
transmitted. In other words, this unit shall automatically discontinue
transmission in case of either absence of information to transmit or
operational failure.
About recommended cables
Properly shielded and grounded cables and connectors must be used for
connection to host computers and/or peripherals.

4EN
STR-AZ7000ES/STR-AZ5000ES/STR-AZ3000ES
5-037-019-11(1)
Licenses
•Dolby, Dolby Vision, Dolby Atmos, Dolby Audio,and the double-D
symbol are trademarks of Dolby Laboratories Licensing Corporation.
Manufactured under license from Dolby Laboratories. Confidential
unpublished works. Copyright © 1992–2021 Dolby Laboratories. All
rights reserved.
•For STR-AZ5000ES/STR-AZ3000ES only
Manufactured under license from IMAX Corporation. IMAX® is a
registered trademark of IMAX Corporation in the United States and/
or other countries.For DTS patents, see http://patents.dts.com.
Manufactured under license from DTS, Inc. DTS,DTS:X, Virtual:X, and
the DTS:X logo are registered trademarks or trademarks of DTS, Inc.
in the United States and other countries. © 2022 DTS,Inc. ALL RIGHTS
RESERVED.
•For STR-AZ7000ES only
Manufactured under license from IMAX Corporation. IMAX® is a
registered trademark of IMAX Corporation in the United States and/
or other countries.For DTS patents, see http://patents.dts.com.
Manufactured under license from DTS, Inc. DTS,DTS:X Pro, Virtual:X,
and the DTS:X logo are registered trademarks or trademarks of DTS, Inc.
in the United States and other countries. © 2022 DTS,Inc. ALL RIGHTS
RESERVED.
•Use of the Works with Apple badge means that an accessory has
been designed to work specifically with the technology identified
in the badge and has been certified by the developer to meet Apple
performance standards.
•This product is protected by certain intellectual property rights of
Microsoft Corporation. Use or distribution of such technology outside
of this product is prohibited without a license from Microsoft or an
authorized Microsoft subsidiary.
•For details of the GPL,LGPL and other software licenses, please refer to
[Software License Information] in [System Settings] of the [Setup] menu
on the product.
•The software included in this product contains copyrighted software
that is licensed under the GPL/LGPL and other licenses which may
require access to source code.You may find a copy of the relevant
source code as required under the GPL/LGPL (and other licenses) at the
following URL.
You may obtain the source code as required by the GPL/LGPL on a
physical medium from us for a period of three years after our last
shipment of this product by applying through the form at the following
URL.
This offer is valid to anyone in receipt of this information.
https://oss.sony.net/Products/Linux/
Please note that Sony cannot answer or respond to any inquiries
regarding the content of this source code.
•The Spotify Software is subject to third party licenses found here:
https://www.spotify.com/connect/third-party-licenses.
•Use your phone, tablet or computer as a remote control for Spotify. Go
to spotify.com/connect to learn how.
•Disclaimer regarding services offered by third parties
Network services, content and the (operating system and) software
of this product may be subject to individual terms and conditions and
changed, interrupted or discontinued at any time and may require fees,
registration and credit card information.

5EN
STR-AZ7000ES/STR-AZ5000ES/STR-AZ3000ES
5-037-019-11(1)
Trademarks
•Windows Media is either a registered trademark or trademark of
Microsoft Corporation in the United States and/or other countries.
•The LDAC™ name is a trademark of Sony Group Corporation or its
affiliates.
•LDAC is an audio coding technology developed by Sony that enables
the transmission of High-Resolution (Hi-Res) Audio content, even over
a Bluetooth connection. Unlike other Bluetooth compatible coding
technologies such as SBC, it operates without any down-conversion of
the Hi-Res Audio content*, and allows approximately three times more
data** than those other technologies to be transmitted over a Bluetooth
wireless network with unprecedented sound quality, by means of
efficient coding and optimized packetization.
* excluding DSD format contents
**in comparison with SBC (Subband Coding) when the bitrate of
990kbps (96/48kHz) or 909kbps (88.2/44.1kHz) is selected
•The Bluetooth® word mark and logos are registered trademarks
owned by Bluetooth SIG, Inc. and any use of such marks by
Sony Group Corporation and its subsidiaries is under license.
•The terms HDMI™, HDMI High-Definition Multimedia Interface,
and the HDMI Logo are trademarks or registered trademarks of
HDMI Licensing Administrator, Inc.
•Google, Google Play,Google Home and Chromecast built-in are
trademarks of Google LLC. Google Assistant is not available in certain
languages and countries.
•Apple, AirPlay,iPad, iPhone and iPod touch are trademarks of Apple Inc.,
registered in the U.S. and other countries.
•“BRAVIA” logo is a trademark of Sony Group Corporation or its affiliates.
•Wi-Fi®, Wi-Fi Protected Access® and Wi-Fi Alliance® are registered
trademarks of Wi-Fi Alliance.
•Wi-Fi CERTIFIED™, WPA™, and WPA2™ are trademarks of Wi-Fi Alliance.
•Being Roon Tested means that Sony and Roon have collaborated to
ensure you have the best experience using Roon software and Sony
equipment together, so you can just enjoy the music.
•“TRILUMINOS” and“TRILUMINOS” logo are a registered trademark of
Sony Group Corporation or its affiliates.
•Spotify and Spotify logos are trademarks of the Spotify Group.*
* Depending on the country and region,this function may not be
available.
•All other trademarks and registered trademarks are trademarks or
registered trademarks of their respective holders. In this manual, ™and
® marks are not specified.

6EN
STR-AZ7000ES/STR-AZ5000ES/STR-AZ3000ES
5-037-019-11(1)
Precautions
On safety
Should any solid object or liquid fall into the cabinet, unplug the receiver
and have it checked by qualified personnel before operating it any
further.
On power sources
•Before operating the receiver, check that the operating voltage is
identical with your local power supply.
The operating voltage is indicated on the nameplate on the back of the
receiver.
•If you are not going to use the receiver for a long time, be sure to
disconnect the receiver from the wall outlet. To disconnect the AC power
cord (mains lead), grasp the plug itself; never pull the cord.
•One blade of the plug is wider than the other for the purpose of safety
and will fit into the wall outlet only one way.If you are unable to insert
the plug fully into the outlet,contact your dealer.
•AC power cord (mains lead) must be changed only at a qualified service
shop.
•To reduce the risk of electric shock, the speaker cable should be
connected to the apparatus and the speakers in accordance with the
following instructions.
1) Disconnect the AC power cord from the MAINS.
2) Strip 10 to 15 mm (13/32 to 19/32 in) of the wire insulation of the
speaker cable.
3) Connect the speaker cable to the apparatus and the speakers
carefully so as not to touch the core of speaker cable by hand. Also
disconnect the AC power cord from the MAINS before disconnecting
the speaker cable from the apparatus and the speakers.
On heat buildup
Although the receiver heats up during operation, this is not a
malfunction. If you continuously use this receiver at a large volume, the
cabinet temperature of the top,side and bottom rises considerably*. To
avoid burning yourself,do not touch the cabinet.
* The top of the cabinet may become too hot to touch.
On placement
•Do not install the appliance in a confined space,such as a bookcase.
•Sufficient space around the receiver is needed to release heat. When
placing the receiver in a rack, leave more than 44.45 mm (1.75 in) space
above the receiver, and more than 44.45 mm (1.75 in) space along the
sides of the receiver. The rack behind the receiver should be open.If you
place the receiver with its back against the wall, leave more than 88.9
mm (3.5 in) space between the receiver and the wall.
•Make sure to use a“WS-RE2” dedicated rack mount kit for this receiver
when mounting the receiver on a rack mount.
•Place the receiver in a location with adequate ventilation to prevent
heat buildup and prolong the life of the receiver.
•Do not place the receiver near heat sources, or in a place subject to
direct sunlight,excessive dust, or mechanical shock.
•Do not place anything on top of the cabinet that might block the
ventilation holes and cause malfunctions.
On operation
Before connecting other device,be sure to turn off and unplug the
receiver.
On cleaning
Clean the cabinet,panel, and controls with soft dry cloth. Do not use any
type of abrasive pad,scouring powder, or solvent, such as alcohol or
benzine.
On updating
This receiver allows you to update the software automatically when
connected to the Internet via a wired or wireless network.
You can add new features and use the receiver with more convenience
and safety by updating the receiver.
If you do not want to update automatically,set [Auto Update] to [Off].
However, the receiver may update the software automatically for reasons
such as safety, even if this function is disabled. You can also update the
software using the settings menu when this function is disabled. For
details, refer to Help Guide.
You may not use the receiver while the software is being updated.

7EN
STR-AZ7000ES/STR-AZ5000ES/STR-AZ3000ES
5-037-019-11(1)
On Internet connection
When connecting the receiver to the Internet,use the router (ADSL
modem or optical line termination device with the router function
supplied with the Internet provider,or Wi-Fi access point). If you connect
to the Internet without using the router, a security problem may occur. If
you are not sure that the wall outlet for the network line has the router
function, ask your manager of the apartment house or Internet provider.
On BLUETOOTH communication
Supported BLUETOOTH version and profiles
Profile refers to a standard set of functions for various BLUETOOTH
product features. See “BLUETOOTH section” in “Specifications”
(page38) for the BLUETOOTH version and profiles supported by this
receiver.
Effective communication range
BLUETOOTH devices should be used within approximately 30meters
(98.4feet) (unobstructed distance) of each other. The effective
communication range may become shorter under the following
conditions.
•When a person, metal object, wall or other obstruction is between the
devices with a BLUETOOTH connection
•Locations where a wireless LAN is installed
•Around microwave ovens that are in use
•Locations where other electromagnetic waves are generated
Effects of other devices
BLUETOOTH devices and wireless LAN (IEEE 802.11b/g/n) device use the
same frequency band (2.4GHz). When using your BLUETOOTH device
near a device with wireless LAN capability, electromagnetic interference
may occur. This could result in lower data transfer rates,noise, or inability
to connect.If this happens, try the following remedies:
•Use this receiver at least 10meters (33feet) away from the wireless LAN
device.
•Turn off the power to the wireless LAN device when using your
BLUETOOTH device within 10meters (33feet).
•Install this receiver and BLUETOOTH device as closer to each other as
possible.
Effects on other devices
The radio waves broadcast by this receiver may interfere with the
operation of some medical devices.Since this interference may result in
malfunction, always turn off the power on this receiver and BLUETOOTH
device in the following locations:
•In hospitals, on trains,in airplanes, at gas stations, and any place where
flammable gasses may be present
•Near automatic doors or fire alarms
•This receiver supports security functions that comply with the
BLUETOOTH specification to ensure secure connection during
communication using BLUETOOTH technology. However, this security
may be insufficient depending on the setting contents and other
factors,so always be careful when performing communication using
BLUETOOTH technology.
•Sony shall not be held liable in any way for damages or other loss
resulting from information leaks during communication using
BLUETOOTH technology.
•BLUETOOTH communication is not necessarily guaranteed with all
BLUETOOTH devices that have the same profile as this receiver.
•BLUETOOTH devices connected with this receiver must comply with
the BLUETOOTH specification prescribed by the Bluetooth SIG,Inc., and
must be certified to comply.However, even when a device complies
with the BLUETOOTH specification, there may be cases where the
characteristics or specifications of the BLUETOOTH device make it
impossible to connect, or may result in different control methods,
display or operation.
•Noise may occur or the audio may cut off depending on the BLUETOOTH
device connected with this receiver, the communications environment,
or surrounding conditions.
If you have any questions or problems concerning your receiver, please
consult your nearest Sony dealer.

8EN
STR-AZ7000ES/STR-AZ5000ES/STR-AZ3000ES
5-037-019-11(1)
Manuals provided for this product
The following manuals are provided for this product.
The information included in each manual is as shown below:
Startup Guide Operating
Instructions
(this booklet)
Help Guide
(online)
Preparation
Installation
Connections
Initial Setup
To read the Help Guide, go to
the following website:
https://rd1.sony.net/help/ha/
straz305070/h_uc/
Basic operations
Listening/Watching
Advanced operations
Listening/Watching
Advanced operations
BLUETOOTH features
Network features
Multi-zone features
Sound effect features
Other features
Adjusting settings
Troubleshooting
Precautions/Specifications

9EN
STR-AZ7000ES/STR-AZ5000ES/STR-AZ3000ES
5-037-019-11(1)
Table of contents
Manuals provided for this product ..................................... 8
Main parts and controls.....................................................10
Preparation 1: Preparing the receiver and the remote
control.......................................................................... 21
Preparation 2: Performing Easy Setup ...............................23
Enjoying video/sound from the connected device............24
Using the menu on the TV screen ......................................25
Changing the settings .......................................................27
Selectable sound fields and their effects...........................28
Reverting to the factory default settings ...........................29
Troubleshooting ............................................................... 30
Specifications ....................................................................35

10EN
STR-AZ7000ES/STR-AZ5000ES/STR-AZ3000ES
5-037-019-11(1)
Main parts and controls
Front panel cover
Parts Functions
(power) Turns the receiver on or sets it to standby
mode (page 22).
Power indicator Lights up according to the status of the
receiver. Also, the color of the indicator
changes depending on the status of the
receiver. For details, visit the Help Guide.
Remote control sensor Receives signals from the remote control.
MASTER VOLUME Turns to adjust the volume level (page 24).
Attaching the front cover

11EN
STR-AZ7000ES/STR-AZ5000ES/STR-AZ3000ES
5-037-019-11(1)
Front panel
Parts Functions
PING Displays the IP address and MAC address on
the display panel.
Input buttons Select the device you want to play.
When you press any of the input buttons, the
receiver turns on.
Press OTHERS button repeatedly to select
other playback source.
Display panel Switches information on the display panel.
TONE MODE, TONE+/– Press to adjust the bass/treble level of the
speaker.
SPEAKERS Switches the front speakers to“OFF”,“A”,“B”
or “A+B.”
Parts Functions
CALIBRATION MIC jack Connect the supplied calibration microphone
for “Auto Calibration”to this jack (page 21).
HDMI OUT Switches the output for two monitors
connected to the HDMI OUT A and
HDMI OUT B (ZONE 2) jacks. When
[HDMI OUT B Mode] is set to [Main] in
[HDMI Settings], output is toggled between
“HDMI A”,“HDMI B”,“HDMI A+B” and
“HDMI OFF” each time the button is pressed.
Select “HDMI OFF” to turn off the output for
HDMI OUT A and HDMI OUT B (ZONE 2) jacks.
When [HDMI OUT B Mode] is set to [Zone2],
output is toggled between“HDMI A” and
“HDMI OFF” each time the button is pressed.
(USB) port Connect a USB device here.
continued

12EN
STR-AZ7000ES/STR-AZ5000ES/STR-AZ3000ES
5-037-019-11(1)
Parts Functions
ZONE CONTROL (ZONE2,
ZONE 3)
Selects the location to be controlled.
Tuner control buttons Used for tuner operations.
BLUETOOTH Switches the receiver to the BLUETOOTH®
function by pressing the button when
[Bluetooth Mode] is set to [Receiver].
When the button is pressed and held for more
than 2 seconds,the receiver enters the pairing
mode.
TEST PICTURE Displays the Test Picture on the TV screen.
TEST TONE Plays back the Test Tone on the speakers.
PURE DIRECT Turns on the Pure Direct function to enjoy high
fidelity sound.
Menu operation buttons Used for menu operations displayed on the TV
screen and the display panel of the receiver.
HOME: Displays the home menu on the
TV screen (page 23, 24,
25, 27, 29).
AMP MENU: Displays the menu on the
display panel of the receiver to
operate the receiver.
IN-CEILING SP Activates the In-Ceiling Speaker Mode.
SOUND FIELD
(2CH/MULTI, MOVIE,
MUSIC)
Selects the sound field you want. For details,
see “Selectable sound fields and their effects”
(page 28).
HDMI IN 7 (VIDEO) jack
(for STR-AZ7000ES/
STR-AZ5000ES only)
Connect an HDMI device. For supported video
signals, see “Video signals supported by HDMI
jacks” (page 18).
360SSM Activates or deactivates the
360 Spatial Sound Mapping function.
The 360 Spatial Sound Mapping function
allows you to enjoy an amazing 360 Spatial
Sound experience that makes the sound
feel more spacious and as if there are more
speakers in the room.

13EN
STR-AZ7000ES/STR-AZ5000ES/STR-AZ3000ES
5-037-019-11(1)
Rear panel (STR-AZ7000ES)
IR REMOTE IN/OUT jacks •You can control the receiver from a
distance by connecting an IR repeater
(not supplied) to the IR REMOTE IN jack.
•You can start or stop playback of devices
such as a CD player connected to the
receiver by connecting an IR blaster (not
supplied) to the IR REMOTE OUT jack.
PRE OUT jacks Connect to an external power amplifier and a
subwoofer.
RS232C port This is the control expansion terminal for
custom installation.
FM ANTENNA terminal
HDMI IN/OUT jacks Connect HDMI devices. For supported video
signals, see “Video signals supported by HDMI
jacks” (page 18).
Wireless LAN antenna
DIGITAL OPTICAL IN jacks
COAXIAL IN (SA-CD/CD)
jack
TRIGGER OUT jacks Connect to interlock on/off of the power
supply of other 12V TRIGGER compliant
equipment, or the amplifier/receiver of Zone
2 or Zone 3.
continued

14EN
STR-AZ7000ES/STR-AZ5000ES/STR-AZ3000ES
5-037-019-11(1)
S-CENTER OUT jack When the receiver is connected to the
S-CENTER SPEAKER IN jack of your TV, you
can output the center part of the receiver
sound from the TV speakers. By using this
connection,TV audio such as dialogue can be
made to sound as if it is coming out of the TV
screen.(Acoustic Center Sync function)
LAN port
VIDEO IN jacks
VIDEO OUT jacks
AC IN terminal Connect the supplied AC power cord (mains
lead).
SPEAKERS terminals Connect to speakers.
By changing the setting, HEIGHT 3 terminals
can be used for the front wide, Zone 2 or
center 2 speaker connection.
With the center 2 speaker connection, by
installing two speakers above and below
the TV screen,for example, TV audio such
as dialogue can be made to sound as if it is
coming out of the TV screen. (Dual Center
Speaker function)
ZONE 2/ZONE 3 AUDIO
OUT (VARIABLE) jacks
AUDIO IN jacks

15EN
STR-AZ7000ES/STR-AZ5000ES/STR-AZ3000ES
5-037-019-11(1)
Rear panel (STR-AZ5000ES)
FM ANTENNA terminal
HDMI IN/OUT jacks Connect HDMI devices. For supported video
signals, see “Video signals supported by HDMI
jacks” (page 18).
Wireless LAN antenna
DIGITAL OPTICAL IN jacks
COAXIAL IN (SA-CD/CD)
jack
TRIGGER OUT jacks Connect to interlock on/off of the power
supply of other 12V TRIGGER compliant
equipment, or the amplifier/receiver of Zone
2 or Zone 3.
IR REMOTE IN/OUT jacks •You can control the receiver from a
distance by connecting an IR repeater
(not supplied) to the IR REMOTE IN jack.
•You can start or stop playback of devices
such as a CD player connected to the
receiver by connecting an IR blaster (not
supplied) to the IR REMOTE OUT jack.
PRE OUT jacks Connect to an external power amplifier and a
subwoofer.
RS232C port This is the control expansion terminal for
custom installation.
continued

16EN
STR-AZ7000ES/STR-AZ5000ES/STR-AZ3000ES
5-037-019-11(1)
S-CENTER OUT jack When the receiver is connected to the
S-CENTER SPEAKER IN jack of your TV, you
can output the center part of the receiver
sound from the TV speakers. By using this
connection,TV audio such as dialogue can be
made to sound as if it is coming out of the TV
screen.(Acoustic Center Sync function)
LAN port
VIDEO IN jacks
VIDEO OUT jacks
AC IN terminal Connect the supplied AC power cord (mains
lead).
SPEAKERS terminals Connect to speakers.
By changing the setting, HEIGHT 2 terminals
can be used for the Zone 2 or center 2 speaker
connection.
With the center 2 speaker connection, by
installing two speakers above and below
the TV screen,for example, TV audio such
as dialogue can be made to sound as if it is
coming out of the TV screen. (Dual Center
Speaker function)
ZONE 2/ZONE 3 AUDIO
OUT (VARIABLE) jacks
AUDIO IN jacks
Table of contents
Other Sony Stereo Receiver manuals

Sony
Sony STR-DA3000ES User manual

Sony
Sony STR-DH130 User manual

Sony
Sony STR-K660P - Fm Stereo/fm-am Receiver User manual

Sony
Sony STR-DE135 User manual

Sony
Sony STR-ZA3100ES User manual

Sony
Sony STR-D515 - Fm-am Receiver User manual

Sony
Sony STR-DG520 User manual

Sony
Sony STR-D760Z User manual

Sony
Sony XAV-W600BT User manual

Sony
Sony ICF-SW7600 User manual

Sony
Sony CMT-X7CD User manual

Sony
Sony STR-DE975 User manual

Sony
Sony XAV-AX100 User manual

Sony
Sony STR-DE445 - Fm Stereo/fm-am Receiver User manual

Sony
Sony STR-DB795 Quick start guide

Sony
Sony STR-DH100 User manual

Sony
Sony XAV-9000ES User manual

Sony
Sony STR-WX5 User manual

Sony
Sony STR-DE245/DE345 User manual

Sony
Sony STR-D1015 User manual