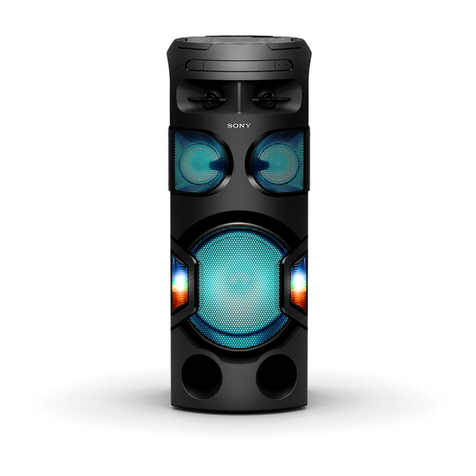
Sony FST-ZUX999 User manual

FST-ZUX999.GB.4-148-130-11(1)

FST-ZUX999.GB.4-148-130-11(1)
2GB
WARNING
To reduce the risk of re, do not cover the
ventilation opening of the apparatus with
newspapers, tablecloths, curtains, etc. Do
not place the naked ame sources such as
lighted candles on the apparatus.
To reduce the risk of re or electric shock,
do not expose this apparatus to dripping
or splashing, and do not place objects
lled with liquids, such as vases, on the
apparatus.
Do not install the appliance in a conned
space, such as a bookcase or built-in
cabinet.
As the main plug is used to disconnect
the unit from the mains, connect the unit
to an easily accessible AC outlet. Should
you notice an abnormality in the unit,
disconnect the main plug from the AC
outlet immediately.
Do not expose batteries or apparatus with
battery-installed to excessive heat such as
sunshine, re or the like.
e unit is not disconnected from the
mains as long as it is connected to the
AC outlet, even if the unit itself has been
turned o.
CAUTION
e use of optical instruments with this
product will increase eye hazard.
is appliance is classied as a CLASS 1
LASER product. is marking is located
on the rear exterior.
Note on DualDiscs
A DualDisc is a two sided disc product
which mates DVD recorded material on
one side with digital audio material on
the other side. However, since the audio
material side does not conform to the
Compact Disc (CD) standard, playback on
this product is not guaranteed.
Music discs encoded with copyright
protection technologies
is product is designed to playback
discs that conform to the Compact Disc
(CD) standard. Recently, various music
discs encoded with copyright protection
technologies are marketed by some record
companies. Please be aware that among
those discs, there are some that do not
conform to the CD standard and may not
be playable by this product.

FST-ZUX999.GB.4-148-130-11(1)
3GB
Note on copyright-protected
content
e transferred music is limited to private
use only. Use of the music beyond this
limit requires permission of the copyright
holders.
License and Trademark Notice
“WALKMAN” and “WALKMAN”
logo are registered trademarks of Sony
Corporation.
“Memory Stick” is a trademark of Sony
Corporation.
MPEG Layer-3 audio coding
technology and patents licensed from
Fraunhofer IIS and omson.
Windows Media is a registered
trademark of Microso Corporation
in the United States and/or other
countries.

FST-ZUX999.GB.4-148-130-11(1)
4GB
Table of Contents
About this system................................ 5
Guide to parts and controls .............7
Getting Started
Hooking up the system
securely..................................................19
Setting the clock ................................22
Operations
Playing a CD/MP3 disc .....................23
Listening to the radio .......................27
Before using the USB device with
this system............................................28
Transferring music to a USB
device.....................................................30
Recording analog audio to a USB
device.....................................................34
Playing a le of the USB device.....36
Creating your own program
(Program Play).....................................40
Using optional audio
components.........................................42
Adjusting the sound .........................43
Creating a party atmosphere.........45
Enjoying DJ-style music...................49
Changing the display .......................54
Changing other options..................56
Singing along ......................................57
Using the Timers.................................58
Additional Information
Troubleshooting.................................61
Messages...............................................69
Precautions...........................................71
Specications ......................................72
Compatible USB devices with this
system....................................................74

FST-ZUX999.GB.4-148-130-11(1)
5GB
About this system
is system oers two main features: the DJ-o mode and the DJ mode.
In DJ-o mode, you can use the system as a normal “audio compo” with the functions
allocated to A and B channels on the unit.
Furthermore, using the DJ mode of the system, you can enjoy DJ-style music such as
crossfading sound outputs using the multiple functions.
Switching the system between the DJ-mode and the DJ-o mode is easy!
Simply press the DJ MODE button which allows you to use either one as required.
Some buttons and indicators on the unit illuminate for your smooth operation. Check
the status while operating.
DJ MODE button
Lights up in blue
when in DJ mode.
CHANNEL A CHANNEL B
SEAMLESS SHUFFLE PLAY button
Lights up in bright green when you
use the seamless shue play.
SEAMLESS ON/OFF button
Lights up in bright amber when you
turn on the seamless play mode or
use the seamless shue play.
Functions on channel A
Lights up in bright amber when you
select either CD, TUNER, USB 1 or
AUDIO IN 1 function.
Playback/pause button for channel
A
Lights up in bright amber during
pause status.
During playback, the button lights up
in green.
Continued

FST-ZUX999.GB.4-148-130-11(1)
6GB
DJ mode “on and o” indicator
Lights up in amber when you are in
DJ-o mode and lights up in blue
when you are in DJ mode.
ENTER button for channel A
Lights up in amber and indicates the
button should be pressed.
(Headphones) CUE button for
channel A (DJ mode only)
Lights up in red when you are
listening to the sound using the
channel A functions in DJ mode.
You can switch the monitoring
channel from B to A with this button.
CROSS FADER slider (DJ mode only)
Slide to change the channel (A or B),
or mix the sounds from channel A
and B in DJ mode.
Functions on channel B
Lights up in bright amber when you
select the USB 2 or AUDIO IN 2
function.
ENTER button for channel B
Lights up in amber and indicates the
button should be pressed.
(Headphones) CUE button for
channel B (DJ mode only)
Lights up in red when you are
listening to the sound using the
channel B functions in DJ mode.
You can switch the monitoring
channel from A to B with this button.
MIC LEVEL dial
Adjust the microphone volume level.
LEVEL dial (DJ mode only)
Adjust the headphones volume level
in DJ mode.
Playback/pause button for channel
B
Lights up in bright amber during
pause status.
During playback, the button lights up
in green.
Notes on the DJ mode
When you turn o the system, the system
turns on in DJ-o mode the next time.
In DJ mode, only VOLUME +/and /
buttons on the remote can be used. Use
buttons on the unit for full operations.
In DJ mode, always check the CROSS
FADER slider position if there is no sound
from speakers.
In DJ mode, make sure to adjust the
headphones volume level using LEVEL.
MASTER VOLUME cannot be used to adjust
the headphones volume in DJ mode.
In DJ mode, always check the headphones
volume level when there is no sound output
from the headphones.
In DJ mode, always check if the channel
(CHANNEL A or B) for the selected function
and the CUE ( or ) button you pressed
matches when there is no sound output from
the headphones.

FST-ZUX999.GB.4-148-130-11(1)
7GB
Guide to parts and controls
is manual mainly explains operations using the buttons on the unit, but the same
operations can also be performed using the buttons on the remote when using the DJ-
o mode. However, in DJ mode, operations with the remote are limited (only /and
VOLUME +/buttons are available). Use the buttons on the unit for full operations
when using the DJ mode.
Main unit
Top view
Continued

FST-ZUX999.GB.4-148-130-11(1)
8GB
Front view
/(on/standby) button (page
21, 22, 59)
Press to turn on or o the system.
STANDBY indicator (page 55, 61)
Lights up when the system is turned o.
Remote sensor (page 62)
Function buttons (for CHANNEL
A):
CD/DISC button (page 23, 24, 25,
26, 30, 32, 40, 41, 51)
USB 1 button (page 29, 30, 36, 37,
38, 39, 40, 41, 51, 52)
TUNER/BAND button (page 27,
35)
AUDIO IN 1 button (page 35, 42)
Press to select a function.

FST-ZUX999.GB.4-148-130-11(1)
9GB
Guide to parts and controls
DISPLAY A button (for CHANNEL
A) (page 22, 54)
In DJ-o mode:
Press to change the information on the
display for audio source on CHANNEL
A and B.
In DJ mode:
Press to change the information on the
display for audio source on CHANNEL
A.
Level indicator (page 56)
Indicates the sound level of the audio
source that is currently being played
back.
OPERATION JOG dial (page 45,
46, 47, 48, 49, 50, 51)
Turn clockwise or counterclockwise to
select or adjust the setting, or control the
sound output.
OPERATION JOG dial is key dial and
allows you to control various operations
in combination with other buttons on
the unit.
ISOLATOR button (page 47)
Press to turn on or o the isolation eect
on the output sound.
FLANGER button (page 46)
Press to turn on or o the anger eect
on the output sound.
DELAY button (page 46)
Press to turn on or o the delay eect on
the output sound.
SOUND FLASH button (page 45)
Press to turn on or o the sound ashing
eect.
X-ROUND ON/OFF button (page
47, 48)
Press to turn on or o the X-ROUND
function.
X-ROUND AUTO button (page 47)
Press to select the X-ROUND automatic
mode.
X-ROUND MANUAL button (page
47)
Press to select the X-ROUND manual
mode.
MAX PAD button (page 48)
Press to enhance the sound.
CROSS FADER slider (DJ mode
only) (page 52, 53)
Slide to the le or right to separate or
blend the sound from CHANNEL A
and B.
Control the playback operations when
using the fader start function.
Level indicator (page 56)
Indicates the sound level of the audio
source that is currently being played
back.
Continued

FST-ZUX999.GB.4-148-130-11(1)
10GB
DISPLAY B button (for CHANNEL
B) (page 22, 54)
In DJ-o mode:
Press to display the clock.
Press to display the sound level.
In DJ mode:
Press to display the clock.
Press to change the information on the
display for audio source on CHANNEL
B.
Function buttons (for CHANNEL
B):
USB 2 button (page 29, 32, 36, 37,
38, 39, 40, 41, 51, 52)
AUDIO IN 2 button (page 35, 42,
43)
Press to select a function.
(USB 2) port (page 30, 32, 34,
51, 59)
Connect an optional USB device for
playback, transferring or recording of
audio les.
USB indicator lights up in red when
transferring or recording to the
connected USB device or when erasing
audio les or folders.
ERASE button (DJ-o mode only)
(page 32)
Press to erase audio les and folders
from the USB device connected to the
(USB 2) port.
REC TO button (DJ-o mode
only) (page 31, 32, 35)
Press to transfer audio tracks or les
from a disc or record the sound from an
analog audio source to the USB device
connected to the (USB 2) port.
Press to transfer audio les from the
USB device connected to the (USB 1)
port to the USB device connected to the
(USB 2) port.
MIC LEVEL dial (page 57)
Turn clockwise or counterclockwise to
adjust the microphone volume.
(Headphones) LEVEL dial (DJ
mode only) (page 53)
Turn clockwise or counterclockwise to
adjust the headphones volume level in
DJ mode.
When listening to the audio source
through headphones in DJ-o mode,
adjust the headphones volume using
MASTER VOLUME.
NIGHT MODE button (page 45)
Press to turn on or o the night mode.

FST-ZUX999.GB.4-148-130-11(1)
11GB
Guide to parts and controls
Continued
OPTIONS button (page 25, 26, 27,
29, 32, 37, 38, 39, 41, 43, 52, 54,
56, 58)
Press to enter or exit the OPTIONS
menu.
BEAT LEVEL button (page 49, 51)
Press to select the beat sound level.
BEAT PATTERN button (page 50,
51)
Press to display the selected beat pattern
(rhythms of the beat).
Hold down to change the beat pattern
with the OPERATION JOG.
BEAT SPEED button (page 51)
Press to display the current beat speed
when the auto BPM function is activated
by the system.
Hold down to change the beat speed with
the OPERATION JOG.
BPM CONTROL button (page 50)
Press to input the tempo of the audio
source. is function can be used with
the AUDIO IN 1, 2 or TUNER function
in DJ-o mode and all functions in DJ
mode.
Note that the tempo is automatically
calculated by the system with the auto
BPM function when using the CD, USB
1 or USB 2 function in DJ-o mode.
However, you can turn on the auto BPM
function at any time by pressing the
BPM CONTROL button even when the
function is forcibly turned o due to the
tempo change made manually.
BEAT ON/OFF button (page 50)
Press to turn on or o the rhythms of
the beat.
PAD 1/PAD 2/PAD 3/PAD 4 button
(page 49)
Press to select a registered PAD sound.
Hold down to change the PAD sound or
to perform the combo PAD sounds with
the OPERATION JOG.
For CHANNEL B operations:
Search dial (page 29, 37, 38, 39,
41, 43, 52, 54, 56, 58)
Turn clockwise or counterclockwise to
select a track, le or folder.
Turn clockwise or counterclockwise to
select a setting in OPTIONS menu.
ENTER button (page 29, 33, 37,
38, 39, 41, 43, 52, 54, 56, 58, 59)
Press to enter the settings.
e ENTER buttons on the unit guide
you to which button should be pressed
with a ashing indicator.

FST-ZUX999.GB.4-148-130-11(1)
12GB
(play/pause) button (page
36, 41, 51)
Press to start or pause playback.
(stop) button (page 32, 35, 36,
37, 40)
Press to stop playback, transferring or
recording.
RETURN button (page 37)
Press to return to the parent folder.
Press to return to previous display of the
OPTIONS menu.
Press to exit search mode.
/(go back/go forward)
button (page 32, 36, 41)
Press to select a track or le.
/(rewind/fast forward)
button (page 36)
Hold down to nd a point in a track or
le.
+/(select folder) button
(page 32, 36, 41)
Press to select a folder.
(Headphones) CUE button
(DJ mode only) (page 53)
Press to listen to CHANNEL B sound
through the connected headphones.
ILLUMINATION button (page 56)
Press to select the power illumination
pattern.
GROOVE button (page 43)
Press to reinforce the bass.
X-MAXIMIZER button (page 44)
Press to enhance the sound quality.
MASTER VOLUME
Turn clockwise or counterclockwise to
adjust the volume.
POWER ILLUMINATOR (page 56)
SURROUND button (page 43)
Press to turn on or o the surround
eect.
AUTO MP3 BOOSTER+ button
(page 44)
Press to improve and enhance the audio
le’s sound quality.
LEVEL INDICATOR button (page
56)
Press to select the level indicator pattern.
(Headphones) CUE button
(DJ mode only) (page 53)
Press to listen to CHANNEL A sound
through the connected headphones.

FST-ZUX999.GB.4-148-130-11(1)
13GB
Guide to parts and controls
Continued
For CHANNEL A operations:
Search dial (page 23, 24, 25, 26,
27, 29, 32, 37, 38, 39, 41, 43, 52,
54, 56, 58)
Turn clockwise or counterclockwise to
select a track, le or folder.
Turn clockwise or counterclockwise to
select a setting in OPTIONS menu.
ENTER button (page 23, 24, 25,
26, 27, 29, 32, 37, 38, 39, 41, 43,
51, 52, 54, 56, 58)
Press to enter the settings.
e ENTER buttons on the unit guide
you to which button should be pressed
with a ashing indicator.
(play/pause) button (page
23, 36, 41, 51)
Press to start or pause playback.
(stop) button (page 23, 32, 36,
37, 40)
Press to stop playback, transferring or
recording.
RETURN button (page 24, 37)
Press to return to the parent folder.
Press to return to previous display of the
OPTIONS menu.
Press to exit search mode.
TUNING +/button (page 27)
Press to tune in the desired station.
/(go back/go forward)
button (page 23, 36, 41)
Press to select a track or le.
/(rewind/fast forward)
button (page 23, 36)
Hold down to nd a point in a track or
le.
+/(select folder) button
(page 23, 36, 41)
Press to select a folder.
HIGH/MID/LOW dial (page 44)
Turn clockwise or counterclockwise to
adjust the level of frequency band.
SEAMLESS SHUFFLE PLAY button
(for the USB function in DJ-o
mode only) (page 39)
Press to start the seamless music shue
playback for audio les stored in the
connected USB device.
SEAMLESS ON/OFF button (for
the USB function in DJ-o mode
only) (page 39)
Press to turn on or o the seamless
play mode for audio les stored in the
connected USB device.
DJ MODE button
Press to turn on or o the DJ mode.

FST-ZUX999.GB.4-148-130-11(1)
14GB
(USB 1) port (page 29, 31, 36,
51)
Connect an optional USB device.
Use the (USB 1) port for playback
only.
DISC 1 DISC 3 buttons (page
24)
Press to select a disc.
Press to switch to the CD function from
other functions.
DISC SKIP/EX-CHANGE button
(page 24)
Press to select a disc.
Press to exchange a disc while playing.
OPEN/CLOSE button
Press to load or eject a disc (discs).
MIC jack (page 57)
Connect a microphone.
(Headphones) jack
Connect the headphones.
Disc tray
Remote
* Buttons on the remote other than /and
VOLUME +/cannot be used in DJ mode.
/(on/standby) button (page
21, 22, 59)
Press to turn on or o the system.

FST-ZUX999.GB.4-148-130-11(1)
15GB
Guide to parts and controls
Continued
CLOCK/TIMER SELECT button
CLOCK/TIMER SET button (page
22, 59)
Press to set the clock and the timers.
REPEAT/FM MODE button (page
26, 27, 39)
Press to listen to a disc, a single track or
le repeatedly.
Press to select the FM reception mode
(monaural or stereo). e FM reception
mode can be selected only in DJ-o
mode.
Function buttons:
USB button (page 30, 32, 36, 37,
38, 39, 40)
Press to select the USB function.
CD button (page 23, 30, 40)
Press to select the CD function.
TUNER/BAND button (page 27,
35)
Press to select the TUNER function.
Press to select FM or AM reception
mode.
FUNCTION button (page 23, 30,
32, 35, 36, 37, 38, 39, 40, 42, 43)
Press to select a function.
+/(tuning) button (page 27)
Press to tune in the desired station.
/(go back/go forward)
button (page 23, 32, 36, 41)
Press to select a track or le.
/(rewind/fast forward)
button (page 23, 36)
Hold down to nd a point in a track or
le.
ENTER button (page 22, 23, 24,
25, 26, 27, 28, 33, 37, 38, 39, 41,
43, 54, 56, 58, 59)
Press to enter the settings.
DISC SKIP button (page 24)
Press to select a disc.
+ (select folder) button (page
23, 32, 36, 41)
Press to select a folder.

FST-ZUX999.GB.4-148-130-11(1)
16GB
VOLUME +/button
Press to adjust the volume.
Press to adjust the headphones volume in
DJ-o mode.
(select folder) button (page
23, 32, 36, 41)
Press to select a folder.
EQ button (page 44)
Press to select the frequency band. e
frequency level for the selected frequency
can be adjusted with the /
button.
CLEAR button (page 42)
Press to delete a pre-programmed track
or le.
Playback buttons
(play) button (page 23, 36,
41)
Press to start playback.
(pause) button (page 23, 36)
Press to pause playback.
(stop) button (page 23, 32, 35,
36, 37, 40)
Press to stop playback, transferring or
recording.
TUNER MEMORY button (page
27, 28)
Press to preset the radio station.
PLAY MODE/TUNING MODE
button (page 26, 27, 28, 38, 41)
Press to select the play mode of a disc or
a USB device.
Press to select the tuning mode.
DISPLAY button (page 22, 54)
Press to display the clock.
Press to change the information on the
display.
SLEEP button (page 58)
Press to set the Sleep Timer.

FST-ZUX999.GB.4-148-130-11(1)
17GB
Guide to parts and controls
Continued
Indicates the disc presence. (page 23)
Indicates the selected play mode.
(page 25, 37)
Lights up in tuner function. (page 27)
Lights up when the respective
eect(s) is turned on.
Indicates the playback status for audio
source on CHANNEL B in DJ mode.
Lights up when the night mode is
turned on. (page 45)
Indicates the selected play mode for
audio source on CHANNEL B when
using the DJ mode. (page 37)
Lights up when the USB device is
connected to the (USB 2) port.
Lights up when the timer is set. (page
58)
Lights up during transferring or
recording. (page 30, 34)
Indicates the le format for an audio
le being played back in DJ mode
from the USB device connected to the
(USB 2) port.
Indicates the sound level for audio
source in DJ-o mode.
Displays the text information for
audio source on CHANNEL B in DJ
mode.
Lights up when a track name ( ),
a tag information (TAG), an artist
name ( ) and/or a folder name ( )
is displayed for CHANNEL B in DJ
mode. (page 54)
Indicates the current eect level
(“ISOLATOR”/“FLANGER”/
“DELAY”/“SOUND FLASH”)
adjusted by OPERATION JOG.
Indicates the current X-ROUND
mode.
During playback of audio source, this
also indicates the sound level.
Display

FST-ZUX999.GB.4-148-130-11(1)
18GB
Lights up when the seamless mode is
turned on during playback. (page 39)
Indicates the equalizer level of high,
mid and low frequency bands. (page
44)
Lights up when the USB device is
connected to the (USB 1) port.
Lights up when the disc (or discs) is
loaded in DJ-o and DJ mode (“CD”).
Indicates the le format (“MP3”/
“WMA”/“AAC”) for an audio le
being played back in DJ-o mode
from the MP3 disc or either USB
device connected to the (USB 1 or
USB 2) port.
Indicates the le format (“MP3”/
“WMA”/“AAC”) for an audio le
being played back in DJ mode
from the MP3 disc or USB device
connected to the (USB 1) port.
Displays the text information for all
functions on CHANNEL A and B in
DJ-o mode.
Displays the text information for
audio source on CHANNEL A in DJ
mode.
Lights up when a track name ( ),
a tag information (TAG), an artist
name ( ) and/or a folder name ( )
is displayed.
e information is displayed for
CHANNEL A or B in DJ-o mode,
and for CHANNEL A in DJ mode.
(page 54)
Indicates the playback status for audio
source.

FST-ZUX999.GB.4-148-130-11(1)
19GB
Getting Started
Getting Started
Hooking up the system securely
White tube Blue tube Blue tube White tube
Connect blue connector
to REAR (L) jack
Connect blue connector to
REAR (R) jack Connect white connector
to FRONT (L) jack
Connect white connector to
FRONT (R) jack
Continued

FST-ZUX999.GB.4-148-130-11(1)
20GB
FM lead antenna (Extend it horizontally.)
AM loop antenna
To wall outlet
To front speaker (Right)
To rear speaker (Right)
To rear speaker (Left)
To front speaker (Left)
Antennas
Find a location and an orientation that
provide good reception, and then set up
the antennas.
Keep the antennas away from the speaker
cords, the power cord and the USB cable
to avoid picking up noise.
Front/Rear speakers
Press down on the tab below the jack on
the speaker and insert the appropriate
speaker cord. Make sure the metal
leads (not the part covered with vinyl
insulation) are securely inserted into the
speaker jacks. Insert the end of the cord
marked with a black line into the jack
and the cord with a colored tube (blue or
white) into the jack. If the cords are
reversed, the sound will be distorted and
will lack bass.
Jacks on the front and rear speakers
Insert only the stripped
portion of the speaker cords
Cord with
a black
line ()
Cord with a
colored tube
(white for front
speakers and
blue for rear
speakers) ()
Make sure to match the projections on
the SPEAKER jacks on the unit and the
speaker cords, and insert the cords rmly
to the SPEAKER jacks.
e speaker cords can be tted with a
cable hook at the bottom-rear of each
front or rear speaker.
Cable hook
Voltage selector
For models with a voltage selector, set
VOLTAGE SELECTOR to the local
power line voltage.
Set VOLTAGE SELECTOR to 230
240V, 220V or 120V.
Table of contents
Other Sony Stereo System manuals

Sony
Sony MEX-N6000BH User manual

Sony
Sony HCD-DP900D User manual

Sony
Sony ZS-X3CP Marketing Specifications & Features User manual

Sony
Sony HCD-ZX30AV User manual

Sony
Sony CX-LFA500 User manual

Sony
Sony HCD-V3900 User manual

Sony
Sony ZS-D7 User manual

Sony
Sony CMT-V50iP User manual

Sony
Sony BKSR-2020 User manual

Sony
Sony SRS-XB32 User manual