2
INFORMATION
You are cautioned that any changes or modifications not
expressly approved in this manual could void your authority to
operate this equipment.
WARNING
To reduce the risk of fire or electric shock, do not expose this
apparatus to rain or moisture.
To avoid electrical shock, do not open the cabinet. Refer
servicing to qualified personnel only.
Caution
The mains plug on this equipment must be used to disconnect
mains power.
Please ensure that the socket outlet is installed near the
equipment and shall be easily accessible.
Notice
Use the power cord set approved by the appropriate testing
organization for the specific countries where this unit is to be
used.
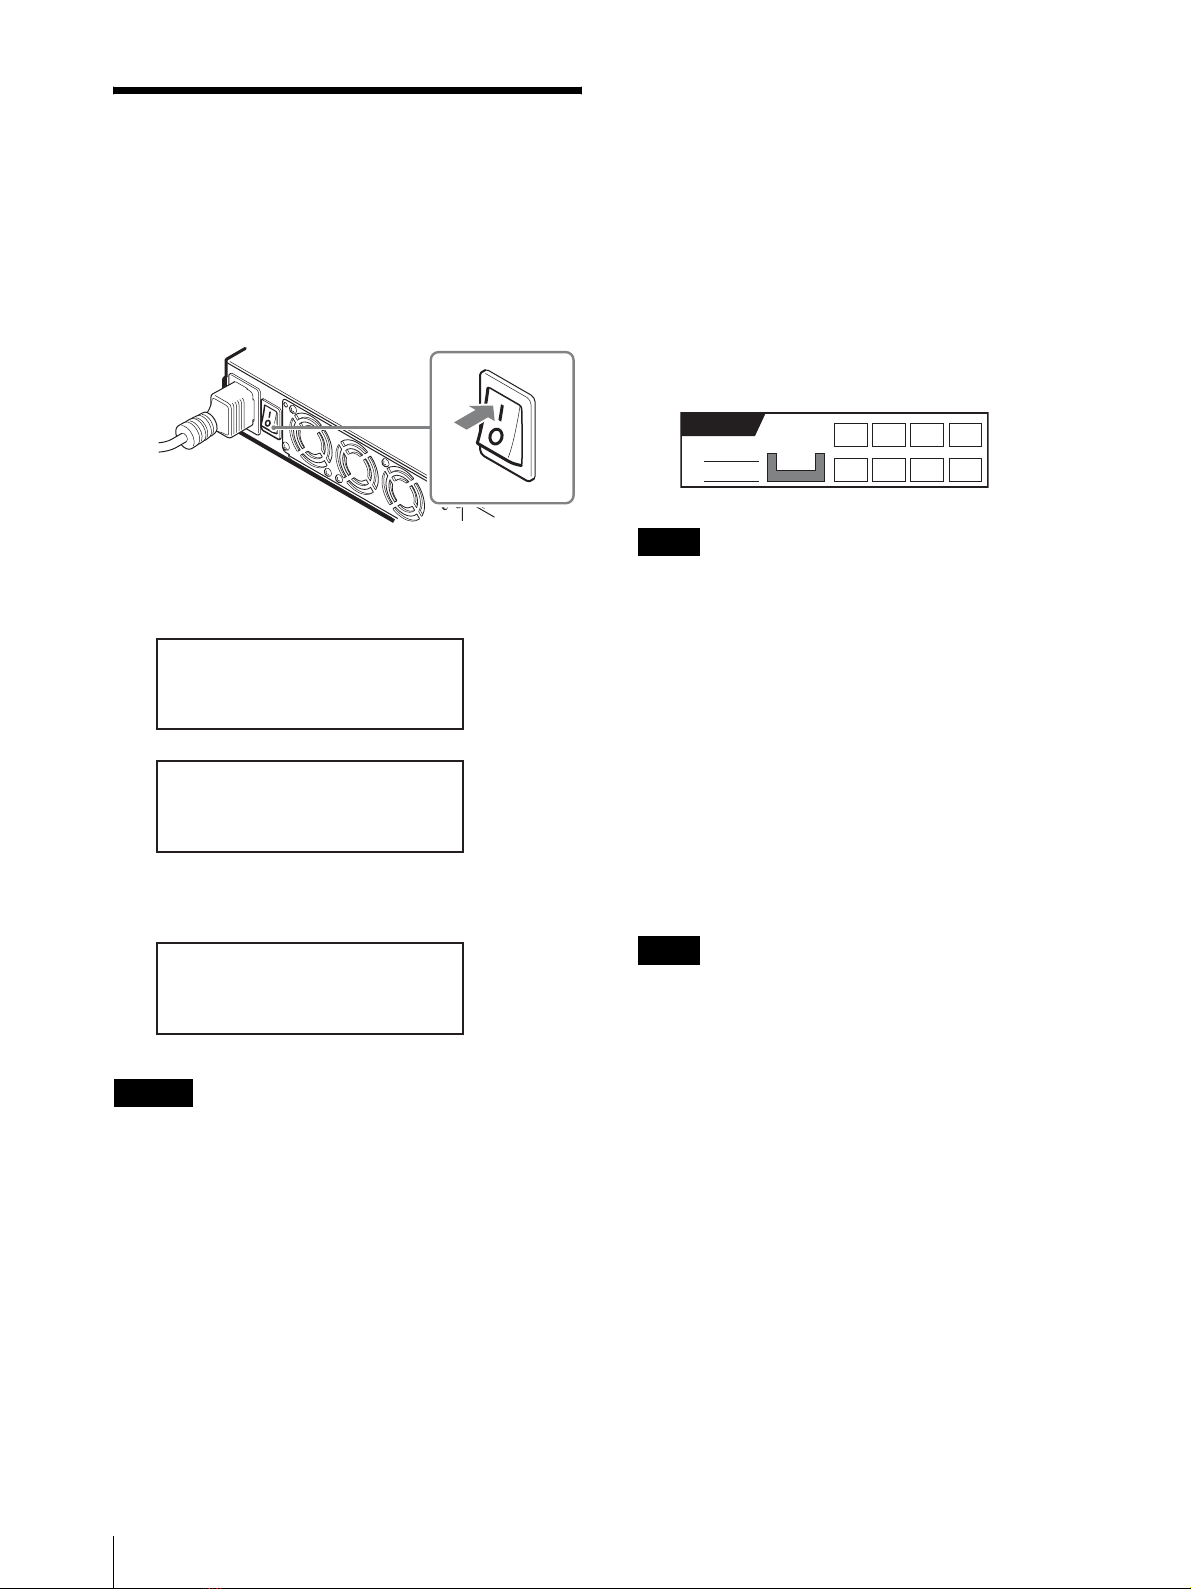
WARNING
Before performing any installation or maintenance procedures,
be sure that the library power switch is in the off position and
that the power cord is disconnected from the library.
WARNING
The standalone library weighs around 13.5 kg. At least 2 people
are needed to move or lift the library. Make sure you install the
rack-mount library in the lowest possible location in the rack.
For best results, use a rack with extension support legs.
INFORMATION
This equipment has been tested and found to comply with the
limits for a Class B digital device, pursuant to Part 15 of the FCC
Rules. These limits are designed to provide reasonable
protection against harmful interference in a residential
installation. This equipment generates, uses, and can radiate
radio frequency energy and, if not installed and used in
accordance with the instructions, may cause harmful
interference to radio communications. However, there is no
guarantee that interference will not occur in a particular
installation. If this equipment does cause harmful interference to
radio or television reception, which can be determined by
turning the equipment off and on, the user is encouraged to try
to correct the interference by one or more of the following
measures:
• Reorient or relocate the receiving antenna.
• Increase the separation between the equipment and receiver.
• Connect the equipment into an outlet on a circuit different
from that to which the receiver is connected.
• Consult the dealer or an experienced radio/TV technician for
help.
All interface cables used to connect peripherals must be shielded
in order to comply with the limits for a digital device pursuant
to Subpart B of Part 15 of FCC Rules.
If you have any questions about this product, please contact
the Sony Support Center written on the warranty card.
ATTENTION
According to the EU Directives related to product safety, EMC
and R&TTE the manufacturer of this product is Sony
Corporation, 1-7-1 Konan Minato-ku Tokyo, 108-0075 Japan.
The Authorised Representative is Sony Deutschland GmbH,
Hedelfinger Strasse 61,70327 Stuttgart, Germany. For any
service or guarantee matters please refer to the addresses given
in separate service or guarantee documents.
AUFMERKSAMKEIT
Im Sinne der EU Richtlinien bezüglich Produktsicherheit, EMV
und R&TTE ist Sony Corporation, 1-7-1 Konan Minato-ku
Tokyo, 108-0075 Japan der Hersteller dieses Produktes.
Bevollmächtigter ist Sony Deutschland GmbH, Hedelfinger
Strasse 61,D-70327 Stuttgart. Für Service oder
Garantieangelegenheiten wenden Sie sich bitte an die in
separaten Service oder Garantiedokumenten angegebenen
Adressen.
RoHS 指令(欧州環境規制)に対応済
European Union Restriction of Hazardous
Substances Directive compliant.
Entspricht der Richtlinie der Europäischen
Union zur Beschränkung der Verwendung
gefährlicher Stoffe.
Für Kunden in Deutschland
Diese Ausrüstung erfüllt die Europäischen EMC-
Bestimmungen für die Verwendung in folgender/folgenden
Umgebung(en):
• Wohngegenden
• Gewerbegebiete
• Leichtindustriegebiete
(Diese Ausrüstung erfüllt die Bestimmungen der Norm
EN55022, Klasse B.)
ACHTUNG
Zur Trennung vom Netz ist der Netzstecker aus der Steckdose
zu ziehen, welche sich in der Nähe des Gerätes befinden muß
und leicht zugänglich sein soll.
HINWEISE
• Maschinenlärminformations-Verordnung - 3. GPSGV, der
höchste Schalldruckpegel beträgt 70 dB(A) oder weniger
gemäss EN ISO 7779.
• Zum Netzanschluß dieses Gerätes ist eine geprüfte Leitung zu
verwenden.
Es sind die zutreffenden nationalen Errichtungs- und/oder
Gerätebestimmungen zu beachten. (Für einen Nennstrom bis
6A)
Declaration of Conformity
Trade Name: SONY
Model No.: LIB-81
Responsible Party: Sony Electronics Inc.
Address: 16530 Via Esprillo San Diego, CA. 92127
U.S.A.
Telephone No.: 858-942-2230
This device complies with Part 15 of the FCC Rules. Operation is
subject to the following two conditions:
(1) This device may not cause harmful interference, and
(2) This device must accept any interference received, including
interference that may cause undesired operation.