manuals.online logo
Brands
  1. Home
  2. •
  3. Brands
  4. •
  5. Sony
  6. •
  7. TV
  8. •
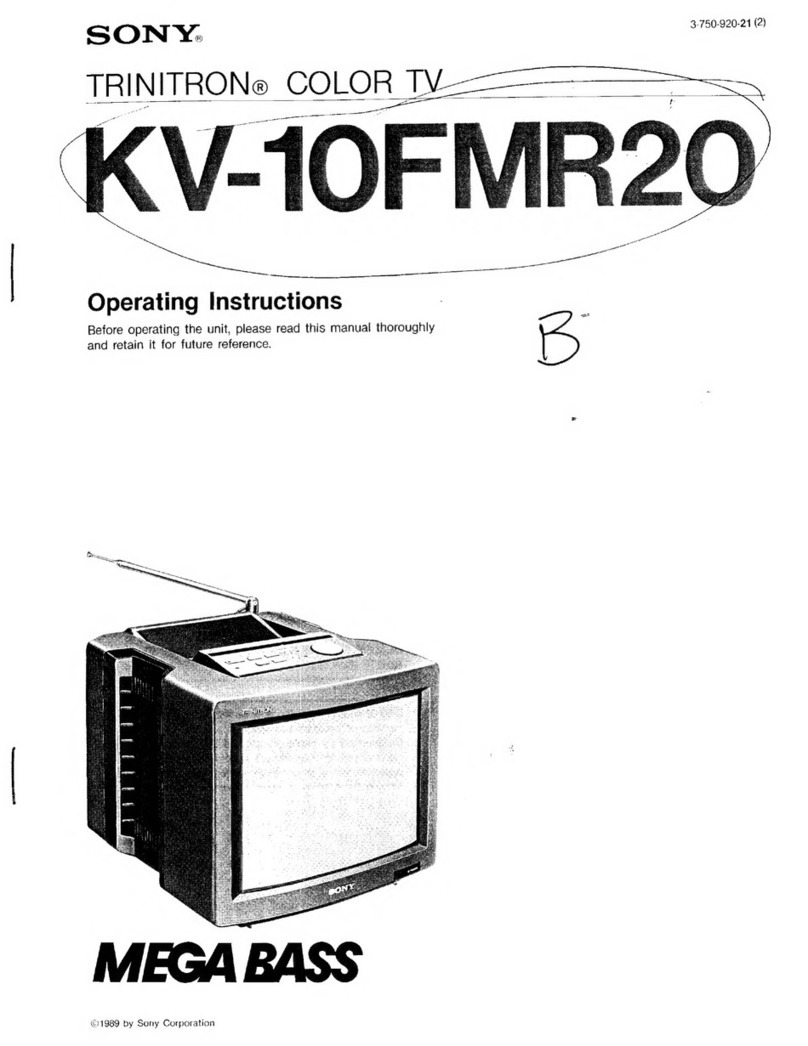
  9. Sony KV-19TS20 User manual

Sony KV-19TS20 User manual

S
oO
NY:
3-751-226-21
(1)
Trinitrone
Color
TV
KV-19TS20
KV-19TR10
KV-19TS10
KV-2037RS
KV-19TR20
KV-2027R
Operating
Instructions
Before
operating
the
unit,
please
read
this
manual
thoroughly
and
retain
it
for
future
reference.
Owner’s
Record
The
model
and
serial
numbers
are
located
at
the
rear
of
the
unit.
Record
these
numbers
in
the
spaces
provided
below.
Refer
to
them
whenever
you
call
upon
your
Sony
dealer
regarding
this
product.
Model
No.
Serial
No.
PROPERTY
OF
THE
NATIONAL
TECHNICAL
DEPT.
£ILe@
LOrY
Do
sot
remc
vé
©
1989
by
Sony
Corporation
WARNING
To
prevent
fire
or
shock
hazard,
do
not
expose
the
unit
to
rain
or
moisture.
oy
NULe)y
RISK
OF
ELECTRIC
SHOCK
DG
NOT
OPEN
CAUTION:
TO
REDUCE
THE
RISK
OF
ELECTRIC
SHOCK,
DO
NOT
REMOVE
COVER
(OR
BACK).
NO
USER-SERVICEABLE
PARTS
INSIDE.
REFER
SERVICING
TO
QUALIFIED
SERVICE
PERSONNEL.
This
symbol
is
intended
to
alert
the
user
to
the
presence
of
uninsulated
“dangerous
voltage”
within
the
product’s
enclosure
that
may
be
of
sufficient
magnitude
to
constitute
a
risk
of
electric
shock
to
persons.
This
symbol
is
intended
to
alert
the
user
to
the
presence
of
important
operating
and
maintenance
(servicing)
instructions
in
the
literature
accompanying
the
appliance.
CAUTION:
TO
PREVENT
ELECTRIC
SHOCK,
DO
NOT
USE
THIS
POLARIZED
AC
PLUG
WITH
AN
EXTENSION
CORD,
RECEPTACLE
OR
OTHER
OUTLET
UNLESS
THE
BLADES
CAN
BE
FULLY
INSERTED
TO
PREVENT
BLADE
EXPOSURE.
EEE
EEE
ee
Note
to
CATV
system
installer
in
the
U.S.A.
This
reminder
is
provided
to
call
the
CATV
system
installer’s
attention
to
Article
820-22
of
the
NEC
that
provides
guidelines
for
proper
grounding
and,
in
particular,
specifies
that
the
cable
ground
shal!
be
connected
to
the
grounding
system
of
the
building,
as
close
to
the
point
of
cable
entry
as
practical.
i
Identify
Your
TV
Before
Use
In
this
manual,
the
instructions
are
given using
the
model
with
maximum
functions.
Please
disregard
information
in
the
manual
which
contradicts
with
your
TV.
First
of
all,
please
check
the
model
number
of
your
TV
set.
This
manual
applies
to
several
models
and
there
are
slight
differences
among
them.
Please
check
the
table
below
to
see
what
is
equipped
with
your
TV
before
you
begin
the
operation.
Table
for
each
model
YES:
equipped
NO:
not
equipped
|Major
featuras
Models
19TS20
19TS10
19TR20
19TR10
2037RS
2027R
Stereo
reception
YES
YES
NO
NO
YES
NO
MTS
decoder
YES
YES
NO
NO
YES
NO
YES
YES
VIDEO
INPUT
jacks
(3
phono
jacks)
No
(2
phono
jacks)
Ne
nO
No
YES
AUDIO
OUTPUT
jacks
(VARIABLE)
NO NO
NO
NO
NO
SPEAKER
switch
on
the
rear
panel
YES
NO
NO
NO
NO
NO
Supplied
Remote
|
RM-783
RM-782
RM-781
RM-780
RM-782
RM-780
Commander
Telescopic
dipole
Pi
phew
i
NO
NO
YES"
YES*
NO
YES
Central
and
Central
and
Model
destination
U.S.A.
U.S.A.
U.S.A./Canada
|
U.S.A./Canada
|
South
America,
|South
America,
and
other
areas|and
other
areas
KV-2037RS
and
KV-2027R
are
for
the
customers
in
the
countries
other
than
the
U.S.A.
and
Canada.
«Supplied
only
for
U.S.A.
models.
Contents
Before
Use
Set-up
Operation
—
General
Features
Precautions
....
Location
of
controls.....
Connecting
TV
antenna/cable
..............
Connecting
other
optional
equipment
Presetting
TV
channels
Watching
TV
programs
Adjusting
the
picture
..........
Enjoying
the
convenient
features
......
Timer/Block
Specifications
Troubleshooting
Features
Color
monitor
featuring
a
Mirrorbiack™
Trinitron
picture
tube
for
high
resolution,
high
contrast
picture.
Multi-band
VHF/UHF/CATV
tuner
receives
up
to
125
cable
channels
for
a
total
of
181
possible
off-air
and
cable
channels.
Built-in
MTS
(Multichannel
TV
Sound)
decoder
enables
reception
of
stereo
programs
and
Second
Audio
Program
(SAP)
broadcasts.
(Only
for
KV-19TS20,
KV-19TS10,
KV-
2037RS)
Built-in
video
input
jacks
for
better
quality
picture
of
the
connected
VCR
or
other
equipment.
(Only
for
KV-19TS20,
KV-19TR20)
Variable
audio
output
jacks
reproduce
TV
or
video
sound
through
an
audio
system.
(Only
for
KV-19TS20)
On-screen
displays
Supplied
Remote
Commander
provides
you
many
other
convenient
features.
Timer/Block
for
automatic
program
starting
and
channel
blocking.
°
Sleep
timer
automatically
turns
off
the
TV
after
approximately
one
hour.
e
Automatic
programming
to
preset
all
receivable
channels
instantly.
«
Jump
button
to
switch
quickly
between
two
channels.
And
other
features
for
high
quality
picture.....
e
Dynamic
color™
system
for
superior
color
reproduction
with
natural
facial
color
tones
and
dazzling
whites.
«
Dynamic
picture™
system
adjusts
picture
contrast
automatically
to
produce
more
detail
in
both
bright
and
dark
areas
of
every
scene.
Precautions
Safety
¢
Operate
the
unit
only
on
120
V
AC.
One
blade
of
the
plug
is
wider
than
the
other
for
the
purpose
of
safety
and
will
fit
into
the
power
outlet
only
one
way.
If
you
are
unable
to
insert
the
plug
fully
into
the
outlet,
contact
your
dealer.
Should
any
liquid
or
solid
object
fall
into
the
cabinet,
unplug
the
unit
and
have
it
checked
by
qualified
personnel
before
operating
it
any
further.
Unplug
the
unit
from
the
wall
outlet
if
it
is
not
going
to
be
used
for
several
days
or
more.
To
disconnect
the
cord,
pull
it
out
by
the
plug.
Never
pull
the
cord
itself.
Installation
To
prevent
internal
heat
build-up,
do
not
block
the
ventilation
openings.
©
Do
not
install
the
unit
in
a
hot
or
humid
place
or
in
a
place
subject
to
excessive
dust
or
mechanical
vibration.
Cleaning
Clean
the
unit
with
a
slightly
damp
soft
cloth.
Use
a
mild
household
detergent.
Never
use
strong
solvents
such
as
thinner
or
benzine
as
they
might
damage
the
finish
of
the
cabinet.
Repacking
Retain
the
original
carton
and
packing
materials
for
safe
transport
of
this
unit
in
the
future.
TS
Use
of
this
television
receiver
for
other
than
private
viewing
of
programs
broadcast
on
UHF
or
VHF
or
transmitted
by
cable
companies
for
the
use
of
the
general
public
may
require
authorization
from
the
broadcaster/cable
company
and/or
program
owner.
If
you
have
any
questions
or
problems
concerning
your
unit,
please
contact
your
nearest
Sony
dealer.
For
details
safety
precautions,
see
the
leaflet
“IMPORTANT
SAFEGUARDS".
Mover:
1(elame)mOrelalicel
ts
Refer
to
the
pages
indicated
in
@
for
details.
On-screen
displays
a)
e
Channel
numbers
e
MTS
mode
indication
«
“MUTING”,
“SLEEP”
or
“VIDEO”
indication
b)
“AUTO
PROGRAM”,
“TIMER”
or
“TIMER
BLOCK”
indication
c)
«
Bar
display
for
volume
or
picture
adjustment
e
Current
time
for
Timer/Block
[1]
TV/VIDEO
button
@@
(Only
for
KV-19TS20,
KV-19TR20)
MTS
button
@
(Only
for
KV-19TS10,
KV-2037RS)
HABE
@)
[2]
VOLUME
+/-
buttons
@
@
[3]
CHANNEL
+/-
buttons
@
@
[4]
POWER
switch
@
@
[5]
TIMER
tamp
@
[6]
STEREO
lamp
@
(Only
for
KV-19TS20,
KV-19TS10,
KV-2037RS)
Remote
control
detector
KV-19TS10
KV-19TR10
KV-2037RS
KV-2027R
VHF/UHF
antenna
terminal
@
[9]
VIDEO
INPUT
jacks
@
(VIDEQ/AUDIO)
KV-19TR20
[10]
VIDEO
INPUT
jacks
@
(VIDEO/AUDIO
L,
R)
[11]
AUDIO
OUTPUT
(VARIABLE)
jacks
@
AUDIO
OUTPUT
AVARIABLE)
[12]
SPEAKER
ON/OFF
switch
@
Location
of
Contents
[
Remote
Commander
RM-780/781/782/783
[13]
MUTING
button
©
TIMER/BLOCK
setting
buttons
@
(TIMER/BLOCK,
CLEAR,
AM/PM,
OFF/REPEAT)
(15)
Channel
presetting
buttons
@
(AUTO
PGM,
ADD,
ERASE)
&)
&
Channel
number
buttons
@
@
DISPLAY
button
@
PICTURE
+/-
buttons
@
&
*VOL
(volume)
+/-
buttons
@ @
SLEEP
button
@
[21]
*POWER
switch
@@
—_
™
B
SSeS
WB
BBs
il
[22]
Picture
adjusting
buttons
@
(SELECT,
RESET,
LEVEL
+/-)
[23]
CABLE
button
@
@
*TV/VIDEO
button
@ @
(Only
for
RM-781,
RM-783)
SONY
[25]
«MTS
button
@
(Only
for
RM-782,
RM-783)
ENTER
button
@ @
JUMP
button
@
*CH
(channel)
+/-
buttons
@
@
*
The
functions
of
these
buttons
are
also
available
on
the
TV.
Battery
installation
Insert
two
size
AA(R6)
If
the
Commander
does
not
operate
properly,
the
batteries
with
correct batteries
might
be
exhausted.
Replace
them
with
new
polarity.
ones.
To
avoid
damage
from
possible
battery
leakage,
remove
the
batteries
when
the
Commander
will
not
be
used
for
a
long
time.
If
a
Remote
Commander
that
is
not
recommended
is
used
to
operate
this
TV,
or
if
the
supplied
Remote
Commander
is
used
to
operate
another
TV,
the
TV
may
not
operate
properly.
In
normal
operation,
batteries
will
last
up
to
half
a
year.
1
Open
the
lid.
2
Connecting
TV
Antenna/Cable
Indoor
Antenna
Adjustmen
For
VHF/UHF
reception,
use
the
supplied
telescopic
dipole
antenna.
Adjust
the
length,
direction
and
angle
of
both
elements
symmetrically
until
the
picture
is
clear.
*
The
telescopic
dipole
antenna
is
supplied
only
to
KV-19TR10/20
(USA
models)
and
KV-2027R.
Connecting
TV
Antenna/Cable
ovelicletel
me
UalCiliremeegicateln
If
you
cannot
obtain
satisfactory
reception
with
an
indoor
antenna,
use
an
outdoor
antenna.
Cabie
TV
reception
is
only
possible
by
connecting
a
cable
supplied
by
your
local
cable
operator.
To
connect
a
VHF,
UHF,
or
VHF/UHF
combination
antenna*
or
CATV
cable
/
1
Check
the
cable
type
and
prepare
the
cable
end
using
the
appropriate
connector.
75-ohm
coaxial
cable
(round)
300-ohm
twin-lead
cable
(flat)
v
Fasten
with
a
screwdriver.
Attach
an
optional
F-type
connector.
Antenna
connector
2
Plug
the
connector
into
VHF/UHF
on
the
rear
of
the
TV.
*
Most
combination
antennas
are
equipped
with a
signal
splitter.
How
to
attach
an
F-type
connector
to
the
75-ohm
coaxial
cable
Remove
the
splitter
and
attach
the
appropriate
connector.
1
———
=
—
[
—_
7mm
(‘4
inch)
10mm
(?/sinch)
—
-F-type
connector
[
3mm
(1/8
inch)
o
4
———
yr
10
When
you
connect
both
VHF
and
UHF
antennas
Use
the
optional
EAC-66
U/V
mixer.
1
Prepare
the
VHF
antenna
end
using
the
appropriate
connector.
2
Connect
the
cables
to
the
mixer.
3
Plug
the
mixer
to
VHF/UHF.
When
the
U/V
mixer
is
used
Snow
and
noise
may
appear
in
the
pictures
of
the
cable
TV
channels
over
37
(W+1).
tl
Connecting
Other
Optional
Equipment
The
VIDEO
INPUT
jacks
are
only
equipped
for
KV-1
9TS20
and
KV-19TR20.
Connecting
a
VCR
With
this
connection,
you
will
be
able
to...
-
View
the
playback
of
video
tapes
—
Record
TV
programs
—
Record
a
TV
program
while
viewing
another
For
KV-19TS20
Rear
of
TV
For
KV-19TR20
Rear
of
TV
{wipeo
ipur
|
te.
—
to
VHF/UHF
To
watch
the
VCR
picture
1
Turn
on
the
TV.
2
Press
the
TV/VIDEO
button
so
that
the
“VIDEO”
indication
appears
on
the
screen.
3
Set
the
VCR
in
playback
mode.
To
return
to
the
TV
mode
Press
the
TV/VIDEO
button
until
a
channel
number
appears
on
the
screen.
12
Connecting
cord
VMC-810S/820S
(optional)
to
line
F
FY
output
VHF/UHF
output
3.
Signal
flow
VMC-606M
(1m)/
607M
(2m)
(optional)
[o———5
jp
~
Jes
VCR,
Video
iz
=|
disc
player,
etc.
VHF/UHF
output
tc:
Signal
flow
«
If
you
connect
a
monaural
VCR,
connect
the
audio
output
of
the
VCR
to
the
L
jack
of
the
TV.
The
monaural
sound
is
heard
from
both
speakers.
For
operation,
refer
to
the
instruction
manual
furnished
with
the
VCR.
«
Keep
the
VCR
away
from
the
TV,
if
the
picture
or
sound
is
affected.
When
no
signal
is
fed
through
the
VIDEO
INPUT
jacks
even
though
the
TV
is
in
the
video
mode,
“VIDEO”
indication
will
appear
on
the
screen.
The
AUDIO
OUTPUT
jacks
are
equipped
only
for
KV-19TS20.
cOfoyalarcreutlarem-lameVelelComey
A111)
To
listen
to
the
TV
or
connected
VCR
sound
through
an
audio
system
When
an
audio
system
is
connected
to
AUDIO
OUTPUT,
be
sure
to
set
the
SPEAKER
switch
on
the
rear
of
the
TV
to
OFF.
The
sound
from
the
TV’s
speakers
will
be
cut
off.
KV-19TS20
Rear
of
TV
SPEAKER
ON
VHFOUME
to
AUDIO
OUTPUT
(VARIABLE)
To
adjust
sound
level
Leave
the
amplifier
volume,
bass
and
treble
controls
at
their
mid
position
and
adjust
the
level
with
the
VOLUME
buttons
on
the
TV
or
the
VOL
buttons
on
the
Commander.
Speakers
50,
DO-O
e@00M7MF0O
Amplifier
=~
}
to
line
input
Set
Amplifier’s
function
to
line
input.
RK-74A
connecting
cord
(optional)
«Choa:
Signal
flow
13
Presetting
TV
Cha
o
Preset
All
Receivable
Channels
Auto
ally
KV-19TS20
Press
POWER
on
the
TV
or
the
i"
-
‘
1
Remote
Commander
to
turn
the
TV
on.
===
Press
CABLE
so
that
the
appropriate
|
|
mode
appears.
—S-
C3
Remote
control
detector
To
preset
VHF
or
UHF
To
preset
cable
TV
channels
channels
Press
AUTO
PGM.
AUTO
PGM
“AUTO
PROGRAM’
is
displayed
on
the
screen
and
receivable
channels
(other
than
the
channels
already
preset)
will
be
preset
in
numerical
sequence.
The
channels
previ
unit's
memory.
When
no
more
channels
can
be
found,
the
programming
stops
and
the
lowest
numbered
channel
is
displayed.
ously
preset
remain
in
the
RM-783
Receivable
channles
of
this
TV
are:
To
check
preset
channels
VHF:
2-13
Press
CH
+/-.
UHF:
14-69
Cable:
1-125
To
add
the
channels
that
could
not
be
preset
with
Only
for
KV-19TS20,
KV-19TR20
automatic
programming
because
their
signal
strength
was
too
If
the
“VIDEO”
indication
is
displayed
on
the
screen
weak,
or
to
erase
unnecessary
channels,
follow
the
steps
in
Press
the
TV/VIDEO
button
on
the
TV
or
on
the
Remote
“To
preset
only
the
desired
channels”
on
the
next
page.
Commander
so
that
a
channel
number
appears.
14
ralats)
me)
an
CoM
=lesls\-Melnla(-iescr-
le
Preset
Only
the
Desired
C
1
Press
the
channel
number
button(s)
and
then
ENTER
to
select
the
channel
to
be
added
or
erased.
1
2
3
Cy
ea
tS)
4
5
6
G2)
bt Es
9
7
8
ss
|
ot
aa
0
ENTER
aaa
|
2
To
add
channels
-
Press
ADD.
A
“+”
appears
for
a
moment.
This
channel
has
now
been
added
to
the
channel
scan
memory.
To
erase
channels
—
Press
ERASE.
RM-783
A
“~"
appears
for
a
moment.
This
channel
has
now
been
erased
from
the
channel
scan
memory.
The
next
time
the
CH
+/-
button
is
pressed,
this
channel
will
be
skipped.
Repeat
steps
1
and
2
for
other
channels
to
be
added
or
erased.
When
a
VHF
or
UHF
channel
is
erased
The
cable
TV
channel
with
the
same
number
is
also
erased
and
vice
versa.
Cabie
TV
channel
chart*
Cable
TV
systems
use
letters
or
numbers
to
designate
channels.
To
tune
in
a
channel,
refer
to
the
chart
below.
Number
on
this
TV
4
5
6
14
15
16
7
+18 #19
#20
21
22 23
24
268
26
27
286
29
30
Corresponding
CATV
channel
AB A7
A6
A
8B
C
D_
CE
F
G_H
I
J
K
LM
NO PQ
31
32
33 34
35
36
37
38
39
nn
93
94
95
96
97
98
99
100
101
102
123
124
125
|
R
5
T
U
VW
Wt
W+2
Wad...
-
W+57
W+58_A-5
A-4
A3
A-2
A-1
W+59W-60
W+61
W+82 W+83
W-84
Check
with
your
local
cable
TV
company
for
more
complete
information
on
the
available
channels.
Note
Pay
cable
TV
systems
use
scrambled
or
encoded
signals
and
require
special
converters
(decoders)
in
addition
to
the
normal
cable
connection.
*
The
designation
of
the
cable
TV
channels
conforms
to
the
EIA/NCTA
recommendation.
10
Watching
TV
Programs
KV-19TS20
Press
POWER
on
the
TV
or
the
Remote
Commander
to
turn
the
TV
on.
Press
CABLE
so
that
the
appropriate
mode
appears.
3
C3
CABLE
To
view
VHF
or
UHF_
To
view
cable
TV
channels
channels
Select
a
channel
in
one
of
the
following
two
ways:
To
select
a
channel
directly,
press
the
channel
number
button(s)
and
then
ENTER.
For
example,
to
select
channel
10,
press
1,
0
and
ENTER.
544
ee
es
a
To
scan
the
preset
channels
in
numerical
sequence,
press
CH
+/-.
ENTER
,
'
'
‘
1
t
'
’
’
1
'
t
t
(
‘
'
1
t
{
t
t
’
1
1
'
'
t
t
‘
’
1
1
t
'
'
’
t
RM-783
4
Press
VOL
+
or
-
to
adjust
the
volume.
ay)
To
turn
off
the
TV
Press
POWER
on
the
TV
or
the
Remote
Commander
again.
16
PANo|(UC
(atom
(alm
aa
ed
eLE=
Press
SELECT
repeatedly
until
the
on-screen
display
of
the
item
to
be
adjusted
appears,
then
press
LEVEL
+/-.
RESET
SELECT
LEVEL
+/-
Skin
tones
|
“
‘UR
=
(NA
BN
NWA
AM
become
purplish
mma
peered.
Skin
tones
become
greenish
PICTURE
+/—
COLOR
-
LEVEL
+
COLOR
COLOR
1
0
a
ME
RM-783
To
decrease
color
intensity
_,¢élammanamesmm
sxcremasl,
To
increase
color
intensity
BRIGHT
(brightness)
-
LEVEL
+
BRIGHTNESS
‘WH
IGHTNESS
(none
eG
Oe
eee
Brighter
SHARP
(sharpness)
-
LEVEL
+
SHARPNESS
A
Softer
maces.
Sharper
To
adjust
picture
contrast
co
to
increase
picture
contrast
with
vivid
color.
+
PICTURE
ae
ae
to
decrease
picture
contrast
with
soft
color.
To
clear
the
adjustment
levels
and
restore
the
factory
preset
levels
at
once,
press
RESET.
17
MTS
JUMP
DISPLAY
RAM-783
18
Muting
the
sound
Press
MUTING.
The
“MUTING”
indication
will
appear
on
the
screen.
To
restore
the
sound,
press
MUTING
again
or
VOL
+.
Using
the
SLEEP
timer
Press
SLEEP.
The
TV
will
be
turned
off
automatically
after
about
one
hour.
The
green
“SLEEP
ON”
indication
will
appear
on
the
screen
for
a
few
seconds
when
SLEEP
is
pressed
and
the
red
“SLEEP”
indication
will
appear
one
minute
before
the
TV
is
turned
off.
To
cancel
the
SLEEP
timer,
press
SLEEP
again,
or
turn
off
the
TV.
The
“SLEEP
OFF”
indication
will
appear
when
SLEEP
is
pressed
again.
Receiving
a
Multichannel
TV
Sound
program
(Only
for
KV-19TS20,
KV-19TS10,
KV-2037RS)
Each
time
MTS
is
pressed,
MAIN,
SAP
(Second
Audio
Program),
or
MONO
are
selected
in
sequence.
To
listen
to
stereo
sound,
select
the
MAIN
mode
so
that
the
on-screen
MAIN
indication
appears.
The
STEREO
indicator
on
the
TV
lights
up
whenever
a
stereo
broadcast
is
received.
There
may
be
cases
of
stereo
broadcasts
where
excessive
noise
will
be
heard
due
to
a
weak
incoming
signal.
You
may
be
able
to
eliminate
this
noise
by
selecting
the
MONO
mode.
Switching
quickly
between
two
channels
Press
JUMP.
Each
time
JUMP
is
pressed,
the
channel
which
appeared
on
the
screen
directly
before
is
recalled.
This
button
enables
you
to
keep
track
of
two
programs
alternately.
Keeping
the
channel
displayed
Press
DISPLAY.
To
make
the
channel
display
disappear,
press
DISPLAY
again.
Timer/Block
Internal
clock
Once
the
internal
clock
is
set,
the
current
time
will
appear
on
the
screen.
It
is
necessary
to
set
the
clock
correctly
to
activate
the
program
start
TIMER
and
channel
BLOCK.
|
Program
start
TIMER
[Makes
a
program
of
your
choice
appear
on
the
screen
automatically
at
the
desired
time.
Pace
BLOCK
Blocks
a
channel
from
appearing
on
the
screen
for
12
hours.
Use
channel
BLOCK
to
prevent
children
from
watching
undesirable
programs.
The
buttons
used
for
the
above
functions
are
located
on
the
Remote
Commander.
To
set
the
internal
clock,
program
start
TIMER
and
channel
BLOCK,
you
must
summon
the
corresponding
“pages”:
“clock
page,”
“TIMER
page”
and
“BLOCK
page.”
To
change
the
“pages”,
press
TIMER/BLOCK.
stands
for
the
TIMER/BLOCK
button.
TIMER/
}
CLEAR
BLOCK
=:
“AM"/“PM"
indication
disappears.
“clock
page”
ENTER
[=
2
seconds
buttons
1/8
(TYMER
SET)
semeremen
[
)——>
BB
Aan
CH
One
€
ao
eee
before
9:00am
—
“AM"/PM”
“TIMER
page”
indication
pag
disappears
I
moh
ax}
(CH
BLOCK)
wifiem
CH.
aon
Mises
2
RM-783
{indications
in
red)
»
All
settings
will
be
erased
from
the
unit's
memory
if
the
unit
is
unplugged.
or
if
a
power
failure
occurs.
«
The
TIMER
and
BLOCK
will
operate
only
if
the
clock
is
set
correctly.
«
If
the
TIMER
and
BLOCK
are
set
for
overlapping
times
on
the
same
channel,
the
blocked
channel
will
appear
on
the
screen
at
the
time
set
on
the
TIMER.
13
Timer/Block
How
to
Set
the
Internal
Clock
Example:
To
set
the
clock
to
8:05
PM
Press
TIMER/BLOCK
once
to
change
from
“normal
page”
to
“clock
page.”
TIMER/BLOCK
G8:
BBam
“clock
page”
Press
0, 8, 0,
5
AM/PM
(0
necessary).
ooo
4
5 6
oOo
[as
—
ima)
08:05pm
If
you
have
performed
the
operation
correctly,
press
ENTER.
The
numbers
will
“wink”
to
indicate
that
the
clock
has
been
set.
(The
0
in
front
will
disappear.)
ENTER
If
you
have
made
a
mistake,
press
CLEAR
and
return
to
step
2.
The
“AM/PM”
indication
will
disappear
after
2
seconds.
To
summon
“TIMER
page,”
press
TIMER/BLOCK
before
the
“AM’/“PM"
indication
disappears.
To
return
to
“normal
page,”
press
TIMER/BLOCK
after
the
“AM"/“PM”
indication
has
disappeared.
To
reset
the
clock,
summon
“clock
page”
and
press
CLEAR
before
the
“AM"/“PM"
indication
disappears.
Then
follow
the
steps
above
from
step
2.
12:00
AM
stands
for
midnight.
12:00
PM
stands
for
noon.
20

Other manuals for KV-19TS20

1

This manual suits for next models

5

Other Sony TV manuals

Sony KV-20FS100 - 20" Fd Trinitron Wega User manual

Sony

Sony KV-20FS100 - 20" Fd Trinitron Wega User manual

Sony KE-42TS2U - 42" Flat Panel Color Tv User manual

Sony

Sony KE-42TS2U - 42" Flat Panel Color Tv User manual

Sony Bravia KDL-43W800F User manual

Sony

Sony Bravia KDL-43W800F User manual

Sony WEGA KV-BZ216 User manual

Sony

Sony WEGA KV-BZ216 User manual

Sony WEGA kv-da29 User manual

Sony

Sony WEGA kv-da29 User manual

Sony TRINITRON KV2080R User manual

Sony

Sony TRINITRON KV2080R User manual

Sony KE-42TS2E User manual

Sony

Sony KE-42TS2E User manual

Sony KV-27FS12 - 27" Trinitron Wega User manual

Sony

Sony KV-27FS12 - 27" Trinitron Wega User manual

Sony BRAVIA KD50X75WL User manual

Sony

Sony BRAVIA KD50X75WL User manual

Sony KV-30XBR910 User guide

Sony

Sony KV-30XBR910 User guide

Sony WEGA KLV-HG26M1 User manual

Sony

Sony WEGA KLV-HG26M1 User manual

Sony wega kv-aw212 User manual

Sony

Sony wega kv-aw212 User manual

Sony Bravia KD-43X8500G User manual

Sony

Sony Bravia KD-43X8500G User manual

Sony Bravia KD-65X9000C User manual

Sony

Sony Bravia KD-65X9000C User manual

Sony BRAVIA KDL-48R560C User manual

Sony

Sony BRAVIA KDL-48R560C User manual

Sony KD-65X9500B User manual

Sony

Sony KD-65X9500B User manual

Sony Trinitron WEGA KV-DZ29 User manual

Sony

Sony Trinitron WEGA KV-DZ29 User manual

Sony XR55A80CK User manual

Sony

Sony XR55A80CK User manual

Sony Trinitron KV-20V50 User manual

Sony

Sony Trinitron KV-20V50 User manual

Sony XR-83A80L User manual

Sony

Sony XR-83A80L User manual

Sony KLV-32M1 - 32" Lcd Wega Color Tv User manual

Sony

Sony KLV-32M1 - 32" Lcd Wega Color Tv User manual

Sony Trinitron WEGA KV-SZ29 User manual

Sony

Sony Trinitron WEGA KV-SZ29 User manual

Sony KD-30XS955 Instructions: TV stand User manual

Sony

Sony KD-30XS955 Instructions: TV stand User manual

Sony FD Trinitron WEGA KV-13FS110 User manual

Sony

Sony FD Trinitron WEGA KV-13FS110 User manual

Popular TV manuals by other brands

RCA 27F500T user guide

RCA

RCA 27F500T user guide

JVC AV-32H35SAE instructions

JVC

JVC AV-32H35SAE instructions

Toshiba 42 UA3A Series operating instructions

Toshiba

Toshiba 42 UA3A Series operating instructions

Philips 28PT7128/12 Specifications

Philips

Philips 28PT7128/12 Specifications

Westinghouse CW40T2RW user manual

Westinghouse

Westinghouse CW40T2RW user manual

Panasonic TX-P58V10E operating instructions

Panasonic

Panasonic TX-P58V10E operating instructions

Panasonic Viera TC-58PS24 operating instructions

Panasonic

Panasonic Viera TC-58PS24 operating instructions

Philips 50PFL3707/F8 quick start guide

Philips

Philips 50PFL3707/F8 quick start guide

RCA G27646 Brochure & specs

RCA

RCA G27646 Brochure & specs

Salora 43UHX4500 operating instructions

Salora

Salora 43UHX4500 operating instructions

Samsung UE55AU7175UXXC user manual

Samsung

Samsung UE55AU7175UXXC user manual

Samsung OH46F user manual

Samsung

Samsung OH46F user manual

Samsung HL-R5678W - 56" Rear Projection TV Guide de l'utilisateur

Samsung

Samsung HL-R5678W - 56" Rear Projection TV Guide de l'utilisateur

JVC AV-27D201 Service manual

JVC

JVC AV-27D201 Service manual

JVC I'Art Pro AV-56WP94 How-to

JVC

JVC I'Art Pro AV-56WP94 How-to

Brionvega BV1 instruction manual

Brionvega

Brionvega BV1 instruction manual

Sharp 21LS-90C Operation manual

Sharp

Sharp 21LS-90C Operation manual

Philips 50PFL3807/F7 user manual

Philips

Philips 50PFL3807/F7 user manual

manuals.online logo
manuals.online logoBrands
  • About & Mission
  • Contact us
  • Privacy Policy
  • Terms and Conditions

Copyright 2025 Manuals.Online. All Rights Reserved.