manuals.online logo
Brands
  1. Home
  2. •
  3. Brands
  4. •
  5. Sony
  6. •
  7. VCR System
  8. •
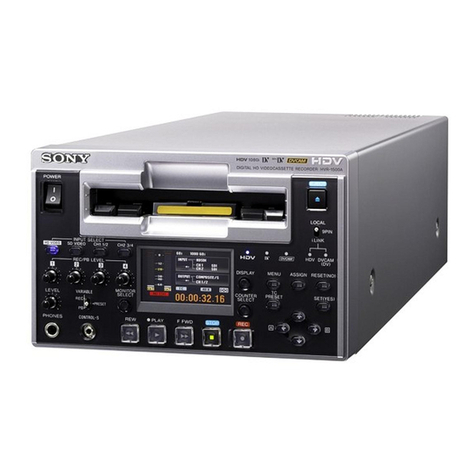
  9. Sony HR-A54U User manual

Sony HR-A54U User manual

This manual suits for next models

1

Other Sony VCR System manuals

Sony VO-5850P User manual

Sony

Sony VO-5850P User manual

Sony SLV-ED616MJ User manual

Sony

Sony SLV-ED616MJ User manual

Sony SRW-5000 User manual

Sony

Sony SRW-5000 User manual

Sony SLV-SE740B User manual

Sony

Sony SLV-SE740B User manual

Sony Video 8 EV-A50 User manual

Sony

Sony Video 8 EV-A50 User manual

Sony SLV-SE610K User manual

Sony

Sony SLV-SE610K User manual

Sony SLV-SF950N User manual

Sony

Sony SLV-SF950N User manual

Sony ShowView SLV-SE510B User manual

Sony

Sony ShowView SLV-SE510B User manual

Sony SLV-D300P Operating Instructions (SLVD300P) User manual

Sony

Sony SLV-D300P Operating Instructions (SLVD300P) User manual

Sony SLV-D370P - Dvd/vcr Combo User manual

Sony

Sony SLV-D370P - Dvd/vcr Combo User manual

Sony HDCAM-SR SRW5800 User manual

Sony

Sony HDCAM-SR SRW5800 User manual

Sony SLV-N51 - Video Cassette Recorder User guide

Sony

Sony SLV-N51 - Video Cassette Recorder User guide

Sony HDWM2000/20 User manual

Sony

Sony HDWM2000/20 User manual

Sony SLV-SE10 User manual

Sony

Sony SLV-SE10 User manual

Sony SLV-SP100R User manual

Sony

Sony SLV-SP100R User manual

Sony SLV-662HF Operating Instructions (SLV-662HF / 679HF / 679HF PX... User manual

Sony

Sony SLV-662HF Operating Instructions (SLV-662HF / 679HF / 679HF PX... User manual

Sony SLV-L6HF PL User manual

Sony

Sony SLV-L6HF PL User manual

Sony DNW-A220 User manual

Sony

Sony DNW-A220 User manual

Sony SLV-SE600A User manual

Sony

Sony SLV-SE600A User manual

Sony SLV-SE230B User manual

Sony

Sony SLV-SE230B User manual

Sony Betamax SL-HF2100 User manual

Sony

Sony Betamax SL-HF2100 User manual

Sony SLV-789HF - Video Cassette Recorder User manual

Sony

Sony SLV-789HF - Video Cassette Recorder User manual

Sony SLV-N700 - Video Cassette Recorder User manual

Sony

Sony SLV-N700 - Video Cassette Recorder User manual

Sony SLV-SF99EN User manual

Sony

Sony SLV-SF99EN User manual

Popular VCR System manuals by other brands

RCA VR678HF user guide

RCA

RCA VR678HF user guide

Zenith VRL4270HF Operating guide & warranty

Zenith

Zenith VRL4270HF Operating guide & warranty

Akai VS-606EA Operator's manual

Akai

Akai VS-606EA Operator's manual

Panasonic NV-SJ412EE operating instructions

Panasonic

Panasonic NV-SJ412EE operating instructions

FUNAI 27C-450 Service manual

FUNAI

FUNAI 27C-450 Service manual

Sanyo VHR-M262EV Service manual

Sanyo

Sanyo VHR-M262EV Service manual

JVC SR-VS20U - Dual Format S-vhs/minidv Recorder instructions

JVC

JVC SR-VS20U - Dual Format S-vhs/minidv Recorder instructions

Grundig GV 7400 EURO Service manual

Grundig

Grundig GV 7400 EURO Service manual

Zenith VCM321 Installation and operating guide

Zenith

Zenith VCM321 Installation and operating guide

JVC HR-A43U, HR-A63U instructions

JVC

JVC HR-A43U, HR-A63U instructions

Aiwa VX-S135U operating instructions

Aiwa

Aiwa VX-S135U operating instructions

RCA VR725HF user guide

RCA

RCA VR725HF user guide

JVC 0703-AH-PJ-BJ instruction manual

JVC

JVC 0703-AH-PJ-BJ instruction manual

TruTech ZV450TT8 owner's manual

TruTech

TruTech ZV450TT8 owner's manual

JVC HR-DVS1EK instructions

JVC

JVC HR-DVS1EK instructions

Sensory Science DDV2120 user guide

Sensory Science

Sensory Science DDV2120 user guide

JVC HR-VP78U instructions

JVC

JVC HR-VP78U instructions

RCA VR611HF user guide

RCA

RCA VR611HF user guide

manuals.online logo
manuals.online logoBrands
  • About & Mission
  • Contact us
  • Privacy Policy
  • Terms and Conditions

Copyright 2025 Manuals.Online. All Rights Reserved.

PROG.
CHECK
PROG.
TV operation – Press and hold
TV button, then press POWER,
TV CH +/–, VOL +/–, TV/VCR
POWER
TV
12 3
45
0
AUX
6
78
DAILY
9
WEEKLY
DISPLAY
TV/VCR
SP/EP
CANCEL
START
REW FF
PLAY
REC
MENU
OK
STOP
TV CH +
TV CH –
TV
+ VOL
TV
VOL –
PAUSE
STOP DATE CH
C.RESET OSD
ENTER TIMER
1
2
4
3
CH
MENU
POWER
VIDEO
(MONO)
L–AUDIO–R
STOP/EJECT
PAUSE
REC
REW FF
PLAY
POWER
OK
TV/VCR TIMER REC MTB
QUICK START*
A GUIDE TO EASY SET UP AND USE
CHECK
PACKAGE
CONTENTS
1
1
The Path To Enjoyment
Starts Here . . .
Dear Customer,
Thank you for purchasing
this JVC Video Cassette
Recorder.
SET CLOCK
AND
TUNER
3
3
SITUATE AND
CONNECT
VCR
2
2
5
5
4
4RECORD
A
PROGRAM
PLAY BACK
A
TAPE
1
1MAKE SURE THAT YOUR PACKAGE
CONTAINS:
b–INSTANT TIMER RECORDING
a–BASIC RECORDING
4
4WATCH A RECORDED PROGRAM
5
5RECORD A PROGRAM
MONO/Hi-Fi/SUPER VHS
VIDEO CASSETTE RECORDERS
UPrinted in Malaysia
0298 IYV*UN*PJ
COPYRIGHT © 1998 VICTOR COMPANY OF JAPAN, LTD.
12 3
45
0
6
789
1
2
4
3
LPT0013-002A
* You can use the available buttons on the remote control or on the VCR.
1Load a cassette with the label facing out and the window facing up.
2Press REW or FF to find program start point.
3Press PLAY to start playback.
4Press STOP (remote) or STOP/EJECT (VCR), then press STOP/EJECT to remove the
cassette.
* You cannot perform ITR using the remote control.
1Press REC to start recording.
2Press REC to engage ITR. “0:30” appears on the screen.
3To extend duration in increments of 30 minutes, press REC as many times as necessary.
* You can use the available buttons on the remote control or on the VCR.
1Load a cassette as above.
2Press CH, or press the appropriate NUMBER keys (remote) and press ENTER (remote),
to select the recording channel.
3Press SP/EP (remote) to set the recording speed.
4Press REC and PLAY together (remote) or REC (VCR) to start recording.
5Press PAUSE to stop recording temporarily, and press PLAY to resume.
6Press STOP or STOP/EJECT, then press STOP/EJECT to remove the cassette.
STOP/EJECT
PAUSE
POWER
NUMBER
TV/VCR
ENTER
PLAY
STOP
REC
FF (Fast-Forward)
PAUSE
REW (Rewind) FF (Fast-Forward)
POWER
PLAY
REC
RF CABLE (F-TYPE)
“AA” BATTERY x 2
VIDEO CASSETTE RECORDER
INFRARED
REMOTE
CONTROL
UNIT
* The HR-A34U
has only one
AUDIO input
connector.
* The VCR illustrations appearing in
this sheet are of the HR-A54U.
* Please refer to the HR-A54U/A34U’s instruction manual for
more detailed information.
REW (Rewind)
SP/EP
OK
MENU
OK
MENU
CH 5∞
CH 5∞
%fi
Downloaded from: https://www.usersmanualguide.com/
a–BASIC ANTENNA/CABLE CONNECTION
SITUATE AND CONNECT YOUR
NEW VCR
2
2b–CATV CONVERTER CONNECTION 3
3SET YOUR VCR'S CLOCK AND
TUNER
1Place the VCR on a stable, horizontal
surface.
2Disconnect your antenna or cable line
from your TV.
3Connect your antenna to your VCR.
4Connect your VCR to your TV.
nAntenna Splitter nAntenna Splitter
nVHF/UHF Antenna Mixer
nRF Cable n300-75 ohm Matching
Transformer
●CONNECTORS WHICH ARE OR MAY BE REQUIRED:
CABLE TV LINE Note:
Exact connector positions and names may differ.
ANT. IN
RF OUT
VHF/UHF
VHF
VHF
UHF
UHF
UHF ONLY
VHF ONLY
SEPARATE VHF/UHF
COMBINED VHF/UHF Back of VCR (example only) Back of TV (example only)
RF CONNECTION
5After completing the basic connections:
●If you’re using a Cable Box, . . .
. . . go to 2b (CATV CONVERTER
CONNECTION) .
●If you’re using an AV connection, . . .
. . . go to 2c (AUDIO/VIDEO
CONNECTIONS).
●If you’re using an RF connection, . . .
. . . go directly to 3(CLOCK).
INOUT
ANT. IN
RF OUT
CATV Input
From
Cable
Box
To TV
Cable
Box
TV
VCR
With this connection you can view/record any
cable channel including scrambled channels to
which you have subscribed.
After making the connections, go to 3(CLOCK).
INOUT
ANT. IN
RF OUT
CATV Input
From VCR
Cable
Box
To TV
TV
VCR
With this connection, you can view one
scrambled cable channel while recording
another unscrambled channel.
After making the connections, go to 3(CLOCK).
To watch TV with this type of connection
1Press TV/VCR on remote to engage VIDEO
mode.
2Tune TV to VCR output channel
(3, 4 or AV mode).
3Tune VCR to Cable Box output channel.
4Select desired channel on Cable Box.
•You can only view the channel you’re
recording.
•You cannot change channels with the
VCR remote control.
To watch TV with this type of connection
1Press CH or NUMBER keys to select desired
channel for recording.
2Press TV/VCR to engage TV mode.
3Tune TV to Cable Box output channel.
4Select desired channel on Cable Box.
•You cannot record scrambled channels.
•To play back a tape, you must tune the Cable
Box to the VCR output channel.
c–AUDIO/VIDEO CONNECTIONS
To Listen To VCR Sound Through A
Component Stereo Audio System,
Connect As Shown
AV connection methods differ from one type
of VCR to another. First, for any TV and VCR
type, connect your VCR to your TV using RF
connection. Then make AV connections
following one of the methods pictured to the
right.
After making the connections, go to 3
(CLOCK)
.
MONAURAL VHS VCR gAV TV
VIDEO OUT
AUDIO OUT
VIDEO IN
AUDIO IN
SUPER VHS VCR gAV STEREO TV WITH S-VIDEO
INPUT TERMINALS
VIDEO IN
S-VIDEO IN
VIDEO OUT
S-VIDEO OUT
R
AUDIO INAUDIO OUT
L
R
L
Hi-Fi VHS VCR gAV STEREO TV
VIDEO INVIDEO OUT
R
AUDIO INAUDIO OUT
L
R
L
AMP
VIDEO OUT
AUDIO OUT
R
L
VCR TV
Monaural deck owners:
Connect to VCR's AUDIO
OUT
a–CLOCK
1
3
a– Press CH 5∞ or %fi to set the time, then
press OK.
b– Press CH 5∞ or %fi to set the date, then
press OK.
c– Press CH 5∞ or %fi to set the year, then
press OK.
d– Press CH 5∞ or %fi to set D.S.T.(Daylight
Saving Time) to "ON" or "OFF".
When you’re finished with this set-up proce-
dure, press MENU to start the clock.
Displayed with HR-A54U only
2
Press CH 5∞ or %fi to select “CLOCK SET”,
then press OK.
Press
MENU to access this screen.
Press CH 5∞ or %fi to select “INITIAL SET”,
then press OK.
b–TUNER
1
2
3
Press MENU to access this screen. Press CH 5∞
or %fi to select “TUNER SET”, then press OK.
Press CH 5∞ or %fi to select “AUTO
CHANNEL SET”, then press OK.
Receivable channels in your area are automati-
cally assigned to CH 5∞ buttons, and non-
receivable channels are skipped.
●At the end of Auto Channel Set, “SCAN
COMPLETED” appears on screen.
●If the scan was unsuccessful, “SCAN
COMPLETED–NO SIGNAL” appears on screen.
Check the connections and start again.
MAIN MENU
FUNCTION SET
TUNER SET
=INITIAL SET
PRESS (5,∞), THEN (OK)
PRESS (MENU) TO END
INITIAL SET
=CLOCK SET
LANGUAGE ENGLISH
GUIDE CHANNEL SET
SELECT WITH (5,∞) AND (OK)
PRESS (MENU) TO END
MAIN MENU
FUNCTION SET
=TUNER SET
INITIAL SET
PRESS (5,∞), THEN (OK)
PRESS (MENU) TO END
CLOCK SET
TIME DATE YEAR
– –:– –AM 1/ 1 98
D.S.T. : ON
PRESS (5,∞), THEN (OK)
PRESS (MENU) TO END
TUNER SET
BAND CATV
=AUTO CHANNEL SET
MANUAL CHANNEL SET
SELECT WITH (5,∞) AND (OK)
PRESS (MENU) TO END
AUTO CHANNEL SET
SCANNING ...
PRESS (MENU) TO END
Downloaded from: https://www.usersmanualguide.com/
This file has been downloaded from:
www.UsersManualGuide.com
User Manual and User Guide for many equipments like mobile phones, photo cameras, monther board, monitors, software, tv, dvd, and othes..
Manual users, user manuals, user guide manual, owners manual, instruction manual, manual owner, manual owner's, manual guide,
manual operation, operating manual, user's manual, operating instructions, manual operators, manual operator, manual product,
documentation manual, user maintenance, brochure, user reference, pdf manual
Downloaded from: https://www.usersmanualguide.com/