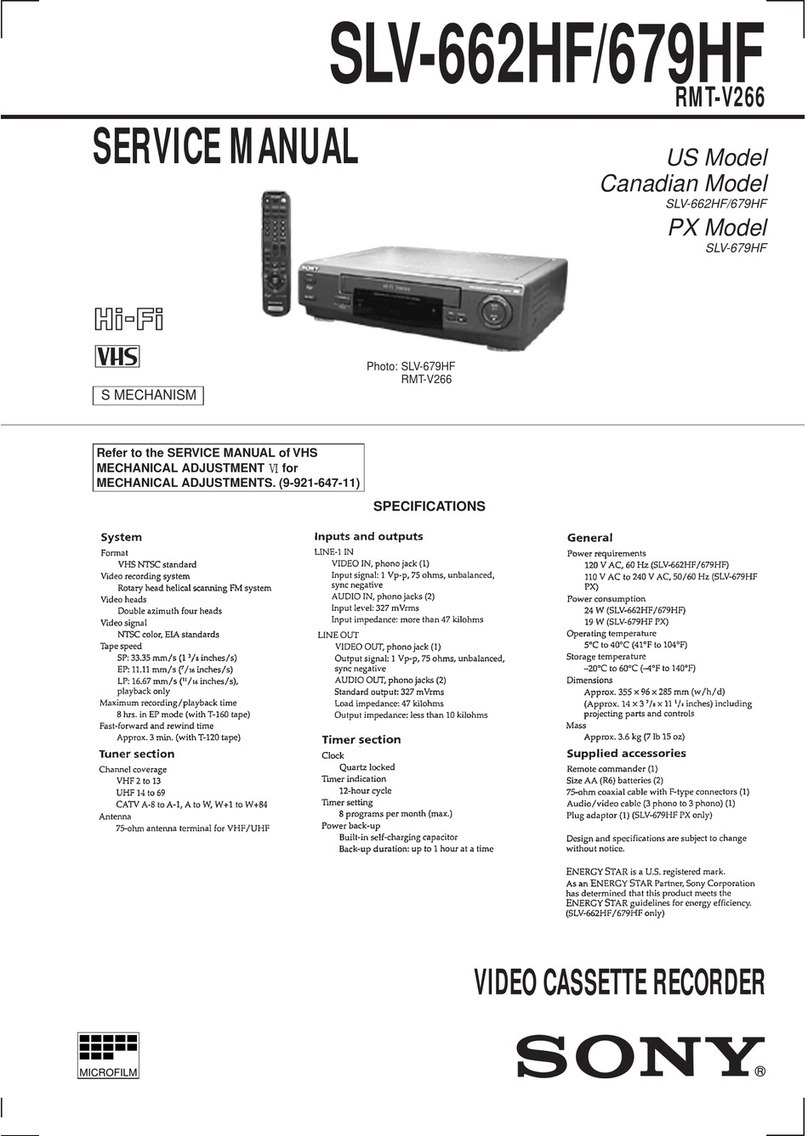
Sony SVT-124P User manual

© 1997 Sony Corporation
Operating Instructions page 2
Before operating the unit, please read this manual
thoroughly, and retain it for future reference.
Mode d’emploi page 36
Avant de faire fonctionner cet appareil, lisez
attentivement le présent mode d’emploi et conservez-le
pour toute référence ultérieure.
Bedienungsanleitung Seite 70
Vor der Inbetriebnahme lesen Sie diese Anleitung
sorgfältig durch und bewahren Sie sie zum späteren
Nachschlagen auf.
Manual de instrucciones página 104
Antes de utilizar la unidad, lea este manual
detenidamente y consérvelo para futuras referencias.
Istruzioni per l’uso pagina 138
Prima di usare l’apparecchio, leggere con attenzione
questo manuale e conservarlo per riferimenti futun.
Videocassette
Recorder
3-194-198-03 (1)
SVT-124P
SVT-124P

2
WARNING
To prevent fire or shock hazard, do not
expose the unit to rain or moisture.
To avoid electrical shock, do not open the
cabinet. Refer servicing to qualified
personnel only.
CAUTION
The format used for time lapse recording in this
video cassette recorder differs from the regular VHS
video format. Cassettes recorded in two-hour mode
on this unit can be viewed on a normal VHS video
cassette rcorder. However, cassettes recorded in
other modes may show some picture noise when
played on a normal VHS video cassette recorder.
What is Time Lapse Video?
• A normal VCR records 50 fields per second, while
this time lapse VCR records in a range from 5.6 to
10 fields per second. Through reduction of the
number of fields recorded per second, this VCR is
capable of recording for extended periods of time
on a standard video tape (up to a maximum of 27
hours).
• As a result, this VCR is extremely useful for long-
term monitoring or recording events that take
place slowly (such as the blooming of a flower).
• If a tape that has been recorded in time lapse
mode is played back in the normal three-hour
mode, the speed of the tape will be increased 5 to
9 times, depending on the speed the original
recording was made at, so that the slow changes
that were recorded can be viewed at a much
faster speed.
CAUTION
Danger of explosion if battery is incorrectly replaced.
Replace only with the same or equivalent type recommended by
the manufacturer.
Discard used batteries according to the manufacturer’s
instructions.
Voor de klanten in Nederland
• Dit apparaat bevat een MnO2-Li batterij voor memory back-up.
• De batterij voor memory back-up van het geheugen is bevestigd
op Z8801 van platt TB-5.
• Raadpleeg uw leverancier over de verwijdering van de batterij op
het moment dat u het apparaat bij einde levensduur afdankt.
• Gooi de batterij niet weg, maar lever hem in als KCA.
• Bij dit produkt zijn batterijen geleverd. Wanneer deze leeg zijn,
moet u ze niet weggooien maar inleveren als KCA.
ADVARSEL!
Lithiumbatteri - Eksplosionsfare ved fejlagtig håndtering.
Udskiftning må kun ske med batteri af samme fabrikat og type.
Levér det brugte batteri tilbage til laverandøren.
VARNING
Explosionsfara vid felaktigt batteribyte.
Använd samma batterityp eller en ekvivalent typ som
rekommenderas av apparattillverkaren.
Kassera använt batteri enligt fabrikantens instruktion.
ADVARSEL
Eksplosjonsfare ved feilaktig skifte av batteri.
Benytt samme batteritype eller en tilsvarende type anbefalt av
apparatfabrikanten.
Brukte batterier kasseres i henhold til fabrikantens
instruksjoner.
VAROITUS
Paristo voi räjähtää, jos se on virheellisesti asennettu.
Vaihda paristo ainoastaan laitevalmistajan suosittelemaan
tyyppiin.
Hävitä käytetty paristo valmistajan ohjeiden mukaisesti.

3
English
Table of Contents
Alarm Recording .....................................................23
Connecting an Alarm Sensor..............................23
Setting the Alarm Speed and Duration...............23
Setting the Alarm Recording Mode ...................24
Scanning the Picture of the Alarm Recordings —
Alarm Scan...............................................25
Displaying the Alarm List — Alarm Recall.......25
Playback ...................................................................26
Audio Playback ..................................................26
Adjusting Pictures ..............................................27
Various Playback Modes ........................................28
Picture Search.....................................................28
Still Picture .........................................................28
Field-by-Field Picture ........................................28
Maintenance .............................................................29
Cleaning Video Heads........................................29
Replacing Video Heads ......................................29
Checking the Video Heads Every 1000 Hours...29
Maintaining Mechanical Parts............................29
Servicing Periodically ........................................29
Terminals..................................................................30
WARNING OUT Terminal................................30
TAPE END OUT Terminal................................30
SW OUT Terminal .............................................31
REMOTE Jack ...................................................32
Troubleshooting .......................................................33
Specifications............................................................34
Precautions.................................................................4
Features ......................................................................5
Location of Parts and Controls ................................6
Front Panel...........................................................6
Rear Panel ............................................................7
Display Window...................................................7
Connections ................................................................8
Connecting a Camera, Monitor and Microphone.8
Connecting a Switcher .........................................8
Setting the Language .................................................9
Setting the Clock......................................................10
Adjusting to Summer Time ................................11
Setting the Time/Date Display ...........................11
Changing the Display Position of the Time/Date
Display .....................................................12
Setting the Buzzers ..................................................13
Handling a Video Cassette......................................14
Inserting a Video Cassette..................................14
Ejecting a Video Cassette...................................14
Protecting Your Cassette from Being Erased.....14
Setting the Operation Mode ...............................14
Recording .................................................................15
Locking the Record Mode — Security Lock
Function ...................................................16
Recording on the Same Cassette Repeatedly —
Repeat Recording.....................................16
Recording after Power Interruption or Moisture
Condensation............................................17
Setting the Mode at the End of the Tape ............17
Monitoring the Recording Condition .................18
Checking the Used Time ....................................18
Timer Recording......................................................19
Day of the Week Recording ...............................19
Daily Recording .................................................20
Setting the Holiday.............................................21
Recording Using an External Timer...................21
Changing/Cancelling the Timer Settings ...........22

4
Precautions
On safety
•Operate the unit on 220 - 240 V AC, 50 Hz only.
•The nameplate indicating operating voltage, power
consumption, etc., is located on the rear of the unit.
•Should any solid object or liquid fall into the cabinet,
turn off the power, unplug the unit and have it
checked by qualified personnel before operating it
any further.
•Do not drop or place heavy objects on the power
cord. If the power cord is damaged, turn off the
power immediately. It is dangerous to use the unit
with a damaged power cord.
•Connect the power cord to the wall AC outlet.
For connecting the power source, see “Connecting a
Camera, Monitor and Microphone” on page 8.
•Unplug the unit from the wall outlet if it is not to be
used for several days or more.
•Disconnect the power cord from the wall AC outlet
by grasping the plug, not by pulling the cord.
On installation
•Do not place a heavy object on the unit.
•Allow adequate air circulation to prevent internal heat
build-up.
Do not place the unit on surfaces (rugs, blankets, etc.)
or near materials (curtains, draperies) that may block
the ventilation slots.
•Do not install the unit in a location near heat sources
such as radiators or air ducts.
•Place the unit to avoid direct sunlight.
•Do not install the unit in a place subject to
mechanical vibration or shock.
•Do not put magnetic objects close to the unit and
cassette tape. Magnetic fields may affect the color
reproduction of the unit and cause distortion.
•Whenever you changed the place of the installation,
degauss the unit.
•The unit is designed for operation in a horizontal
position.
Do not install it in an inclined position.
On operation
When the unit is not in use, turn the power off to
conserve energy and to extend its life.
On moisture condensation
If the unit is brought directly from a cold to a warm
location, moisture may condense on the video head
drum. In this condition, the tape may adhere to the
head drum and cause serious damage to the head. To
avoid damage caused by moisture condensation, be
sure not to leave a cassette inside the compartment
when the unit will not be used. If moisture
condensation is present, the “dddd” indicator flashes in
the display window and the
unit will not operate. When
the “dddd” indicator
disappears, you can operate
the unit.
On video cassettes
Remove and store video cassettes after recording or
playback.
On cleaning
As a safety precaution, unplug the unit before cleaning
it.
•To keep the unit looking brand-new, periodically
clean it with a mild detergent solution. Never use
strong solvents such as thinner or benzine, or abrasive
cleaners since they will damage the cabinet.
When cleaning, keep liquid away from electrical
contacts and connectors.
•When there is a buildup of dust on air vents, use a
vacuum cleaner to remove it.
On repacking
•Before repacking, disconnect all cables and
connecting cords.
•Do not throw away the carton and packing materials.
They make an ideal container with which to transport
the unit. When shipping the unit to another location,
repack it.
On transportation
When transporting the unit, protect it from vibration
and impact.
If you have any questions about this unit, contact your
authorized Sony dealer.

5
Features
Forward field advance
This VCR offers improved search functions with the
ability to move forwards between fields.
Clock operation backup
When a power interruption occurs, the built-in
rechargeable battery will provide backup power for the
clock for up to 30 days.
Security lock
To guard against operation errors, this VCR locks all
of the buttons.
Monitoring the recording condition
You can check the recorded image during recording by
pressing a single button.
Field recording/field playback
Because single fields can be recorded one by one in
time lapse mode and all fields can be viewed
separately during playback, you can record more
information.
Audio recording in 12-/24-mode
You can record audio information with video
information even in 12- or 24-hour mode and listen to
it by selecting audio mode during playback.
Various recording functions
•Repeat recording: When the tape reaches the end,
the VCR rewinds the tape and starts recording again
from the beginning of the tape.
•Timer recording: You can set the timer on daily
recording or weekly recording.
•Alarm recording: If an externally connected alarm
sensor is triggered, you can make a complete
recording of the situation that triggered the alarm.
Mode settings on monitor
You can set the modes for all functions, such as the
internal timer setting, the alarm recording mode
settings, etc. on the monitor.
Used time indicator
This VCR shows used time of head drum and power
on time on the monitor screen.
Alarm scan function
You can scan the alarm recording and play it back for
first five seconds.
Clog detection
The VCR always checks that the video signal is
recorded without problem (in time lapse mode only).
If the recording cannot be made properly because the
recording head has become clogged, the VCR will give
a warning.

6
Location of Parts and Controls
Front Panel (Refer to pages in parentheses for details.)
1STANDBY/ON switch
2Cassette compartment
3MENU/AUDIO ON button (9/26)
4TAPE SPEED/DATA ’button (15/9)
5TIMER REC/DATA ‘button (20/9)
6ON-SCREEN ON/OFF switch (11)
7REPEAT REC ON/OFF switch (16)
8REPEAT REC indicator (16)
9ON indicator
0EJECT 6button (14)
!¡ Display window (7)
!™ SHIFT v/TRACKING – button (9/27)
!£ ALL RESET button (30)
!¢ SHIFT b/TRACKING + button (10/27)
!∞ MENU RESET button (17, 22, 24)
!§ REW 0button
!¶ PLAY ”/REC CHECK button
!• FF )button
!ª PAUSE P/AL SCAN button
@º STOP pbutton
@¡ REC rbutton
1234567
89!º
!¡ !™ !¢!∞ !§ !¶ !• !ª @º @¡
!£

7
Rear Panel (Refer to pages in parentheses for details.)
1TAPE END OUT terminal (30)
2WARNING OUT terminal (30)
3COM (common) terminal (30)
4EXT TIMER IN terminal (21)
5SW OUT terminal (31)
6COM (common) terminal (23, 31)
7ALARM OUT terminal (23)
8ALARM IN terminal (23)
9Battery compartment
0AC IN (inlet) (8)
!¡ REMOTE jack (32)
!™ MIC IN jack (8)
!£ AUDIO IN/OUT jacks (phono type)
!¢ VIDEO IN/OUT jacks (BNC type) (8)
Display Window
1Alarm recording indicator
2Error indicator
3Power interruption indicator
4External timer recording indicator
5Timer recording indicator
6Security lock indicator
7Cassette indicator
8OFF indicator
9Tape speed indicator
0Tape operation indicators
!¡ Recording indicator
!™ Linear time counter/Timer recording indicator
123 56
7 8 !º !™!¡9
4
5
6
7
8
1
2
3
4
9!º !¡!™!£!¢

8
Connecting a Switcher
Note
When you connect several cameras to a switcher,
synchronize the cameras.
If not, the picture will be disturbed.
Turn all the power off before making connections.
Connect the AC power cord last.
Connecting a Camera, Monitor
and Microphone
With the following connections, you can monitor the
picture and sound.
To connect an alarm sensor
Refer to page 23.
Connections
to VIDEO OUT
Camera switcher
to EXT
TIMING
IN
Video camera
Monitor
to video output
Use of BNC connector
Align pin with cutout, insert and
turn right to lock.
To remove, turn left and pull out.
Microphone
to MIC IN
to VIDEO IN
to AC IN
to a wall outlet
to video
input
to VIDEO IN
to SW
OUT
to MONITOR OUT
Video camera
Monitor

9
Select English, French or German for the display
language.
1Turn on the power.
2Press MENU, and the SET UP 1 display appears
on the monitor screen.
3Press SHIFT vso that ENGLISH flashes.
4Press DATA ‘/’to select the language.
5Press PAUSE to return to the normal display.
Setting the Language
15234
∗CLOCK SET
01-01-00 SAT 00 : 00 : 00
∗LANGUAGE
ENGLISH
∗CLOCK SET
01 - 01-00 SAT 00 : 00 : 00
∗LANGUAGE
FRANCAIS
<SET UP 1>
∗SUMMER TIME SET NO USE
WEEK MONTH TIME
ON LST-SUN 03 02 : 00
OFF LST-SUN 10 02 : 00
∗CLOCK SET
01-01 -00 SAT 00 : 00 : 00
∗LANGUAGE
ENGLISH

10
5Set the month by pressing
DATA
‘/’, then press
SHIFT
b
.
6Set the year by pressing
DATA
‘/’, then press
SHIFT
b
.
7Set the hour by pressing
DATA
‘/’, then press
SHIFT
b
.
8Set the minutes by pressing
DATA
‘/’, then
press SHIFT
b
.
9Press
DATA
’simultaneously with a time signal.
You can set the clock at the 00 second point.
10After setting the date and time, press PAUSE to
return to the normal display.
Set the clock to the current time and date on the
monitor screen. For Daylight Saving Time, proceed the
steps in “Adjusting to Summer Time” on page 11 first.
Example:
Set the date and time to 15:20 on 15 October, 1997.
1Turn on the power of the equipment to be used.
2Press MENU, and the SET UP 1 display appears
on the monitor screen.
The first display shows 1 January, 2000.
3
Press SHIFT vto move the flashing to 01.
4
Set the day by pressing DATA
‘/’
, then press
SHIFT b.
Setting the Clock
13
Time
Day of the week
Day-Month-Year
4-9 10
<SET UP 1>
∗SUMMER TIME SET NO USE
WEEK MONTH TIME
ON LST-SUN 03 02 : 00
OFF LST-SUN 10 02 : 00
∗CLOCK SET
01-01 -00 SAT 00 : 00 : 00
∗LANGUAGE
ENGLISH
OFF LIST-SUN 10 02 : 00
∗CLOCK SET
15-01-00 SAT 00 : 00 : 00
∗LANGUAGE
ENGLISH
OFF LIST-SUN 10 02 : 00
∗CLOCK SET
15-10-00 SUN 00 : 00 : 00
∗LANGUAGE
ENGLISH
O S SU 0 0 00
OFF LIST-SUN 10 02 : 00
∗CLOCK SET
15-10-97 WED 00 : 00 : 00
∗LANGUAGE
ENGLISH
OFF LIST-SUN 10 02 : 00
∗CLOCK SET
15-10-97 WED 15 : 00 : 00
∗LANGUAGE
ENGLISH
ON
1ST SUN
04
02
:
00
OFF LIST-SUN 10 02 : 00
∗CLOCK SET
15-10-97 WED 15 : 20 : 00
∗LANGUAGE
ENGLISH
2

11
Adjusting to Summer Time
You can adjust to Summer Time when the season
changes.
1Press MENU, and the SET UP 1 display appears
on the monitor screen.
2Press DATA ‘/’to set SUMMER TIME to NO
USE or USE:
NO USE: no Summer Time adjustment is
made
USE: Summer Time adjustment is made
3Set the date and time the Summer Time adjustment
is made.
WEEK ON
Press DATA ‘/’to set which day the Summer
Time adjustment is made:
1ST, 2ND, 3RD, 4TH or LST for first, second,
third, fourth or last week.
Then press SHIFT b, and press DATA ‘/’to
select the day of the week:
SUN, MON, TUE, WED, THU, FRI or SAT
MONTH ON
Press DATA ‘/’to set which month the
Summer Time adjustment is made:
01, 02, 03, 04...11, 12 for January, February
.....December
TIME ON
Press DATA ‘/’to set the time the Summer
Time adjustment is made. The time can only be
set between 01 and 22.
Then press SHIFT b, and press DATA ‘/’to
set the minutes.
Following the same procedures as WEEK ON,
MONTH ON and TIME ON, set WEEK OFF,
MONTH OFF and TIME OFF when the time is
changed back from the Summer Time to standard
time.
4Press PAUSE to return to the normal display.
Setting the Time/Date Display
You can display four items of information, date, time,
number of alarm recordings and recording/playback
speed and turn off each item which you do not want to
display.
1Turn on the power of the equipment to be used.
2Press MENU until the SET UP 2 display appears
on the monitor screen.
3
Press SHIFT vso that the item of DISPLAY to be set
flashes and
DATA ‘/’
to set to Y(yes) or N(no).
Example: When you set the date display to N.
4Press PAUSE to return to the normal display (time/
date screen).
To turn off the screen display
Set the ON-SCREEN switch to OFF.
Alarm count
Recording/playback
speed
Current time
<SET UP 2>
∗DISPLAY
DATE N
TIME Y
ALARM COUNT Y
SPEED Y
∗BUZZER
ALARM IN Y
000
15:20:00
24
<SET UP 2>
∗DISPLAY
DATE Y
TIME Y
ALARM COUNT Y
SPEED Y
∗BUZZER
ALARM IN Y
<SET UP 1>
∗SUMMER TIME SET NO USE
WEEK MONTH TIME
ON LST-SUN 03 02 : 00
OFF LST-SUN 10 02 : 00
∗CLOCK SET
15-10-97 WED 15:20:00
<SET UP 1>
∗SUMMER TIME SET USE
WEEK MONTH TIME
ON 1ST-SUN 03 03 : 00
OFF 1ST-SUN 09 03 : 00
∗CLOCK SET
15-10-97 WED 15:20:00

12
Changing the Display Position of
the Time/Date Display
You can change the position of the time/date display
that appears on the monitor screen.
1Turn on the power of the equipment to be used.
The normal display appears.
2Change the display position as follows.
To move the display downwards, press SHIFT v.
(When the display reaches the bottom of the
screen, the display returns to the top of the screen.)
To move the display rightwards, press SHIFT b.
(When the display reaches the right-hand edge of
the screen, the display returns to the left-hand edge
of the screen.)
Note
While recording, this function does not work.
To turn off or on the screen display
Set the ON SCREEN switch to OFF or ON.
Date
Alarm count
Recording/
playback speed
Time
Press SHIFT
b
.
Press SHIFT
v
.
Setting the Clock
15-10-97 WED 000
15:20:00 12
15-10-97 WED 000
15:20:00 12

13
Setting the Buzzers
14
2
You can turn on/off three types of buzzers:
•ALARM IN buzzer: beeps while it receives an
alarm signal. (See “Alarm Recording” for more
information on page 23.)
•TAPE END buzzer: beeps when the tape reaches its
end.
•KEY IN buzzer: beeps when you press a button.
1Turn on the power of the equipment to be used.
2Press MENU until the SET UP 2 display appears
on the monitor screen.
3Press SHIFT vso that the item of BUZZER to be
set flashes and DATA ‘/’to set to Y (yes) or N
(no).
4Press PAUSE to return to the normal display.
3
ALARM
COUNT
Y
SPEED Y
∗BUZZER
ALARM IN Y
TAPE END Y
KEY IN N
ALARM
COUNT
Y
SPEED Y
∗BUZZER
ALARM IN Y
TAPE END Y
KEY IN N

14
Handling a Video Cassette
Protecting Your Cassette from
Being Erased
Remove the tab on the cassette with a screwdriver or a
similar tool as shown below. This protects your
cassette against an accidental recording.
If you want to record again on the cassette without its
safety tab, simply cover the safety tab hole with a
piece of plastic tape.
Setting the Operation Mode
You can set the mode for the VCR when a video
cassette is inserted on the SET UP 3 display.
1Press MENU until the SET UP 3 display appears
on the screen.
2Press SHIFT vto move the flashing to TAPE IN
MODE and set to STOP or REC by pressing
DATA ‘/’.
STOP: the VCR enters stop mode when a video
cassette is inserted.
REC: the VCR enters recording mode when a
video cassette is inserted.
3Press PAUSE to return to the normal display.
This section shows you how to insert a video cassette
into the VCR.
Inserting a Video Cassette
Insert the cassette into the cassette compartment by
slowly pressing its center with the arrow on the top.
When the cassette is inserted, the VCR automatically
turns on and the indicator lights in the display
window.
If you insert the cassette without its safety tab for
recording, the VCR ejects the cassette automatically.
Ejecting a Video Cassette
Press EJECT 6on the VCR.
You can eject the cassette even when the power is off.
When you press EJECT 6, the VCR turns on
automatically.
After ejecting the cassette, the VCR turns off again.
Recommended cassette
This VCR is designed and calibrated with 180-minute
tape (Sony E-180). To ensure stable operation and
optimum picture quality, we recommend that you use a
Sony 180-minute tape.
Cassette compartment
EJECT 6
Safety
tab
<SET UP 3>
ALARM MODE
ALARM SPEED
ALARM DURATION
TAPE IN MODE
TAPE END MODE
TAPE END OUT
CLOG DETECT.
Y1
3H
20S
STOP
REW
-3M
Y

15
This section shows you how to record the signal from
the video camera in the normal or time lapse mode, to
set the security lock and to record repeatedly on the
same cassette.
1Turn on the power of the equipment to be used.
2Insert the cassette.
3Set the recording speed by pressing TAPE SPEED.
a) In time lapse modes, it is possible to record additionally
three hours longer than the displayed recording time.
4Press REC r.
Recording starts.
To stop recording
Press STOP p.
To pause recording
Press PAUSE P.
Press the button again to resume recording.
Recording
Notes
•Whenever you insert a tape and first start recording,
Adaptive Picture Control (APC) automatically
improves recording quality by adjusting the VCR to
the condition of the video heads and tape. There is
about a 6-seconds delay before the VCR actually
starts recording when REC ris pressed.
•This VCR is provided with a clog detection function.
In time lapse modes, if recording is not made
properly, the recording indicator will flash on the
display window and a warning signal will be output
from the WARNING OUT terminal. In this case, stop
recording immediately and check the VCR.
12 4 STOP p
3
In the display window
Recording speed
Record-
ing
speed
3
12
24
Maximum recording
time with 180-
minute tape (hour)
Standard
mode
Time
lapse
modea)
3
15
27
Interval
(sec.)
1/50
0.1
0.18
Audio
recording
Possible
Tape
motion
Continuous
PAUSE P
If recording does not start and the cassette is
ejected
The tab on the cassette is removed to protect against
accidental recording.

16
Recording on the Same Cassette
Repeatedly — Repeat Recording
You can record on the same cassette repeatedly in two
different modes: R (repeat) 1 and R (repeat) 2.
1Set the REPEAT REC switch to ON.
The REPEAT REC indicator lights.
2Press MENU until the SET UP 3 display appears
on the screen.
3Set the TAPE END MODE to R1 or R2 by
pressing DATA ‘/’.
R1: If an alarm input is received during repeat
recording, the recording mode switches to alarm
recording and the REPEAT REC indicator goes
off. After the end of the tape is reached, the tape
is automatically rewound and stops at the
beginning. The OFF indicator lights in the
display window.
R2: If an alarm input is received during repeat
recording, the recording mode switches to alarm
recording. Repeat recording is performed
regardless of whether an alarm input is received
or not.
4Press PAUSE to return to the normal display.
5Press REC r.
Recording begins.
When the tape reaches the end, the tape is rewound
at the beginning and recording resumes.
Locking the Record Mode —
Security Lock Function
Locking the record mode is useful to guard against
accidental recording interruptions when the VCR is
used for surveillance or monitoring purposes.
To set the security lock
While pressing SHIFT b, press TAPE SPEED.
The indicator lights in the display window.
The security lock function also works in timer
recording mode.
To release the security lock
While pressing SHIFT b, press TAPE SPEED again.
The indicator turns off.
TAPE SPEED
SHIFT b
SHIFT bTAPE SPEED
Recording
1
24
5
REPEAT
REC
indicator
3
<SET UP 3>
ALARM MODE
ALARM SPEED
ALARM DURATION
TAPE IN MODE
TAPE END MODE
TAPE END OUT
CLOG DETECT.
Y1
3H
20S
STOP
R1
-3M
Y

17
<POWER FAILURE>
<DEM>
002 FAILURE
RECOVERY
001 FAILURE
RECOVERY
20-12
20-12
10-12
20-12
07:15
07:30
11:00
12:00
Note
If REPEAT REC is set to OFF while repeat recording is in
progress, recording proceeds until the end of the tape is
reached and then stops automatically after the tape is
rewound at the beginning. The OFF indicator lights in the
display window.
To clear the P indicator
Press MENU RESET with pointed material.
To clear the power interruption/moisture
condensation data
Press MENU until the POWER FAILURE/DEW
display appears and press MENU RESET with pointed
material.
Setting the Mode at the End of
the Tape
You can set the mode of the tape operation when the
tape comes to the end during recording using the SET
UP 3 display.
When the REPEAT REC switch is set to OFF
1Press MENU until the SET UP 3 display appears
on the screen.
2Set TAPE END MODE to REW, STOP or EJECT
by pressing DATA ‘/’.
REW: when the tape comes to the end, the VCR
rewinds the tape automatically and enters stop
mode at the beginning of the tape.
STOP: when the tape comes to the end, the VCR
enters stop mode at once.
EJECT: when the tape comes to the end, the tape
is ejected at once.
3Press PAUSE to return to the normal display.
MENU RESET
Recording after Power Interruption
or Moisture Condensation
If a power interruption occurs, The P indicator lights in
the display window and if a moisture condensation
occurs, the “dddd” indicator flashes. Even if a power
interruption or moisture condensation occurs while
recording, the internal batteries provide backup power
for memory for at least 30 days. The internal batteries
can be charged in about 48 hours.
If the power is interrupted during recording, the
recording starts automatically after power is restored.
To check power interruptions or moisture
condensation
Press MENU until the POWER FAILURE/DEW
display appears.
This shows a count of the power interruption and
moisture condensation and the period when the
recording was interrupted.
Count of power interruption
Count of moisture condensation
No recording
periods
MENU
<SET UP 3>
ALARM MODE
ALARM SPEED
ALARM DURATION
TAPE IN MODE
TAPE END MODE
TAPE END OUT
CLOG DETECT.
Y1
3H
20S
STOP
REW
-3M
Y

18
Monitoring the Recording
Condition
You can check the recording condition by pressing
PLAY/REC CHECK while recording in time lapse
mode.
Press PLAY/REC CHECK while recording.
After the tape is rewound for about three seconds and
played back for about two seconds, the unit returns to
the original recording mode.
Note
While monitoring the recording condition, recording is
interrupted.
PLAY/REC CHECK
Checking the Used Time
1Turn on the power of the equipment to be used.
2Press MENU until the USED TIME display
appears on the screen.
VIDEO: amount of time the video head has been
used
POWER: the amount of time the power has been
on.
3Press PAUSE to return to the normal display.
23
1
Recording
When the tape reaches the end
The OFF indicator lights in the display window.
Press EJECT 6, REC r, FF ), REW 0or
PLAY zto turn off the OFF indicator.
When the REPEAT REC switch is set to ON
Follows the steps 2 through 4 in “Recording on the
Same Cassette Repeatedly — Repeat Recording” on
page 16.
2H
<USED TIME>
VIDEO
POWER
Y
00020H
00040H

19
You can set the timer recording in two methods: day of
the week recording and daily recording.
Before starting, make sure that the time and date are
set properly. (See page 10.)
Day of the Week Recording
Example:
Making a recording from 8:00 on Tuesday to 17:00 the
same day with the recording speed set to 24-hour
mode.
1Turn on the power of the equipment to be used.
2Press MENU until the TIMER SET display
appears on the screen.
Timer Recording
3Press SHIFT vto move the flashing to TUE and
the SHIFT bto move it to the hour position of
START.
4Set the start hour by pressing DATA ‘/’and
press SHIFT b.
5Set the start minute by pressing DATA ‘/’and
press SHIFT b.
6Set the stop hour by pressing DATA ‘/’and
press SHIFT b.
7Set the stop minute by pressing DATA ‘/’and
press SHIFT b.
3-9
212
111
SUN MON TUE WED THU FRI SAT
––:––
––:–– –––
N
SUN
––:––
––:–– –––
N
MON
08:00
17:00
24
Y
TUE
––:––
––:–– –––
N
WED
––:––
––:–– –––
N
THU
––:––
––:–– –––
N
FRI
––:––
––:–– –––
N
SAT
––:––
––:–– –––
NDLY
<TIMER SET>
WEEK START STOP SPD
SUN
MON
TUE
WED
THU
FRI
SAT
DLY
EXT
--:--
--:--
--:--
--:--
--:--
--:--
--:--
--:--
∗∗∗∗∗
---
---
---
---
---
---
---
---
---
--:--
--:--
--:--
--:--
--:--
--:--
--:--
--:--
∗∗∗∗∗
N
N
N
N
N
N
N
N
N
<TIMER SET>
WEEK START STOP SPD
SUN
MON
TUE
WED
THU
FRI
--:--
--:--
--:--
--:--
--:--
:
---
---
---
---
---
--:--
--:--
--:--
--:--
--:--
:
N
N
N
N
N
N
10
<TIMER SET>
WEEK START STOP SPD
SUN
MON
TUE
WED
THU
FRI
--:--
--:--
08:--
--:--
--:--
---
---
---
---
---
--:--
--:--
--:--
--:--
--:--
N
N
N
N
N
N
<TIMER SET>
WEEK START STOP SPD
SUN
MON
TUE
WED
THU
FRI
--:--
--:--
08:00
--:--
--:--
---
---
---
---
---
--:--
--:--
--:--
--:--
--:--
N
N
N
N
N
N
<TIMER SET>
WEEK START STOP SPD
SUN
MON
TUE
WED
THU
FRI
--:--
--:--
08:00
--:--
--:--
---
---
---
---
---
--:--
--:--
17:--
--:--
--:--
N
N
N
N
N
N
<TIMER SET>
WEEK START STOP SPD
SUN
MON
TUE
WED
THU
--:--
--:--
08:00
--:--
--:--
---
---
---
---
---
--:--
--:--
17:00
--:--
--:--
N
N
N
N
N

20
When the indicator appears in the display
window, the buttons except TIMER REC do not
work.
8Set the recording speed by pressing DATA ‘/’
and press SHIFT b.
9Select Y (yes) to execute the timer recording by
pressing DATA ‘/’.
If you want to preset other settings, repeat steps 3
to 9.
10When you have completed all the settings, press
PAUSE to return to the normal display.
11Insert the cassette.
12Press TIMER REC.
The VCR turns off automatically, and enters the
timer recording standby mode. The indicator
appears in the display window.
When no cassette is inserted, the indicator
flashes and a beep sounds.
Daily Recording
You can preset the timer to start recording each day of
the week.
1Move the flashing to the appropriate day of the
week by pressing SHIFT v.
2Set the day to DLY by pressing DATA ‘/’
before setting the hour position of START in step
3.
When the time set in the STOP section is
earlier than the time set in the START section
The STOP time is assumed to be for the next day, and
the T (tomorrow) indicator is displayed before the stop
time.
Timer recording is interrupted when the power
is interrupted
When a period of the power interruption is shorter than
the power backup time (within 30 days) and within the
timer end time, the recording is resumed after the
power is restored.
The P indicator lights in the display window to show
that the timer recording is interrupted.
To clear the P indicator, press MENU RESET on the
front panel. (See page 17.)
To stop the timer recording
Press TIMER REC. The recording stops.
Timer Recording
<TIMER SET>
WEEK START STOP SPD
SUN
MON
TUE
WED
THU
--:--
--:--
08:00
--:--
--:--
---
---
24
---
---
--:--
--:--
17:00
--:--
--:--
N
N
N
N
N
<TIMER SET>
WEEK START STOP SPD
SUN
MON
TUE
WED
THU
FRI
--:--
--:--
08:00
--:--
--:--
---
---
24
---
---
--:--
--:--
17:00
--:--
--:--
N
N
Y
N
N
N
U
WED
THU
FRI
SAT
DLY
EXT
--:--
--:--
--:--
--:--
--:--
∗∗∗∗∗
---
---
---
---
---
---
--:--
--:--
--:--
--:--
--:--
∗∗∗∗∗
N
N
N
N
N
N
<TIMER SET>
WEEK START STOP SPD
SUN
MON
TUE
WED
THU
--:--
17:00
--:--
--:--
--:--
---
24
---
---
---
--:--
08:10
--:--
--:--
--:--
N
Y
N
N
N
T
Table of contents
Languages:
Other Sony VCR System manuals

Sony
Sony VO-9800 User manual

Sony
Sony Hi 8 EV-C2000E Hi 8 EV-C2000E UB User manual

Sony
Sony SLV-ED89AF User manual

Sony
Sony DVW-A500P User manual

Sony
Sony EV-S7000 User manual

Sony
Sony SLV-751HF User manual

Sony
Sony SLV-757UC User manual

Sony
Sony DVCAM DSR-80 User manual

Sony
Sony SVT-124 User manual

Sony
Sony GV-500 Primary User manual

Sony
Sony LX40 User manual

Sony
Sony DSR 45A - Professional Editing Video Cassete... User manual

Sony
Sony SL-HF600 User manual

Sony
Sony SLV-SE85 User manual

Sony
Sony Video Walkman GV-D900E User manual

Sony
Sony SL-HF550 User manual

Sony
Sony SLV-ED115 User manual

Sony
Sony SLV-SE20 User manual

Sony
Sony SLV-SE100A1, SLV-SE100A2 User manual

Sony
Sony SLV-E180EE User manual