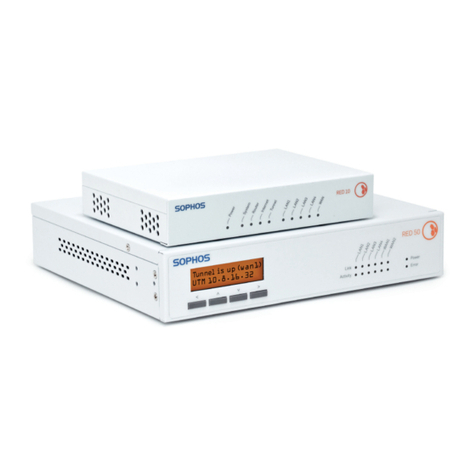
Sophos RED 50 User manual

Quick Start Guide
RED 50

Sophos RED 50 Quick Start Guide
1. Preparing the installation
Congratulations on your purchase of the Sophos RED 50 security appliance to
protect your data and computers of your branch office. This Quick Start Guide
describes in a few steps how to install the appliance.
Unpack the appliance and prepare the installation
After checking the completeness of the scope of supply, identify the unique
RED-ID that is printed underneath your unit.
For further reference, you might also want to write the RED-ID down in the
area below:
RED-ID: __________________________________________________________
Sophos RED 50 This Quick Start Guide Power supply Shielded RJ45
Appliance and Security Notes and cable Ethernet cable
Security Notes and
Regulatory Compliance
Sophos RED Appliances
Quick Start Guide
RED 50
Before you begin, make sure you
have a working Internet connection.
RED 50 Rev 1
WAN1 MAC Address:
WAN2 MAC Address:
3330mA
This device complies with Part 15 of the FCC Rules.
Operation is subject to the following two conditions:
(1) this device may not cause harmful interference, and
(2) this device must accept any interference received,
including interference that may cause undesired operation.
LISTED
E215284
I.T.E.
A0000014EE22E39

Sophos RED 50 Quick Start Guide
Have the appliance activated
Call your company’s system administrator, who first needs to activate
your unit on the central UTM appliance. Now provide the RED-ID of your
RED 50 appliance and wait until he or she has confirmed a successful
activation before proceeding with the next step. You might also want to note
your administrator’s name and phone number in case you need it for later
purposes:
Administrator’s name and phone number: _____________________________
2. Connecting the appliance
Connect your PCs to the LAN ports of the RED 50 appliance
Use shielded twisted pair Ethernet cables (RJ45) to connect your PCs to the
LAN ports (1-4) of the RED 50 appliance, either directly or via a hub or switch.
Connect the RED 50 to the Internet
Use the orange shielded Ethernet cable of the scope of supply to connect the
WAN1 interface of the RED 50 appliance to the interface of your router or
cable modem that connects to the Internet.
(Optional) If your office is equipped with a standby Internet connection, also
connect the WAN2 interface of the RED 50 appliance to the interface of your
router or cable modem that connects to the second Internet line.

Sophos RED 50 Quick Start Guide
3. Powering up the appliance
Connect the RED 50 to the power supply
Connect the RED 50 appliance to the power supply from the scope of supply
and plug the power cord into the electrical outlet. The Power LED will turn
on and the system will boot. The LCD will show the message "Starting RED"
and the RED-ID.
4. Establishing a tunnel
Establish a tunnel to your central UTM appliance
The RED 50 will now automatically retrieve its configuration from the
Internet and establish a tunnel to your central office. After successfully
establishing the tunnel, the LCD will show the message "Tunnel is up
(wan1)" and either the IP address or the hostname of the UTM appliance to
which the RED 50 is connected.
Please also write down the second line as it will help your administrator to
troubleshoot in case of a failure:
IP address or hostname of UTM appliance:
________________________________________________________________
Starting RED
> A0000014EE22E39
If you don’t see this message or
if the red Error LED is on, please
refer to the Operating Instructions to
identify potential errors or contact your
administrator.
Tunnel is up (wan1)
> UTM 10.8.16.32

Sophos RED 50 Quick Start Guide
1. Vorbereitung
Wir beglückwünschen Sie zum Kauf einer Sophos RED 50 Appliance zum
Schutz Ihres Netzwerkes und der Computer in Ihrer Außenstelle. Dieser Quick
Start Guide beschreibt in kurzen Schritten die Installation der Appliance sowie
den Verbindungsaufbau zu Ihrer Zentrale.
Auspacken der Appliance und Vorbereitung der Installation
Nachdem Sie die Vollständigkeit des Lieferumfangs überprüft haben,
identifizieren Sie bitte die eindeutige RED-ID auf der Unterseite des Geräts
und notieren Sie diese hier:
RED-ID: __________________________________________________________
Sophos RED 50 Dieser Quick Start Guide Netzteil und Kabel Abgeschirmtes RJ45
Appliance und Sicherheitshinweise Ethernet-Kabel
Security Notes and
Regulatory Compliance
Sophos RED Appliances
Quick Start Guide
RED 50
Bevor Sie beginnen, stellen Sie bitte
sicher, dass Sie eine funktions-
bereite Internetverbindung haben.
RED 50 Rev 1
WAN1 MAC Address:
WAN2 MAC Address:
3330mA
This device complies with Part 15 of the FCC Rules.
Operation is subject to the following two conditions:
(1) this device may not cause harmful interference, and
(2) this device must accept any interference received,
including interference that may cause undesired operation.
LISTED
E215284
I.T.E.
A0000014EE22E39

Sophos RED 50 Quick Start Guide
Aktivieren der Appliance
Informieren Sie Ihren Systemadministrator, damit er Ihr Gerät auf der
zentralen UTM Appliance aktiviert. Nennen Sie hierzu die RED-ID, die Sie oben
notiert haben. Warten Sie, bis die erfolgreiche Aktivierung bestätigt wurde,
bevor Sie mit dem nächsten Schritt fortfahren. Bitte notieren Sie den Namen
und die Rufnummer Ihres Administrators für spätere Zwecke.
Name und Rufnummer Ihres Administrators: ___________________________
2. Verbindung herstellen
Verbinden Sie Ihre PCs mit den LAN-Ports der RED 50 Appliance
Verwenden Sie abgeschirmte Ethernet-Kabel, um Ihre PCs direkt oder über
einen Hub oder Switch an die LAN-Ports (1-4) anzuschließen.
Verbinden Sie RED 50 mit dem Internet
Verwenden Sie das orangene Ethernet-Kabel (im Lieferumfang enthalten), um
den WAN1-Port der RED 50 Appliance mit Ihrem Router oder Kabelmodem,
das den Zugang zum Internet herstellt, zu verbinden.
(Optional) Falls Ihr Büro mit einem zweiten Internetanschluss ausgestattet
ist, verbinden Sie den WAN2-Port der RED 50 Appliance mit dem Router oder
Kabelmodem, das den Zugang zur zweiten Internetverbindung herstellt.

Sophos RED 50 Quick Start Guide
3. Gerät anschalten
Verbinden Sie die Appliance mit der Stromversorgung
Verbinden Sie die RED 50 Appliance mit dem mitgelieferten Netzteil und
stecken Sie das Stromkabel in die Netzsteckdose. Die Power-LED sollte nun
aufleuchten und das System starten. Das LCD zeigt die Meldung "Starting
RED" sowie die RED-ID.
4. Aufbau des Tunnels
Aufbau eines Tunnels zur zentralen UTM Appliance
Die Appliance wird nun automatisch ihre Konfiguration aus dem Internet
herunterladen und einen Tunnel zu Ihrer Zentrale aufbauen. Nach dem
erfolgreichen Aufbau des Tunnels erscheint im LCD die Meldung "Tunnel
is up (wan1)" und entweder die IP-Adresse oder der Hostname der UTM
Appliance, mit der die RED 50 Appliance verbunden ist.
Bitte notieren Sie die zweite Zeile im Feld unten; dies wird Ihrem
Administrator im Falle eines Problems bei der Fehlersuche helfen.
IP-Adresse oder Hostname der UTM Appliance:
________________________________________________________________
Starting RED
> A0000014EE22E39
Falls Sie diese Meldung nicht
sehen oder die rote Error-
LED leuchtet, schauen Sie bitte in
der Bedienungsanleitung nach oder
kontaktieren Sie Ihren Administrator.
Tunnel is up (wan1)
> UTM 10.8.16.32

Sophos RED 50 Quick Start Guide
Sales DACH
Deutschland, Österreich,
Schweiz
Tel: +49 (0) 611 5858-0
Tel: +49 (0)721 255 16-0
E-Mail: [email protected]
United Kingdom Sales:
Tel: +44 (0)8447 671131
Email: [email protected]
North American Sales:
Toll Free: 1-866-866-2802
Email: [email protected]
Australia & New Zealand Sales
Tel: +61 2 9409 9100
Email: [email protected]
Boston, USA | Oxford, UK
© Copyright 2011. Sophos Ltd. All rights reserved.
All trademarks are the property of their respective owners.
Sophos Quick Start Guide 09.12v1.dNA
Other manuals for RED 50
1
Table of contents
Languages:
Other Sophos Network Hardware manuals