Sound World Solutions HD75R Series User manual

HD75R SeRieS
USER GUIDE

Welcome to
Sound World
Solutions!
Thank you for your purchase.
We’re here to help with any
questions. You can reach
us at (855) 792-0117 or via
email at customersupport@
soundworldsolutions.com.

Ready to hear better with your new HD75R device?
It may take some time to get used to the amplification provided by your
new device. You will hear many sounds with clarity that you are not
used to hearing. Ambient and environmental sounds like shuffling papers,
cutlery, and dishes may be distracting at first. Your brain needs to get
used to these sounds. We suggest trying to use your new device
regularly over the course of about two weeks as you will need to
adapt to the brighter and clearer sounds the HD75R will provide.
HD75 app
Although your HD75R comes ready to use out of the box, you have the
option of downloading the free HD75 app onto your smartphone for
optimal customization (see page 14).
Please read all instructions before wearing devices.
The HD75R Series
System Parts .....................4
HD75R Buttons & Features ........5
Bought a Pair? ....................6
Charging your HD75R .............7
Ear & Ear Tip Selection ............8
Proper Placement/Insertion .......9
Removing the HD75R .............
10
Button Function ..................
11
Customizing the HD75R...........
12
Presets ..........................
13
HD75 app ........................
14
Equalizer.........................
15
Environment Modes .............
16
Advanced Audio Features ........
17
Care & Cleaning .................
18
Troubleshooting .................
19
Safety & Warranty ...............
20

4
Take a
moment to
familiarize
yourself
with your
HD75R.
Package Includes:
Ear Tips (5 sizes)
Cleaning Tool
*If you bought a pair of the HD75Rs see page 6.
Congratulations on Your New HD75R!
*
with medium
ear tip
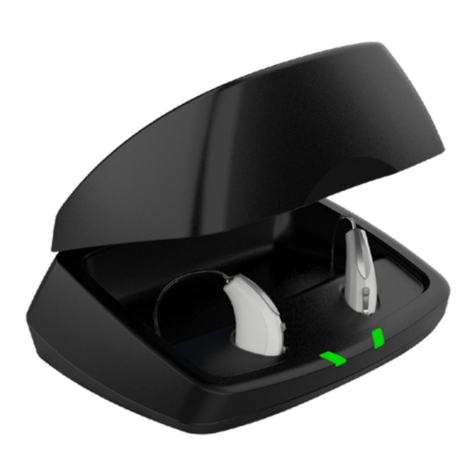
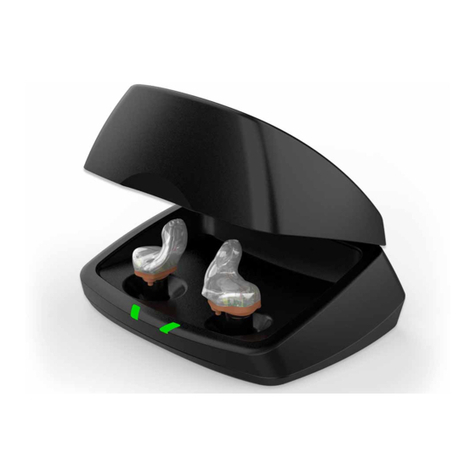
HD75R Carry Case
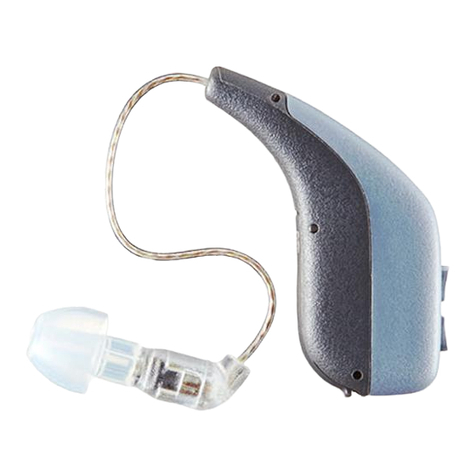
HD75R
Charging Station

5
Buttons & Features:
Microphones Flexible
Length Tube
Power/
Volume Down/
Presets
Power/Volume Up/
Environment
Modes
Your HD75R
provides
comfort and
control for
a superior
listening
experience.
Receiver
Ear Tip
HD75R Buttons & Features
Charging
Port

6
Bought a pair?
If you bought a single HD75R you can
wear it on either ear. If you bought
a pair, look at the serial number on
the case. One of your HD75Rs will
have a bar under the serial number
(the other HD75R will not have it)
to differentiate between the two.

7
Charging your HD75R
Your HD75R comes pre-programmed
and ready to use right out of the box.
We recommend you charge your device
before use. This could take up to 4 hours.
While charging, the lights on the device
will be red. You’ll know it’s fully charged
when the lights turn off. If light blinks,
this indicates problems charging.
Disconnect and connect again.
You cannot harm your device by leaving
it on the charger once charged.
Recharge by inserting device so that the
contacts on your HD75R align with those
of the charging station. Device will be
on and ready to use when removed from
charging station.

8
Ear & Ear Tip Selection
Which Ear Tip to Select?
Your HD75R comes packaged with the medium ear tip placed on the
device. You can replace the medium ear tip with a smaller or larger one.
Selecting proper ear tip size:
• Make sure the ear tip has a snug fit that is secure
and comfortable
• If you experience feedback/whistling then try a
larger ear tip for a better seal
• If your own voice is echoing or is boomy try a
smaller ear tip
Note: Selecting the proper size ear tip is a trade off
between comfort and feedback/whistling.
Which Ear to Fit?
If you only have one HD75R,
select which ear to fit:
• If you need mild
amplification select the
worse ear or go with
your preference.
• If high amplification is
needed for both sides then
select the better ear.

9
Proper Placement/Insertion
Wearing the HD75R
When placing the HD75R in your
ear, be sure to place the body of
the device (the section with the
buttons) behind your ear – not above
the ear. Insert the Receiver with
the ear tip as deep as you can
while maintaining comfort
(see image to the right).
*Once inserted, turn on device by
pressing both buttons on the device
simultaneously for 5 seconds.

10
Removing the HD75R
How to remove the HD75R
To remove the HD75R, simply
grab the flexible tube by the
ear canal and gently pull back
and out to remove it from
your ear.
Do not forget to turn off your
device by pushing both volume
buttons for 5 seconds.

11
Button Function
The HD75R has
two buttons that
control different
functions (Power,
Volume, Presets,
and Environment
Modes). When you
make a change,
you will hear
a voice prompt
that lets you
know what
change you made.
Power On/Off - To power the device on or off, simply press both
buttons at the same time for 5 seconds.
Volume – To increase volume, press and release the Volume Up button.
To decrease volume, press and release the Volume Down button. When you
have reached upper or lower limits of volume, you will no longer hear a voice
prompt. Instead, you will hear beeps, which mean you have reached the limits.
Presets – The HD75R comes with 3 Presets. Toggle through the Presets by
pressing and holding the Volume Down button for at least 2 seconds.
Once you find the Preset that you are comfortable with, you can change the
volume, if needed, as an adjustment. See page 13 for further details.
Environment Modes – The HD75R comes with 3 Environment Modes
(Everyday, Restaurant, & Entertainment). You can toggle through the
Environment Modes by pressing and holding the Volume Up button
for at least 2 seconds. See page 16 for further details.

12
Customizing the HD75
You can customize your
HD75R in one of two ways:
selecting a preset (see p. 13)
or downloading the HD75 app
to your Smartphone and
adjusting via the app
(see p. 14).
1) Download the app onto
your smartphone
2) Open the app and follow
instructions
3) Choose “Run Hearing
Screening”
4) After the hearing
screening, your HD75R
will be in Personal Profile
instead of a Preset
The HD75R comes with 3 Presets.
The default setting is Preset 1.
The device will tell you which
Preset has been selected –
“Preset 1”, “Preset 2”, “Preset 3”.
Preset 1 – Default – Boost the
high frequency
Preset 2 – More boost in the high
& mid frequencies
Preset 3 – More boost in the mid
and low frequencies
HD75 app (page 14)Presets (page 13)
Customize

13
Presets
You do not need a smartphone to customize your HD75R. Choosing the appropriate preset is often
enough to provide a good listening experience.
A Preset is a pre-programmed frequency response to provide certain amounts of amplification at different
frequencies. Your task is to select the Preset that provides you with comfortable hearing, at which point you
can adjust Volume and/or Environment Modes to help you find the most clear and comfortable listening
level. Remember, to toggle through Presets, press and hold the Volume Down button for at least 2 seconds.
Preset 1 – Provides mild amplification in the high frequencies for more clarity.
Preset 2 – Provides some mid frequency and even more high frequency amplification than Preset 1.
Use Preset 2 if Preset 1 still does not provide enough clarity.
Preset 3 – Provides some low and even more mid frequency amplification than Preset 2.
Use Preset 3 if you need clarity as well as volume.

14
HD75 app
If you choose to further customize, download
the HD75 app onto your smartphone. For iPhone,
visit the App Store. For Android, visit Google Play.
The app should recognize your HD75R without
having to pair/connect to your phone’s
Bluetooth, as long as your phone’s Bluetooth
is on when powering on your HD75R.
Select your HD75R on the initial screen, then
follow instructions. Please read the User Guide
within the app for more instructions.
Note: Once you customize the HD75R, the only way
to access the Presets is through the HD75 app.

15
Equalizer (App only)
The Equalizer, available only in the HD75 app, allows you to make adjustments to either a Preset or Personal Profile
(your customized profile using the Hearing Screening). You can adjust overall Volume, Treble, Mid, and Bass.
Equalizer
Volume – Use this to adjust overall volume, all frequencies will be adjusted simultaneously.
Treble – Use this to adjust the higher frequencies (>2300 Hz) for more clarity. If sounds are tinny
or you get a slight whistle, decrease Treble in small increments
Mid – Adjust the Mid frequencies to get rid of electronic sounding voices.
Bass – This provides low frequency amplification (150-1000 Hz). Lower the Bass if sounds are
too loud or boomy. Also, if your voice is too loud or echoing then lower the Bass. If you need a bit
more loudness from the device, raise the Bass in small increments.

16
Environment Modes
Environment Modes allow you to customize based on your listening needs in a specific environment.
Toggle through modes by pressing and holding the Volume Up button. Environment Modes may be
selected on the device (or through the HD75 app) anytime, no matter what Preset you have chosen
or if you have downloaded the HD75 app and run the Hearing Screening.
Everyday – This is the default mode out of the box. Use this throughout the day for normal use in
environments that are quiet, or somewhat quiet.
Restaurant – If you are in an environment with background noise, selecting Restaurant does two things:
first, it activates a 2nd microphone for directionality, and second, it automatically decreases some low
and mid frequency amplification. The two steps allow for better hearing in noisy situations, focusing on
capturing the clarity of speech.
Entertainment – When you want to listen to music or the television, select Entertainment.
This will boost the low and mid frequencies a bit, while maintaining high frequency amplification.

17
Advanced Audio Features
Phone calls can connect to your hearing aid through any ASHA* Android-compatible device.
You will continue to control volume and other phone functions, like ending a call, from your phone.
Note that the microphone for your phone is still used, so you must keep the phone close
to your mouth if you are using the HD75R.
*For a list of ASHA-compatible devices, please see https://www.soundworldsolutions.com/product/hd75r/
Audio Streaming
Audio streaming only works on ASHA Android compatible devices. Please refer to the Audio Streaming
Insert that came in your product box.
Answering Phone Calls

18
Care & Cleaning
Do your best to keep
your hearing instrument
clean at all times. Heat,
moisture and foreign
substances can result
in poor performance.
Cleaning the HD75R
NOTE: Never use water, solvents, cleaning fluids or oil to clean your
instrument. A cleaning tool is included with your HD75R. It is recommended
that you use the wire loop at the end of this tool to remove any wax
buildup from the ear tip and nozzle at least once per week.
Use a cleaning brush or soft cloth to clean debris from around the
buttons, microphone and charging contacts; inspect the receiver
and ear tip regularly.
Cleaning the Ear Tips
For best comfort, and long term care, occasional cleaning of the ear
tip is recommended using an alcohol pad or slightly damp cloth.
Care & Cleaning

19
Troubleshooting
Feedback (whistling noise) is heard
• Try a different preset
• The gain is set too high. Decrease volume.
If using the Customizer app, decrease
high/mid frequencies
• Ear tip size is too small or fit is too loose.
A deeper, snug fit is preferable
• Ensure ear is clear of wax
No sound coming from HD75R
• Make sure your battery is charged.
• Remove any wax that may be blocking
the ear tip or nozzle
Sound is muffled or garbled, or no sound
• Check that the ear tip is mounted to nozzle
correctly
• Remove any wax that may be blocking the
ear tip
• Try a different Preset or Environment setting
Echo of your own voice/sounds too loud
• Change ear tip size to one size smaller
• Insert ear tip further into ear canal
• Decrease Bass in small increments

20
Important Safety Information
WARNING: To reduce the risk of electric shock, do not remove cover. No user serviceable parts inside. Refer servicing to
qualified personnel.
WARNING: To reduce the risk of fire or electric shock, do not expose this product to rain or moisture. The HD75R should
not be exposed to dripping or splashing. No objects filled with liquids should be placed on or near the HD75R.
• Read these instructions
• Keep these instructions
• Heed all warnings
• Follow all instructions
• Do not use this apparatus near water
• Clean only with dry cloth
• Do not place near any heat sources
such as radiators, heat registers, stoves,
or other apparatus (including amplifiers)
that produce heat
• Refer all servicing to qualified service
personnel. Servicing is required when the
apparatus has been damaged in any way,
such as liquid has been spilled or objects
have fallen into the apparatus, the apparatus
has been exposed to rain or moisture, does not
operate normally, or has been dropped
Table of contents
Other Sound World Solutions Hearing Aid manuals
