Soundchoice PROAudio A4 Series User manual

A4 Series Professional
Class-D Four Channel Amplifier
INSTALLATION AND OPERATION MANUAL
Caution: Please read this manual carefully before operating
Damage caused by misuse is not covered by the warranty

2 / 7 www.scpaudio.com
SAFTY WARNINGS!
1. Read and keep these instructions.
2. Heed all warnings and follow all instructions.
3. Do not use this apparatus near water.
4. Do not block any ventilation openings. Install in accordance with the manufacturer’s instructions.
5. Do not install near any heat sources such as radiators, heat registers, stoves, or other apparatus that produce heat.
6. Do not defeat the safety purpose of the polarized or grounding-type plug. If the provided plug does not fit into your outlet,
consult an electrician for replacement.
7. Protect the power cord from being walked on or pinched particularly at plugs, convenience receptacles, and the point where
they exit from the apparatus.
8. Only use attachments/accessories specified by the manufacturer.
9. Use only with the cart, stand, tripod, bracket, or table specified by the manufacturer, or sold with the apparatus. When a cart is
used, use caution when moving the cart/apparatus combination to avoid injury.
10. Unplug this apparatus during lightning storms or when unused for long periods of time.
11. Refer all servicing to qualified service personnel. Servicing is required when the apparatus has been damaged in any way,
such as power-supply cord or plug is damaged, liquid has been spilled or objects have fallen into the apparatus, the apparatus
has been exposed to rain or moisture, does not operate normally, or has been dropped.
12. This appliance shall not be exposed to water and that no object filled with liquid such as vases shall be placed on the
apparatus.
13. Plug this apparatus to the proper wall outlet and make the plug easily removable.
14. WARNING: To reduce the risk of fire or electric shock, do not expose this apparatus to rain or moisture.
15. An appliance with a protective earth terminal should be connected to a mains outlet with a protective earth connection.
WARNING!
TO PREVENT FIRE OR SHOCK HAZARD, DO NOT USE THE PLUG WITH
AN EXTENSION CORD, RECEPTACLE OR OTHER OUTLET UNLESS THE BLADES
CAN BE FULLY INSERTED TO PREVENT BLADE EXPOSURE.
TO REDUCE THE RISK OF FIRE OR ELECTRIC SHOCK, DO NOT EXPOSE
THIS APPLIANCE TO RAIN OR MOISTURE.
TO PREVENT ELECTRICAL SHOC
K, MATCH WIDE BLADE PLUG TO WIDE SLOT, FULLY INSERT.

3 / 7 www.scpaudio.com
INTRODUCTION
Description
The A series four channel power amplifiers are designed for professional audio application and fix installations, while
the digital class-D technology helps the amplifiers generate powerful output while keep less heat because of its high
efficiency, up to 85%. The power amplifier is designed with special PWM power supply to ensure extreme stability,
less noise and minimum heat. Its rated power from 4×200W, 4×300W, 4×400W at stereo 8Ω, the amplifier support 8Ω &
4Ω and versatile mode of stereo, parallel and bridge makes it work well with professional speakers and subwoofers .
With complete protection of clip, high temp, overload and short circuit to ensure these amplifiers work under severe
working environment.
Features
Switching power technology digital Class-D power amplifier
Green technology amplifier with 85% efficiency
With PWM special power circuit to ensure excellent cooling system
19” universal rack mount type in 1U height
Support stereo output at 8Ω & 4Ω
Output mode selector of stereo, parallel and bridge
4×Input by balanced XLR male connector
4×Output by balanced Speakon female connector
Complete protection include clip, high temp, overload and short circuit

4 / 7 www.scpaudio.com
FRONT PANEL
1. CH1 volume knob
2. CH1 protect, clip & signal indicators
3. Bridge, stereo & parallel indicators
4. CH2 protect, clip & signal indicators
5. CH2 volume knob
6. Power indicator
7. CH3 volume knob
8. CH3 protect, clip & signal indicators
9. Bridge, stereo & parallel indicators
10. CH4 protect, clip & signal indicators
11. CH4 volume knob
12. AC power switch
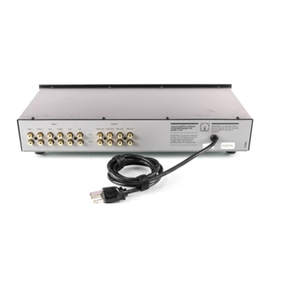
REAR PANEL
1. AC Power Socket.
2. CH4 speaker output
3. CH3 speaker output
4. CH2 speaker output
5. CH1 speaker output
6. CH4 XLR Input, balanced
7. Bridge, stereo & parallel selector
8. CH3 XLR Input, balanced
9. CH2 XLR Input, balanced
10. Bridge, stereo & parallel selector
11. CH1 XLR Input, balanced

5 / 7 www.scpaudio.com
AMPLIFIER OPERATION GUIDE
Setup
Before operating the A series amplifiers, check the mains supply voltage and connect the IEC inlet to the mains power
supply using the power lead supplied (or equivalent). Ensure that the cooling vents at front and rear are not covered or
obstructed in any way with adequate space for air-flow through the unit.
Each side of the A series amplifiers can be operated as an independent pair of channels or as a single combined output
in Bridge mode. Set the mode using the selector switch for the relevant pair of channels (rear panel 7 & 10).
Bridge mode offers the option of operating the A series as a stereo amplifier into 2 larger 8Ω speakers.
It is also possible to operate one side in Bridge mode to give 1 high output channel with the other side in stereo, which
can be useful to power a large sub and a pair of satellite speakers (left + right).
Standard dual stereo or quad mode
Connect speakers to Channel 1, 2, 3 and 4 outputs via the SPK connectors (rear panel 2, 3, 4 & 5)
For standard output mode SPK wiring, connect + and - wires to pins 1+ and 1- (most common configuration)
Ensure that the combined load on each channel is no lower than 4Ω (for speakers in parallel, 8Ω + 8Ω = 4Ω)
Connect line level inputs to the CH 1, 2, 3 and 4 XLR inputs (rear panel 6, 8, 9 & 11)
Each output is governed by its own channel gain control on the front panel.
Bridge mode
Bridge mode is different to standard mode in that it combines 2 of the output channels to a single mono output.
This mode enables double the power to a single speaker output compared with standard mode.
The difference is that the speaker load must be no lower than 8Ω, whether a single speaker or combined load.
Bridge mode can be useful especially when driving a large, high power subwoofer.
Connect the speaker(s) for Bridge mode to the Channel 1/3 SPK output(s).
Note that the SPK wiring in Bridge mode is different to standard mode.
Connect the “+” speaker wire to amplifier 1+ (rear panel 5) and the “–” speaker wire to amplifier 2+ (rear panel 5).
Note: For reference, this wiring is printed on the rear panel. Incorrect speaker wiring can damage the amplifier!
In Bridge mode, CH 1 and 3 XLR inputs send mono signal to the CH 1 and 3 SPK outputs (pins 1+/2+)
Operation
With channel gain controls (front panel 1, 5, 7, 11) turned fully down (anti-clockwise), switch on the power (front panel
12) and the LED POWER indicator will light (front panel 6)
Placing the input signal into the connected channel inputs, gradually increase the relevant gain controls (only CH 1 and
3 will have an effect in Bridge mode). The amplified signal should be heard through the speakers and the SIG indicators
(front panel 2, 4, 8, 10) should respond to the audio output. Increase the volume controls to the required level.
Alongside the SIG indicators are CLIP indicators, which should only light very briefly on the loudest transients or spikes
in the audio. If the CLIP LEDs light for more than a fraction of a second at a time, the volume controls should be turned
down or input signal will need to be reduced.
Before powering down, turn down the volume controls to avoid loud pops or noises through the speaker.

6 / 7 www.scpaudio.com
SPECIFICATION
Model A4100 A4200 A4300 A4400
Description Four Channel Power Amplifier
Rated Output 4Ω 4×170W 4×350W 4×500W 4×600W
Rated Output 8Ω 4×100W 4×200W 4×300W 4×400W
Bridge Out 4Ω 2×330W 2×600W 2×900W 2×1000W
Bridge Out 8Ω 2×160W 2×330W 2×500W 2×630W
Frequency Response 20Hz~20KHz
THD <0.3%
S/N Ratio >105dB
Input Impedance 20KΩ (bal.), 10KΩ (unbal.)
Crosstalk >75dB
Connector Input by XLR, 1V, 20KΩ (bal.), 10KΩ (unbal.)
Power Supply AC 100~240V, 50/60Hz
Dimension 484×375×44mm
Net Weight 4.5kg 5.0kg 5.5kg 5.7kg
TROUBLESHOOTING
No power light on front
panel switch
Ensure IEC inlet is connected to mains and lead is in good condition
Ensure mains outlet is switched on
Power light is on but no
other LEDs and no output
Check input signal and connection leads
Ensure channel gain controls are not turned fully down
Power light and Signal
LEDs are lit but no output
Check speaker leads are in good condition and connected properly
If speakers/leads OK, switch off again and refer to qualified service personnel
Check speakers are in good working order and not shorted (use a multi-tester)
Case getting hot Ensure cooling vents are clear and fan is working (refer to technician if not)
Output is very distorted
and CLIP LEDs are
lighting
Check the speaker impedance is not below the rated Ohms
Turn down the input level from audio source
Turn down channel gain controls
Output is working but at
very low level
Ensure input source is at line level
Increase input level from audio source
Turn up channel gain controls

7 / 7 www.scpaudio.com
SERVICE
Procedures
Ensure the problem is not related to operator error, or system devices that are external to this unit. Information provided
in the troubleshooting portion of this manual may help with this process. Once it is certain that the problem is related to
the product contact your warranty provider as described in the warranty section of this manual.
Variations and Options
Variations
Products supplied through legitimate sources are compatible with local AC power requirements.
Options
No optional items are available for this product.
Warranty
Warranty terms of global three years. While the term and warranty may vary by country and may not be the same for all
products. Terms and conditions of warranty for a given product may be determined first by locating the appropriate
country which the product was purchased in, then by locating the product type.
Specifications may change without notice.
This manual suits for next models
4
Table of contents
Other Soundchoice PROAudio Amplifier manuals
Soundchoice PROAudio
Soundchoice PROAudio CA2120 User manual
Soundchoice PROAudio
Soundchoice PROAudio 4120A User manual
Soundchoice PROAudio
Soundchoice PROAudio C2 Series User manual
Soundchoice PROAudio
Soundchoice PROAudio 120MA User manual
Soundchoice PROAudio
Soundchoice PROAudio T-60FP User manual
Soundchoice PROAudio
Soundchoice PROAudio 2120A User manual
Soundchoice PROAudio
Soundchoice PROAudio C4 Series User manual
Soundchoice PROAudio
Soundchoice PROAudio CA4360 User manual
