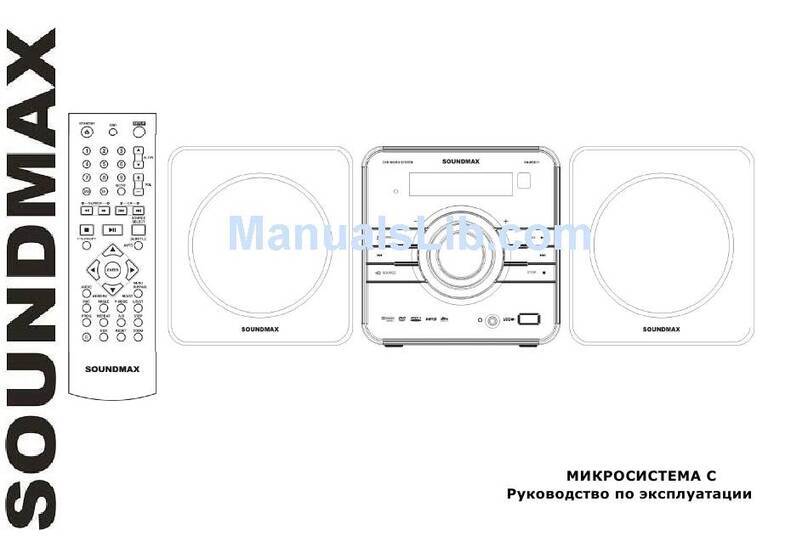
SoundMax SM- MSD11 User manual

3
Before you start
Ut il iz a t io n o f t h e p r o du ct
If you want to dispose t his product , do not m ix it with general househ old wast e. Ther e is a separat e collect ion system for
used electronic pr oduct s in accor dance with legislat ion t hat r eq uir es pr oper treatm ent , recovery and recy cling.
Please cont act your local aut horit ies for t he correct m et hod of disposal. By doing so, you will ensure that y our disposed
pr oduct undergoes t he necessary treat m ent, r ecov ery and recycling and thus prevent potent ial negativ e effects on the
env ir on m en t an d hu m an healt h.
I m p or t a n t sa f e g ua r ds
The lightning flash is int ended t o alert the user t o t he presence of dangerous volt age wit hin t he product 's
enclosure, and touching the inner part s m ay result in a risk of elect ric shock to persons.
The exclam at or y m ark is int ended to alert t he user to the pr esence of im port ant oper at ing inst r uct ions.
To reduce t he risk of elect ric shock or fire, do not open t he cover. Refer servicing t o qualified service personnel.
This m ark indicates this unit belongs to class 1 laser product. The laser beam m ay pr oduce radiation harm t o t he
direct ly t ouching hum an bod y.
‚To prev ent t he risk of fire or elect ric shock, don’t allow w at er t o com e in t o cont act wit h the device and don’t use th e
device in high hum idit y condit ions.
‚The device is equipped with high voltage components and a laser system; hence you shall not open the device and
repair it by y ourself. The laser beam is dangerous t o ey es when the housing is r em ov ed. Don’t look at it.
‚When t he dev ice is m ov ed from cold prem ises t o the w ar m room or v ice v ersa, condensat e m ay form on t he laser head
and the dev ice m ay not operat e properly. I n t his case please t ur n the device on for 1- 2 hours wit hout disc before
play back to heat it to a proper operat ion t em perat ur e.
‚Don’t tr y to m anually op en or close t he disc t ray to load discs.
‚Disconnect the receiver only when there is no disc t herein.
‚If you are not going t o use t he dev ice for a long t im e disconnect it from t he wall outlet .
‚Before t urning t he device on, please m ake sure t hat you have connect ed it properly; adjust the volum e of speakers and
amplifiers of your system to the minimum. Adjust the volume as necessary only after normal playback has started to
avoid dam age of your audio syst em.

4
‚Use supply sources of rated v olt age; ot herw ise t he unit m ay not funct ion or m ay be dam aged.
‚Place t he unit on a hor izont al surface. Keep the unit vent ilat ed. Don’t block the heat hole. Over heat m ay cause
m alf unct ion .
‚Do not place any obj ect s on t he cov er, t his m ay m ak e it f unct ion im pr op erly ( in corr ect play back) .
‚Please place the unit in a dry and well-aired area. Do not place it near heating units or expose it to direct sunlight,
m echan ical vib rat ion, hu m idit y or ex cessiv e dust .
‚Never use liquid det ergent s, ab rasives or organic com pound s ( alcohol, gasoline, etc) t o clean t he unit body .
‚All repairs and technical service should be m ade by qualified specialist from service centers.
All im a g e s p r o vi de d h e r e in a r e sch e m a t i c dr a w in g s o f r e a l ob j e ct s a n d m a y d iff e r f r om t h e ir r e a l i m a g e s.

6
Con t rol e le m en t s
Front pan e l Re a r panel
1. Display 1. Speak er output
2. STANDBY but t on 2. FM ant enn a
3. PREVI OUS but t on 3. SCART connect or
4. SOURCE b ut t on 4. Com posi te v ideo out put
5. PLAY/ PAUSE but t on 5. R/ L st ereo audio out put
6. NEXT butt on 6. Coax ial digit al audio out put
7. STOP but t on
8. VOLUME regulat or
9. USB port
10. Head ph on e j ack

7
Re m o t e con t r ol ( RC)
1. STANDBY but t on
2. OSD but t on
3. Num ber but tons
4. SEARCH+ / - ( REWI ND/ F.FORWARD) but t ons
5. STOP but t on
6. PLAY/ PAUSE but t on
7. TITLE/ COPY but ton
8. Cur sor ( UP/ DOWN/ LEFT/ RIGHT) butt on s
9. AUDI O/ MEMORY but t on
10. ANGLE but t on
11. PBC but t on
12. PROG but t on
13. REPEAT but t on
14. MUTE butt on
15. USB but t on
16. SETUP but t on
17. SLOW UP/ SLOW DOWN but t ons
18. VOL- / VOL+ but t on s
19. GOTO but t on
20. CH- / CH+ ( PREVI OUS/ NEXT) but t ons
21. SOURCE SELECT but t on
22. SUBTI TLE/ AUTO but t on
23. ENTER button
24. MENU/ RI PPING/ MO/ ST but t on
25. V- MODE bu t t on
26. L/ R/ ST but t on
27. STEP but t on
28. A- B bu t ton
29. ZOOM but t on
30. RESET but t on

8
Ba t t e r y in st a lla t i on
1. Rem ov e t he bat tery com part m ent cov er on t he back of t he RC.
2. I nser t the bat ter ies int o t he bat t er y com part m ent m aking sure t hat t he cor rect
polarity is observed.
3. Install the cov er back.
‚Use t w o AAA/ 1.5V bat t er ies for t he RC. The RC should be point ed at t he IR sensor
wit hin 8 met ers and within 30 degr ees at t he left or the right side.
‚Tak e the batt ery out of the RC if it is not used for a long tim e.
‚Do not m ix new and used bat teries or differ ent ty pes of bat t eries. Weak bat t eries
can leak and severely dam age t he RC

9
Con nect ion
Before y ou st art connect ion of ext ernal devices, en sure t hat power of the un it is switched off. Follow ing out put s are
available in t his unit :
Com p osit e v id e o
Use the yellow plug of an AV cable to connect t he com posit e video output of this unit to t he video input of a TV/ m onit or.
SCART
Use a 21- pin SCART cable t o connect the SCART output of this unit to t he TV/ m onit or SCART input.
St e r e o a u d io
Use a pair of RCA cables (red for right/white for left) to connect the stereo audio outputs of this unit to a TV or a stereo
input of power amplifier.
Co a xia l d igi t a l a u d io
Use the special coaxial cable t o connect the coaxial output of this unit t o the coaxial input of power am plifier.
Spea ker ou t put
Use t he built - in cable of t he speakers t o connect t his unit t o t he input of sound box es.
N ot es:
‚The connect ion you should m ake depends on t he TV/ m onit or input ter m inals. Don’t m ake all the connect ions at the
sam e t im e; otherwise the produced pict ure will be affected.
‚The physical connect ion should accord t o the audio output set up of t his unit.
‚The unit does not support DTS sound out put . To obt ain DTS f or m at sound you need to connect the unit to an ext ernal
am plifier suppor ting DTS wit h t he help of a coax ial cable ( not included ) .

10
Sy st e m se tu p
1. Press SETUP but t on t o ent er t he set up m enu. I n set up m ode, press SETUP butt on again t o quit t he set up page.
2. Use LEFT/ RIGHT cur sor but t ons t o choose a setup page: General set up page, Audio setup page, Dolby Digit al setup,
Video set up page, Preference page.
3. Press DOWN cursor but t on to ent er the set up page select ed.
4. Use UP/ DOWN cur sor but t on s t o select t he opt ion y ou want t o adj ust .
5. Press RI GHT cur sor but t on to ent er t he adj ust m ent list . Use UP/ DOWN cu r sor butt on s t o select t he adj ust m ent and press
ENTER butt on t o conf irm and ret urn t o opt ion s list.
6. To ret urn t o set up page list pr ess LEFT cur sor butt on in t h e op t ions list .
N ot e : The it em s in gray can’t be set up. The set up is m em orized and kept aft er power is off.
Ge n er al se t u p
‚TV DI SPLAY
4: 3/ Panscan: When t he un it connect s t o t he nor m al TV set , t he w ide- screen im age
shows on t he full screen, but some part is cut off.
4: 3/ Let t er box: Wh en t he un it connect s t o t he norm al TV set , t he w ide- scr een im ag e
shows and black bars appear on the top and bot tom of screen.
16: 9: Use t his item when t he unit is connect ed with the wide screen TV set .
‚ANGLE MARK
I t w il l sh ow t he ang le m ark w hen play ing DVD disc wit h m u lt i- angle view if select ing On.
‚OSD LANGUAGE
Select on - scr een disp lay lan gu ag e: En glish, Russian.
‚CLOSED CAPTIONS
This function doesn’t work with discs wit hout capt ions. If Capt ions is Off, press SUBTI TLE but ton on t he RC to set Capt ions
on. The default set up is On.
‚SCREEN SAVER
If Screen saver is set ON and the unit is switched on without a disc playing for several minutes, a moving picture appears
on the screen, and the unit will go t o st andby m ode after several m inut es. Press STANDBY butt on on the RC t o wake it up.
‚LAST MEMORY
When this function is on, the unit can memorize the time elapsed from the last time you played the disc. Then at the next
play ing, it w ill resum e play ing from t he m em or ized point .

11
Audio setup
‚ANALOG AUDI O: Dow nm ix
LT/ RT: The audio out is Left and Right channels form at even if the original sound is
5.1CH for m at .
St ereo: The audio out form at is st ereo even if the or iginal sound is 5.1CH form at.
‚DI GI TAL AUDI O: Digit al out put
SPDI F/ OFF: no digit al signal out ( optical or coaxial outpu t off) , only analog audio
out put .
SPDI F/ RAW: no decoding on t he am plifier digit al signal input .
SPDI F/ PCM: the am plifier m ust b e suppor ted by PCM decodin g or Dolby digit al
decoding funct ion.
LPCM out put: this it em is available when Digit al Out put is set t o SPDIF/ PCM. Select
sam ple rat ing of the digital output as 48 kHz or 96 kHz.
‚HDCD
You can select the digital filt er Off, 1x, 2x.The init ial fact ory set up is Off.
D olb y se t u p
‚DUAL MONO
St ereo: st ereo out put signal,
L- Mon o: lef t out put signal,
R- Mono: right out put signal,
Mix - Mon o: left and right output average signal.
‚DYNAMI C
If watching large dynamic scope movie program at night, by selecting this mode you
can reduce the volume to a very low level and at t he same time keep the fine details
sounds. I n t his case, t his doesn’t dist ur b t he fam ily and k eep t he quality sound.
V id eo se t u p
‚VIDEO OUTPUT
Off: set v ideo out put t o CVBS.
RGB: set video output in Red/ Green/ Blue f or m at when connecting to SCART
t er m inals.
‚COLOR SETTI NG
You can set sharpness, bright ness, con t r ast, gam m a, hue and sat ur at ion according t o
your preference.

12
Pr e fe r e nce se t u p ( av ailable while d isc is on full st op)
‚TV TYPE
This unit is suitable for all kinds of TV systems. You can select one of the PAL, NTSC
or Multi.
Aut o: the TV sy stem is auto switched according t o t he disc sy st em .
NTSC: this syst em is used in USA, Taiwan, Japan etc.
PAL: this syst em is used in China, Europe, Hong Kong et c.
‚PBC
Act iv at e or d isab le t he PBC ( Play back cont r ol fu nct ion ) .
‚AUDIO, SUBTITLE, DISC MENU language set up
These are the initial settings by your preference. If a setting is supported by disc
content , it w ill work. Ot herwise t he disc default v alue work s. And t hese set t ings can
be changed respectiv ely by pressing AUDIO and SUBTI TLE butt ons w hen playing.
‚PARENTAL
The contr ol lev el is for parent al t o control play in g content and protect your children f rom violence and erot ic. The disc, the
level of which is higher t han the set ting level can not be played.
‚PASSWORD
Change t he passwor d. The init ial fact ory password is 136900. You can set you r own password. I f y ou forget y our own
password, y ou can use 136 900 as general password.
‚DEFAULT
Reset t o the init ial fact ory set ups.

13
Bu t t on f un ct ion s
STAN D BY
Press STANDBY but ton t o swit ch on t he unit . When on, press t his but t on to sw itch off t he unit .
W a r n in g: The power is not fully cut off at standby state. If the unit will not be used for a long tim e, turn off the power by
disconnect ing t he power cord from t he current supply.
N u m be r bu tt on s
Press num ber but t on s to input dig it s ( channel num ber s, play back t im e et c.) .
GOTO
Press GOTO but t on t o en ter t he m enu enabling t o select p lay back st ar t t im e for t he t it le, t rack or chap ter , and t o set som e
ot her p lay back param et ers. To quit t he m enu, pr ess GOTO but t on.
SETUP
Pr ess SETUP bu tt on , t h e on- scr een set u p m enu w ill be d isp layed .
PLAY/ PAUSE
When play ing t he disc, press PLAY/ PAUSE but t on to pause, press t he butt on again t o ret ur n t o norm al play.
MUTE
Press MUTE but t on, no sound will be heard and t he m ut e sy m bol will display on t he TV screen. Press t he but t on again, and
t he sou nd w ill r esum e.
PBC
Pr ess t o en ab le or disable t h e PBC ( play back cont r ol) m enu ( f un ct ion av ailable on ly f or VCD discs encod ed w it h PBC
su pp or t ) .
AN GLE
When play ing t he disc wit h m ult i- angle, press ANGLE butt on t o change v iew angle.
SEARCH + / - ( REW I N D/ F. FO RW AR D)
‚Press t hese butt ons for fast for ward or fast rew ind; with each pressing the speed will change as follow s: 2 – 4 – 8 –
16 – 32 - norm al.
‚I n Rad io m ode pr ess t h e but t ons t o sear ch st ron g signal st at ions m anually .

14
VOL+ / -
Pr ess VOL+ t o ad j ust v olu m e u p, pr ess VOL- t o ad j ust v olum e d ow n. You can also rot at e VOLUME r eg ulat or t o adj u st t he
sound v olum e lev el.
V- M O DE
Press V- MODE but t on to swit ch t he video out put m ode.
PROG
‚If the disc has 2 or more tracks, chapters or titles, set up the playing order to your preference. Press PROG button to
ent er progr am m enu.
‚Press num ber but ton s t o input t he n um ber of t he t rack, t it le or chapt er. I f t he pr ogr am m ed t rack s are over t en, m ov e
the cur sor t o <item and press ENTER button to go on programming (maximum 20 programmable items). Use cursor
bu t t ons to m ove t he cursor t o the START. Press ENTER but t on t o st art pr ogram play .
‚When play ing MP3 d isc, prog ram m ing is not av ailable.
‚To quit t he prog ram m ing m enu press PROG but t on or m ove t he cursor on EXI T it em and press ENTER bu tt on.
OSD
Press OSD but t on repeatedly, the relat ive inform at ion of the current playback w ill display on the scr een.
SOURCE SELECT
You can switch among various signal sources by pressing SOURCE SELECT but ton.
CH - / CH + ( PREVI OU S/ N EXT)
‚In Rad io m ode press these but tons to go t o prev ious or nex t st ored r adio st ation.
‚When p laying DVD disc, press PREVI OUS but ton t o go to t he prev ious chapt er or NEXT but t on t o go t o t he next chapt er.
‚When play ing SVCD, VCD, CD disc, press PREVI OUS but t on t o go t o t he pr ev iou s track or press NEXT butt on t o go t o
the nex t t rack.
TI TLE/ COPY
‚When play ing DVD disc, press TI TLE/ COPY but ton t o open t h e title list .
‚When playing m ultiform at disc, if a USB is connect ed to t he unit , press TI TLE/ COPY butt on t o go t o file copying function.
MENU/ RI PPI NG/ MO/ ST
‚When playing DVD disc, press t his button t o open t he disc m enu.
‚In Rad io m ode use this butt on t o select t he Mono or St ereo m ode.
‚When USB is connect ed, press this but t on t o en ter RIPPING m enu.

15
SUBTI TLE/ AUTO
‚When playing a DVD disc wit h m ult i- subtit le funct ion, press this butt on t o select the subtit le language.
‚I n Radio r eceiv ing m ode use t his but t on t o aut om at ically adj ust and save all st at ions wit h st rong sign al.
AU D I O/ M EMORY
‚When play ing DVD w ith m ore t han one audio language, press AUDIO/ MEMORY but t on t o select y ou desired audio
language.
‚I n Rad io m ode, t o sav e t he curr ent st at ion int o t he u nit m em ory , af ter select ing t he f req uen cy press AUDI O/ MEMORY
but ton, t hen press num ber but t ons. The frequency will be st ored under corresponding num bers.
Cursor buttons
Press cursor butt on s for navigat ion in v arious m enus.
EN TER
Pr ess ENTER bu t t on t o con fir m in pu t dat a or select ed op t ion s.
USB
Insert t he USB device int o the slot on t he front panel. Press USB butt on t o play cont ent of t he USB device.
STEP
When playing DVD, SVCD, VCD disc, press STEP bu t t on once, t he pict ur e changes to nex t fram e. Press PLAY/ PAUSE bu tt on
t o r esum e nor m al play .
ZOOM
‚When playing DVD, SVCD, VCD disc, press repeatedly ZOOM to zoom in or zoom out t he picture in the following order:
2x = > 3x = > 4x = > 1/ 2 = > 1/ 3 = > ¼ = > Nor m al.
‚In zoom in m ode, press cursor t o m ove t he pict ur e for viewing. The picture cannot be m ov ed in zoom out m ode.
REPEAT
Press REPEAT butt on repeat edly t o swit ch between various repeat m odes: chapt er/ t it le/ t rack / folder r epeat ( depending on
t he d isc t y pe) .
A - B
‚Press A- B but t on at t he st ar t point ( A) and the ending point ( B) to select t he repeat fragm ent.
‚Press A- B but t on t he t hird t im e t o can cel fragm en t r epeat a nd ret ur n t o n or m al play .

16
STOP
‚When play ing DVD/ VCD/ SVCD/ CD disc, press STOP but t on once, the unit will m em orize t he prev ious ending point .
Press PLAY/ PAUSE button to continue playback. Press STOP button twice; now playback can only be resumed from t he
beginning of t he disc.
‚In Radio m ode, w hile aut o scanning, press STOP but ton t o stop t he process.
RESET
When the disc tray cover is open, press RESET button to reset all setting to default values (except PARENTAL and
PASSWORD SETUP set t in gs) .
L/ R/ ST
When play ing a VCD disc pr ess t his but ton repeat edly t o select variou s audi o channels ( Left m ono/ Right m ono/ Mix
m ono/ St er eo) .
SLOW UP/ D OW N
While play back, press repeatedly SLOW UP but t on t o select slow for ward play back speed as follows: 1/ 2 = > 1/ 4 = > 1/ 8 = >
1/ 16 = > Nor m al. While playback , pr ess repeatedly SLOW DOWN butt on t o select slow backward playback speed as follow s:
1/ 2 = > 1/ 4 = > 1/ 8 = > 1/ 16 = > Norm al.

17
Ot h er o pe ra t ion s
Rippin g
This unit has Ripping function m aking it handy and quick to copy aud io files ( e.g.
m usic) fr om CDs. RI PPI NG is convert ing fr om CDDA f or m at t o t he com pre ssed
MP3 f or m at onto a USB drive. I n the course of copying, I D3 t ags are generat ed
aut om at ically in Russian and Eng lish, depending on t he source. I f t he disc does
not cont ain such infor m at ion in CD- t ext f or m at , I D3 t ags will be written as
“ Unknow n ar tist ” an d “ Un kn ow n album ” .
RIPPING function has a sim ple and intuit ive menu. To display the Ripping menu,
press MENU/RIPPING/MO/ST button on the RC while a CD playback. A USB-drive
should be connected to the unit. For navigat ion in t he menu use cursor but t ons and
pr ess ENTER butt on to confirm your option. In “ Opt ions” colum n y ou may set speed
and bit rate for ripping. In “Track” column you may select tracks for ripping (press
ENTER but t on t o select a h igh light ed t rack) . Besides, y ou can select all t rack s
( “ Select all” ) or can cel y our choice ( “Select non e” ) . To st ar t con ver tin g pr ocess,
select “ St ar t” and press ENTER but t on .
After ripping is started, a menu will appear showing the progress of the
procedure. File ripping is performed in real time, so you can listen to files
current ly under ripping.
N ot es:
‚A folder is created on the USB-drive for the ripped files. If such a folder
already ex ist s on t he USB, ripping oper ation is unav ailab le.
‚To avoid data loss, do not disconnect the USB-drive until ripping is
com pleted.
MP3 / JPEG/ M PEG4 back g rou n d
MP3 - generally adopt ed standard of audio com pression, com pressing aud io dat a t o 1/ 12 of t heir size. One CD disc mat
st ore m ore than 60 0 m inut es of m u sic ( 170 songs) . And t he q ualit y of MP3 disc approxim at es t o an audio CD qualit y.
JPEG ( Joint Phot ogr aphic Exper t Gr oup ) - im age com pression alg or it hm , used all ov er t he w orld and pr ov id ing high level of
com pr ession of t he sour ce dat a. Any gr aphics ed it or m ay e dit im ages of t his for m at and t heir size in 15- 20 t im es less t hen
t he original im ages.
MPEG4 - standard for transmitting audio and video data via channels with low capacity. This format is very popular since it
m ade possible t o p lace full-length m ovies wit h good enough resolut ion in one CD.

18
N ot e : Some DivX discs cannot be played due to their parameters and recording conditions. Video files more than 2 Gb
hav ing AVI ex t en sion can be played part ially .
M P3 / M PEG4 p la y ba ck
Af t er y ou inser t ed a disc cont ain ing MP3 or MPEG4 files, following m enu w ill be disp lay ed
on t he screen:
1. File list window - shows t he current ly av ailable file list .
2. Play back inf o window - shows cur rent play back t im e, t rack nu m ber , v olu m e lev el,
play back st at us ( st op/ play/ pause) et c.
Use UP/ DOWN cur sor butt ons t o select a folder/ file and press PLAY/ PAUSE or ENTER but t on
to start it s playback. Pr ess PROG but t on t o select between f older playback and filelist
play back m odes.
JPEG playba ck
‚While a file playback, press STOP but t on, 12 t hum bnails will be shown on t he screen.
‚Press cur sor but t on s t o select t he desired pict ure.
‚Use cursor butt on s t o select SLI DE SHOW it em , t hen press PLAY/ PAUSE or ENTER but t on t o st art slide show.
‚Use cursor butt ons to select MENU it em , t hen press PLAY/ PAUSE or ENTER butt on t o enter but t on function m enu.
In JPEG playback m ode, but t on funct ions are as follows:
Bu t t on Funct ion
STOP Ent ering t hum bnail m ode
NEXT Nex t pict ur e
PREVI OUS Prev ious picture
PLAY/ PAUSE To play / pause slideshow
Select CONTI NUE it em and press ENTER butt on to go t o t he other m enu page:
ZOOM Change zoom m ode
F.FORWARD Zoom in pict ure
REWIND Zoom out pict ure
Cursor but t ons Mov e zoom center
N ot e : Som e file nam es can be displayed incorrect ly due to incompatibilit y of support ed encoding.
USB n o t es
The supported USB capacity is 16 Gbs. Please use USB of famous brands; some models of USB cannot be supported by this
unit d ue t o in com pat ibilit y .

19
Copying da ta
‚Play data disc or USB cont aining MP3/ JPG/ DivX files.
‚Press TI TLE/ COPY but ton on RC, t he COPY m enu will appear wit h opt ion of ALL SELECT/ ALL UNSEL/ COPY/ EXI T.
‚Mov e t he cursor t o the t arget f ile or folder, press ENTER b ut t on to t ick it , or select ALL SELECT item to select all t he
data.
‚Choose NEXT item t o st art copy ing dat a the select ed dev ice.

20
Ge ne ra l in for m a t ion
H a n dlin g co m p a ct d iscs
‚Do not inser t any t hing ot her t han a CD into the disc tray .
‚Do not use cracked, chipped, warped, or otherwise damaged discs as they may cause
dam age t o the player.
‚Handle the disc only by t he edges ( as shown in t he pictur e) . To keep discs clean do not touch its surface.
‚St ore discs in t heir cases when not in use.
‚Do not ex pose discs t o direct sunlight , high hum idity , high tem perat ure or dust .
‚Prolonged ex posur e t o ex tr em e tem perat ur e can w rap a disc.
‚Do not att ach labels, writ e on or apply chem icals to the surface of the discs.
‚Do not t ouch the recorded surface of the discs.
‚Use 12- cm CDs. Use only conventional, fully circular discs. Do not use irregularly shaped discs.
Cle a n in g d is cs
Fingerprints should be carefully wiped from the surface of disc with a soft cloth. Unlike
conv en t ion al recor ds, co m pact d iscs h av e n o g r oov es t o collect du st an d m a croscop ic dir t , so
gent ly w ipin g t hem wit h a sof t clot h should rem ov e m ust panicles. Wipe in a st raight m ot ion
from the center t o the edge.
Never use thinner benzine, record cleaner or anti static spray on a compact disc. Such chemicals can damage its plastic
surface.
Acce ssor ie s
Head unit 1 pc
Speaker 2 pcs
Rem ot e con t r oller 1 pc
Au dio- v ideo cable 1 pc
Batt ery AAA 1.5V 2 pcs
Consum er inform at ion 1 pc
Warr ant y car d 1 pc
I nst r uct ion m anual 1 pc
Table of contents
Other SoundMax Stereo System manuals

SoundMax
SoundMax SM-2401 User manual

SoundMax
SoundMax SM-PS5015B User manual

SoundMax
SoundMax SM-PS5068B User manual

SoundMax
SoundMax SM-MSD11 User manual

SoundMax
SoundMax SM-PS4405 User manual

SoundMax
SoundMax SM-PS5081B User manual

SoundMax
SoundMax SM-MS4206 User manual

SoundMax
SoundMax SM-PS4201 User manual

SoundMax
SoundMax MS-MSD10 User manual

SoundMax
SoundMax SM-PS5022B User manual