Sovereign SC50TCWG User manual

25985-050106.qxp 14/03/2006 10:26 Page 1
50cm DOUBLE CAVITY
GAS COOKER
Models: SC50TCWG & SC50TCSSG
PLEASE NOTE: This appliance must be installed only by a registered corgi gas
fitter and in accordance with the local authority regulations in force.
It must be used in areas with adequate ventilation only.
Please read these instructions carefully before attempting to install or use this
product. It is advisable to keep these instructions in a safe place for future reference.
Installation and Operating Instructions

25985-050106.qxp 14/03/2006 10:26 Page 2
INTRODUCTION
Thank you for choosing this quality Sovereign cooker. It has been designed to give years of trouble-
free service provided it is installed and maintained correctly.
Please read these instructions carefully before installing or using your cooker. Included is some
important safety information in addition to guidelines and recommendations which will enable you to
take full advantage of all the functions available.
1. Prior to installation, ensure that the local distribution conditions (nature of the gas and gas
pressure) and the adjustment conditions are compatible.The factory set adjustment conditions for
this appliance are stated on the rating label.
2. This appliance must be installed and connected in accordance with current installment regulations.
Particular attention should be given to the relevant requirements regarding ventilation.
3. Cookers do not contain materials hazardous to the natural environment.
4. Packaging materials are recyclable.
5. When the cooker is no longer serviceable, please make sure that it can no longer be used. Cut off
the supply cable and remove the door as they may constitute risk, especially to children.Then
deliver the appliance to the specialised organisations dealing with the disposal of waste and
purchase of recycling materials.
6. The cooker should be connected to the gas system or LPG cylinder and adjusted only by a
certified fitter of gas appliances or a technician of an authorised servicing company.
7. The manufacturer disclaims all liability for any injury or damage resulting from the improper
installation of the appliance or its improper use.
8. lf the appliance breaks down, in particular in the event of a gas leak or short-circuit, the appliance
and the gas supply must be switched off and a servicing company should be immediately
contacted. A faulty cooker must not be used.
9. Non qualified repairs of the appliance are not allowed, otherwise the warranty will be invalid.
10.The cooker is manufactured in class 1 of the security against electric shock and must be
connected to the installation with working external earth circuit.
11.Never lift the cooker using the oven door handle.
12.The manufacturer reserves the right to modify the appliance in order to modernise it and to
constantly improve quality, without prior notification to the user.These modifications, however, will
not cause difficulties in using the appliance.
13.Do not attempt to repair or replace the mains cable yourself. This must be done by a qualified
electrician only.

25985-050106.qxp 14/03/2006 10:26 Page 3
CONTENTS
GENERAL INFORMATION . . . . . . . . . . . . . . . . . . . . . . . . . . . . . . . . . . . . . . . . . . . . . . . .4
PURPOSE . . . . . . . . . . . . . . . . . . . . . . . . . . . . . . . . . . . . . . . . . . . . . . . . . . . . . . . . . . . . .4
TECHNICAL SPECIFICATION . . . . . . . . . . . . . . . . . . . . . . . . . . . . . . . . . . . . . . . . . . . . .4
PARTS IDENTIFICATION . . . . . . . . . . . . . . . . . . . . . . . . . . . . . . . . . . . . . . . . . . . . . . . . .4
SAFETY INSTRUCTIONS . . . . . . . . . . . . . . . . . . . . . . . . . . . . . . . . . . . . . . . . . . . . . . . . .4
SAFETY ADVICE . . . . . . . . . . . . . . . . . . . . . . . . . . . . . . . . . . . . . . . . . . . . . . . . . . . . . . .5
INSTALLATION . . . . . . . . . . . . . . . . . . . . . . . . . . . . . . . . . . . . . . . . . . . . . . . . . . . . . . . . .5
POSITION . . . . . . . . . . . . . . . . . . . . . . . . . . . . . . . . . . . . . . . . . . . . . . . . . . . . . . . . . . . . .5
ELECTRICAL CONNECTIONS . . . . . . . . . . . . . . . . . . . . . . . . . . . . . . . . . . . . . . . . . . . . .7
CONNECTING THE COOKER TO THE GAS SUPPLY . . . . . . . . . . . . . . . . . . . . . . . . . .7
USING THE HOB . . . . . . . . . . . . . . . . . . . . . . . . . . . . . . . . . . . . . . . . . . . . . . . . . . . . . . . .8
COOKWARE . . . . . . . . . . . . . . . . . . . . . . . . . . . . . . . . . . . . . . . . . . . . . . . . . . . . . . . . . . .9
CHOICE OF UTENSILS . . . . . . . . . . . . . . . . . . . . . . . . . . . . . . . . . . . . . . . . . . . . . . . . . . .9
GRILL . . . . . . . . . . . . . . . . . . . . . . . . . . . . . . . . . . . . . . . . . . . . . . . . . . . . . . . . . . . . . . . .9
OVEN . . . . . . . . . . . . . . . . . . . . . . . . . . . . . . . . . . . . . . . . . . . . . . . . . . . . . . . . . . . . . . .10
CLEANING AND MAINTENANCE . . . . . . . . . . . . . . . . . . . . . . . . . . . . . . . . . . . . . . . . .11
GENERAL COMMENTS . . . . . . . . . . . . . . . . . . . . . . . . . . . . . . . . . . . . . . . . . . . . . . . . .11
CLEANING THE PAN SUPPORT . . . . . . . . . . . . . . . . . . . . . . . . . . . . . . . . . . . . . . . . . . .11
CLEANING THE BURNERS . . . . . . . . . . . . . . . . . . . . . . . . . . . . . . . . . . . . . . . . . . . . . .11
CLEANING THE OVEN . . . . . . . . . . . . . . . . . . . . . . . . . . . . . . . . . . . . . . . . . . . . . . . . . .11
CLEANING THE GLASS IN TOP CAVITY DOOR . . . . . . . . . . . . . . . . . . . . . . . . . . . . . .12
REPLACING THE LAMP . . . . . . . . . . . . . . . . . . . . . . . . . . . . . . . . . . . . . . . . . . . . . . . . .12
TROUBLESHOOTING . . . . . . . . . . . . . . . . . . . . . . . . . . . . . . . . . . . . . . . . . . . . . . . . . . .13
HELPLINE INFORMATION . . . . . . . . . . . . . . . . . . . . . . . . . . . . . . . . . . . . . . .BACK PAGE

25985-050106.qxp 14/03/2006 10:27 Page 4
GENERAL INFORMATION
PURPOSE
Thecooker should be used for preparing household meals only. It must not be used for
any other purpose.
TECHNICAL SPECIFICATION
Supply voltage: 230/240V~50Hz
Gross weight: 69.5kg
External dimensions HxWxD(cm): 90x50x60
Top cavity capacity (litres): 20
Bottom cavity capacity (litres): 42
Total wattage (kW) 30W
PARTS IDENTIFICATION
342
1
5
6
1-small burner
2-medium burners
3-large burner
4-pan support
5-control knob
6- grill pan
87-x 2 wire shelves and drip tray
8-igniter and lamp control
9. - removable grill deflector plate
(not shown).
7
Fig. 1
SAFETY INSTRUCTIONS
ALWAYS:
• Always turn off all controls after use.
• Always stand back when opening the oven door to allow heat to disperse.
4

25985-050106.qxp 14/03/2006 10:27 Page 5
SAFETY ADVICE
• Always use dry oven gloves when removing items from the oven.
• Always be careful when operating the cooker and take care to avoid touching hot
elements inside the oven.
• Always ensure that the cables of other household appliances used near the working
cooker are away from its hot elements. Ensure also that the cables are not trapped by
the oven door.
• Always keep the oven door closed when the cooker is not in use.
• Always place pans centrally on the hob burners and position them so that the handles
cannot accidentally be caught or become heated by other burners.
• Always keep the cooker clean as a build up of grease or fat from cooking can cause a fire.
• Always allow the cooker to cool before cleaning.
NEVER:
• Never leave children unsupervised where the cooker is installed as the appliance will
get hot during and after use.
• Never allow anyone to sit or stand on any part of the cooker.
• Never store items above the cooker that children may attempt to reach.
• Never heat up unopened food containers as pressure can build up causing them to burst.
• Never store chemicals, food stuffs, pressurised containers in the cabinets above or
next to the cooker.
• Never fill a deep fat frying pan more than 1/3 full of oil, or use a lid. DO NOT LEAVE
UNATTENDED WHILE COOKING!
• Never place flammable or plastic items on or near the hob.
• Never use the cooker as a room heater.
• Never dry clothes or place other items on or near the hob or oven door.
• Never wear garments with long flowing sleeves whilst cooking.
NOTE!
The use of a gas cooker results in the production of heat and moisture in the room
in which it is installed. Always ensure that the kitchen is well ventilated.
INSTALLATION
POSITION
After unpacking the cooker ensure that there is no visible damage. If the cooker has been
damaged during transit, do not use it. After reading any information stickers, remove them
from oven door, burners or pan supports.
All packaging materials should be discarded according to your local authority
regulations and not left within the reach of children as they are a potential safety
hazard.
5

25985-050106.qxp 14/03/2006 10:27 Page 6
Fig. 2
• The kitchen where the cooker is to be installed should be dry and have an efficient
ventilation system.
• There should be an open space above the appliance to allow kitchen odours to
disperse. A cooker hood may be installed to either absorb or extract the odours.The
distance between the gas hob and the hood should not be less than 650mm.
(Fig. 2).
• Do not install the cooker on a window-door axis.
• The position of the cooker should ensure free access to all controls.
The cooker is equipped with adjustable feet designed for levelling the cooker and for
adjusting the upper edge of the cooker to furniture level.
In order to eliminate the risk of the cooker falling forward a
chain has been installed at the rear side of the cooker.This
should be fastened securely to the wall behind the appliance
with the bracket supplied (Fig. 3).
Fig. 3
Levelling the Cooker
The cooker needs to be level.To achieve this use the
adjustable feet until it is at the correct level (Fig. 4).
After positioning the cooker, connect it to the gas supply.The
cooker has natural gas burners fitted. If connection of LPG is
to be made, LPG burners (not supplied) have to be fitted. ADJUSTABLE
FOOT
Fig. 4
6

25985-050106.qxp 14/03/2006 10:27 Page 7
ELECTRICAL CONNECTIONS
• Cookers equipped with a supply cable with a plug should be connected to a socket
with an earth contact.
• Connecting the cooker to a socket without an earth contact may result in an electric
shock in the event of a failure of the cooker’s electrical system.
• The socket should be easily accessible by the user. Ensure that the supply cable does
not touch the hot surfaces of the cooker.
NOTE!
If the appliance is equipped with a supply cable without a plug, the plug should be
fitted by a qualified electrician in accordance with current safety standards.
Important!
The wires in the mains lead are coloured in accordance with the following code:
Green and yellow
=
earth
Blue
=
neutral
Brown
=
live
CONNECTING THE COOKER TOTHE GAS SUPPLY
Before installing the cooker to the gas supply system, ensure that the appliance is
compatible with the local distribution conditions (nature of the gas and gas
pressure). In the event of incompatibility replace the nozzles and adjust the gas
fittings.
The connection should be made in accordance with the regulations in force and by
a certified installer.
• The cooker may be connected to the natural gas supply or to an LPG cylinder (LPG
jets not supplied). The appliance is supplied with natural gas burners fitted.
• The cooker may be connected to the natural gas supply with a rigid connection or by
means of a flexible hose manufactured to current safety regulations.
• Use a rubber hose with a safety certificate to connect the appliance to an LPG
cylinder.
• Every time the cooker has been connected to an LPG cylinder, check the cylinder
valve for soundness, the connection of the regulator to the cylinder as well as its
operation.
NOTE!
1. Under no circumstances should the gas soundness be checked by means of a
naked flame (e.g. with a match or candle) as there is a danger of explosion!
2. Regularly check the condition of the hose and soundness of the connection in
accordance with the regulations in force.
7

25985-050106.qxp 14/03/2006 10:27 Page 8
USING THE HOB
Before using the cooker for the first time
you should:
• Read the operating and safety
instructions thoroughly.
• If applicable, remove the remnants of
stickers and glue from the gas hob,
surfaces of hobs, pan supports and
oven door.
• Ensure that all elements of the
burners are positioned correctly.
Press and turn the control knob to the
large flame position. Press and hold the
ignition button downwards until ignition
has started (Fig. 5).
The large flame mark is for maximum
heat output.
For simmering, lower the heat output by
LARGE
FLAME
SMALL
FLAME
OFF POSITION
IGNITION AND
LIGHT
BUTTON
turning the control knob towards the
smaller flame position.
Turn the knob to OFF (
●
) when cooking
BACK
LEFT FRONT
LEFT FRONT
RIGHT BACK
RIGHT
has finished.
Fig. 5
• The flame should not lick around from the bottom of a pan but cover only two-thirds of
its surface.This will reduce the gas consumption and prevent the flame from soiling the
utensils.
• The size of the flame depends on the position of the knob.The full flame should be
used until the dish begins to boil, then it is better to use the simmering flame.
• Burners and ignitor tips should be kept clean, as dirt adversely affects the
performance.
• Before removing an item off a burner, reduce the flame or turn the burner off
completely.
• Before switching on a burner, make sure that the knob you are going to use
corresponds to the burner you wish to switch on.The relationship between knobs and
burners is shown in Fig. 5.
Operating burners supplied from an LPG cylinder.
Before lighting the first burner, open the valve on the LPG cylinder. Then light the burner
using one of the methods described above.
When closing the flow of gas before turning off the last burner:
• Close the valve on the LPG cylinder.
• When the flame has gone out, close the tap of that burner.When the cooker is not
used, the valve of the LPG cylinder should be closed.
8

25985-050106.qxp 14/03/2006 10:27 Page 9
COOKWARE
CHOICE OF UTENSILS
Pots should not be too tall, ideally their height should equal two-thirds of the diameter of
their bottom. Utensils should always be clean and dry as they will then conduct and retain
the heat better.
During cooking you should use the pan lids.This will prevent an excess of odours from
accumulating in the kitchen.
The pan is too small for the burner
and the lid is not being used
Fig. 6
Correctly selected pan
GRILL
The grill and oven have a flame failure device.This ensures
that no gas escapes if the flames are extinguished. A thermal
cut-off prevents the oven from overheating if the temperature
exceeds safety limits.
Before using the grill for the first time it is recommended to
turn and leave the grill turned on for a period so residues
from manufacture are burnt away. A smell on initial use is
normal and not a malfunction.
Turn the light on by pressing only the top half of the button
(Fig. 5).
Fig. 7
Turn the control knob to the large flame position and press
and hold the bottom half of the ignition button until the grill
burner ignites (Fig. 7). For high heat leave the control on the
large flame position.To lower the heat level turn the control
towards the small flame position.
When grilling it is recommended to close the grill door. If the
door is left open, fit the heat deflector (Fig. 9. It may get hot
in use.
HEAT
Fig. 8
Alway use the handle
GRILL
PAN
DEFLECTOR
Fig. 9
when removing the grill
pan (Fig. 8). Do not leave
the grill unattended
while in use.
9

25985-050106.qxp 14/03/2006 10:27 Page 10
OVEN
Before using the oven for the first time it is recommended to
leave the oven turned on for a period so residues from
manufacture are burnt away. A smell on initial use is normal
and not a malfunction.
Turn the control knob to the large flame position and press
and hold the bottom half of the ignition button until the oven
burner ignites (Fig. 5).
If the flame goes out, repeat all the steps above keeping the
knob pushed in for about 5 seconds longer.
Turn the knob to a setting from 1 to 8.The table below
shows what setting you should select for the corresponding
oven temperature.
The light can be turned on by pressing the top half of the
ignition button (Fig. 5).
Fig. 10
Setting
1
2
3
4
5
6
7
8
Max
Temp. °C
130
140
150
170
190
230
245
250
280
NOTE!
1. When lighting the oven burner or grill burner with a match, take care to avoid
burns.
2. When grilling, the cooker gets very hot.Take care and avoid touching hot elements
inside the oven. Pay special attention to children.
10

25985-050106.qxp 14/03/2006 10:27 Page 11
CLEANING AND MAINTENANCE
NOTE!
Switch off the cooker at the mains supply before cleaning.
GENERAL COMMENTS
• Clean the cooker regularly to maintain its working condition and aesthetic appearance.
• When cleaning the cooker do not use harsh abrasives, caustic cleaners or sharp
objects.
• Clean the stainless steel elements, knobs and control panel with soft cleaners which
do not contain abrasives.
• Burners and ignitors should always be kept clean and dry to ensure proper
performance.
• Immediately after use, soak used baking trays, tins and other utensils in warm water
with dish-washing liquid. Thoroughly clean them with a soft brush or sponge and dry
them carefully.
• Ensure that the oven seal is always clean.
CLEANING THE PAN SUPPORT
Remove the dirty pan support from the hob, put it in warm soapy water for some time,
then wash and dry it.
CLEANING THE BURNERS
• Gas burners should be cleaned regularly and after each spillage to remove cooking
residuals and dirt.
CAP
RING
NOZZLE
BODY
Fig. 11
• To clean burners, remove the caps and rings
(Fig. 11), putting them separately in warm
soapy water. After cleaning, check that the
burner ports are clear.
• The body near the nozzle should always be
clean. Dirt accumulating around the nozzle may
clog it, as a result of which the burner will not
light or will light only with a small flame.To
clean the nozzle use a brush soaked in
solvent.
• Dry all the elements of the burner carefully
as wet elements may not light properly.
Assemble clean and dry burners carrying out
the disassembly steps in the reverse order.
CLEANING THE OVEN
The oven compartment is coated with vitreous enamel.To clean particularly difficult burnt
spots, special oven cleaning agents may be used. However, as these agents are caustic,
be careful when using them and follow the agents’/manufacturers’ guidelines.
To make cleaning easier the oven door may be removed (Fig. 12).
11

25985-050106.qxp 14/03/2006 10:27 Page 12
CAUTION!
1. Before cleaning it you should wait until the oven cools down.
2. Do not steam pressure clean the oven.
3. It is the best to clean the bottom of the oven after every use and not allow the remains
of food and spots of oil to remain burned on.
CLEANING THE GLASS IN TOP CAVITY DOOR
Ensure the top cavity door is cold before cleaning. Release the two screws securing the
top frame. Remove the top frame and slide out the glass (Fig. 12).
To replace the glass, place bottom edge of the glass in the clips. Carefully lay the glass on
the buffers so it rests flush with the side frame. Replace the top frame and secure with the
two screws.
GLASS
SCREW BUFFER
SIDE FRAME
TOP FRAME SCREW
Fig. 12
REPLACING THE LAMP
Wait for the oven to cool.
Unscrew and remove the diffuser. Unscrew
the lamp from the lampholder. Replace lamp
and diffuser (Fig. 13).
The replacement lamp must be of the same
type, voltage and wattage (15W SES) oven
DIFFUSER
LAMP LAMPHOLDER
lamp.
Fig. 13
12

25985-050106.qxp 14/03/2006 10:27 Page 13
TROUBLESHOOTING
• Ignition does not work
If all burners fail to ignite, check that the electric plug is in the mains socket.
If the electricity supply has failed, all burners may be lit with a match.
If one burner fails to ignite, check that the burner and ignitor is clean and dry. Wash
and dry the burner and ignitor, clean the nozzle with a thin copper wire and check if
the burner ports are clear.
• Uneven cooking
Ensure that the dish is positioned centrally.
13

25985-050106.qxp 14/03/2006 10:27 Page 14
14

25985-050106.qxp 14/03/2006 10:27 Page 15

25985-050106.qxp 14/03/2006 10:27 Page 16
The appliance is guaranteed for a period of 2 years from the date of purchase.
Keep your purchase and installation receipts with these instructions.
If the appliance fails to work properly during the 1 year period contact the Faults
and Assistance Helpline on 0870 607 7270.
The appliance will be repaired (at the manufacturer’s discretion) at no cost to
you. If the guarantee has elapsed, you will be given a quotation for any repairs or
parts required.
This appliance/fitting is marked according to the European directive 2002/96/EC on Waste
Electrical and Electronic Equipment (WEEE). By ensuring this product is disposed of
correctly, you will help prevent potential negative consequences for the environment
and human health, which could otherwise be caused by inappropriate waste handling
of this product.
The symbol on the product, or on the documents accompanying the product, the
Crossed Out Wheelie Bin symbol, indicates that this appliance/fitting may not be
treated as household waste. Instead it shall be handed over to the applicable
collection point for the recycling of electrical and electronic equipment. Disposal must
be carried out in accordance with local environmental regulations for waste disposal. For
more detailed information about treatment, recovery and recycling of this product, please
contact your local authority, your household waste disposal service or the retailer where you
purchased the product.
Micromark
Devonshire House, 550 White Hart Lane, London N17 7RQ
www.micromark.co.uk
Micromark continuously tries to improve its products for the benefit of its customers.
For this reason we reserve the right to make changes to any product at any time, without notice.
MICROMARK INSTRUCTIONS MM25985/050106 © Micromark 2006
This manual suits for next models
1
Table of contents
Other Sovereign Cooker manuals
Popular Cooker manuals by other brands

IKEA
IKEA VARDAGEN manual

Brandt
Brandt KG365TE1 operating instructions

DeLonghi
DeLonghi PEMA 96 Users operating and installation instructions
AIRLUX
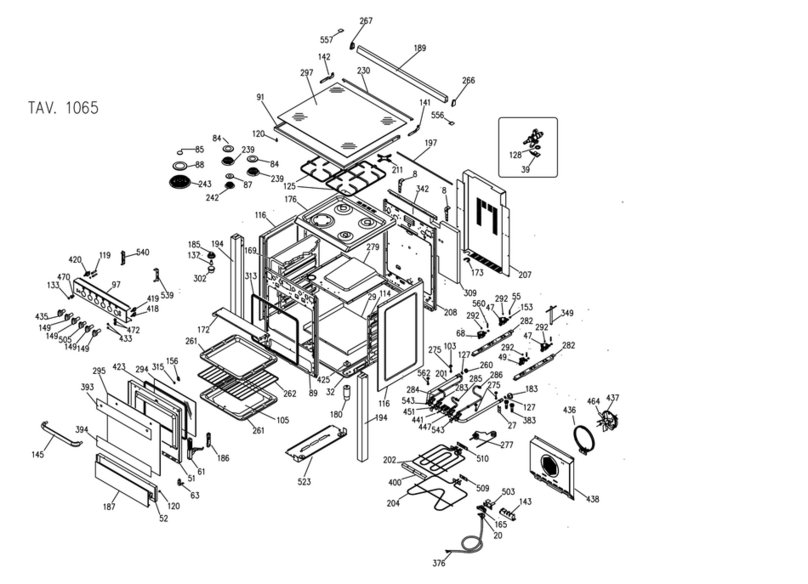
AIRLUX GlemGas XCC650CM parts manual
METRO PROFESSIONAL
METRO PROFESSIONAL GIC3035 instruction manual

Belling
Belling FSE60DOMW Users guide & installation handbook
