Spacesaver POWER PRO User manual

Spacesaver Corporation
1
THIS SYSTEM INCLUDES:
AISLEENTRYSAFETY................................................4
POWEROVERRIDEPACK ..........................................4
KEYLOCKFUNCTIONS ......................................... 4-5
BOTTOM MOUNT LOCK ..........................................5
WAIST-HIGHLOCK ................................................. 5-6
REMOTECONTROL ...................................................6
OVERHEADAISLELIGHTS ........................................6
AISLEGUARD SAFETY.............................................6
PAGE PAGE
SYSTEMPREPAREDFOR:
SPACESAVERORDERNUMBER:
GENERALOPERATIONINSTRUCTIONS
FOR
SPACESAVER
POWER PRO
ELECTRICCONTROLS
CONTROL FUNCTIONS.............................................2
TOUCH AND HOLD CONTROL ................................2
ONE TOUCH CONTROL ............................................2
STOPPINGCARRIAGETRAVEL ................................2
TOUCHANDHOLD-MANUALRESET....................2
ONETOUCH-MANUALRESET ................................3
PHOTOELECTRICSAFETYSWEEP .........................3
ELECTRO-MECHANICALSAFETYSWEEP .............3
REV.1.0

2
POWERPROELECTRICCONTROLOPERATION
Spacesaver electric systems may include all or some of the many Spacesaver safety devices offered for operator
protection. The intent here is to describe the proper use of the electric controls. This document, coupled with your on
site training, will provide the means for the safe, efficient and non-abusive use of the system. Subsequent training of
new personnel is the responsibilty of the area supervisor. This overview of operation and safety features may include
information about options not incorporated into your unique Spacesaver System.
Your role in maintaining the system:
• Bring any problem observed to the attention of a supervisor at once.
• Keep all aisles clear of obstructions.
• Keep the tracks free of any small debris.
SWITCH FUNCTIONS:
The STOP/RESET button will shut carriage travel down softly.
The STOP/RESET button will reset the system after a safety fault.
The STOP/RESET button will cancel a locked aisle condition.
The STOP/RESET button will turn off aisle lights.
The MOVE button will initiate carriage movement.
The MOVE button will turn on aisle lights.
The RECEPTACLE near the base of the switch will accept the power override unit
and the safety override key.
1. Selecting an aisle with the "touch and hold" option:
1.1 Push in and hold an "move" button on either side of the aisle you
wish to open. Carriage movement will cease when pressure is
removed from the button or when the aisle is fully open.
2. Selecting an aisle with the "one touch" option:
2.1 Push in an "move" button on either side of the aisle you wish to
open, until carriage movement begins at any location within the
system. Release the button and the selected aisle will open
automatically. Carriage movement will cease when the aisle is fully
open.
3. Stopping carriage travel:
3.1 All system movement can be stopped at any time by pressing the
"stop" / "reset" button on any carriage.
4. Selecting an aisle with the "touch and hold" manual reset option:
4.1 Aisle selection with this option is identical to #1.
4.2 Once the aisle is fully open the reset lights will blink on either side of
the selected aisle.
4.3 No new aisle selection can be made until the reset button on either
side of the open aisle is pressed, canceling the locked aisle
condition.
Note: The closing of a safety faulted aisle is not possible without the
use of the safety override key. Please see your supervisor for
instructions regarding the safe use of the safety override key.

Spacesaver Corporation
3
5. Selecting an aisle with the "one touch" manual reset option:
5.1 Aisle selection with this option is identical to #2.
5.2 Once the aisle is fully open the reset lights will blink on either side of
the selected aisle.
5.3 No new aisle selection can be made until the reset button on either
side of the open aisle is pressed, canceling the locked aisle condition.
Note: The closing of a safety faulted aisle is not possible without the use
of the safety override key. Please see your supervisor for
instructions regarding the safe use of the safety override key.
6. Using the optional photoelectric safety sweep:
6.1 If carriage movement begins while you are in the aisle, it can be
stopped by breaking the invisible light beam constantly being
projected along the entire length of each carriage. If an obstruction of
any kind is detected, the carriages will come to an abrupt stop. The
beam sweeps for obstructions close to the floor.
6.2 The safety sweep may also prevent damage to material left laying in
the aisle.
CAUTION!:Remember that sweep activation must be done from
floor level. Therefore, never climb on the shelves!
6.3 When a safety sweep has been activated during carriage travel the red
light just above the RESET button will begin to blink and all system
function will cease. A press of the RESET button will turn the blinking
light to steady.
6.4 If it is not possible to remove the obstruction in the aisle the following
procedure can be used. Press a RESET button under the blinking red
light. The red light will stop blinking and turn steady. Gently press the
appropriate move button to open the safety locked aisle. The safety
locked aisle will fully open, allowing entry and removal of the
obstruction. Normal operation has now been restored.
7. Using the Electro - Mechanical Safety Sweep:
7.1 If carriage movement should begin while you are in the aisle, it can be
stopped abruptly by applying pressure to the safety sweep located
along the full length of each carriage just above floor level. The safety
sweep can also help prevent damage to media left laying in the aisle.
7.2 The safety sweep may also prevent damage to material left laying in
the aisle.
CAUTION!:Remember that sweep activation must be done from
floor level. Therefore, never climb on the shelves!
7.3 When a safety sweep has been activated during carriage travel the red
light just above the RESET button will begin to blink and all system
function will cease. A press of the RESET button will turn the blinking
light to steady.
7.4 If it is not possible to remove the obstruction in the aisle the following
procedure can be used. Press a RESET button under the blinking red
light. The red light will stop blinking and turn steady. Gently press the
appropriate move button to open the safety locked aisle. The safety
locked aisle will fully open, allowing entry and removal of the
obstruction. Normal operation has now been restored.

4
8. Using the optional photoelectric aisle entry sensor:
8.1 Using this option usually requires no conscious effort on your part. As
you enter the aisle you break an invisible light beam. As long as you
stand in the beam, or stay in the aisle after breaking the beam, no
carriage movement is Posssible.
8.2 When you leave the aisle you will have to press the "reset" button at
that aisle in order to return the system to an operable condition.
8.3 Activation of this safety will have the same effect on the carriage as
does the activation of the safety sweep. See Section 6 or 7 for details
on clearing your system.
9. Using the optional power override pack:
9.1 This feature provides a temporary means for operating your system
during a power outage.
9.2 The unit plugs into a receptacal provided at each control head. Slow
movement of one carriage at a time, in either direction, is achieved by
pressing a rocker switch on the power pack. A warning beep will
sound to alert that an aisle is being closed.
9.3 With power off to the system, the safety devices and limit switches
will not work. Extreme care must be exercised while using the
power override unit.
9.4 If your power override unit is the rechargeable type it should be
plugged into a 110 volt outlet while not in use. The L.E.D.'s will help
determine the units charged status. Both L.E.D.'s on indicates that the
unit is fully charged. One L.E.D. on indicates that the unit is charging. If
both L.E.D.'s are on, but the unit fails to work, check the condition of the
internal fuse.
9.5 If your power override unit is of the battery type the batteries should be
changed every 12 months or more frequently if used often. Use 16 D
size batteries.
10. The Power Pro system has several different “lock” options available.
10.1 Lock the entire system to either side and shut down every control head
allowing no access for optimum security. This option will override all
other lock commands within the module. All control heads will go
dormant.
Use: Open the first or last aisle, packing the system to the right or left.
Activate the keylock on the face panel (could also be located on a
platform). The system shuts down and electrically locks so no access is
available.
10.2 Lock any number of carriages in either direction allowing limited
access.
Use: First shift is ending and second shift does not need access to aisles 5 &
6. Open aisle 4, moving the 4th & 5th carriages to the right and
carriages 1,2, & 3 to the left. Activate the keylock on the face panel of
carriage 4. The system will lock carriage 4 & 5 into position and allow
movement from carriages 1,2, & 3. This configuration will grant access
to aisles 1 – 4 only.
10.3 Lock one (or more) carriage in the stationary mode allowing access to
two or more sub-modules.

Spacesaver Corporation
5
Use: Configurations of this type must have a single aisle wide enough to be
split into two or more aisles (a 72” aisle will split into two 36” aisles). A
5 carriage system has several users requiring access. Open aisle 3,
then move carriage 3 into the center of the open aisle so access is
available to aisles 3 & 4. Activate the keylock on the face panel of
carriage 3. Carriage 3 will lock in this position ( Stationary Mode). This
will effectively create two systems, one two carriage system on each
side of carriage 3.
NOTE: Multiple keylocks are required to allow multiple stationary/lock
options.
To operate these options is very simple. Position the carriage(s) with a
keylock to their desired position, insert the key, turn the lock, and
remove the key. You have just locked that carriage into position and the
other carriages within that module will respond accordingly.
OTE*** Multiple keylocks are required to allow m
11. Using the optional bottom mount lock:
11.1 This feature provides extra media security by electronically
deactivating the system while at the same time mechanically locking
the system.
11.2 The lock will be found near floor level on the outside of the first or last
carriage.
11.3 A special barrel style key is required to release the lock handle from its
housing. Once the lock handle pops out turn it 180Oto open and snap
the handle back into its housing. Failure to do this may cause damage
to the lock, floor covering or carriage.
11.4 The key is also required for re-locking. Once the lock handle pops out,
turn it 180Oto lock and snap the handle back into its housing.
11.5 The key should be removed in both the locked and unlocked positions.
The key should be kept by the area supervisor.
11.6 If the lock is located on carriage one, move all carriages closed to the
right and lock to disable any system operation.
11.7 If the lock is located on the last carriage, move all carriages closed to
the left and lock to disable any system operation.
11.8 Special locking configurations may be used. Consult your
salesperson.
12. Using the optional waist high lock:
12.1 This feature provides extra media security by electronically
deactivating the system while at the same time mechanically locking
the system.
12.2 It is conveniently located on the front of the first or last carriage at about
waist level. The key is required for locking and unlocking. The key
should be removed when not in use.
12.3 Rotate the polished chrome handle 1/4 turn to engage or disengage
the cam latch mechanism with the striker plate in the floor.
12.4 Rotate the key 1/2 turn to lock or unlock. The key should be kept by an
area supervisor when not in use.
12.5 If the lock is located on carriage one, move all carriages closed to the
right and lock to disable any system operation.

6
Spacesaver Corporation
a division of KI
U.S.A.: 1450 Janesville Ave., Ft. Atkinson, WI 53538, (920) 563-5546, 1-800-492-3434, FAX: (920) 563-2702
CANADA: 266 King Street East, Toronto, Ontario M5A 4L5, (416) 360-1022, 1-800-544-3679, FAX: (416) 360-7290
WEBSITE: www.spacesaver.com E-MAIL: ssc@spacesaver.com Copyright © 2000, Spacesaver Corporation. Printed in U.S.A.
REV. 2.0/OP-0040 SSC/EPD 7/04
12.6 If the lock is located on the last carriage, move all carriages closed
to the left and lock to disable any system operation.
12.7 Special locking configurations may be used. Consult your
salesperson.
13. Using the optional remote control interface:
13.1 This feature allows operation of the system from some remote
location.
13.2 A display on the remote indicates the present state of the system.
13.3 Most efforts required to operate the system can be carried out at
the remote station.
13.4 Safety activations and locked aisles cannot be cleared via the
remote control.
14. Using the optional overhead aisle lights:
14.1 Use of the optional aisle lighting usually requires no conscious
effort on you part. These lights will come on when the aisle is
opened or when you enter the aisle.
14.2 The lights will go out automatically shortly after you leave the aisle.
14.3 You may have to turn the lights back on when entering a darkened
aisle. Do this by pressing the "move" button on either side of the
aisle.
14.4 If the lights are not timed to go out automatically upon exiting the
aisle they can be turned off manually by pressing a "reset" button
on either side of the aisle.
15. Using the optional AisleGuard safety system:
15.1 Using this option usually requires no conscious effort on your part.
A request for an aisle will automatically generate a scan of the
open aisle before carriage movement begins.
15.2 Any aisle entry or exit will automatically generate a scan of the
aisle.
15.3 As long as you remain in the aisle no carriage movement is
possible and the "aisle in use" message is displayed along with a
solid red light.
15.4 Upon leaving the aisle system should automatically return to the
"green light" state. If not, check the aisle for an obstruction and
then press the reset button to restore operation.
RECOMMENDED LOADING INSTRUCTIONS:
Do not fully load one side of double-entry shelving without counterbalance weight on the other side.
Begin loading at the lowest shelf.
At no time should the weight differential from one side to the other exceed 50 percent.

ATTN: AREA SUPERVISOR ONLY
OPERATION INSTRUCTIONS
POWER PRO
SAFETY OVERRIDE KEY
Extreme caution must be used while operating under this
condition.This method of operation should only be used when
the problem causing the carriage shut-down cannot be
corrected by the operator. Spacesaver Area Contractor service
personnel should be called at once to correct the problem. This
device should be used only by supervisors and service
personnel.
Using the Safety Override Key:
1. The safety override key will provide restricted use of the system
when normal operation cannot be restored after a safety sweep fault.
See Sections 6 & 7 in the Operation Instructions Booklet for recovery
instructions not requiring the use of this key. If it becomes necessary
to close a faulted aisle the override key will be required.
2. While operating a carriage using the safety override key it will travel
at a reduced rate of speed, a warning beeper will sound and the
pushbutton must be held constantly during carriage travel. The limit
switches will stop travel when carriages nest together.
3. To close a faulted aisle do the following:
A) Step up to a carriage on either side of the faulted aisle. They
will be displaying a blinking red light just above the RESET
button. A press of the RESET button will only turn the blinking
light to steady.
B) Insert the safety override key into the receptacle.
C) You now have 40 seconds to complete the carriage move. If
time expires before the move is complete you must remove and
re-insert the key to purchase another 40 seconds.
D) A move of any carriage in the system, during a safety fault, will
require that a safety override key be inserted into the carriage
during the move.
E) Once the safety fault has been cleared the safety override key
must be removed. Normal system operation is not possible
while the key is inserted.
F) Once the faulted aisle is closed other aisles may be selected.
The faulted aisle may be opened without the use of the safety
override key. However, the safety override key is required to
reclose the faulted aisle.

Spacesaver Corporation
a division of KI
U.S.A.: 1450 Janesville Avenue, Fort Atkinson, WI 53538, (920 563-6362, 1-800-492-3434, FAX: (920 563-2702
CANADA: 266 King Street East, Toronto, Ontario M5A 4L5, (416 360-1414, 1-800-544-3679, FAX: (416 360-7290
WEBSITE: www.spacesaver.com E-MAIL: ssc@spacesaver.com
Copyright ©, 2000 by Spacesaver Corporation. All Rights Reserved. Printed in U.S.A. OP-0041 SSC/ECONO 5/00

PROGRAMMING/OPERATION
INSTRUCTIONS
PROGRAMMABLE ELECTRIC, POWER ASSIST &
POWERPRO®
WITH UNIVERSAL TOUCHPAD CONTROL
The following procedure allows the user to program the Universal
TouchPad Control with their own 4-digit code. Upon initial power-up
the TouchPad Control code is set to 1 2 3 4.
To change code.
1. Press the "#" key, then press the "*" key . The green L.E.D. will begin
to blink.
2. Dial in the present code within the allotted 10 seconds. The red L.E.D.
will begin to blink.
3. Dial in the new code within the allotted 10 seconds.
4. Thesolidgreen L.E.D. willreturn.
Note: To verify that the new code has been accepted; with the reset light blinking, dial
in the code again. The red L.E.D. should glow steady for 3 seconds and then go out.
Note: Asthe name implies,the Universal Touchpad Control is very versatile. In
simple terms, think of this control as a sophisticated set of relay contacts. The
contactsareactivated/deactivatedbyenteringthepresentcode. Theexamplesgiven
below represent only a sample of the more common uses for this control.
Example 1: Install the Touchpad on the left or right stationary of the system or at
somenearby location. Configurethe carriagesas needed. Enterthe presentcode and
the system will remain locked in that configuration until the code is entered once
again,allowingnormaloperationtoresume.
Example 2: Install the Touchpad on the extreme left carriage. Pack the carriages to
the right. . Enter the present code and the system will remain locked in that configu-
rationuntil thecode is entered once again,allowing normaloperation toresume.
Example 3: Install the Touchpad on the extreme right carriage. Pack the carriages to
the left. . Enter the present code and the system will remain locked in that configura-
tionuntil the codeis entered onceagain, allowing normaloperation to resume.
Example 4: Install the Touchpad on any carriage within the system. Park that
carriage in the desired location. . Enter the present code and the carriage will remain
locked in that position until the code is entered once again, allowing normal operation
to resume. Think of this as another way to create a stationary carriage for the Pro-
grammable Electric and the Power Pro systems. If used on a Power Assist system
all carriages will lock.
OP-0203

PROGRAMMING/OPERATION
INSTRUCTIONS
POWER ASSIST / POWERPRO®
WITH TOUCHPAD CONTROL
The following procedure allows the user to program the TouchPad
Control with their own 4-digit code. Upon initial power-up the
TouchPad Control code is set to 1 2 3 4.
To change code.
1. Press the "#" key, then press the "*" key . The green L.E.D. will begin
to blink.
2. Dial in the present code within the allotted 10 seconds. The red L.E.D.
will begin to blink.
3. Dial in the new code within the allotted 10 seconds.
4. ThesolidgreenL.E.D.willreturn.
Note: Key press during code set will sound a beeper.
Note: To verify that the new code has been accepted; with the reset light blinking, dial
in the code again. The red L.E.D. should glow steady for 3 seconds and then go out.
Operation of the system with close left configuration.
1. Begin with the carriages packed to the left.
2. Selectanaisle and entertheappropriate code ontheTouchPad.
3. Carriage(s)willmoveright toopentheaisle to theleftoftheTouchPad
whichhasbeenused.
4. Uponexitingthe open aisletheoperator goes tothefar rightcarriageand
pressesthe“Closebutton”.
5. Thecarriage(s) willmove leftto packall carriagesto the left.
6. Thecarriagesarenowconfiguredforthenextmoverequest.
Operation of the system with close right configuration.
1. Begin with the carriages packed to the right.
2. Selectanaisle and entertheappropriate code ontheTouchPad.
3. Carriage(s)willmove lefttoopentheaisle to therightof theTouchPad
whichhasbeenused.
4. Uponexitingthe open aisletheoperator goes tothefar left carriageand
pressesthe“Closebutton”.
5. Thecarriage(s)will moverightto packallcarriages to theright.
6. Thecarriagesarenowconfiguredforthenextmoverequest.
OP-0204


Extreme caution must be exercised while operating under either the safety override or power
override mode. Safety override should be used only when the operator cannot correct the problem
causing carriage shut down. Power override should be used only during times of a power outage.
Spacesaver area contractor service personnel should be called at once to correct any problem
necessitating the use of the safety override key. The safety override key should be used only by
supervisorsorservicepersonnel.
While operating a carriage using the safety override key it will travel at a reduced rate of
speed, a warning beeper will sound as the carriage moves and the metal key must be toggled and
held during carriage movement.
The safety override key is not required to move a carriage away from a safety fault.
USING THE SAFETY OVERRIDE FUNCTION:
ATTN: AREA SUPERVISOR ONLY
OPERATIONSINSTRUCTIONS
for Power Assist and PowerPro®
Safety and Power Override Functions
TouchPad Control Only
1. When a safety fault occurs the L.E.D. light on the control
will begin to blink. A push of the control will cause the
L.E.D. light to stop blinking and glow steady red.
2. Insertthe safety overridekey into theopening just above
the key slot. The L.E.D. light will begin to flutter.
3. Insert the metal key into the key slot. Toggle the key
clockwisefor right movementor counter clockwisefor left
movementas required. 40seconds areallowed to
accomplish the carriage move. If the move is not
completedwithin this time frame, removeand reinsertthe
safety override key to purchase an additional 40 seconds.
Note: The metal key
may be used to move
carriages at any time,
not just during times of a
safety fault. This key
should be kept by the
areasupervisorfor
security reasons.

Spacesaver Corporation
a division of KI
U.S.A.: 1450 Janesville Avenue, Fort Atkinson, WI 53538-2798, (920) 563-6362, 1-800-492-3434, FAX: (920) 563-2702
CANADA: 266 King Street East, Toronto, Ontario M5A 4L5, (416) 360-1022, 1-800-544-3679, FAX: (416) 360-7290
UK: Commonwealth House, 148-153 High Holborn, London WC1V 6PJ, (020) 7404-7441, FAX: (020) 7404-7442
Copyright ©, 2002 by Spacesaver Corporation. All Rights Reserved. Printed in U.S.A. OP-0205 SSC/ECONO 2/02
A safety overridden move of any carriage within the system will require insertion of the safety
override key in that carriage. Once the safety overridden move is complete the safety override key
must be removed to return the system to normal operation. The safety override key should be kept
by the area supervisor for safety reasons. Once the safety faulted aisle is closed other carriages
within the system may be operated. The safety override key is not required to open a faulted aisle,
only to close it.
USING THE POWER OVERRIDE FUNCTION:
1. ThePowerOverrideunitprovidesatemporarymeansfor
operating your system during times of a power outage.
This unit is not intended to be used as a safety override
devise. Plug the phone jack end into the same opening
used for the safety override key. Toggle the switch on the
side of the unit to initiate either left or right movement.
Please see page 3 in either the PowerPro®or Power
Assist Operations Instructions manual for full detail
regarding use and care of the unit.
Note: Theoverride pack must be kept by theAreaSupervisorfor
security reasons.

OP-0206
Attention Service Person Only
Power Assist & PowerPro®TouchPad
Control
Installation, Setup and Service
Subject: Function and use of 2 pin jumper locations at JP1-8.
Location JP1 –Beeper options:
No jumper: Beeper will sound when keys are pushed.
Jumper: Beeper will not sound when keys are pushed.
Location JP2 –Operating mode:
No jumper: Normal control mode. The control will initiate the appropriate move when the
code is entered.
Jumper: Locking mode. The touch pad allows the user to lock a module or a carriage.
Entering the appropriate code enables the locking. Re-entering the code disables
the locking.
Location JP3 –Not used
Location JP4 –Default reset upon power up*.
No jumper: The control will operate when the customer programmed code is used.
Jumper: The control will default to 1-2-3-4 upon power up.
Service person action required:
Symptom: The customer is unable to determine which code is active.
Cause: Someone has changed the code and has not informed the group. Could
be vandalism or an oversight.
Solution: Place a jumper at location JP4. Remove the TouchPad connector at the
back of the board and reconnect. The system will default to 1-2-3-4. Remove the jumper at
location JP4. The customer is now free to enter a new code.
Location JP5 –Jumper to enable 5-digit code.
Location JP6 –Jumper to enable 6-digit code.
Location JP5 & 6 –Jumper to enable 7-digit code.
Location JP7 & 8 –Reserved for future
Subject: To establish lock left or lock right action of the system.
As part of the control installation, the 2 conductor wire in the 4 pin header must be properly
placed. Place this header at J3 or J8 depending if close left or close right is desired. The board is silk
screened with the right or left designation to aid in this procedure. See the drawing on the back of this page
for wiring detail.
Note: The production planning department MUST be given prior knowledge of the lock left or lock right
preference. The face panel on the systems left or right will be routed to accept the “Close button”.

OP-0206
* Default code greater than 4: (5=1-2-3-4-5) (6=1-2-3-4-5-6) (7=1-2-3-4-5-6-7)

OP-0210
Attention Service Person Only
INSTALLATION, SET UP & SERVICE INSTRUCTIONS
PROGRAMMABLE ELECTRIC, POWER ASSIST &
POWERPRO® WITH UNIVERSAL TOUCHPAD CONTROL
Subject: Function and use of 2 pin jumper locations at JP1-8.
Location JP1 – Beeper options:
No jumper: Beeper will sound when keys are pushed.
Jumper: Beeper will not sound when keys are pushed.
Location JP2 – Operating mode:
No jumper: Normal control mode. The control will initiate the appropriate move when the
code is entered.
Jumper: Locking mode. The touch pad allows the user to lock a module or a carriage.
Entering the appropriate code enables the locking. Re-entering the code disables
the locking.
Location JP3 – Not used
Location JP4 – Default reset upon power up. *
No jumper: The control will operate when the customer programmed code is used.
Jumper: The control will default to 1-2-3-4 upon power up.
Service person action required:
Symptom: The customer is unable to determine which code is active.
Cause: Someone has changed the code and has not informed the group. Could
be vandalism or an oversight.
Solution: Place a jumper at location JP4. Remove the TouchPad connector at the
back of the board and reconnect. The system will default to 1-2-3-4. Remove the jumper at
location JP4. The customer is now free to enter a new code.
Location JP5 – Jumper to enable the use of a 5-digit code.
Location JP6 – Jumper to enable the use of a 6-digit code.
Location JP5 & JP6 in combination – Jumper both to enable the use of a 7-digit code.
Location JP7 & JP8 – Reserved for future.
Note: See the drawing on the back of this page for wiring detail.
* Default codes greater than 4: (5=1-2-3-4-5) (6=1-2-3-4-5-6) (7=1-2-3-4-5-6-7)

OP-0210

1. Familiarize yourself with the
"Operation Instructions" booklet.
2. Ask questions, if you are unsure of
any operational or safety features.
3. Bring any unusual performance of
the system to the attention of your
supervisor.
4. Treat this system as you would any
piece of precision equipment.
5. Follow the recommended shelf
loading instructions found in the
"Operation Instructions" booklet.
6. Keep media neatly stored and
pushed fully back onto the
shelving.
7. Provide needed preventative
maintenance according to the
recommended schedule. Ask
about a preventative maintenance
contract.
8. Make certain that all system safety
devices are operational.
9. Call your local Spacesaver repre-
sentative immediately, if a safety
device requires attention.
1. Climbing on the shelving.
(Use a stool.)
2. Jumping onto the floor from step
stools, ladders, etc.
3. Leaving items in the aisles.
4. Operating the system without
checking the open aisle(s) for
people and/or objects.
5. Allowing media to extend into the
aisle to the extent that the car-
riages cannot nestle together
properly.
6. Leaving reference shelves extend-
ing into the aisle.
7. Overloading your system. Stay
within recommended weight and
distribution limits.
8. Operating any system under the
safety override condition except in
the presence of your supervisor.
REV. 2.0/OP-9145 SSC/ECONO 5/00
IMPROPER USEPROPER USE
PROPER USE/IMPROPER USE

REV. 4.0/OP-9209 SSC/EPD IN 5500-553
For Spacesaver Area Contractors
and Distributors
1. Form #1 provides confirmation that the customer is satisfied with the system
installation and training and will start the clock for the warranty period. This
document should be hand delivered to the customer and completed during
face-to-face dialogue.
2. Form #2 is a check for the installer to confirm, in detail, that Spacesaver’s
specifications for installation have been met & the Field Quality Form is to
note discrepancies with manufacturing product. The factory certified installer
should sign this form.
3. Form #3 is the warranty activation. This card should be provided to those cus-
tomers interested in activating their system warranty on the Spacesaver’s
Corporate website.
4. The customer should receive:
4.1 Copy #1 of Form #1 (Certification of Warranty/System Acceptance.)
4.2 The “Operation Instructions” booklet.
4.3 The printed copy of the "Proper Use/Improper Use" document.
5. Your office should retain:
5.1 Copy #2 of Form #1 (Certification of Warranty/System Acceptance.)
6. Spacesaver should receive:
6.1 Copy #3 of Form #1 (Certification of Warranty/System Acceptance.)
6.2 Form #2 signed by a Certified Installer.
Please return the items at #6 above in the postage paid enclosed envelope.
FORM 1: CERTIFICATE OF WARRANTY/
SYSTEM ACCEPTANCE
FORM 2: INSTALLATION/FIELD QUALITY
REPORT INSPECTION FORM
FORM 3: WARRANTY ACTIVATION CARD
USE:
Effective Use Of:

Table of contents
Popular Controllers manuals by other brands
Kutai electronics
Kutai electronics ADVR-083 Operation manual
HTC
HTC VIVE Operation guide
Klereo
Klereo Kompact Installation guides
Smartgen
Smartgen HGM9510 user manual
RIFT Actuators
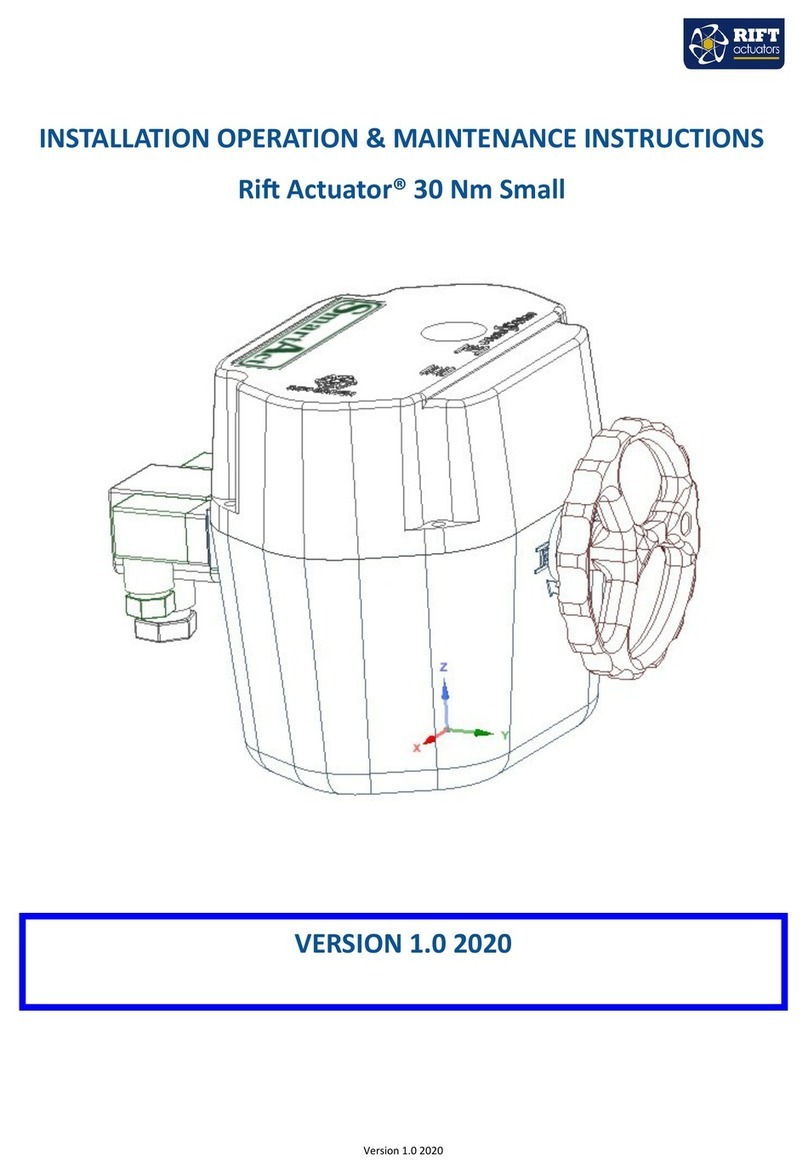
RIFT Actuators 30 Installation, operation & maintenance instructions
Veris Industries
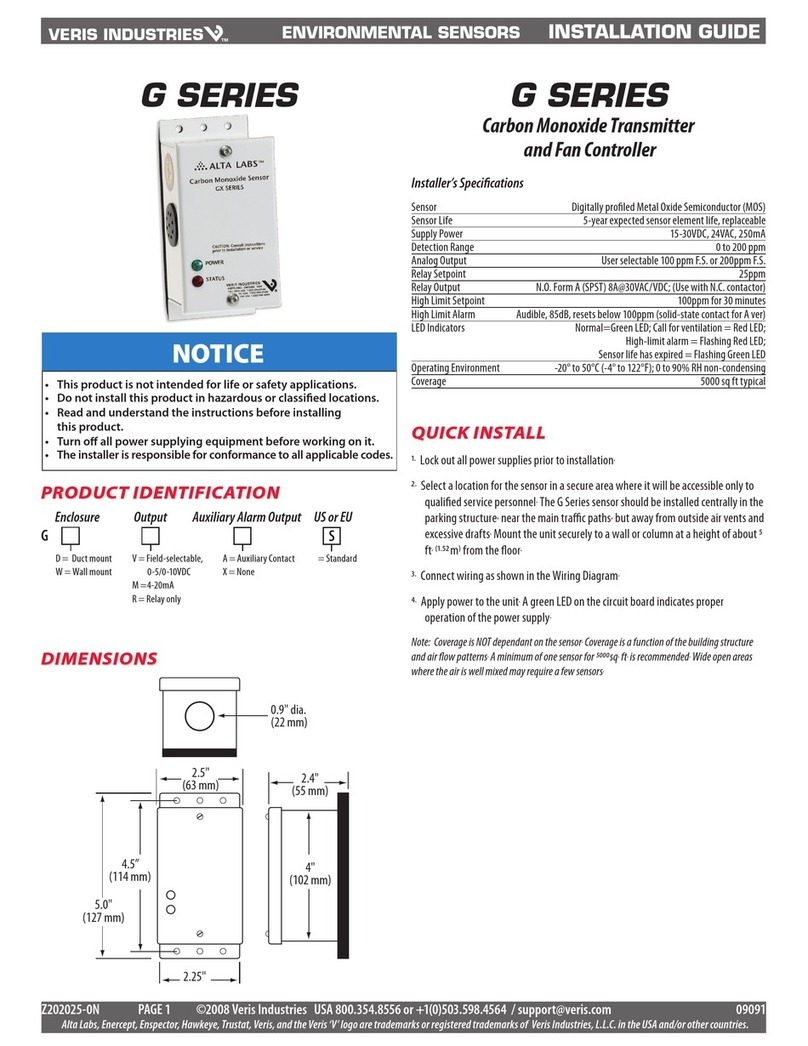
Veris Industries G Series installation guide

