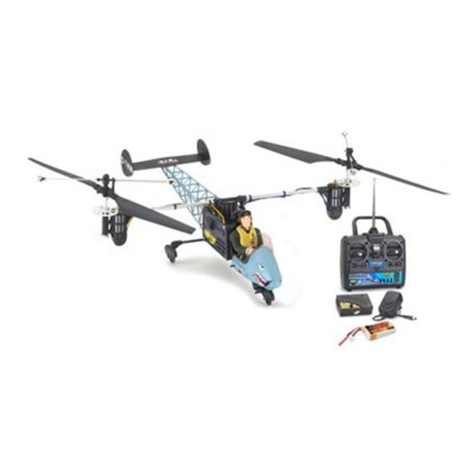
Sparc Delta Defender User manual

14277A
14
Congratulations on your purchase of the SPARC!™Delta Defender™helicopter. Your Delta Defender comes with
everything needed to y, so you can start ying as soon as you have thoroughly read the instruction manual
and have charged the built-in ight battery.
Key Features:
• Advanced selectable infrared (IR) radio control system with digital trims
• Fully proportional throttle and steering control (2 channels)
• Durable foam body
• Built-in Li-Po battery for longer ight duration
• Quick charging directly from the transmitter
Safety Precautions:
Warning: Any change or modication to this product will void all warranties.
• Choking hazard: Small parts contained; not for children under age 8.
• Keep everything, especially hair, away from the main rotor blades and tail rotor at all times.
• Make sure the transmitter and Delta Defender have their power turned off when not in use.
• Keep your Delta Defender in your sight when ying.
• Do not attempt to charge any battery other than the specied built-in Li-Po with the charger in the
transmitter. Never leave the Delta Defender unattended while charging.
• To help protect your Delta Defender from damage, remember to lower the throttle stick to idle immediately to
stop the blades if your Delta Defender is falling over or hitting something.
Battery Cautions for Li-Po Battery:
• Charge the battery with the specied built-in charger only. Please carefully follow the charging instructions as
described on the following page.
• Do not over discharge or overcharge.
• Do not short-circuit, drop or damage the battery.
• Do not put the battery near/in re or heat.
• Store the Delta Defender in a cool, dry place and out of the reach of children.
For Transmitter:
• Use of alkaline AA batteries for replacement is recommended. Do not mix brands or types of batteries.
• Do not attempt to charge non-rechargeable batteries.
Notes for Adults:
• Examine the Delta Defender carefully for any possible damage prior to every ight. Do not attempt to y until
all damage has been repaired.
• Adult supervision is required when a child is charging/installing/replacing the batteries in the Delta Defender.
Notes for Maintenance:
• Remove the batteries installed in the transmitter if you are not going to use this product for a long time.
• Clean the transmitter’s surface with a dry, soft cloth if it is dirty. Do not use any water or spray cleaner
on this transmitter.
• Store this product in a cool, dry place.
• Replace the batteries in the transmitter when you hear the low battery alarm (beeping sound).
• If you do not replace the batteries in time, you could lose control of your Delta Defender or crash it.
• If the Delta Defender body becomes damaged, it can easily be repaired using foam-safe CA glue purchased
from your local hobby store. Adult supervision is required when using adhesives on your model.
Where to y:
• Large, indoor room
• 2 car garage
• Basement
Note: It is not prefererd to y your Delta Defender outside as sunlight will greatly
reduce the range of your transmitter.
Warnings and Safety:
• Never y in places full of people, pets or furniture.
• When ying the Delta Defender, keep enough distance away from people for safety.
• Adult supervision is recommended for children age 12 and under.
• Keep the blades away from body parts, even when they aren’t spinning; the unit could be turned on by accident.
Note: Your Delta Defender has a built-in safety feature that prevents running the battery down accidentally which
could damage the helicopter battery. After 30 seconds, if the helicopter has been left on and the transmitter has
been turned off, the blades of the helicopter will rotate slightly every second and the helicopter will emit a beep
and the blades will move at the same time.
Use of the Infrared (IR) Radio:
General Operation:
Your infrared transmitter operates on a “line of sight” principal which means
the transmitter must be able to “see” your Delta Defender to operate properly.
If there are obstructions between the transmitter and helicopter such as walls,
windows, furniture or any other objects, your helicopter may not operate
properly. Make sure to operate your Delta Defender in an open area to avoid any
obstructions between your transmitter and your Delta Defender. Also use caution
when ying near windows where direct sunlight is entering the room as this may
reduce the range of your radio system.
Changing Channels:
Your Delta Defender is shipped on Channel A and is ready to y out of the box after charging. Two Delta Defenders
can be own at the same time if you change the channel of one of the models. To change the channel of your
Delta Defender, you will need to follow the procedure below.
Channel A: Press and hold the “A” button on the transmitter. Move the power switch to “ON” then release the “A”
button. Quickly turn on the power of your Delta Defender. The transmitter will now emit a series of beeps. Once
the beeps have stopped, the channel has been changed.
Channel B: Press and hold the “B” button on the transmitter. Move the power switch to “ON” then release the “B”
button. Quickly turn on the power of your Delta Defender. The transmitter will now emit a series of beeps. Once
the beeps have stopped, the channel has been changed. Channel B is the optional channel for your Delta Defender.
Troubleshooting:
Problem
Unit does not operate
Delta Defender won’t lift
Loss of control or ight battery will
not charge
Unit does not respond to transmitter
Solution
1. Check polarity installation or replace
with fresh AA batteries
2. Fully charge the battery
3. Replace the Delta Defender
4. Turn on the Delta Defender
Recharge battery
1. Replace transmitter batteries
2. Remove obstruction from IR signal
Follow procedure under “Changing
Channels” to set transmitter and
helicopter to same channel
Possible Cause
1. Transmitter AA batteries are depleted
or installed incorrectly as indicated by
the low-battery alarm
2. Delta Defender battery is not charged
3. Crash has damaged the Delta
Defender
4. Delta Defender is not turned on
Flight battery is low
1. Transmitter batteries are
running low
2. Obstruction blocking IR signal
Transmitter is on different channel than
helicopter
Replacement Parts:
Part# Description Retail
HBZ9007 Rotor Blade Set: Delta Defender $9.99
EFLA209 Foam-Safe CA $9.99
EFLA207 Foam-Safe CA Activator $4.99
Please keep this Instruction Manual for future reference.
Please call the Horizon Product Support Staff with any questions regarding operation of the Delta Defender at
1-877-504-0233.
DELTA DEFENDER
RADIO CONTROL RESCUE HELICOPTER
™
R
B
A

32
Charging Your Delta Defender:
The Delta Defender’s charger ensures an accurate charge every time. During the charge cycle, it continually
monitors the battery’s current and voltage.
1. Make sure the transmitter and Delta Defender power switches are turned “OFF.”
2. Attach the transmitter’s charge lead (in the bottom of the transmitter) into the charging port on the Delta
Defender. Make sure the red dot on the charge lead faces the rear of the Delta Defender to prevent damaging
the battery.
3. The LED indicator on the transmitter will be solid when the battery is being charged, and then the LED will ash
when battery is close to full. The LED will go out when battery is fully charged.
Lifting Off for the First Flight:
1. Pull the throttle stick down to the bottom of its travel and then turn
”ON” the transmitter.
2. Keeping everything clear from the rotors, turn “ON” the Delta
Defender power switch.
3. Place the Delta Defender on the ground with the tail pointing
towards you.
4. Gently push the throttle stick up; the main rotor will spin up and
the Delta Defender will take off. Climb to 1.0–1.5 meters (3–5 feet)
high and hold that height.
Note: It may be necessary to “arm” the helicopter by quickly moving
the throttle stick through its range from low to full throttle and back
before the helicopter responds.
5. If you notice that the Delta Defender wants to “wander/turn” to
the left or right, some steering adjustments may be necessary.
(See Making Flight Adjustments below.)
Note: If you do not have previous helicopter ying experience, we
recommend that you hand launch the Delta Defender. This is easily
accomplished by grasping the Delta Defender between the landing skids and tail boom while applying throttle.
At approximately half to 3/4 throttle, the Delta Defender can be safely released into the air.
6. You may notice the Delta Defender takes up to 2 seconds for controls to initialize. This should be considered
normal.
Making Flight Adjustments: (Delta Defender turns left or right)
The steering trim makes small adjustments to the Delta Defender’s direction. If the nose (front) turns right,
press the opposite trim to the direction the Delta Defender is turning. Tones will become softer as more left
trim is added and louder as more right trim is added. A long tone will be heard when trim is at center. Turns
right, trim left; turns left, trim right. Use only small amounts of trim (press the trim once or twice) to adjust the
trim setting.
Note: Right and left are viewed as if you were sitting inside the helicopter in the pilot seat.
Flight Control:
For smooth control of the Delta Defender always make
small control movements.
• Flying up and down: When your Delta Defender is
stable in the air, gently push/pull the stick up/down to
make it y higher/lower.
• Turning left and right: After you are procient in
controlling the ying height of your Delta Defender,
try turning left/right by moving the steering stick to
the same direction.
• The Delta Defender has a plastic balance weight on
the carbon boom below the main body to adjust the
ight speed. The recommended position at the rear
is for slowest forward speed. As you become more
experienced slide the adjuster progressively towards
the front to increase the forward speed.
Important: Your Delta Defender has a range of up to
18–20 feet (5–6 meters). Make sure to y close enough
to keep your Delta Defender within the operating range
of the transmitter.
How to Charge:
Transmitter battery installation:
It may be necessary to loosen and remove
the 2 Phillips screws on the back of the
battery cover of the transmitter to install the
transmitter batteries.
Charge ight battery with your transmitter:
IMPORTANT: Make sure the transmitter and Delta Defender have their power turned ‘OFF’ before charging.
7
123
4
5
6
12
9
8
11
10
2
3
4
5
6
7
8
9
10
11
OFF
ON
CHG
1
12
OFF
ON
CHG
Turns right
Open Cover
Install 4x Batteries
(Check polarity)
Close Cover
Main rotor
Stabilizer
Connecting shaft
Tail rotor
Charging port
Landing gear
Balance weight
Steering trim/Channel selector
Steering
Throttle
Power/charge indicator
Power switch
Trim left/
Channel A
Turns left
Trim right/
Channel B
Other Sparc Toy manuals
Popular Toy manuals by other brands

Hasbro
Hasbro KRE-O CityVille Invasion Haunted Hideaway... manual

Fisher-Price
Fisher-Price HBK98 manual

Maison Battat
Maison Battat Symphony in B quick start guide
THE WORLD MODELS
THE WORLD MODELS Barbera Jean 52 instruction manual

IKEA
IKEA BLAVINGAD quick start guide

PACIFIC CYCLE
PACIFIC CYCLE Mossy Oak TODDLER QUAD KT1210WMA manual

