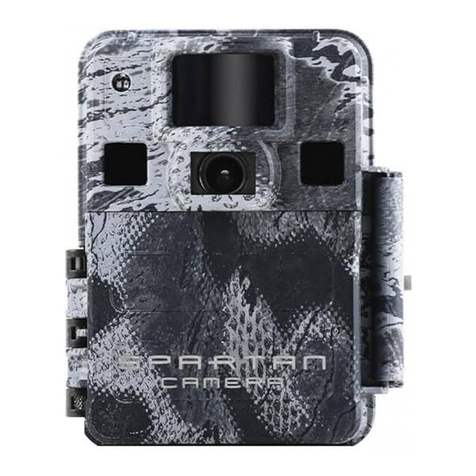
Spartan Camera GoCam GC-EUb User manual

1
SpartanGoCam3G(GC-EUb)
WirelessCameraUser’sManual
PLEASEREADCAREFULLYBEFOREUSINGCAMERA
www.cameratraps.co.za

2
PackageContents
MountingStrap 1 CameraTrap 1
Antenna 1 USBCable 1
User’sManual 1
CameraBodyandPorts

3
Keys&Buttons
•MENU =Entertheprogrammenuinpreviewmode
•▲▼◄►:Movebetweenthemenuitemsandchangethevalue
•OK =Saveparametersettingsinmenumode
=Playvideosinplaybackmode
•Playbackbutton =Inlivepreviewwindow,switchbetweenplaybackandpreviewmode
•DEL =deleteanimageinplaybackmode
UseShortcuts:Inlivepreviewwindow,
▲istheshortcuttochooseVideomode,and
▼istheshortcutfortheCameramode
OKisforcapturephotosorrecordavideomanually
• Mode(Power)Switch:ONattop.SETUPinthemiddle.OFFatthebottom
Start
1. MakesurethepowerswitchisatOFFposition.Loadthebatteriesintothebatterycompartmentaccordingto
thepolaritiesindicated.Loadasetof12(recommended),8or4(emergency,left2columns)batteries.Or
connect6Vexternalpowersupplytothecamerabyusingthecorrectcableandexternalbattery.
Thefollowingbatteriescanbeused:
•High‐performancealkalinebatteries
•Lithiumbatteries(recommended)
•RechargeableNi‐MHbatteries
2. InsertanSDcard(32GBorsmaller).OpenthecameraandinserttheSDcardintothecardslot.Refertothecard
symbolonthecameracaseforproperorientation.Thecamerasupportsupto32GBSDcard.Pleasenotethat
theSD‐cardshouldnotbelocked.
3. InsertastandardsizecellularSIMcard.
4. Screwtheantennaontotheantennajackonthetopofthecamera.Makesureit’sallthewayinbutDONOT
overtightit.
5. SlidethepowerswitchtotheSETUPposition(youwillhear3‐shortbeeps).Thecamerawillenterthelivepreview
modeandstart"Searchingnetwork..."
6. Waituntilthecamerafindsthenetwork.
MENUSETTINGS
1. Pressthe buttontoenterintothemenu,thenpress◄or►buttonstomovebetweenthetabs
(submenu)whichcontainsdifferentgroupofitems.Pressthe▲or▼buttonstoactivatethesubmenuand
editdifferentitems(Date/Time/Sensitivity/FlashPoweretc.).Press◄►tochangethevalue.PresstheOK
buttontosave.
Setting Items Description
CAMERA
Mode Choose to take a Photo or Video
(ONLY PHOTO’S can be transmitted to e-mail addresses / cell numbers)
Photo Size Choose the image size, e.g. 3MP, 5MP or 8MP.
Photo Burst Choose the number of images taken after each trigger (1-3).
(ONLY THE FIRST PHOTO will be transmitted to e-mail addresses / cell numbers)
Burst Interval Choose the interval time length between the images taken in burst mode (Long /
Short).
Video Size Choose the video resolution (720P, WVGA (800×480); QVGA (320×240) or 1080P)
Video Length Select from 1 second to 30 seconds
Setting Items Description
TRIGGER
Sensitivity Select between High, Low, Normal and OFF.
Trigger Interval The sleeping time after each trigger.

4
Time Lapse
The camera can be triggered by timer at a preset time interval (from 30 seconds to
every 8 hours). Please note that even in Time Lapse mode, the camera still can be
triggered unless the Sensitivity is set to OFF.
Start-Stop1
The camera can be set to operate only at a specific time period if preferred. To
enable this function select ON and press ok. The start-stop menu will then appear.
This menu contains the settings for times to start and stop as well as the trigger
interval and time lapse interval. The start-stop setting will override all other general
camera settings. Since there are 2 periods available, make sure to not program
times that overlap.
Start-Stop2 The second time period available for Time Lapse
Setting Items Description
SYSTEM
Clock Enter to set the Date and Time.
Time Stamp ON /Off. Choose if the image stamp is to be shown or not (Time / date / temperature °C
/ moon phase).
Flash Power High / Low. Infrared Flash Power.
Format Format the SD card. This will erase all data on the SD card. This cannot be undone.
Overwrite ON/OFF. If ON, once the SD card is full, the camera will delete the oldest images /
video and keep recording the new images / videos.
Default Restore all settings to factory default values.
Information Show Model name & version of firmware on the camera.
Password This option allows for a 6 digit password to be set.
Beep Select On or Off for Beeps when pushing the camera buttons
Setting Items Description
WIRELESS‐Use
Setup Tool to inpu
t
Data – details
below
Send Mode Use Setup Tool to input Cell Network Data – details below
Choose to send the image Instantly, just send the Daily report (of number of activations
which you can set the time in the Setup Tool) or just turn the wireless function Off.
Send Via
Use Setup Tool to input Cell Network Data – details below
Choose to send the image via MMS (MMS) – can send images to cell phones and e-
mail addresses
or E-mail (Lite) – sends to e-mail address only via Internet.
Please DO NOT SELECT Premium (For US Customers ONLY)
Send To Use Setup Tool to input Cell Network Data – details below
Phone Use Setup Tool to input Cell Network Data – details below
Email Use Setup Tool to input Cell Network Data – details below
Image From
Use Setup Tool to input Cell Network Data – details below
Allows you to name the location / camera where the image will be transmitted from and
this will be imprinted on the image and will be in the Email subject line
Realtime
Use Setup Tool to input Cell Network Data – details below
This allows the camera trap to be constantly “ON” and awake to react instantly to SMS
commands that are sent by the user to remotely control the camera trap (details below).
This can also be changed in the camera trap Menu.
Setup Tool Select this to copy the Setup Tool Application program to the SD card (a pre-installed
program in the camera trap) to input the above network parameters manually.
Copy Para
Select this to Copy the current camera settings (MMSCFG.BIN) file to the SD card
which can be loaded into the WIRELESS.exe Setup Tool application file saved onto
your PC.

5
Howtousethecameratraps’CellularFeaturesviathe“SetupTool”
Ifyourwirelesscarrier’snetworkparametersarenotpre‐programmedintothecamerafromthefactory,youwillneed
tousetheSetupToolApplication(apre‐installedprograminthecameratrap)toinputtheseparametersmanually.
2. NavigatetotheWirelesstab;scrolldowntoenterthesubmenus.
3. ScrolldowntoSetupToolandpressOK.Amessagewillappear“TheSetupToolhasbeenDownloadedtothe
SDCard”
4. OnceyouhavedownloadedtheSetupTooltotheSDcard(Menu>Wireless>SetupTool),switchthecamera
trapOFF.
5. TaketheSDcardoutandreadtheSDcardfromyourcomputer.TheSetupToolapplicationprogramwillonly
workonaPC/laptop.CopytherelevantSetupToolapplicationprogram(WIRELESS.exefile)thatisnowon
yourSDcardtoyourPC(wesuggestyoumakeaseparatefolderforthis).
6. Oncecopied,open(double‐click)theWIRELESS.exeapplicationfileandyouwillseethesetupwindowasbelow:
Fill in the settings you prefer into the blank fields. These
settingswilloverwritetheexistingsettingsfromthecamera
SendMode:
Instant: tohavetheimagessendimmediatelytoyou
viaMMS/e‐mail(canbemanagedfrom0to
9999).
DailyReport: will send you a SMS message of the # of
activationsthecamerahastakenataspecific
timethatyoucanset.
Off: turnsthewirelessfunctionOFF.
OperatorParameters:
ForCountry,chooseCustomandthenclicktheParameters
button.Youwillseethesetupwindowpopupasfollows:
Fill in the relevant cellular network parameters obtained
from CAMERA TRAPS cc and press OK (South Africa cell
providerparametersinthismanual).

6
SendTo:
For Send Via there is a drop down Menu for you to select the
following;
MMS:(CansendimagesviaMMStocellphone
numbers/emailaddressesorBOTH)
GoWirelessAuto:(USONLY)
GoWirelessLite:(Cansendimagesviaemailtoemail
addressesONLY)–CHEAPESTOPTION
GoWirelessPremium: (USONLY)
1. SendingimagesviaMMStocellphonenumbersoremailaddressesorBOTH.
Ifthisiswhatyouarelookingtodo,selectMMS
2. SendingimagesviaemailtoemailaddressesONLY.
Ifthisiswhatyouarelookingtodo,selectGoWirelessLite
IfyouhavechosentosendimagesviaMMStocellphonenumbers/emailaddressesorBOTH,intheRecipientswindow
ticktherelevantboxesthatyouwouldliketherecipienttoreceivetheimagesandfillintheirdetails.
N.B.ForSouthAfricancellphonenumbers–inputthemasnormalwithNOspacesandNOcountrycodesorprefixes
i.e.0821234567
I
fyouhavechosentosendimagesviaemail
ONLY(GoWirelessLite)toemailaddresses,the
Email Setting…cannowbeclickedandthe
followingwindowwillappear:
HereyouinputtheSending email account
details asthecamerawillusethisaccountto
sendtherelevantimages.
There are a number of popular email server
settings that have been pre‐programmed into
theunitandthesecanbeselectedbyclickingon
thedropdownmenu(picbelow).
Ifyoudonotwanttouseoneofthesepre‐
programmedservers,youcanalsouseyour
existingpersonale‐mailsettingsifpreferredby
fillinginalltherequireddetails.
PLEASENOTE:
AstandardpartofinternetsecurityonthepartofGoogle
and other email processors is to keep your account safe.
When you first use Gmail in your camera, Google will
typicallyblockyouraccess.Youwillreceiveanemail
stating that an application or person has tried to access
youraccount.Sincethecameraissendingtheemailthe
responseisreturnedtothecamera.Ourserverwillattempt
todetectthisissueandsendanotificationemailto
the configured Account Email. Thus, you may receive an
emailfromourserver.WithGmailandotheremailservices
youarelikelytohavethisproblem.Thisisnotanissuewith
GoWirelessbutisatypicalissue.
Readbelowforstepstoremedythesituation.
Inordertoallowthecameratouseyourgmailaccountyou
will have to follow a series of steps to enable other
applications(orlesssecureapps)touseyourgmailaccount.

7
Googlewillsendyouanemailnotifyingyouaboutthisissue.Itwillalso
containalinkthatwilltakeyoutothepageswhereyoumustallowless
secureappstouseyourgmailaccountforsendingemail.
OncetheSendingemailparametershavebeenputin,under
theRecipientswindowticktherelevantemailboxes(upto
4) that you would like the recipient to receive the images
andfillintheiremailaddresses.
Image(minimisedimagesizewhentransmitting):
WithMMS&GoWirelessLitemode,itissetatdefaulttoNormal(640x480pixelsand96dpi).Thisisabout30‐50KB
insizewhensendingviae‐mailorMMS.
‐ TheoriginalsizeimagewillstillbesavedtotheSDcardinthecameratrap.
ImageFrom:
Thiswillgenerateatitle(max15characters)foreachimagereceivedwhichwillbeimprintedonthephoto/MMSand
emailsubjectlinesotheuserwillknowwhere(whichcamera)theimageshavecomefrom.
Realtime:
Thisallowsthecameratraptobeconstantly“ON”andawaketoreactinstantlytoSMScommandsthataresentbythe
usertoremotelycontrolthecameratrap(detailsbelow).ThiscanalsobechangedinthecameratrapMenu.
StatusResponse:
ItischeckedbydefaultwhenRealtimeis“ON”andwillallowthecameratosendtheuseraSMSresponseafteritreceives
theuser’sSMScommand.
“Default”Button
Bypressingthis,thedefaultSPARTANsettingswillbeloaded(USONLY).
“Load”Button
Foreaseofuse,selectthisoptionifyouwanttoamendacellularnetworksparameters,phoneore‐mailsettings.Itwill
askyouwhichbinarytypefile(MMSCFG.BIN)settingsyouwouldliketoloadthatneedtobeamended–selectthefile
thatshouldbesavedinthesamelocationfromwhereyouopeneduptheWIRELESS.exeApplicationprogram(either
fromonyourcomputeraswerecommendedortheSDcardifyouhavenotsaveditacrosstoyourcomputer).
“Cancel”Button
ClosestheWIRELESS.exeApplicationprogram.

8
“Save”Button
Pressthe‘Save”buttonandabinaryfile(MMSCFG.BIN)willbesavedinthesamelocationfromwhereyouopenedup
theWIRELESS.exeApplicationprogram(eitherfromonyourcomputeraswerecommendedearlierorfromyourSDcard
ifyouhavenotsaveditacrosstoyourcomputer).Thisbinarytypefile(MMSCFG.BIN)nowneedstobesaved/copied
backtotheblankSDcardthatwillgobackintothecameratrapinorderforthecameratoupdatealltherelevantsettings
youhavejustputin.
Oncesaved/copiedbackontotheSDcard,removetheSDcardandinsertitbackintothecameratrap.Turnthecamera
onto‘SETUP’andaseriesof3xquickbeepsdirectlyfollowedby2xslowerbeepswillbeheard.These2xslowerbeeps
indicatethatthecamera’sparametersandsettingshavebeenupdated.
Programmingisnowcomplete.Itisrecommendedtosetupthecamerainanareawithagoodsignalandtestbefore
deployinginaremotearea.
RemoteControllingyourcameratrapusingSMS
TheSpartan®3GwirelesscameracanbecontrolledbysendingSMS commands to the camera’s SIM card phone
number (PLEASE NOTE: SOME CELLULAR TOWERS DO NOT SUPPORT ALL COMMANDS.Iftheunitsendsyouatext
response of “Network Busy” this means the tower/service area does not support the command. This is not a
manufacturer/cameraissue).
The Commander Phone Number ‐ The Recipient Phone numbers that you set in the setup process for “Phone1”/
“Phone2”/“Phone3”&“Phone4”willbethecommanderphonenumbersi.e.theonesthatcancontrolthecameravia
SMS.
SMSSwitch‐InordertousetheSMScontrolfunction,theuserneedstosettheswitchtoONinthesetupprocess.
Spartan®3GSMSCommandCodeList
COMMAND TEXTMESSAGE SMSRESPONSEYOUWILLGET
TakePhotoandSendNow *500# Picturesending("Invalid"whenthecameramodeisVideo.)
SignalLevel*150#Thesignalisveryweak/weak/good/verygood
PowerLevel*201#BatteryLevel1to5(lowtohigh)
SendViaMMS*120#0#SendviaMMS
SendViaInternet *120#1# SendviaInternet(WhensendviaisInternet,"SendTo"willbemodifiedtoEmailonly)
SendToPhone*130#0#Sendtophone
SendToEmail*130#1#Sendtoemail
SendToBoth*130#2#Sendtoboth(WhensendviaisInternet,"SendTo"willbemodifiedtoEmailonly)
AddPhone *100#number# Phonenumberadded(number=therelevantcellphonenumberyouwanttoadd)
DeletePhone*101#number#Phonenumberdeleted(number=therelevantcellphonenumberyouwanttodelete)
AddEmail*110#email#Emailadded(email=therelevantemailaddressyouwanttoadd)
DeleteEmail*111#email#Emaildeleted(email=therelevantemailaddressyouwanttodelete)
CameraModePhoto*200#0#Settophotomode
CameraModeVideo*200#1#Settovideomode
SendModeInstant*140#0#Sendinstantphoto
SendModeDailyReport*140#1#Senddailyreport
SendModeOff*140#2#Sendisoff
SetPIRLeveltoHigh*202#0#PIRsensitivityhigh
SetPIRLeveltoNormal*202#1#PIRsensitivitynormal
SetPIRLeveltoLow*202#2#PIRsensitivitylow
SetPIRLeveltoOff*202#3#PIRsensitivityoff
TurnSMSOff*104#CameraTurnedOff

9
SOUTHAFRICACELLULARNETWORKPARAMETERS
SUPPORT&FREQUENTLYASKEDQUESTIONS(FAQ’s)
1. What do M, E, T, or S on the photo's info strip mean?
The letter on the info strip at the bottom of the photo indicates what type of event caused the photo to be taken.
M = motion-triggered
E = event (a photo taken at a scheduled time)
T = time-lapse
S = requested photo (only available with Real Time ON)
2. How do I know when it's time to change the batteries?
It’s a good idea to keep an eye on the power indicator on the info strip on night photos. Once you see a power indicator other than P5, plan
to replace your batteries soon. Monitoring the power level is just one good reason for using photo events, especially night time ones.
VODACOM
Internet
APN: internet
Username: (blank)
Password:(blank)
MMS
APN: mms.vodacom.net
Username: (blank)
Password: (blank)
URL(MMSC): http://mmsc.vodacom4me.co.za
Gateway(Proxy): 196.006.128.13
Port: 8080
MTN
Internet
APN: internet
Username: (blank)
Password:(blank)
MMS
APN: myMTN
Username: mtnmms
Password: mtnmms
URL(MMSC): http://mms.mtn.co.za/mms/wapenc
Gateway(Proxy): 196.11.240.241
Port: 8080
CellC
Internet
APN: internet
Username: (blank)
Password:(blank)
MMS
APN: mms
Username: (blank)
Password: (blank)
URL(MMSC): http://mms.cmobile.co.za/
Gateway(Proxy): 196.031.116.250
Port: 8080
Telkom
Internet
APN: internet
Username: (blank)
Password:(blank)
MMS
APN: mms
Username: (blank)
Password: (blank)
URL(MMSC): http://mms.8ta.com:38090/was
Gateway(Proxy): 41.151.254.162
Port: 8080

10
3. Real Time ON vs. Real Time OFF
Real Time ON:
- can request a photo
- faster delivery ofphotos
- almost immediate response to requests for photos, hi-res photos, and settings changes
- high power consumption, shorter battery life
Real Time OFF:
-much lower power consumption, longer battery life
- cannot request that the camera take a photo
- a few seconds’ delay when transmitting photos and status reports
- some delay in responding to requests for hi-res photos and settings changes (until after the next event that causes the camera to contact
the server)
4. Photo and Thumbnail Settings
Either 3 or 5 MP are the better choices. If you request the full resolution version of a photo, the 3 MP size will transmit faster and use less
data. However, you will be able to enlarge the 5 MP size more. The camera’s native resolution is 5 MP so setting size to 8 MP won’t really
get you real higher resolution.
Thumbnail Size
Normal thumbnails (640 x 480):
+ transmit faster
+ use less storage space on the SD card
+ use less data
+ use less battery power
– can be very grainy, don’t enlarge well
If you are using a camera for security and monitoring a low-traffic site where you just need to see that something is still there (e.g., a building,
camper, piece of equipment), then normal thumbnails may be the better choice.
If there is something that you want to see in a clearer picture, you can always request the full-resolution photo.
Large thumbnails (1280 x 960):
+ take longer to transmit
+ user more storage space on the SD card
+ use more data
+ use more battery power
– are much clearer, generally enlarge well
If you are using a camera to monitor animals or people, this may be the better setting. If you are using normal thumbnails but find yourself
requesting full-resolution photos fairly often, try large thumbnails. They may be good enough that you don’t need to request full-resolution
photos.
5. 6V External Battery Setups (Non-Solar)
Cell cameras can be incredibly useful technology, but battery life can be a real problem, especially if your cameras are not deployed where
you can reach them quickly and easily. External batteries, even relatively small, inexpensive ones, can greatly increase the length of time a
cell camera can run without requiring attention. 6V 12Ah SLA (Sealed Lead Acid) batteries work the best and are available from good
hardware’s nationwide. You can also purchase a ready-made cable like the one shown below from CAMERA TRAPS cc. It works on all
Spartan cameras.
You may want to get a spare battery so that you can just swap out batteries when necessary rather than pulling the battery, recharging it, and
putting it back.

11
6. Using Start-Stop Times
Start-Stop Times are handy settings that allow you to control how your camera works during one or two time periods during a day.
Running the camera only during part of the day (See Pic Right)
If you are using cameras for security, you may not want the camera taking pictures
during the day when you are out and about at the location. In that case, set the start
time for after you will be inside for the night and the stop time for shortly before you
plan to be out again so that the camera takes pictures during the night but not while
you are active outside.
Setting different trigger intervals for different times of the day (See Pic Below)
In the first example, a camera on a feeder in Texas is set to take more frequent
pictures during the day and evening when the deer are most active then take fewer
pictures at night when the genets and bush pigs are active.

12
TechnicalSpecifications
WARRANTYINFORMATION
TheCamerapurchasedfromourauthorizeddealersiswarrantedtobefreefromdefectsinmaterialandworkmanshipfor2year
fromtheoriginaldateofpurchaseundernormaluse.HCOOutdoorProductswill,atitsoption,repairorreplaceyourcamerawith
thesameorcomparablemodel,freeofcharge(exceptyoumustpayforshippingchargessetforthbelow),foraperiodof(1)one
yearfromtheoriginaldateofpurchaseintheeventofadefectinmaterialsorworkmanshipoccurringwithnormaluse.Thiswarranty
onlyextendstotheoriginalretailpurchaser.Purchasereceiptorotherproofofdateoforiginalpurchaseisrequiredbeforewarranty
performance.Thewarrantyonanyreplacementproductprovidedunderthiswarrantyshallbefortheunexpiredportionofthe
warranty period applicable to the original product. *Sorry but ourwarrantyisONLYappliedtothecamerasboughtfromour
authorizeddealers.Thiswarrantyextendssolelytofailuresduetodefectsinmaterialsorworkmanshipoccurringduringnormaluse.
Itdoesnotcovernormalwearoftheproduct.Thiswarrantyisvoidif:theproducthousinghasbeenremoved,iftheproduct'slabel,
logoorserialnumberhavebeenremovedoriftheproductfailstofunctionproperlyasaresultofaccident,misuse,abuse,neglect,
mishandling,misapplication,non‐compatiblebatteries,faultyinstallation,setup,adjustments,impropermaintenance,alteration,
maladjustmentofcontrols,modification,powersurges,servicebyanyoneotherthanHCOorHCOauthorizedservicecentreoracts
beyondthemanufacturer'sordistributor'scontrol.Note:Thecameraisnotwaterproof;pleaseprotectyourcameraproperlyfor
outdoorsuse.
Shouldyourproductprovedefectiveduringthiswarrantyperiod,pleasecontactustoobtainaRMAnumberpriortoreturningthe
defectiveunit.*RMAnumberisrequiredforallreturns.Include$11.95forreturnshipping&insurance.(ForU.S.customersonly.
CHECKORMONEYORDERONLYPLEASE,NON‐REFUNDABLE).Iftheproductisbeyondthewarrantyperiod,thepriceforrepairing
orreplacingmayvary.Pleaseallow6‐8weeksfordelivery.Internationalcustomerspaydifferentamountofshipping&insurance.
WewillsenddetailedinformationalongwiththeRMAnumber.IncludewithyourcameratheRMAformandacopyofyourdated
cashregisterreceiptorotherproofofpurchase.Thewarrantyworkwillnotautomaticallyextendtheoriginalwarrantyperiod.The
customerhas2weekstoreportanyDOA(DeadonArrival)products(pleasetestproductuponreceipt).Ifyouhaveanyquestions
regardingthewarrantyofHCOproducts,pleasesendusanemailat[email protected].*Pleaseconsultyourdealerorusif
youhaveanyquestionorproblemwhileyouusethecamerabeforeyourequestaRMAnumberandsendthecamerabackforrepair.
Someproblemsmaybesolvedeasilywithhelpfromourdealersorus.
CAMERAREPAIR
Repairsfordamagesnotcoveredbythewarrantywillbesubjecttoacharge.PleasecontactHCOOutdoorstodeterminemore
informationandtodiscussrepairoptionsnotcoveredunderwarranty.

13
CUSTOMERSERVICECONTACT
E‐mail:[email protected]
Website:www.hcooutdoors.com
Phone:1‐770‐582‐0004
HCOOutdoorProducts
6665CornersIndustrialCt.SuiteD
Norcross,GA30092U.S.A.
CAMERATRAPScc
E‐mail:info@cameratraps.co.za
Website:www.cameratraps.co.za
POBOX1011LINKHILLS,3652,SOUTHAFRICA
Phone:+27(0)835600555/+27(0)824220356
Table of contents
Other Spartan Camera Digital Camera manuals
Popular Digital Camera manuals by other brands

GNB
GNB SY-058 owner's manual
Kodak
Kodak PIXPRO AZ251 quick start guide

Panasonic
Panasonic Lumix DC-G9 Operating instructions for advanced features

Panasonic
Panasonic Lumix DMC-LX7 Basic operating instructions
Mintion
Mintion Beagle manual
National Geographic
National Geographic EXPLORER 6 operating instructions
