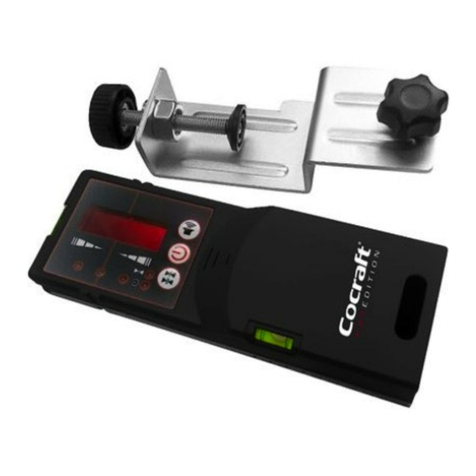
Spartan Power SP-PM120 User manual

1
16/02/17
Spartan Power
SP-PM120 Power Meter
User Manual

2
Contents
Introducon
Product descripon
Before you use the device
Proper use
Safety notes
Danger to children!
Notes on the baery
Explanaon of symbols
Changing the baeries
Product descripon and funcons
Sengs
Time
Greenhouse gas emissions (GHG)
Overload warning
Performing measurements
Displaying measured values
Automac display of measured values
Individual display of measured values
Display of consumpon values
04
04
05
06
07
08
09
10
11
11
14
16
16
17
18
20
21
24
24
24
25
25
26
Using the device for the first me
Price for night-me current(2nd tariff)
Electricity price per kWh(1st tariff)
Seng a specific measured value

3
Consumpon history
Graphical representaon of consumpon
Displaying consumpon values (kWh)
cosφ (power factor)
Deleng measured values
Aborng the deleon process
Troubleshoong
Unusual readout on the display
Cleaning
Protecng the environment
Disposing of baeries
Disposing of old appliances
Packaging
Technical data
Declaraon of conformity
Measurement accuracy
Guarantee
26
27
28
30
30
31
31
31
32
33
33
33
34
34
36
36
37

4
Introducon
Congratulaons on the purchase of our new Power
Meter with large LCD, yellow backlight and high
accuracy.
This device helps to determine the energy cost
of connected electrical devices. We hope you
are able to minimise your power costs as a result!
Product Descripon
This Power Meter supplies you with data on
the power consumpon of connected electrical
devices. With the push of a buon, you can
quickly and easily see the power measurements.
Measurements such as Voltage, Amperage,
Power, Frequency, Power Factor and Overload
values are displayed. You can also enter your
electricity rate and then display the actual costs.
Displaying the equivalent CO2 emission in kg
also provides you with addional ecological
informaon. The monitor also shows you the
total consumpon over a measurement period
of up to seven months and the corresponding
operang me.

5
Before you use the device
Aer unpacking the product and before each
use, check whether the product is damaged.
In that case, do not use the product. The oper-
ang instrucons are based on the standards
and rules in force in the United States. Also
and laws in other countries!
read through the operang instrucons and
safety notes. Only in this way, will you be able
to safely and reliably use all funcons.
Store the operang instrucons, the receipt
and, if possible, the packaging in a safe place.
If you lend, give away or sell the device, please
also include the operang instrucons.
Before you use the device, please first carefully
be sure to observe the country-specific direcves

and maximum load up to 1800 was at the most.
6
Proper use
The device serves to determine the power
consumpon of connected consumers and the
resulng costs.
The product is only intended for private use
and is not designed for commercial use. Only
use the product as described in these operang
instrucons. Any other use is improper and may
result in damage to property or even personal
injury.
The manufacturer assumes no liability for
damages, which are incurred as the result of
improper use.
Safety notes
Before you use your Power Meter,
please observe the following points:
Faulty electrical installaon or excess mains
voltage may result in an electric shock.
The device is only suitable for 120VAC/60Hz

7
Please consider the corresponding technical
data, see table of contents
Only connect the device to a properly installed
120 V fused socket with earthing contact.
Do not use the device if it exhibits visible dama-
ges or if the mains plug is defecve.
Do not open the housing, instead have qualified
professionals perform any repairs.
For this ,contact a qualified workship.Claims
to liability and warranty claims are excluded in
the event of own aempts at repair, improper
connecon or improper use.
Only use the device in dry indoor areas. Never
operate it in wet rooms or outdoors.
The device may not come into contact with
dripping water or splashes and/or other liquids.
Maintain a minimum distance of one meter to
sources of moistures such as wash basins or the
like.
Never take hold of the device with wet hands.
Never aempt to grasp an electrical appliance
aer it has fallen in water. If this happens,
immediately disconnect the device from the
power supply.

8
Danger to children!
Children oen do not recognise risks
or underesmate them.
Do not interconnect mulple Power Meter and/
or do not connect the device to similar devices.
Do not cover the device, there is a risk of over-
heang.
If you are not using the device or in the event of
a failure, disconnect it from the socket.
The socket serves as a separator to the power
supply and must be readily accessible.
Keep the packaging bags and wrappers away
caon hazard!
This device is not intended to be used by persons
(including children) with impaired physical,
sensory or mental abilies or who lack experience
and/or knowledge unless they are supervised
by a person responsible for their safety or have
been instructed by such a person in how to use
the device.
Do not make any modificaons to the device.
from babies and small children. There is a suffo-

9
Notes on the baery
The Power Meter is loaded with 2 type LR44
and/or AG13 baeries (buon cells – these bat-
teries are included in the product contents).
Explanaon of symbols
Supervise children and keep the device out of
their reach to ensure that they do not play with
it. Improper use means there is a risk of electro-
cuon!
Never aempt to recharge the baeries.
Do not throw the baeries into fire, do not
short-circuit or disassemble them! There is a risk
of explosion!
Keep baeries away from children. If a baery
is ingested, immediately contact a physician.
Promptly remove empty baeries from the
device! Increased risk of leakage!
Do not expose baeries to extreme condions,
e.g. radiators or direct sunlight! There is an
Only use the baery type specified
here to aviod risks associated with
fire and explosion.

10
You can find the following symbols on the device
and/or in the operang instrucons:
increased risk of leakage!
Avoid contact with skin, eyes and mucous
membranes. In the event of contact with baery
acid,immediately flush the affected areas with
plenty of clean water and immediately contact
a physician.
Only insert baeries of the same type, do not
use different types of baeries or combine used
a new baeries with one another.
Always replace both baeries at the same me.
If needed, clean the baeries and device contacts
before inserng them.
Follow the safety notes.
Only use in enclosed spaces.
CAT II
300 V
The monitor is admied for use with
circuits, which are directly connected
with the low voltage grid.
Note on disposing of old appliances
(see page 33)

11
Using the device for the first me
When the device is delivered, the baeries are
already inserted. Acvate them by removing
the insulaon strips in the baery compartment
To open the baery compartment, proceed as
described in the following secon.
Changing the baeries
1. Pull the device out of the socket.
2. Push the two side catch springs of the baery
compartment together at the same me and
pull the baery compartment out of the device.

12
3. Remove the empty baeries and dispose
them of at a collecon point for old baeries.
4. Insert 2 new baeries (1.5 V buon cells, type
LR44/AG13) in the baery compartment.
When inserng the baeries, make sure that
the polarity (+/-) is correct as shown in above
photo, Posive(+) is in outside.
5. Insert the baery compartment with the two
contact springs in the device slots and push
it unl it locks into place.

13
The baery compartment can only be inserted
in the device in one direcon.
The baery compartment must be completely
inserted before reacvang the device.
If you do not use the device for a prolonged
period of me, take the baeries out of the
device to prevent them from becoming empty
prematurely.

14
Product descripon and funcons
3
4
1
2
5
6
1. LCD display
Display for measured values, me, costs,
greenhouse gas emissions
2. Buon VALUE / +
Display various measured values such as
Voltage(V), Current(A), Power(W), Frequency
(Hz), Power factor(cosφ), Amax, Wmax;
Increase value.
7

5. Buon
SET / OK
Input mode for me,12hr/24hr, 1.Rate cost,
1.Rate me, 2.Rate cost, 2.Rate me, GHG,
Overload Current, Overload Power, save entry.
15
3. Buon DISPLAY / -
Display Time, Total kWh, Total me, Total costs,
Greenhouse Gas emissions(GHG);
Reduce values.
6. Buon HISTORY
Present consumpon values over a period of
up to 7 days/7 months
7. Socket with integrated children protecon
Insert both plug pins at the same me when
connecng the plug.
LCD Display
4. Buon
RESET
Back to factory default mode
8
9
10

16
8. Display area for Voltage(V), Current(A),
Power(W), Frequency(Hz), Power factor(cosφ),
Amax, Wmax;
9. Display area for Time, Total kWh, Total me,
Currency(€,$,£,Paper Money), 1st and 2nd tariff,
Total costs, Greenhouse Gas emissions(GHG)
10. Graphical representaon of energy consumpon
in the last 7 days or 7 months.
Sengs
To exclusively perform measurements (without
a cost calculaon), you can skip this secon and
connue with the topic “Performing measurements
” (starng on page 24).
Time
1. Depress the buon SET / OK for 3 seconds.
The me display will blink. Pressing the buon
SET / OK several mes will access the different
input opons. Select the me to be entered as
the me.
2. Set the hours ahead with the buon VALUE/+
and back with the buon
DISPLAY / -
3. Select the minutes with the buon HISTORY
Set them ahead with the buon VALUE / +
and back with the buon DISPLAY / -

17
4. When seng the seconds are set to zero.
5. By pressing the buon SET / OK , you save
the me and can now set 12Hr/24Hr me
display with the buons VALUE / + or
DISPLAY / - . If you select the 12Hr display,
AM will appear for the morning and PM for
the aernoon on the me display.
1. Aer entering the me including the 12Hr /
24Hr display, push the buon SET / OK . COST
will appear on the display.
2. Now enter the electricity price per kilo
wa hour (generally expressed in pence/
cents). Set the amount ahead with the
buon VALUE / + and back with the buon
DISPLAY / -
3. Access the pence/ cent amounts with the
buon HISTORY
The first decimal place of the pence/cent
readout blinks. Set the number ahead with

18
the buon VALUE / + and back with the
buon DISPLAY / -
4. Set the other decimal places of the pence/
cent readout in the same manner (Example:
0.185 = 18.5 pence/ cents).
5. Aer entering the last digit of the pence/
cent amount, push the buon HISTORY
again. The currency display will blink. With
the buons VALUE / + or DISPLAY / - , you
can select a currency symbol for Euro ( €),
a bank note( ), US dollor($) and Pound(£)
price. Complete the input process by pressing
sing the buon
display appears.
SET / OK unl the standard
Mark: During above setting, it will automatically
back to standard display if no operation for 30s
6. If you only have one tariff(i.e. no night-me
current), you have finished specifying the

If you have night-me current, proceed as follows
1. Aer entering the current price as described
19
above(dayme tariff), push the buon SET/OK
The me will be displayed, as below:
2. Enter the me here, from when the dayme
tariff applies. Set the hours ahead with the
buon VALUE / + and back with the buon
DISPLAY / -
3. Access the minutes with the buon ;
HISTORY
Set them ahead with the buon VALUE / +
and back with the buon DISPLAY / -
4. Push the buon
current tariff will appear as below:
SET / OK and the night-me
5. Now enter the power price per kilowa hour
(generally expressed in pence/ cents). Set
the Pound/ Euro amount ahead with the
buon VALUE / + and back with the buon
DISPLAY / -
6. Access the pence/ cent amounts with the
buon HISTORY

20
The first decimal place of the pence/ cent
readout blinks and set the number ahead
with the buon VALUE / + and back with the
buon DISPLAY / -
7. Set the other decimal places of the pence/
cent readout in the same manner as described
above.
(Example: 0.245 = 24.5 pence/ cents). Enter as
described under the menu item “Seng the
price per kWh”.
8. Push the buon
displayed,from when the night-me tariff
SET / OK and the me is
applies. Enter the me here.
9. Set the hours ahead with the buon VALUE /+
and back with the buon DISPLAY / -
10. Access the minutes with the buon HISTORY
Set ahead with the buon VALUE / + and
back with the buon DISPLAY / -
Greenhouse gas emissions (GHG)
The producon of energy releases greenhouse
gases (among others carbon dioxide CO2),
which places a burden on the environment.
With this device, you are able to determine how
much CO2 is released by an energy supplier
Table of contents
