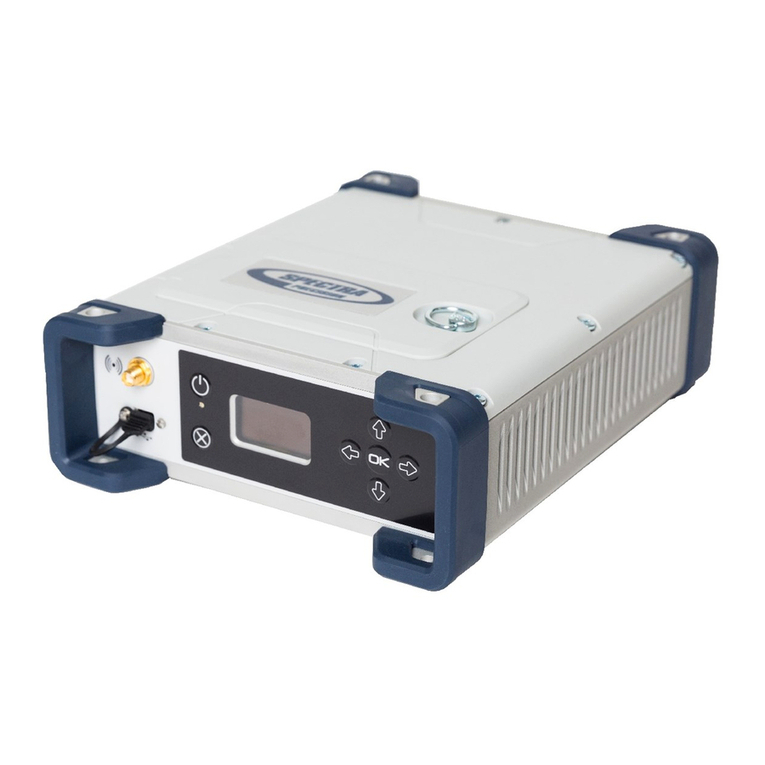
Spectra Geospatial SP85 User manual

Español
3
English
2 1
Configuración del cargador de pilas:
• Conecte el cable de salida ([1]) del alimentador de CA/CC ([2]) a la entrada del cargador de pilas ([3]).
• Escoja el cable de alimentación ([4]) correspondiente a su país.
• Conecte un extremo del cable de alimentación a la entrada del alimentador de CA/CC ([5]) y el otro extremo a una
toma de corriente ([6]). De esta forma se encenderá el cargador de pilas y el LED POWER se iluminará en verde.
Inserte las dos pilas ([7]) en el cargador de pilas (observe que la orientación de las pilas sea la adecuada). ElLED
CONTACT de cada pila se iluminará en naranja cuando se detecte la presencia de una pila. El LED CHARGE comenzará
a parpadear en verde rápidamente para indicar que la pila se está cargando.
Las pilas secargan simultáneamente. El proceso tarda un par de horas. Cuando una pila quede completamente
cargada, el LED CHARGE correspondiente se iluminará en verde.
Extraiga las pilas del cargador cuando ambas estén completamente cargadas..
Inserción de las pilas en el receptor:
• dé la vuelta al receptor.
• Empuje con un dedo el gancho hacia dentro (véase [8]) para desbloquear la puerta del compartimento y tire de ella
para abrirla (véase [9]).
• Oriente la pila correctamente, colóquela en el lado interior correcto del compartimento y empújela para introdu-
cirla (véase [10]) para que encaje en las cuatro lengüetas guía.
• Empuje la pila completamente hacia la izquierda. Se activará el mecanismo de bloqueo bajo la pila (véase [11]).
• Cierre la puerta. Asegúrese de que el gancho queda bloqueado.
• Vuelva a poner el receptor boca arriba..
¿Desea insertar una tarjeta SIM o SD? Abra la solapa de goma con las siglas “SD” y “SIM” (en el lado derecho) tirando
suavemente hacia la derecha. La lengüeta sobresale ligeramente a un lado de la solapa ([12]).
Dé la vuelta a la tarjeta (el lado con la etiqueta mirando hacia abajo) (véase la tarjeta SIM en [13]) y empuje hasta que
oiga cómo encaja.
Vuelva a colocar la solapa de goma. Este proceso de cinco pasos debe seguirse cuidadosamente. El lado interno de la
solapa tiene unas formas moldeadas (véase [14]) que encajan en las ranuras de las tarjetas. Comenzando por la bisa-
gra, deben encajar en lo siguiente:
• El bloque más cercano a la bisagra ([15])
• La ranura de la tarjeta SIM ([16])
• La ranura de la tarjeta SD ([17])
• El segundo bloque ([18])
• A continuación, deslice el pulgar por la solapa, comenzando por la bisagra hasta el otro extremo, ejerciendo la pre-
sión necesaria para asegurarse de que la solapa quede correctamente insertada.
Colocación del receptor y del colector de datos en un poste extensible (remoto) o un trípode (base):
• Mida la altura del instrumento.
• Encienda el receptor manteniendo presionado durante unos 2 segundos. El LED de estado de la pila utili-
zada se ilumina en verde. Deje que el receptor se inicie.
• Entretanto, encienda el colector de datos y ejecute el software de campo.
Comienzo del levantamiento: siga las instrucciones del software de campo para realizar el levantamiento
Supervisión de las pilas: las dos pilas se utilizan sucesivamente. El LED de estado de la pila que se está utilizando
primero aparece iluminado en verde. (Si los dos LED aparecen iluminados en verde, la pantalla de control indicará qué
pila se está utilizando: junto al icono de la pila correspondiente aparecerá una flecha). Cuando la pila en uso empiece
a gastarse, el LED correspondiente comenzará a parpadear lentamente en verde y, a continuación, con mayor rapi-
dez. La alimentación pasará automáticamente de la pila gastada a la pila llena en el momento adecuado, sin que el
funcionamiento del receptor se vea afectado por ello. Ahora podrá sustituir la pila gastada por otra cargada. Esto
tampoco afectará al funcionamiento del receptor.
Finalización del levantamiento: Mantenga presionado durante unos 2 segundos para apagar el receptor.
ADVERTENCIA - Cargue y utilice las pilas de ión-litio siguiendo en todo momento las instrucciones. La carga o el uso de las pilas con
equipos no autorizados puede provocar explosiones o incendios y pueden causar lesiones personales y daños en los equipos.
¿DESEA MÁS INFORMACIÓN? Descargue la Guía del usuario de SP85 en nuestro sitio web:
https://spectrageospatial.com/sp85-gnss-receiver/
Set up the battery charger:
• Connect the output cable ([1]) of the AC/DC power block ([2]) to the battery charger input ([3]).
• Choose the power cord ([4]) that is suitable for your country.
• Connect the end of the power cord to the AC/DC block input ([5]), and the other to a power outlet ([6]). This powers
up the battery charger, causing the POWER LED to turn solid green.
Insert the two batteries ([7]) onto the battery charger (give the right orientation to the battery). For each battery,
the CONTACT LED will turnsolid orange when the battery is detected. The CHARGE LED will start blinking green at a
fast rate toindicate that the battery is being charged.
The batteries charge simultaneously. This will take a few hours. When a battery reaches full charge, the corre-
sponding CHARGE LED turns solid green.
Remove the batteries from the charger when both fully charged.
Insert the batteries into the receiver:
• Turn the receiver upside down.
• With a finger, push the snap-in hook inward (see [8]) to unlock the compartment trapdoor, then pull it open (see
[9]).
• Give the right orientation to the battery, prop it against the right inner side of the compartment, then push the bat-
tery in (see [10]) so that it fits into the four guiding tabs.
• Push the battery fully to the left. This releases a stop mechanism underneath the battery (see [11]).
• Close the trapdoor. Make sure the snap-in hook is locked.
• Put back the receiver the right way up.
Need to insert a SIM Card or SD Card? Open the rubber flap with the “SD” and “SIM” acronyms marked on it (on the
right side), pulling its tongue gently to the right. The tongue is that small part protruding from one end of the flap
([12]).
Turn the card upside down (label side oriented downward) (see SIM card in [13]), then push it in until you hear a click.
Put the rubber flap back in place. This is a five-step operation to be observed with care. The inner side of the flap is
fitted with molded parts (see [14]) that are intended to fit into the card slots. Starting from the flap hinge, these
should be inserted successively into:
• The block the closest to the hinge ([15])
• The SIM card slot ([16])
• The SD card slot ([17])
• The second block ([18])
• Then run a thumb along the flap, starting from the hinge and all the way to the other end, exerting pressure as
many times as necessary to make sure the flap is thoroughly inserted.
Set up the receiver and data collector on a range pole (rover) or a tripod (base):
• Measure the instrument height.
• Turn on the receiver by pressing for about 2 sec. The status LED of the battery being used turns solid green.
Let the receiver boot.
• Meanwhile, turn on the data collector and run your field software.
Start your survey: Follow the instructions given by the field software to run your survey.
Battery monitoring: The two batteries are used one after the other. The status LED of the battery being drained is
first solid green. (If the two LEDs are solid green, it is the control display that tells you which battery is currently used:
an arrow is shown by the corresponding battery icon.) When the battery used is getting low, the corresponding LED
starts blinking green slowly, and then more quickly. Power will automatically switch from the low battery to the fresh
one when it’s time, without causing any disruption in receiver operation. You may then replace the low battery with a
fresh one. This will not affect receiver operation either.
Ending the survey: Press for about 2 seconds to turn off the receiver.
WARNING - Charge and use the rechargeable Li-ion batteries only in strict accordance with the instructions. Charging or using the
batteries in an unauthorized equipment may cause an explosion or fire, and can result in personal injury or/and equipment damage.
NEED MORE INFORMATION? Please download the SP85 User Guide from our website:
https://spectrageospatial.com/sp85-gnss-receiver/
SP85 Quick Start Guide- - - - - - - - - - - - - - - - - - - page 2
Guía de referencia rápida SP85 - - - - - - - - -página 3
Guide de démarrage SP85 - - - - - - - - - - - - - - - - page 4
Guia de iniciação rápida SP85 - - - - - - - - - - -página 5
SP85 Kurzanleitung- - - - - - - - - - - - - - - - - - - - - - - -Seite 6
Compartimento
de la pila A
LED de estado
de la pila A
LED de estado
de la pila B
Botón de encendido
Pantalla de
supervisión
Botón de
desplazamiento
Botón Registro
Compartimento
de la pila B
Amortiguador
Oricio roscado de 5/8”
Conector de
alimentación/datos
Battery A
Compartment
Battery A
Status LED
Battery B
Status LED
Power On/O
Button
Monitor
Screen
Scroll Button
Log Button
Battery B
Compartment
Shock Absorber
5/8”Threaded Insert
Power/Data
Connector
Regulatory Compliance: SP85 complies with the following international regulations: CE,
FCC,IC, ROHS, SAR and more. All details and official certificates can be found in the User
Guide available on https://spectrageospatial.com/sp85-gnss-receiver/.
Quick Start Guide P/N 119788, rev A - May 2019
[1]
[2]
[3]
[4]
[5]
[6]
[7]
[8]
[9]
[11]
[10]
[12]
[13]
[17] [16] [15]
[18]
[14]

Français
4
Brasileiro
5
Deutsch
6
Préparer le chargeur de batteries :
• Connecter le câble de sortie ([1]) du bloc alimentation secteur ([2]) à l’entrée ([3]) du chargeur de batteries.
• Choisir le cordon d’alimentation ([4]) qui convient dans le pays d’utilisation.
• Connecter l’extrémité du cordon secteur à l’entrée ([5]) du bloc alimentation secteur, et l’autre ([6]) à une prise
secteur. Le chargeur de batteries est alors alimenté, et le voyant POWER s’allume (vert fixe).
Insérer les deux batteries ([7]) sur le chargeur de batteries (orienter correctement les batteries au préalable). Pour
chaque batterie, le voyant CONTACT passe à l’orange fixe une fois la batterie détectée. Le voyant CHARGE se met
ensuite à clignoter rapidement en vert pour indiquer que la batterie est en cours de charge.
Les batteries se chargent en même temps. Cette opération dure quelques heures. Lorsqu’une batterie arrive en fin
de charge, le voyant CHARGE passe au vert fixe.
Retirer les batteries du chargeur lorsque les deux sont complètement chargées.
Insérer les batteries dans le récepteur :
• Mettre le récepteur à l’envers.
• Utiliser un doigt pour pousser le verrou vers l’intérieur (voir [8]) et ainsi libérer la trappe du compartiment, puis
tirer pour ouvrir (voir [9]).
•
Donner la bonne orientation à la batterie, l’appuyer contre le bord intérieur droit du compartiment, puis l’enfoncer
dans le compartiment (voir
[10]
) de manière à ce qu’elle s’engage correctement dans les quatre taquets de guidage
.
• Pousser la batterie à fond à gauche ce qui enclenche un mécanisme de blocage sous la batterie (voir [11]).
• Fermer la trappe batterie. S’assurer que le verrou est bien fermé.
• Remettre le récepteur à l’endroit.
Besoin d’insérer une carte SIM ou une carte SD ? Ouvrir le rabat flexible sur lequel sont marqués les sigles “SD” et
“SIM” (côté droit), en tirant doucement sur la languette vers la droite. La languette est cette petite partie qui dépasse
d’une extrémité du rabat ([12]).
Retourner la carte (côté marquage orienté vers le bas) (voir [13]), puis l’enfoncer dans le lecteur, jusqu’à entendre un
“clic”.
Remettre le rabat flexible en place. Cette opération se passe en cinq étapes, à suivre avec précaution. La partie
interne du rabat comporte des parties moulées (voir [14]) qui sont supposées rentrer dans les lecteurs de carte. En
partant de la charnière du rabat, ces parties moulées doivent être insérées successivement dans :
• Le plot le plus proche de la charnière ([15])
• Le lecteur de carte SIM ([16])
• Le lecteur de carte SD ([17])
•Ledeuxièmeplot([18])
• Puis déplacer un pouce sur tout le rabat, en partant de la charnière et jusqu’à l’autre extrémité, en y exerçant une
pression aussi souvent que nécessaire afin de s’assurer que le rabat est partout correctement inséré.
Installer le récepteur et le carnet de terrain sur une canne (mobile) ou sur un trépied (base) :
• Mesurer la hauteur d’instrument.
• Mettre le récepteur sous tension en appuyant environ 2 sec. sur . Le voyant d’état de la batterie utilisée
s’allume (vert fixe). Attendre que le récepteur termine sa phase de démarrage.
• Pendant ce temps, mettre le carnet de terrain sous tension et lancer le logiciel terrain.
Démarrer le levé : Suivre les instructions données par votre carnet de terrain pour effectuer le levé.
Surveillance des batteries
: Les deux batteries sont utilisées l’une après l’autre. Le voyant de la batterie utilisée est
d’abord vert fixe. (Si les deux voyants son au vert fixe, c’est l’écran de contrôle qui indique quelle batterie est en cours
d’utilisation : une flèche apparaît près de l’icône de la batterie utilisée.) Lorsque la charge restante dans la batterie uti-
lisée diminue de manière importante, le voyant vert correspondant commence à clignoter lentement, puis plus rapide-
ment. L’alimentation va alors, à un moment donné, passer automatiquement de la batterie faible vers la batterie
pleine, sans provoquer d’interruption dans le fonctionnement du récepteur. Vous pouvez alors éventuellement rempla-
cer la batterie déchargée. Cette opération n’aura également aucun impact sur le fonctionnement du récepteur.
Terminer le levé : Appuyer pendant environ 2 secondes sur pour éteindre le récepteur.
ATTENTION - Ne charger et n’utiliser les batteries rechargeables Li-ion qu’en respectant scrupuleusement les instructions fournies.
Le chargement et l’utilisation des batteries dans un appareil non autorisé peut provoquer une explosion ou un incendie, blesser l’opé-
rateur ou endommager l‘appareil. BESOIN DE PLUS D’INFORMATIONS ? Merci de télécharger le Guide Utilisateur SP85 depuis notre site
Internet à l’adresse : https://spectrageospatial.com/sp85-gnss-receiver/
Configure o carregador da bateria:
• Conecte o cabo de saída ([1]) do módulo de energia CA/CC ([2]) à entrada do carregadorde bateria ([3]).
• Escolha o cabo de energia ([4]) que seja adequado em seu país.
• Conecte uma extremidade do cabo de energia à entrada ([5]), do módulo CA/CC e a outra a uma tomada elétrica
([6]). O carregador da bateria será alimentado, fazendo com que o LED de ENERGIA se acenda na cor verde.
Insira as duas baterias ([7]) no carregador da bateria (coloque a bateria na posição correta). Para cada bateria, o
LED DE CONTATO ficará na cor laranja quando a bateria for detectada. O LED DE CARREGAMENTO começará a piscar
rapidamente em verde para indicar que a bateria está sendo carregada.
As baterias carregam simultaneamente. Isso levará algumas horas. Quando uma bateria estiver totalmente carre-
gada, o LED DE CARREGAMENTO correspondente ficará verde.
Remova as baterias do carregador quando elas estiverem totalmente carregadas.
Insira as baterias no receptor:
• Vire o receptor de cabeça para baixo.
• Com o dedo, empurre o gancho de encaixe para dentro (consulte [8]) para destravar a porta do compartimento e
puxe para abrir (consulte [9]).
• Coloque a bateria na posição correta, apoie-a contra o lado direito interno do compartimento e empurre-a para
dentro (consulte [10]) para que ela se encaixe nas quatro abas de apoio.
• Empurre a bateria totalmente para a esquerda. Isso irá liberar um mecanismo de travamento sob a bateria (con-
sulte [11]).
• Feche a porta. Garanta que o gancho de encaixe esteja travado.
• Vire o receptor para cima, na posição correta.
Precisa inserir um cartão SIM ou SD? Abra a aba de borracha com as inicias “SD” e “SIM” (do lado direito), puxando a
lingueta com cuidado para a direita. A lingueta é aquela pequena parte saliente que fica na extremidade da aba ([12]).
Vire o cartão de cabeça para baixo (com o lado da etiqueta para baixo) (consulte “Cartão SIM em [13]), e empurre-o
até ouvir um clique.
Coloque a aba de borracha no lugar novamente. Essa é uma operação de cinco etapas que deve ser feita com cui-
dado. O lado de dentro da aba conta com partes moldadas (consulte [14]) feitas para se acomodarem nos espaços do
cartão. A partir da articulação da aba, estes devem ser inseridos sucessivamente nos seguintes espaços:
• O bloco, o mais próximo da articulação ([15])
• O espaço do cartão SIM ([16])
• O espaço do cartão SD ([17])
• O segundo bloco ([18])
• Corra o dedo ao longo da aba, da articulação até a outra extremidade, exercendo pressão quantas vezes for neces-
sário para garantir que a aba esteja perfeitamente inserida.
Apoie o receptor e o coletor de dados em uma haste de extensão (rover) ou em um tripé (base):
• Meça a altura do instrumento.
• Ligue o receptor pressionando por cerca de 2 segundos. O LED de estado da bateria em uso fica verde.
Espere o receptor inicializar.
• Ligue o coletor de dados e execute o seu software de campo.
Comece a medição: Siga as instruções dadas pelo software de campo para rodar a pesquisa.
Monitoramento da bateria: As duas baterias serão usadas uma após a outra. O LED de estado da bateria usada fica
primeiro na cor verde. (Caso os dois LEDs estejam verdes, será o monitor de controle que indicará qual bateria está
sendo atualmente usada: uma seta é exibida pelo ícone da bateria correspondente.) Quando a energia da bateria
usada estiver baixa, o LED correspondente começa a piscar lentamente em verde e depois mais rapidamente. A ali-
mentação irá, automaticamente e no momento adequado, mudar da bateria com baixa energia para a bateria carre-
gada, sem causar qualquer interrupção na operação do receptor. Depois, você poderá substituir a bateria
descarregada por uma nova. Isso não afetará a operação do receptor.
Finalizando a pesquisa: Mantenha pressionado por cerca de 2 segundos para desligar o receptor.
AVISO - Carregue e use a bateria recarregável de íon-Lítio estritamente de acordo com as instruções. Carregar ou usar as baterias
em um equipamento não autorizado pode causar explosão ou incêndio e resultar em danos físicos e/ou à propriedade. PRECISA DE
MAIS INFORMAÇÕES? Baixe o Guia do Usuário do SP85 no nosso site: https://spectrageospatial.com/sp85-gnss-receiver/
Vorbereiten des Ladegeräts:
• Verbinden Sie das Anschlusskabel ([1]) des Netzteils ([2]) mit dem Eingang des Ladegeräts ([3]).
• Wählen Sie die passende Netzanschlussleitung ([4]) für Ihr Land.
• Verbinden Sie das Ende der Netzanschlussleitung mit dem Eingang des Netzteils ([5]) und das andere Ende mit
einer Steckdose ([6]). Das Ladegerät wird nun mit Strom versorgt; die Betriebs-LED „POWER“ leuchtet grün.
Legen Sie die beiden Akkus ([7]) in das Ladegerät ein (achten Sie auf korrekte Polung). Für jeden erkannten Akku
leuchtet die Kontakt-LED „CONTACT“ orangefarben. Ein schnelles grünes Blinken der Lade-LED „CHARGE“ zeigt an,
dass der Akku geladen wird.
Die Akkus werden gleichzeitig geladen.Dieskann ein paar Stunden dauern. Sobald ein Akku voll geladen ist,
leuchtet die zugehörige Lade-LED dauerhaft grün.
Nehmen Sie die Akkus aus dem Ladegerät heraus, sobald beide vollständig geladen sind.
Einlegen des Akkus in den Empfänger:
• Stellen Sie den Empfänger auf den Kopf.
• Drücken Sie den Schnappverschluss mit einem Finger nach innen (siehe [8]), um das Akkufach zu öffnen, und zie-
hen Sie die Klappe auf (siehe [9]).
• Achten Sie auf die Polarität und legen Sie den Akku an der rechten Innenseite des Fachs an. Drücken Sie ihn dann
nach unten (siehe [10]) auf die vier Führungsnasen.
• Drücken Sie den Akku nun ganz nach links. Dabei wird eine Verriegelung unter dem Akku freigegeben (siehe [11])
• Schließen Sie den Fachdeckel. Achten Sie darauf, dass der Schnappverschluss einrastet.
• Stellen Sie den Empfänger wieder richtig hin.
Einlegen von SIM-Karte oder SD-Speicherkarte: Öffnen Sie die mit „SD“ und „SIM“ markierte Gummiabdeckung (an
der rechten Seite), indem Sie die Zunge vorsichtig nach rechts ziehen. Die Zunge ist der kleine Gummifortsatz am
Ende der Abdeckung ([12]).
Halten Sie die Karte mit der Oberseite (bedruckte Seite) nach unten (vgl. SIM-Karte in
[13]
) und drücken Sie sie hinein,
bis ein Klicken ertönt. Schließen Sie die Gummiabdeckung. Befolgen Sie die beschriebenen fünf Schritte sorgfältig. Die
Innenseite der Abdeckung weist eine spezielle Form auf (siehe
[14])
, sodass die Kartenschächte dicht verschlossen
werden. Ausgehend vom „Scharnier“ der Abdeckung greifen diese Formteile nacheinander in folgende Gegenstücke:
• den Block direkt neben dem Scharnier ([15])
• den SIM-Kartenschacht ([16])
• den SD-Karteneinschub ([17])
• den zweiten Block ([18])
• Drücken Sie dann beginnend am Scharnier mit dem Daumen auf die Abdeckung und ziehen Sie den Daumen bis
zum anderen Ende; üben Sie dabei beständig Druck aus und wiederholen Sie den Vorgang, bis die Abdeckung voll-
ständig in alle Gegenstücke eingerastet ist.
Befestigen von Empfänger und Datenerfassungsgerät
an einem Antennenstab (Rover) bzw. auf einem Stativ (Basis):
• Messen Sie die Instrumentenhöhe.
• Schalten Sie den Empfänger durch etwa zwei Sekunden langes Drücken der Taste ein. Die Status-LED
des aktiven Akkus leuchtet grün. Warten Sie, bis der Empfänger gestartet ist.
• Schalten Sie in der Zwischenzeit das Datenerfassungsgerät ein und starten Sie Ihre Außendienstsoftware.
Ausführen der Messung: Befolgen Sie die Anleitungen der Außendienstsoftware, um die Messung durchzuführen.
Überwachen des Akkuzustands: Die beiden Akkus werden nacheinander verwendet. Die Status-LED des aktiven
Akkus leuchtet zu Beginn grün. (Wenn beide LEDs grün leuchten, zeigt ein Pfeil am Display den aktiven Akku an.)
Sobald der Akku schwächer wird, blinkt die jeweilige LED zuerst langsam, dann immer schneller grün. Die Umschal-
tung vom nahezu entladenen auf den vollen Akku erfolgt automatisch ohne Unterbrechung des Empfängerbetriebs.
Sie können nun den leeren Akku durch einen vollen ersetzen. Auch das ist im laufenden Betrieb möglich.
Beenden der Messung
: Drücken Sie etwa zwei Sekunden lang auf die Taste , um den Empfänger auszuschalten.
ACHTUNG - Laden und verwenden Sie aufladbare Lithium-Ionen-Akkus nur gemäß den Anleitungen. Das Laden oder Verwenden des Akkus
mit nicht dafür vorgesehenen Geräten kann Explosionen oder Brände verursachen und so zu Verletzungen oder Sachschäden führen.
WEITERE INFORMATIONEN finden Sie in der Bedienungsanleitung zum SP85, die Sie auf unserer Website herunterladen können::
https://spectrageospatial.com/sp85-gnss-receiver/
Compartiment
batterie A
Voyant état
batterie A
Voyant état
batterie B
Bouton
Marche/Arrêt
Ecran de
contrôle
Bouton délement
Bouton
enregistrement
Compartiment
batterie B
Ceinture
anti-chocs
Embout 5/8”
Connecteur
Alim/Données
Compartimento
da bateria A
LED de estado
da bateria A
LED de estado
da bateria B
Botão liga/desliga
Tela de
monitoramento
Botão de rolagem
Botão de gravação
Compartimento
da bateria B
Sistema antichoque
Orifício roscado de 5/8”
Conector de
Alimentação/Dados
Fach für
Akku A
Status-LED
für Akku A
Status-LED für
Akku B
Betriebstaste
Display
Navigationstaste
Aufzeichnungstaste
Fach für Akku B
Stoßdämpfendes
Gummi
5/8-Zoll-Innengewindeeinsatz
Strom-/Datenanschluss
Regulatory Compliance: SP85 complies with the following international regulations: CE,
FCC, IC, ROHS, SAR and more. All details and official certificates can be found in the User
Guide available on https://spectrageospatial.com/sp85-gnss-receiver/.
Quick Start Guide P/N 119788, rev A - May 2019
[1]
[2]
[3]
[4]
[5]
[6]
[7]
[8]
[9]
[11]
[10]
[12]
[13]
[17] [16] [15]
[18]
[14]
Other Spectra Geospatial Receiver manuals
Popular Receiver manuals by other brands

Lindsay Broadband
Lindsay Broadband LB-1000-RR user manual
Hallicrafters
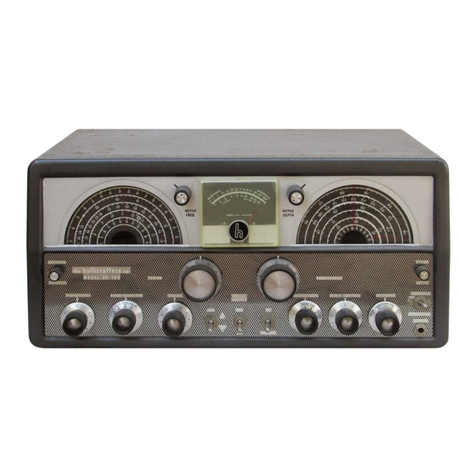
Hallicrafters SX-100 MARK IA Operating and service instructions
Arris
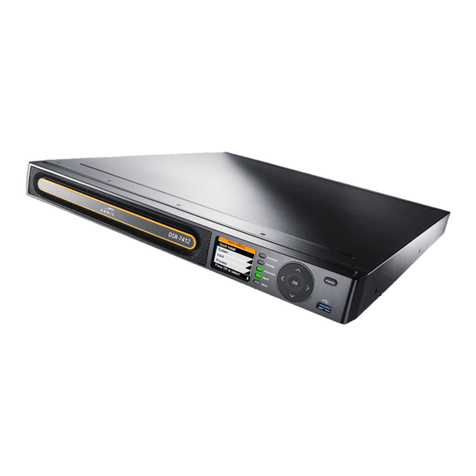
Arris DSR-7400 Series quick start guide
Sony
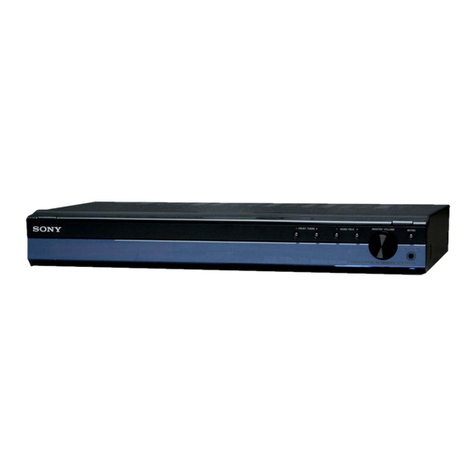
Sony STR-KS2000 - Blu-ray Dvd Receiver Component Service manual
Yaesu
Yaesu FT-2500M Code guide
Harman Kardon
Harman Kardon AVR 5500 owner's manual
