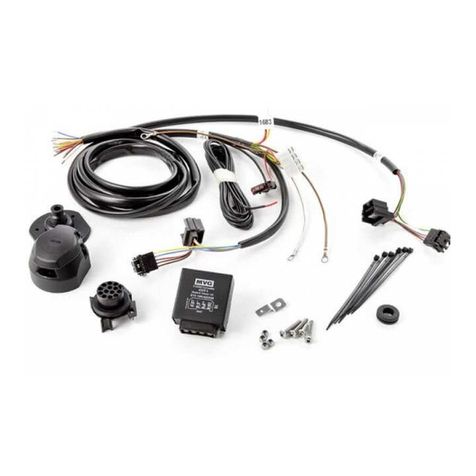
Speedsignal B-339TY01 User manual

EINBAUANLEITUNG
Installation Guide
RunLock
Toyota Hilux VIII. Gen. (2015-)
nur für Fahrzeuge mit analogem Zündschloss
only for vehicles with analogue ignition lock
Art. Nr. B-339TY01
Carl-von-Ossietzky-Straße 3 Fax: +49 8061 49518 – 10 Homepage: www.speedsignal.de
D- 83043 Bad Aibling facebook: facebook.com/speedsignal
10R – 04 5004

B-339TY01 0 2
Sicherheitshinweise - safety instructions
Der Einbau dieses Artikels darf nur von geschultem Fachpersonal vorgenommen werden und nur nach der in dieser
Anleitung beschriebenen Vorgehensweise.
Die speedsignal GmbH übernimmt keinerlei Haftung für Personen- oder Sachschäden, die mit dem Missbrauch unserer
Produkte im Zusammenhang stehen.
Vor der Montage bitte die Batterie abklemmen. Beim Einbau müssen alle zusätzlichen Versorgungsleitungen ent-
sprechend ihres Querschnittes und ihrer Kabellänge abgesichert werden. (DIN VDE 0298-4)
The installation of this product should only be carried out by trained specialist personnel and in accordance with this manual.
speedsignal GmbH cannot accept any liability for injury to persons or damage to property from errors or mistakes in this operating
manual.
Please disconnect the battery before you start with the installation. During montage, all additional supply lines must be secured
pursuant to their cross section and cable length. (DIN VDE 0298-4)
Beschreibung - description
Die Motorweiterlaufschaltung ist eine elektrische Schaltung bei Kraftfahrzeugen, die es ermöglicht, den Zündschlüs-
sel aus dem Zündschloss abzuziehen, ohne den Motor abzustellen. Je nach Fahrzeugtyp und -ausstattung lassen sich
auch die Türen verriegeln, ohne dass der Motorlauf unterbrochen wird.
Die Motorweiterlaufschaltung ist in erster Linie für Behördenfahrzeuge in Ausübung ihrer dienstlichen Pflicht vorgese-
hen. Beim Einbau in andere Fahrzeuge als Behördenfahrzeuge weisen wir darauf hin, dass ein unnötiges Laufenlassen
von Fahrzeugmotoren nach §30 I StVO verboten ist.
RunLock is an electrical circuit for vehicles, which enables you to remove the ignition key without switching of the engine. Ac-
cording to vehicle type and equipment, you can even lock the doors without interrupting the engine run.
Primarily it is intended for the use within authority vehicles in exercise of their duties.
For the installation into other vehicles (not authority) we point out that an unnecessary engine run is forbidden by law in many
countries such as in Germany according to StVO §30.
Lieferumfang – scope of delivery
8
Interface Hauptkabelsatz ER 70 RunLock- Taster
main cable set RunLock- button
3470048 C-3470048 340116 6003131
Benötigtes Werkzeug - Required tools
Torxschrauber Ausbauwerkzeug Bohrmaschine Lötkolben
Torx screwdriver removal tool drill soldering irons
Ø 12mm

B-339TY01 0 3
Abgriffpunkte – tap points
Lenkrad Tacho Fahrerfußraum Beifahrerfußraum
Steering wheel speedometer driver's footwell passenger footwell
Start-Stop-Taster
Start-Stop button
Abgriffpunkt A – Zündung - Tap Point A – ignition lock
Lenkradabdeckung entfernen. Hierzu müssen zwei Originales graues (PIN 3), gelbes (PIN 8) und rotes
Schrauben gelöst werden. Weißen Stecker an der Kabel (PIN 5) mit dem gelieferten Kabelsatz,
rechten Seite des Lenkgestänges abstecken. technisch einwandfrei am Fahrzeug verbinden.
Remove the steering wheel cover. To do this, Connect the grey (PIN 3), yellow (PIN 8) and red
remove two screws. Disconnect the white plug on (PIN 5) cables of the original cables to the supplied
the right side of the steering wheel. cable set, technically correct on the vehicle.
A
C
B
D
PIN 5
PIN
3
PIN
8
E

B-339TY01 0 4
Abgriffpunkt B CAN-Bus – Tacho - Tap Point B CAN-Bus – speedometer
4 Schrauben (Kreuzschlitz) lösen und Tacho heraus- Weiß-braunes Kabel des gelieferten Kabelsatzes,
nehmen. Der Abgriffpunkt befindet sich an der Rückseite. technisch einwandfrei mit CAN Low (PIN 35), sowie
Loosen 4 Phillips-head screws and remove speedometer weiß-gelbes Kabel (CAN High (PIN 36) des Fahr-
The tap point is located at the rear. zeuges verbinden.
Connect the white-brown of the supplied cable set
with CAN Low (PIN 35) and the white-yellow cable
to the CAN High (PIN 36) of the vehicle technically
correct.
Abgriffpunkt C – Fahrerfußraum - Tap Point C – driver's footwell
Abgriffpunkt befindet sich hinter den Abdeckungen. Masse des gelieferten Kabelsatz an Karosserie an-
Erreichbar durch den Fahrerfußraum. bringen
The tap point is located behind the covers. Attach the ground of the supplied cable set to the
Accessible through the driver's footwell. bodywork.
CAN High
PIN 36 CAN Low
PIN 35

B-339TY01 0 5
Grünes (PIN 5 unlock) und blaues Kabel (PIN 15 lock) des gelieferten Kabelsatzes, technisch einwandfrei mit den
gleichfarbigen originalen Kabeln am Fahrzeug verbinden.
Connect the green (PIN 5 unlock) and blue (PIN 15 lock) cable of the original cables to the supplied cable set, techni-
cally correct, on the vehicle.
Abgriffpunkt D - Beifahrerfußraum - Tap point D - passenger footwell
Abgriff befindet sich hinter dem Handschuhfach. Originales weißes Kabel (PIN 2) mit dem
Weißer Stecker rechts oben. gelieferten Kabelsatz, technisch einwandfrei, am
Tap is located behind the glove compartment. Fahrzeug verbinden.
White plug top right. Connect the white cable (PIN 2) of the original cable
with the supplied cable set, technically correct, to
the vehicle.
Abgriffpunkt E - Start-Stop-Taster - Tap point E - Start-Stop button
Originales Lila Kabel (PIN 8) mit dem gelieferten Kabelsatz, technisch einwandfrei, am Fahrzeug verbinden.
Connect the original purple cable (PIN 8) with the supplied cable set, technically correct, to the vehicle.
PIN 5
unlock
PIN 15
lock
PIN
2
PIN 8

B-339TY01 0 6
PIN Belegung Kabelsatz Stecker - PIN Assignment Cable set Connector
Anschlussbelegung 12-poliger Minifit-Stecker
Pin assignment 12-pin Minifit connector
Ein-/Ausgang
Input/output
Bezeichnung
designation
Kabelfarbe
Cable colour
Bemerkung
remark
1 Eingang input Masse ground braun brown Masse RunLock-Taster
Ground RunLock button
2 Eingang input Masse ground braun brown Masse RunLock-Taster
Ground RunLock button
3 Ausgang output Output RunLock 3 orange Ansteuerung ER70
4 Ausgang output Output LED grün green Ausgang +12 V (Anzeige RunLock)
Output +12 V (Display RunLock)
5 Eingang input Remote-Signal weiß white Auf- & Zusperrsignal Open & close signal
6 Eingang input CAN Low weiß-braun
white-brown
Siehe Seite 4, Abgriffpunkt B
See page 4, tapping point B
7 Eingang input Stromversorgung +12 V
Power supply +12 V rot red Anschluss an Klemme 30,
Connection to clamp 30,
8 Eingang input GND Impuls GND Impulse
Lila purple Start-Stop De-/Aktivierung
Start-Stop Deactivation/Activation
9 Ausgang output Output RunLock 1 grau Ausgang +12 V (RunLock aktiv), siehe Seite 3
Output +12 V (RunLock active), see table page 3
10 nicht belegt
not assigned --- --- ---
11 nicht belegt
not assigned --- --- ---
12 Eingang input CAN High weiß-gelb
white-yellow
Siehe Seite 4, Abgriffpunkt B
See page 4, tapping point B
Anschlussbelegung 4-poliger Minifit-Stecker
Pin assignment 4-pin Minifit connector
Ein-/Ausgang
Input/output
Bezeichnung
designation
Kabelfarbe
Cable colour
Bemerkung
remark
1 Eingang input Masse ground braun brown Masse ground
2 nicht belegt not assigned speeren blau blue ---
3 Eingang input Taster in button in lila purple RunLock-Taster RunLock button
4 nicht belegt not assigned speeren grün green ---
Installation Taster 6003131 - Installation of the RunLock button 6003131
Der RunLock-Taster 6003131 kann auf einer freien Schaltfläche installiert werden. Den Taster dazu in einer Öffnung
mit 12mm Durchmesser anbringen. Diese Öffnung muss gegebenenfalls gebohrt werden.
The RunLock button 6003131 can be installed on a free button. To do this, place the button in an opening with a diameter of 12
mm. This opening must be drilled if necessary.
Ø
12mm
TX 20

B-339TY01 0 7
Funktionsprüfung - functional test
Für eine erfolgreiche Aktivierung der Motorweiterlaufschaltung sind folgende Schritte notwendig:
1. Motor starten
2. Handbremse anziehen
3. Leerlauf einlegen / bei Automatik auf Stellung „P“ stellen
4. Füße von den Pedalen nehmen
5. RunLock-Taster drücken
6. Schlüssel abziehen
7. aus dem Fahrzeug steigen
8. Türe verschließen
Zur Deaktivierung der Motorweiterlaufschaltung beachten Sie bitte folgende Vorgehensweise:
1. Fahrzeug entsperren
2. Zündschlüssel wieder in das Zündschloss stecken und auf Position II stellen
3. RunLock-Taster drücken
Bei Betätigung des Brems- oder Kupplungspedals VOR dem Ausschalten der Motorweiterlaufschaltung UND/ODER
dem Einstecken des Zündschlüssels auf Position II schaltet sich der Motor automatisch aus.
Leucht- und Blinkverhalten des RunLock-Tasters:
Taster blinkt: Alle Voraussetzungen für die Aktivierung der Motorweiterlaufschaltung sind gegeben.
Taster leuchtet durchgehend: Die Motorweiterlaufschaltung ist erfolgreich aktiviert.
Taster leuchtet nicht mehr: Die Motorweiterlaufschaltung ist erfolgreich deaktiviert.
The following steps are necessary for successful activation of the RunLock:
1. start the engine
2. pull the hand brake
3. shift into neutral / automatic: switch to parking position
4. remove your feet from the pedals
5. push the RunLock button
6. remove key
7. get out of car
8. lock the doors of vehicle
For deactivating RunLock please observe the following procedure:
1. unlock the vehicle doors
2. insert the key in the ignition switch and turn it to position II
3. push the RunLock button
The engine will shut off if you touch the pedals before you deactivate the RunLock and/or insert key to ignition switch to posi-
tion II.
Illumination and flashing behaviour of RunLock button:
button flashes: All conditions for activating the RunLock are fulfilled.
button illuminates constantly: RunLock is activated successfully
button does not illuminate: RunLock is deactivated successfully

B-339TY01 0 8
Garantiebestimmungen:
Die speedsignal GmbH gewährleistet innerhalb der gesetzlichen Frist von 2 Jahren ab Datum des Erstkaufes, dass dieses
Produkt frei von Materialfehlern und Verarbeitungsfehlern ist, sofern dieses Produkt unseren Vorgaben entsprechend
verbaut wurde.
Sollten Reparaturen durch Verarbeitungsfehler oder Fehlfunktionen des Produktes innerhalb der Gewährleistungsfrist
nötig sein, wird die speedsignal GmbH das Produkt reparieren oder durch ein fehlerfreies Produkt ersetzen. Um die
Gewährleistung beanspruchen zu können, benötigen Sie einen Kaufbeleg.
Der Garantieanspruch erlischt durch:
unbefugte Änderungen am Gerät oder Zubehör
selbst ausgeführte Reparaturen am Gerät
unsachgemäße Nutzung bzw. Betrieb
Gewalteinwirkung auf das Gerät (Herabfallen, mutwillige Zerstörung, Unfall, etc.)
Beachten Sie beim Einbau alle sicherheitsrelevanten und gesetzmäßigen Bestimmungen.
Bitte beachten Sie generell beim Einbau von elektronischen Baugruppen in Fahrzeugen die Einbaurichtlinien und Ga-
rantiebestimmungen des Fahrzeugherstellers.
Sie müssen auf jeden Fall den Auftraggeber (Fahrzeughalter) auf den Einbau eines Interfaces aufmerksam machen und
über die Risiken aufklären.
Es empfiehlt sich, mit dem Fahrzeughersteller oder einer seiner Vertragswerkstätten Kontakt aufzunehmen, um Risi-
ken auszuschließen.
speedsignal GmbH guarantees within the legal deadline of 2 years from the original date of purchase that this product is free from
defects in material and workmanship as long as this product was installed similar to our installation guide.
If repairs of processing errors or malfunctions of this product are necessary within the warranty period, speedsignal will repair the
product or replace it with a flawless product. To be able to assert the benefit of these provisions, you need the proof of purchase.
Warranty claim and operating license lapses:
unauthorised changes on the device or accessory
self-initiated repairs at the device
improper use or operation
violent impacts to the device (fall down, wanton destruction, accident, etc.)
For installation, please notice all safety and legal regulations.
When installing electronic assemblies into vehicles please note the installation guidelines and warranty conditions of the vehicle
manufacturer.
In any case, you have to inform the principal (vehicle owner) about the installation of this interface and about all risks.
It is therefore recommended to get in contact with the vehicle manufacturer or with an authorized workshop to exclude any risks.
Carl-von-Ossietzky-Straße 3 Fax: +49 8061 49518 – 10 Homepage: www.speedsignal.de
D- 83043 Bad Aibling facebook: facebook.com/speedsignal
Table of contents
Other Speedsignal Automobile Electronic manuals
Popular Automobile Electronic manuals by other brands
Alpine
Alpine DPR-RDS1 owner's manual
BFT
BFT STOPPY MBB 219 - 500.C Installation and user manual

Dynojet
Dynojet POWER VISION PV3-1604C install guide
Fangscoo-alarm
Fangscoo-alarm TK103 user manual
Dakota Digital
Dakota Digital LED Tail Lights for 1969 Chevelle LAT-NR310 installation instructions
ZYLUX
ZYLUX TygerDog TD1000A-X user guide
