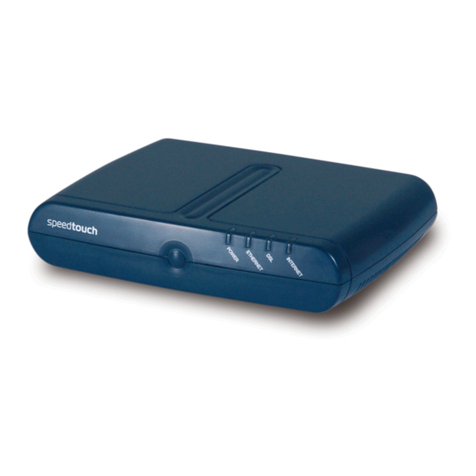
Speedtouch 605 Assembly instructions

SpeedTouch™608 WL/620
SpeedTouch™
605/608/608 WL/620
(Wireless) Business DSL Routers
Installation and Setup Guide
Power
Ethernet
WLAN
Plug-in
ISDN
Internet
DSL

Your SpeedTouch™ product is designed and tested to meet the latest safety standards. However,
to ensure safe use of this product, it is important that the Safety Instructions and Regulatory Notic-
es contained in the enclosed SpeedTouch™ Setup CD-ROM and/or Safety and Regulatory booklet
are read, and complied with carefully, before installing the product.
Votre produit SpeedTouch™ a été conçu et testé en vue de répondre aux dernières normes en mat-
ière de sécurité. Pour garantir l'utilisation adéquate du produit, il est cependant indispensable de
lire et de se conformer aux consignes de sécurité et informations réglementaires contenues sur le
CD-ROM d'installation du SpeedTouch™ et/ou dans la brochure intitulée Consignes de sécurité et
informations réglementaires, et ce, préalablement à l'installation du produit.
Dieses SpeedTouch™ Gerät wurde nach den neuesten Sicherheitsstandards entwickelt und
getestet. Die ordnungsgemäße Verwendung dieses Geräts kann jedoch nur sichergestellt werden,
wenn Sie die Sicherheitshinweise und Zulassungsbestimmungen auf der SpeedTouch™ Setup CD-
ROM und/oder in der Broschüre mit Sicherheitshinweisen und Zulassungsbestimmungen lesen
und genau beachten, bevor Sie das Gerät installieren.
Su producto SpeedTouch™ está diseñado y probado para cumplir los últimos estándares de seg-
uridad. En cualquier caso, para asegurar una utilización segura de este producto, es importante leer
y cumplir cuidadosamente las Instrucciones de seguridad y la Información sobre regulaciones con-
tenidas en el CD de instalación de SpeedTouch™ antes de instalar el producto.
Seu produto SpeedTouch™ foi desenvolvido e testado para atender os últimos padrões de seg-
urança. No entanto, para garantir que esse produto seja utilizado com segurança, é importante que
as Instruções de segurança e Informações sobre normas contidas no folheto e/ou no CD-ROM de
instalação do SpeedTouch™ sejam lidas e entendidas, antes de instalar o produto.
Il prodotto SpeedTouch™ è stato progettato e testato in conformità ai più moderni standard di si-
curezza. Tuttavia, per garantire un utilizzo sicuro di questo prodotto, prima di procedere con l'in-
stallazione, è importante leggere attentamente e rispettare le Precauzioni di sicurezza e
informazioni sulla normativa contenute nel CD-ROM di installazione di SpeedTouch™ allegato e/o
l'opuscolo Safety and Regulatory (Sicurezza e normative).
Uw SpeedTouch™ product is ontworpen en getest volgens de nieuwste veiligheidsnormen. Om
echter een veilig gebruik van dit product te garanderen, is het belangrijk dat de Veiligheidsvoor-
schriften en Regelgevingsinformatie op de bijgevoegde installatie-cd van de SpeedTouch™en/of
de Veiligheidsvoorschriften en Regelgevingsbrochure gelezen en strikt nageleefd worden voora-
leer het product geïnstalleerd wordt.
SpeedTouch™-produkten har utvecklats och testats för att uppfylla de senaste säkerhetsstandard-
erna. Det är ändå mycket viktigt att du noggrant läser och följer säkerhetsinstruktionerna och
föreskrifterna i installations-CD-ROM:en för SpeedTouch™ och/eller häftet med säkerhetsinstruk-
tioner och föreskrifter innan du installerar produkten.
EN
FR
DE
ES
PT
IT
NL
SV

SpeedTouch™
605/608/
608 WL/620
Installation and Setup Guide

Copyright
Copyright ©1999-2006 THOMSON. All rights reserved.
Distribution and copying of this document, use and communication of its contents is not permitted without written authorization
from THOMSON. The content of this document is furnished for informational use only, may be subject to change without notice,
and should not be construed as a commitment by THOMSON. THOMSON assumes no responsibility or liability for any errors or
inaccuracies that may appear in this document.
Thomson Telecom Belgium
Prins Boudewijnlaan, 47
B-2650 Edegem
Belgium
www.speedtouch.com
Trademarks
The following trademarks are used in this document:
SpeedTouch™ is a trademark of THOMSON.
DECT is a trademark of ETSI.
Bluetooth® word mark and logos are owned by the Bluetooth SIG, Inc.
Ethernet™ is a trademark of Xerox Corporation.
Wi-Fi® and the Wi-Fi logo are registered trademarks of the Wi-Fi Alliance. "Wi-Fi CERTIFIED", "Wi-Fi ZONE", "Wi-Fi Alli-
ance", their respective logos and "Wi-Fi Protected Access" are trademarks of the Wi-Fi Alliance.
UPnP™ is a certification mark of the UPnP™ Implementers Corporation.
Microsoft®, MS-DOS®, Windows® and Windows NT® are either registered trademarks or trademarks of Microsoft Corpo-
ration in the United States and/or other countries.
Apple® and Mac OS® are registered trademarks of Apple Computer, Incorporated, registered in the United States and
other countries.
UNIX® is a registered trademark of UNIX System Laboratories, Incorporated.
Adobe®, the Adobe logo, Acrobat and Acrobat Reader are trademarks or registered trademarks of Adobe Systems, Incor-
porated, registered in the United States and/or other countries.
Netscape® and Netscape Navigator® are registered trademarks of Netscape Communications Corporation.
Other brands and product names may be trademarks or registered trademarks of their respective holders.
Document Information
Status: v2.0 (April 2006)
Reference: E-DOC-CTC-20051017-0126
Short Title: Installation and Setup Guide ST605/608/608 WL/620 R6.1 (en)

Contents
E-DOC-CTC-20051017-0126 v2.0 i
Contents
About this Installation and Setup Guide ................... 1
1 Introducing the SpeedTouch™.................................... 3
2 Basic Installation ........................................................... 5
2.1 Mounting your SpeedTouch™ ........................................................ 6
2.2 Installing your SpeedTouch™......................................................... 7
2.2.1 Guided Installation........................................................................................................... 8
2.2.2 Manual Installation ........................................................................................................17
2.3 The SpeedTouch™ Setup CD........................................................ 19
2.4 SpeedTouch™ Connection Essentials .......................................... 21
2.5 Connections Overview and Powering .......................................... 22
2.5.1 Wireless Setup ............................................................................................................... 23
2.6 Basic Security .............................................................................. 24
3 Web-Based User Interface.......................................... 27
4 Troubleshooting.......................................................... 29
4.1 Checking the Hardware................................................................ 30
4.2 LED Diagnostics ........................................................................... 31
4.3 Web Diagnostics .......................................................................... 33

Contents
E-DOC-CTC-20051017-0126 v2.0
ii
4.4 SpeedTouch™ Setup CD Troubleshooting ................................... 35
4.5 Wireless Setup Troubleshooting .................................................. 38
4.6 Easy Setup Troubleshooting ........................................................ 39
4.7 Reset to Factory Defaults ............................................................ 40

About this Installation and Setup Guide
1
E-DOC-CTC-20051017-0126 v2.0
About this Installation and Setup Guide
Used symbols The following symbols are used in this Installation and Setup Guide:
Terminology Generally, the SpeedTouch™605(i), SpeedTouch™608(i),
SpeedTouch™608 WL(i) WL and SpeedTouch™620(i) will be referred to as
SpeedTouch™ in this Installation and Setup Guide.
Documentation and
software updates
THOMSON continuously develops new solutions, but is also committed to improve
its existing products.
For suggestions regarding this document, please contact
documentation.spe[email protected].
For more information on THOMSON's latest technological innovations, documents
and software releases, visit us at: www.speedtouch.com.
A note provides additional information about a topic.
A tip provides an alternative method or shortcut to perform an action.
!A caution warns you about potential problems or specific precautions that
need to be taken.

About this Installation and Setup Guide
2E-DOC-CTC-20051017-0126 v2.0

3
E-DOC-CTC-20051017-0126 v2.0
Introducing the SpeedTouch™
1 Introducing the SpeedTouch™
Introduction In a minute you will be able to access the Internet using your
SpeedTouch™ (Wireless) Business DSL Router.
This Installation and Setup Guide will show you how to set up your SpeedTouch™
and how to connect a computer or a local area network (LAN) to the Internet.
Identifying your
SpeedTouch™
The label on the bottom of your SpeedTouch™ informs you about the
SpeedTouch™’s:
Product name
Model number
Serial number
Power requirements
DSL variants The SpeedTouch™ comes in two ADSL variants:
POTS: The SpeedTouch™605/608/608 WL/620 connects to an analogue Plain
Old Telephone Service (POTS) line.
ISDN: The SpeedTouch™605/608/608 WL/620i connects to an Integrated
Service Digital Network (ISDN) line, enabling residences with an ISDN line to
use the ADSL service.
SHDSL: The SpeedTouch™605s/620s connects to a Symmetric High-Bitrate
Digital Subscriber Loop (SHDSL) line.
You can easily identify your variant by checking the product name printed on the
label on the bottom of your SpeedTouch™.
!Do not remove or cover the label.
The ... variant supports ...
POTS ADSL
ADSL2
ADSL2+
RE-ADSL
ISDN ADSL
ADSL2
ADSL2+
SHDSL 2-wire SHDSL
4-wire SHDSL
SHDSL.bis
!Only use the SpeedTouch™ variant which is appropriate for the DSL service
provided to your premises.

4E-DOC-CTC-20051017-0126 v2.0
Introducing the SpeedTouch™
SpeedTouch™ Setup
CD
Your SpeedTouch™ comes with a Setup CD.
If you insert the CD into a Microsoft Windows PC or Mac OS X computer:
The first time, an intuitive SpeedTouch™ Quick-Install Wizard will guide you
through the hardware setup of your SpeedTouch™ and will help you to
connect to the Internet.
See “2.2 Installing your SpeedTouch™” on page 7 for more information.
For future reference, the SpeedTouch™ CD Menu provides links to all contents
See “2.3 The SpeedTouch™ Setup CD” on page 19 for more information.
If you use another operating system, a set of subdirectories allows you to easily
browse for user documentation, SpeedTouch™ system software, service templates,
SNMP MIBs, etc.
SpeedTouch™ Home
Install Wizard
The SpeedTouch™ Home Install Wizard has been designed to help you on the
Internet very quickly.
First, the wizard tries to detect your SpeedTouch™. As soon as you have connected
your SpeedTouch™ to your computer, the wizard configures your SpeedTouch™
and - if necessary - your computer.
The Home Install Wizard was designed for Microsoft Windows operating systems
and Mac OS X - in the latter case provided you use a wired connection to your
SpeedTouch™.
You can start the SpeedTouch™ Home Install Wizard:
Automatically from the SpeedTouch™ Quick Install Wizard when you insert
the SpeedTouch™ Setup CD into a computer for the first time.
See “2.2 Installing your SpeedTouch™” on page 7 for more information.
From the SpeedTouch™ CD Menu Home page, via Run Quick Installation. This
will in fact re-run the Quick-Install Wizard and subsequently start the Home
Install Wizard as if you started the Setup CD for the first time.
From the SpeedTouch™ CD Menu Maintenance page, via Reconfigure my
SpeedTouch™.
If you do not want to use the guided installation procedure, you can also
install and configure your SpeedTouch™ manually. See “2.2.2 Manual
Installation” on page 17 for more information.

5
E-DOC-CTC-20051017-0126 v2.0
Chapter 2
Basic Installation
2 Basic Installation
Before you begin Make sure you read the safety instructions and regulatory notices first. You can find
the safety instructions on the Setup CD (see “2.2 Installing your SpeedTouch™” on
page 7). They may also be provided as a printed booklet.
DSL service The DSL service must be up and running on your telephone line.
If both conventional telephone and DSL service are simultaneously available from
the same copper pair, you will need a central splitter or distributed filters for
decoupling DSL and telephone signals.
Computer requirements To connect computer(s) via Ethernet, make sure the computer(s) are equipped
with an Ethernet network interface card (NIC).
For wireless networking, you will need a wireless 802.11 b/g compatible client
adapter for each computer you intend to connect wirelessly.
Wireless client
adapters
You can use one of the following wireless client adapters:
SpeedTouch™110g CardBus
SpeedTouch™121g USB adapter
Any other Wi-Fi certified WLAN client
Internet connection
details
You need the following connection details from your Internet Service Provider (ISP):
Your ISP’s method for connecting to the Internet (for example PPPoE, IPoA)
The VPI/VCI (for example 8/35) and encapsulation type
Your user name and password to connect to the Internet for PPP connections
Your IP settings in case of static configurations
You must have received this information when you subscribed to DSL at your
Internet Service Provider (ISP). You will be prompted for this information at a given
step in the installation procedure.
!Public telephone lines carry voltages that can cause electric shock. Only try
to set up splitter/filters that have been designed to be installed by
unqualified personnel. For further assistance, contact your Internet Service
Provider.
Optionally your ISP may indicate the Service Profile to use in the
SpeedTouch™ Home Install Wizard or Easy Setup.

6E-DOC-CTC-20051017-0126 v2.0
Chapter 2
Basic Installation
2.1 Mounting your SpeedTouch™
Setup possibilities You can mount the SpeedTouch™ on a wall or simply place it on a desk.
Wall mount Proceed as follows to mount the SpeedTouch™ on a wall or other vertical surface:
1Drill two holes in the wall or other vertical surface where you want to place the
SpeedTouch™.
2Fasten two screws in the wall holes. The screws should protrude five
millimetres from the surface of the wall.
3Attach your SpeedTouch™ on the wall using the two mounting slots on the
bottom.
If you install the SpeedTouch™ onto plasterboard, use dowels to
secure the screws. Otherwise the strain of the cables connected to the
SpeedTouch™ rear panel connectors could pull the SpeedTouch™
from the wall.
MODEM ACCESS CODE: 0123456789
MAC: AAABCCCDDEEE
US:TMBXXXXXXXXXXX
THOMSON TELECOM
IC: 431F-STZZZ
*ACCESS CODE 0123456789*
*MACADDRESS AAABCCCDDEEE*
N10406
SSID:SoeedTouchVVVVVV
WEP (hex):1234ABCDEF
WPA PSK: 1234ABCDEF
TCM: 12345670
SpeedTouch ZZZ
XXXXXXX
I
N
T
E
R
T
E
K
L
I
S
T
E
D
USC
CONFORMS TO:
UL STD 60950-1
CERTIFIED TO:
CAN/CSA STD C22.2
No.60950-1
DSLBSFFFFF RQQI
S/N:CPYYWWPPXXX (CC)
*DSLBSFFFFF RQQI*DSLBSFFFFF RQQI
*MACADDRESS AABCCCDDEEE*
CET APPAREIL NUMERIQUE DE LA CLASSE B
EST CONFORME A LA NORME NMB-003 DU CANADA
THIS CLASS B DIGITAL APPARATUS
COMPLIES WITH CANADIAN ICES-003
MADE IN COUNTRY
RATED INPUT:18V
~
1000mA
THIS DEVICE CONTAINS A RADIO MODULE
FROM THOMSON TELECOM BELGIUM,
MODEL NUMBER SPEEDTOUCH XXXX,
CERTIF NO RSE-STXXXX
!

7
E-DOC-CTC-20051017-0126 v2.0
Chapter 2
Basic Installation
2.2 Installing your SpeedTouch™
Internet connectivity
setup
There are different ways to set up your SpeedTouch™. The best way depends on
your operating system.
If you use the following
operating system
the recommended way to set up your
SpeedTouch™ is
Microsoft Windows (98 SE,
Millennium, 2000 or XP)
the Home Install Wizard, as described in
“2.2.1 Guided Installation” on page 8.
Mac OS X, provided you use a
wired connection to your
SpeedTouch™
Any operating system
(provided you have IP
connectivity)
the Easy Setup, as described in “2.2.2 Manual
Installation” on page 17.
Mac OS X, wirelessly
connected to your
SpeedTouch™ and provided
you have IP connectivity
If you are using Microsoft Windows XP, you can also use the Microsoft
Windows XP Internet Gateway Device (IGD) Control Agent for UPnP, as
described in the SpeedTouch™ User’s Guide.

8E-DOC-CTC-20051017-0126 v2.0
Chapter 2
Basic Installation
2.2.1 Guided Installation
Introduction On the CD, a Quick-Install Wizard is provided that will guide you through the first
installation and setup of your SpeedTouch™.
The Quick-Install Wizard will:
Provide important safety and regulatory information.
Show you how to make the necessary connections to your SpeedTouch™.
Show you how to turn on your device.
Prepare you to smoothly run the SpeedTouch™ Home Install Wizard.
The subsequent SpeedTouch™ Home Install Wizard will then prepare your
SpeedTouch™ and your local computer(s) to connect to the Internet.
The Home Install Wizard will:
Guide you through connecting your computer(s) to your SpeedTouch™.
Prepare the SpeedTouch™ to connect to the Internet.
Connecting the cables:
wait!
Do not plug in any cables until you are prompted to do so by the SpeedTouch™
Quick-Install Wizard and/or the SpeedTouch™ Home Install Wizard.
Starting the CD for the
first time
To start the SpeedTouch™ Setup CD Menu:
1Insert the Setup CD into your computer's CD-ROM or DVD-ROM drive.
Microsoft Windows: The CD should autostart.
Mac OS X: Double-click Menu in the window with the content of the CD.
2Select the language of your choice and click OK.
3The procedure continues with the SpeedTouch™ Quick-Install Wizard.
Proceed with “ Quick-Install Wizard” on page 9.
!You need administrative rights to run the applications on the Setup CD on a
Microsoft Windows 2000 or XP operating system, or Mac OS X computer.
If not, see ”The SpeedTouch™ CD does not start automatically”
on page 35.

9
E-DOC-CTC-20051017-0126 v2.0
Chapter 2
Basic Installation
Quick-Install Wizard The SpeedTouch™ Quick-Install Wizard guides you through the first setup of your
SpeedTouch™.
Proceed as follows:
1On the Welcome page, click Next to continue.
2Select your SpeedTouch™ from the list of supported devices and click Next.
The SpeedTouch™ Safety Instructions and Regulatory Notices are displayed.
If you ran the CD on this computer before, the Quick-Install Wizard is
not shown; the CD menu appears instead (see “2.3 The SpeedTouch™
Setup CD” on page 19 for more information).
A product picture helps you to easily identify your SpeedTouch™. If
you are not sure what device you have, check the label on the bottom
of your SpeedTouch™.

10 E-DOC-CTC-20051017-0126 v2.0
Chapter 2
Basic Installation
3Scroll down and read all the instructions carefully, select I have read and I fully
understand the Safety Instructions and Regulatory Information to confirm
your reading, and then click Next.
4Subsequent screens guide you through the preliminary hardware setup of
your SpeedTouch™.
Follow all the instructions carefully and click Next each time your are ready to
proceed.
As soon as all the required preliminary connections to your SpeedTouch™
have been made, and your SpeedTouch™ is turned on and initialized, the final
steps in the Quick-Install Wizard will:
Make all information readily available to let the Home Install Wizard
configure your SpeedTouch™ to connect to the Internet.
See “ Internet connection details” on page 5 for an overview of
information you must have readily available.
Start the SpeedTouch™ Home Install Wizard.
5Click Set up my SpeedTouch to continue.
6The procedure continues with the SpeedTouch™ Home Install Wizard.
Proceed with “ Home Install Wizard” on page 11.
!Your SpeedTouch™ is designed and tested to meet the latest safety
standards. However, to ensure safe use of this product, it is important
that you carefully read and comply with the Safety Instructions and
Regulatory Notices shown and/or available in the Safety and
Regulatory booklet before you install the SpeedTouch™.

11
E-DOC-CTC-20051017-0126 v2.0
Chapter 2
Basic Installation
Home Install Wizard The SpeedTouch™ Home Install Wizard guides you through your local network
connections and prepares the SpeedTouch™ to connect to the Internet. Proceed as
follows:
1On the Welcome page, click Next to continue.
The Software License Agreement window appears.
2You must accept before continuing. Click Yes to accept.
The SpeedTouch™ Home Install Wizard checks your system and invites you to
connect the SpeedTouch™ to your computer.
If you accepted the Software License Agreement in a previous
configuration setup, this window will not be shown.
See “ SpeedTouch™ wiring” on page 21 for a comprehensive
overview of all SpeedTouch™ connections.
On Mac OS X the wizard may require you to restart the computer
before being able to continue. If so, restart the computer.
The Home Install Wizard will automatically restart. If not, select
SpeedTouch™ Maintenance and click Run Quick Installation from the
CD Menu.

12 E-DOC-CTC-20051017-0126 v2.0
Chapter 2
Basic Installation
3Make one of the following connections:
Connect the yellow RJ-45 Ethernet cable to the yellow (indicated)
Ethernet port on your SpeedTouch™ and the other end to the computer’s
Ethernet port.
For wireless networking (only possible on a 608 WL/620), plug a wireless
card or adapter into your computer.
4Once the hardware is installed and connected to the SpeedTouch™, the
procedure continues with configuring your Internet connection.
Proceed with “ Configuring the Internet connection” on page 13.
In case of problems or for advanced information, see
“2.5.1 Wireless Setup” on page 23.
If the wizard does not detect a connection, an error message will be
displayed. Refer to “ The wizard does not detect a connection” on
page 35.

13
E-DOC-CTC-20051017-0126 v2.0
Chapter 2
Basic Installation
Configuring the Internet
connection
Proceed as follows:
1If prompted, enter the User name and Password for your SpeedTouch™
security settings and click OK.
2Select the appropriate Region, Provider and Service for your Internet
connection as specified by your Internet Service Provider and click Next.
3Your connection to the Internet connectivity is set up:
Select the VPI/VCI - and, if required, the Connection Type - as specified
by your Internet Service Provider and click Next.
Enter the User Name and Password for your Internet account settings as
specified by your Internet Service Provider and click Next.
4The procedure continues with some additional configurations.
Proceed with “ Configuring the SpeedTouch™ (and your computer)” on
page 14.
The factory default user is ‘Administrator’ and its password is blank. It
is advisable to specify another user name and password during the
configuration procedure to protect your SpeedTouch™ from security
violation. See “2.6 Basic Security” on page 24 for more information.
If the Internet Service Provider has included a separate disk with a
dedicated service profile, click Have Disk to browse to the location of
the appropriate service profile template file.
!From here on, the procedure might differ from the description below.
The requested information will depend on the selected service profile
and should be provided by your Internet Service Provider. Subsequent
screens will guide you through the configuration of both the
SpeedTouch™ and your computer. Enter the requested information
and click Next whenever requested.

14 E-DOC-CTC-20051017-0126 v2.0
Chapter 2
Basic Installation
Configuring the
SpeedTouch™ (and
your computer)
Proceed as follows:
1Depending on the selected service profile and your ISP’s requirements, you
may have to fill in some additional settings during the Home Install Wizard,
like Dynamic DNS Service, Time Configuration, DMZ Port Assignment or
other.
Enter the information provided by your ISP and click Next whenever
requested.
2Your ISP might ask you to specify Simple Network Management Protocol
(SNMP) community settings. SNMP is a protocol to monitor and deliver
reports on SLA performance. With the help of SNMP, your ISP can be pro-
actively aware of network problems, even before you are.
A community name serves as password and authentication. The community
name you specify is associated with a specific MIB view (which MIB objects
are to be seen by the ISP) and access policy: read-only or read-write (in case
your ISP needs to be able to modify values of the MIB). It is advisable not to
leave these fields blank.
Click Next to continue.
3To protect the wireless connections to your SpeedTouch™608 WL/620, move
the slide control to the desired security mode.
This manual suits for next models
3
Table of contents
Other Speedtouch Network Router manuals
Popular Network Router manuals by other brands
Trane
Trane ComfortLink II XL 850 user guide
SMC Networks
SMC Networks SMC8606T Management guide

Avaya
Avaya Ethernet Routing Switch 8300 Series Planning and Engineering

Alcatel
Alcatel SPEED TOUCH PRO user manual
BELGACOM
BELGACOM B-BOX Instructions for use
Perle
Perle P840 User and system administration guide
Digicom
Digicom Michaelangelo LANPro 8D5517 Specifications
Ruijie
Ruijie Reyee RG-EW3000GX PRO Hardware installation and reference guide

Bosch
Bosch GMF 1400 CE Professional Original instructions
Billion
Billion BiPAC 7404VNOX user manual
TRENDnet
TRENDnet TEG -S81 g Quick installation guide

Teldat
Teldat Atlas 250 installation manual
