manuals.online logo
Brands
  1. Home
  2. •
  3. Brands
  4. •
  5. Speidel
  6. •
  7. Brewing System
  8. •
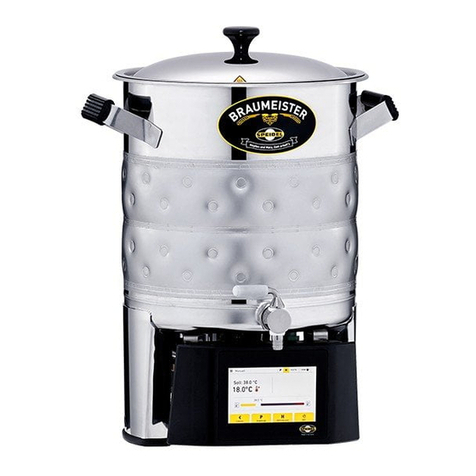
  9. Speidel Braumeister PLUS 10 litres User guide

Speidel Braumeister PLUS 10 litres User guide

Speidels Braumeister PLUS
10,20,50litres
Original instruction manual in English
Languages other than English are machine translated.
ITEM NO. 41010-30, 47070-30, 45050-30
IMPORTANT!
READ CAREFULLY BEFORE USE, KEEP FOR FUTURE REFERENCE
This instruction manual is part of the device. Read and follow the
instructions carefully to avoid possible damage and accidents. Keep
this manual in a safe place and give it to anyone who operates the
appliance.
Table of contents
1. General Information
2. Technical data
2.1 Functions and application areas
2.2 Components and scope of supply
2.3 Information on special components
2.4 Dimensions, power and energy consumption
2.5 Disposal
3. Safety
3.1 General safety instructions
3.2 Special safety instructions
4. Preperation
4.1 Safety instructions
4.2 Setup
4.3 Storage and transport
4.4 Modi
fi
cation
5. Control unit
5.1 Setup
5.2 Starting point
5.3 Functions
6. Brewing
6.1 Introduction
6.2 Preperations
6.3 Programming/ starting the brewing automation
6.4 Mashing
6.5 Lautering
6.6 Hop boiling
6.7 Cooling down
6.8 Main fermentation
6.9 Maturing
7. Notes
7.1 Symbols
7.2 Troubleshooting
8. Maintenance
8.1 Cleaning
8.2 Maintenance/updates
Appendix
A Legal aspects of home brewing
B Warranty conditions and transaction processing
C Languages
1. General Information
Dear customer,
You have purchased a new device from our company. We thank you for your trust. Quality and functionality are the
main focus of our products. Please read the instruction manual completely before the
fi
rst use and make it available to
every user of the Braumeister PLUS.
We have written this instruction manual to ensure reliable and safe commissioning and operation of the Braumeister
PLUS right from the start.
If you follow these notes and instructions carefully, your Braumeister PLUS will work to your complete satisfaction and
have a long service life.
Declaration of Conformity
Speidel Tank- und Behälterbau GmbH con
fi
rms that the products
“
Braumeister PLUS 10 litres
”
,
“
Braumeister PLUS 20
litres
”
and
“
Braumeister PLUS 50 litres
”
(mentioned in this instruction manual) comply with the regulations of the
relevant European Directives.
Manufacturer
Speidel Tank- und Behälterbau GmbH
Krummenstra
ß
e 2, 72131 Ofterdingen, Germany
Phone +49(0)7473 9462-0, Fax +49(0)7474 9462-99
www.speidels-braumeister.de, www.speidel-behaelter.de
Additional Information
Instruction manual as of september 2020
2. Technical data
2.1 Functions and application areas
The Braumeister PLUS is designed and produced for brewing smaller quantities of beer. Before each brewing process,
the Braumeister PLUS must be checked to ensure that it is in a safe and proper condition.
2.2 Components and scope of supply
The components and the scope of supply are shown in the following
fi
gure. The Braumeister PLUS is operated with
one circulation pump and one heating coil. The Braumeister 50 litres has another additional handle on the back (not
shown here).
1.
Container lid
2.
Hold-down bar
3.
Screen plate 1
4.
Brewing kettle with double jacket
5.
Pull rod / level gauge
6.
Drain tap
7.
Screen plate 2
8.
Fully automatic brewing control
9.
Lifting brackets
10.
Malt pipe
11.
Support bolt
12.
Support bracket
13.
Heating coil
14.
Circulation pump
2.3 Information on special components
Container lid
The lid helps with heating to reach the temperatures faster. The ventilation holes prevent pressure build-up in the
boiler and allow air to circulate easily. Water condenses on the underside of the lid at higher temperatures. When
lifting the lid, make sure that the edge of the lid is held over the opening in the boiler so that the condensation water
that runs o
ff
(when held at an angle) runs back again.
Brewing kettle with double jacket
The double jacket on the Braumeister PLUS o
ff
ers the main advantage that the trub in the wort can sink to the bottom
during the cooling process without disturbance, thus forming a very clear wort before it is drained. Furthermore, there
is no turbulence if, for example, a cooling spiral is removed after cooling. The cooling time is similar to that of a cooling
spiral. It is possible that trub which quickly settles in the middle of the wort is wrapped around the temperature
sensor in an isolating manner and therefore several degrees more are displayed than are actually present in the wort.
The direction of
fl
ow through the double jacket is usually from bottom to top. This is where the best convection and
trub precipitation was obtained from tests.
After cooling, drain the double jacket (into a collecting vessel
–
not over the electronics of the Braumeister). The
connections
fi
t on common coupling systems such as Gardena (welded on are sockets 1
“
ET).
Restriction: When brewing with a short malt pipe, the cooling function of the double jacket can only be used to a
limited extent due to the small contact surface with the wort. We recommend the optional cooling spiral. The water
quality for cooling via the double jacket should be such that it is as low in lime and free of rust particles as possible
(water from heavily rusted supply pipes). In the case of water containing lime, an decalci
fi
cation with stainless steel-
compatible substances may be necessary after a certain time to maintain an optimum
fl
ow rate.
Note: During the production of the double jacket, slight bulges are created on the inside of the jacket, which form the
cavity for the water
fl
ow. These are not transport damages or similar.
Drain tap
The drain tap facilitates cleaning and the draining of the trub during
fi
lling. This is done by cleaning from above and at
the same time draining the dirty water downwards into a drain or container via the hose supplied. The drain is located
in the middle of two bases and thus the Braumeister PLUS can also be emptied completely by tilting it slightly. After
cleaning is complete, the Braumeister is still turned upside down to dry out completely and to empty the pumps.
Circulation pump
The circulation pump can be switched on and o
ff
in manual mode. It is important that the pump is vented after
fi
lling
the liquid in manual mode to ensure that the pump has full capacity and that it does not run dry and may be damaged.
This is done by switching the pump on and o
ff
several times with water
fi
lled in (until no more air bubbles escape and
hardly any pump noises can be heard). When in automatic mode, the device will do this on its own. In the automatic
brewing process, the pump switches o
ff
automatically in case of too high temperatures and only switches on again in
a colder state. The power of the pump can be adjusted with the rotary potentiometer. The power recommended by
Speidel is marked by an arrow.
2.4 Dimensions, power and energy consumption
Braumeister PLUS 10 litre
DIMENSIONS
Capacity Height
⌀
Box dimensions
10 l 48 cm 30 cm 60
×
40
×
50 cm (l
×
w
×
h)
POWER AND ENERGY CONSUMPTION
Weight
12 kg with
fi
ttings and lifting brackets
Heating coil
1.200 watts heating power
Pump
27 watts
Power supply
230 V~
Minimum security
10 Amp with FI circuit breaker
Content
Brewing quantity approx. 10 l
fi
nished beer (normal beer) approx. 11 l beer wort
Max.
fi
lling level
uppermost marking on the drawbar 12 l
Max. malt quantity
2,8 kg
Braumeister PLUS 20 litre
DIMENSIONS
Capacity Height
⌀
Box dimensions
20 l 60 cm 40 cm 74 x 60 x 61 cm (l
×
w
×
h)
POWER AND ENERGY CONSUMPTION
Weight
19 kg with
fi
ttings and lifting brackets
Heating coil
2.000 watts heating power
Pump
27 watts
Pwoer supply
230 V~
Minimum security
10 Amp with FI circuit breaker
Content
Brewing quantity approx. 20 l
fi
nished beer (normal beer) approx. 23 l beer wort
Max.
fi
lling level
uppermost marking on the drawbar 25 l
Max. malt quantity
6 kg
Braumeister PLUS 50 litre
DIMENSION
Capacity Height
⌀
Box dimensions
50 l 70 cm 50 cm 74 x 60 x 61 cm (l
×
w
×
h)
POWER AND ENERGY CONSUMPTION
Weight
24 kg with
fi
ttings and lifting brackets
Heating coil
3.200 watts heating power
Pump
27 watts
Power supply
230 V~
Minimum security
16 Amp with FI circuit breaker
Content
Brewing quantity approx. 50 l
fi
nished beer (normal beer) approx. 53 l beer wort
Max.
fi
lling level
uppermost marking on the drawbar 55 l
Max. malt quantity
13 kg
2.5 Disposal
If you have to dispose of your Braumeister PLUS, please follow the instructions below:
Protect our environment, electrical appliances do not belong in the household waste. Use the collection points
provided for the disposal of electrical appliances and hand in any electrical devices that you no longer use. This will
help to avoid potential e
ff
ects on the environment and human health caused by incorrect disposal. You are also
contributing to the reuse, recycling and other forms of recovery of waste electronic equipment.
Information on where to dispose of the equipment can be obtained from your local authority or municipal authorities.
3. Safety
3.1 General safety instructions
The device and the power cord must be inspected regularly for signs of damage. If damage is found, the device must
not be used any more.
Always unplug the power cord from the wall outlet
fi
rst (pull the plug, not the cord) when you stop using the machine.
This also applies to cleaning or in the event of a malfunction
–
only then remove the cable from the control unit.
Route the power cord so that it does not come into contact with sharp objects. It must be unrolled and plugged in
completely at the device or at the socket. A cable reel must not be used.
An extension cord must not be longer than 3 m.
Do not use multiple sockets as this unit is too powerful. Avoid overloading the electrical fuse. Due to the increased
power requirement of the Braumeister PLUS, do not switch any other
“
large consumers
”
to the same fuse.
Fire
hazard!
The Braumeister PLUS may only be used for its intended purpose and in a safe and secure condition. Ensure that the
Braumeister PLUS is in proper condition before each use.
Children and frail people:
For the safety of your children, do not leave any packaging parts (cardboard, polystyrene, etc.) within reach. Do not let
small children play with foil.
There is danger of su
ff
ocation!
This device is not intended for use by persons (including children) with reduced physical, sensory or mental
capabilities or lack of experience and/or knowledge, unless they are supervised by a person responsible for their
safety or have received instructions from that person on how to use the device.
Children should be supervised to ensure that they are kept away from the device and do not play with it.
3.2 Special safety instructions
The container, lid and attachments become very hot. At the end of the brewing process the kettle contains boiling beer
wort. Please observe the installation instructions. Never move the Braumeister PLUS while it is hot. When working on
and with the Braumeister PLUS, you should always use pot holders or gloves.
Danger of burns!
When lifting the lid, make sure that the water condensed on the underside runs back into the container. Hold the lid at
an appropriate angle over the container.
Risk of scalding!
The Braumeister PLUS consists almost entirely of stainless steel (electrically conductive). For this reason it may only
be operated via a 30 mA residual current circuit breaker. Usually such an RCD is already present in the house
installation.
Danger of electric shock!
Only ever carry out cleaning work on the Braumeister PLUS with the plug disconnected (disconnect from the power
supply). Do not spray the unit or spray into the electrical components.
Danger of electric shock!
Important: To operate the control unit, it is essential to lock the plug connections on the rear of the unit. There is a risk
of overheating when operating with unlocked plug connections.
Fire hazard!
For insulation, please use the
“
thermal sleeve
”
accessory o
ff
ered for this purpose. If you use your own insulation,
please ensure that the electronics and the lower area of the Braumeister PLUS remain well ventilated, otherwise heat
accumulation and damage to the control unit may occur.
Before each use the pump must be vented to prevent it from running dry. The venting process takes place by itself in
automatic mode. In manual mode, switch the pump on and o
ff
several times until no more air bubbles escape.
4. Preperation
4.1 Safety instructions
The Braumeister PLUS must be cleaned thoroughly with lukewarm water before
fi
rst use (chapter
“
Cleaning 8.1
”
).
Please also observe the safe setup of the Braumeister PLUS below. Ensure that the Braumeister is in proper condition.
To do this, check the components listed in chapter
“
2. Technical Data
”
for any damage. Also observe the safety
instructions in chapter
“
3. Safety
”
. Otherwise the Braumeister PLUS is designed for immediate use.
4.2 Setup
The Braumeister PLUS must be placed on a stable, secure and horizontal base before use or before the brewing
process. Please note that the Braumeister PLUS when
fi
lled can weigh up to 30 kg/50 kg/90 kg and is full of boiling
hot beer wort. The recirculation during the brewing process requires horizontal installation. Avoid a shaky base. A
stable wooden crate or a table that is not too high is most suitable. The Braumeister PLUS must not be moved during
the brewing process. The handles are only intended for transport and handling when empty. Keep children and in
fi
rm
persons away from the appliance when in use. Once the Braumeister PLUS has been safely set up, connect the
machine to the power supply. You can now put the Braumeister PLUS into operation.
4.3 Storage and transport
The Braumeister PLUS must be stored in a dry place. Avoid contact with ferrous or rusty objects.
Only transport the Braumeister when empty and with the handles provided. The unit must be disconnected from the
power supply before transportation and must never be moved while it is in operation.
Risk of scalding!
4.4 Modi
fi
cation
A modi
fi
cation of the Braumeister PLUS is expressly not permitted, except by adding accessories tested by the
manufacturer. Unauthorised modi
fi
cations to the unit can lead to serious safety risks and safe use cannot continue to
be guaranteed. If improper changes are made to the unit, the warranty will become void. See also Appendix
“
C
Warranty Conditions, Warranty Processing
”
.
5. Control unit
5.1 Setup
The Braumeister PLUS is controlled via the touch display, which is mounted on the bottom of the Braumeister
’
s base.
The following functions can be found on the start display:
Start display
1.
Menu / Status
2.
Time, temperature, recipe and instructions
3.
Time
4.
On/O
ff
Pump (P) /Heating (H), Temperature
5.
Wi-Fi
6.
Brewing of a recipe
7.
Edit recipes
8.
Manual operation
9.
Settings
5.2 Starting point
When you start up your Braumeister PLUS for the
fi
rst time, you are automatically guided through the set-up process.
Here you can also connect to My Speidel right at the start.
To make subsequent changes to the settings from the setup process, please follow these steps:
You can call up the
Navigation
via the menu display. Tap the
Settings
section with your
fi
nger.
Navigation
In the
Settings
section you will
fi
nd options for setting language, Wi-Fi, metrics, sound, etc.
Settings
To change settings, simply select the desired area with your
fi
nger. You can then make the desired change in the new
window.
Language settings
5.3 Functions
Press
Brew
, select a recipe and start the brewing process with
Select
. Then follow the instructions on the display. For
a detailed description, see chapter
“
6. Brewing
”
.
In
My Recipes
, your recipes can be saved, created on the machine or synchronised via My Speidel.
To change a recipe, select the relevant recipe with your
fi
nger and then press
Edit
. You can thean scroll with your
fi
nger to navigate through the recipes. Simply use your
fi
nger to select items you want to adjust. You can then make
changes using the appearing keyboard. When you
’
ve made all your changes, click
Back
. A window appears where you
can save your changes.
Recipes can also be developed, stored and exchanged via the customer portal www.myspeidel.com. Futhermore, it is
possible to manage the Braumeister (or other devices) and monitor the brewing process online.
In manual mode, the pump and the heating can be switched on or o
ff
. The P and the H in the menu bar show whether
the pump or the heating is on.
If the letter is yellow, the pump or heater is activated. If the symbol is only half yellow, the pump is activated but not on
because the liquid is, for example, still too hot. You set the setpoint temperature using the temperature controller.
In the
Settings
section you will
fi
nd options for setting language, Wi-Fi, metrics, sound, etc.
In all operating modes (automatic /brewing start, recipes and manual operation) you can return to the start menu by
Cancel
or pressing
Back
several times.
6. Brewing
6.1 Introduction
The beer production with the Braumeister PLUS can be carried out in di
ff
erent phases, with each phase being
explained separately here.
First, these phases are described in general terms, so that the brewing process applies to all beer types and recipes. A
concrete brewing example for the
fi
rst time brewer and a special recipe with the exact quantities, brewing times and
temperature levels are given in the following chapter.
Before you start brewing beer, it is best to get an overview of the individual steps that ultimately lead to the
fi
nished
beverage. To ensure that you don
’
t miss any steps and to get an overview of your brewing processes afterwards, it is
advisable to keep a brewing log (this can be done handwritten on paper, but also digitally via My Speidel).
One more piece of advice: When trying to brew for the
fi
rst time, you should take a day and possibly brew with a
second person, as it is simply more fun that way and you can use a little help.
Please always remember that brewing beer requires some experience and you get better from brewing process to
brewing process. So don
’
t be disappointed if the
fi
rst beer doesn
’
t quite meet your expectations.
6.2 Preperations
Getting the ingredients
Obtain the necessary brewing ingredients (hops, malt and yeast) in advance. It is important that the malt is fresh. After
grinding (breaking up the grains
–
not too
fi
ne, see
“
The right grinding pattern
”
on page 29), the malt should be used as
quickly as possible. The quantities vary somewhat depending on the recipe, with the malt quantity ranging from 2-
2.5/4-5/9-11kg and the hop quantity from 15-40/20-80/50-150g. The hops are mostly o
ff
ered in pressed form as
pellets. For fermenting, dry yeast is recommended at
fi
rst because it is easy to store and has a longer shelf life, but
later special liquid yeasts are also recommended. These ingredients can be obtained from home brewer stores or via
the internet.
Example: Hop pallets Example: Barley
Example: Water Example: Dry yeast
Cleaning the equipment
Before brewing, the Braumeister is rinsed out with warm water and the pump is
fl
ushed by switching it on. The other
equipment such as the beer spindle, cooking spoon and fermentation tank are ready and have also been cleaned. See
also the instructions in Chapter
“
8.1 Cleaning
”
.
Hygiene
Hygiene is the top priority when brewing beer. Especially in cold areas (during cooling,
fi
lling and fermentation) the
beer or beer wort is exposed to the risk of infection. This can cause the beer to spoil and ruin all the work. You should
therefore pay particular attention to absolutely clean vessels (fermentation barrel, bottles) and working materials
(spoons, taps, seals). The use of special disinfectants is particularly suitable for disinfecting these vessels and objects.
These are available in specialist winery shops and in home brewery stores. These are also suitable for
fi
lling into the
airlock, for disinfecting the fermentation container and the other equipment. The disinfection of bottles and/or
maturing kegs is carried out in the same way as for the fermentation tank. This guarantees that the fermented beer is
fi
lled into absolutely clean bottles or maturing kegs. For the maturing vessels, this should be done a few days before
the end of fermentation so that the
fi
lling process can take place quickly and without rushing.
Softening of the brewing water
If necessary, the brewing water can be softened. For this purpose, the water (cold tap water) is boiled for 30 minutes in
the Braumeister PLUS, then cooled down and stored temporarily in the fermentation tank until the brewing process is
complete. The separated lime has settled on the bottom of the container and is disposed of. The Braumeister PLUS is
designed for brewing approx. 10l /20l /50l of
fi
nished beer (normal beer). For this purpose, 15-20l /25-30l /55-60l of
brewing water are required. For the beginner respectively for the
fi
rst brewing attempts, normal (hygienically perfect,
colourless and odourless) cold tap water can also be used to keep the e
ff
ort at the beginning a little bit within limits.
Basically the brewing water should have a hardness of less than 14
°
dH.
The right grinding pattern
Clearance of 1.2 mm; clearly too
fi
nely grinded.
Clearance of 1.4 mm; not yet completely optimal.
Ideally with a clearance of 1.6 mm; suitably grinded. If whole grains do not
break when pressed on, the grain has been too coarsely grinded.
6.3 Programming/ starting the brewing automation
Plug in the Braumeister PLUS. The control unit is in its basic state.
Start display
To program a recipe and its time and temperature values, press
My Recipes
. Then select the recipe you want to edit
from the menu. New recipes can be created or deleted. Furthermore, you can also manage and synchronize your
recipes via
www.myspeidel.com
.
Three standard recipes are available at the beginning. To change a recipe, select the recipe with your
fi
nger and then
press
Edit
. You can then use your
fi
nger to scroll. Simply use your
fi
nger to select items you want to customize.
Afterwards make changes using the appearing keyboard. When you
’
ve made all your changes click
Save
.
Edit a recipe

Other manuals for Braumeister PLUS 10 litres

1

This manual suits for next models

5

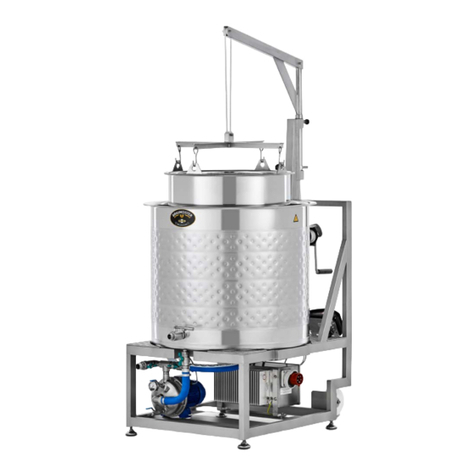
Other Speidel Brewing System manuals

Speidel Braumeister Instruction sheet

Speidel

Speidel Braumeister Instruction sheet

Speidel Braumeister 200 User manual

Speidel

Speidel Braumeister 200 User manual

Speidel Braumeister 47070 Instruction sheet

Speidel

Speidel Braumeister 47070 Instruction sheet

Speidel Braumeister 200 L User manual

Speidel

Speidel Braumeister 200 L User manual

Speidel Braumeister Instruction sheet

Speidel

Speidel Braumeister Instruction sheet

Speidel Braumeister PLUS 10 litres User manual

Speidel

Speidel Braumeister PLUS 10 litres User manual

Popular Brewing System manuals by other brands

Blichmann Engineering Fermentator F3-42 Supplementary Operation, Assembly, Maintenance Manual

Blichmann Engineering

Blichmann Engineering Fermentator F3-42 Supplementary Operation, Assembly, Maintenance Manual

Toddy ESSENTIAL BREWER quick start guide

Toddy

Toddy ESSENTIAL BREWER quick start guide

Bunn ITCB instructions

Bunn

Bunn ITCB instructions

Northern Brewer The Center of Gravity instructions

Northern Brewer

Northern Brewer The Center of Gravity instructions

Brouwland 058.020.8 manual

Brouwland

Brouwland 058.020.8 manual

Brewolution Graviator M011-3 instruction manual

Brewolution

Brewolution Graviator M011-3 instruction manual

Concordia Ascent-Touch user guide

Concordia

Concordia Ascent-Touch user guide

Wilbur Curtis Company D1000GT Service manual

Wilbur Curtis Company

Wilbur Curtis Company D1000GT Service manual

American Metal Ware Shuttle P300 Operator's manual

American Metal Ware

American Metal Ware Shuttle P300 Operator's manual

MR.BEER LBK instructions

MR.BEER

MR.BEER LBK instructions

Peco Services Electrim EB1D manual

Peco Services

Peco Services Electrim EB1D manual

Curtis G4 CGC Series user guide

Curtis

Curtis G4 CGC Series user guide

BRAVILOR BONAMAT Bolero Series Technical manual

BRAVILOR BONAMAT

BRAVILOR BONAMAT Bolero Series Technical manual

Blichmann Engineering WineEasy Assembly operation maintenance

Blichmann Engineering

Blichmann Engineering WineEasy Assembly operation maintenance

modbar Pour-Over How-to guide

modbar

modbar Pour-Over How-to guide

Ss Brewtech E-Kettle 304 Product guide

Ss Brewtech

Ss Brewtech E-Kettle 304 Product guide

Bloomfield Koffee-King 8541 owner's manual

Bloomfield

Bloomfield Koffee-King 8541 owner's manual

Keurig Hot K-Cup Commercial Series owner's manual

Keurig Hot

Keurig Hot K-Cup Commercial Series owner's manual

manuals.online logo
manuals.online logoBrands
  • About & Mission
  • Contact us
  • Privacy Policy
  • Terms and Conditions

Copyright 2025 Manuals.Online. All Rights Reserved.