manuals.online logo
Brands
  1. Home
  2. •
  3. Brands
  4. •
  5. Spektrum
  6. •
  7. Remote Control
  8. •
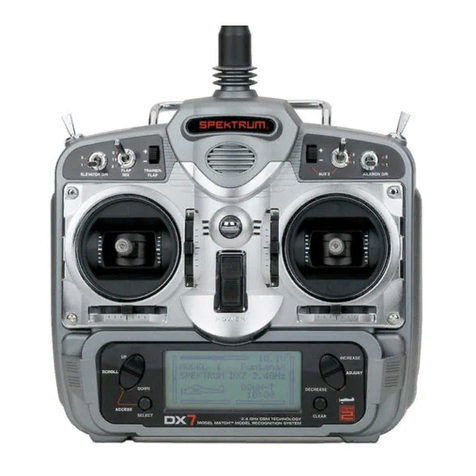
  9. Spektrum DX6I Operating instructions

Spektrum DX6I Operating instructions

issue 65:8
the CRONICLE
Spring 2010
I
a m instructionally c h a l -
lenged.I found the 95 page
owner’s manual for the original
Spektrum DX6 (written as though
fixed-wing aircraft and helicopters were
the only models that would ever use it)
virtually incomprehensible.Fortunately
Chuck Winder wrote a set of DX6
programming instructions for dummies
(i.e., sailors like me who never flew
model airplanes) which was included in
his article entitled “Spektrum DX6 RC
System,”published in Model Yachting in
the spring of 2006.
Recently I had to replace my old
original DX6, and thus I found myself
confronted by the Spektrum DX6i
manual (this time it’s 138 pages long),
and a transmitter that must be pro-
grammed with controls and menus
that differ from those of the original
DX6. Fortunately, the principles are
basically unchanged, and Chuck’s old
set of instructions served as the Ro-
setta Stone that allowed me to translate
from aviator-speak to sailor jargon,and
successfully program the 6i with only
a few epithets and references to the
parentage of the engineers who de-
signed the thing and wrote the manual.
Since I fear I may need to program it
again someday, I made notes about the
steps I took. Perhaps some other 914er
somewhere suffers from a handicap like
mine and will find the following CR
RADIO ACTIVITY
Programming the Spektrum DX6i
by Dick Martin
914-specific programming instructions
helpful.When (if ) you try to read them
‘cold’ they likely will seem at least as
dense as I accuse the DX6i manual of
being. With a live transmitter in your
hands, however, I think you will find it
easy to follow the steps in this DX6i
programming cookbook. Please note,
however,that this ‘recipe’is not intended
to completely replace the manual. Be
sure to read pp. 6-23 and 136-137 for
important general (and easily compre-
hensible) information about operating
the DX6i system.
Preliminaries
Control stick adjustments – If you,
like me, find horizontal motion of your
sail-control joystick and vertical motion
of your rudder joystick distracting, take
advantage of the method for adjusting
joystick tensions described on page 12
of the DX6i manual. Open the back of
the case (remove six screws);then mark-
edly tighten the “stick tension screw”
for the vertical travel of the left-hand
gimbals (viewed with the transmitter
lying face down) to make it act more like
a normal rudder joystick; then tighten
the screw at the upper right corner of
the right-hand gimbals to restrict lateral
motion of the sail-control joystick. I
found that if I overshot with that screw
it would create too much friction in the
up-down plane as well, so you’ll need
to experiment with it. While you are
at it you may want to tighten the large
tensioning screw running through the
metal strip that is the primary means
of adjusting the feel of the up-down
motion of the sail joystick.
“Binding” – Before the transmitter
can communicate with the receiver they
must be electronically “bound”together
so that the receiver will ‘hear’ encoded
commands from only that transmitter
(actually, commands only from the
specific model memory you assign to
your CR 914 as described in step 1.a.).
Insert the binding plug, power up the
receiver(s),and confirm that the receiver
LED(s) is/are flashing. Center both
joysticks (which will establish a pre-
liminary fail-safe setting—see step 7 for
more information), then pull and hold
the rear switch on the left side of the top
of the transmitter (labeled just “trainer”
rather than “binding/trainer”—thanks
a lot, Spektrum) while you turn on the
power switch. It may take as much as
20 seconds, and you may have to move
the transmitter to another position,
but eventually the blinking LED(s)
will glow steadily to tell you that the
encoding has succeeded. Be sure to re-
move the binding plug before you turn
off the receiver—otherwise the bound
instructions will be lost.
The programming process – All
programming is carried out by either
depressing or rotating a large roller
switch (which rotates a little too easily
past the notch you want when you try
to work too fast). A few minutes of
practice before you set out in earnest
will reduce aggravation later on. When
the transmitter is turned on you will
Editor’s note: In an attempt to inject a little
levity into a somewhat tedious process,
the author may have made the 2.4 GHz
spread spectrum DX6i appear to be poorly
designed and not worth the hassle required
to make it work. Do not be misled! If you
are contemplating switching to a DX6i,
particularly if you presently use a 75 MHz
radio, do not let this article dissuade you
from acquiring this well-engineered instru-
ment which, once you get it programmed,
will greatly improve the quality of your
RC sailing life and those of race manag-
ers and regatta chairs who will no longer
have to worry about channel conflicts with
your radio.
Panel 1
Spring 2010
the CRONICLE issue
65:9
see the “main screen” shown in Panel 1.
To initiate programming, momentarily
depress (click) the roller switch. at
takes you to the first screen of the first
of two menus (for some reason they are
called lists). is one is the adjust list
(see Panel 2).When you arrive there the
word “Main”is highlighted to indicate it
is live and that if you depress the roller
now you will return to the Main screen.
Don’t do that now; instead become
familiar with the roller and how it op-
erates—and how easy it is to overshoot
with it. You’ll discover that the “Main”
‘button’ becomes highlighted when
you reach the extreme left or counter-
clockwise end of 9 active roller notches
on the adjust list screen. Each notch
highlights a type of adjustment that can
be made,several of which, such as flaps,
are irrelevant for our simple boats (I was
surprised to find that spoilers and bomb
bay doors didn’t make the list—I guess
Spektrum is saving them for the DX8i).
Each time you roll to a new notch
those items scroll up from the bottom
of the screen, sequentially becoming
highlighted one at a time.e first and
last items on the list when highlighted
disconcertingly appear alone, but in
between those extremes three items ap-
pear at a time, the middle one of which
is highlighted.e 9th and last item on
the adjust list is setup list. Click on
it by depressing the roller.
at takes you to the second menu
of things you can do (see Panel 3).
is setup list works exactly like the
adjust list, except that the roller can
now select from 13 active notches, the
majority of which, such as thro cut,
you will never use (“thro” stands for
throttle,not throat—no, the setup list
does not include a way to exact revenge
on the person who dreamed up this
programming scheme). At the left end
of these 13 notches “Main” is high-
lighted as before, and at the right end
the highlight is on setup list .Cute.As
you have guessed by now, clicking on
any of the highlighted items on either
list (other than Main, adjust list and
setup list)drills down to the next level
of the menus. In the next section we’ll
deal with the specific items a 914er
needs to program in that lower menu
tier, but I strongly recommend that you
practice working with these menus until
you feel you can cope with them first.
From here on it gets easier.
Programming a CR 914
Step 1. Model #, type, & name
a. Number – e Main screen should
say mdl 1 if your CR 914 is the first boat
you program. If not, go to the adjust
list at the bottom of which you will
find the model select menu from
which you can select a number (1-10)
for the “model” you want to program.
b.Type – en from the initial setup
list screen, highlight model type.
Click on it, then click on the icon of
an airplane (labeled acro rather than,
say, apln or airp—perhaps RC avia-
tors have acrophobia, or maybe that’s
an acronym). e DX6i will beep to
impress you with how clever it is while it
records that your sailboat will be stored
in its memory as an acro, and then with
the roller shift the highlight to List.
c. Name – Click the roller to return
to setup list, then rotate the roller
one notch to highlight model name
and click on it. Rotate one notch to
shift the highlight from List to a blank
below the line that identifies the model
number. Click the roller, then rotate
it to select the characters you want to
‘type’(something like “CR914”might be
nice).en rotate over to highlight the
word ok!(I love that exclamation point:
some geek has a sense of humor), click
on it, then click again to return to the
model name screen and click on the
highlighted word List to return to the
setup list screen.
Panel 2
Panel 3
Step 2. “Wing tail mix”
at’s what the DX6i calls a function
that simply will not translate into our
native tongue but must be set correctly
(don’t worry about the “why,” just trust
me). From the setup list screen ro-
tate the roller 6 notches to the right to
highlight wing tail mix, then depress
the roller to bring up the wing tail mix
screen. Be sure that all three items on
that screen show inh to indicate that
they are “inhibited.” Click the roller to
return to the setup list.
Step 3. Servo direction
Now rotate the roller 2 notches to the
left to highlight reverse, then depress
the roller to bring up the reverse screen
shown in Panel 5. Be sure the “aile”
control is set to “N” for Normal. If you
want your sail joystick to trim in the
sheets when you pull it toward you, the
way most sailors do,then scroll to high-
light the “N”next to “thro”(“throttle”
controls the sheets),click on it and then
rotate the roller one notch to change the
“N” to “R” (which will also change the
little switch icon so its handle points
up—see Panel 5). Click once to make
the DX6i remember your selection,then
scroll back to highlight List (ignore the
other four controls on this screen) and
click to return to the setup list screen.
Step 4. Rudder adjustments
a. Travel – Remember: the DX6i
thinks you turn your boat right or
left with ailerons, not the rudder. So
when you program the rudder joystick
ignore things that say rudd and work
with aile instead! Now, with your boat
electronics turned on and the transmit-
Panel 4
Panel 5
issue 65:10
the CRONICLE
Spring 2010
ter communicating with the receiver
(wiggle your rudder joystick to be sure
it is),adjust the boat’s rudder servo horn
and linkage if necessary so the rudder is
fairly parallel with the keel.en, from
the DX6i setup list screen, rotate the
roller until adjust list is highlighted
in the middle of the screen. Click once
and then scroll three clicks to highlight
travel adj. Click once to bring up the
travel adj screen shown in Panel 6.
function won’t trim fins that will prevent
your boat from diving like a submarine
at times; instead,it electronically adjusts
the centering of your servos. Click the
roller to call up the sub trim screen
shown in Panel 7. All the controls
should show zeros.If you need to tweak
your rudder to get it perfectly centered,
proceed as follows. Scroll to highlight
the zero after aile, click on it, and then
rotate the roller until your rudder is per-
fectly centered.(is adjustment moves
the rudder in very tiny increments; I
had to roll the roller 15 notches to the
right to correct a 1ºdeflection to the
left of center that was present after I
had programmed my rudder’s travel to
120% both ways in Step 4.b. Which is
why Panel 7 shows è15 after aile).
‘needle’of the sail trim gauge (the white
vertical bar at the left side of the screen)
with the black switch to the right of the
sail joystick. With the sail joystick in
the center of its range the sail servo arm
should point at roughly 9:00 relative to
the bow. If not, reposition the arm on
its shaft so that it does.
b. Sail servo travel – Now access the
adjust list screen. Scroll until travel
adj is highlighted, then click on it to
access the travel adj screen shown in
Panel 6. Scroll until the é100% next
to thro is highlighted. Now, carefully
move the sail joystick to trim the sails,
all the way to its fully trimmed posi-
tion if the mainsheet does not become
taught and the sail servo begin to hum.
(If necessary, reposition the servo arm
on its shaft and readjust the attach-
ment of the common sheet to the
cockpit floor so that, with the joystick
in the fully trimmed position, the sail
servo arm is pointing at around 11:00
relative to the bow, the knot connecting
the common sheet to the main and jib
sheets is about 1/2 inch forward of the
turning block on the aft port deck, and
the mainsheet is not quite taught.Now,
with the joystick still fully trimmed in,
rotate the DX6i roller control clock-
wise (to the right) until the mainsheet
just becomes tense. e sail servo arm
should now point somewhere around
11:30 and the common sheet knot
should be 1/8 inch or so forward of its
turning block. If not, tinker with the
position of the servo arm on its shaft
and the common sheet adjustment until
those conditions are met.With my boat,
on the travel adj screen thro reads
ê125% when I finish this process.
Next, with the sails fully trimmed in
and the main boom essentially on the
center line of the hull, check to be sure
that the jib boom points roughly at the
aft shroud—where the jib is trimmed
properly for a beat. Now carefully push
the sail joystick to the other (fully out)
end of its range. e servo arm should
point somewhere between 7:30 and
8:30 at this point and you should be
able to push the main boom forward
until it is touching the shrouds.I like to
have my jib boom about 5-10 degrees
forward of perpendicular to the hull
Panel 6
Panel 7
Scroll until the è100% next to aile
(not rudd, remember) is highlighted.
Move the rudder joystick to the extreme
right and left ends of its range and see
how far your rudder moves; if you want
more rudder travel, with the joystick
pushed to the right rotate the roller to
the right to deflect the rudder further
rightward until you like the way it looks
(I set mine at 120%). Now push and
hold the rudder joystick to the left (you
will see the number return to 100%)
and holding the joystick there rotate the
roller until the same number as your
rightward deflection (e.g., in my case
120%) appears. en click the roller to
implant these adjustments in memory
and scroll back to List,and then click to
return to the adjust list screen. (Don’t
worry if the rudder now seems to be
deflected slightly when its joystick is
centered; you’ll fix that in the next step).
b. Centering – Before proceeding
with this step, be sure you haven’t ac-
cidentally moved the rudder trim switch
located below the rudder joystick.
Return to the Main screen and, with
the rudder joystick centered, look at
the rudder trim gauge (the horizontal
bar below the airplane icon). Its ‘needle’
should be in the dead center of that bar
(the needle is white when it is centered
and turns black when the trim switch
moves it to either side).Tweak the rud-
der trim switch if necessary to make
its needle turn white. Next, bring up
the adjust list screen and scroll to
highlight sub trim. Unfortunately this
c. Dual rate and Exponential – I
played with these ways of customizing
my rudder motion with my old DX6
and found them, and the transmitter
switch that says your choices are “0”and
“1,”more distracting than useful. If you
want to try them, now that you are well
on your way to becoming a DX6i Jedi
Master you will have no trouble under-
standing and following the instructions
on pp. 62-63 of the manual.
Step 5. Sail control adjustments
us far you have not touched the
sail joystick, which should have been
roughly centered when you first turned
on the transmitter. Note that it may be
possible to over trim the sails before you
have adjusted the sail (thro) control.
Over trimming, particularly if it occurs
suddenly (for example, if the sails are
out but the sail joystick is in the fully-
trimmed position before you turn on the
transmitter) can create a force sufficient
to break something. Be careful when
you trim in with the sail joystick.
a. Sail servo position – Access the
Main screen (that should be a piece of
cake by now) and,if necessary center the

Spring 2010
the CRONICLE issue
65:11
midline when my sail joystick is fully
out, so that the jib presents maximum
area to the wind when the apparent
wind is at 170-175 degrees relative to
my course. To accomplish that I find
I must rotate the roller until é115%
appears next to thro when the sail
joystick is fully out.
Step 6. Transmitter power
To comply with various govern-
mental requirements, the DX6i can be
programmed with one of three different
power levels.Mine proved to have been
programmed for the European Union
rather than the United States. A Spek-
trum tech told me that the U.S. power
setting (of “247”— I have no idea what
that number means) is higher than the
EU setting of “326,” and several blog-
gers say that the U.S.setting gives them
better range although I was unable to
detect a reproducible difference. To
check, and change if necessary, access
the setup list, scroll until power set-
ting is highlighted, click on it, and see
what the power setting screen says. If
it says “A-EU 326” or “C-FRANCE,”
click again and scroll until it says “B-US
247,” then click again to program that
setting into memory.
Step 7. “Fail-safe” Rebinding
“Fail-safe” refers to the sheet setting
that you want your boat to have in case
communication between the transmit-
ter and the receiver fails.To embed the
sail control positions you have just fin-
ished programming into the transmitter
in the fail-safe setting you want to be
saved in your receiver, in this final step
you need to repeat the binding process
described in the preliminary section of
this recipe with your sails in the position
you want them to be if you should lose
radio communication with your boat.
I prefer to have the rudder centered
and the sails halfway out because I want
the boat to continue moving more or
less straight ahead when I lose control
during a race, to minimize the danger
of interfering with another boat before
I can warn other sailors that my boat is
out of control. Another approach is to
program fail-safe with the rudder hard
to port or starboard and the sails nearly
fully eased,to make the boat go into ‘or-
bit’ and more or less stay where it is on
the water rather than potentially sail off
over the horizon when control is lost.
Reprinted from the CRonicle, issue 65, Spring 2010. Copyright © CR 914 Class
2010. Other websites may link to this document, but it may not be copied,
reprinted or disseminated in any other form without the consent of the author.

Other manuals for DX6I

3

Other Spektrum Remote Control manuals

Spektrum DX7s User manual

Spektrum

Spektrum DX7s User manual

Spektrum DX6I User manual

Spektrum

Spektrum DX6I User manual

Spektrum DX18t User manual

Spektrum

Spektrum DX18t User manual

Spektrum BEASTX AR7210BX User manual

Spektrum

Spektrum BEASTX AR7210BX User manual

Spektrum DX3R User manual

Spektrum

Spektrum DX3R User manual

Spektrum DX8 User manual

Spektrum

Spektrum DX8 User manual

Spektrum DX3S User manual

Spektrum

Spektrum DX3S User manual

Spektrum DX3 User manual

Spektrum

Spektrum DX3 User manual

Spektrum DX3C Quick start guide

Spektrum

Spektrum DX3C Quick start guide

Spektrum DX3E User manual

Spektrum

Spektrum DX3E User manual

Spektrum DX6 User manual

Spektrum

Spektrum DX6 User manual

Spektrum DX18 User manual

Spektrum

Spektrum DX18 User manual

Spektrum DX5 PRO User manual

Spektrum

Spektrum DX5 PRO User manual

Spektrum DX3.0 User manual

Spektrum

Spektrum DX3.0 User manual

Spektrum DX3C User manual

Spektrum

Spektrum DX3C User manual

Spektrum DX 4e User manual

Spektrum

Spektrum DX 4e User manual

Spektrum DX Series User manual

Spektrum

Spektrum DX Series User manual

Spektrum 5-Channel Full Range DSM2 2.4GHz Radio... User manual

Spektrum

Spektrum 5-Channel Full Range DSM2 2.4GHz Radio... User manual

Spektrum DX8 User manual

Spektrum

Spektrum DX8 User manual

Spektrum ix20 User manual

Spektrum

Spektrum ix20 User manual

Spektrum DX7 User manual

Spektrum

Spektrum DX7 User manual

Spektrum DX4S User manual

Spektrum

Spektrum DX4S User manual

Spektrum DX3S User manual

Spektrum

Spektrum DX3S User manual

Spektrum DX2S User manual

Spektrum

Spektrum DX2S User manual

Popular Remote Control manuals by other brands

ELRO AG40RE11 manual

ELRO

ELRO AG40RE11 manual

MELICONI CONTROL TV 100 manual

MELICONI

MELICONI CONTROL TV 100 manual

Alfaled AFR-T5 quick start guide

Alfaled

Alfaled AFR-T5 quick start guide

Polk Audio DR-3 instruction manual

Polk Audio

Polk Audio DR-3 instruction manual

Universal Remote Control CLIKR-5 UR5U-8500 operating instructions

Universal Remote Control

Universal Remote Control CLIKR-5 UR5U-8500 operating instructions

AirTurn DIGIT III user manual

AirTurn

AirTurn DIGIT III user manual

Sony XR-55A90J Dismantling Information for Use

Sony

Sony XR-55A90J Dismantling Information for Use

Magnetek Flex 4Base instruction manual

Magnetek

Magnetek Flex 4Base instruction manual

RF SOLUTIONS ELITE-L Series quick start guide

RF SOLUTIONS

RF SOLUTIONS ELITE-L Series quick start guide

Anderic RRH100 instruction manual

Anderic

Anderic RRH100 instruction manual

FONESTAR MPX-410ES quick start guide

FONESTAR

FONESTAR MPX-410ES quick start guide

urmet domus 1068/005A Installation and programming manual

urmet domus

urmet domus 1068/005A Installation and programming manual

Telis Composio RTS user manual

Telis

Telis Composio RTS user manual

Revo VRS-LANC user manual

Revo

Revo VRS-LANC user manual

Chamberlain LiftMaster Professional 312HM owner's manual

Chamberlain

Chamberlain LiftMaster Professional 312HM owner's manual

Philips SBC RU 538 Instructions for use

Philips

Philips SBC RU 538 Instructions for use

SRS Labs CMC4-DIGI-AHD instruction manual

SRS Labs

SRS Labs CMC4-DIGI-AHD instruction manual

Crestron MLX-3 Configuration guide

Crestron

Crestron MLX-3 Configuration guide

manuals.online logo
manuals.online logoBrands
  • About & Mission
  • Contact us
  • Privacy Policy
  • Terms and Conditions

Copyright 2025 Manuals.Online. All Rights Reserved.