manuals.online logo
Brands
  1. Home
  2. •
  3. Brands
  4. •
  5. Spirit
  6. •
  7. Light Fixture
  8. •
  9. Spirit LEDglo User manual

Spirit LEDglo User manual

LEDglo Refrigeration Light
Horizontal Refrigeration Shelf Light
Before you begin, read these instructions completely
and carefully. If you have any questions regarding
the proper use, installation, or safety considerations
of this product, please visit our website or contact
spirit LED Lighitng.
Spirit LED Lighting
1200 Valwood Pkwy.
Carrollton TX. 75006
Tel + 1-972-444-8400
Fax + 1-972-444-8424
Your kit includes:
* Model: LEDglo
* Mounting Brackets (Qty 2)
* #8 Self-Taping Screws (Qty 4)
* 75W Power Supply
* TYCO 6-WAY DISTRIBUTOR (Qty 1)
* Extension power cables
* 1/8” Drill Bit
* Wire Cutters
* Phillips Head Screwdriver
www.spiritledlighting.com
Thank you for purchasing Spirit LED LIghting
Horizontal Fixture Shelf Light.
Model: LEDglo
PRODUCT SPECIFICATIONS
Luminaire
Power Supply
PARAMETER
PARAMETER
VALUE
VALUE
In mm
Case Length 8.34 212.00
Case Width 1.70 43.00
Case Height 1.18 30.00
Mounting Lenght 9.45 240.00
Mounting Width 1.22 31.00
Overall Length 9.45 240.00
PS24V100W-01
TYCO 6-WAY DISTRUBUTOR
Tools needed:
Input Power
Rated Power Output
8 Watts
75 Watts (100 Watts Max)
24V DC
24V DC
*Due to constant power design input (Lin)
will vary depending on input voltage. Be
sure to size wire awg accordingly for worst
case input voltage.
Spirit LED Lighting
1200 Valwood Pkwy.
Carrollton TX. 75006
Tel + 1 972-444-8400
Fax + 1 972-444-8424
[email protected]
Product information is subject to change without notice.
® 2010 Spirit LED Lighting. All Rights Reserved.
www.spiritledlighting.com
-25 to 40C
4.1 Amps
120/277V AC
Dry, Damp
50/60 HZ
-40 to +55C
Dry, Damp
Input Voltage Range
Voltage Range
Humidity
Input Voltage
Operating Temp. Range
Output Current
Environment
Input Frequency
Operating Temp. Range
Environment
Installation Guide
Prepare Display Case
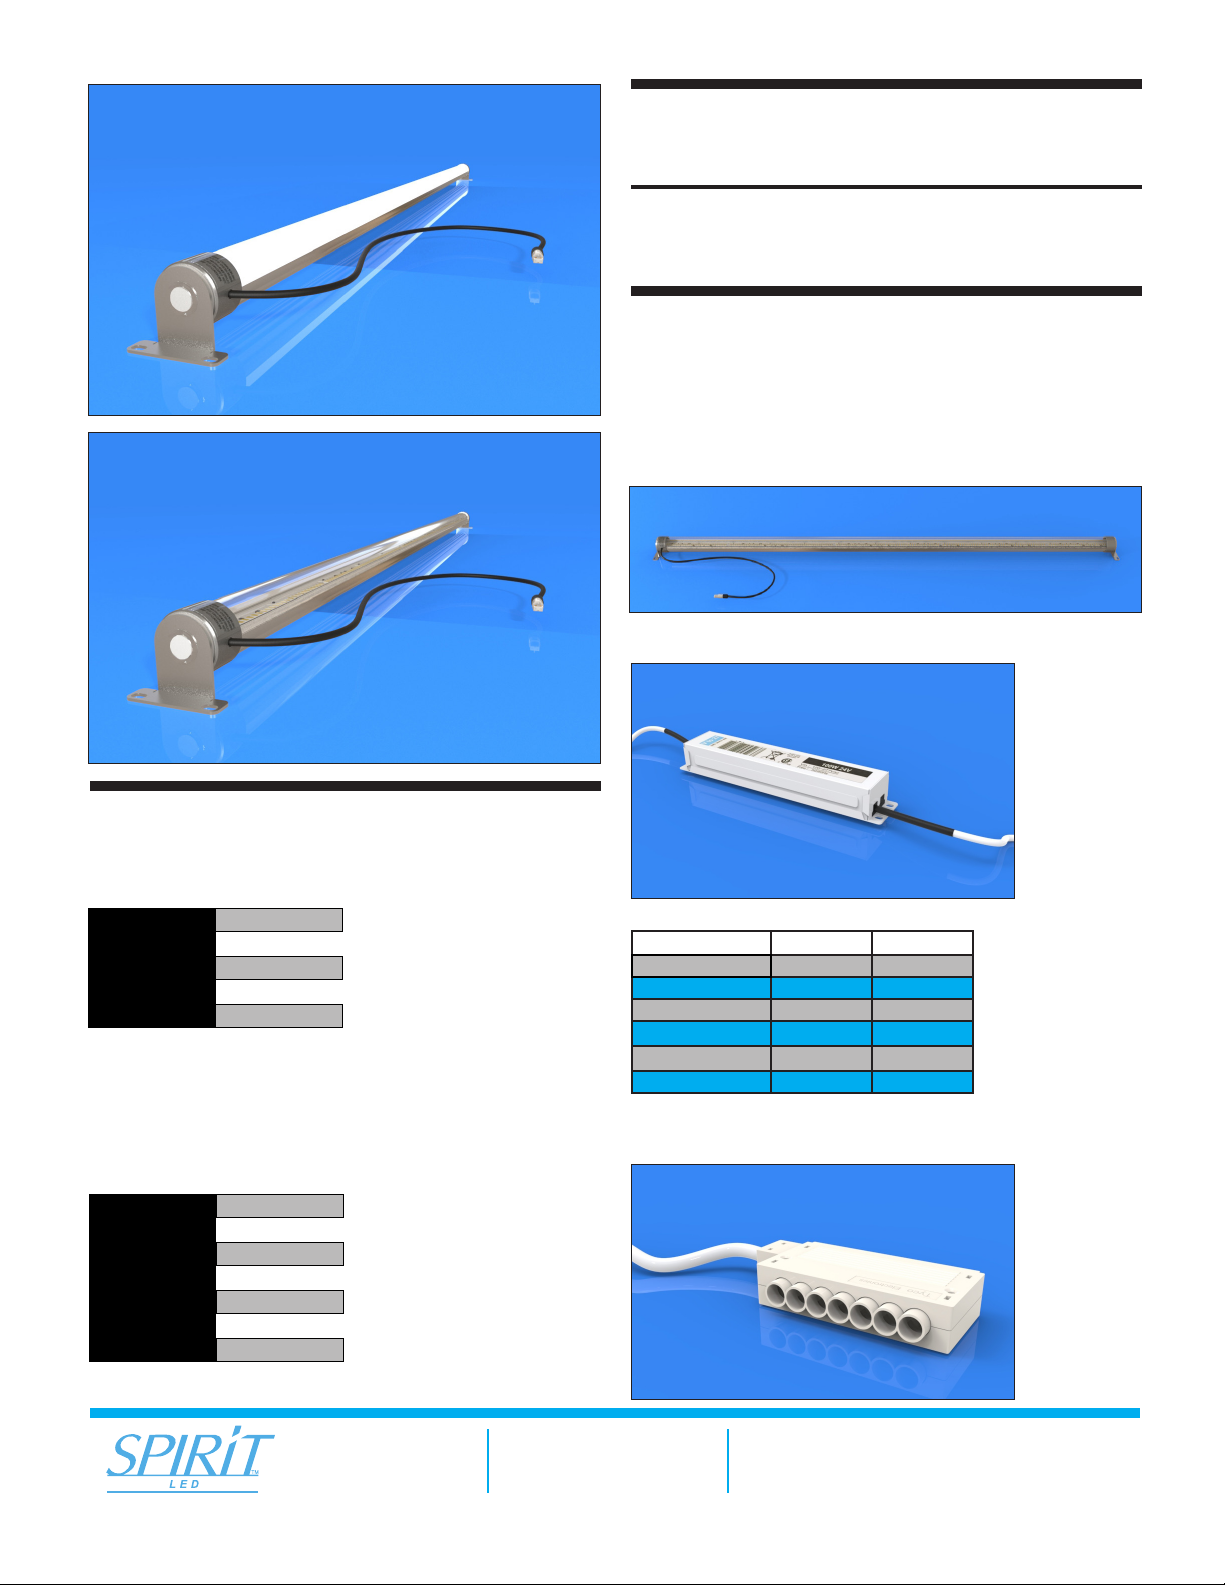
Installing the mounting brackets
Installing the LEDglo to the mounting brackets
DANGER: RISK OF ELECTRICAL SHOCK OR FIRE. DISCONNECT POWER BEFORE INSTALLATION
INSTALLATION INSTRUCTIONS - LIGHT FIXTURE
Before you begin, read these instructions completely and carefully. If you have any questions regarding the proper use,
installation, or safety considerations of this product, please visit our website or contact spirit LED Lighitng.
● Then turn AC power off to the display case.
● Disconnect all power to the lamp xture.
● Remove uorescent tubes. Dispose of tubes properly.
● Remove the ballast and starter where applicable.
● Remove and replace original “tombstone” lamp
holders with provided mounting brackets.
● Determine the mounting position of the rst bracket
in light troffer.
● Drill 2 pilot holes (specify size and spacing of holes
for bracket).
● Measure for second bracket and drill 2 pilot holes
(specify size and spacing of holes for bracket and
distance from rst bracket.
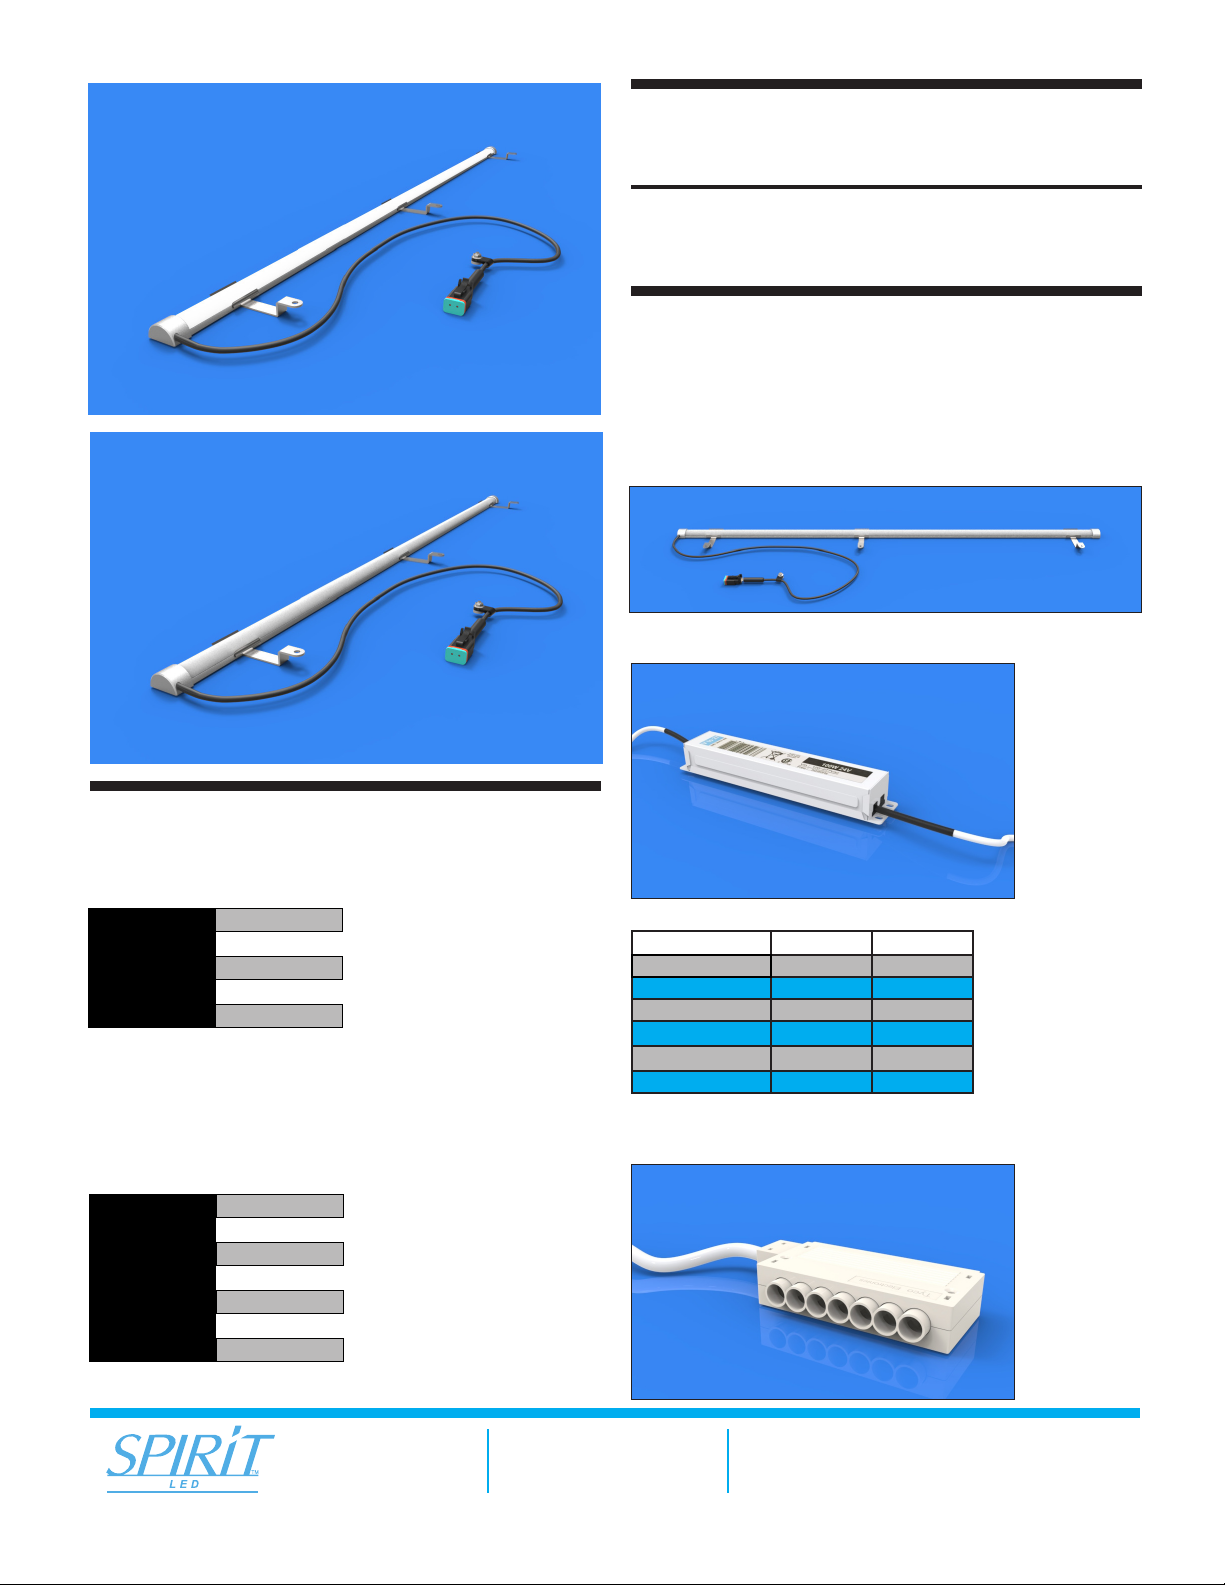
● Install the LEDglo canopy light in the mounting
brackets so that the LEDglo power cable is at the end
of the light troffer with the cable exit.
● Feed the LEDglo canopy light power cable through
the cable exit in the troffer into the display cabinet.
● Once the power cable is fed through the cable exit,
connect the extension power calbes to the light
power cable.
Spirit LED Lighting
1200 Valwood Pkwy.
Carrollton TX. 75006
Tel + 1 972-444-8400
Fax + 1 972-444-8424
[email protected]
Product information is subject to change without notice.
® 2010 Spirit LED Lighting. All Rights Reserved.
www.spiritledlighting.com
AC
120 - 277V
Fluorescent Lamp
Fluorescent
Ballast
x.x”
Light Troffer
Light Troffer
Hole Dia. (x2)
Distance Inches
Bracket
Power Cable
LEDglo Refrigeration Light
Horizontal Fixture Canopy Light
Before you begin, read these instructions completely
and carefully. If you have any questions regarding
the proper use, installation, or safety considerations
of this product, please visit our website or contact
spirit LED Lighitng.
Spirit LED Lighting
1200 Valwood Pkwy.
Carrollton TX. 75006
Tel + 1-972-444-8400
Fax + 1-972-444-8424
Your kit includes:
* Model: LEDglo
* Mounting Brackets (Qty 2)
* #8 Self-Taping Screws (Qty 4)
* 75W Power Supply
* TYCO 6-WAY DISTRIBUTOR (Qty 1)
* Extension power cables
* 1/8” Drill Bit
* Wire Cutters
* Phillips Head Screwdriver
www.spiritledlighting.com
Thank you for purchasing Spirit LED LIghting
Horizontal Fixture Canopy Light.
Model: LEDglo
PRODUCT SPECIFICATIONS
Luminaire
Power Supply
PARAMETER
PARAMETER
VALUE
VALUE
In mm
Case Length 8.34 212.00
Case Width 1.70 43.00
Case Height 1.18 30.00
Mounting Lenght 9.45 240.00
Mounting Width 1.22 31.00
Overall Length 9.45 240.00
PS24V100W-01
TYCO 6-WAY DISTRUBUTOR
Tools needed:
Input Power
Rated Power Output
30 Watts
75 Watts (100 Watts Max)
24V DC
24V DC
*Due to constant power design input (Lin)
will vary depending on input voltage. Be
sure to size wire awg accordingly for worst
case input voltage.
Spirit LED Lighting
1200 Valwood Pkwy.
Carrollton TX. 75006
Tel + 1 972-444-8400
Fax + 1 972-444-8424
[email protected]
Product information is subject to change without notice.
® 2010 Spirit LED Lighting. All Rights Reserved.
www.spiritledlighting.com
-25 to 40C
4.1 Amps
120/277V AC
Dry, Damp
50/60 HZ
-40 to +55C
Dry, Damp
Input Voltage Range
Voltage Range
Humidity
Input Voltage
Operating Temp. Range
Output Current
Environment
Input Frequency
Operating Temp. Range
Environment
Installation Guide
Prepare Display Case
Installing the LEDglo shelf light
DANGER: RISK OF ELECTRICAL SHOCK OR FIRE. DISCONNECT POWER BEFORE INSTALLATION
INSTALLATION INSTRUCTIONS - LIGHT FIXTURE
Before you begin, read these instructions completely and carefully. If you have any questions regarding the proper use,
installation, or safety considerations of this product, please visit our website or contact spirit LED Lighitng.
● Then turn AC power off to the display case.
● Disconnect all power to the lamp xture.
● Remove uorescent tubes. Dispose of tubes properly.
● Remove the ballast and starter where applicable.
● Remove and replace original “tombstone” lamp
holders with provided mounting brackets.
● Attach mounting brackets to the light.
● Attach mounting brackets to the shelf using self
tapping screws.
● Feed LEDglo shelf light power cable through the
pre-existing hole in the shelf into the display cabinet.
● Once the power cable is fed through the pre-existing
hole, connect the exstension power cable to the light
power cable.
● Once the LEDglo shelf light has been installed, attach
the supplied warning label nearby the installed light.
Spirit LED Lighting
1200 Valwood Pkwy.
Carrollton TX. 75006
Tel + 1 972-444-8400
Fax + 1 972-444-8424
[email protected]
Product information is subject to change without notice.
® 2010 Spirit LED Lighting. All Rights Reserved.
www.spiritledlighting.com
AC
120 - 277V
Fluorescent Lamp
Fluorescent
Ballast
Power Cable

Popular Light Fixture manuals by other brands

Eaton i-P65 Instruction leaflet

Eaton

Eaton i-P65 Instruction leaflet

Fiberstars JAZZ J400C owner's manual

Fiberstars

Fiberstars JAZZ J400C owner's manual

Philips HF3471/01 Quick start card

Philips

Philips HF3471/01 Quick start card

Conrad KB-A4 operating instructions

Conrad

Conrad KB-A4 operating instructions

luminii Kendo-45M Series installation instructions

luminii

luminii Kendo-45M Series installation instructions

Regent Lighting FRISK Mounting instruction

Regent Lighting

Regent Lighting FRISK Mounting instruction

Ibiza MH-ASTRO-WASH manual

Ibiza

Ibiza MH-ASTRO-WASH manual

Philips CHLORIDE CCAX Series instruction sheet

Philips

Philips CHLORIDE CCAX Series instruction sheet

emaux GL10 Installation and operation manual

emaux

emaux GL10 Installation and operation manual

Philips LWL2 Series specification

Philips

Philips LWL2 Series specification

Robe Robin 600E Beam user manual

Robe

Robe Robin 600E Beam user manual

Martin Professional Ego X4 user manual

Martin Professional

Martin Professional Ego X4 user manual

ETC Source Four Revolution user manual

ETC

ETC Source Four Revolution user manual

Chauvet Professional MAVERICKF2BW user manual

Chauvet Professional

Chauvet Professional MAVERICKF2BW user manual

Philips Calculite AL2HC specification

Philips

Philips Calculite AL2HC specification

Holiday Living & Design W11C0015 quick start guide

Holiday Living & Design

Holiday Living & Design W11C0015 quick start guide

Chauvet Q-Spot 150 supplementary guide

Chauvet

Chauvet Q-Spot 150 supplementary guide

Philips D04 specification

Philips

Philips D04 specification

manuals.online logo
manuals.online logoBrands
  • About & Mission
  • Contact us
  • Privacy Policy
  • Terms and Conditions

Copyright 2025 Manuals.Online. All Rights Reserved.