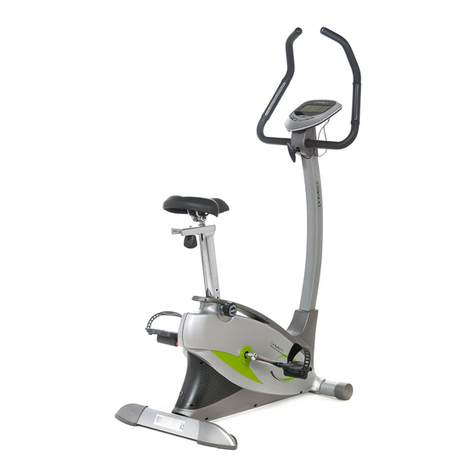
Sportig Spinstar User manual

USER’S MANUAL

Dear Customers:
Welcome to the use of our fitness equipment. By using our equipment, we hope you will get fit in a very
effective way.
Before the use, please read carefully and strictly following the instruction to operate.
Please contact us in case of any problem. Thanks for your cooperation.
Warning :
Please read all instructions and precaution measures of the manual before the
use, and keep it for future reference.
Safety Instruction…………………….3
Exploded View……………………… 5
Accessory List ....................................6
Assembly Instructions……………….7
Monitor Introduction …...……..……11
CONTENT

Please read all instructions before the use of this fitness equipment. Below is the basic precaution measure
ahead of the use.
Caution:
1、In case of any accident arising from health or safety, which makes the exercise not going as normal, user
should consult with doctor about his/her own health before the use of the fitness equipment.
2、Please pay attention to the status of health at any time while training. It could probably be harmful to your
health if it’s done in a wrong way of training. Please stop the exercise immediately once you feel any of the
following symptoms such as headache, chest distress, irregular heart rate, shortness of breath, dizziness and
sick and check and confirm with doctor. Keep on with the training only after the permission of doctor.
3、It is strongly recommended to use this equipment the way the manual instructs. Please stop using it right
away once you find any defected accessories during the process of assembly and maintenance or there is any
noise when it’s being used. Make sure you will go on after every problem is solved.
Children
1. Keep the children and pet away from the equipment when using.
Tips
1、Please put the fitness equipment on the strong and flat surface and cover the floor and blanket with
protective sheet from the damage to ground. For the sake of safety, please make sure there will be no less than
50cm distance between the equipment and the surrounding
2. Before using the equipment, please check and make sure all the bolts, nuts that needed to be twisted tightly
are done so for safety use.
3、Be careful of the safety and take the right measures or being assisted by others if necessary in the process of
lifting and moving this equipment.
4、The equipment is only limited to the use for indoor. Please do not use it in the environment where it is wet
and it’s in the sun.
5、The Max. user weight is 150 KG
Maintenance
1. After the use for one or two months, please strictly check the equipment under the guidance of instruction for
its being operated normally while using the original accessories.
2. To make sure it’s being used normally, please often do maintenance to the parts venerable to damage, wear
and rupture.
3. It is okay to use the cleaning cloth to clean the equipment. Avoid it in touch with materials like corrosive
cleaner.
Other Safety Tips
1. Please wear the comfortable and tight clothes while using this training equipment to avoid being hooked for
any risk during the process.
Safety Instruction

2. This equipment is not recommended for use of health recovery.
3. The commonly used standard No. for product: GB17498.1-2008/GB17498.10-2008
4. Please read the manual before using this fitness equipment.
5. Please contact with department of service if our assistance is required for any problem
Thanks for your choice on our product
You have already moved forward an important step in the process of development and the persistence of fitness
exercise.
Our product will become a very effective tool for meeting your goal of being fit. It will improve your life
quality by often using our product.
Below are a few beneficial aspects of cardio exercise.
⚫Losing Weight
⚫Beneficial to the health of heart
⚫Enhancing vigor
⚫Reducing pressure
⚫Effective to prevent the feeling of anxiousness and depression
⚫Better your self image

Exploded View

No.
Description
Quantity
No.
Description
Quantity
1.
Front chain guard
1
64.
Flywheel supporting piece (right)
1
2.
Back chain guard
1
65.
Decorative piece
1
3.
Main frame
1
66.
Brake connecting holder
1
4.
Bearing supporting holder
2
67.
Bearing
1
5.
Middle bearing washer
1
68.
Curved piece
1
6.
Flywheel central axis
1
69.
Bottom bracket
1
7.
Deep groove bearing 6004
2
70.
Middle empty tube
2
9.
Deep groove ball bearing
2
71.
Welding nut
2
10.
M10-L shape handle
1
72.
Brake decorative cover
1
14.
Flywheel
1
73.
Brake round tube
1
16.
Brake square tube
1
74.
Flywheel supporting piece(left)
1
19.
Handlebar adjustable nut
1
75.
Legging tube
2
20.
Brake
1
76.
Brake handle fixed holder
1
21.
Brake handle
1
77.
Main supporting tube
1
22.
M5X33 bolt
1
78.
Frame supporting tube
1
23.
M8X5T
1
79.
Legging tube bolt
4
29.
M6X12 inner hexagon bolt
4
81.
Back leg tube
1
31.
Welding nut M10
4
82.
Front leg tube
1
32.
M10 non-skid nut
2
83.
Adjustable legging pad
4
33.
Crank cover
2
84.
Belt
1
35.
M6X12 inner hexagon bolt
4
85.
Pedal
1
36.
M8 non-skid bolt
1
88.
Pedal
1
37.
Acorn nut M8
4
89.
Left Right crank
2
38.
Washer
4
91.
Middle bearing nut
2
39.
leg tube plug
4
92.
Middle bearing
1
41.
Lock pin
1
93.
Computer
1
42.
4.2 flat self-tapping screw
2
94.
M8 bolt
2
43.
3.2 self-tapping screw
5
95.
Non-skid bolt
2
44.
Handlebar nut
2
96.
Washer
2
45.
Middle empty plug
3
97.
Sliding wheel
2
46.
L shape handle bar
4
98.
Rolling wheel holder
2
47.
L shape handle bar
4
49.
Handle supporting tube
1
50.
Handle support sliding rail(lower)
1
51.
Washer
2
52.
Handle support sliding rail(upper)
1
54.
Handlebar
1
55.
Saddle sliding rail(lower)
1
56.
Saddle inserting tube
1
58.
Saddle
1
61.
Saddle steel sliding rail
1
63.
Front inserting tube
2
Accessory List

The First Step
Install the back leg tube (81) onto the main frame (3) and connect the two acorn nuts (37), flap
gasket and bolt (8).
The method for installing front leg tube is the same as the back one.
Assembly Instruction

The Second Step
Insert saddle sliding rail (55) into the main frame, loose the knob (47) first and put the saddle
tube into the saddle frame, adjusting it to a proper height while pointing right to the hole, later
insert the knob (47) back and tighten it.
Then install the saddle (58) onto the adjustable saddle post (61), tightening it with knob (47)
and washer (51).

The Third Step
Insert the measuring tube (50) into the main frame while pointing right at the hold.
Tighten it with nut (45) and the inserting block (44) and L shape lock pin (47).
Using the grip, install the computer (93) onto the handlebar (53) to adjust the angle properly.
Then insert the sensor line into the back hole of computer.

The Fourth Step
Switch the Left pedal (85) onto the left crank of main frame (1) and the right pedal (88) onto
the right crank.
Attention:
Right paddle is rotating clockwise
Left paddle is rotating counterclockwise

1. Product Description :
SPECIFICATIONS :
TIME………………………………………………….…..…00:00-99:59MIN:SEC
SPEED………………...…….……………………….…..… 0.0-999. 9KM/H
DISTANCE…………………………………………...……. 0-99.99KM
TOTAL DISTANCE…………………………………………0-9999KM
CALORIES…………………………………………………. 0-999.9KCAL
PULSE ………………………………………………………….60-120 TIMES/MIN
AUTO SCAN : Start the monitor or press the button to turn into the condition of scanning.
All the functions data of Time, Calories, Pulse, Speed, Distance would automatically be on display in a cycling
way, with data pausing for 6 seconds for each function.
2. Methods for using
1) Battery Installation
Please install no.5 AAbattery to the battery box on the back of computer.
(All the function would be refreshed to be “0”every time after the batter is replaced)
2) Automatic on and off
The main display would show all the data during the exercise of user.
The data of odometer would be saved after stopping exercise for more than 256 seconds.
It would keep calculating when the user starts to run again.
3) Reset
Press the button for two seconds, all the functions except the odometer would be refreshed
to be “0”.
Attention!
1. If the computer would not be displaying data normally, please install the battery again.
2. Specification of battery: Two piece of no.5 AA battery.
3. The battery must be taken out from the computer for safe treatment once it was out of energy for trash.
4. This manual is also suitable for equipment without computer.
Computer Introduction
Other manuals for Spinstar
3
Table of contents
Other Sportig Exercise Bike manuals
Popular Exercise Bike manuals by other brands
Sparraw
Sparraw SP RUN104 manual

Christopeit Sport
Christopeit Sport X3 Black Edition Assembly and exercise instructions

Christopeit Sport
Christopeit Sport MB 3 Assembly and exercise instructions
kinetic
kinetic T-2800 user manual

Schwinn
Schwinn EVO Airdyne Assembly manual
Precor
Precor RBK 615 Assembling and maintaining


