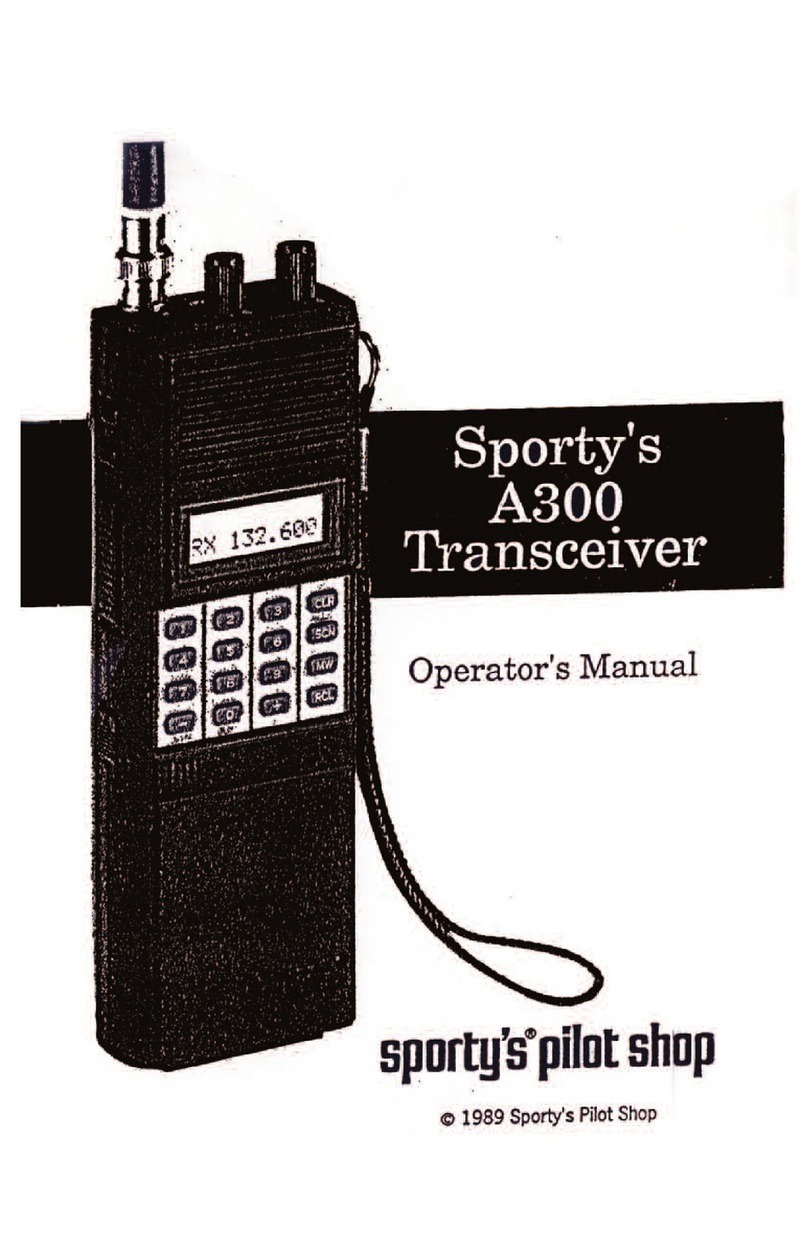
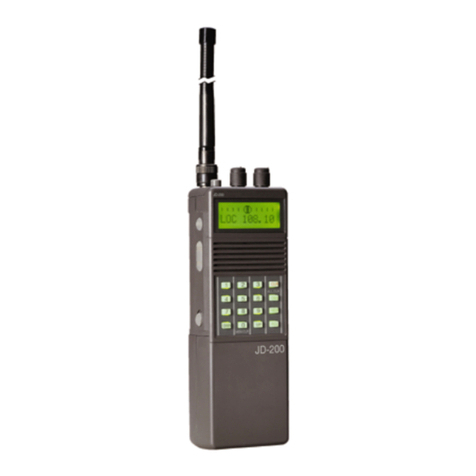
Sporty's SP-200 User manual

Sporty’s SP-200
Handheld NAV/COM
© 2003 Sportsman’s Market, Inc.
Operator’s Manual
SP-200 BOOKLET 9/28/04 5:46 PM Page 3

Simplified Directions
1. Install the batteries.
2. Turn the unit on (rotate volume knob clockwise).
3. Enter the first six digits of desired frequency
(1 2 2 9 7 5 for 122.975 MHz).
4. Listen and transmit.
SP-200 BOOKLET 9/28/04 5:46 PM Page 4

Table of Contents
General Information . . . . . . . . . . . . . . . . . . . . . . . . . . . . . . . . . . . 2
Introduction . . . . . . . . . . . . . . . . . . . . . . . . . . . . . . . . . . . . . . . 2
Features . . . . . . . . . . . . . . . . . . . . . . . . . . . . . . . . . . . . . . . . . . 2
Warranty . . . . . . . . . . . . . . . . . . . . . . . . . . . . . . . . . . . . . . . . . 3
License Requirements . . . . . . . . . . . . . . . . . . . . . . . . . . . . . . . 3
Antenna Requirements . . . . . . . . . . . . . . . . . . . . . . . . . . . . . . . 3
Batteries . . . . . . . . . . . . . . . . . . . . . . . . . . . . . . . . . . . . . . . . . . 4
Precautions . . . . . . . . . . . . . . . . . . . . . . . . . . . . . . . . . . . . . . . . 6
Controls . . . . . . . . . . . . . . . . . . . . . . . . . . . . . . . . . . . . . . . . . . . . . 8
Top View . . . . . . . . . . . . . . . . . . . . . . . . . . . . . . . . . . . . . . . . . 9
Left Side View . . . . . . . . . . . . . . . . . . . . . . . . . . . . . . . . . . . . 10
Front View . . . . . . . . . . . . . . . . . . . . . . . . . . . . . . . . . . . . . . . 10
Right Side View . . . . . . . . . . . . . . . . . . . . . . . . . . . . . . . . . . . 11
Operating Instructions . . . . . . . . . . . . . . . . . . . . . . . . . . . . . . . . 12
Manual Frequency Selection . . . . . . . . . . . . . . . . . . . . . . . . . . 12
Frequency Search . . . . . . . . . . . . . . . . . . . . . . . . . . . . . . . . . . 13
Frequency Memory . . . . . . . . . . . . . . . . . . . . . . . . . . . . . . . . 14
Memory Recall . . . . . . . . . . . . . . . . . . . . . . . . . . . . . . . . . . . . 15
Memory Scan . . . . . . . . . . . . . . . . . . . . . . . . . . . . . . . . . . . . . 16
Memory Clear . . . . . . . . . . . . . . . . . . . . . . . . . . . . . . . . . . . . 17
Transmitting . . . . . . . . . . . . . . . . . . . . . . . . . . . . . . . . . . . . . . 18
VOR Operations . . . . . . . . . . . . . . . . . . . . . . . . . . . . . . . . . . . 19
Localizer Operations . . . . . . . . . . . . . . . . . . . . . . . . . . . . . . . 21
Key Lock . . . . . . . . . . . . . . . . . . . . . . . . . . . . . . . . . . . . . . . . 22
Screen and Keypad Lighting . . . . . . . . . . . . . . . . . . . . . . . . . . 22
Last Frequency . . . . . . . . . . . . . . . . . . . . . . . . . . . . . . . . . . . . 22
Accessories . . . . . . . . . . . . . . . . . . . . . . . . . . . . . . . . . . . . . . . . . . 23
Specifications . . . . . . . . . . . . . . . . . . . . . . . . . . . . . . . . . . . . . . . . 27
SP-200 BOOKLET 9/28/04 5:46 PM Page 5

General Information
Introduction
This manual contains only operational information relative to
Sporty’s SP-200 NAV/COM. This manual is not intended as a
service or maintenance manual and does not contain any theory or
schematic diagrams.
Features
Sporty’s SP-200 is a hand-held, aircraft communication and
navigation transceiver with the following features:
•2,280 COMM frequencies (118.000 MHz to 136.975 MHz)
(unit will also receive 137.000 MHz to 142.975 MHz)
•8.33KHz spacing
•200 NAV frequencies (108.000 MHz to 117.950 MHz)
•Last Frequency Function
•Duplex communications — unit transmits on the Flight
Service Station (FSS) frequency, 122.100 MHz, while
listening over the VOR frequency
•Course Deviation Indicator (CDI) with Omni Bearing
Selector (OBS) and TO/FROM Indicator
•Localizer with CDI
•VOR with CDI
•Back-Lit Keypad and Screen
•20 Memory Channels
•Full Feature Scanner — Scan the 20 Memory Channels or
the entire frequency range
•Key Lock
•Low Battery Indicator
•External Power and Antenna Options
•Easiest to use hand-held transceiver available
2
SP-200 BOOKLET 9/28/04 5:46 PM Page 6

Warranty
Our Warranty is simple. If, in its first five years, your SP-200
NAV/COM fails due to defective workmanship or parts under normal
use, we will replace it or repair it at our option.
The warranty does not apply to units subject to misuse, battery
leakage, neglect or accidents. Nor does the warranty apply to units
damaged by lightning, excess current, moisture, units repaired or
altered outside the factory, units with altered or removed serial
numbers, or units used with accessories other than those listed in the
Accessories section of this manual.
To have your unit serviced under this warranty, return it postage
paid with proof of purchase to: Sporty’s Pilot Shop, Clermont
County/Sporty’s Airport, Batavia, Ohio 45103-9747.
Note: When returning your unit for warranty service, do NOT
include any accessories (belt clip, headset adapter, etc.).
If your SP-200 is no longer under warranty, you may still have it
serviced at Sporty’s. Call Sporty’s Customer Service at 513.735.9000
for instructions.
License Requirements
Operating the transceiver in an aircraft that has an aircraft radio station
license requires no additional license. To get an aircraft radio station
license fill out FCC Form 601. Operating the radio on the ground
requires a ground station authorization. This form is available from
the FCC by calling 800.418.3676.
Antenna Requirements
Included with the SP-200 is a flexible rubber antenna (Rubber Duck),
which may be used for both COMM and NAV frequencies. However,
an external antenna may be needed if operating inside an aircraft (must
be properly installed by an aircraft radio shop), automobile or other
metal enclosure.
3
SP-200 BOOKLET 9/28/04 5:46 PM Page 7

4
On top of the SP-200 is a BNC connector, which is standard for use
on aircraft radios. Therefore, little difficulty should be encountered in
connecting an existing aircraft radio antenna to the SP-200.
When using the flexible antenna inside an aircraft or other enclosure,
the optional remote antenna mount allows the antenna to be
positioned in a side window or other favorable location for improved
reception. The SP-200 can also be positioned in a side window or
other favorable location by using the optional suction cup transceiver
holder. See the accessories section of this manual for these products.
Batteries
An Alkaline Battery Pack is standard equipment with the SP-200.
Alkaline batteries, such as Eveready®Energizers, are a good power
source for a backup radio because they have excellent storage life and
no maintenance is required.
The Alkaline Battery Pack is NOT rechargeable. The batteries must
be replaced. To replace the batteries, turn the power OFF and then
remove the battery pack from the unit by pushing the Battery Pack
Release up (see Controls section of this manual) and sliding the
battery pack left toward the Battery Pack Release. The case splits into
two sections by pressing on the top of the case. Push in the center on
the positive (+) terminal side and gently pull the two sections apart.
Eight 1.5 volt AA alkaline batteries are required.
Replace the batteries by following the positive (+) and negative (-)
terminal markings inside the case. When the batteries are replaced, snap
the two sections back together and attach the battery pack to the radio.
To attach the Alkaline or Nicad Battery Pack, make sure the power is
OFF and then align the grooves on the SP-200 and battery pack.
Slide the battery pack onto the radio until it locks in place.
The following table is a conservative estimate of the life of fresh
Alkaline batteries at some common duty cycles with the audio
background noise silenced by the Squelch.
SP-200 BOOKLET 9/28/04 5:46 PM Page 8

Life Transmit Receive Standby Light
15.4 hrs 2% 3% 95% Off
12.8 hrs 2% 3% 95% On
9.5 hrs 10% 10% 80% Off
7.9 hrs 10% 10% 80% On
6.0 hrs 20% 20% 60% Off
5.0 hrs 20% 20% 60% On
The optional Nicad (nickel-cadmium) Battery Pack is rechargeable and
must be charged upon receipt before using. If possible, completely
discharge the Nicad Battery Pack before recharging. Repeated
recharging, after minimal usage (discharging) of Nicad batteries, results
in very poor battery performance.
The Nicad Battery Pack is not recommended when the SP-200
will be used as a backup radio. The storage life of Nicad batteries
is not as predictable as Alkaline batteries. The Nicad Battery Pack
is recommended when the SP-200 will be used on a daily or frequent
basis.
The following table is a conservative estimate of the life of a fully
charged Nicad Battery Pack at some common duty cycles with the
audio background noise silenced by the Squelch.
Life Transmit Receive Standby Light
6.0 hrs 2% 3% 95% Off
5.0 hrs 2% 3% 95% On
3.8 hrs 10% 10% 80% Off
3.2 hrs 10% 10% 80% On
2.5 hrs 20% 20% 60% Off
2.1 hrs 20% 20% 60% On
Use only the chargers listed in the Accessories section of this manual.
When the alkaline batteries need replaced or the Nicad Battery Pack
needs recharged, the screen will display “BATT” as shown below and
the selected frequency will flash.
Note: Will maintain memory one hour
with batteries removed.
122.975
BATT
5
SP-200 BOOKLET 9/28/04 5:46 PM Page 9

6
Precautions
•Changes or modifications not expressly approved by the
manufacturer for compliance could void the user’s authority
to operate the equipment.
•Never attempt to service this unit yourself. It should be
referred to qualified service personnel. Please read the
Warranty section in this manual.
•If liquid spills or some solid object falls into the unit, remove
the battery pack or external power adapter and have the unit
checked by a qualified person before further operation.
•The optional Nicad (nickel-cadmium) Battery Pack is
recyclable. It may be unlawful in your state to dispose of
Nicad batteries in a municipal landfill. Please contact your
local solid waste officials for disposal and recycling options.
•Never dispose of batteries or battery packs in a fire. They
may explode.
•Never leave weak or dead batteries in the Alkaline Battery
Pack. They may leak and cause permanent damage.
•Never store a battery pack where it may be accidentally
shorted.
•Never crush or disassemble a Nicad battery pack. Nicad
batteries contain toxic chemicals.
•Never store a discharged Nicad Battery Pack. The cell
polarity may reverse, making it impossible to recharge.
•Use only the approved external power adapters, Nicad
battery chargers and battery packs listed in the Accessories
section of this manual.
SP-200 BOOKLET 9/28/04 5:46 PM Page 10

7
•Never touch an external antenna when the danger of
lightning is present.
•Do not leave the transceiver near heat sources, such as
radiators or air ducts, or place the transceiver in an
environment where the radio will be subjected to moisture,
excessive dust, shock or mechanical vibration.
•Abrasive cleaners or chemical solvents may mar or damage
the case. Clean the transceiver with a soft cloth dampened
with a mild detergent solution.
•If operating the transceiver at temperatures outside the range
of -20°F to 122°F (-30°C to 50°C), the LCD (screen) may
not display the selected frequency. If the SP-200 is used
in temperatures lower than the recommended range, the
characters being displayed may change very slowly. These
irregularities will disappear, with no harm to the SP-200,
when operation is resumed within the recommended
temperature range.
SP-200 BOOKLET 9/28/04 5:46 PM Page 11

8
Controls
TOP
LEFT SIDE FRONT RIGHT SIDE
A
D
BC
F
E
G
H
I
J
K
L
M
N
O
P
Q
R
S
T
U
V
W
SP-200
SP-200
DC 9V
LIGHT
PTT
KEYLOC MEMCLR
ALLCLR
123
456
789
0
DWN UP
CLR
OBS
MEM
RCL
LASTFREQ
EAR MIC
SQ VOL
OFF
ANT
SP-200 BOOKLET 9/28/04 5:46 PM Page 12

This section serves only to identify and briefly describe the SP-200’s
external features. Please see the Operating Instructions section for
detailed instructions on the use of the SP-200.
Top View
(A) Antenna Connector
The flexible rubber antenna or an external antenna may be
attached to this BNC connector.
(B) Earphone Jack
Using the optional Headset Adapter (#8635A) the earphone of
a standard aviation noise attenuating headset may be plugged
into this jack. The internal speaker is disabled when this jack
is used.
(C) Microphone Jack
Using the optional Headset Adapter (#8635A) the microphone
of a standard aviation noise attenuating headset may be
plugged into this jack. The internal microphone is disabled
only when this jack is used with a microphone connected to
the adapter.
(D) Last Frequency
Lets you toggle between your last two frequencies.
(E) Squelch
Rotate clockwise to increase squelch and counterclockwise to
decrease squelch.
(F) On/Off and Volume Control
Combination on/off and volume control. Turn the knob
clockwise from the OFF position to turn the unit on and to
increase volume. Turn the knob counterclockwise to decrease
volume and to turn the unit off.
9
SP-200 BOOKLET 9/28/04 5:46 PM Page 13

Left Side View
(G) Light Button
This button activates the back lighting for the screen and
keypad.
(H) Push-To-Talk Button
This button activates the internal microphone or an external
microphone when using the optional headset adapter.
(I) Battery Pack Release
Pushing this button upward releases the battery pack for
removal.
Front View
(J) Screen
This LCD displays the current frequency, Course Deviation
Indicator (CDI) and other information to the operator.
(K) Internal Speaker
(L) Internal Microphone
(M) Numeric Keypad
These keys are used whenever the SP-200 requires a numeric
input such as setting the frequency or Omni Bearing Selector
(OBS).
(N) Down Key/Key Lock Key
This key is used to select the next lower frequency, select the
next lower OBS setting or to initiate search and scan functions.
This key is also used in combination with the Clear key to lock
out all inputs to the keyboard.
(O) Memory Clear Key
This key is used to delete a selected memory channel.
10
SP-200 BOOKLET 9/28/04 5:46 PM Page 14

(P) Clear Key
This key is used to clear erroneous key entries and to exit
functions such as search, scan, and memory storage and
recall.
This key is also used in combination with the Down
key to lock out all inputs to the keyboard.
(Q) Omni Bearing Selector Key
This key is used to activate the Omni Bearing Selector (OBS)
function for the Course Deviation Indicator (CDI).
(R) Memory Key
This key is used while storing frequencies in one of the 20
memory channels.
(S) Recall Key
This key is used to recall stored frequencies from the 20
memory channels.
(T) Up Key
This key is used to select the next higher frequency, select the
next higher OBS setting or to initiate search and scan functions.
(U) Battery Pack
Right Side View
(V) Wrist Strap Pin
The wrist strap (included as standard equipment) attaches to
this location.
(W) External Power Jack
The SP-200 may be powered externally, with or without a
battery pack attached, or the Nicad batteries charged by
plugging the optional 12/24 Volt Cigarette Lighter Power
Adapter (#8634A) or the 115 Volt Wall Power Adapter
(#8633A) into this location.
11
SP-200 BOOKLET 9/28/04 5:46 PM Page 15

Operating Instructions
To perform the following functions you must be in the basic operating
mode of the SP-200. To ensure that you are in the basic operating
mode, press the clear key until the last frequency you entered
manually is displayed.
Manual Frequency Selection
The SP-200 will receive 200 NAV frequencies (108.000 MHz to
117.950 MHz) and 3000 COMM frequencies (118.000 MHz to
142.975 MHz). The SP-200 will transmit on 2280 COMM frequencies
(118.000 MHz to 136.975 MHz). The frequency currently selected is
always displayed in the lower right-hand side of the SP-200’s screen.
From the example above, the SP-200 is receiving 122.975 MHz.
To manually enter a desired frequency such as 118.700 MHz, enter
1 1 8 7 0 0 using the numeric keypad. As each digit is entered, the
flashing cursor moves to the next digit. Six digits are always required
to select a frequency.
The SP-200 will return to the previous frequency if there is a pause of
five seconds or more between key entries while entering a new
frequency. The Clear Key may be pressed any time prior to entering the
fifth digit to clear the digits entered and return to the previous frequency.
Any frequency outside of the range listed above will not be accepted.
The SP-200 will beep when such a digit is entered. For example, starting
any frequency selection with a number other than 1 or attempting to place
a 5, 6, 7, 8 or 9 in the second digit will result in a beep.
12
122.975
SP-200 BOOKLET 9/28/04 5:46 PM Page 16

Frequency Search
To manually search through the frequency range (COMM and NAV),
the Up Key or Down Key may be pressed at any time to select the
next higher or lower frequency. This uses 8.33 KHz steps in the
COMM frequency range and 50 KHz steps in the NAV frequency
range. The Up and Down Keys may be pressed repeatedly to continue
changing the selected frequency.
To automatically search the entire COMM frequency range for a
broadcasting signal, the Up Key or Down Key may be pressed and
held for one second. The Screen will display SEARCH as seen below.
The frequencies will either scroll up or down in 8.33 KHz steps
depending upon whether the Up or Down Key was used to initiate
the Search.
When a broadcasting signal is found, the word SEARCH will flash and
the SP-200 will stop temporarily on that frequency. If the broadcasting
signal is cut off for more than two seconds, the Search will resume
until another signal is found. When 142.975 MHz is reached during an
upward Search, the Search automatically continues at 118.000 MHz.
Likewise, when 118.000 MHz is reached during a downward Search,
the Search automatically continues at 142.975 MHz.
The Search may be canceled at any time by pressing the Clear Key.
The direction of the Search may also be reversed at any time by
pressing and holding the Up or Down Key (whichever is appropriate)
for one second.
It is very important that the Squelch be properly adjusted prior to
initiating a Search. The background static received with the squelch
off may be strong enough to disrupt a Search. If a Search gets “stuck”
on a frequency with too much background noise, increase the Squelch
or press and hold the Up or Down Key for one second to skip that
frequency and resume Searching.
13
122.975
SEARCH
SP-200 BOOKLET 9/28/04 5:46 PM Page 17

Frequency Memory
The SP-200 has 20 memory channels numbered 00 to 19 to store those
frequencies used most often. These memory channels may be used to
store COMM and NAV frequencies.
Select a desired frequency, such as 122.975, to be stored by using
either manual frequency selection or frequency search. To store this
frequency, press the Memory Key. The following screen will appear.
The first available memory channel will be displayed on the top line
of the screen. In this example, memory channel 01 is the first
available location, so we know a frequency is already stored in
memory channel 00. To store the frequency, press the Memory Key a
second time. The screen will now display the following for one
second to verify 122.975 has been stored in memory channel 01.
You may also overwrite an existing memory channel or select an
available memory channel other than the first one displayed. Once
again, select the desired frequency and then press the Memory Key.
Now press either the Up or Down Key to scroll through the 20
memory channels. If a memory channel is already storing a
frequency, the memory channel number and the stored frequency will
14
122.975
01
122.975
01 122.975
122.975
01
SP-200 BOOKLET 9/28/04 5:46 PM Page 18

be displayed on the top line of the screen while your selected
frequency remains on the bottom line.
Once the desired memory channel is selected on the top line of the
screen, press the Memory Key and the frequency will be stored.
Remember, if a channel was selected that was already storing a
frequency, the old frequency will be erased when your selected
frequency is stored.
You may exit the memory function by pressing the Clear Key any
time prior to storing the frequency (pressing the Memory Key the
second time).
Memory Recall
To recall a frequency stored in a memory channel, press the Recall
Key. The memory channel number and the corresponding frequency
of the first memory channel that is being used will be displayed. This
frequency immediately becomes the active frequency and is received
by the SP-200.
In this example, memory channel 01 is listed first, so we know that no
frequency is currently being stored in memory channel 00.
At this point you may select any stored memory channel by either
pressing the Up or Down Key to scroll through the stored frequencies
or by entering the memory channel number by using the Numeric
15
122.975
04 118.700
122.975
01
SP-200 BOOKLET 9/28/04 5:46 PM Page 19

Keypad. For example, to receive memory channel 08 you may either:
1. Press the Recall Key followed by the Up or Down Key to scroll to 08
or
2. Press the Recall Key followed by 0 8.
Once in the Recall function, the SP-200 stays in Recall until the Clear
Key is pressed. This allows you to sequence your frequencies in the
order you may wish to use them. For example, you may wish to store
your airport’s ATIS in memory channel 00, Clearance Delivery in
channel 01, Ground in channel 02, Tower in channel 03 and Departure
in channel 04. For this example you would press the Recall Key once
followed by the Up Key for every frequency change instead of having
to enter each frequency manually.
While in the Recall function the only entries accepted are Numeric
Keypad entries between 00 and 19, the Up or Down Key or the Clear
Key. All other inputs cause the SP-200 to beep. Remember, you may
press the Clear Key at any time to exit the Recall function. Once you
have left the Recall function, the SP-200 will remain on the last
frequency that was being received.
Memory Scan
The Memory Scan function is very similar to the Search function,
except it only scans those COMM frequencies stored in the memory
channels. To Scan the memory channels, press the Recall Key to enter
the Recall function. Then press and hold the Up or Down Key for one
second to initiate either an upward or downward Scan. The word
SCAN will appear on the top line of the screen and the memory
channel number and frequency will be displayed on the bottom line of
the screen.
When a broadcasting signal is found, the word SCAN will flash and
the SP-200 will stop temporarily on that frequency. If the
16
122.975
01
SCAN
SP-200 BOOKLET 9/28/04 5:46 PM Page 20

broadcasting signal is cut off for more than two seconds, the Scan will
resume until another signal is found.
The Scan may be canceled at any time by pressing the Clear Key. The
direction of the Scan may also be reversed at any time by pressing and
holding the Up or Down Key (whichever is appropriate) for one second.
Once you have pressed the Clear Key to exit a Scan, you are still in
the Recall function. Press the Clear Key again to exit the Recall
function. The SP-200 will remain on the last frequency received.
It is very important that the Squelch be properly adjusted prior to
initiating a Scan. The background static received with the squelch off
may be strong enough to disrupt a Scan. If a Scan gets “stuck” on a
frequency with too much background noise, increase the Squelch or
press and hold the Up or Down Key for one second to skip that
frequency and resume Scanning. Please note, since ATIS broadcasts
continually, a Scan will always stop on an ATIS frequency if it is
included in the Scan.
Memory Clear
To clear or erase a memory channel, press and hold the Clear Key
followed by the Memory Key. Release the keys when MEM CLR is
displayed on the top line of the screen.
The first memory channel with a stored frequency will be displayed
on the bottom line of the screen. Press the Up or Down Key to scroll
through the memory channels to select the memory channel to clear.
Once the desired memory channel is displayed, press the Memory
Clear Key (also the 0 Key on the Numeric Keypad) to clear the
selected channel. Additional channels may be cleared by once again
pressing the Up or Down Key to make another selection and then
pressing the Memory Clear Key.
17
122.975
01
MEM CLR
SP-200 BOOKLET 9/28/04 5:46 PM Page 21

Press the Clear Key at any time to exit the Memory Clear function.
To clear every memory channel, hold down the Clear Key while turning
on the power. Please note, there is no way to reverse this process. The
screen will display the following to verify all of the memory channels
have been cleared.
Transmitting
Press the Push-To-Talk Button (PTT) at any time while tuned to a
COMM frequency to broadcast over the selected frequency. While the
PTT is pressed the screen will display TX next to frequency to verify
the SP-200 is broadcasting.
Release the PTT to end the transmission and the SP-200 will once again
receive the selected COMM frequency. If the optional Headset Adapter
is being used with the microphone plugged in the SP-200, the SP-200’s
internal microphone will be deactivated and the microphone on the
headset may be activated by either pressing the SP-200’s PTT or
pressing an inline, remote PTT.
Anytime the PTT is pressed while receiving a NAV frequency, the
Duplex Communications feature will be activated. Duplex
Communications enable the SP-200 to broadcast over 122.100 MHz
(Flight Service Station frequency) while listening over the NAV
frequency. For example, if the selected frequency is 117.000 MHz (a
NAV frequency) and the PTT is pressed, the SP-200 will broadcast over
122.100 MHz. When the PTT is released the SP-200 will once again
receive 117.000 MHz.
18
ALL
MEM CLR
122.975
TX
SP-200 BOOKLET 9/28/04 5:46 PM Page 22
Table of contents
Other Sporty's Transceiver manuals
