Spowdi Mobile Pro User manual
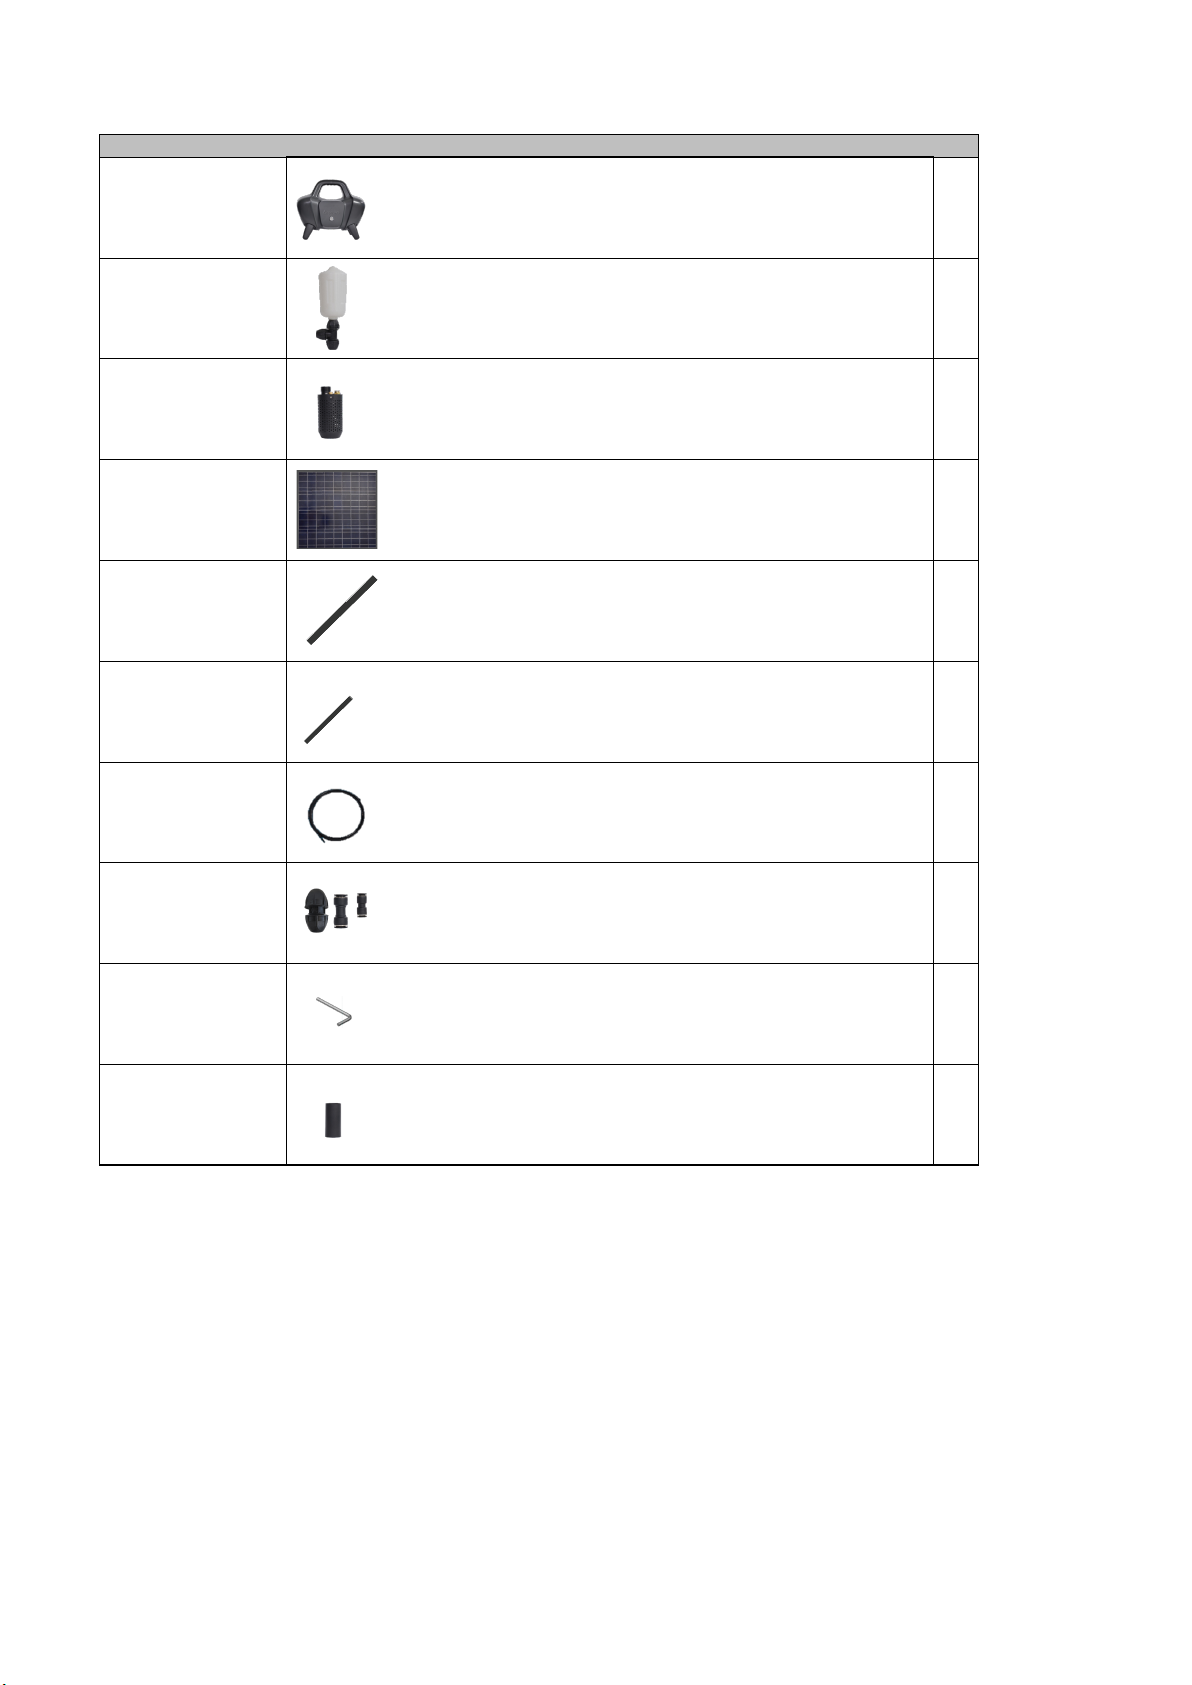
INDEX QTY
A1 pcs
B1 pcs
C1 pcs
D1 pcs
E1 pcs
F1 pcs
G1 pcs
HExtension kit (3 pcs) 1 kit
I1 pcs
J1 pcs
Pressure Vessel (with T-connector)
PMB (Power Management Box)
Pump Unit
Spowdi tool
Solar Panel
25mm tube (0,8m)
16mm Air Outlet Tube (0,8m)
8mm Air Hose
DESCRIPTION
INCLUDED IN THE PACKAGE
Extra Membrane (Spare part)

BEFORE YOU
START 1
Info: The Spowdi Mobile Pro pump is
developed to be used with a Spowdi drip
irrigation kit. The system works best when the
highest point of the irrigation area is less than
5 meters above the water source surface and
less than 50 meters from the water.
BEFORE YOU
START 2
Preparations of tubing: For optimal flow, the
Pressure Vessel (B) needs to be the highest
point of the irrigation system (max 5m). If you
need to mount it a bit from the water, prepare
enough 25mm Tube (E) to be able connect it to
the Pump Unit (C) (0,8m is included).
BEFORE YOU
START 3
Preparations of mounting: You will need to
attach parts of the system using cable ties,
string, wire, or equivalent to something steady
like a fixation pole. Make sure you have the
proper material and tools for this. (not
included)
BEFORE INSTALLING

STEP 1
Unfold the Solar Panel (D) and connect the
short cables on the inside using the power
connectors.
STEP 2
Connect the Solar Panel (D) to the PMB (A)
with the longer cables using the matching
power connections on the backside.
STEP 3
Direct the Solar Panel (D) against the sun,
make sure no part of it is shadowed, and lean
it against the PMB (A).
STEP 4
Turn on the main switch of the PMB (A) on the
backside. If the battery is charged, the button
on the front will turn blue. Otherwise, it needs
charging first. Note! If it has not turned blue
within 10 minutes, ensure the cables are
correctly connected and that no part of the
Solar Panel (D) is shadowed.
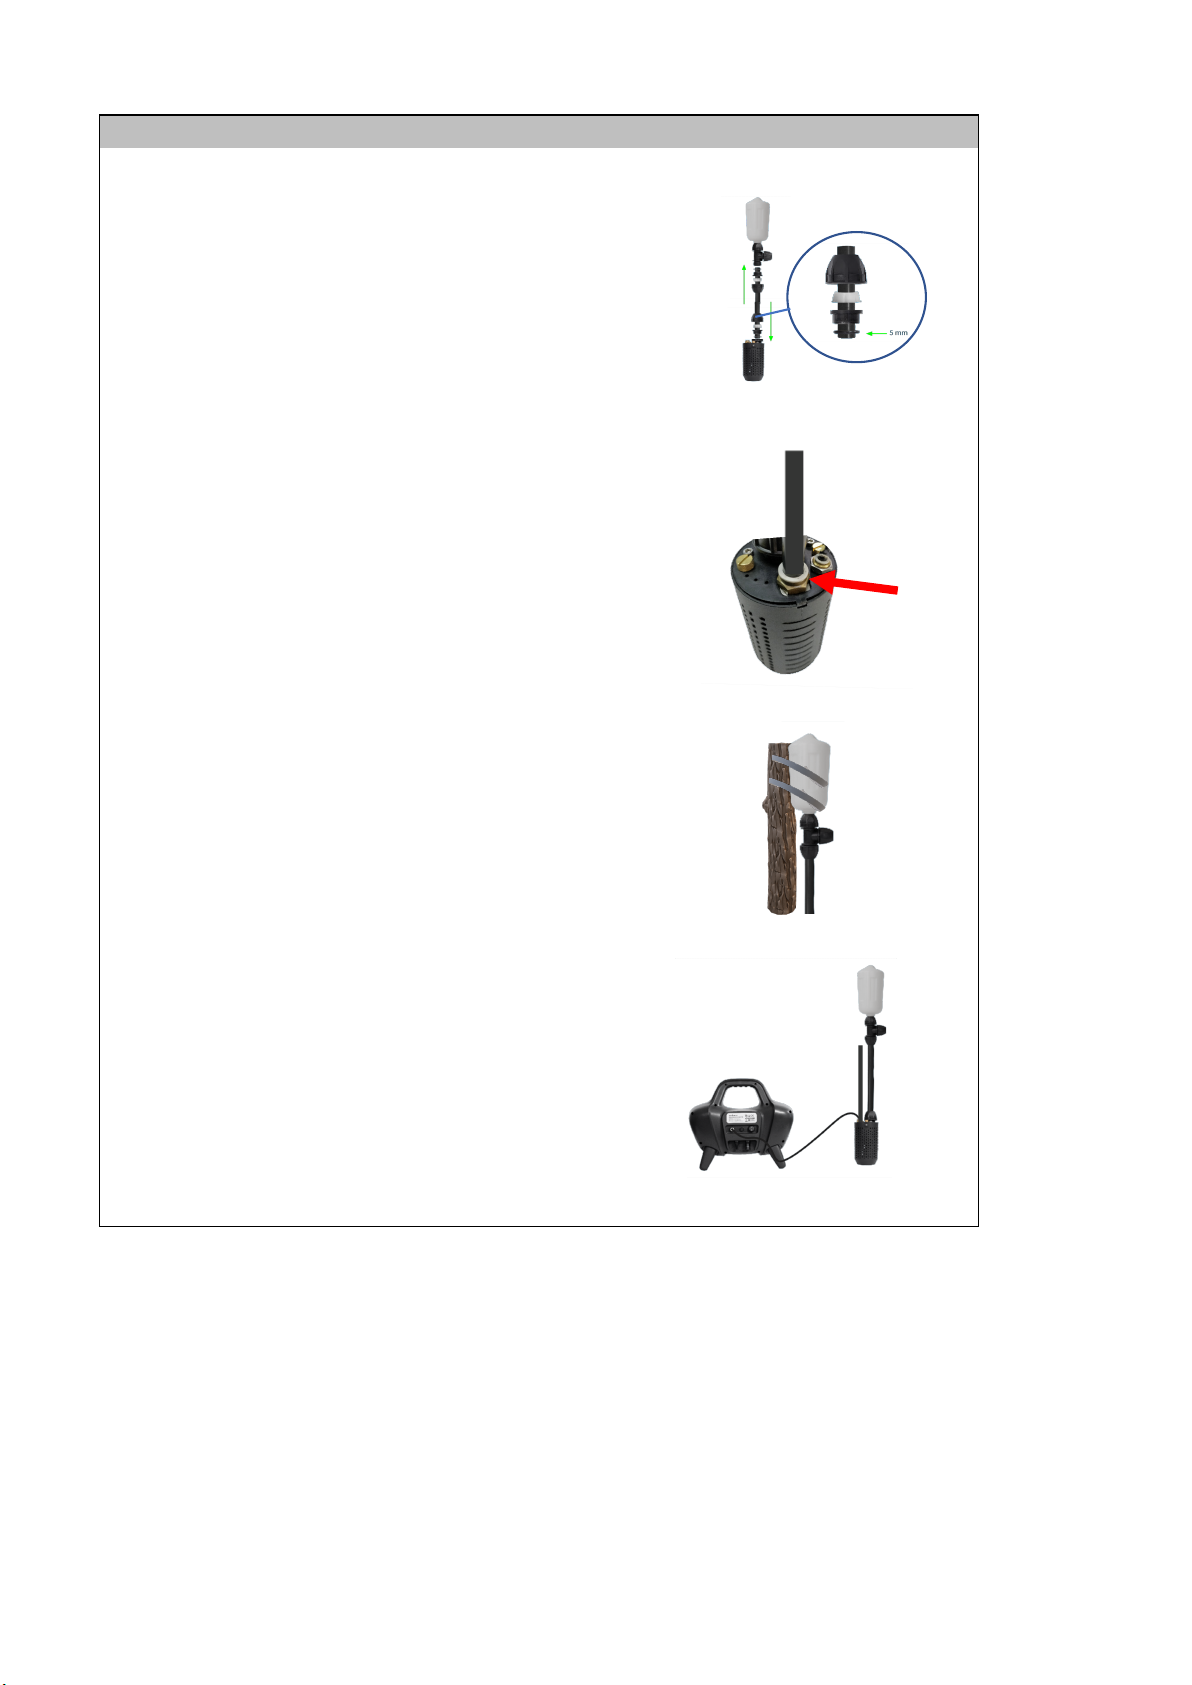
PART 1 - CONNECTING THE SOLAR PANEL AND CHARGING THE SYSTEM
INSTALLING
(D)
(D)
(A)
(D)
(A)
(A)
STEP 5
Connect the Pressure Vessel (B) and the Pump
Unit (C) using the 25mm Tube (E) (either the
0,8m included for flat ground or if you have
prepared a longer tube for an elevated area)
STEP 6
Connect the 16mm Air Outlet Tube (F) to the
Pump Unit (C) by pushing it into the 16mm air
connector while pressing the white locking
mechanism.
STEP 7
Fixate the Pressure Vessel (B) on something
steady (a fixation pole, tree, water tank) so
that it is the highest point of the irrigation
system (material and tools for this is not
included)
STEP 8
Connect the PMB (A) with the Pump Unit (C)
using the 8mm Air Hose (G) by pushing the
ends into the 8mm air connectors while
pressing the white locking mechanism.
PART 2 - ASSEMBLY OF THE SYSTEM
(B)
(E)
(C)
(C)
(F)
(B)
(A)
(C)
(G)

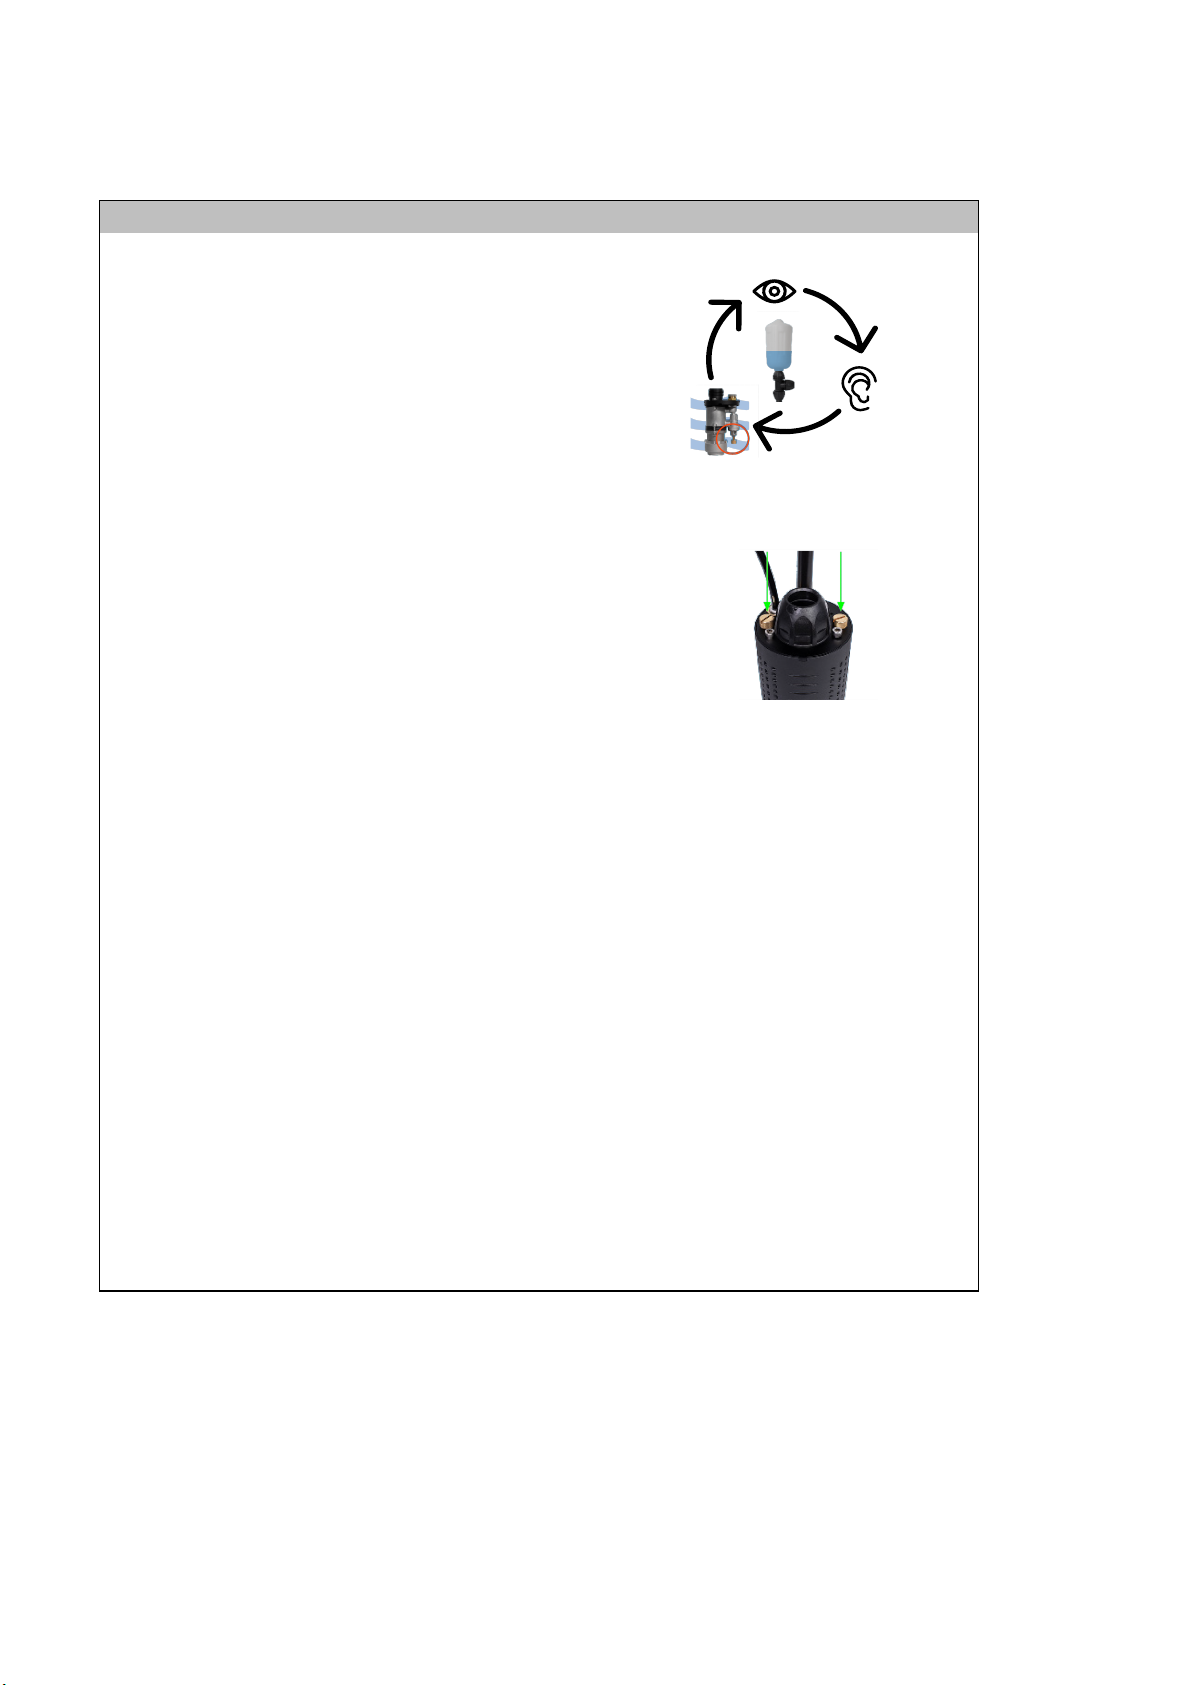
STEP 9
Start the Pump Unit (C) by pressing the front
button on the PMB (A) and make sure you
hear it starting up. If the button is glowing
blue, but the PMB (A) is quiet, it might need
some more charging.
STEP 10
The Pump Unit (C) needs to be filled up with
water to work. To make this process faster:
Submerge the Pump Unit (C) into the water
and shake it up and down a few times. At the
same time cover the 16mm Air Outlet Tube (F)
with your thumb for a second and then release
it for a few seconds. Repeat this until water
starts pumping.
STEP 11
The pump should now deliver some water
through the unconnected end of the T-
connector on the Pressure Vessel (B). However,
the water flow is not optimized yet.
STEP 12
Turn off the system and prepare your Spowdi
Drip Kit (or whatever you want to connect to
your Spowdi Mobile Pro). Then connect it to
the free end of the T-connector on the
Pressure Vessel (B). The Spowdi Mobile Pro is
optimized for the Spowdi Drip Kit but can be
used for other types of water transportation by
using a 25mm tube.
PART 3 - STARTING THE SYSTEM
(C)
(A)
(C)
(F)
(B)
(A)
(B)
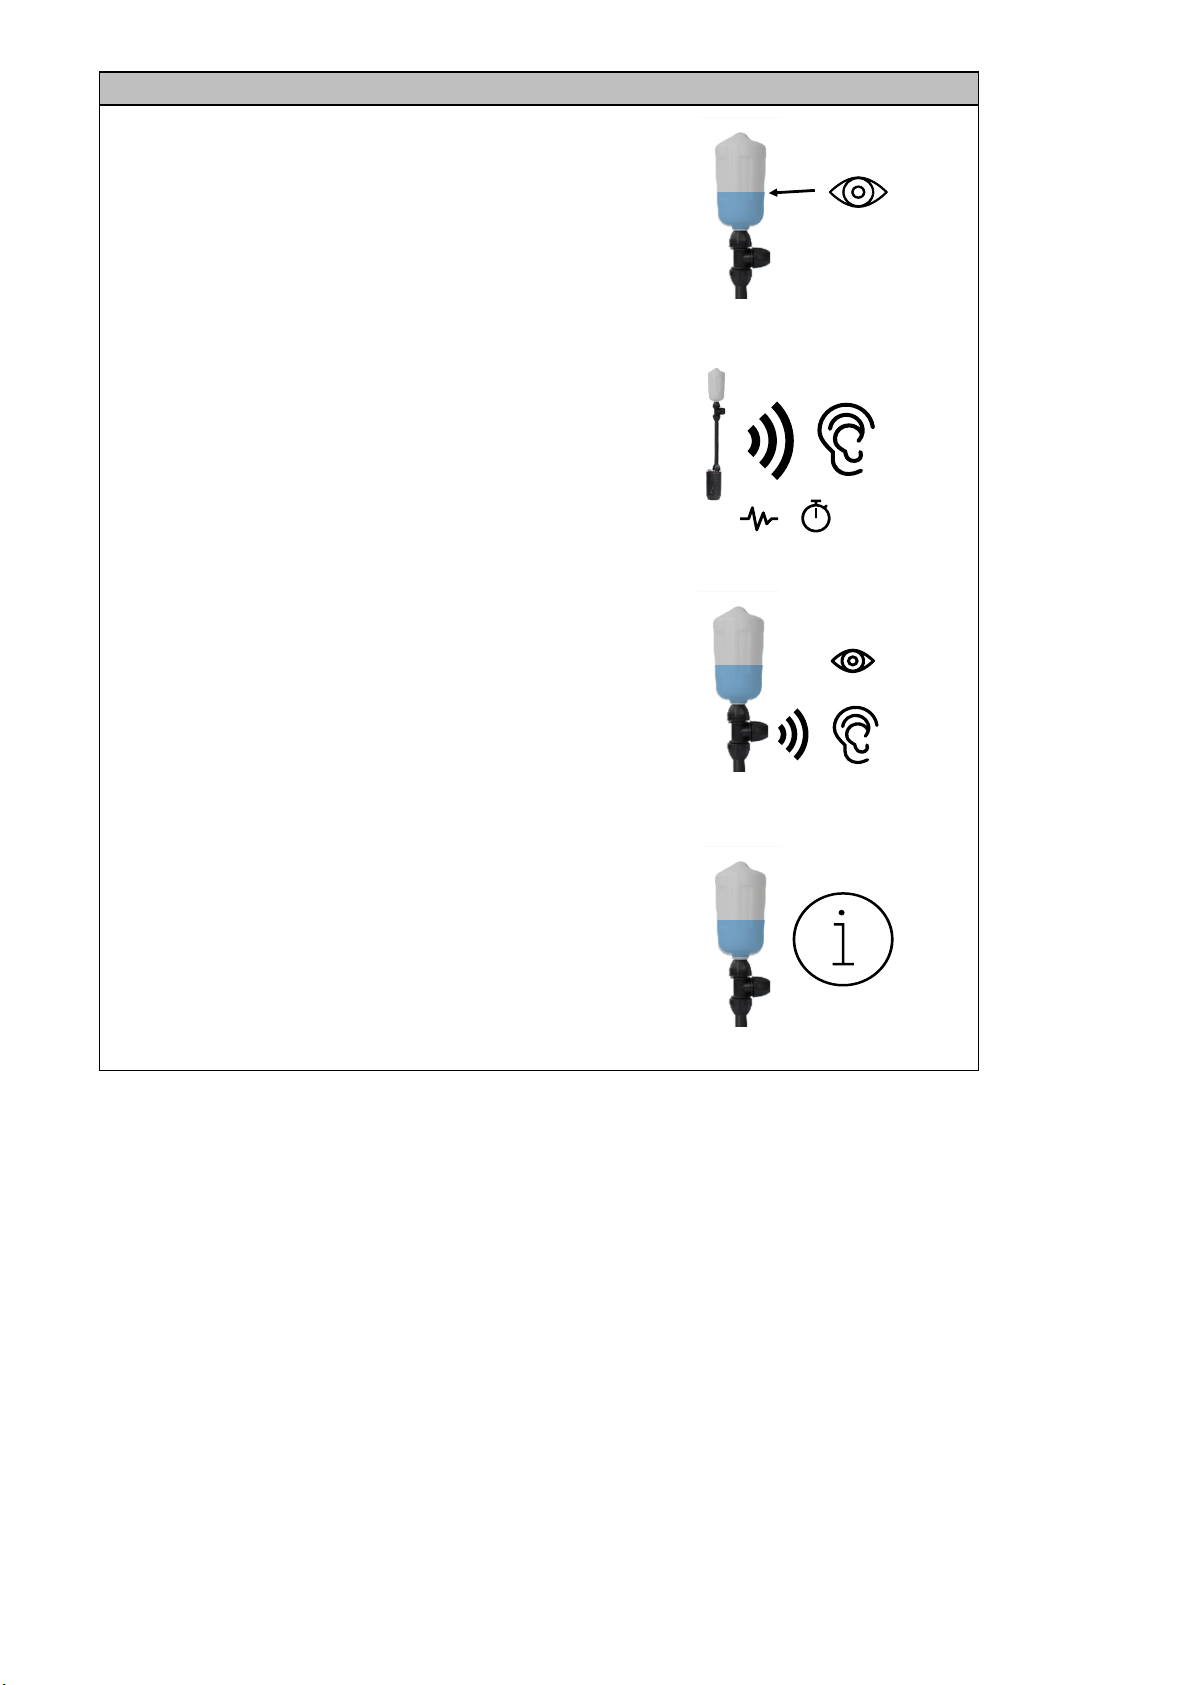
STEP 13
Start the pump with the receiving system
connected and in use (if you are using Spowdi
Drip Kit, open the valves to start irrigating), let
the pump run for a few minutes, so the
connected drip kit is filled with water, and then
look for the water level on the Pressure Vessel
(B).
STEP 14
When the pump is delivering water, you should
also hear a repeating beating sound from the
system. For the next steps you need to count
the beats per minute. You can measure this by
counting the beats for 15 seconds and
multiplying it by 4.
STEP 15
When the pump is being used to irrigate with a
dripkit or to transport water to a higher level
the water level i the Pressure Vessel (B) should
be close to ok and the same time the number
of beats per minut should be somewhere
between 100 and 200. If this is not the case,
use the following steps to optimize the system.
Otherwise, skip to step 23. Note! If you change
any part of the irrigation system, you might
need to optimize it again.
STEP 16
NFO! If the connected system is not a
pressurised system (like the Spowdi Drip Kit or
used for pumping water to a higher level) but
instead used for low-pressure transporting of
water, the level in the Pressure Vessel (B) will
always be low and can not be used as a
measure for optimizing the system.
PART 4 - OPTIMIZING THE SYSTEM
(B)
(C)
-high
(do not exceed)
-ok
-low
100-200 BPM
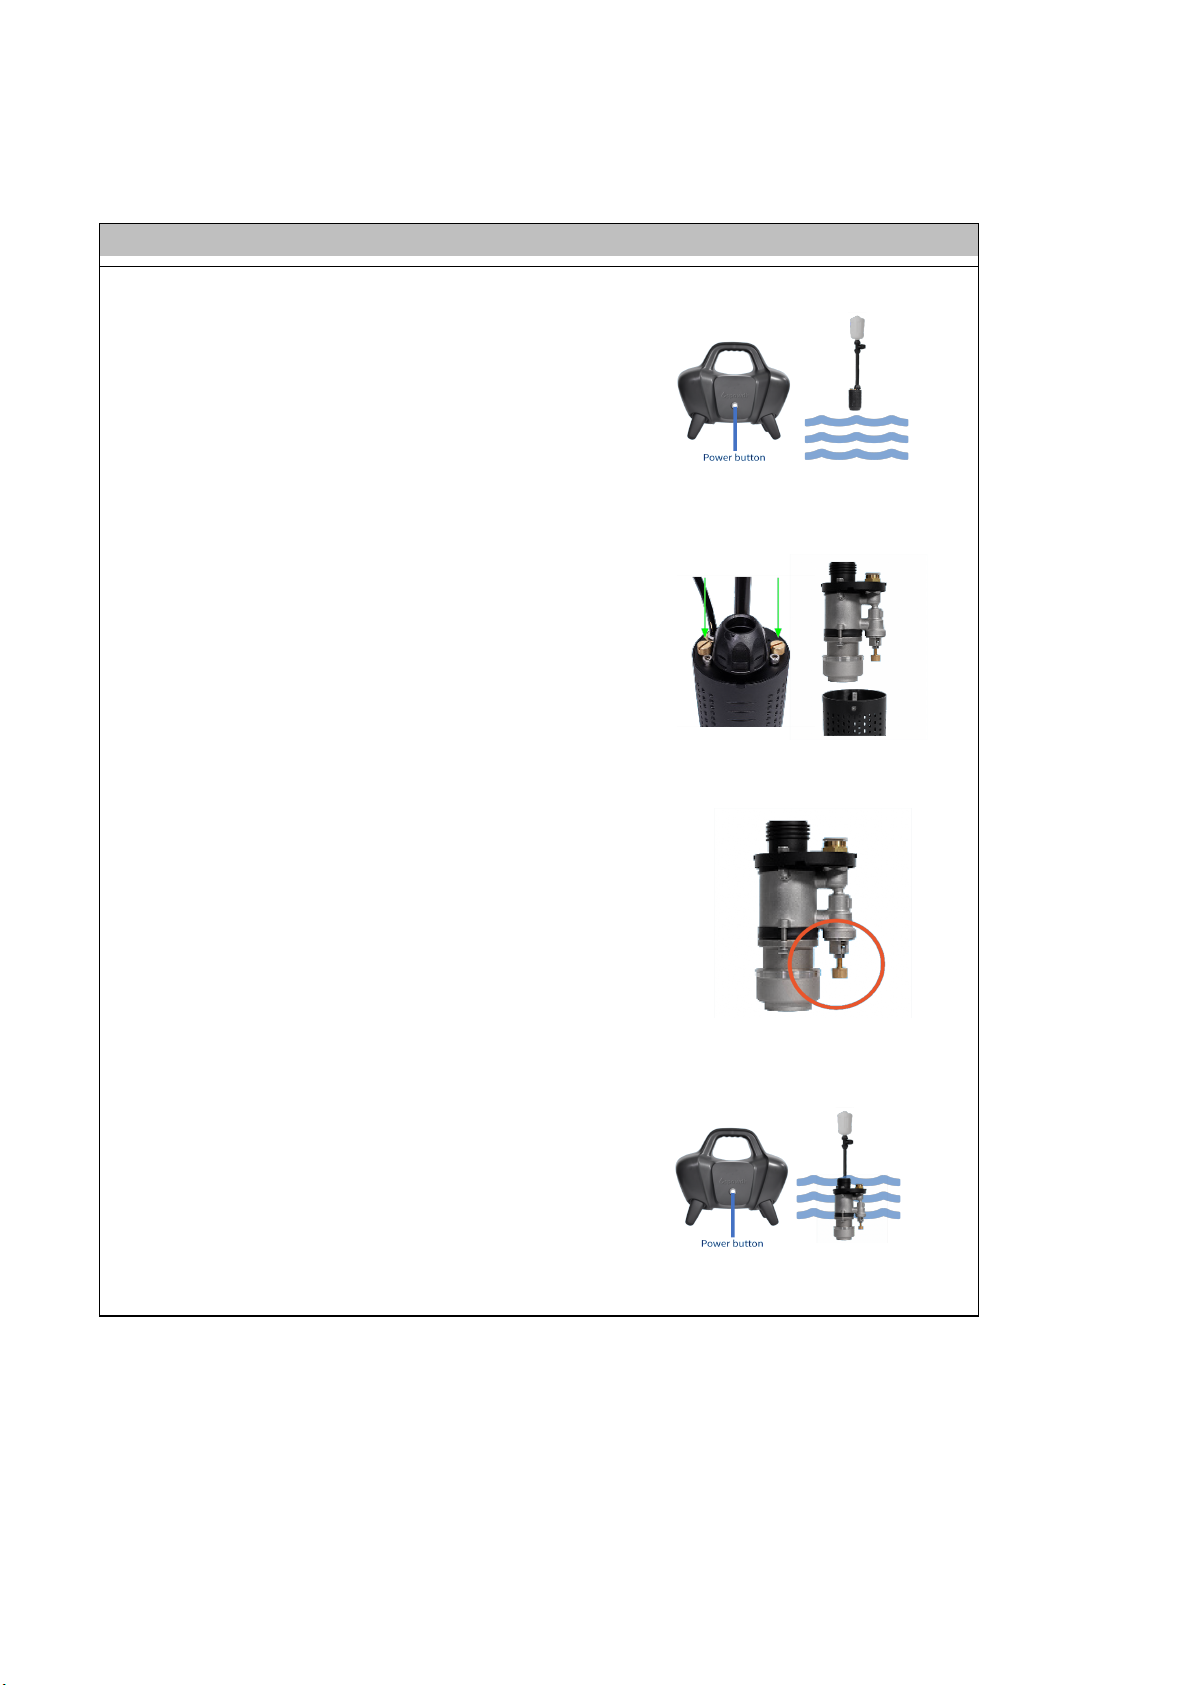
STEP 17
Turn off the system by pressing the front
button on the PMB (A), and take the Pump
Unit (C) out of the water.
STEP 18
Remove the Filter Can on the Pump Unit (C) by
using the golden screws on top of it. Make sure
you do not drop the screws.
STEP 19
If the water level in the Pressure Vessel (B) was
too high or the beating was too slow, adjust
the air screw outwards (counter-clockwise)
two turns;
If the water level in the Pressure Vessel (B)
was too low or the beating was too fast, adjust
it inwards (clockwise) two turns.
STEP 20
Submerge the pump again as before without
the Filter Can, and start the pump.
PART 4 - OPTIMIZING THE SYSTEM
(C)
(A)
(C)
(C)
(C)
(A)
STEP 21
Watch the water level on the Pressure Vessel
(B), and count the beats again. Repeat
adjustments and measurement until the water
level is close to "OK" (but never exceeds max)
and the beats are between 100-200 per
minute. Note! These values are only
recommendations and you might find an other
setting, optimal for your intended use of the
Spowdi Mobile Pro.
STEP 22
When you are done, attach the Filter Can on
the Pump Unit (C) using the golden screws.
PART 4 - OPTIMIZING THE SYSTEM
(C)
(B)
(C)
100-200
BPM
"ok"
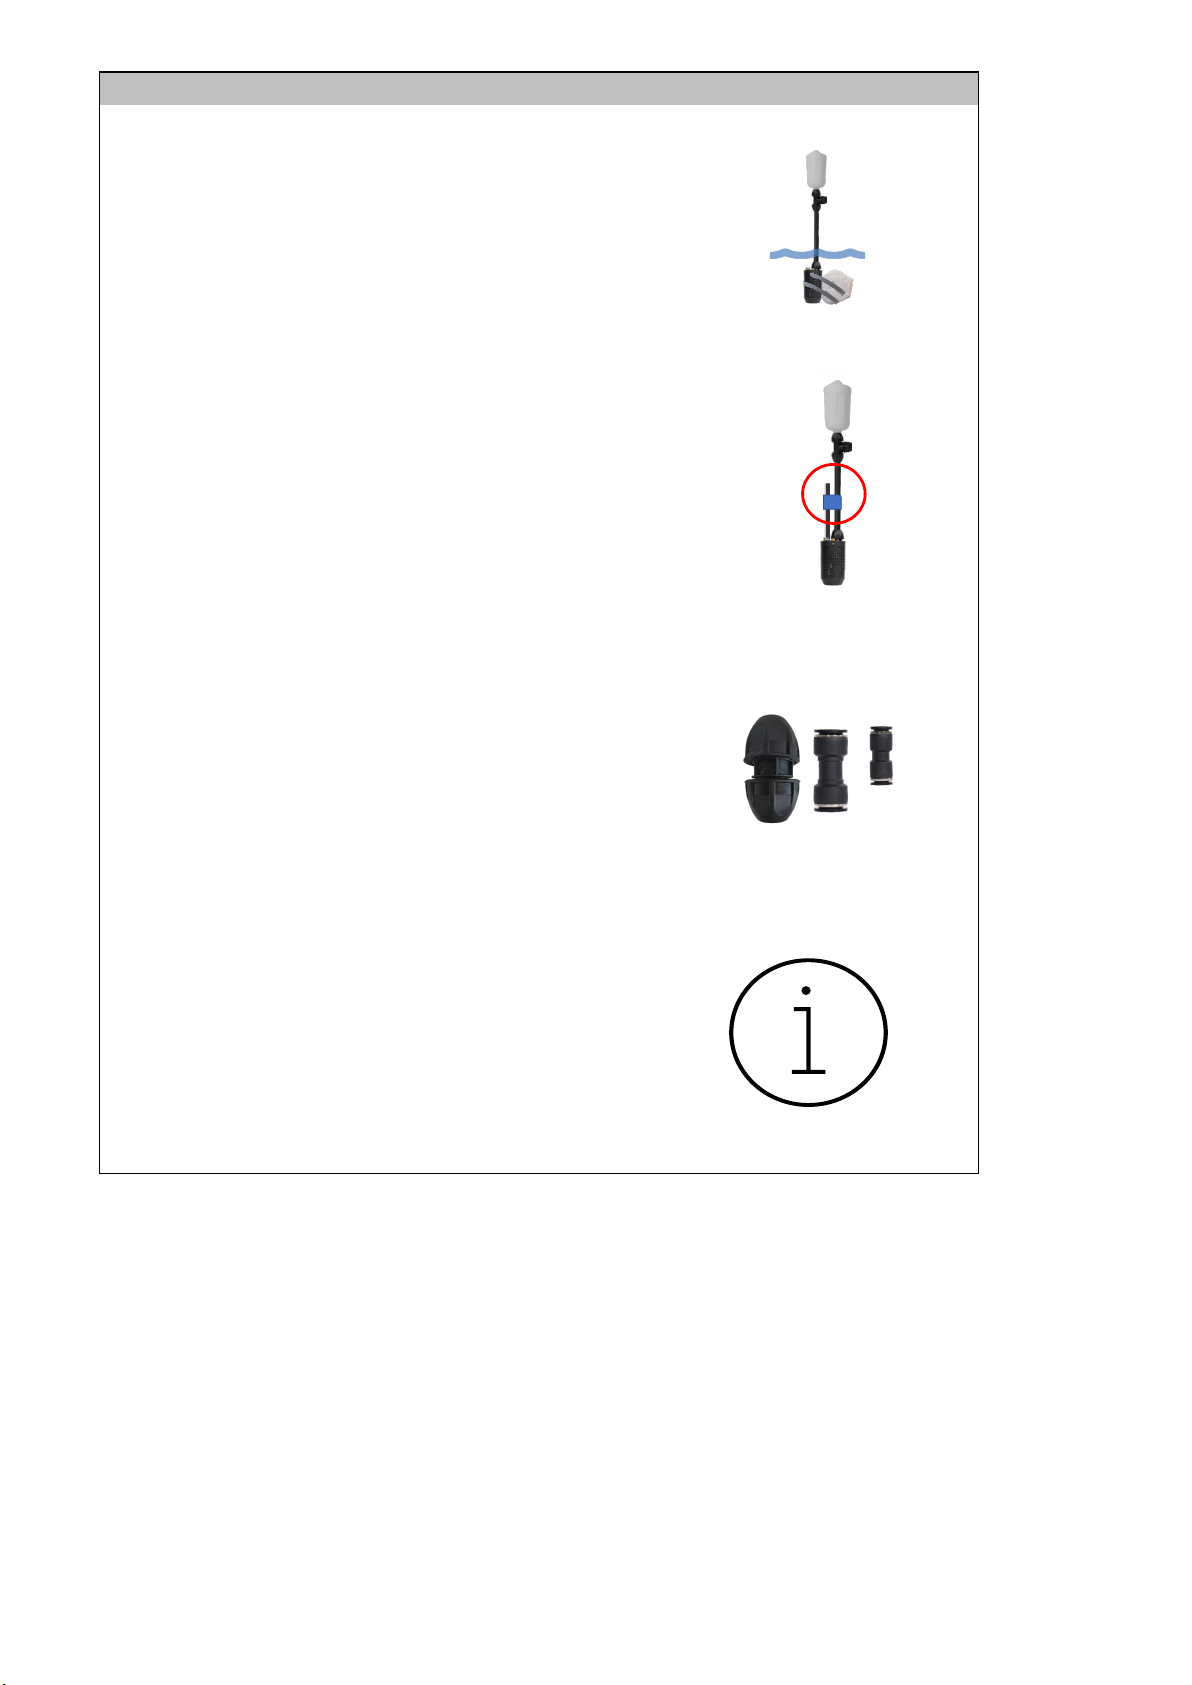
STEP 23
Fasten the Pump Unit (C) (while turned off)
30cm below the water surface by attaching it
to something stable like a rock or a pole (Not
included).
STEP 24
Mount the 16mm Air Outlet Tube (F) to the
25mm Tube (E) so that it will stay above water
when the Pump Unit (C) is submerged.
STEP 25
If needed, you can prolong any part of the
system using the three parts if the Extension
Kit (H). Disconnect the tube you want to
prolong, cut the length that you need and
connect it between the extension part and the
intake/outtake.
STEP 26
The system is now complete, and you can
enjoy the Spowdi Mobile Pro pollution-free
timesaving water pumping.
PART 5 - COMPLETING THE SYSTEM
(C)
(C)
(F)
(E)
(H)

INFO:
INFO: When in use, the water level in the
Pressure Vessel (B) should never exceed the
max mark. This is affected by the pump
frequency, the total area being irrigated
simultaneously and how much the valves are
opened. Adjust these things so that the level
does not exceed the max mark.
EXTENDING;
INFO! If you want to disconnect the PMB (A)
and Solar Panel (D) for storage, disconnect the
8mm Air Hose (G) on the PMB (A) by pressing
the white ring inwards and gently pulling the
hose. For the Solar Panel (D), push the release
hooks on the power connectors on the PMB
(A) together and, at the same time, pull the
cable downwards gently. Note! You can also
use some smaller objects, like two keys,
instead of your fingers to push the release
hooks together.
MAINTENANCE:
- Clean the Filter Can regularly.
- Wipe the Solar Panel with a damp cloth.
- Do not expose the PMB to direct sunlight or
water.
- To change the membrane, read the specific
manual for this or ask your Spowdi Agent.
SERVICE:
Periodically have service done by a Spowdi
ackredited service agent.
PART 6 - USING THE SYSTEM
(B)
Table of contents


