manuals.online logo
Brands
  1. Home
  2. •
  3. Brands
  4. •
  5. Ssl
  6. •
  7. Car Stereo System
  8. •
  9. Ssl SD717MB User manual

Ssl SD717MB User manual

This manual suits for next models

1

Other Ssl Car Stereo System manuals

Ssl DD889B User manual

Ssl

Ssl DD889B User manual

Ssl CAP350B User manual

Ssl

Ssl CAP350B User manual

Ssl DD612 User manual

Ssl

Ssl DD612 User manual

Ssl ML4OUSA User manual

Ssl

Ssl ML4OUSA User manual

Ssl SD702 User manual

Ssl

Ssl SD702 User manual

Ssl DD888 User manual

Ssl

Ssl DD888 User manual

Ssl SD440USA User manual

Ssl

Ssl SD440USA User manual

Ssl SD722MBI User manual

Ssl

Ssl SD722MBI User manual

Ssl S6000V User manual

Ssl

Ssl S6000V User manual

Ssl ML43B User manual

Ssl

Ssl ML43B User manual

Ssl SM316 User manual

Ssl

Ssl SM316 User manual

Ssl ML44USA User manual

Ssl

Ssl ML44USA User manual

Popular Car Stereo System manuals by other brands

JL Audio Stealthbox SB-CAN-G2MVX3D/10TW3 installation guide

JL Audio

JL Audio Stealthbox SB-CAN-G2MVX3D/10TW3 installation guide

Clarion PU-9836A Service manual

Clarion

Clarion PU-9836A Service manual

Sony MEX-BT5750U operating instructions

Sony

Sony MEX-BT5750U operating instructions

Mitsubishi Electric AR0M manual

Mitsubishi Electric

Mitsubishi Electric AR0M manual

Sony RM-X7BT reference guide

Sony

Sony RM-X7BT reference guide

Insignia NS-HD5113 user guide

Insignia

Insignia NS-HD5113 user guide

Clarion BTD3341 user manual

Clarion

Clarion BTD3341 user manual

USA SPECS PA11-VW6 owner's manual

USA SPECS

USA SPECS PA11-VW6 owner's manual

Sony MEX-N4380BT operating instructions

Sony

Sony MEX-N4380BT operating instructions

Kenwood KCD-BT6544U/UY Service manual

Kenwood

Kenwood KCD-BT6544U/UY Service manual

JVC KD-DB912BT instruction manual

JVC

JVC KD-DB912BT instruction manual

Philips CSQ405/98 user manual

Philips

Philips CSQ405/98 user manual

Alpine TDM-7544 Specifications

Alpine

Alpine TDM-7544 Specifications

Autotek TransAm TA 1400 user manual

Autotek

Autotek TransAm TA 1400 user manual

Clarion PN-3124N-A Service manual

Clarion

Clarion PN-3124N-A Service manual

Denso TEN FT0108A user manual

Denso TEN

Denso TEN FT0108A user manual

Pyle PLD57MU owner's manual

Pyle

Pyle PLD57MU owner's manual

Harman Chrysler Radio Navigation System RB4 user manual

Harman

Harman Chrysler Radio Navigation System RB4 user manual

manuals.online logo
manuals.online logoBrands
  • About & Mission
  • Contact us
  • Privacy Policy
  • Terms and Conditions

Copyright 2025 Manuals.Online. All Rights Reserved.

SD717MB 24.ACCESSORY
Accessory Quantity
User Manual 1PC
Wire
USB Cable
Keys
Install metal bar
Remote controller
Warranty card
2PCS
1PC
1PC
1PC
1PC
2PCS
2 43
INSTRUCTIONS
1.WELCOME
2.WARNING
6.Panel Arrangement
7.Panel Button Control Instruction
8.Main Menu Touch Operation
9.OSD Setup
10.Adjust Mode
11.Remote Control Function
12.Disc Play Touch Operation
13.CD/MP3 Operation Interface
14.RDS User Operation
15.Radio Operation
16.DVD Basic Operation
17.VCD Basic Operation
18.CD/MP3 Basic Operation
19.Bluetooth Touch Operation
20.Other Play Mode
24.Accessory
3.NOTE
4.Features
5.Basic Operation
21.Trouble Shooting
22.Wiring Diagram
23.Specifications
3
3
4
5
6
7
8
12
13
14
15
17
18
19
21
22
32
35
37
39
40
41
42
43
INSTRUCTIONS
1.WELCOME
2.WARNING
1. Please keep the disc slot clean, wipe it off when there is some dirt on it. You should
wipe off any dirt on the disc before you place it into the unit. If the disc is dirty and you
place it inside the unit, it will cause the unit to go into an error and will not play the
disc. Please ask professional to clean the laser.
2. Playing the radio at higher volumes for a long period of time may cause hearing
issues. You should play this unit at a moderate listen level.
3. This unit is set up by precision parts. If you open up this unit, you will void any and
all of your warranty.
4. Please do not touch LCD display with any hard object so that you prevent it from
getting scratched or damaged.
5. To avoid an accident caused by watching the LCD screen. This unit has a vehicle
lock out wire so that you will not be allowed to watch a video while driving down the
road.
6. This unit is meant for a 12V power and negative ground system from a vehicle.
NOTE:
We keep improving this product all the time. There may be some changes in it that are
not in this manual.
INSTRUCTIONS
Thank you for enjoying series of digital car A/V product.
To properly use this product, please go through this instruction manual for installation
and operation, put it in a safe place for future use!
Power supply
Power range
Max operate current
Dimensions
Ground system
FM tuner
European frequency range
Signal/Noisse ratio
Stereo separation
Search station volt
Distortion rate
AM tuner
Limit noise sensitivity
DVD PLAYER
Signal/Noise ratio
Frequency response
DC 12V
10.8-16.0V DC
10A
155X182X53MM
Negative ground
87.5-108MHz
55dB
30dB
20-30dBuv
1.5%
522-1620KHz
32dB
70dB
20Hz-20KHz
23.SPECIFICATIONS:
USA frequency range 87.5-107.9MHz
European frequency range
USA frequency range 530-1710KHz
Amp Rating 85 Watts x 4 Channels
3
42
INSTRUCTIONS INSTRUCTIONS
22.WIRING DIAGRAM
This player is equipped with ISO standard connector, please follow below instruction:
● Yellow – 12 V Constant
● Black – Ground wire
● Blue - Power Antenna / Remote Amp Turn On
● Orange – Back-Up Camera Trigger (+) ● Pink – Parking Brake (-)
● White/White black - Left front speaker (+-)
● Purple/Purple black - Right rear speaker (+/-)
● Green/Green black - Left rear speaker (+/-)
● Red - ACC ON (+12V) ● Grey/Grey black - Right front speaker (+/-)
Note:
The “PARKING BRAKE” wire must be connected to the parking brake system
of your car. When the parking brake is engages, the LCD will be allowed to view
your video. If not, the screen will produce an image saying, “PARKING BRAKE”.
This is a safety feature designed for the driver not to watch a video while driving.
The video output on this unit will not be affected by this.
4 41
3.NOTE
● This unit can play the following disc
4.FEATURES
INSTRUCTIONS INSTRUCTIONS
DVD PLAYER
1. MPEG-4 Decoder Technology
2. Compatible with MP4 (AVI/5.X), DVD (DVD-R/DVD-RW), VCD,
SVCD, CD-RW, WMA, MP3, JPG
3. Supporting Multiple Subtitles, Angles, Languages
4. Child lock function
5. 4-Channel Audio Output
6. Pause, Play, Up/Down, Stop, Zoom, PBC Function
RADIO
1. AM/FM Radio Tuner
2. 30 Radio Preset Stations (18FM, 12AM)
LCD DISPLAY
1. 7” - 16:9 TFT LCD Display
2. Touchscreen
21.TROUBLE SHOOTING
After ignition
switch off, setting
information all lose
Remote control no
function
Poor performance
of radio station
Can not load disc
Can not play disc
Can not switch
language/subtitle
No image
PROBLEM
Can not power on
CAUSE
Check whether power fuse
blew or not
Some factor cause MPU wrong
operation
No enough power supply
from battery
Disc is scratched
Put wrong side of disc into unit
Lens has dirty
There is only one language/
subtitle in disc
Video line between unit and
TV is not properly connected
SOLUTION
Change fuse same as the old one
Press RESET button on the panel by pen
point, then, power on
Check whether antenna is connected or not,
or poor connection
Change new disc
Slot in the disc with sign side up
Clean lens by lens clean disc
If disc is not with multi-language/subtitle, it
cannot switch language/subtitle
Reconnect lines
Improper length of antenna,
poor connection of antenna
grounding
The disc will not go in all
the way
Change the wiring around
Change battery in remote control
Remove the 2 screws on top of the radio
Wrong connection between
ignition line ACC and
Constant 12 Volt wire
5
40
5.BASIC OPERATION
1. SOURCE ON/OFF
Press SRC button on panel or SOURCE button on remote control quickly to power on.
Press SRC button on panel or SOURCE button on remote control longer to power off.
2. PLAYING SOURCE CHOOSE
Press SOURCE button on remote control, unit will switch sources in the following
sequence: RADIO → DVD → AUX
3. MUTE CONTROL
Press MUTE button on panel or MUTE button on remote control shortly to turn off
sound output, press again to back to sound output.
4. VOLUME ADJUSTMENT
1) Press VOL+/VOL- button on panel, VOL+/VOL- button on remote control or touch
button on display to adjust volume level.
2) The volume setting on this unit is 0 - 39.
BASS, TREBLE, BALANCE & FADER ADJUSTING (SELECT)
Press SEL button on remote control to choose your desired Bass, Treble, Balance &
Fader level:
NOTE:
1) DVD playing mode, MBP & User will be automatically activated.
2) After 5 seconds you choose desired mode, do not adjust volume button. The mode will
automatically take you back to status before adjustment.
5. RESET
1) If unit is not working correctly, you should press the RES button. This will reset the
radio and should start working correctly afterwards.
2) After reset, all settings will resume back to the factory default settings.
VOL BAS TRE L/R
F/R
INSTRUCTIONS INSTRUCTIONS
20.OTHER PLAY MODE
AUX IN:
AUX IN OPERATION
1) Press “Source” button on remote control or touch “AUX” on the touch screen, to
switch to AUX mode.
2) This will allow you to listen and or watch any source that you have plugged into this
section of the radio.
3) This unit has 1 - Video RCA input & 1 pair of Audio RCA’s for this feature.
CCD (Back-Up Camera)
1) If there is a back-up camera installed onto your car, you will need to connect it to
the CCD video input.
2) When you are backing up the car there you will see this image on your screen.
3) You can set CCD image according to your car's own position in general setting mode.
6 39
INSTRUCTIONS INSTRUCTIONS
6.PANEL ARRANGEMENT
7
38
1
2
3 4 5 6 7 8
9
10
11 12
13
14
15 16
17
18 19 20 21
22 23
24
25
26
INSTRUCTIONS INSTRUCTIONS
7.PANEL BUTTON CONTROL INSTRUCTION
8 37
19.BLUETOOTH TOUCH OPERATION
1.SRC On/Off / Function MODE button
2.AMS Program Preset/Play Repeat button
3.(VOL/SEL) Volume adjustment mode
4.BAND/SYS /P.N button
5.EQ Button
6.Number Button 1/INT (Intro Scan)
7.Number Button 2/RPT (Repeat Playback)
8.Number Button 3/RDM (Random playback)
9.Number Button 4/OSD
10.Number Button 5/ STOP
11.Number Button 6/PALY
12.A/V AUX External Input
13.USB socket
14.Release button
15.UP Adjustment(TFT Screen)/Hang-free
16.DN Adjustment(TFT Screen)/Hang up
17.PIC Color Selection button
18.UP Adjustment(TFT Screen)/Hang-free
19.DN Adjustment(TFT Screen)/Hang up
20.MUTE / TFT on/off button
21.TFT Display Screen Extend/Retreat
22.LCD Display window
23.Disc load slot
24.Disc out button
25.SD socket
26.Reset button
INSTRUCTIONS INSTRUCTIONS
OUTLOOK AND BASIC FUNCTION
1. Power On/Off / Function MODE button
Press this button for a short moment to turn
on power, and long press it to turn off power.
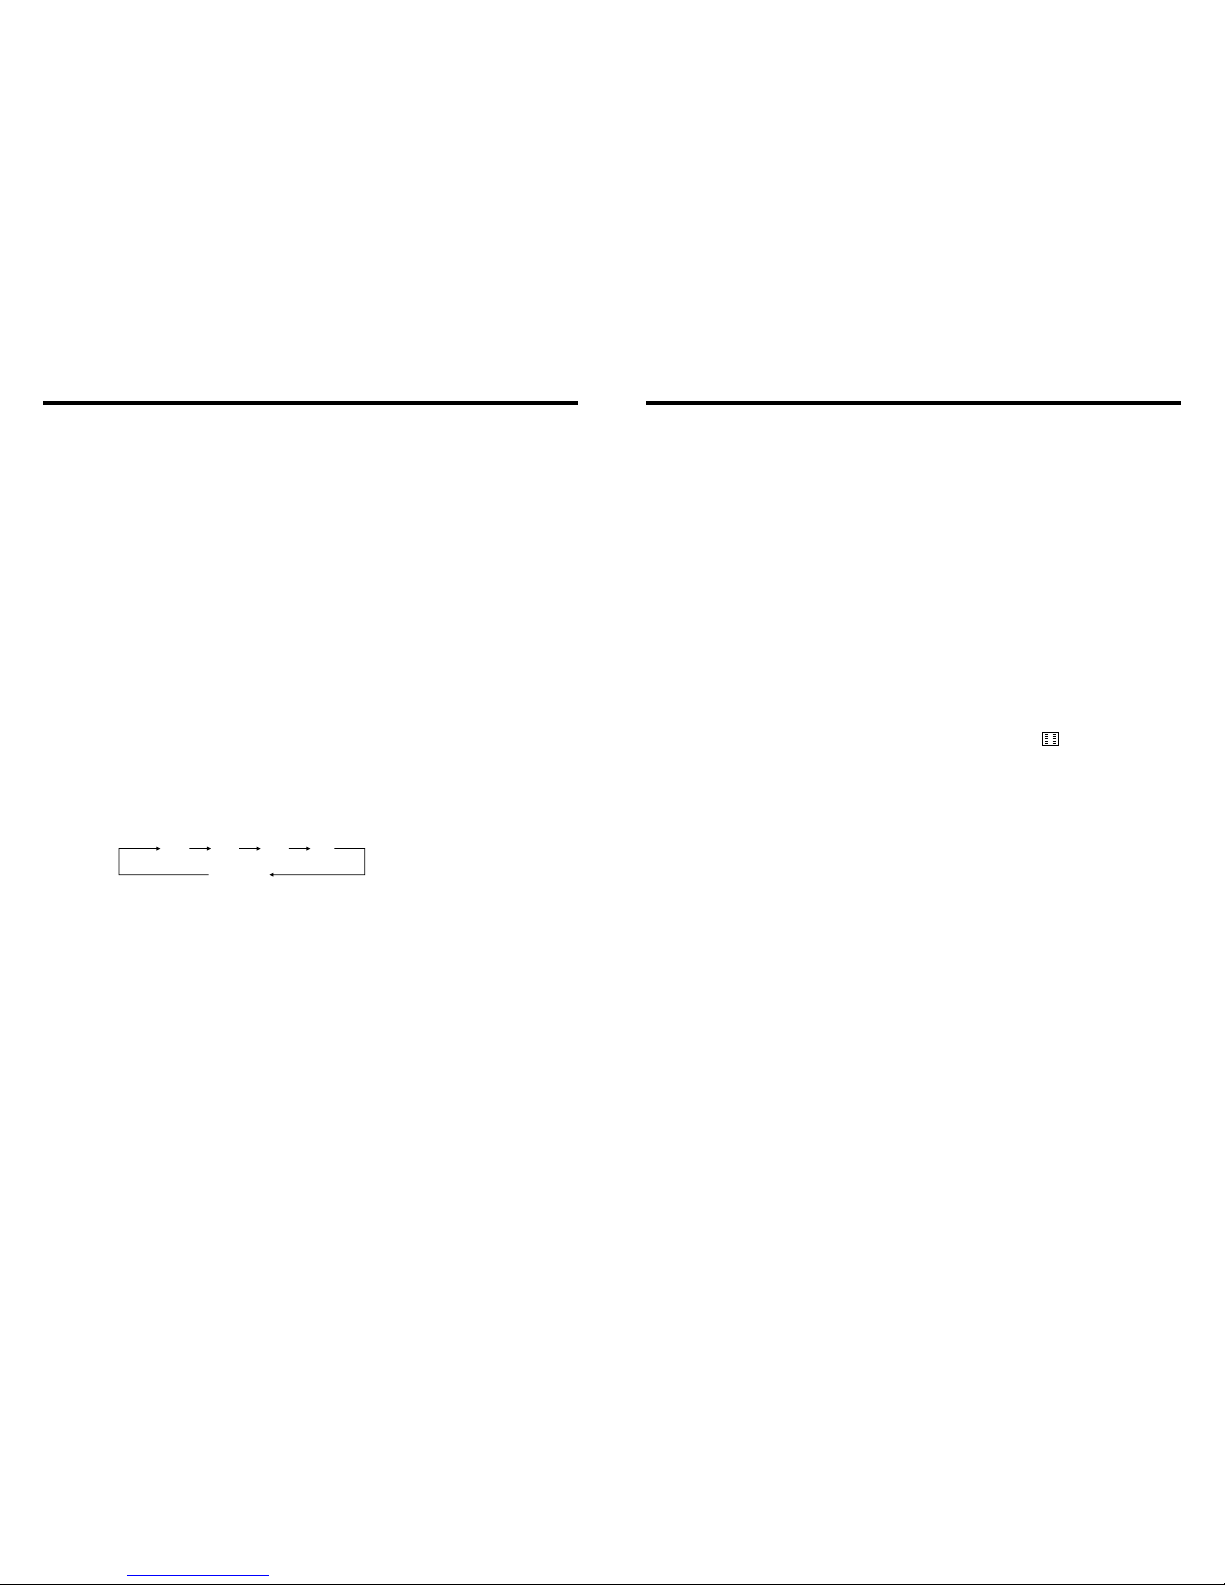
Every button-press activates mode change
as follows:
Note: When the device without connection
to USB, SD, CDC or DVD no disc inside,
the system will automatically skip these
related working mode.
10. CD Program Play
In CD mode, you can set the sequence of playing by the program function, the operation
is as follows:
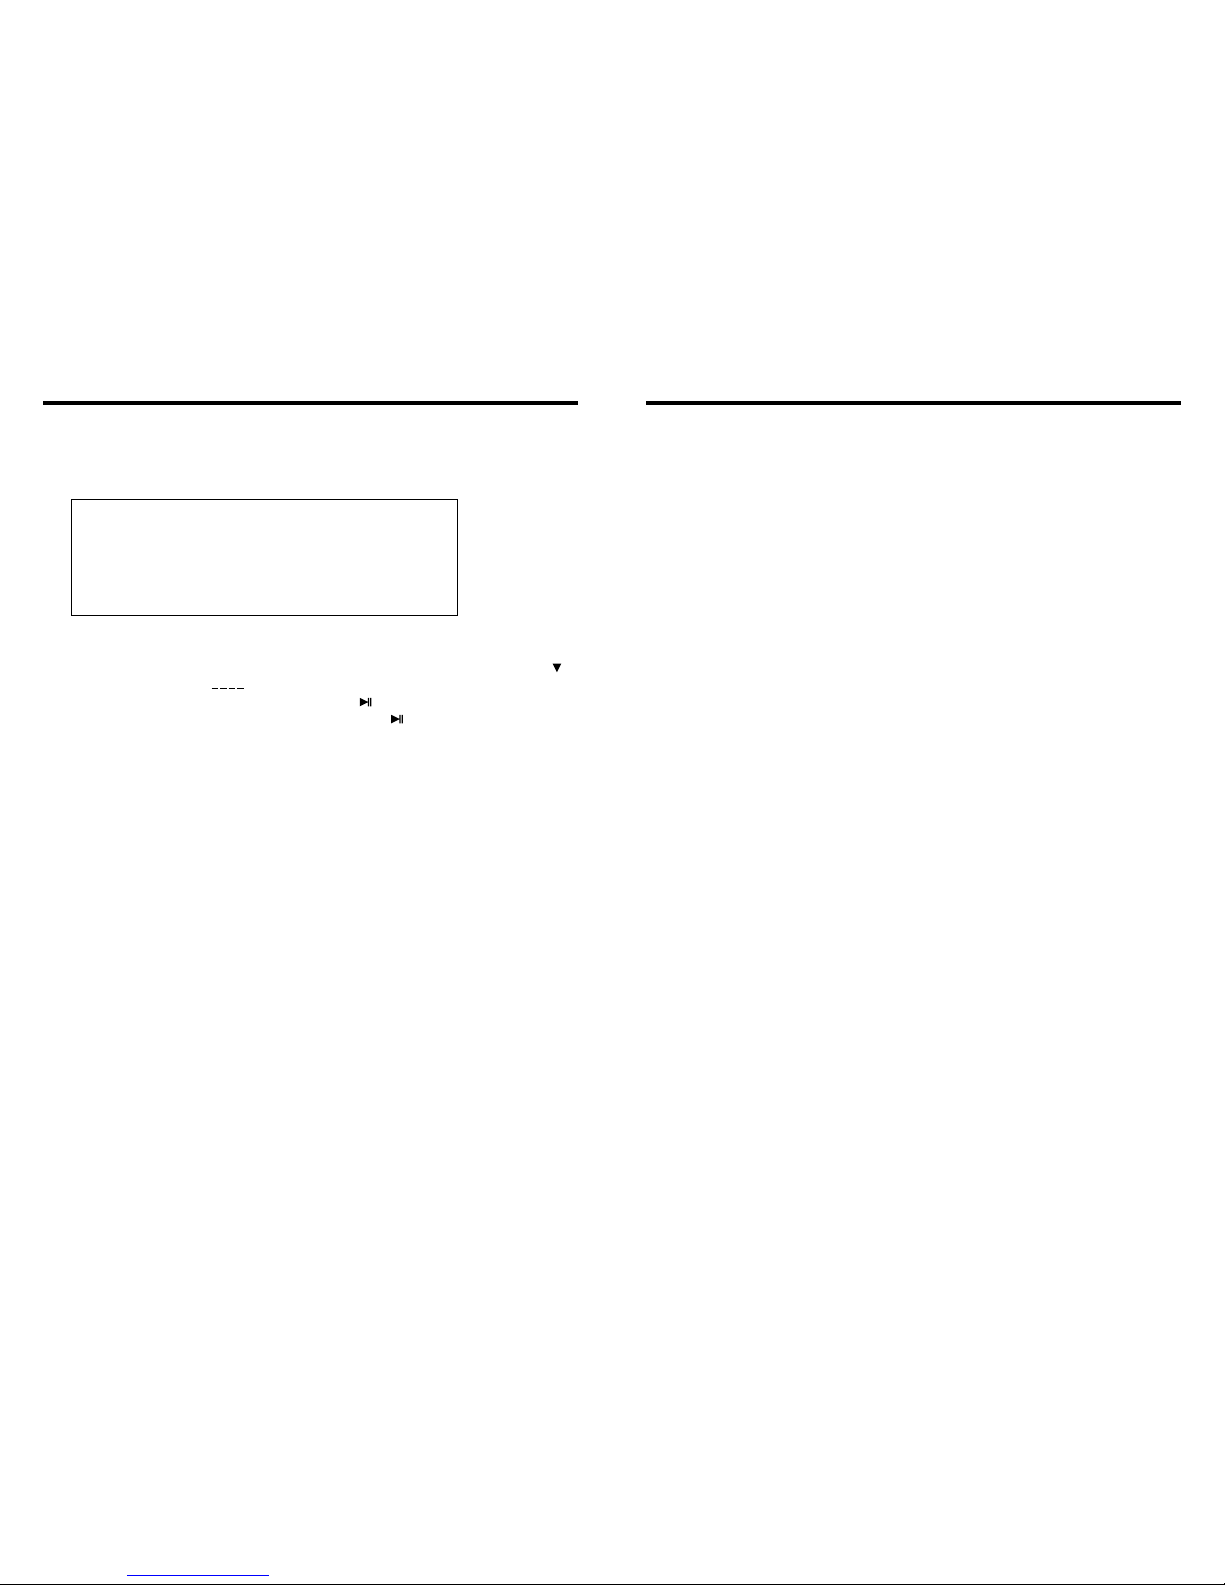
When CD is playing, press ST/PROG button, then the display shows:
Input the number of the song you want to program by the remote control, program the
first song, input your desired song, for example, the sixth song, and press number button
6 on the remote control. Program the second song, press button move the cursor to
2 . Input your desired song, for example, the ninth song, press number button 9 on
the remote control. Press button to program play.
Back to the normal mode, press the ST/PROG button, then press button.
Note: This function can only be worked by the remote control.
11. MP3 Program Play
In MP3 mode, you can set the sequence of playing by the program function, the
operation is as follows:
When MP3 is playing, press ST/PROG button, then the display shows:
Then, input desired song by remote control.
For example: Program the first song, input 01, press button move the cursor to the
second lattice, input desired song, for example the third song. Program the second song,
press button, work with button, move the cursor to 2 . Input 01, press button
move the cursor to the second lattice, input desired song, for example, the sixth song
(press 6). Press button to program play.
Back to the normal mode, press the ST/PROG button and then press button.
Note: This function can only be worked by the remote control.
PROG
TC
3__:__
4__:__
TC
7__:__
8__:__
5__:__
6__:__
TC
11__:__
12__:__
9__:__
10__:__
TC
15__:__
16__:__
13__:__
14__:__
PLAY DELETE
1__:__
2__:__
9
36
2.AMS Program Preset/Play Repeat button
Under radio mode, press this button for a short moment to start scanning preset programs.
Under PLAY mode, press it to repeat playing a single song, and press it again to turn off
this function.
3.(VOL/SEL) Volume adjustment mode
Repeat pressing this button can select the VOL. BAS. TRE. FAD adjustment mode. Then
can rotate the button to adjust VOL. BAS. TRE. FAD as your likes.
4.BAND/SYS /P.N button
In radio mode, press this button to switch band, every time to choose band, the sequence
is as follows: FM1 FM2 FM3 AM1 AM2
In playing state, press this button to switch video system, AUTO, NTSC, PAL.
5.EQ Button
Press this button shortly to choose preset EQ mode to adjust timbre:
POP ROCK CLAS OFF
6.Number Button 1/INT (Intro Scan)
In radio mode, press this button to hear radio preset;
In disc playback mode, press this button to start or stip the intro scan function.
7.Number Button 2/RPT (Repeat Playback)
In radio mode, press this button to hear radio preset;
In disc playback mode, press this button to repeat the current track indefinitely.
8.Number Button 3/RDM (Random playback)
In radio mode, press this button to hear radio preset;
In disc playback mode, press this button to play frocks on the disc in random order.
9.Number Button 4/OSD
In radio mode, press this button to hear radio preset;
In disc playback mode, press this button to display the disc location and playing time
of the current music.
INSTRUCTIONS INSTRUCTIONS
Slide in CD/MP3 disc, unit will play it automatically. If disc is in slot, press DVD touch
button on main menu can to play.
1. Repeat Play
In CD/MP3 mode, press AMS/RPT button on remote control, to startup following, repeat
CD disc: Single song repeat→ Repeat play off.
MP3 disc: Single song repeat→Directory repeat→ Repeat play off.
2. Fast Forward/Fast Rewind
Press SEEK + / SEEK - button on remote control, or / touch button on display to
speed forward or backward playing.
Note: Hold above button a bit longer to operate.
3. Previous/Next Song Play
In playing mode, press SEEK + / SEEK - on remote control, or / touch button on
display to choose previous/next song.
4. Pause Play
In play mode, press button on remote control, or button on display to pause.
Press again to go back to normal play.
5. Stop Play
In play mode:
1) Press button on remote control to enter the pause mode, the position will be stored
in unit. At that time, press button on remote control or touch button on display to
resume playing at the stored position.
2) Press button on remote control twice to enter into stop mode, here, press
button on remote control or touch button on display, unit will play from the first song.
6. OSD
In playing mode, short press OSD on remote control to show all information of present
disc.
7. Randomly Play
In CD mode, press LOC/RDM button on remote control, to instantly play each song.
Press again to back to the normal play.
8. EQ Mode
1) This function can only be worked by remote control.
2) When playing CD/MP3, press the “ZOOM” button on the remote control, you can
choose the sound mode.
3) When enter this function, press the button / / / to move the course to select
sound mode which in the system menu, after your selection position will show red color
to indicate the confirmation.
9. OPEN
Press button on pedestal to eject disc.
18.CD/MP3 BASIC OPERATION
10 35
10.Number Button 5/ STOP
In radio mode, press this button to hear radio preset;
In disc playback mode, press this button for to stop playback.
11.Number Button 6/PALY
In radio mode, press this button to hear radio preset;
In disc playback mode, press this button for Play/Pause.
12.A/V AUX External Input
External connection for A/V input
13.USB socket
Connect the USB memory to this socket, and the unit can play music format files
supported by this unit in the USB memory
14.Release button
Press this button can take off the control panel.
15.UP Adjustment(TFT Screen)/Hang-free
After the display screen is extended, press this button to adjust the upward view angle
of the screen in 5 setps of adjusting angle.
At Bluetooth state, when a phone come in, press this button can answer the phone.
16.DN Adjustment(TFT Screen)/Hang up
After the display screen is extended, press this button to adjust the downward view angle
of the screen in 5 setps of adjusting angle.
At Bluetooth state, when a phone come in, press this button can hang up the phone.
17.PIC Color Selection button
Short press this button to chroma setup in the following level:
Bright Soft Sharp Standard Self Set Bright
18.UP Adjustment(TFT Screen)/Hang-free
Operation and function are the same as in (15)
19.DN Adjustment(TFT Screen)/Hang up
Operation and function are the same as in(16)
20.MUTE / TFT on/off button
Press this button to shut off the sound output, re-press this button can resume the sound
output, long press this button can turn off the TFT LCD display.
INSTRUCTIONS INSTRUCTIONS
PROG
TC
3__:__
4__:__
TC
7__:__
8__:__
5__:__
6__:__
TC
11__:__
12__:__
9__:__
10__:__
TC
15__:__
16__:__
13__:__
14__:__
PLAY DELETE
1__:__
2__:__
15. VCD Program Playing
In VCD mode, you can set playing sequence of songs by program play function.
The program playing operation steps are as follows:
In VCD mode, press ST/PTOG button, display will show:
Input the songs which you want to programmed by the number buttons on remote control.
For example: Program the first song, input your desires song, for example, the fourth song,
and press number button 4 on the remote control. Program the second song, press
button move the cursor to 2 . Input your desired song, for example, the eighth song,
press number button 8 on the remote control. Press button to program play. Back to
the normal mode, press the ST/PROG button, then press button.
Note: This function can only be worked by the remote control.
11
34
21.TFT Display Screen Extend/Retreat
Press this button to extend the TFT screen from the device or retreat it back. The
maximum angle of extension is 104 degree.
Attention: Under the disc playing mode, there is no image display at the moment of screen
extension after the button is pushed. It will become normal in 3 seconds.
22.LCD Display window
Under radio mode, channel and frequency are displayed; Under play mode, the directory
of the song and time elapsed are displayed.
23.Disc load slot
Opening for disc to enter or retreat.
24.Disc out button
Press this button can eject the disc.
25.SD socket
This is a high-spees transmission interface, which can read high-capacity date
in MP3 or MP4 format.
26.Reset button
Press this button can back to default mode.