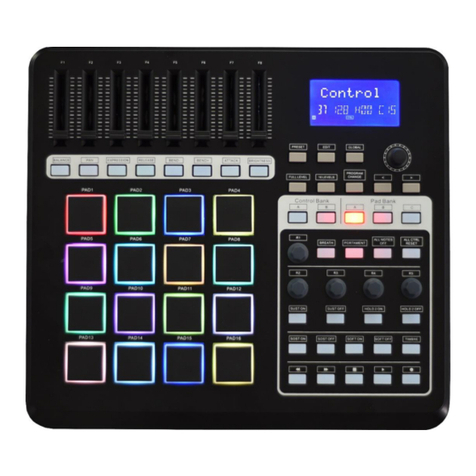
Stage right SRP64 User manual

SRP64 Grid Controller
P/N 625895
User's Manual

2
CONTENTS
SAFETY WARNINGS AND GUIDELINES.......................................................................................................................................3
FEATURES..............................................................................................................................................................................................................4
CUSTOMER SERVICE....................................................................................................................................................................................4
PACKAGE CONTENTS.................................................................................................................................................................................5
SYSTEM REQUIREMENTS.........................................................................................................................................................................5
Windows®.......................................................................................................................................................................................................5
Mac® OS X®....................................................................................................................................................................................................5
PRODUCT OVERVIEW.................................................................................................................................................................................6
Top Panel.........................................................................................................................................................................................................6
Rear Panel.......................................................................................................................................................................................................8
CONTROL SOFTWARE................................................................................................................................................................................9
Assign a Pad to Start/Stop MMC............................................................................................................................................10
Assign Pads to Send MIDI Notes ..............................................................................................................................................11
Assign a Pad to Toggle a MIDI CC# Between Two Values..............................................................................12
Save Settings to a Preset................................................................................................................................................................13
Setting Pad RGB Backlighting .................................................................................................................................................... 13
SETUP IN ABLETON® LIVE™.................................................................................................................................................................15
TECHNICAL SUPPORT............................................................................................................................................................................... 17
REGULATORY COMPLIANCE.............................................................................................................................................................. 17
Notice for FCC .......................................................................................................................................................................................... 17
Notice for Industry Canada...........................................................................................................................................................18

3
SAFETY WARNINGS AND GUIDELINES
Please read this entire manual before using this device, paying extra attention to these
safety warnings and guidelines. Please keep this manual in a safe place for future reference.
•This device is intended for indoor use only.
•Do not expose this device to water or moisture of any kind. Do not place drinks or
other containers with moisture on or near the device. If moisture does get in or on
the device, immediately unplug it from the power source and allow it to fully dry
before reapplying power.
•Do not touch the device, the power cord, or any other connected cables with wet
hands.
•Do not expose this device to excessive vibration.
•Do not subject the product to extreme force, shock, or fluctuations in temperature
or humidity.
•Do not expose this device to excessively high temperatures. Do not place it in, on,
or near a heat source, such as a fireplace, stove, radiator, etc. Do not leave it in
direct sunlight.
•Clean using a soft, dry cloth only. Do not use chemical cleaners, solvents, or
detergents. For stubborn deposits, moisten the cloth with warm water.
•This device has no user serviceable parts. Do not attempt to open, service, or
modify this device.

4
FEATURES
•64 velocity and pressure sensitive performance Pads with RGB customizable
backlighting
•Pads can be assigned to send Note, MIDI Control Change, and Program Change
messages
•6 built-in memory slots for storing button assignments and settings
•Powered by the USB connection to the computer
•Requires less than 100mA current
•MIDI IN and MIDI OUT connectors
•Dedicated Note, Octave, Aftertouch, Channel, Velocity, Mute, and Volume function
buttons
•Compatible with Windows® XP (SP2) or newer and Mac® OS X® 10.3.9 or newer
•Controlled using graphical PC and Mac software applications (download from
website)
•Compatible with Albeton® Live™ digital audio workstation (DAW) software
•Measures 10.1" x 10.1" x 1.4" (256 x 256 x 36 mm) and weighs 1.9 lbs. (840g)
CUSTOMER SERVICE
The Monoprice Customer Service department is dedicated to ensuring that your ordering,
purchasing, and delivery experience is second to none. If you have any problem with your
order, please give us an opportunity to make it right. You can contact a Monoprice
Customer Service representative through the Live Chat link on our website
www.monoprice.com or via email at support@monoprice.com. Check the website for
support times and links.

5
PACKAGE CONTENTS
Please take an inventory of the package contents to ensure you have all the items listed
below. If anything is missing or damaged, please contact Monoprice Customer Service for a
replacement.
1x SRP64 Grid Controller
1x USB Cable
1x USB Power Cable
1x MIDI to 3.5mm Audio Cable
SYSTEM REQUIREMENTS
If using this controller with a computer, ensure that the computer has the following
minimum capabilities. Note that USB hubs are not supported.
Windows®
•Pentium® 800 MHz or higher (CPU requirement may be higher for laptops)
•256MB RAM
•DirectX® 9.0b or later
•Windows® XP (SP2) or later
Mac® OS X®
•Mac G3 800 MHz or G4 733 MHz or higher (G3/G4 accelerator cards not supported)
•OS X 10.3.9 with 256MB RAM or OS X 10.4.2 or later with 512MB RAM

6
PRODUCT OVERVIEW
Top Panel
1. Parameter Control Buttons: These buttons can be assigned to send Control Change
messages and can be used to send continuous control data to a digital audio
workstation (DAW).
2. Memory Button: The SRP64 features 6 built-in memory slots for storing button
assignments and settings. Press and hold the Memory button and press one of the 6

7
Pads to the right of the Memory button to recall the settings assigned to that Pad.
Momentarily press the Memory button, then press one of the 6 Pads to the right of
the Memory button, to save the current button assignments and settings to the
memory slot assigned to that Pad.
3. Trigger Pads: The 8x8 grid of velocity and pressure sensitive Pads can be configured
to send Note or Control Change messages. They can be used to trigger drum hits to
your software or hardware module.
4. Note Button: Press the Note button to configure the Pads to send Note messages.
Use the ▲and ▼buttons to increase or decrease the current Note by a semitone.
5. Octave Button: Press the Octave button, then use the ▲and ▼buttons to increase
or decrease the Octave setting. The range of settings is 0-4 with 0 being the initial
setting. Press both the ▲and ▼buttons at the same time to reset the Octave
setting to 0.
6. A-touch Button: Press the A-touch button to control the Aftertouch function. Press
the button once to enter Channel Aftertouch Mode, press it a second time to enter
Keyboard Aftertouch Mode, and finally press it a third time to disable Aftertouch
Mode. The button illuminates red when in Channel Aftertouch Mode and the SRP64
will send Channel Aftertouch information when pressing the Pads. The button
illuminates blue when in Keyboard Aftertouch Mode and the SRP64 will send
Keyboard Aftertouch information when pressing the Pads.
7. Channel Button: Press the Channel button, then use the ▲and ▼buttons to
increase or decrease the Channel setting. The range of settings is 1-16 with 1 being
the initial setting.
8. Velocity Button: Press the Velocity button to cycle through the different velocity
settings. The button illuminates green when Normal velocity is selected, red when
Heavy velocity is selected, and blue when Constant velocity is selected.
9. Mute Button: Press the Mute button to toggle controller mute on or off. When
Mute is on, the SRP64 cannot send any MIDI messages.
10. Volume Button: Press the Volume button to send a General MIDI Master Volume
message (F0 7F 7F 04 01 00 xx F7).

8
11. MMC Buttons: These six buttons default to send MIDI Machine Control messages to
a sequencer. From top to bottom, the buttons perform Play, Fast Forward, Rewind,
Record, Stop, and Loop functions. Press the ◄◄ and ►buttons at the same time
to set the buttons to send Control Change messages instead of MMC messages.
12. ▲and ▼Buttons: These buttons are used to increase or decrease values and to
navigate menus and options.
Rear Panel
13. USB: USB Type-B connector for connecting your PC using the included USB cable.
14. MIDI Out: MIDI output connector.
15. MIDI In: MIDI input connector.
16. DC 5V: DC barrel connector for connecting the included USB Power Cable to a USB
power source.
17. Power: Press the Power button to turn the SRP64 on or off.

9
CONTROL SOFTWARE
This Grid Controller includes Control Software to change and manage the various settings.
Download the Windows® or Mac® software package from the 625895 page on the
monoprice.com website, connect the SRP64 to your computer, then run the software to
control the settings. While the software is intuitive and easy to use, a few setup examples
are listed in the following sections. The main window of the software is shown below.

10
Assign a Pad to Start/Stop MMC
It can be easier to trigger a Pad to start or stop a song than to use the keyboard or mouse.
The following example sets Pad 7 to send a Stop message and Pad 8 to send a Start
message.
1. Click Pad 7 in the software to select it, then use the Mode pull down list box to set
it to Switched.
2. Use the CC Number pull down list box to set the value to 1, which is the MMC Stop
command.
3. Click Pad 8 in the software to select it, then use the Mode pull down list box to set
it to Switched.
4. Use the CC Number pull down list box to set the value to 2, which is the MMC Start
command.

11
Assign Pads to Send MIDI Notes
It is natural to lay down snare and kick drum notes when starting a song. The following
example sets Pads 1 and 2 to trigger Bass Drum and Snare Drum notes (MIDI note numbers
36 and 38 respectively).
1. Click Pad 1 to select it, then use the Mode pull down list box to set it to MIDI Note.
Use the CC Number pull down list box (which also controls the MIDI note number
when MIDI Note is selected) to 36 for the Bass Drum. Leave the other setting at the
default Gate value, which causes the note to end when the Pad is released. The
Toggle option causes the note to continue playing until the Pad is hit a second time.
2. Click Pad 2 to select it, then use the Mode pull down list box to set it to MIDI Note.
Use the CC Number pull down list box, which also controls the MIDI note number
when MIDI Note is selected, to 38 for the Snare Drum.

12
Assign a Pad to Toggle a MIDI CC# Between Two Values
One popular musical effect is to take an audio clip, filter it heavily for certain sections of
the song, then switch it back to the full open sound later in the song. The following
example sets Pad 6 to toggle two values for the Brightness filter (CC#74).
1. Click Pad 6 to select it, then use the Mode pull down list box to set it to Switched
and the Mode Option to Toggle.
2. Use the CC Number pull down list box to set the value to 74., which is the
Brightness filter.
3. Use the Min/LSB pull down list box to set the value to 78, which closes down the
filter part way, but still allows a lot of audio to pass through. Next, use the
Max/MSB pull down list box to set the value to 127, which opens the filter
completely to let full audio through.
Now, pressing Pad 6 toggles between the filtered and full audio settings.

13
Save Settings to a Preset
Once you have configured the SRP64 to your preferences, you should save the settings to
a memory slot for instant recall. In the following example, we will save the settings to
memory slot 2.
1. Locate the Send to Keyboard button on the right side of the software interface. Use
the Send to Mem pull down list box to set it to 2.
2. Click the Send to Keyboard button to save preset to memory slot 2.
Setting Pad RGB Backlighting
Each Pad can be set to any color by controlling the brightness of the red, green, and blue
elements. Perform the following steps to set the backlighting color for a Pad.
1. Click any Pad to select it.
2. Use the CR, CG, and CB pull down list boxes in the top right corner of the interface
to set the brightness for the red, green, and blue elements to a value between 0
and 127. 0 is minimum brightness (color element is off) and 127 is the maximum
brightness.
3. Once you have set the value for all three color elements, click the Send to Keyboard
button to send the selected color to the Pad.

14
The following table shows the RGB values for some common basic colors.
COLOR
R
G
B
White
127
127
127
Black
0
0
0
Red
127
0
0
Green
0
127
0
Blue
0
0
127
Cyan
0
127
127
Magenta
127
0
127
Yellow
127
127
0
Orange
127
82
0

15
SETUP IN ABLETON® LIVE™
Once you have connected the SRP64 to your computer, open your Ableton® Live™
software and go to the Preferences screen. Click the Link MIDI tab on the left to get the
following screen.
•In the MIDI Ports section at the bottom, click the Track button to the right of the
Input and Output options to set Track On, which enables the SRP64 as an Input
device to play MIDI tracks in Live and as an Output device to see the played and
recorded notes feedback to the Pad LEDs.
•Set the Sync option On for the Output to cause the Pad LEDs to pulse and flash in
time with your project tempo.
•Turning Remote On for both the Input and Output allows the SRP64 to be mapped
to parameters in Live and to see feedback of that mapping.

16
•Turning Track On for the SRP64 allows Live™ to playback and control any device
connected to the physical MIDI ports.
•When used with Ableton® Live, the 8x8 grid of RGB LED Pads will give intuitive
visual feedback on your clips as you launch, stop, edit, and record them. Conversely,
you can see these Pads on your Live screen inside a colored 8x8 rectangular "ring".
The color of the "ring" changes depending on which Control Surface choice is
selected in Live.
•Pressing a Pad on the SRP64 triggers a clip (if one exists) in the corresponding slot in
Live. However, pressing an empty clip slot on an unarmed track will stop clip
playback on that track. If the track is armed, pressing a Pad begins recording into an
empty clip slot.
•When used with Ableton Live, the top 8 buttons default as Scene Launch buttons,
which can be assigned to other functions, as desired. When used as Scene Launch
buttons, pressing the Scene Launch buttons on the right side of the SRP64 will
trigger horizontal rows of clips, also known as "Scenes". The buttons allow you to
launch, stop, and/or record multiple clips with one button, making them ideal for
live performances. As with the 8x8 grid of Pads, the Scene Launch buttons match
the scene colors on your Live screen.
•To play the session in Ableton Live, you have to set the device and channel for Light
track by 1) selecting W-P64 for the MIDI TO value and 2) selecting CH.6 for Channels,
as shown below.
If you find that features described in this manual do not function as expected, recheck your
MIDI port settings.

17
TECHNICAL SUPPORT
Monoprice is pleased to provide free, live, online technical support to assist you with any
questions you may have about installation, setup, troubleshooting, or product
recommendations. If you ever need assistance with your new product, please come online
to talk to one of our friendly and knowledgeable Tech Support Associates. Technical
support is available through the online chat button on our website www.monoprice.com
support times and links.
REGULATORY COMPLIANCE
Notice for FCC
This device complies with Part 15 of the FCC rules. Operation is subject to the following
two conditions: (1) this device may not cause harmful interference, and (2) this device must
accept any interference received, including interference that may cause undesired
operation.
Modifying the equipment without Monoprice's authorization may result in the equipment
no longer complying with FCC requirements for Class B digital devices. In that event, your
right to use the equipment may be limited by FCC regulations, and you may be required to
correct any interference to radio or television communications at your own expense.
This equipment has been tested and found to comply with the limits for a Class B digital
device, pursuant to Part 15 of the FCC Rules. These limits are designed to provide
reasonable protection against harmful interference in a residential installation. This
equipment generates, uses and can radiate radio frequency energy and, if not installed and
used in accordance with the instructions, may cause harmful interference to radio
communications. However, there is no guarantee that interference will not occur in a
particular installation. If this equipment does cause harmful interference to radio or
television reception, which can be determined by turning the equipment off and on, the

18
user is encouraged to try to correct the interference by one or more of the following
measures:
•Reorient or relocate the receiving antenna.
•Increase the separation between the equipment and receiver.
•Connect the equipment into an outlet on a circuit different from that to which the
receiver is connected.
•Consult the dealer or an experienced radio/TV technician for help.
Notice for Industry Canada
This Class B digital apparatus complies with Canadian ICES-003.
Cet appareil numérique de la classe B est conforme à la norme NMB-003 du Canada.
Monoprice™, Stage Right™, the Stage Right logo, and all Monoprice logos are trademarks
of Monoprice Inc.
Apple®, Mac®, and OS X® are trademarks of Apple Inc., registered in the U.S. and other
countries.
Microsoft®, Windows®, and Vista® are either registered trademarks or trademarks of
Microsoft Corporation in the United States and/or other countries.
Pentium® is a trademark of Intel Corporation or its subsidiaries in the U.S. and/or other
countries.
Ableton® and Live™ are trademarks of Ableton AG.
Table of contents
Other Stage right Controllers manuals
Popular Controllers manuals by other brands
Dometic
Dometic EA1000 Installation and user manual
Altronix
Altronix Maximal series installation guide
Sanyo Denki
Sanyo Denki Sanmotion R 3E S instruction manual
Honeywell
Honeywell UDC1200 MICRO-PRO Startup guide
ASROCK
ASROCK iEP-7020E Series user manual
BIFFI
BIFFI RPHD-10 Installation, operation and maintenance manual
