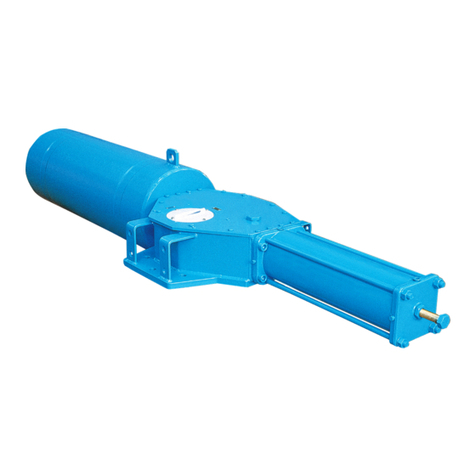
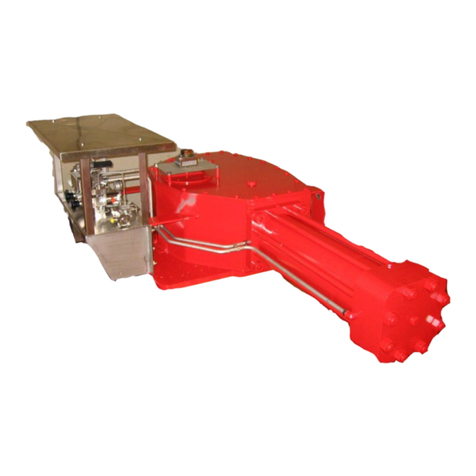
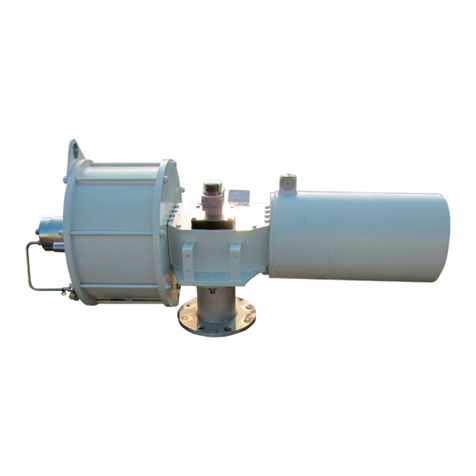
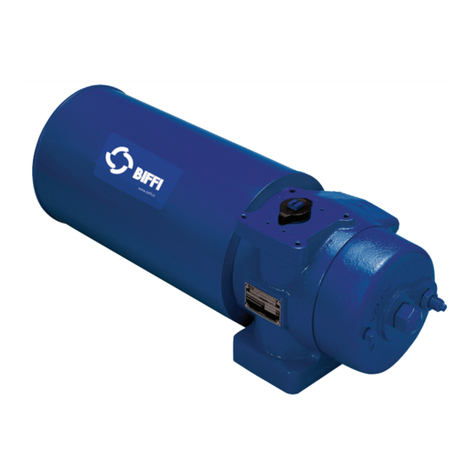
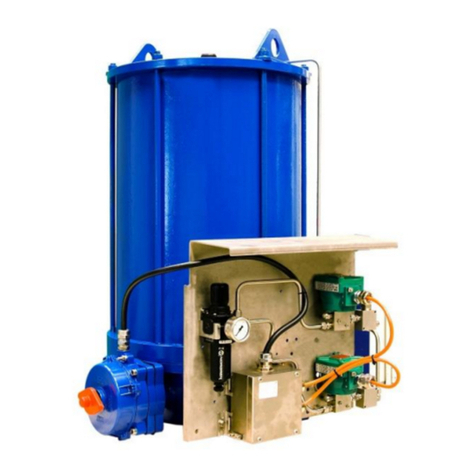
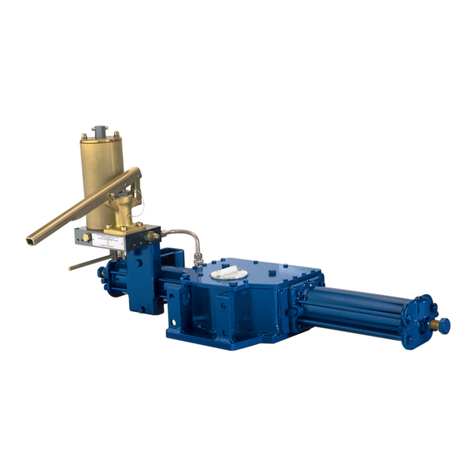
BIFFI RPHD-10 User manual

Installation, Operation and Maintenance Manual
MAN 605 Rev. 4
February 2021
Copyright © Biffi. The information in this document is subject to change without notice. Updated data sheets can be obtained from our website www.biffi.it or from your nearest Biffi Center:
Biffi Italia s.r.l. - Strada Biffi 165, 29017 Fiorenzuola d'Arda (PC) – Italy PH: +39 0523 944 411 – [email protected]
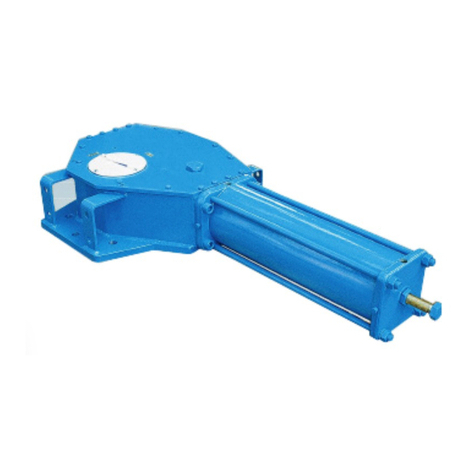
Biffi RPHS
Spring-Return Hydraulic Actuator

Revision Details
Revision Details
February 2021
Installation, Operation and Maintenance Manual
MAN 605 Rev. 4
Rev. Date Description Prepared Checked Approved
4 February 2021 Migration to new template
3 18/04/06 Updated applicable regulation (chapter 1.1.1) Ermanni Orefici Vigliano
2 09/09/14 General Update Ermanni Cristalli Vigliano
1 11/12/09 General Update Ermanni Stoto Vigliano
0 05/05/99 Document Release Lazzarini Aliani Ziveri
Revision Details

i
Installation, Operation and Maintenance Manual
MAN 605 Rev. 4
Table of Contents
February 2021
Table of Contents
Table of Contents
Section 1: General Warnings
1.1 Generalities................................................................................................... 1
1.2 Identification Plate ........................................................................................ 2
1.3 Introducing the Actuator............................................................................... 3
1.4 Data Sheet .................................................................................................... 4
Section 2: Installation
2.1 Checks Upon Actuator Receipt ...................................................................... 5
2.2 Actuator Handling......................................................................................... 5
2.3 Storage ......................................................................................................... 7
2.4 Actuator Assembly on the Valve.................................................................... 7
2.5 Hydraulic Connections................................................................................ 10
2.6 Electrical Connections (If Any)..................................................................... 11
2.7 Commissioning........................................................................................... 11
Section 3: Operation and Use
3.1 Operation Description................................................................................. 12
3.2 Residual Risks.............................................................................................. 14
3.3 Operations.................................................................................................. 14
3.4 Calibration of the Angular Stroke ................................................................ 14
3.5 Calibration Of Microswitches (If Foreseen) .................................................. 16
3.6 Calibration of the Operation Time............................................................... 19
Section 4: Operational Tests and Inspections
Operational Tests and Inspections..........................................................................20
Section 5: Maintenance
5.1 Periodic Maintenance.................................................................................. 21
5.2 Extraordinary Maintenance ......................................................................... 23
5.3 Lubrication of Mechanism ........................................................................... 26
5.4 Dismantling and Demolition ....................................................................... 27
Section 6: Troubleshooting
6.1 Failure or Breakdown Research.................................................................... 28
Section 7: Layouts
7.1 Spare Parts Order........................................................................................ 29
7.2 Parts List ror Maintenance and Replacing Procedure.................................... 30
Section 8: Date Report for Maintenance Operations
Date Report for Maintenance Operations...............................................................32

Notes
February 2021
Installation, Operation and Maintenance Manual
MAN 605 Rev. 4
This page is intentionally left blank

General Warnings 1
Section 1: General WarningsInstallation, Operation and Maintenance Manual
MAN 605 Rev. 4 February 2021
NOTICE
Biffi Italia s.r.l. pays the highest attention to collecting and verifying the documentation
contained in this user manual. However Biffi Italia s.r.l. is not liable for any mistakes
contained in this manual, for damage or accidents due to the use of the latter.
The information contained is of exclusive reserved ownership of Biffi Italia s.r.l. and may be
modified without prior notice. All rights reserved.
Section 1: General Warnings
NOTICE
The manual is an integral part of the machine, it should be carefully read before carrying
out any operation and it should be kept for future references.
1.1 Generalities
BiffI Italia s.r.l. actuators are conceived, manufactured and controlled according to the
Quality Control System in compliance with EN-ISO 9001 international regulation.
1.1.1 Applicable Regulation
UNI EN ISO 12100-1: 2005: Safety of machinery –
Basic notions, general design principles.
Part 1-Basic terminology, method.
UNI EN ISO 12100-2: 2005: Safety of machinery –
Basic notions, general design principles.
Part 2-Technical principles and specification.
2006/42/EC: Machine directive.
97/23/EC: Directive for pressure PED equipment (until 18 July 2016)
2014/68/EU from 19 July 2016
2006/95/EC: Directive for low voltage equipment (until 19 April 2016)
2014/35/EU from 20 April 2016
2004/108/EC: Directive for the electromagnetic compatibility
(until19 April 2016) 2014/30/EU from 20 April 2016
94/9/CE: Directive and safety instructions for use in hazardous area
(until 19 April 2016) 2014/34/EU from 20 April 2016

General Warnings2
Section 1: General Warnings
February 2021
Installation, Operation and Maintenance Manual
MAN 605 Rev. 4
1.1.2 Terms and Conditions
Biffi Italia s.r.l. guarantees that all the items produced are free of defects in workmanship
and manufacturing materials and meet relevant current specifications, provided they
are installed, used and serviced according to the instructions contained in the present
manual. The warranty can last either one year from the date of installation by the initial
user of the product, or eighteen months from the date of shipment to the initial user,
depending on which event occurs first. All detailed warranty conditions are specified in the
documentation forwarded together with the product. This warranty does not cover special
products or components not warranted by subcontractors, or materials that were used or
installed improperly or were modified or repaired by unauthorized staff. In the event that
a fault condition be caused by improper installation, maintenance or use, or by irregular
working conditions, the repairs will be charged according to applicable fees.
The warranty and Biffi Italia s.r.l. liability shall lapse in the event that any modification
or tampering whatsoever be performed on the actuator.
1.2 Identification Plate
! WARNING
It is forbidden to modify the information and the marks without previous written
authorization by Biffi Italia s.r.l.
The plate fastened on the actuator contains the following information (Figure1).
Figure 1 Data Plate

General Warnings 3
Section 1: General WarningsInstallation, Operation and Maintenance Manual
MAN 605 Rev. 4 February 2021
1.3 Introducing the Actuator
RPHS are hydraulic high-pressure spring-return actuators, suitable for any quarter
turn application such as ball, plug, butterfly valves or dampers, in both ON-OFF and
MODULATING heavy-duty service.
The actuator is made of a rack and pinion mechanism made by alloy steel which transform
into the rotary movement for the valve operation the linear movement of the hydraulic
cylinder in one direction, and the linear movement of the spring in the opposite direction.
The surfaces of the pinion and rack are treaded to guarantee a low friction and a long life
The spring module incorporates one or two springs in parallel, depending on the model,
and it is fully encapsulated to protect persons during actuator disassembling. External
travel stops allow precise angular stroke adjustment between 80° and 100°.
Totally enclosed, weatherproof housing, made of nodular cast iron for maximum strength
and suitable for use in hostile environments.
The actuator is assembled onto the valve by connecting the actuator- housing flange to the
valve flange by a spool piece and the actuator shaft to the valve stem by a stem extension.
The mounting flange, on the housing top, can be utilised for the assembly of limit switches,
position transmitter, positioner etc., which are actuated by the actuator output shaft.
The actuator housing is provided, on the front face and in the rear face (optional), with
threaded holes for the assembly of accessories (control panels, air storage tank, etc.).
The expected lifetime of actuator is approximately 25 years.
Figure 2 Identification of actuator parts
Hydraulic control
panel
Hydraulic
cylinder
Weatherproof housing
Spring cartridge
Spool piece for
valve coupling

General Warnings4
Section 1: General Warnings
February 2021
Installation, Operation and Maintenance Manual
MAN 605 Rev. 4
1.4 Data Sheet
Supply fluid Hydraulic oil or fire-resistant fluid
Operating temperature Standard: from –30 °C to +100 °C
Optional: from –60 °C to +140 °C
Design pressure Design pressure of the cylinder 220 barg
Supply pressure Please refer to technical document: “actuator datasheet”
Max operating torque Up to 2600 Nm

Installation 5
Section 2: Installation
Installation, Operation and Maintenance Manual
MAN 605 Rev. 4 February 2021
Section 2: Installation
2.1 Checks Upon Actuator Receipt
• Check that the model, the serial number of the actuator and the technical
data reported on the identification plate correspond with those of order
confirmation (Section 1.2).
• Check that the actuator is equipped with the fittings as provided for by
order confirmation.
• Check that the actuator was not damaged during transportation: if necessary
renovate the painting according to the specification reported on the
order confirmation.
• If the actuator is received already assembled with the valve, its settings have
already been made at the factory.
• If the actuator is delivered separately from the valve, it is necessary to check,
and, if required, to adjust, the settings of the mechanical stops (Section 3.4) and
of micro-switches (if any) (Section 3.5).
2.2 Actuator Handling
NOTICE
The lifting and handling should be made by qualified staff and in compliance with the laws
and provisions in force.
! WARNING
The fastening points are appropriate for the lifting of the actuator alone and not for the
valve+actuator assembly. Avoid that during the handling, the actuator passes above the
staff. The actuator should be handled with appropriate lifting means. The weight of the
actuator is reported on the delivery bill.

Installation6
Section 2: Installation
February 2021
Installation, Operation and Maintenance Manual
MAN 605 Rev. 4
Figure 3 Lifting and storage method
1-2= lifting points (obligatory)
! WARNING
1 = point of support (lifting points)
2= don’t lay the actuator on tie-rods
Don’t lay the actuator on accessories (manual hand-pump, manual jack-screw,
hydraulic control group etc.).

Installation 7
Section 2: Installation
Installation, Operation and Maintenance Manual
MAN 605 Rev. 4 February 2021
2.3 Storage
If the actuator needs storage, before installation follow these steps:
• Place it on a wood surface in order not to deteriorate the area of valve coupling.
• Make sure that plastic plugs are present on the hydraulic and electrical
connections (if present).
• Check that the protection of the control system and of the limit switch box (if any)
are properly closed.
If the storage is long-term or outdoor:
• Keep the actuator protected from direct weather conditions.
• Replace plastic plugs of hydraulic and electrical connections (if any) with metal
plugs that guarantee perfect tightness.
• Coat with oil, grease or protection disc, the valve coupling area.
• Periodically operate the actuator (Section 3.3).
2.4 Actuator Assembly on the Valve
2.4.1 Types of assembly
For coupling to the valve, the housing is provided with a flange with threaded holes
according to Biffi standard tables (TN1312 attached). The number, dimensions and
diameter of the holes are made in accordance with ISO 5211.The actuator is provided
with a spool piece and a stem extension for coupling to the valve. The assembly position
of the actuator, with reference to the valve, must comply with the plant requirements
(cylinder axis parallel or perpendicular to the pipeline axis).
NOTICE
To fix the actuator to the valve flange must be used the stud bolts and nuts supplied
by Biffi! In case the actuator is supplied without stud bolts and nuts the following materials
must be used as a minimum:
• ASTM A 193 Grade L7 for Stud Bolts
• ASTM A 194 Grade 4 for Nuts

Installation8
Section 2: Installation
February 2021
Installation, Operation and Maintenance Manual
MAN 605 Rev. 4
Figure 4
Table 1.
Standard ISO 5211
Holes Position
View from X ALTERNATIVE
Holes Position
N° 4 Threaded Holes
Notes:
- All dimensions are in mm
- Actuator shown in closed position
View from Y
Actuator Model A± 0,2 B± 0,2 ØC D ØE 0
-0,1 ØF 0
-0,5 G ØH K J L ØM 0
-0,2 ØP
RPHD-10
RPHS-10 49.5 49.5 M8 10 16 21 23 66 30 3 70 40 90
RPHD-20
RPHS-20 72.1 72.1 M10 12 22 29 25 92 32 3 102 50 125

RPHD-40
RPHS-40 88.4 88.4 M12 15 28 37 34 112 42 3 125 60 150
RPHD-80
RPHS-80 99 99 M16 23 37 49 45 132 55 3 140 75 175

Installation 9
Section 2: Installation
Installation, Operation and Maintenance Manual
MAN 605 Rev. 4 February 2021
2.4.2 Assembly Procedure
NOTICE
Failure to comply with the following procedures may impair product warranty.
! WARNING
Installation, commissioning and maintenance and repair works should be carried out by
qualified staff. A non-conforming assembly could be the source of serious accidents.
For actuator assembly on the valve:
NOTICE
Check that the assembly position, as shown on the documentation, complies with system’s
geometry. Check the consistency of the parts of actuator-valve coupling.
• Operate the actuator so that it reaches the position matching valve position
(Section 3.3).
• Lubricate valve stem with oil or grease.
• Properly clean and remove grease from valve coupling flange surfaces.
• Connect, if supplied separately, the stem extension onto the valve stem and fasten
it with the special fastening pins.
• Lift the actuator using the special lifting points (Section 2.2).
• Install the actuator so that valve stem inserts in the coupling area. This coupling
should be made without forcing.
• Fasten the two parts with the threaded connections (screws, tie rods, nuts). If
holes of coupling flanges are not aligned, adequately operate the actuator if
necessary move the mechanical stops backwards (Section 3.4).
• Fasten threaded connections. Please refer to Table 2.
Table 2. Nuts tightening torque
Threading Tightening torque (Nm)
M8 20
M10 40
M12 70
M16 160
The screwing values in Table 2 were calculated considering the materials ASTM A320 L7 for
screws or tie rods and ASTM A194 gr.2H for the nuts.

Installation10
Section 2: Installation
February 2021
Installation, Operation and Maintenance Manual
MAN 605 Rev. 4
2.5 Hydraulic Connections
NOTICE
Check that the values of hydraulic supply available in the system are compatible with those
reported on the identification plate of the actuator. The connections should be made by
qualified staff.
NOTICE
Use pipes and connections appropriate as for type, material and dimensions. Use motor
fluid with purity degree ISO 4406 17/14 or NAS 1638 Class 8 (AS4059 Class 4B-F).
! WARNING
For special applications the lower contamination degree is required. Please refer to the
documentation supplied.
• Properly burr the ends of rigid pipes if present.
• Properly clean the interior of pipes sending through them plenty of the supply fluid
used in the system.
• Mould and fasten the connection pipes so that no irregular strains at entries or
loosening of threaded connections occur.
• Make the connections according to the functional diagram.
• Check the absence of leakages from hydraulic connections.
NOTICE
For the characteristics of the motor fluid please refer to the documentation supplied.

Installation 11
Section 2: Installation
Installation, Operation and Maintenance Manual
MAN 605 Rev. 4 February 2021
2.6 Electrical Connections (If Any)
! WARNING
Use components appropriate as for type, material and dimensions.
The connections should be made by qualified staff. Before carrying out any operation,
cut line power off. Safety provisions as per CEI 64-8 regulation should be complied with
(same as IEC 60364).
• Remove plastic plugs from cables entries.
• Screw firmly the cable glands.
• Introduce connection cables.
• Make the connections in compliance with applicable wiring diagrams on the
documentation supplied.
• Screw the cable gland.
• Replace the plugs of unused entries with metal plugs.
2.7 Commissioning
! WARNING
Installation, commissioning and maintenance and repair works should be made by
qualified staff. Any calibration relative to functional aspects of the actuator are preset at
the factory. Before any modifications please read Biffi Italia s.r.l.
Upon actuator commissioning please carry out the following checks:
• Check that the values of hydraulic supply available in the system are compatible
with those reported on the identification plate of the actuator (Figure 2) and on
the documentation supplied.
• Check the power voltage of electrical components complies with the one reported
on the documentation supplied.
• Check the absence of leakages in the cylinder and in hydraulic connections.
• Check that paint is intact and in case renovate it according to the specification on
order confirmation.
• Carry out all kinds of operations and check their proper execution (Section 3.3).
• Check the proper operation of all the warnings.

Operation and Use12
Section 3: Operation and Use
February 2021
Installation, Operation and Maintenance Manual
MAN 605 Rev. 4
Section 3: Operation and Use
3.1 Operation Description
The oil supply pressurizes the hydraulic cylinder chamber relevant to the operation to carry
out (opening or closing) (see following pages).
This pressure starts the linear motion of the piston and the consequent rotation motion
of the rack and pinion mechanism, to which the valve stem is coupled, in one direction.
The operation in the opposite direction is made by the linear movement generated from
the spring releasing.
For local or remote operations, please refer to Section 3.3.1, 3.3.2, 3.3.3 and 3.3.4 and
prior to technical documentation furnished with actuators.
Typical schematics for various applications are follow attached for information only: in
these schematic, actuator operation in local is performed by the optional hydraulic manual
override. Actuator operation in remote shall be performed operating the hydraulic manual
selector (item 3 of example in follow page) by signal from control room.
Figure 5
Hydraulic manual override
(Optional *)
The power and control systems are supplied on specific customer demand (refer to specific
documentation furnished).

Operation and Use 13
Section 3: Operation and Use
Installation, Operation and Maintenance Manual
MAN 605 Rev. 4 February 2021
Local control suitable also for remote oil supply for spring-return actuators.
Figure 6
1. Rack and pinion mechanism
2. Hydraulic cylinder
3. Spring cartridge
4. Hydraulic manual selector
5. Hydraulic manual override
S = Stop valve
C = Check valve
P = Hand pump
R = Relief valve
O = Oil tank

Operation and Use14
Section 3: Operation and Use
February 2021
Installation, Operation and Maintenance Manual
MAN 605 Rev. 4
3.2 Residual Risks
! WARNING
The actuator has parts under pressure. Use the due caution. Use the due caution.
Use individual protections provided for by the laws and provisions in force.
3.3 Operations
The operations are carried out sending the proper signal through the control system in
compliance with Customer specifications.
Please refer to the functional diagram and specific documentation supplied.
3.4 Calibration of the Angular Stroke
It is important that the mechanical stops of the actuator (and not those of the valve) stop
the angular stroke at both extreme valve position (fully open and fully closed), except when
this is required by the valve operation (e.g. metal seated butterfly valves).
The setting of the open valve position is performed by adjusting the travel stop screw on
the end flange of the spring container.
The setting of the closed valve position is performed by adjusting the travel stop
screw, which is on the right side of the actuator (screwed into the end flange of the
hydraulic cylinder).
For the adjustment of the travel stop screw in the end flange of the hydraulic cylinder
proceed as follows:
1. Unscrew the plug from the cylinder end flange.
2. If the actuator angular stroke is stopped before reaching the end position
(fully open or closed), unscrew the stop screw by turning it anticlockwise with an
Allen wrench until the valve reaches the correct position.
3. If the actuator angular stroke is stopped beyond the end position (fully open or
closed valve), screw the stop screw by turning it clockwise until the valve reaches
the correct position.
4. Screw the plug into the cylinder end flange.

Operation and Use 15
Section 3: Operation and Use
Installation, Operation and Maintenance Manual
MAN 605 Rev. 4 February 2021
Figure 7
Table 3.
Hydraulic Cylinder Diameter Wrench C1 (mm) Wrench C2 (mm)
From 28 to 40 8 22
From 45 to 60 12 27
From 70 to 175 14 36
From 200 to 235 22 36
Travel stop screw screwed on the end flange of spring container
For the adjustment of the travel stop screw proceed as follows:
1. Loosen the lock nut “d”.
2. If the actuator angular stroke is stopped before reaching the end position,
unscrew the stop screw “v” by turning it anticlockwise until the valve reaches
the correct position.
3. If the stop-screw is too hard to be operated, reduce or remove the cylinder
pressure, in order to move the mechanism far from the screw. Operate the
setting-screw and then pressurize again the cylinder to reach end position.
4. If the actuator angular stroke is stopped beyond the end position, screw the stop
screw by turning it clockwise until the valve reaches the correct position.
5. Tighten the lock nut, after having correctly placed the threaded seal washer “s”
and “w”.

Operation and Use16
Section 3: Operation and Use
February 2021
Installation, Operation and Maintenance Manual
MAN 605 Rev. 4
To operate the adjustments refer to following table:
Table 4.
Spring Container Size Wrench C1 (mm) Wrench C2 (mm)
010 8 24
020 8 24
040 13 41
080 15 46
Figure 8
3.5 Calibration Of Micro-switches (If Foreseen)
NOTICE
Operate only the micro-switches corresponding to the direction of operation being carried
out, as clearly reported on the micro-switch.
Micro-switches are placed inside a special box (Figure 9).
For micro-switches calibration please refer to the relative wiring diagram and follow
these steps:
1. Unscrew the fastening screws of the cover (Figure 9).
2. Remove the cover paying attention not to deteriorate the gasket and the
cylindrical and flat coupling surfaces.
3. Operate the actuator (in opening or closing) with local pneumatic or hydraulic
operation (Section 3.3).
4. Unscrew the screw of the operating cam relative to the micro-switch to calibrate
and adjust it according to the settings (Figure 10).
5. Tighten the screw.
6. Operate the actuator and adjust any other micro-switch with the procedure
already described.
7. Position the cover making sure the cam-carrier shaft grips with the index
dragging shaft.
8. Check that the cover and the index show the proper position of the valve
(Figure 11).
9. Tighten the screws.
This manual suits for next models
8
Table of contents
Other BIFFI Controllers manuals

BIFFI
BIFFI HLAS User manual

BIFFI
BIFFI ALGA Series User manual

BIFFI
BIFFI OLGA User manual

BIFFI
BIFFI F02 manual

BIFFI
BIFFI ALGA-EAC Series User manual

BIFFI
BIFFI PLA User manual

BIFFI
BIFFI OLGA Series User manual

BIFFI
BIFFI FCB Series User manual

BIFFI
BIFFI RPD Series User manual

BIFFI
BIFFI ICON3000 Series User manual

BIFFI
BIFFI GPO-EAC User manual

BIFFI
BIFFI F01-2000 User manual

BIFFI
BIFFI OLGA-H User manual

BIFFI
BIFFI OLGAS-QA User manual

BIFFI
BIFFI ALGAS User manual

BIFFI
BIFFI COMPACT Series User manual

BIFFI
BIFFI HLA User manual

BIFFI
BIFFI GIGS 0.3 User manual

BIFFI
BIFFI TPS Series User manual

BIFFI
BIFFI ICON3000 Series Setup guide