Staheli West DewPoint 6210 2015 User manual

DewPoint 6210
Owner's Manual
R7.1: 12.1.21
2015 DewPoint 6210
2016 DewPoint 6210
2017 DewPoint 6210
2018 DewPoint 6210
2019 DewPoint 6210
2020 DewPoint 6210
2021 DewPoint 6210
2022 DewPoint 6210
TestsTests
MaintenanceMaintenance
TroubleshoongTroubleshoong
Technical
Informaon
Technical
Informaon
OperaonOperaon
Pre-Operaon
Requirements
Pre-Operaon
Requirements
SafetySafety

RAISING INDIVIDUAL, FAMILY, AND COMMUNITY STANDARDS WHILE
REVOLUTIONIZING THE AGRICULTURAL INDUSTRY.
FOR THE MOST UP TO DATE SERVICE INFORMATION DOWNLOAD THE
STAHELI WEST APP:
When you see a QR code in this handbook,
scan the code with your smart phone or tablet
to see the associated video or content.
iOS
Download the App
CONTACT YOUR DEALER FOR SERVICE ASSISTANCE
TestsTests
MaintenanceMaintenance
TroubleshoongTroubleshoong
Technical
Informaon
Technical
Informaon
OperaonOperaon
Pre-Operaon
Requirements
Pre-Operaon
Requirements
SafetySafety

Contents
Foreword
DewPoint Machine Operator Training....................8
Warranty Informaon.............................................10
Safety
Safety Decals ..........................................................13
Tractor Requirements.............................................15
Safe Procedures...................................................... 16
Boiler Jurisdicon ...................................................18
Boiler Safety Test ....................................................19
Pre-Operaon Requirements
Water...... ................................................................ 24
Source Selecon and Water Sampling ..........24
Analysis and Treatment
Equipment Specicaon ..........................24
System Equipment Setup ..............................25
Transportaon ..............................................26
Water Soener..............................................27
Reverse Osmosis Unit....................................28
Setup............................................................. 29
Water Equipment Selecon ..........................30
Water Treatment Chemical ...........................32
Quality/Blow-Down Principles .....................33
Quality Sengs .............................................35
Baler Preparaon ...................................................36
Install Baler Hardware...................................36
Install Cameras on Baler ...............................36
Install Bale Moisture Monitor on Baler.........36
DewPoint Machine Preparaon .............................37
Install Oponal/Custom Equipment..............37
Install Cameras on DewPoint Machine .........37
Install Air Hose Coupler.................................38
Valve Inspecon ............................................39
Generator Inspecon ....................................40
Electrical Panel Inspecon ............................41
Actuator Inspecon.......................................42
Wheel Inspecon ..........................................44
DewPoint Hookup to Tractor ..................................45
DewPoint Hookup to Baler .....................................46
Fill Fuel Tanks..........................................................47
Fill Water Tanks ......................................................48
Start DewPoint .......................................................49
Burner Tune............................................................50
Gazeeka Calibraon................................................51
Gazeeka Screen ......................................................52
Brake Adjustments .................................................53
Operaon
Common Operang Times......................................56
How to Start Steaming ...........................................57
Common Valve Sengs..........................................59
Simple Operaon....................................................60
Steam Rate Adjustment With a Gazeeka................61
Steam Rate Adjustment Without a Gazeeka ..........62
Common Operaon................................................63
Short Term Storage (Wet Layup) ............................64
Keep Hot.................................................................65
Blowdown System ..................................................66
Water Purge System ...............................................68
Steam Purge System...............................................69
Irrigaon.................................................................70
Cung.... ................................................................71
Raking.....................................................................72
DewPoint Machines................................................74
Baling With Steam..................................................75
Suggested Moisture With Steam............................76
Steaming Dierent Crops .......................................77
Steam Eects in Dierent Temperatures................78
Judging Bale Moisture............................................79
Moisture Sensors....................................................80
Judging Bale Moisture with the
Gazeeka Moisture Gauge .............................81
Judging Bale Moisture by
Bale Chamber Pressure ................................83
Judging Bale Moisture Visually...............................84
Judging Bale Moisture with a
Handheld Moisture Probe ............................85
Judging Bale Moisture with a
Baler-Mounted Contact Moisture Sensor ....87
Judging Bale Moisture Aer Baling ........................88
Judging Bale Temperature......................................89
Hauling, Stacking, and Storage of
Steam-Treated-Hay ......................................90
Hauling and Stacking Steamed Hay During
Normal Harvest Operaons ..........................90
Stacking High-Temperature Steamed Hay
When Weather Is a Threat............................90
TestsTests
MaintenanceMaintenance
TroubleshoongTroubleshoong
Technical
Informaon
Technical
Informaon
OperaonOperaon
Pre-Operaon
Requirements
Pre-Operaon
Requirements
SafetySafety

Contents
Technical Informaon
Components Locaon List ...................................... 93
Diagram 1 ...............................................................94
Diagram 2 ...............................................................94
Diagram 3 ...............................................................95
Diagram 4a (2017-2022).........................................95
Diagram 4b (2015-2016).........................................96
Diagram 5a (2016-2022).........................................96
Diagram 5b (2015)..................................................97
Diagram 6a (2017-2022).........................................97
Diagram 6b (2015-2016).........................................98
Diagram 7a (2017-2022).........................................98
Diagram 7b (2015-2016).........................................99
Diagram 8 ...............................................................99
Diagram 9 ...............................................................100
Diagram 10 .............................................................100
Diagram 11 .............................................................101
Diagram 12 .............................................................101
Diagram 13 .............................................................101
Diagram 14 .............................................................101
Diagram 15 .............................................................102
Diagram 16 .............................................................102
Diagram 17 Propane System ..................................103
Field Work Screen...................................................104
How the 6210 Works..............................................105
Sensors.... ...............................................................108
Actuators ................................................................111
Generator Controller (2017-2022) .........................112
Generator Controller (2015-2016) .........................113
Fuses....................................................................... 114
Circuit Breakers ......................................................116
Connecons............................................................ 117
120 V Control Power...............................................121
Touch Screen Wiring (2017-2022) ..........................122
Panel 2 Relay Block Wiring (2017-2022).................124
Burner Wiring (2016-2022) ....................................126
Fuel Pump .............................................................. 128
Fan Motor...............................................................129
Fuel Nozzles............................................................130
Troubleshoong
Fault 1: No Purge Card............................................ 134
Fault 14: High Fire Switch / Purge Hold
T19 High Fire Switch (See Fault 222).............134
Fault 15: Flame Detected (Standby) .......................135
Fault 17: Main Flame Fail (see Fault 220) ...............135
Fault 18: Flame Detected (Pre-Purge) ....................136
Fault 19: Main Flame Ign........................................137
Fault 20: Low Fire SW O / Purge Hold
T18 Low Fire Switch (See Fault 223)..............138
Fault 28: Pilot Flame Fail ........................................139
Fault 29: Lockout ILK (Airow Switch / VFD) ..........140
Fault 30-44 ............................................................. 140
Fault 45: Low Fire Switch O / Louver Low
Fire Posion Is Set Abnormally High .............141
Fault 46-127: Call Service .......................................141
Fault 200: High Pressure Limit Switch
(HPLS) Is Tripped ...........................................142
Fault 201: Turn Burner Switch ON..........................143
Fault 202: Operang Pressure Control Switch
(OPLS) Is Tripped ...........................................144
Fault 203: Boiler Water Level Is High......................144
Fault 204: Pilot Propane Level Is Low .....................144
Fault 205: Pilot Propane Pressure Low...................145
Fault 206: Supply Water Is Empty...........................145
Fault 207: Pressure Dierenal Alarm....................146
Fault 208: Flue Temp Is High...................................147
Fault 209: Feed Water and Boiler Water
Temp. Dierenal Limit Has Exceeded..........148
Fault 210: Ambient Temperature Is High................149
Fault 211: Furnace Door Temp Is High....................149
Fault 212: Low Water 2 Tripped .............................149
Fault 213: Boiler Taking Longer Than
Expected to Fill..............................................149
Fault 214: Data Logging Failed: Replace USB Drive 150
Fault 215: Manual Valve Operaon Is ON ..............150
Fault 216: Pressure Detected on
Fuel Nozzle 2 in Low Fire...............................150
Fault 217: Fuel Nozzle 1 Pressure Is
Low in Low Fire .............................................151
Fault 218: Fuel Nozzle 1 Pressure Is
Low in High Fire.............................................151
Fault 219: Fuel Nozzle 2 Pressure Is
Low in High Fire.............................................151
Fault 220: Fuel Was Not Detected
During Main Oil Ignion (See Fault 17).........152
Fault 221: Burner Louver Not Closed in Standby....153
Fault 222: Burner Louver Did Not
Open for Purge (See Fault 14).......................154
TestsTests
MaintenanceMaintenance
TroubleshoongTroubleshoong
Technical
Informaon
Technical
Informaon
OperaonOperaon
Pre-Operaon
Requirements
Pre-Operaon
Requirements
SafetySafety

Contents
Fault 223: Burner Louver Did Not
Close for Pilot Ignion (See Fault 20) ............155
Fault 224: Trouble with One or More Sensors........156
Fault 225: Burner Modbus Signal Failure ...............157
Fault 226: Burner Controller Did Not
Detect That the Louver Actuator Closed.......157
Fault 227: Burner Controller Did Not
Detect That Louver Actuator Opened ...........158
Fault 228: Steam Pressure Is Low...........................158
Fault 229: Boiler Water Temp. Is Low and
Steam Pressure Is Normal.............................158
Fault 230: Turn Water System On...........................158
Fault 231: Boiler Water Level Is Too
High for Operaon ........................................ 158
Fault 232: Generator Status (Page 1 of 3)...............159
Fault 233: Generator Modbus Signal Failure..........162
Fault 234: Generator Started Manually
from Generator Controller ............................162
Fault 235: Generator Is in Warning ........................163
Fault 236: Generator Is in Failure (Page 1 of 2) ......164
Fault 237: Feed Pump Overload .............................166
Fault 238: Circulaon Pump Overload....................166
Fault 239: Iniate Hold: AC Frequency / Noise.......167
Fault 240: Control Switch Relay SR-1
Did Not Annunciate.......................................167
Fault 241: Low Water 1 Relay SR-2
Did Not Annunciate.......................................167
Fault 242: Low Water 2 Relay SR-3
Did Not Annunciate.......................................168
Fault 243: High Pressure Limit Switch Relay SR-4
Did Not Annunciate.......................................168
Fault 244: Operang Pressure Control Relay SR-5
Did Not Annunciate.......................................168
Fault 245: Burner Relay SR-6 Did Not Annunciate..169
Fault 246: Fan VFD SR-7 Did Not Annunciate .........169
Fault 247: Airow Switch SR-8
Did Not Annunciate.......................................169
Fault 248: Touch Screen Version Is
Incompable with This DewPoint .................170
Fault 249: Check Network Cable or
Fault 214: Missing USB Drive
(PLC-015: DEV001 No Device Found) ............171
Fault 250: Fuel Pump Pressure LOW ......................172
Fault 251: Propane Pressure HIGH .........................172
Fault 300: Low Water 1 or 2 Tripped ......................173
Fault 301: Boiler Not Filling /
Slowly Filling with Water (See Fault 300)......176
Fault 302: Faulty PLC Input Card (See Test 13) .......177
Fault 303: Boiler Water Level Higher
Than Set Point / Boiler Overowing..............178
Fault 304.A: Work Lights Will Not Turn On.............178
Fault 304.B: Side and Top Rear Work Lights Will
Not Turn On (2015-2016 Machines Only) .....179
Fault 305: Touch Screen Controller
Will Not Turn On ...........................................180
Fault 306: Steam Coming out of
Water Supply Tanks ......................................181
Fault 307: Burner Smoking / Pulsing ......................182
Fault 308: Actuators/Valves Not Opening/Closing .183
Fault 309: Loss of Steam
Pressure During Operaon............................184
Fault 310: Feed Water Pump Not Running.............185
Fault 311: Circulaon Pump Not Running ..............186
Fault 312: Water in Steam / Bales Have Water
Splotches / Sudden Loss of Steam
Pressure and Water Level .............................187
Fault 313: Touch Screen Problems: Frozen,
Won’t Respond to Touch...............................188
Fault 314: Failed PTO Bearing(s).............................188
Fault 315: PTO Sha Slipping..................................189
Fault 316: Water Coming out of
Steam Purge Valve ........................................189
Fault 317: Water in Furnace / Steam Coming out of
Flue Exhaust / Leaky Flue Tube(s) .................189
Fault 318: Camera problems ..................................189
Fault 319: Boiler Building Pressure
During Fill Stage ............................................190
Fault 320: PLC NAK Error ........................................190
Fault 321: Blown Valve Actuator Fuses
Panel 2: F1-F7 (5 amp) ..................................190
Fault 322: Blown Louver Actuator Fuse
Panel 2: F8 (5 amp) .......................................190
Fault 323: Blown Fuse Panel 3: F1 (15 amp)...........191
Fault 324: Blown Fuse Panel 3: F2 (15 amp)...........191
Fault 325: Blown Fuse Panel 3: F3 (5 amp).............191
Fault 326: Blown Fuse Panel 3: F4 (1.5 amp)..........191
Fault 327: Blown Fuse Panel 3: F5 (2 amp).............191
Fault 328: Blown Fuse Panel 3: F6 (2 amp).............192
Fault 329: Blown Fuse Panel 3: F7 (2 amp).............192
Fault 330: Blown Fuse Panel 3: F8 (1.5 amp)..........192
Fault 331: Blown Fuse Panel 3: F9 (0.5 amp)..........192
Fault 332: Blown Fuse Panel 3: F10 (1.5 amp)........192
Fault 333: 2015-2016’s ONLY -
Blown Fuse Panel 3: F1 (15 amp) ..................193
Fault 334: 2015-2016’s ONLY -
Blown Fuse Panel 3: F2 (15 amp) ..................193
Fault 335: 2015-2016’s ONLY -
Blown Fuse Panel 3: F3 (2 amp) ....................193
Fault 336: 2015-2016’s ONLY -
Blown Fuse Panel 3: F4 (15 amp) ..................193
Fault 337: 2015-2016’s ONLY -
Blown Fuse Panel 3: F5 (5 amp) ....................193
TestsTests
MaintenanceMaintenance
TroubleshoongTroubleshoong
Technical
Informaon
Technical
Informaon
OperaonOperaon
Pre-Operaon
Requirements
Pre-Operaon
Requirements
SafetySafety

Contents
Fault 338: 2015-2016’s ONLY -
Blown Fuse Panel 3: F6 (1.5 amp) .................194
Fault 339: 2015-2016’s ONLY -
Blown Fuse Panel 3: F7 (2 amp) ....................194
Fault 340: 2015-2016’s ONLY -
Blown Fuse Panel 3: F8 (2 amp) ....................194
Fault 341: 2015-2016’s ONLY -
Blown Fuse Panel 3: F9 (2 amp) ....................194
Fault 342: 2015-2016’s ONLY -
Blown Fuse Panel 3: F10 (1.5 amp) ...............194
Fault 343: 2015-2016’s ONLY -
Blown Fuse Panel 3: F11 (0.5 amp) ...............195
Fault 344: 2015-2016’s ONLY -
Blown Fuse Panel 3: F12 (1.5 amp) ...............195
Fault 345: Algae in Supply Tanks.............................195
Fault 346: Burner Stuck in Purge............................195
Fault 347: Trouble Reinstalling Sparge Tube...........196
Fault 348: Touch Screen Reboong
When Generator Starng..............................196
Fault 349: Boiler Taking Longer Than
Normal to Heat Up........................................196
Fault 397: Purge Delay: T19 High
Fire Jumpered (See Fault 221).......................196
Fault 398: Purge Hold: T18 Low Fire Switch
(Waing for Louver to Close)(See Fault 20) ..197
Fault 399: Purge Hold: T19 High Fire Switch
(Waing for Louver to Open)(See Fault 14) ..198
Fault 421: Generator Will Not
Start from Touch Screen................................199
Fault 422: Generator Will Not
Shut o from Touch Screen...........................199
Fault 424: Generator Controller Not Working;
“????????” Displayed on Screen...................199
Tests
Test 1: Flame Detector Test ....................................203
Test 2: Fuel Solenoid Test .......................................203
Test 3: Propane Solenoid Test.................................204
Test 4: Ignion Transformer Test ............................204
Test 5: Igniter Electrode Orientaon & Gap ...........204
Test 6: Intermient Pilot Flame Test.......................205
Test 7: Leaky Igniter Test.........................................205
Test 8: HPLS Calibraon [15 psi] .............................206
Test 9: OPLS Calibraon [14.5 psi]..........................207
Test 10.A: Boiler Water Level Sensor Tesng..........207
Test 10.B: Boiler Water Level Sensor Tesng
(2015 Machines Only) ...................................208
Test 11: Valve Repair...............................................209
Test 12: Pump Service ............................................210
Test 13: Input Card Tesng (See Fault 302).............211
Test 14.A: Program the VFD (AB 156 - AB 458).......212
Test 14.B: Program the VFD (AB 459+) ...................212
Test 15: Fire Tube Cleaning.....................................213
Test 16: Generator End Troubleshoong................216
A: Exciter Wire Test .......................................216
B: Main Stator Test........................................217
C: Voltage Regulator Test ..............................217
D: Surge Suppressor Test...............................218
E: Diodes Test ................................................218
Test 17: Release Wires from Terminal Block...........219
Test 18: Maxed out Sensor Readings......................220
Test 18.A: Faulty Sensor /
Faulty Wire Harness Test ..............................220
Test 18.B: Faulty Sensor Test
(No Mulmeter Required) ............................221
Test 19: All Sensors Oine / Fuse Keeps Blowing ..222
Test 19.A: Faulty Wire Harness Test
(Mulmeter Required)..................................222
Test 19.B: Faulty Sensor Test
(No Mulmeter Required) ............................223
Test 20: Burner Tune...............................................223
Test 21: Touch Screen Calibraon...........................224
Test 22: Burner Gun Assembly Instrucons............225
Test 23: Seng Modbus Address ...........................226
Test 98: CR-2 Bypass and Removal .........................228
Test 99: Update to New Boiler Water
Level Sensor (Update Kit Part # 10344).........229
Maintenance
Winterize ................................................................232
De-Winterize ..........................................................241
Daily Maintenance .................................................245
Pre-Operaon ...............................................246
Post-Operaon..............................................248
50 Hour Maintenance.............................................249
250 Hour Maintenance / Yearly..............................257
500 Hour Maintenance...........................................265
1000 Hour Maintenance ........................................269
1500 Hour Maintenance ........................................271
2000 Hour Maintenance ........................................274
Maintenance Schedule...........................................276
Notes..... .................................................................278
TestsTests
MaintenanceMaintenance
TroubleshoongTroubleshoong
Technical
Informaon
Technical
Informaon
OperaonOperaon
Pre-Operaon
Requirements
Pre-Operaon
Requirements
SafetySafety

© 2022 Staheli West
8
TestsTests
MaintenanceMaintenance
TroubleshoongTroubleshoong
Technical
Informaon
Technical
Informaon
OperaonOperaon
Pre-Operaon
Requirements
Pre-Operaon
Requirements
SafetySafety
Preparaon
Open the “Owner’s Manual”
Read the “Owner’s Manual” before operang the DewPoint machine
Train on where resources are found (Customer Portal, Support Tab, Owner’s Manual)
Train on local boiler requirements
Safety
Show where emergency shut-os are located
Never remove any boiler component while under pressure
Always make sure hydraulic brakes are hooked up and funconing properly
Always lock the steering axles on the steamer and baler when traveling on roadways, operang on
hillsides, or backing up
Operaon
Use only so water or reverse-osmosis-treated water in the DewPoint machine
Fill the supply tanks and add Boiler Guard (water treatment chemical)
Set up your tractor steering stops
Set up your moisture sensor
Teach the dierences between microwave and contact moisture sensors with steam
Teach the basics of the Touch Screen
Turn on the steamer
Shut o the steamer
The importance of the PPM seng and how to set it based on your water test
Dierent start opons (basic overview)
Start All
Start Fill
Keep Hot
Wet Layup
Tune the burner (low and high re)
Field work screen (overview)
Seng the steam valve proporons (4 individual sliders)
Ideal condions (all sliders 100%)
Changing dew condions
Adverse condions (hot and windy)
Turn steam o when turning around
Blowdown (what it is and what to do about it)
Teach what to do when there is a fault
DewPoint Machine Operator Training
Scan to watch the “Operator Training” video in order to learn the following topics:

© 2022 Staheli West
9
TestsTests
MaintenanceMaintenance
TroubleshoongTroubleshoong
Technical
Informaon
Technical
Informaon
OperaonOperaon
Pre-Operaon
Requirements
Pre-Operaon
Requirements
SafetySafety
Operaon
Teach that ideal baling moisture, with steam, is 11-15%
Steamed bales should be ghtly packed with good leaf paern. Sides of bales should be
smooth but not smeared.
Never exceed 135° F (57° C) internal bale temperature
Never stack hay if internal bale temperature exceeds 115° F (45° C)
High-temperature stacking method
Train on what to do if dark spots or wet akes appear
General baling with steam guidelines
Baling speed
Ideal steaming condions
Baling in hot/dry condions
Baling in moderate humidity condions
Avoid baling with stem moisture
Baling in high-humidity condions with stem moisture
You are responsible for how your bales turn out
Service & Cleaning
Train how to perform Daily Maintenance
Show where to nd the Maintenance Schedule
Train how to conrm Blowdown is working
Train how to conrm Water Purge is working
Explain crackling noise in rear supply tank
Train how to perform the Yearly Boiler Safety Test
Safety devices (what they do and where they are located)
Call dealer if more service is required
I ______________________________ have received instrucons on how to properly operate,
test, service, and clean the boiler. I understand that the operang, tesng, and servicing may
only be performed by a qualied individual that has received the instrucons contained in this
handbook.
Print:__________________________________________
Signature: ______________________________________ Date: ___________________
Trainer Name:___________________________________
Trainer Signature:________________________________ Date: ___________________
DewPoint Machine Operator Training
Tests
Maintenance
Troubleshoong
Technical
Informaon
Operaon
Pre-Operaon
Requirements
Safety
(customer / operator)

© 2022 Staheli West
10
TestsTests
MaintenanceMaintenance
TroubleshoongTroubleshoong
Technical
Informaon
Technical
Informaon
OperaonOperaon
Pre-Operaon
Requirements
Pre-Operaon
Requirements
SafetySafety
Warranty Information
All DewPoint machines come with a 1-Year Limited Warranty. This voluntary manufacturer’s warranty covers
everything on the machine against manufacturing defects. Normal wear-and-tear items and problems caused
by operator negligence or operator error are not covered.
The warranty period for the DewPoint machine starts from the date of rst use.
Staheli West Parts oers a 1-year warranty on all parts from the date of purchase. Staheli West Parts does not
cover labor costs of replacing a warraned part.
Warranty items will not be honored if roune maintenance has not been performed.
To ensure warranty coverage, use only OEM parts.
DewPoint Machine
Warranty Period Coverage
Months Hours Parts Labor
0-12 Unlimited 100% 100%
Tests
Maintenance
Troubleshoong
Technical
Informaon
Operaon
Pre-Operaon
Requirements
Safety

© 2022 Staheli West
11
TestsTests
MaintenanceMaintenance
TroubleshoongTroubleshoong
Technical
Informaon
Technical
Informaon
OperaonOperaon
Pre-Operaon
Requirements
Pre-Operaon
Requirements
SafetySafety
Safety
Safety
Safety Decals ..........................................................13
Tractor Requirements.............................................15
Safe Procedures...................................................... 16
Boiler Jurisdicon ...................................................18
Boiler Safety Test ....................................................19

© 2022 Staheli West
13
TestsTests
MaintenanceMaintenance
TroubleshoongTroubleshoong
Technical
Informaon
Technical
Informaon
OperaonOperaon
Pre-Operaon
Requirements
Pre-Operaon
Requirements
SafetySafety
The DewPoint machine has many Safety Decals to help ensure operator safety. Pay aenon to the decals
and their warnings to avoid serious injury. They range from the red DANGER (most dangerous) to the yellow
CAUTION (less dangerous... but sll dangerous)
Keep All Shields
in Place
No Retirar las
Tapas
Mecánicas
Hot Surfaces
in Area
Superficies
Calientes
Cercanas
Do Not
Climb
No Subir
Use a Safe
Ladder or Steps
to Service
Upper
Components
Use una
Escalera
Segura para
Mantener los
Componentes
Superiores
Hot Surfaces
Inside
Superficies
Calientes
Adentro
Never Fire Boiler in
Enclosed Area
Nunca Prender la
Caldera Adentro
Safety Decals
DO NOT REMOVE ANY
BOILER COMPONENT
UNDER PRESSURE
NO RETIRE NINGUN
COMPONENTE DE LA
CALDERA BAJO
PRESIÓN
240 Volts
240 Voltios
Watch Your
Step
Subir con
Cuidado
Use Caution
When Servicing
Engine and
Generator
Tener Cuidado
Mientras
Mantener el
Motor y el
Generador

© 2022 Staheli West
14
TestsTests
MaintenanceMaintenance
TroubleshoongTroubleshoong
Technical
Informaon
Technical
Informaon
OperaonOperaon
Pre-Operaon
Requirements
Pre-Operaon
Requirements
SafetySafety
Safety Decals
To avoid excessive driveline wear, please refer to
your baler Operator’s Manuals regarding proper
hitch and PTO shaft operating angle adjustments.
*See PTO section of the Instruction Manual for
further detail.
Para evitar el desgaste excesivo de toma de
fuerza, consulte los manuales del operador de su
empacadora en relación con el enganche adecua-
do y ajustes del ángulo de funcionamiento de la
toma de fuerza .
* Véase la sección de toma de fuerza en el “In-
struction Manual” para más detalles
When connecting PTO drivelines between this ma-
chine and the baler, be sure the front connecting
yoke of the driveline on each machine holds the
same rotation angle.
*See PTO section of the Instruction Manual for
further detail.
Al conectar la toma de fuerza entre esta máquina y
la empacadora , asegúrese de que la conexión
frontal yugo de la línea de conducción en cada
máquina tiene el mismo ángulo de rotación.
* Véase la sección de toma de fuerza en el “In-
struction Manual” para más detalles.
To avoid excessive driveline wear, adjust hitch
height so that the machine runs level.
*See PTO section of the Instruction Manual for
further detail.
Para evitar el desgaste excesivo de toma de
fuerza, adjuste la altura del enganche de modo que
la máquina funciona nivel.
* Véase la sección de toma de fuerza en el “In-
struction Manual” para más detalles
To Prevent Serious Injury or death:
1. Read the Instruction Manual before operating
the machine
2. Keep all shields in place
3. No Riders
4. Make certain everyone is clear of machine
before starting engine or operation
5. Stop engine and operation before adjusting,
lubricating, or cleaning
6. Use the flashing warning lights and slow moving
vehicle emblem when transporting on highways.
Para evitar lesiones graves o la muerte:
1. Lea el “Instruction Manual” antes de hacer fun-
cionar la máquina
2. Mantenga todos las tapas mecánicas en su lugar
3. No Pasajeros
4. Asegúrese de que todos estén lejos de la máqui-
na antes de arrancar el motor o la operación
5. Apague el motor y la operación antes de ajustar,
lubricar, o limpiar la máquina
6. Use las luces intermitentes de advertencia y de
vehículo lento durante el transporte en las carret-
eras
There are also many lengthy warnings and words of advice. Read all of them and know what they refer to.

© 2022 Staheli West
15
TestsTests
MaintenanceMaintenance
TroubleshoongTroubleshoong
Technical
Informaon
Technical
Informaon
OperaonOperaon
Pre-Operaon
Requirements
Pre-Operaon
Requirements
SafetySafety
Tractor Requirements
In order to pull the DewPoint machine ≈ 30,000 lbs (when fully loaded) and a big baler ≈
20,000 lbs, you will need a tractor with the following horsepower.
In order to stop the DewPoint machine and a big baler you will need a tractor equipped with a hydraulic trailer
brake valve.
Adjust the amount the hydraulic trailer brakes engage by moving these pins to meet your needs.
DO NOT OPERATE THE DEWPOINT MACHINE WITH A TRACTOR THAT LACKS THE NECESSARY HORSEPOWER OR
HYDRAULIC BRAKING SYSTEM. SERIOUS DEATH OR INJURY MAY OCCUR.
Hydraulic Trailer
Brake Valve Required
More
More
FrontRear
Less
Less
Engine Horsepower
0-2% Slopes 200
0-5% Slopes 240
0-10% Slopes 275

© 2022 Staheli West
16
TestsTests
MaintenanceMaintenance
TroubleshoongTroubleshoong
Technical
Informaon
Technical
Informaon
OperaonOperaon
Pre-Operaon
Requirements
Pre-Operaon
Requirements
SafetySafety
Operating on Hillsides
• Operating on side slopes can cause water to get into your steam.
• e DewPoint is a heavy machine, and signicant side slopes could cause the machine to slide or tip.
• Ensure that brakes are functioning properly before taking the DewPoint up or down steep slopes.
Safety Lighting
e DewPoint has all proper safety, hazard and signal lighting installed. Check that all lights are functioning
properly before each use.
Electricity Overhead
Ensure that the DewPoint will not interfere with overhead power lines. Hitting power lines with the DewPoint
can cause serious damage to you, your equipment, and/or others.
Personal Protective Equipment
When operating or servicing the DewPoint, ensure that you use all proper Personal Protective Equipment
(PPE). PPE includes but is not limited to, proper footwear, gloves, eye protection and ear protection.
Persons on DewPoint
• Never operate the DewPoint while others are on or under the machine.
• Ensure that stepping and standing only happens in designated safe areas.
• DO NOT step or climb areas specically marked prohibited. Doing so can cause serious injury or death.
• Use caution when standing on the deck of the machine - especially if deck is wet.
• DO NOT operate with children near the machine. Ensure that all children are kept at a safe distance.
Shields, Guards & Door
• All shields and guards are in place for a reason. Never operate the machine with shields or guards displaced
or removed.
• Never attempt to operate the machine with the boiler door removed.
Exhaust and Fumes
Never operate the DewPoint in conned spaces. e generator and burner generate toxic gases. Operation and
maintenance should only happen in well-ventilated areas.
Handrails
Some service and maintenance procedures on the DewPoint require climbing around the top of the
machine. Step ladders and handrails have been specically put in place and designed with your safety in
mind. Please use caution and common sense when climbing on top of the DewPoint machine.
Chemicals
Use chemicals according to instructions attached to their containers. Using them improperly can be very
dangerous. If no longer needed, ensure that excess chemicals are disposed of properly.
Traveling on Public Roads
When traveling on public roads, obey all local trac laws. Before traveling on any public roads (or any roads
when you will be traveling at higher rates of speed) make sure that steering is locked and trailer brakes are
working properly.
Safe Procedures

© 2022 Staheli West
17
TestsTests
MaintenanceMaintenance
TroubleshoongTroubleshoong
Technical
Informaon
Technical
Informaon
OperaonOperaon
Pre-Operaon
Requirements
Pre-Operaon
Requirements
SafetySafety
Safety Chains
Ensure that safety chains are connected and free from defect before operating the DewPoint.
Faulty/Broken/Worn Out Components
• Replace all lters according to maintenance schedule.
• Repair any faulty components as soon as they fail to function properly. Using defective components
(especially sensors) can be a hazard to you and those around you.
• Periodically check bolts to ensure that they are properly tightened.
• Do not operate the DewPoint if any components are leaking or will not hold pressure.
Burner Safety System
• NEVER jumper burner safeties.
• Keep hands away from the louver. Hands and/or ngers can be pinched and lacerated by the fan.
• Keep debris away from the louver to avoid pulling debris into the burner; this will obstruct air ow.
Fire Safety
• Check the re extinguisher according to the maintenance schedule attached to the extinguisher.
• If re does occur, use the re extinguisher as directed on distinguisher.
• Always stand upwind of ames.
Safe Procedures
Opening Valves/Drains Under Pressure
• Use extreme caution when opening/ushing any valve that is under pressure. Hot steam and/or water can
cause harm to you and others.
• Do not operate the Blowdown Valve or Baler Steam valves without all hardware properly installed.
• Stand clear when draining hot water from the boiler.
Electrical/Battery Safety
Use caution when working:
1) near the ignition transformer.
2) in the electrical panel.
3) around any lose electrical wires.
4) near pump & generator plugs.
5) near the battery as they all have high voltage electricity passing through them.
Sight Glass
Remember that the sight glass is actually GLASS, not plastic or rubber. It can break and can cut you.
Propane
• Turn o propane tanks when the DewPoint is not in use.
• Be cautious of any propane smell - if smell is detected, shut down and nd the leak.
• Check hoses to ensure they are not cracking and/or leaking.
• Check propane tanks for damage. Replace if damaged.
• Keep the dust covers over the lling valves when the machine is in use.

© 2022 Staheli West
18
TestsTests
MaintenanceMaintenance
TroubleshoongTroubleshoong
Technical
Informaon
Technical
Informaon
OperaonOperaon
Pre-Operaon
Requirements
Pre-Operaon
Requirements
SafetySafety
Boiler Jurisdiction
It is your responsibility to make sure your boiler is up to code and meets the
legal requirements in your area.
For boiler jurisdiction information in your area, navigate to:
https://www.nationalboard.org/PrintAllSynopsis.aspx?Jurisdiction=Select

© 2022 Staheli West
19
TestsTests
MaintenanceMaintenance
TroubleshoongTroubleshoong
Technical
Informaon
Technical
Informaon
OperaonOperaon
Pre-Operaon
Requirements
Pre-Operaon
Requirements
SafetySafety
Boiler Safety Test
1
3
5
2
4
6
Press Menu.
*e DewPoint machine needs to be full of fuel and
water before the boiler safety test can occur.
Press Test Now.
Press Conrm Test Now.
*Generator will start aer this step.
Following the instructions on the screen, press
Control Power on the le of the screen o (RED) and
on (GREEN). When the indicator on the right turns
green it means that the system is functioning properly.
Press Maintenance.
Press Boiler Safety Test.
Press Control Power button on the right.
Press Low Water 1.
Press and hold Manual Test.

© 2022 Staheli West
20
TestsTests
MaintenanceMaintenance
TroubleshoongTroubleshoong
Technical
Informaon
Technical
Informaon
OperaonOperaon
Pre-Operaon
Requirements
Pre-Operaon
Requirements
SafetySafety
7
9
11
8
10
12
Press Reset.
Press High Pressure Limit.
Press and hold the Pressure Relief button to relieve
pressure.
Reset the HPLS by pressing down on the Reset button.
e indicator turning green indicates proper function
of Low Water 1.
Repeat these steps for Low Water 2.
Attach air compressor tting to the psi Test Hose.
Begin lling with air slowly until the High Pressure
Limit Switch trips (Trips around 15 psi).
Press the Operating Pressure button. Fill the boiler
again with compressed air until the Operating
Pressure Limit Switch trips (Trips around 14.5 psi).
Boiler Safety Test
This manual suits for next models
7
Table of contents
Other Staheli West Kitchen Appliance manuals
Popular Kitchen Appliance manuals by other brands

Alfresco Chef
Alfresco Chef VERONA Manual & user guide

Outdoor Gourmet
Outdoor Gourmet 156633 Assembly instructions & user manual

Bartscher
Bartscher 500393 instruction manual
Titan
Titan TT-CWC1523DZ owner's manual

Brentwood Appliances
Brentwood Appliances FD-1026BK Operating and safety instructions

Ceado
Ceado ES500S Instruction and maintenance manual

Byzoo
Byzoo SV03 Instruction and Care Manual

Pyle
Pyle PSTMH22 instructions

Dash
Dash DRG001 Instruction manual & recipe guide
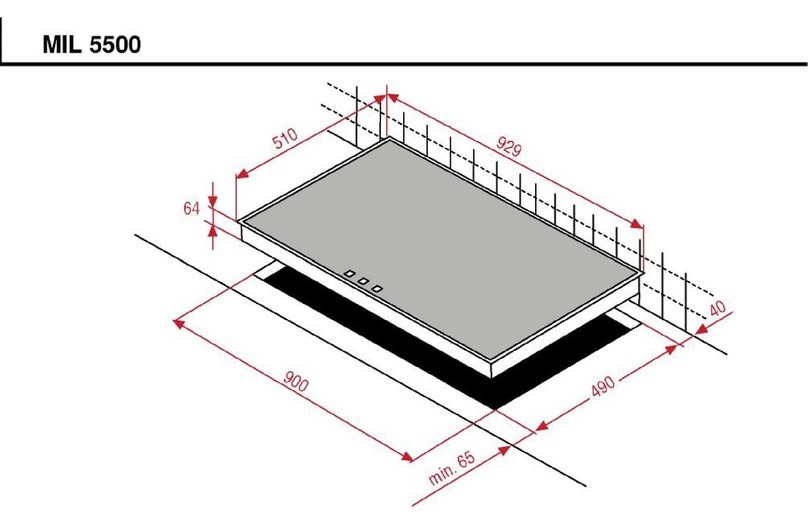
Blomberg
Blomberg GEB 3536 Dimensions
Koncar
Koncar SE 5640 SERIES Operating, installation and connecting instructions
Coopers of Stortford
Coopers of Stortford MF-001 Instructions for use


