STAND STEADY SS-LOTM14BL User manual

AB
C
D
EF
G
H
J x 15
K x 28
L x 2
M x 2
P x 4 Q x 4 R x 11 S x 8 T x 2 V x 2 W x 2
Part List
Assembly
Tools Included: Tools Needed:+
Y
Assembly me
30 mins
Weight limit
75 lbs.
2 person
assembly
14-CAPACITY OPEN CHARGING CART
SS-LOTM14BL | Made in Taiwan
www.standsteady.com
customerservice@standsteady.com
703-688-DESK (3375)
C
D
R
R
R
A
B
L
M
QP
L
M
QP
Step 1:
OPTION A (on wheels): Attach the casters (L & M) to the side frames (A & B)
with the lock washer (Q) and acorn nut (P), using the included wrench.
OPTION B (tabletop): Attach padded feet (O) to
the side frames (A & B) in place of casters (L & M).
Step 2: Combine the back panel (C) to the bottom panel (D) with 3 screws (R),
using the included hex wrench.
O x 4
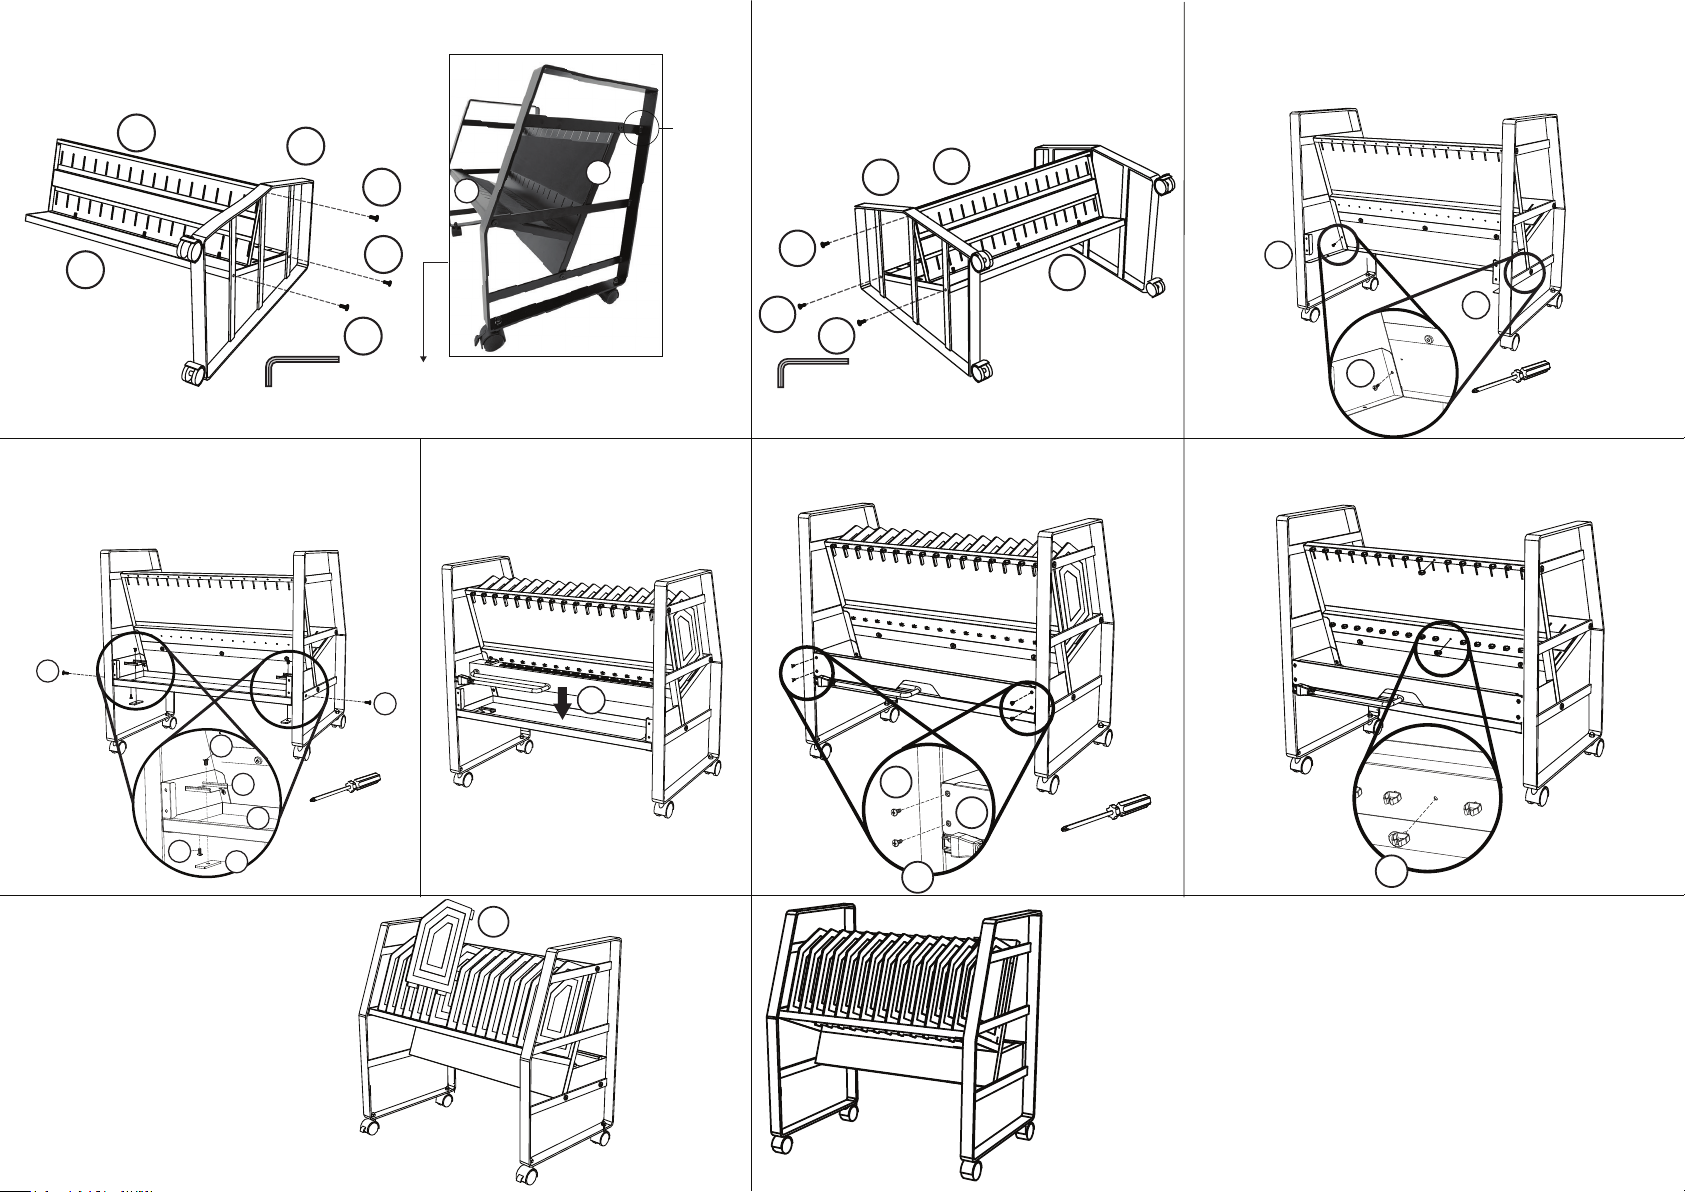
Step 8: Install the power tray back panel (H)
with 4 screws (S), using a screw driver.
Step 9: Attach the 28 cable clips (K)
to the main unit.
Step 10: Install the 15 plastic
dividers (J) to the main unit.
You have completed assembly.
S
H
SK
J
Step 3: Attach side (B) to panels (C & D)
with 3 screws (R), using the included
hex wrench.
Step 4: Attach side (A) to panels (C & D)
with 3 screws (R), using the included
hex wrench.
R
R
R
R
RR
A
B
C
D
C
D
Step 5: Attach the power tray panels
(E & F) to the main unit with 2 screws (S),
using a screw driver.
Step 6: Attach the bottom power tray
panel (G) with 2 screws (S). Attach the
2 power strip brackets (T,V,& W) to the
panel (G) with a screw driver.
Step 7: Push the power strip into
the brackets.
F
S
V
G
Panels C & D attach on an angle
(should resemble a reclining seat),
with lateral beams on side B inset
inset
T
ALL SET!
For any quesons or missing parts, contact customer service
customerservice@standsteady.com
703-688-DESK (3375)
D
C
E
Y
S
R
R
W
Table of contents


