Techly iCa-Tr7 User manual

DUAL-SIDED MOBILE TV CART/TROLLEY WITH GLASS SHELVES
www.techly.com
www.techly.com - info@techly.com
EN User's Manual
IT Manuale d’istruzione
DE Bedienungsanleitung
FR Mode d’emploi
ES Manual de instrucciones
PL Instrukcja użytkownika
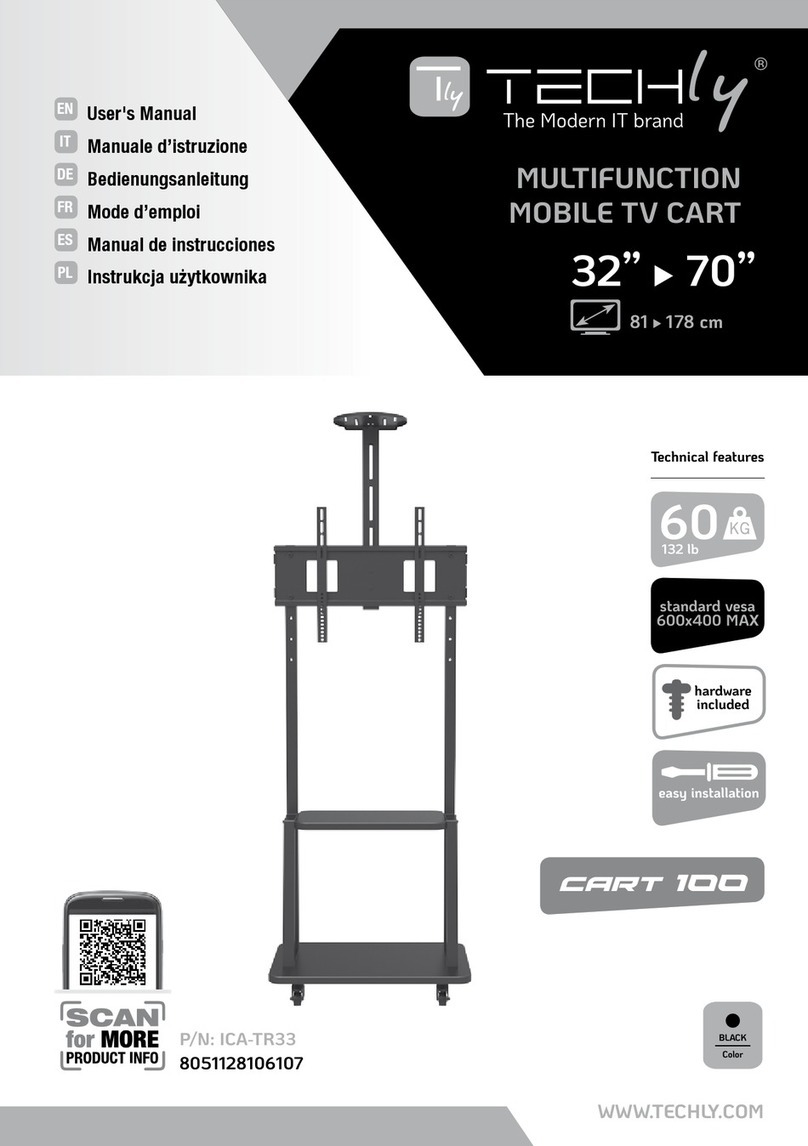
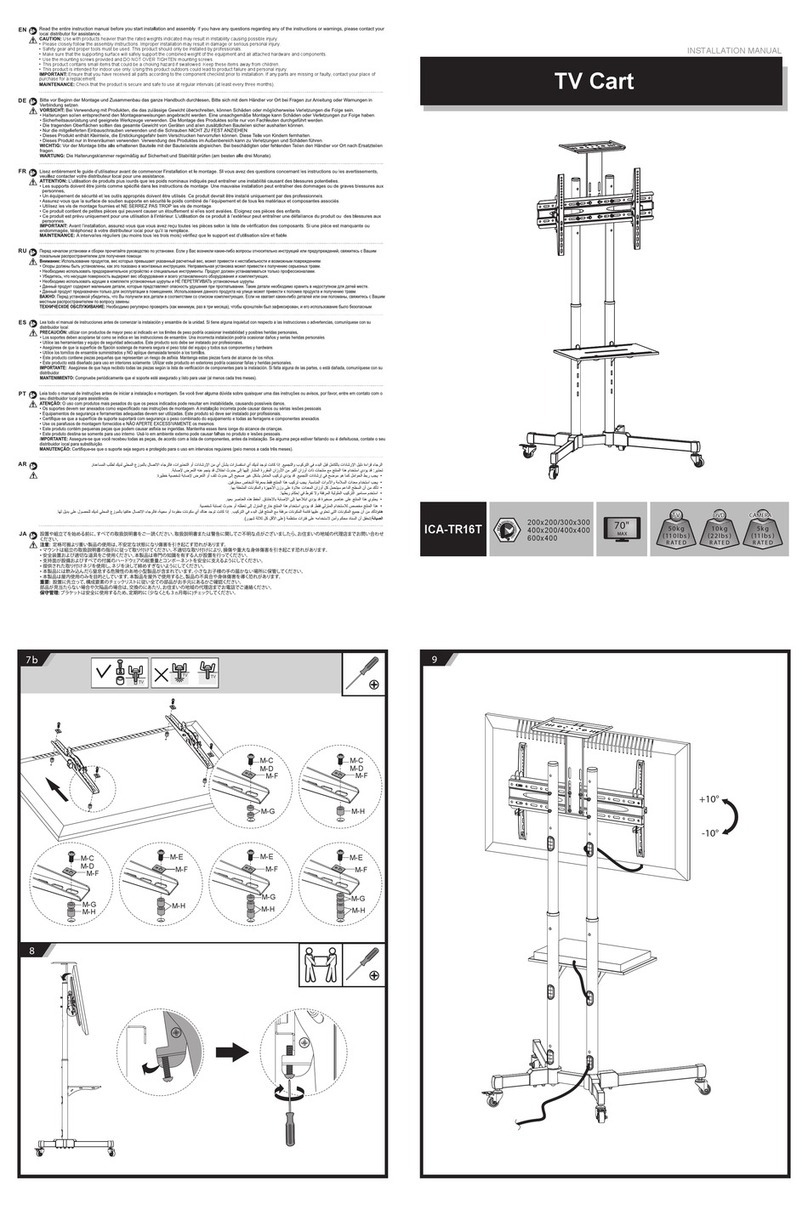
ICA-TR7
37” - 70”
80KG
from
200x200
to
800x400

Dual-siDeD Mobile TV CarT/Trolley
wiTh Glass shelVes
Dual-siDeD Mobile TV CarT/Trolley
wiTh Glass shelVes
2www.techly.com
ATTENZIONE:
Prestate molta
attenzione durante la fase di
montaggio. Se il montaggio non è
stato effettuato in modo corretto e
stabile ciò potrebbe causare la caduta della staffa,
determinando lesioni o danni a cose e persone.
Rispettare tassativamente il peso massimo
dell’apparecchiatura supportata indicato sulal
confezione.
ACHTUNG:
Seien Sie sehr
vorsichtig bei der Montage.
Wird die Montage nicht auf korrekte
und stabile Weise durchgeführt,
könnte dies zum Herunterfallen der Halterung und
dadurch zu Sach- oder Personenschaden führen.
Beachten Sie unbedingt das auf der Verpackung
angegebene Höchstgewicht des Geräts.
CAUTION:
Be very careful during
the assembly. If the mount is
not properly installed it may fall,
resulting in possible injury and/or
damage. Respect the maximum weight limitation
printed on the box.
IT
Gentile Cliente,
grazie per aver scelto un prodotto Techly.
Istruzioni disimballaggio
•Aprire il cartone con cura, rimuovere il contenuto
e distenderlo su un cartone o altro materiale
protettivo per evitare danni.
•Vericarecheilcontenutodellaconfezionecorrisponda
alla lista delle parti nella pagina successiva per
assicurarsi che tutti i componenti siano presenti e
non siano danneggiati. Non utilizzare parti difettose o
danneggiate.
•Leggere attentamente le istruzioni riportate nel
presente manuale prima di procedere all’installazione.
•Tenere sempre questo manuale per future
consultazioni.
Importanti informazioni
sulla sicurezza
Leggere cortesemente le istruzioni prima di
cominciare l’installazione e seguire scrupolosamente
tutteleindicazionicontenutequi.Utilizzareadeguati
dispositivi di sicurezza durante l’intallazione.
Contattare del personale qualicato per effettuare
l’installazione:
•Se non avete compreso le indicazioni contenute
inquestomanualeoavetedeidubbiinmeritoalla
sicurezza dell’installazione.
Non utilizzate il prodotto per uno scopo o in una
congurazione non espressamente specicata in
questeistruzioni.Sideclinaqualsiasiresponsabilità
per danni derivanti da un errato assemblaggio, errato
montaggio o uso non corretto del prodotto.
Alterminedelleoperazionidimontaggioassicurarsi
che il tutto sia stato effettuato a regola d'arte.
Manutenzione
•Vericareperiodicamentecheilsupportosiasicuro
e sicuro da usare (almeno ogni tre mesi)
EN
Dear Customer,
thanks for choosing a Techly product.
Unpacking Instructions
•Carefully open the carton, remove contents and
lay out on cardboard or other protective surface to
avoid damage.
•CheckpackagecontentsagainsttheSuppliedParts
Listinthenextpagetoassurethatallcomponents
were received undamaged. Do not use damaged or
defective parts.
•Carefully read all instructions before attempting
installation.
•Please keep this user's manual for future
consultations.
Important
Safety Information
Please read this instruction before beginning the
installation, and carefully follow all herein contained
recommendations. Use proper safety equipment
during installation.
Pleasecallaqualiedinstallationcontractorforhelp
if you:
•Don't understand these directions or have any
doubts about the safety of the installation.
Do not use this product for any purpose or in
any conguration not explicitly specied in this
instruction. We hereby disclaim any and all liability
for injury or damage arising from incorrect assembly,
incorrect mounting, or incorrect use of this product.
Attheendoftheinstallationmakesuretheprocedure
was correctly observed.
Maintenance
•Checkthatthebarcketissecureandsafetouseat
regular intervals (at least every three months).
DE
Sehr geehrter Kunde,
danke, dass Sie sich für ein Produkt von
Techly entschieden haben.
Anweisungen zum Auspacken
•Öffnen Sie den Karton vorsichtig, entnehmen Sie
den Inhalt und breiten Sie ihn auf einem Karton
oder anderem schützenden Material aus, um
Schäden zu vermeiden.
•Überprüfen Sie, ob der Inhalt der Verpackung
der Teileliste auf der nächsten Seite entspricht,
um sicherzustellen, dass alle Bauteile vorhanden
und nicht beschädigt sind. Verwenden Sie keine
defektenoderschadhaftenTeile.
•LesenSie,bevorSiemitderInstallationbeginnen,die
AnweisungenindieserAnleitungaufmerksamdurch.
•Bewahren Sie diese Anleitung zum späteren
Nachschlagen stets auf.
Wichtige Informationen
zur Sicherheit
Lesen Sie vor der Installation bitte alle Anweisungen
und befolgen Sie alle hier enthaltenen Angaben
genau. Verwenden Sie bei der Installation geeignete
Sicherheitsvorrichtungen. Wenden Sie sich in den folgenden
FällenzumAusführenderInstallationanFachleute:
•Wenn Sie die in dieser Anleitung enthaltenen
Angaben nicht verstanden haben oder Zweifel
hinsichtlich der Sicherheit der Installation haben.
Verwenden Sie das Produkt nicht für Zwecke
oder in einer Konguration, die in dieser Anleitung
nicht ausdrücklich genannt werden. Jegliche
Haftung aufgrund von Schäden durch fehlerhaften
Zusammenbau, falsche Montage oder unkorrekte
Verwendung des Produkts ist ausgeschlossen.
Nach den Montagevorgängen sicherstellen, dass alle
Schritte fachgerecht ausgeführt wurden.
Wartung
•PrüfenSie,obdieHalterungensicherundsicherist,
in regelmäßigen Abständen (mindestens alle drei
Monate) verwenden

Dual-siDeD Mobile TV CarT/Trolley
wiTh Glass shelVes
3
www.techly.com
ATENCIÓN:
Tengamuchocuidado
durante el montaje.
Si el montaje no ha sido realizado
de manera correcta y estable, esto
podría provocar la caída del estribo, provocando
lesiones o daños a cosa y personas.
Respeten imperativamente el peso máximo del
aparatosuportadoqueseindicaenlacaja.
UWAGA:
Należy być bardzo
ostrożnympodczasmontażu.
Niewłaściwie zamontowany może
spaśćpowodującuszkodzeniaoraz
zagrożenie.
Przedrozpoczęciemmontażuupewnijsię,żeściana
jest do tego odpowiednia. Przestrzegaj informacji
omaksymalnymobciążeniuuchwytupodanymna
opakowaniu produktu.
ATTENTION:
Soyez très prudent
lors du montage.
Si le montage n'a pas été effectué
correctement et n'est pas stable le
support pourrait tomber et provoquer des lésions
oudesdégâtsàdeschosesouàdespersonnes.
Respecter le poids maximum de l'appareil supporté
mentionné sur l'emballage.
FR
Cher Client,
nous vous remercions d'avoir choisi un
produit Techly.
Instructions de désemballage
•Ouvrir l'emballage avec soin, vider le carton et
poser le contenu sur un carton ou tout autre
matériel de protection pour éviter des dégâts.
•Vérier que le contenu du carton correspond à
la liste des pièces de la page suivante, s'assurer
que toutes les pièces sont présentes et ne sont
pas endommagées. Ne pas utiliser de pièces
défectueuses ou endommagées.
•Lire attentivement les instructions du présent
manuel avant d'effectuer l'installation.
•Conserverlemanuelpouruneconsultationfuture.
Informations importantes
sur la sécurité
Installer et utiliser ce produit avec soin.
Lirelesinstructionsavantdecommencerl'installation
et suivre scrupuleusement les indications mentionnées.
Utiliser des dispositifs de sécurité adéquats pendant
l'installation. Contacter du personnel qualié pour
effectuer l'installation:
•Sivousn'avezpascomprislesindicationsprésentes
dans ce manuel ou si vous avez des doutes en ce
quiconcernelasécuritédel'installation.
Ne pas utiliser le produit pour un usage ou une
conguration non spéciée dans ces instructions.
Nous déclinons toute responsabilité pour des
dégâtsquiseraientdusàuneerreurd'assemblage,
une erreur de montage ou une utilisation incorrecte
du produit.Au terme des opérations de montage
s'assurerquetoutaétéfaitdanslesrèglesdel'art.
Entretien
•Compruebequelossoportes esseguroyseguro
de usar, a intervalos regulares (al menos cada tres
meses)
ES
Estimado Cliente,
gracias por haber elegido un producto
Techly.
Instrucciones desembalaje
•Abrirelcartónprestandomuchaatención,quitarel
contenidoyapoyarloenuncartónuotromaterial
deprotecciónparaevitarperjuicios.
•Controlar que el contenido del suministro
corresponda a la lista de las partes en la
página siguiente para asegurarse que todos los
componentes estén presentes y no dañados. No
utilizar partes defectuosas o dañadas.
•Leer detenidamente las instrucciones que se
encuentran en este manual antes de seguir con la
instalación.
•Guardarestemanualparaconsultasfuturas.
Importantes informaciones
de seguridad
Instalar y utilizar este producto con cura. Leer
detenidamente las instrucciones antes de empezar
con la instalación y seguir escrupulosamente todas las
indicacionesqueseencuentranaquí.Utilizardispositivos
deseguridadadecuadosdurantelainstalación.Contactar
elpersonalcalicadoparaefectuarlainstalación:
•Si no han entendido las indicaciones que se
encuentran en este manual o tienen dudas acerca
delaseguridaddelainstalación.
No utilicen el producto para un objetivo o en una
conguración no especicada expresamente en estas
instrucciones. Se rehúsa todo tipo de responsabilidad
pordañosprocedentesdeunensamblajeequivocado,
un montaje equivocado o un uso no correcto del
producto. Na vez terminadas las operaciones de montaje
asegurarsequetodohayasidorealizadoperfectamente.
Mantenimiento
•Compruebequelossoportes esseguroyseguro
de usar, a intervalos regulares (al menos cada tres
meses)
PL
Szanowny Kliencie,
dziękujemy za wybór produktów Techly.
Rozpakowywanie
•Ostrożnie otwórz opakowanie, wyjmij jego
zawartośćirozłóżnakartonielubinnejpowierzchni,
która zapobiegnie uszkodzeniu elementów oraz
podłoża.
•Sprawdź zawartość opakowania z załączoną na
następnejstronielistą elementówupewniając się,
że żaden z nich nie jest uszkodzony. Nie należy
używaćwadliwychelementów.
•Przed rozpoczęciem montażu przeczytaj uważnie
instrukcję.
•Zachowajniniejsząinstrukcjęnaprzyszłość.
Ważne informacje dotyczące
bezpieczeństwa
Przeczytaj niniejszą instrukcję przed rozpoczęciem
montażu oraz stosuj się do zawartych w niej
wskazówek. Używaj narzędzi zapewniających
bezpieczeństwo.
Zasięgnijporadyuautoryzowanegoźródłajeśli:
•Nie rozumiesz niniejszej instrukcji lub masz
wątpliwości dotyczące bezpieczeństwa podczas
montażu.
Nie używaj tego produktu do jakichkolwiek innych
celów niż jest przeznaczony. Producent nie ponosi
żadnej odpowiedzialności za szkody powstałe w
wyniku niewłaściwego montażu oraz za szkody
powstałe w wyniku wykorzystania produktu
niezgodnie z przeznaczeniem.
Na koniec upewnij się, że podczas montażu
postępowałeśzgodniezinstrukcją.
Utrzymanie
•Sprawdź,czyuchwytysąbezpieczneibezpieczne
w użyciu, w regularnych odstępach czasu (co
najmniejraznatrzymiesiące)
Dual-siDeD Mobile TV CarT/Trolley
wiTh Glass shelVes
Dual-siDeD Mobile TV CarT/Trolley
wiTh Glass shelVes
4www.techly.com
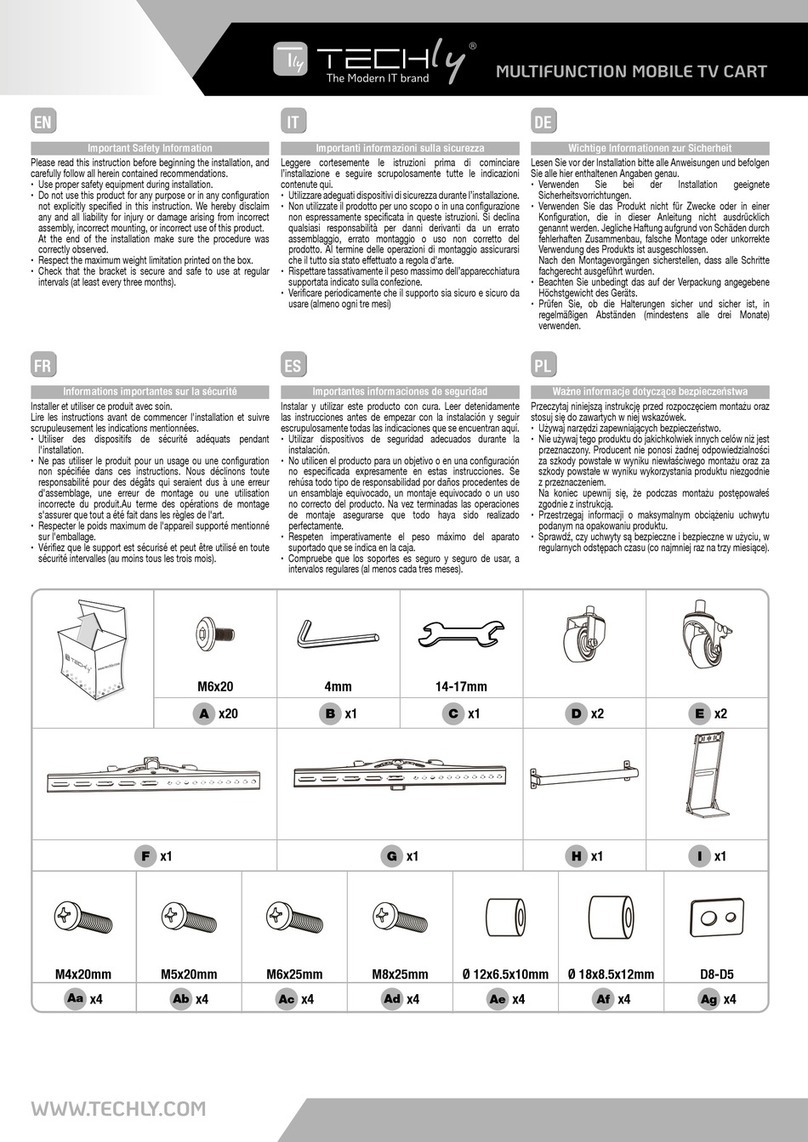
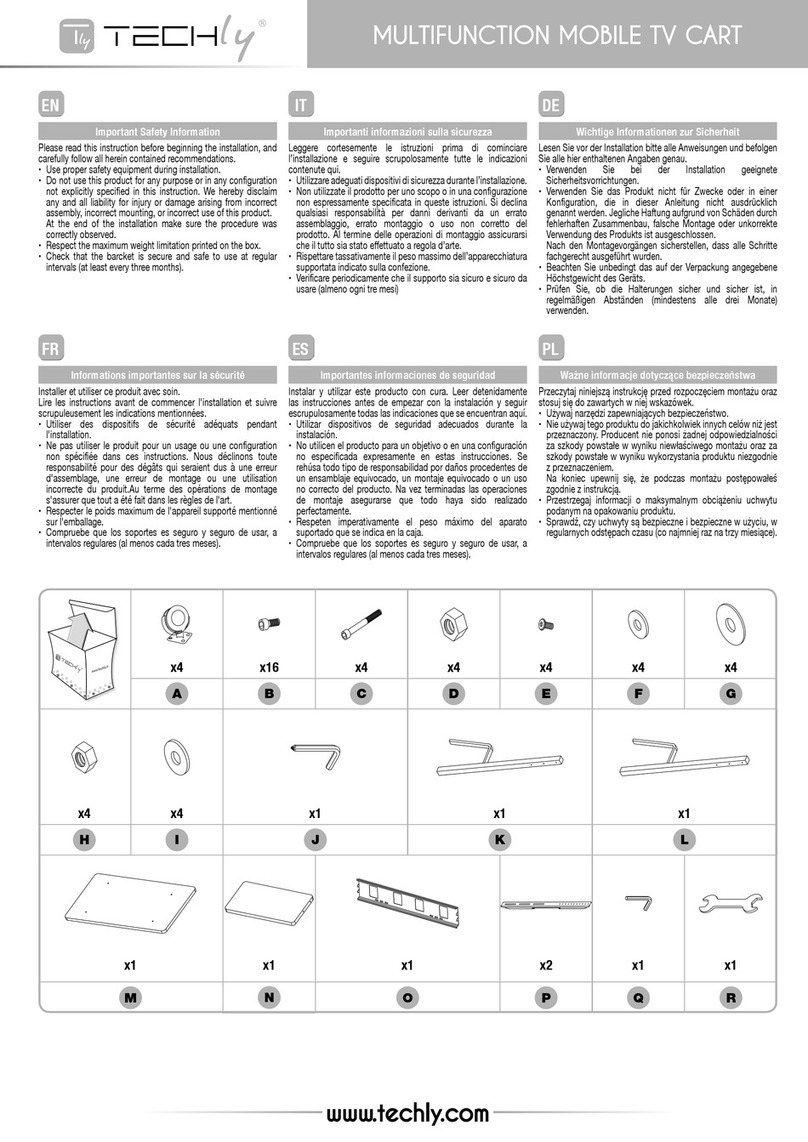
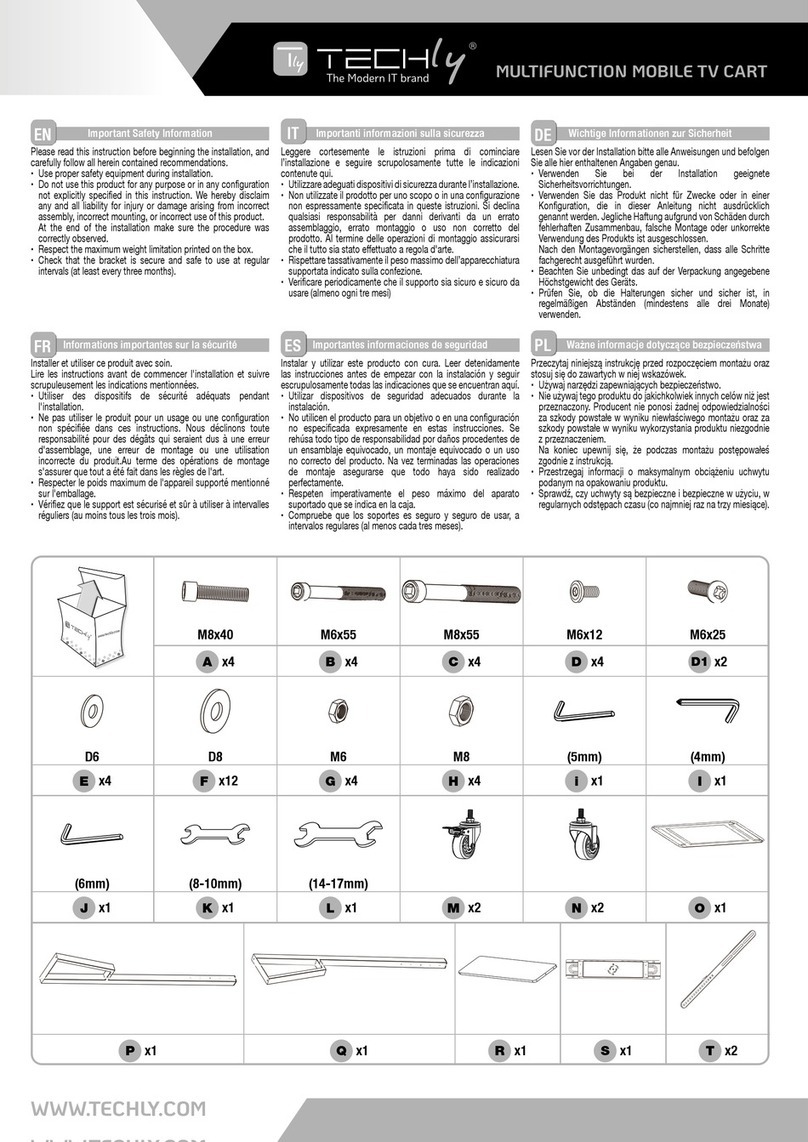
Ax2 Bx2
Cx2 Dx1 Ex4
Fx2 Gx2 Hx4
Package M (x2)
Package P
m-A x4 m-B x4 m-C x4 m-D x4
m-E x4 m-F x4 m-G x8 m-H x4
p-F x8 p-G x1 p-H x1 p-I x1
p-A x8 p-B x2 p-C x8 p-D x8 p-E x2
www.techly.com

1
Dual-siDeD Mobile TV CarT/Trolley
wiTh Glass shelVes
5
www.techly.com
EN
Installing the casters -
IT
Installazione delle ruote
DE
Installieren der Rollen -
FR
Installation des roulettes
ES
Instalación de las ruedas -
PL
Instalowanie kółka
EN
Attachtwopillarstobaseusing
screws and washers, tighten
screwsusing8mmAllenkey
IT
Collegare le due colonne alla
base utilizzando le viti e le
rondelle indicate, stringere le
viti con la chiave a brugola da
8mm
DE
Befestigen Sie die beiden
Säulen an der Basis mit den
richtigen Schrauben und
Unterlegscheiben.
ZiehenSiealleSchraubenmit
8mm Innensechskantschlüssel
FR
Fixezlesdeuxpiliersàla
base en utilisant les vis et les
rondelles appropriées.
SerrezlesvisaveclacléAllen
8mm
ES
Conecte los dos pilares a
la base con los tornillos y
arandelas correctas.
Aprietetodoslostornilloscon
lallaveAllende8mm
PL
"Podłączdwalarydopodłoża
zapomocąwłaściwychśrubi
podkładek.
Dokręcićwszystkieśruby
kluczem imbusowym 8mm
EN
Loosenthescrewsonupperadjustingsliderand
adjustthemtodesiredpositionusing5mmAllenkey.
Adjusttheheightoftheloweradjustingslidersto
desired position in the same way
IT
Allentarelevitisullosnododissaggiosuperiore
con la chiave a brugola da 5mm per regolarla nella
posizione desiderata. Procedendo nello stesso modo,
regolareanchel'altezzadellosnododissaggio
inferiore
DE
LösenSiedieSchraubenanderoberen
Stellschieber und passen Sie sie mit 5 mm
Innensechskantschlüssel in die gewünschte Position.
StellenSiedieHöhederUnterstellschiebereglerindie
gewünschte Position auf die gleiche Weise
FR
Desserrez les vis de réglage curseur supérieur et de
lesadapteràlapositiondésiréeenutilisantlaclé
Allende5mm.Réglezlahauteurdescurseursde
réglageinférieureàlapositiondésiréedelamême
manière
ES
Aojelostornillosdecontroldeslizantedeajuste
superioryajustarlosalaposicióndeseada
mediantellaveAllende5mm.Ajustelaalturadelos
deslizadoresdeajusteinferioralaposicióndeseada
de la misma manera
PL
Poluzowaćśrubynagórnejsuwakaregulacyjnegoi
dostosowaćjedożądanejpozycjizapomocąklucza
imbusowego5mm.Dostosowaćwysokośćślizgaczy
niższydostosowującychsiędożądanegopołożenia
wtakisamsposób
2
EN
Installing the pillars -
IT
Installare le colonne -
DE
Installieren der Säulen
FR
Installation des piliers -
ES
Instalación de las columnas -
PL
Instalacja lary
H
G
p-I p-I
p-E p-B
p-G
EN
Install the casters into
the base holes
Tightenalltopnutsto
secure them
Blocks brakes on
casters to avoid any
sudden movements
during installation
IT
Installare le ruote nei
fori della base
Serrare tutti i dadi
superioriperssarli
Bloccare i freni delle
ruote per evitare
movimenti bruschi
durante l'installazione
DE
Installieren Sie die
RollenindieLöcher
ZiehenSiealleMuttern
aufderOberseitezu
befestigen
Blocks Bremsen auf
Rollen keine plötzlichen
Bewegungen während
der Installation zu
vermeiden
FR
Installez les
roulettes dans les trous
de la base
Serrer tous les écrous
surledessuspourxer
Blocs freins sur
roulettes pour éviter les
mouvementsbrusques
lors de l'installation
ES
Instale las ruedas
enlosoriciosdela
base
Aprietetodaslas
tuercas en la parte
superior para sujetar
Bloquesdefrenosen
las ruedas para evitar
movimientos bruscos
durantelainstalación
PL
Zainstalujkółkado
otworówbazowych
Dokręcićwszystkie
najpopularniejsze
zabezpieczyćjena
nakrętki
Blokuje hamulce na
kółkach,abyuniknąć
gwałtownychruchów
podczas instalacji

3
4
Dual-siDeD Mobile TV CarT/Trolley
wiTh Glass shelVes
Dual-siDeD Mobile TV CarT/Trolley
wiTh Glass shelVes
6www.techly.com
EN
Installing the universal plates -
IT
Installazione delle staffe universali -
DE
Installieren der Universalplatten
FR
Installation des plaques universelles -
ES
Instalación de las placas universales -
PL
Instalacja uniwersalne talerze
EN
Installing the glass shelves -
IT
Installazione delle mensole in vetro -
DE
Installation der Glasböden
FR
Installation des étagères en verre -
ES
Instalación de los estantes de vidrio -
PL
Instalacja półki szklane
EN
Fix the universal plate on the upper
adjusting sliders, using the appropriate
combination of screws and washers, make
sure the universal plate is level, tighten all
screws using 6mm allen key.
Do the same as step as above for the other
universal plate
IT
Fissare la piastra universale sugli snodi
superiori, utilizzando la combinazione
appropriata di viti e rondelle, assicurarsi
che la piastra universale sia a livello,
stringere tutte le viti con la chiave
a brugola da 6mm.
Fare la stessa procedura anche per l'altra
staffa
DE
BefestigenSiedieUniversalplatteauf
den oberen Schieberegler Einstellung,
mitderentsprechendenKombination
vonSchraubenundUnterlegscheiben,
sicherzustellen,dassdieUniversalplatte
Niveau, alle Schrauben mit 6 mm
Innensechskantschlüssel festziehen.
Machen Sie dasselbe wie Schritt, wie oben
fürdasandereUniversalplatte
FR
Fixerlaplaqueuniversellesurlescurseurs
de réglage supérieures, en utilisant la
combinaison appropriée de vis et rondelles,
assurez-vousquelaplaqueuniverselleest
deniveau,serrertouteslesvisàl'aidedela
cléAllende6mm.
Faiteslamêmechosequel'étapecomme
ci-dessuspourl'autreplaqueuniverselle
EN
Fix the supporting arm to the lower adjusting
slider, using the appropriate combination of
screws, make sure the supporting arms are
level, tighten all the screws
IT
Fissare il braccio di supporto allo snodo
inferiore utilizzando la combinazione
appropriata di viti, assicurarsi che i bracci di
supporto siano a livello, serrare tutte le viti
DE
PlatzGlasaufdemTragarm,mitden
entsprechenden Schrauben, um die
Haltbarkeit zu beheben, nicht überdrehen,
sonst kann Glas zu zerbrechen oder Risse
verursachen. Machen Sie dasselbe Schritt wie
oben für die anderen Glasregal.
FR
Poser le verre sur le bras de support, en
utilisantlesvisappropriéespourxerle
plateau, ne serrez pas trop, sinon peut
provoquerverreàbriserousessurer.Faire
lamêmechosequeci-dessuspourl'étapede
l'autre tablette en verre.
ES
Lugardecristalenelbrazodesoporte,
conlostornillosadecuadosparajarla
plataforma, no en exceso, de lo contrario
puede causar vidrio para romper o agrietar.
Hagalomismopasoqueelanteriorparael
otro estante de cristal.
PL
Miejscenaszkłoramieniapodtrzymującego,
przyużyciuodpowiednichśrubdo
zamocowaniapółki,niezbytmocno,gdyż
możespowodowaćszybydowstrząsnąć
lubpękania.Czytensametapjakopisano
powyżejdladrugiejpółceszklanej.
ES
Fije la placa universal sobre los
deslizadores de ajuste superior, utilizando
lacombinaciónadecuadadetornillos
yarandelas,asegúresedequelaplaca
universal es el nivel, apriete todos los
tornillosconllaveAllende6mm.
Hagalomismoqueenelpasoqueel
anterior para la otra placa universal
PL
Fixuniwersalnąpłytęnagórnychsuwaków
doregulacji,zapomocąodpowiedniej
kombinacjiśrubipodkładek,upewnij
się,żepłytajestuniwersalnympoziomie,
dokręcićwszystkieśrubyzapomocą
klucza imbusowego 6mm.
Czytakisamjakkrokjakpowyżejdla
drugiejpłytceuniwersalnej
F
p-F
p-F
p-A
p-A
p-H
p-H
B
C
B
C
p-D

4a
5
5-1
Dual-siDeD Mobile TV CarT/Trolley
wiTh Glass shelVes
7
www.techly.com
EN
Placeglassonthesupportingarm,usingtheappropriatescrewstoxthe
shelf, do not overtighten, otherwise may cause glass to shatter or crack. Do
the same step as above for the other glass shelf.
IT
Posizionarelamensolainvetrosulbracciodisupporto,ssarlautilizzando
leappositevitisenzastringereeccessivamente,altrimentiquestopotrebbe
rompere o scheggiare il vetro. Fare la procedura anche per l'altro ripiano in
vetro.
DE
PlatzGlasaufdemTragarm,mitdenentsprechendenSchrauben,umdie
Haltbarkeit zu beheben, nicht überdrehen, sonst kann Glas zu zerbrechen
oder Risse verursachen. Machen Sie dasselbe Schritt wie oben für die
anderen Glasregal.
FR
Poser le verre sur le bras de support, en utilisant les vis appropriées pour
xerleplateau,neserrezpastrop,sinonpeutprovoquerverreàbriserouse
ssurer.Fairelamêmechosequeci-dessuspourl'étapedel'autretablette
en verre.
ES
Lugardecristalenelbrazodesoporte,conlostornillosadecuadospara
jarlaplataforma,noenexceso,delocontrariopuedecausarvidriopara
romperoagrietar.Hagalomismopasoqueelanteriorparaelotroestante
de cristal.
PL
Miejscenaszkłoramieniapodtrzymującego,przyużyciuodpowiednichśrub
dozamocowaniapółki,niezbytmocno,gdyżmożespowodowaćszybydo
wstrząsnąćlubpękania.Czytensametapjakopisanopowyżejdladrugiej
półceszklanej.
EN
Installing the glass shelves -
IT
Installazione delle mensole in vetro -
DE
Installation der Glasböden
FR
Installation des étagères en verre -
ES
Instalación de los estantes de vidrio -
PL
Instalacja półki szklane
EN
Installing the adapter brakets -
IT
Installazione delle staffe di collegamento -
DE
Installieren der Adapterhalterungen
FR
Installation des supports adaptateurs -
ES
Instalación de los soportes adaptadores -
PL
Instalacja wsporniki adaptera
EN
For Flat back screens -
IT
Per schermi con retro piatto
DE
Für Fernseher mit acher Rückseite
FR
Pour TV à dos plat
ES
Para televisión con parte trasera plana
PL
Do płaskich ekranów tylnych
A
p-C
m-B
m-C
m-F
m-A

5-2
6
Dual-siDeD Mobile TV CarT/Trolley
wiTh Glass shelVes
www.techly.com - info@techly.com
EN
For recessed back screens or to access A/V input
IT
Per schermi con retro curvo o per accedere all'ingresso A/V
DE
Für Innen-zurück-Bildschirme oder A/V-Eingang zugreifen
FR
Pour les écrans à dos creux ou pour accéder à une entrée A/V
ES
Para las pantallas traseras empotradas o para acceder a entrada de A/V
PL
Do wbudowania ekranach tylnych lub dostępu wejście A/V
EN
Note: choose the appropriate screws, washers and spacers
(if necessary) according to the type of screen.
•Positiontheadapterbracketsascloseaspossible
•ScrewtheadapterbracketsontotheTV.Tightenallscrewsbutdo
not over tighten.
IT
Note: scegliere le viti, rondelle e distanziatori (se necessari) adeguate a
seconda del tipo di schermo.
•Posizionarelestaffedicollegamentoilpiùvicinopossibilealcentro
dellaTV.
•AvvitarelestaffedicollegamentosullaTV.Serraretuttelevitimanon
stringere in modo eccessivo.
DE
Hinweis:WählenSiedieSchrauben,Unterlegscheibenund
Abstandshalter(fallserforderlich)sindjenachArtdesBildschirms.
•LegenSiedieBefestigungsbügelsonahwiemöglichanderMitte
desTV
•ZiehenSiedieBefestigungsklammernaufdemTVZiehenSiealle
Schrauben jedoch nicht zu fest.
FR
Note: Choisissez les vis, rondelles et entretoises (si nécessaire) sont
appropriées pour le type d'écran.
•Placezlessupportsdexationaussiprèsquepossibleducentre
delaTV.
•Serrezlessupportsdexationsurletéléviseur.Serreztouteslesvis,
mais sans excès.
ES
Nota: Elija los tornillos, arandelas y espaciadores (si es necesario)
son las adecuadas para el tipo de pantalla.
•Coloquelossoportesdejacióntancercacomoseaposibledel
centrodelaTV.
•Ajustelossoportesdejacióneneltelevisor.Aprietetodoslos
tornillos, pero no en exceso.
PL
Uwaga:Wybierzśruby,podkładkiiprzekładki(jeślikonieczne)
odpowiednie do rodzaju ekranu.
•Umieścićwspornikimocującejaknajbliżejdocentrumtelewizora.
•Wspornikimocującedokręcićnatelewizorze.Dokręcićwszystkie
śruby,aleniezamocno.
EN
Hang the screen onto the screen
mountbracket.Tightenthebottom
screws to secure the bracket to
universal plate
IT
Appendereloschermosullastaffadi
montaggio. Serrare le viti inferiori per
ssarelastaffaallapiastrauniversale
DE
Hängen Sie den Bildschirm auf den
BildschirmHalterung.ZiehenSiedie
unteren Schrauben, um die Halterung
zu universellen Platte sichern
FR
Accrochezl'écransurlesupportde
xationdel'écran.Serrerlesvisdu
baspourxerlesupportdeplaque
universel
ES
Cuelgue la pantalla en la pantalla
soportedemontaje.Aprietelos
tornillosinferioresparajarelsoporte
a la placa universal
PL
Trzymajekrannawspornikuekranu.
Dokręcićdolneśrubymocujące
wspornikdouniwersalnejpłyty
EN
Hang the screen -
IT
Appendere lo schermo -
DE
Hängen Sie den Bildschirm -
FR
Accrochez l'écran
ES
Cuelgue la pantalla -
PL
Powiesić ekran
m
-
D
m-E
m-C
m-C
m-F m-F
m-F m-F
m-F m-G m-G
m-G
m-H
m-H
m-D
m-E
m-D
m-E
Table of contents
Other Techly Outdoor Cart manuals

Techly
Techly ICA-TR16T User manual

Techly
Techly ICA-TR31 User manual

Techly
Techly ICA-TR216T User manual

Techly
Techly ICA-TR33 User manual

Techly
Techly ICA-TR54 User manual

Techly
Techly ICA-TR53MB User manual

Techly
Techly ICA-TR3390 User manual

Techly
Techly ICA-TR53LB User manual

Techly
Techly ICA-TR45 User manual

Techly
Techly ICA-TR3 User manual
Popular Outdoor Cart manuals by other brands

Rubbermaid
Rubbermaid M38 user manual

TYPE A
TYPE A 068-7136-6 Assembly instructions

Newcastle Systems
Newcastle Systems EcoCart Series Assembly manual

Great Little Trading
Great Little Trading Time for Tea Trolley quick start guide

Luxor
Luxor ECMBSKBC-B Assembly instructions

YTL
YTL YTL22139-5 Instruction & assembly manual