manuals.online logo
Brands
  1. Home
  2. •
  3. Brands
  4. •
  5. Stanley
  6. •
  7. Rotary Hammer
  8. •
  9. Stanley SHR243 User manual

Stanley SHR243 User manual

SHR243
SHR263
SHR264
4
11
18
26
34
41
English
繁體中文
한국어
Bahasa Indonesia

Tiếng Việt
A
* The picture above may differ slightly to actual unit.
4
4
B
7
12
13
2
4
5
1
3
7
6
11
9
8
10
5
C1
DE
C2
SHR243/SHR263
ENGLISH
2
7
11
14
FG
15
16
17
SHR264
15
ENGLISH
3
ENGLISH
4
Intended use
Your Stanley SHR243/SHR263/SHR264 SDS plus rotary
hammer is intended to drill holes in concrete, bricks, wood,
and steel, light chipping, demolition applications and for
carbide tipped core drilling or use for screw driver. This tool
is intended for professional use.
SAFTY INSTRUCTION
General Power Tool Safety Warnings
WARNING! Read all safety warnings and all instruc-
tions. Failure to follow the warnings and instructions
may result in electric shock, re and/ or serious injury.
Save all warnings and instructions for future refer-
ence. The term “power tool” in the warnings refers to your
mains-operated (corded) power tool or battery operated
(cordless) power tool.
1. Work area safety
a. Keep work area clean and well lit. Cluttered or dark
areas invite accidents.
b. Do not operate power tools in explosive atmo-
spheres, such as in the presence of ammable
liquids, gases or dust. Power tools create sparks
which may ignite the dust or fumes.
c. Keep children and bystanders away while operating
a power tool. Distractions can cause you to lose control.
2. Electrical safety
a. Power tool plugs must match the outlet. Never modify
the plug in any way. Do not use any adapter plugs with
earthed (grounded) power tools. Unmodied plugs and
matching outlets will reduce risk of electric shock.
b. Avoid body contact with earthed or grounded
surfaces, such as pipes, radiators, ranges and
refrigerators. There is an increased risk of electric
shock if your body is earthed or grounded.
c. Do not expose power tools to rain or wet condi-
tions. Water entering a power tool will increase the
risk of electric shock.
d. Do not abuse the cord. Never use the cord for carrying,
pulling or unplugging the power tool. Keep cord away
from heat, oil, sharp edges or moving parts. Damaged or
entangled cords increase the risk of electric shock.
e. When operating a power tool outdoors, use an
extension cord suitable for outdoor use. Use of a cord
suitable for outdoor use reduces the risk of electric shock.
f. If operating a power tool in a damp location is un-
avoidable, use a residual current device (RCD) protect-
ed supply. Use of an RCD reduces the risk of electric
shock. NOTE: The term “residual current device (RCD)”
may be replaced by the term “ground fault circuit interrupter
(GFCI)” or “earth leakage circuit breaker (ELCB)”.
ENGLISH (Original Instructions)
6
gauge according to the required depth. After that, tighten
the side handle.
♦Slacken the side handle (9) by turning the grip counter-
clockwise.
♦Set the depth stop (8) to the required position. The
maximum drilling depth is equal to the distance between
the tip of the drill bit and the front end of the depth stop.
♦Tighten the side handle by turning the grip clockwise.
Switching on and off
WARNING! Before plugging in to the power source, make
sure the switch can be flipped freely, and can return to its
original position once released. Please check switch lock on
position before turn on and make sure switch lock off before
plugging in to the power source.
♦To switch the tool on, press the variable speed switch
(3). The tool speed depends on how far you press the
switch.
♦As a general rule, use low speeds for large diameter
drill bits and high speeds for smaller diameter drill bits.
♦For continuous operation, press the lock-on button (2)
and release the variable speed switch.
♦To switch the tool off, release the variable speed switch.
To switch the tool off when in continuous operation,
press the variable speed switch once more and release
it.
WARNING! When the user leaves, or pick up, transport,
manner and position the tool, make sure that tool is
switched off and unplugged.
Fitting drill chuck (NQCC, Fig E)
Optional accessory
♦Insert the drill chuck (16) into the tool chuck (6)
according to the instructions for installing attachments.
♦Turn the drill chuck to loosen the clamps at the front-end
of the drill-clamp, and insert the accessory bar (17) into
the clamps and turn the chuck in the opposite direction.
♦You may also use the drill chuck key to tighten the
clamp.
Warning: Never use standard chucks in the
hammer-drilling mode
Replacing the SDS Plus Tool Holder with the
Keyless Chuck (QCC, Fig. D)
1. Turn the locking collar (5) into the unlocking position
and pull the SDS Plus Tool Holder (10) off.
2. Push the keyless chuck (12) onto the spindle and turn
the locking collar (5) to the locking position
To replace the keyless chuck with the SDS Plus tool holder,
first remove the keyless chuck the same way the tool holder
was removed. Then place the tool holder the same way the
keyless chuck was placed making sure to turn the locking
collar to the locking position.
Warning: Never use standard chucks in the
hammer-drilling mode
Selecting the Operating Mode (Fig. B)
The tool can be used in the following operating modes:
Rotary drilling: for screw driving and for drilling
into steel, wood and plastics
Hammer drilling: for concrete and masonry
drilling operations. Bit rotation: non-working
position used only to rotate a flat chisel into the
desired position
Hammering only: for light chipping, chiselling
and demolition applications. In this mode the tool
can also be used as a lever to free a jammed drill bit.
1. To select the operating mode, press the mode selector
button and rotate the mode selector switch (5) until it
points to the symbol of the required mode.
2. Release the mode selector button and check that the
mode selector switch is locked in place.
WARNING! Do not select the operating mode when
the tool is running.
Proper Hand Position (Fig. A, Fig. E)
WARNING! To reduce the risk of serious personal
injury, ALWAYS use proper hand position as shown.
WARNING! To reduce the risk of serious personal
injury, ALWAYS hold securely in anticipation of a
sudden reaction.
Proper hand position requires one hand on the side handle
(8), with the other hand on the main handle (14).
Rotary drilling (Fig. B, Fig. D, Fig. C1/C2)
♦For drilling in steel, wood and plastics, or for screw
driving set the operating mode selector (4) to the
position.
♦Depending on your tool, follow either of the following
instructions:
QCC: Replace the SDS Plus tool holder (12) with the
keyless chuck (14).
NQCC: Fit the drill chuck assembly.
♦insert the appropriate bits. When driving slotted head
screws always use bits with a finder sleeve.
♦For drilling in steel, wood and plastics, set the forward/
reverse lever(4) to the forward position(Fig C1). When
use for screw driver function, tighten screws set the
forward/reverse lever (4) to the forward position(Fig C1)
and loose screws set the forward/reverse lever (4) to
the reverse position(Fig C2).
WARNING! Never use drill chucks in the hammer drilling
mode.
Hammer drilling (Fig. B)
♦For hammer drilling in masonry and concrete, set the
operating mode selector (5) to the position.
♦The drill bit has to be placed accurately onto the drill
hole position. After that, pull the switch for optimal
effects. Make sure the tool is in the correct position to
prevent the drill from deviating from the hole.
♦When the drill hole is clogged with debris or fine powder,
please don’t exert any more pressure. Tool should be
put in free-running state before removing part of the drill
bit from the hole. If repeated a few times, the blockage
in the hole would be cleared, and normal drilling can
3. Personal safety
a. Stay alert, watch what you are doing and use
common sense when operating a power tool. Do
not use a power tool while you are tired or under the
inuence of drugs, alcohol or medication. A moment
of inattention while operating power tools may result in
serious personal injury.
b. Use personal protective equipment. Always wear eye
protection. Protective equipment such as dust mask, non-
skid safety shoes, hard hat, or hearing protection used for
appropriate conditions will reduce personal injuries.
c. Prevent unintentional starting. Ensure the switch is in
the off-position before connecting to power source and/
or battery pack, picking up or carrying the tool. Carrying
power tools with your nger on the switch or energising
power tools that have the switch on invites accidents.
d. Remove any adjusting key or wrench before turning the
power tool on. A wrench or a key left attached to a rotating
part of the power tool may result in personal injury.
e. Do not overreach. Keep proper footing and balance
at all times. This enables better control of the power tool
in unexpected situations.
f. Dress properly. Do not wear loose clothing or jewel-
lery. Keep your hair, clothing and gloves away from
moving parts. Loose clothes, jewellery or long hair can
be caught in moving parts.
g. If devices are provided for the connection of dust
extraction and collection facilities, ensure these are
connected and properly used. Use of dust collection
can reduce dust-related hazards.
4. Power tool use and care
a. Do not force the power tool. Use the correct power tool
for your application. The correct power tool will do the job
better and safer at the rate for which it was designed.
b. Do not use the power tool if the switch does not turn
it on and off. Any power tool that cannot be controlled
with the switch is dangerous and must be repaired.
c. Disconnect the plug from the power source and/ or
the battery pack from the power tool before making
any adjustments, changing accessories, or storing
power tools. Such preventive safety measures reduce
the risk of starting the power tool accidentally.
d. Store idle power tools out of the reach of children
and do not allow persons unfamiliar with the
power tool or these instructions to operate the
power tool. Power tools are dangerous in the hands
of untrained users.
e. Maintain power tools. Check for misalignment or
binding of moving parts, breakage of parts and
any other condition that may affect the power
tool’s operation. If damaged, have the power tool
repaired before use. Many accidents are caused by
poorly maintained power tools.
ENGLISH
5
f. Keep cutting tools sharp and clean. Properly main-
tained cutting tools with sharp cutting edges are less
likely to bind and are easier to control.
g. Use the power tool, accessories and tool bits etc. in
accordance with these instructions, taking into account
the working conditions and the work to be performed.
Use of the power tool for operations different from those
intended could result in a hazardous situation.
5. Service
a. Have your power tool serviced by a qualied repair
person using only identical replacement parts. This
will ensure that the safety of the power tool is maintained.
ROTARY HAMMER SAFETY WARNINGS
Wear ear protectors. Exposure to noise can cause
hearing loss.
Use auxiliary handle(s), if supplied with the tool.
Loss of control can cause personal injury.
Hold power tool by insulated gripping surfaces,
when performing an operation where the cutting
accessory may contact hidden wiring or its own
cord. Cutting accessory contacting a “live” wire may
make exposed metal parts of the power tool “live” and
could give the operator an electric shock.
Never use a chisel accessory in rotary mode. The
accessory will bind in the material and rotate the drill.
Use clamps or another practical way to secure and
support the work piece to a stable platform. Holding
the work by hand or against your body leaves it unsta-
ble and may lead to loss of control.
Before drilling into walls, oors or ceilings, check for
the location of wiring and pipes.
Avoid touching the tip of the drill bit after drilling so as
to avoid scalding.
The intended use is described in this instruction manual.
The use of any accessory or attachment or performance
of any operation with this tool other than those recom-
mended in this instruction manual may present a risk of
personal injury and/or damage to property.
Note: Mains voltage: When connecting to the mains, it is im-
perative to verify if the voltage of the mains matches that of the
power tool. If the mains voltage exceeds the voltage indicated
on the power tool, the user may become severely injured in an
accident, and the tool may be damaged. On the contrary, if the
mains voltage is lower than the voltage required by the tool,
the motor may be damaged as a result.
Thus, if it is not possible to verify the voltage, it is impera-
tive not to plug in to the power source.
RESUDUAL RISKS
Additional residual risks may arise when using the tool
which may not be included in the enclosed safety warnings.
These risks can arise from misuse, prolonged use etc. In
spite of the application of the relevant safety regulations
and the implementation of safety devices, certain risks
cannot be avoided. These are:
Injuries caused by touching any rotating/moving parts.
Injuries caused when changing any parts, blades or
accessories.
Injuries caused by prolonged use of a tool. When using any
tool for prolonged periods ensure you take regular breaks.
Impairment of hearing.
Health hazards caused by breathing dust developed
when using your tool (example:- working with wood,
especially oak, beech and MDF.)
SAFETY OF OTHERS
This appliance is not intended for use by persons
(including children) with reduced physical, sensory
or mental capabilities, or lack of experience and
knowledge, unless they have been given supervision
or instruction concerning use of the appliance by a
person responsible for their safety.
Children should be supervised to ensure that they do
not play with the appliance.
LABELS ON TOOL
The following symbols are shown on the tool along with
date code:
WARNING! To reduce the risk of injury,
the user must read the instruction manual
before use.
Wear ear protection.
Wear safety glasses or goggles.
V Volts Direcet urrent
A Amperes No-Load Speed
Hz Hertz Class II Construction
W Watts Earthing Terminal
min minutes Safety Alert Symbol
ENGLISH (Original Instructions)
4
g. Use the power tool, accessories and tool bits etc.
in accordance with these instructions, taking into
account the working conditions and the work to
be performed. Use of the power tool for operations
different from those intended could result in a hazardous
situation.
5. Service
a. Have your power tool serviced by a qualified
repair person using only identical replacement
parts. This will ensure that the safety of the power tool
is maintained.
ROTARY HAMMER SAFETY WARNINGS
Warning! Additional safety warnings for Hammer
♦Wear ear protectors. Exposure to noise can cause
hearing loss.
♦Use auxiliary handle(s), if supplied with the tool.
Loss of control can cause personal injury.
♦Hold power tool by insulated gripping surfaces,
when performing an operation where the cutting
accessory may contact hidden wiring or its own
cord. Cutting accessory contacting a “live” wire may
make exposed metal parts of the power tool “live” and
could give the operator an electric shock.
♦Never use a chisel accessory in rotary mode. The
accessory will bind in the material and rotate the drill.
♦Use clamps or another practical way to secure and
support the work piece to a stable platform. Holding the
work by hand or against your body leaves it unstable
and may lead to loss of control.
♦ Before drilling into walls, floors or ceilings, check for the
location of wiring and pipes.
♦Avoid touching the tip of the drill bit after drilling so as
to avoid scalding.
♦The intended use is described in this instruction
manual. The use of any accessory or attachment or
performance of any operation with this tool other than
those recommended in this instruction manual may
present a risk of personal injury and/or damage to
property.
Note: Mains voltage: When connecting to the mains, it is
imperative to verify if the voltage of the mains matches that
of the power tool. If the mains voltage exceeds the voltage
indicated on the power tool, the user may become severely
injured in an accident, and the tool may be damaged. On
the contrary, if the mains voltage is lower than the voltage
required by the tool, the motor may be damaged as a result.
Thus, if it is not possible to verify the voltage, it is imperative
not to plug in to the power source.
RESIDUAL RISKS
Additional residual risks may arise when using the tool
which may not be included in the enclosed safety warnings.
These risks can arise from misuse, prolonged use etc. In
spite of the application of the relevant safety regulations and
the implementation of safety devices, certain risks cannot
be avoided. These are:
♦Injuries caused by touching any rotating/moving parts.
♦Injuries caused when changing any parts, blades or
accessories.
♦Injuries caused by prolonged use of a tool. When using
any tool for prolonged periods ensure you take regular
breaks.
♦Impairment of hearing.
♦Health hazards caused by breathing dust developed
when using your tool (example:- working with wood,
especially oak, beech and MDF.)
SAFETY OF OTHERS
♦This appliance is not intended for use by persons
(including children) with reduced physical, sensory
or mental capabilities, or lack of experience and
knowledge, unless they have been given supervision or
instruction concerning use of the appliance by a person
responsible for their safety.
♦Children should be supervised to ensure that they do
not play with the appliance.
LABELS ON TOOL
The following symbols are shown on the tool along with date
code:
WARNING! To reduce the risk of injury, the user
must read the instruction manual before use.
Wear ear protection.
Wear safety glasses or goggles.
Position of Date Code (Fig. A)
The Date Code (10), which also includes the year of
manufacture, is printed into the housing.
Example:
2016 XX JN
Year of manufacturing
PACKAGE CONTENTS
The package contains:
1 Heavy-duty rotary hammerdrill
1 Side handle
1 Depth stop
1 Kitbox
1 Keyless chuck (QCC)
1 Instruction manual
♦Check for damage to the tool, parts or accessories
which may have occurred during transport.
♦Take the time to thoroughly read and understand this
manual prior to operation.
ENGLISH (Original Instructions)
4
g. Use the power tool, accessories and tool bits etc.
in accordance with these instructions, taking into
account the working conditions and the work to
be performed. Use of the power tool for operations
different from those intended could result in a hazardous
situation.
5. Service
a. Have your power tool serviced by a qualified
repair person using only identical replacement
parts. This will ensure that the safety of the power tool
is maintained.
ROTARY HAMMER SAFETY WARNINGS
♦Wear ear protectors. Exposure to noise can cause
hearing loss.
♦Use auxiliary handle(s), if supplied with the tool.
Loss of control can cause personal injury.
♦Hold power tool by insulated gripping surfaces,
when performing an operation where the cutting
accessory may contact hidden wiring or its own
cord. Cutting accessory contacting a “live” wire may
make exposed metal parts of the power tool “live” and
could give the operator an electric shock.
♦Never use a chisel accessory in rotary mode. The
accessory will bind in the material and rotate the drill.
♦Use clamps or another practical way to secure and
support the work piece to a stable platform. Holding the
work by hand or against your body leaves it unstable
and may lead to loss of control.
♦ Before drilling into walls, floors or ceilings, check for the
location of wiring and pipes.
♦Avoid touching the tip of the drill bit after drilling so as
to avoid scalding.
♦The intended use is described in this instruction
manual. The use of any accessory or attachment or
performance of any operation with this tool other than
those recommended in this instruction manual may
present a risk of personal injury and/or damage to
property.
Note: Mains voltage: When connecting to the mains, it is
imperative to verify if the voltage of the mains matches that
of the power tool. If the mains voltage exceeds the voltage
indicated on the power tool, the user may become severely
injured in an accident, and the tool may be damaged. On
the contrary, if the mains voltage is lower than the voltage
required by the tool, the motor may be damaged as a result.
Thus, if it is not possible to verify the voltage, it is imperative
not to plug in to the power source.
RESIDUAL RISKS
Additional residual risks may arise when using the tool
which may not be included in the enclosed safety warnings.
These risks can arise from misuse, prolonged use etc. In
spite of the application of the relevant safety regulations and
the implementation of safety devices, certain risks cannot
be avoided. These are:
♦Injuries caused by touching any rotating/moving parts.
♦Injuries caused when changing any parts, blades or
accessories.
♦Injuries caused by prolonged use of a tool. When using
any tool for prolonged periods ensure you take regular
breaks.
♦Impairment of hearing.
♦Health hazards caused by breathing dust developed
when using your tool (example:- working with wood,
especially oak, beech and MDF.)
SAFETY OF OTHERS
♦This appliance is not intended for use by persons
(including children) with reduced physical, sensory
or mental capabilities, or lack of experience and
knowledge, unless they have been given supervision or
instruction concerning use of the appliance by a person
responsible for their safety.
♦Children should be supervised to ensure that they do
not play with the appliance.
LABELS ON TOOL
The following symbols are shown on the tool along with date
code:
WARNING! To reduce the risk of injury, the user
must read the instruction manual before use.
Wear ear protection.
Wear safety glasses or goggles.
V Volts Direct Current
A Amperes n0No-Load Speed
Hz Hertz Class II Construction
W Watts Earthing Terminal
min minutes Safety Alert Symbol
Alternating
Current /min.
Revolutions or
Reciprocation per
minute
Position of Date Code (FIG. A)
The Date Code (10), which also includes the year of
manufacture, is printed into the housing.
Example:
2016 XX JN
Year of manufacturing
PACKAGE CONTENTS
The package contains:
1 Heavy-duty rotary hammerdrill
1 Side handle
1 Depth stop
1 Kitbox
1 Keyless chuck (QCC) (Optional)
1 Instruction manual
ENGLISH
6
Alternating
Current /min. Revolutions or Recip-
rocation per minute
Position of Date Code (Fig. A)
The Date Code (10), which also includes the year of manu-
facture, is printed into the housing.
Example:
2017 XX JN
Year of manufacturing
PACKAGE CONTENTS
The package contains:
1 Compact rotary hammerdrill
1 Side handle
1 Depth stop
1 Kitbox
1 Drill chuck (Optional)
1 Bit (Optional)
1 Instruction manual
1 Dust collector
1 Keyless chuck (SHR264)
Check for damage to the tool, parts or accessories
which may have occurred during transport.
Take the time to thoroughly read and understand this
manual prior to operation.
ELECTRICAL SAFETY
Your tool is double insulated; therefore no earth wire
is required. Be sure to check that the power supply
corresponds to the voltage on the rating plate.
If the supply cord is damaged, it must be replaced
by the manufacturer or an authorised Stanley
Black and Decker Service Centre in order to
avoid a hazard.
USING AN EXTENSION CABLE
If it is necessary to use an extension cable, please used
an approved extension cable that ts the tool’s power input
specications. The minimum cross-sectional area of the
conducting wire is 1.5 sq. mm. Cables should be untangled
before reeling up.
Cable cross-sectional
area (mm2)
Cable rated current
(Ampere)
0.75 6
1. 10
ENGLISH (Original Instructions)
4
g. Use the power tool, accessories and tool bits etc.
in accordance with these instructions, taking into
account the working conditions and the work to
be performed. Use of the power tool for operations
different from those intended could result in a hazardous
situation.
5. Service
a. Have your power tool serviced by a qualified
repair person using only identical replacement
parts. This will ensure that the safety of the power tool
is maintained.
ROTARY HAMMER SAFETY WARNINGS
♦Wear ear protectors. Exposure to noise can cause
hearing loss.
♦Use auxiliary handle(s), if supplied with the tool.
Loss of control can cause personal injury.
♦Hold power tool by insulated gripping surfaces,
when performing an operation where the cutting
accessory may contact hidden wiring or its own
cord. Cutting accessory contacting a “live” wire may
make exposed metal parts of the power tool “live” and
could give the operator an electric shock.
♦Never use a chisel accessory in rotary mode. The
accessory will bind in the material and rotate the drill.
♦Use clamps or another practical way to secure and
support the work piece to a stable platform. Holding the
work by hand or against your body leaves it unstable
and may lead to loss of control.
♦ Before drilling into walls, floors or ceilings, check for the
location of wiring and pipes.
♦Avoid touching the tip of the drill bit after drilling so as
to avoid scalding.
♦The intended use is described in this instruction
manual. The use of any accessory or attachment or
performance of any operation with this tool other than
those recommended in this instruction manual may
present a risk of personal injury and/or damage to
property.
Note: Mains voltage: When connecting to the mains, it is
imperative to verify if the voltage of the mains matches that
of the power tool. If the mains voltage exceeds the voltage
indicated on the power tool, the user may become severely
injured in an accident, and the tool may be damaged. On
the contrary, if the mains voltage is lower than the voltage
required by the tool, the motor may be damaged as a result.
Thus, if it is not possible to verify the voltage, it is imperative
not to plug in to the power source.
RESIDUAL RISKS
Additional residual risks may arise when using the tool
which may not be included in the enclosed safety warnings.
These risks can arise from misuse, prolonged use etc. In
spite of the application of the relevant safety regulations and
the implementation of safety devices, certain risks cannot
be avoided. These are:
♦Injuries caused by touching any rotating/moving parts.
♦Injuries caused when changing any parts, blades or
accessories.
♦Injuries caused by prolonged use of a tool. When using
any tool for prolonged periods ensure you take regular
breaks.
♦Impairment of hearing.
♦Health hazards caused by breathing dust developed
when using your tool (example:- working with wood,
especially oak, beech and MDF.)
SAFETY OF OTHERS
♦This appliance is not intended for use by persons
(including children) with reduced physical, sensory
or mental capabilities, or lack of experience and
knowledge, unless they have been given supervision or
instruction concerning use of the appliance by a person
responsible for their safety.
♦Children should be supervised to ensure that they do
not play with the appliance.
LABELS ON TOOL
The following symbols are shown on the tool along with date
code:
WARNING! To reduce the risk of injury, the user
must read the instruction manual before use.
Wear ear protection.
Wear safety glasses or goggles.
V Volts Direct Current
A Amperes n0No-Load Speed
Hz Hertz Class II Construction
W Watts Earthing Terminal
min minutes Safety Alert Symbol
Alternating
Current /min.
Revolutions or
Reciprocation per
minute
Position of Date Code (FIG. A)
The Date Code (10), which also includes the year of
manufacture, is printed into the housing.
Example:
2016 XX JN
Year of manufacturing
PACKAGE CONTENTS
The package contains:
1 Heavy-duty rotary hammerdrill
1 Side handle
1 Depth stop
1 Kitbox
1 Keyless chuck (QCC) (Optional)
1 Instruction manual
5
ENGLISH (Original Instructions)
ELECTRICAL SAFETY
Your tool is double insulated; therefore no earth wire
is required. Be sure to check that the power supply
corresponds to the voltage on the rating plate.
Corresponds.
♦If the supply cord is damaged, it must be replaced by
the manufacturer or an authorised Black and Decker
Service Centre in order to avoid a hazard.
USING AN EXTENSION CABLE
If it is necessary to use an extension cable, please used
an approved extension cable that fits the tool’s power input
specifications. The minimum cross-sectional area of the
conducting wire is 1.5 sq. mm. Cables should be untangled
before reeling up.
Cable cross-sectional
area (mm2) Cable rated
current (Ampere)
Cable cross-sectional
area (mm2) Cable rated
current (Ampere)
0.75 6
1.00 10
1.50 15
2.50 20
4.00 25
Cable length (m)
7.5 15 25 30 45 60
Voltage Amperes Cable rated current (Ampere)
115 0 - 2.0 6 6 6 6 6 10
2.1 - 3.4 6 6 6 6 15 15
3.5 - 5.0 6 6 10 15 20 20
5.1 - 7.0 10 10 15 20 20 25
7.1 - 12.0 15 15 20 25 25 -
12.1 - 20.0 20 20 25 - - -
230 0 - 2.0 6 6 6 6 6 6
2.1 - 3.4 6 6 6 6 6 6
3.5 - 5.0 6 6 6 6 10 15
5.1 - 7.0 10 10 10 10 15 15
7.1 - 12.0 15 15 15 15 20 20
12.1 - 20.0 20 20 20 20 25 -
FEATURES (FIG. A, FIG. D)
This tool includes some or all of the following features.
1. Main handle
2. Lock-on button
3. Variable Speed Switch
4. Forward/Reverse Lever
5. Mode Selector
6. Sleeve
7. Tool clamp
8. Depth Stop
9. Side Handle
10. Date code
11. Locking collar (QCC)
12. SDS Plus tool Holder (QCC)
13. Drill Chuck Sleeve (QCC)
14. Keyless Chuck (QCC)
15. SDS bit
16. Drill chuck (NQCC)
ASSEMBLY
WARNING! Before assembly, make sure that the tool is
switched off and unplugged.
Attaching the Side Handle (Fig. A)
WARNING! When using the tool, please use the side
handle for your safety.
The side handle can be fitted to suit both right-handed and
left-handled users.
♦Turn the grip counter-clockwise until you can slide the
side handle onto the front of the tool.
♦Rotate the side handle into the desired position.
♦Tighten the side handle by turning the grip clockwise.
WARNING! When using the tool, remember to install the
side handles properly.
Fitting an accessory (Fig.A)
♦Clean and grease the shank (15) of the accessory.
♦Insert the accessory bar into the tool clamp(7).
♦ Push the accessory down and turn it slightly until it fits
into the slots.
♦Pull on the accessory to check if it is properly locked. The
hammering and drilling function requires the accessory
to be able to move axially several centimetres when
locked in the tool clamp.
♦To remove the accessory, pull back the sleeve (6) and
pull out the accessory from the tool clamp.
USE
WARNING! Always wear glaves when you change
accessories. The exposed metal parts on the tool and
accessory may become extremely hot during operation.
Please operate tool with normal load. Do not overload. Do
not abuse the tool, please refer instruction manual to use
the tool correctly.
WARNING! Before drilling into walls, floors or ceilings,
check for the location of wiring and pipes.
Setting the drilling depth (Fig. A)
The depth stop is a convenient feature to ensure uniformity
in drilling depth. Loosen the side handle to adjust the depth
ENGLISH (Original Instructions)
6
gauge according to the required depth. After that, tighten
the side handle.
♦Slacken the side handle (9) by turning the grip counter-
clockwise.
♦Set the depth stop (8) to the required position. The
maximum drilling depth is equal to the distance between
the tip of the drill bit and the front end of the depth stop.
♦Tighten the side handle by turning the grip clockwise.
Switching on and off
WARNING! Before plugging in to the power source, make
sure the switch can be flipped freely, and can return to its
original position once released. Please check switch lock on
position before turn on and make sure switch lock off before
plugging in to the power source.
♦To switch the tool on, press the variable speed switch
(3). The tool speed depends on how far you press the
switch.
♦As a general rule, use low speeds for large diameter
drill bits and high speeds for smaller diameter drill bits.
♦For continuous operation, press the lock-on button (2)
and release the variable speed switch.
♦To switch the tool off, release the variable speed switch.
To switch the tool off when in continuous operation,
press the variable speed switch once more and release
it.
WARNING! When the user leaves, or pick up, transport,
manner and position the tool, make sure that tool is
switched off and unplugged.
Fitting drill chuck (NQCC, Fig E)
Optional accessory
♦Insert the drill chuck (16) into the tool chuck (6)
according to the instructions for installing attachments.
♦Turn the drill chuck to loosen the clamps at the front-end
of the drill-clamp, and insert the accessory bar (17) into
the clamps and turn the chuck in the opposite direction.
♦You may also use the drill chuck key to tighten the
clamp.
Warning: Never use standard chucks in the
hammer-drilling mode
Replacing the SDS Plus Tool Holder with the
Keyless Chuck (QCC, Fig. D)
1. Turn the locking collar (5) into the unlocking position
and pull the SDS Plus Tool Holder (10) off.
2. Push the keyless chuck (12) onto the spindle and turn
the locking collar (5) to the locking position
To replace the keyless chuck with the SDS Plus tool holder,
first remove the keyless chuck the same way the tool holder
was removed. Then place the tool holder the same way the
keyless chuck was placed making sure to turn the locking
collar to the locking position.
Warning: Never use standard chucks in the
hammer-drilling mode
Selecting the Operating Mode (Fig. B)
The tool can be used in the following operating modes:
Rotary drilling: for screw driving and for drilling
into steel, wood and plastics
Hammer drilling: for concrete and masonry
drilling operations. Bit rotation: non-working
position used only to rotate a flat chisel into the
desired position
Hammering only: for light chipping, chiselling
and demolition applications. In this mode the tool
can also be used as a lever to free a jammed drill bit.
1. To select the operating mode, press the mode selector
button and rotate the mode selector switch (5) until it
points to the symbol of the required mode.
2. Release the mode selector button and check that the
mode selector switch is locked in place.
WARNING! Do not select the operating mode when
the tool is running.
Proper Hand Position (Fig. A, Fig. E)
WARNING! To reduce the risk of serious personal
injury, ALWAYS use proper hand position as shown.
WARNING! To reduce the risk of serious personal
injury, ALWAYS hold securely in anticipation of a
sudden reaction.
Proper hand position requires one hand on the side handle
(8), with the other hand on the main handle (14).
Rotary drilling (Fig. B, Fig. D, Fig. C1/C2)
♦For drilling in steel, wood and plastics, or for screw
driving set the operating mode selector (4) to the
position.
♦Depending on your tool, follow either of the following
instructions:
QCC: Replace the SDS Plus tool holder (12) with the
keyless chuck (14).
NQCC: Fit the drill chuck assembly.
♦insert the appropriate bits. When driving slotted head
screws always use bits with a finder sleeve.
♦For drilling in steel, wood and plastics, set the forward/
reverse lever(4) to the forward position(Fig C1). When
use for screw driver function, tighten screws set the
forward/reverse lever (4) to the forward position(Fig C1)
and loose screws set the forward/reverse lever (4) to
the reverse position(Fig C2).
WARNING! Never use drill chucks in the hammer drilling
mode.
Hammer drilling (Fig. B)
♦For hammer drilling in masonry and concrete, set the
operating mode selector (5) to the position.
♦The drill bit has to be placed accurately onto the drill
hole position. After that, pull the switch for optimal
effects. Make sure the tool is in the correct position to
prevent the drill from deviating from the hole.
♦When the drill hole is clogged with debris or fine powder,
please don’t exert any more pressure. Tool should be
put in free-running state before removing part of the drill
bit from the hole. If repeated a few times, the blockage
in the hole would be cleared, and normal drilling can
1.50 15
2.50 20
4.00 25
Cable length (m)
7.5 15 25 30 45 60
Voltage Amperes Cable rated current (Ampere)
115 0 - 2.- 6 6 6 6 6 10
2.1 - 3.4 6 6 6 6 15 15
3.5 - 5.0 6 6 10 15 20 20
5.1 - 7.0 10 10 15 20 20 25
7.1 - 12.0 15 15 20 25 25 -
12.1 - 20.0 20 20 25 - - -
230 0 - 2.0 6 6 6 6 6 6
2.1 - 3.4 6 6 6 6 6 6
3.5 - 5.0 6 6 6 6 10 15
5.1 - 7.0 10 10 10 10 15 15
7.1 - 12.0 15 15 15 15 20 20
12.1 - 20.0 20 20 20 20 25 -
FEATURES (FIG.A, FIG.D, FIG.F, FIG.G)
This tool includes some or all of the following features.
1. Main handle
2. Lock-on button
3. Variable Speed Switch
4. Forward/Reverse Lever
5. Mode Selector
6. Sleeve
7. Tool clamp
8. Depth Stop
9. Side Handle
10. Date code
11. SDS bit
12. Drill chuck
13. Drill bit
14.Dust collector
15.Locking collar
16.SDS Plus Tool Holder
17. Keyless chuck
ENGLISH
7
ASSEMBLY
WARNING! Before assembly, make sure that the tool is
switched off and unplugged.
Attaching the Side Handle (Fig. A)
WARNING! When using the tool, please use the side
handle (9) for your safety.
The side handle can be tted to suit both right-handed and
left-handled users.
Turn the grip counter-clockwise until you can slide the
side handle onto the front of the tool.
Rotate the side handle into the desired position.
Tighten the side handle by turning the grip clockwise.
WARNING! When using the tool, remember to install
the side handles properly.
Fitting an accessory (Fig. A)
Clean and grease the shank (11) of the accessory.
Insert the accessory bar into the tool clamp (7).
Push the accessory down and turn it slightly until it ts
into the slots.
Pull on the accessory to check if it is properly locked.
The hammering and drilling function requires the ac-
cessory to be able to move axially several centimetres
when locked in the tool clamp.
To remove the accessory, pull back the sleeve (6) and
pull out the accessory from the tool clamp.
Fitting an dust collector (Fig. F)
Insert the accessory bar (11) into dust collector (14),
then insert the accessory bar (11) with dust collector
into tool clamp (7).
Only using the unit upwardly is necessary to use the
dust collector like Fig. F.
USE
WARNING! Always wear glaves when you change acces-
sories. The exposed metal parts on the tool and accessory
may become extremely hot during operation.
Please operate tool with normal load. Do not overload. Do
not abuse the tool, please refer instruction manual to use
the tool correctly.
WARNING! Before drilling into walls, oors or ceilings,
check for the location of wiring and pipes.
Setting the drilling depth (Fig. A)
The depth stop is a convenient feature to ensure uniformity
in drilling depth. Loosen the side handle to adjust the depth
gauge according to the required depth. After that, tighten
the side handle.
Slacken the side handle (9) by turning the grip coun-
terclockwise.
Set the depth stop (8) to the required position. The
maximum drilling depth is equal to the distance
between the tip of the drill bit and the front end of the
depth stop.
Tighten the side handle by turning the grip clockwise.
Switching on and off (Fig. A)
WARNING! Before plugging in to the power source, make
sure the switch can be ipped freely, and can return to its
original position once released. Please check switch lock
on position before turn on and make sure switch lock off
before plugging in to the power source.
To switch the tool on, press the variable speed switch
(3). The tool speed depends on how far you press the
switch.
As a general rule, use low speeds for large diameter
drill bits and high speeds for smaller diameter drill bits.
For continuous operation, press the lock-on button (2)
and release the variable speed switch.
To switch the tool off, release the variable speed
switch. To switch the tool off when in continuous
operation, press the variable speed switch once more
and release it.
WARNING! When the user leaves, or pick up, transport,
manner and position the tool, make sure that tool is
switched off and unplugged.
Fitting drill chuck (Fig D) (SHR243, SHR263)
Optional accessory
Insert the drill chuck (12) into the tool clamp (7) ac-
cording to the instructions for installing attachments.
Turn the drill chuck to loosen the clamps at the front-
end of the drill-clamp, and insert the accessory bar
(13) into the clamps and turn the chuck in the opposite
direction.
You may also use the drill chuck key to tighten the
clamp.
Warning: Never use standard chucks in the
hammer-drilling mode
Replacing the SDS Plus Tool Holder with the
Keyless Chuck (Fig. G) (SHR264)
Turn the locking collar (15) into the unlocking position
and pull the SDS Plus Tool Holder (16) off.
Push the keyless chuck (17) onto the spindle and turn
ENGLISH (Original Instructions)
6
gauge according to the required depth. After that, tighten
the side handle.
♦Slacken the side handle (9) by turning the grip counter-
clockwise.
♦Set the depth stop (8) to the required position. The
maximum drilling depth is equal to the distance between
the tip of the drill bit and the front end of the depth stop.
♦Tighten the side handle by turning the grip clockwise.
Switching on and off
WARNING! Before plugging in to the power source, make
sure the switch can be flipped freely, and can return to its
original position once released. Please check switch lock on
position before turn on and make sure switch lock off before
plugging in to the power source.
♦To switch the tool on, press the variable speed switch
(3). The tool speed depends on how far you press the
switch.
♦As a general rule, use low speeds for large diameter
drill bits and high speeds for smaller diameter drill bits.
♦For continuous operation, press the lock-on button (2)
and release the variable speed switch.
♦To switch the tool off, release the variable speed switch.
To switch the tool off when in continuous operation,
press the variable speed switch once more and release
it.
WARNING! When the user leaves, or pick up, transport,
manner and position the tool, make sure that tool is
switched off and unplugged.
Fitting drill chuck (NQCC, Fig E)
Optional accessory
♦Insert the drill chuck (16) into the tool chuck (6)
according to the instructions for installing attachments.
♦Turn the drill chuck to loosen the clamps at the front-end
of the drill-clamp, and insert the accessory bar (17) into
the clamps and turn the chuck in the opposite direction.
♦You may also use the drill chuck key to tighten the
clamp.
Warning: Never use standard chucks in the
hammer-drilling mode
Replacing the SDS Plus Tool Holder with the
Keyless Chuck (QCC, Fig. D)
1. Turn the locking collar (5) into the unlocking position
and pull the SDS Plus Tool Holder (10) off.
2. Push the keyless chuck (12) onto the spindle and turn
the locking collar (5) to the locking position
To replace the keyless chuck with the SDS Plus tool holder,
first remove the keyless chuck the same way the tool holder
was removed. Then place the tool holder the same way the
keyless chuck was placed making sure to turn the locking
collar to the locking position.
Warning: Never use standard chucks in the
hammer-drilling mode
Selecting the Operating Mode (Fig. B)
The tool can be used in the following operating modes:
Rotary drilling: for screw driving and for drilling
into steel, wood and plastics
Hammer drilling: for concrete and masonry
drilling operations. Bit rotation: non-working
position used only to rotate a flat chisel into the
desired position
Hammering only: for light chipping, chiselling
and demolition applications. In this mode the tool
can also be used as a lever to free a jammed drill bit.
1. To select the operating mode, press the mode selector
button and rotate the mode selector switch (5) until it
points to the symbol of the required mode.
2. Release the mode selector button and check that the
mode selector switch is locked in place.
WARNING! Do not select the operating mode when
the tool is running.
Proper Hand Position (Fig. A, Fig. E)
WARNING! To reduce the risk of serious personal
injury, ALWAYS use proper hand position as shown.
WARNING! To reduce the risk of serious personal
injury, ALWAYS hold securely in anticipation of a
sudden reaction.
Proper hand position requires one hand on the side handle
(8), with the other hand on the main handle (14).
Rotary drilling (Fig. B, Fig. D, Fig. C1/C2)
♦For drilling in steel, wood and plastics, or for screw
driving set the operating mode selector (4) to the
position.
♦Depending on your tool, follow either of the following
instructions:
QCC: Replace the SDS Plus tool holder (12) with the
keyless chuck (14).
NQCC: Fit the drill chuck assembly.
♦insert the appropriate bits. When driving slotted head
screws always use bits with a finder sleeve.
♦For drilling in steel, wood and plastics, set the forward/
reverse lever(4) to the forward position(Fig C1). When
use for screw driver function, tighten screws set the
forward/reverse lever (4) to the forward position(Fig C1)
and loose screws set the forward/reverse lever (4) to
the reverse position(Fig C2).
WARNING! Never use drill chucks in the hammer drilling
mode.
Hammer drilling (Fig. B)
♦For hammer drilling in masonry and concrete, set the
operating mode selector (5) to the position.
♦The drill bit has to be placed accurately onto the drill
hole position. After that, pull the switch for optimal
effects. Make sure the tool is in the correct position to
prevent the drill from deviating from the hole.
♦When the drill hole is clogged with debris or fine powder,
please don’t exert any more pressure. Tool should be
put in free-running state before removing part of the drill
bit from the hole. If repeated a few times, the blockage
in the hole would be cleared, and normal drilling can
ENGLISH
8
the locking collar (15) to the locking position.
To replace the keyless chuck with the SDS Plus tool holder,
rst remove the keyless chuck the same way the tool
holder was removed. Then place the tool holder the same
way the keyless chuck was placed making sure to turn the
locking collar to the locking position.
Warning: Never use standard chucks in the
hammer-drilling mod
Selecting the Operating Mode (Fig. B)
The tool can be used in the following operating modes:
Rotary drilling: for screw driving and for
drilling into steel, wood and plastics
Hammer drilling: for concrete and masonry
drilling operations. Bit rotation: non-working
position used only to rotate a at chisel into
the desired position
Hammering only: for light chipping, chiselling
and demolition applications. In this mode
the tool can also be used as a lever to free a
jammed drill bit.
1. To select the operating mode, press the mode selector
button and rotate the mode selector switch (5) until it
points to the symbol of the required mode.
2. Release the mode selector button and check that the
mode selector switch is locked in place.
WARNING! Do not select the operating mode
when the tool is running.
Proper Hand Position (Fig. A, Fig. E)
WARNING! To reduce the risk of serious personal
injury, ALWAYS use proper hand position as
shown.
WARNING! To reduce the risk of serious personal
injury, ALWAYS hold securely in anticipation of a
sudden reaction.
Proper hand position requires one hand on the side handle
(9), with the other hand on the main handle (1).
Rotary drilling (Fig. B, Fig. C1/C2, Fig. D,
Fig. G )
For drilling in steel, wood and plastics, or for screw driving set
the operating mode selector (5) to the
ENGLISH (Original Instructions)
6
WARNING! Before drilling into walls, floors or ceilings,
check for the location of wiring and pipes.
Setting the drilling depth (FIG. A)
The depth stop is a convenient feature to ensure uniformity
in drilling depth. Loosen the side handle to adjust the depth
gauge according to the required depth. After that, tighten
the side handle.
♦Slacken the side handle (9) by turning the grip
counter-clockwise.
♦Set the depth stop (8) to the required position. The
maximum drilling depth is equal to the distance between
the tip of the drill bit and the front end of the depth stop.
♦Tighten the side handle by turning the grip clockwise.
Switching on and off (FIG. A)
WARNING! Before plugging in to the power source, make
sure the variable speed switch can be flipped freely, and
can return to its original position once released. Please
check switch lock on position before turn on and make sure
switch lock off before plugging in to the power source.
♦To switch the tool on, press the variable speed switch (3).
The tool speed depends on how far you press the switch.
♦As a general rule, use low speeds for large diameter
drill bits and high speeds for smaller diameter drill bits.
♦For continuous operation, press the lock-on button (2)
and release the variable speed switch.
♦To switch the tool off, release the variable speed switch.
To switch the tool off when in continuous operation, press
the variable speed switch once more and release it.
WARNING! When the user leaves, or pick up, transport,
manner and position the tool, make sure that tool is
switched off and unplugged.
Fitting drill chuck (NQCC, FIG. E)
Optional accessory
♦Insert the drill chuck (16) into the tool clamp (7)
according to the instructions for installing attachments.
♦Turn the drill chuck to loosen the clamps at the front-
end of the drill-clamp, and insert the drill bit (17) into
the clamps and turn the chuck in the opposite direction.
♦You may also use the drill chuck key to tighten the
clamp.
Warning: Never use standard chucks in the
hammer-drilling mode
Replacing the SDS Plus Tool Holder with the
Keyless Chuck (QCC, FIG. D)
1. Turn the locking collar (11) into the unlocking position
and pull the SDS Plus Tool Holder (12) off.
2. Push the keyless chuck (14) onto the spindle and turn
the locking collar (11) to the locking position
To replace the keyless chuck with the SDS Plus tool holder,
first remove the keyless chuck the same way the tool holder
was removed. Then place the tool holder the same way the
keyless chuck was placed making sure to turn the locking
collar to the locking position.
Warning: Never use standard chucks in the
hammer-drilling mode
Selecting the Operating Mode (FIG. B)
The tool can be used in the following operating modes:
Rotary drilling: for screw driving and for drilling
into steel, wood and plastics
Hammer drilling: for concrete and masonry
drilling operations. Bit rotation: non-working
position used only to rotate a flat chisel into the
desired position
Hammering only: for light chipping, chiselling and
demolition applications. In this mode the tool can
also be used as a lever to free a jammed drill bit.
1. To select the operating mode, press the mode selector
button and rotate the mode selector switch (5) until it
points to the symbol of the required mode.
2. Release the mode selector button and check that the
mode selector switch is locked in place.
WARNING! Do not select the operating mode when
the tool is running.
Proper Hand Position (FIG. A, FIG. F)
WARNING! To reduce the risk of serious personal
injury, ALWAYS use proper hand position as shown.
WARNING! To reduce the risk of serious personal
injury, ALWAYS hold securely in anticipation of a
sudden reaction.
Proper hand position requires one hand on the side handle
(9), with the other hand on the main handle (1).
Rotary drilling (FIG. B, FIG. D, FIG. C1/C2)
♦For drilling in steel, wood and plastics, or for screw
driving set the operating mode selector (5) to the
position.
♦Depending on your tool, follow either of the following
instructions:
QCC: Replace the SDS Plus tool holder (12) with the
keyless chuck (14).
NQCC: Fit the drill chuck assembly.
♦Insert the appropriate bits. When driving slotted head
screws always use bits with a finder sleeve.
♦For drilling in steel, wood and plastics, set the forward/
reverse lever(4) to the forward position(Fig C1). When
use for screw driver function, tighten screws set the
forward/reverse lever (4) to the forward position(Fig C1)
and loose screws set the forward/reverse lever (4) to
the reverse position(Fig C2).
WARNING! Never use drill chucks in the hammer drilling
mode.
Hammer drilling (FIG. B)
♦For hammer drilling in masonry and concrete, set the
operating mode selector (5) to the position.
♦The drill bit has to be placed accurately onto the drill
hole position. After that, pull the switch for optimal
effects. Make sure the tool is in the correct position to
prevent the drill from deviating from the hole.
♦When the drill hole is clogged with debris or fine powder,
please don’t exert any more pressure. Tool should be
put in free-running state before removing part of the drill
position.
Fit the drill chuck assembly. Depending on your tool, follow
either of the following instructions:
SHR264: Replace the SDS Plus tool holder (16) with
the keyless chuck (17).
SHR243/SHR263:Fit the drill chuck assembly (12).
Insert the appropriate bits. When driving slotted head screws
ENGLISH (Original Instructions)
6
gauge according to the required depth. After that, tighten
the side handle.
♦Slacken the side handle (9) by turning the grip counter-
clockwise.
♦Set the depth stop (8) to the required position. The
maximum drilling depth is equal to the distance between
the tip of the drill bit and the front end of the depth stop.
♦Tighten the side handle by turning the grip clockwise.
Switching on and off
WARNING! Before plugging in to the power source, make
sure the switch can be flipped freely, and can return to its
original position once released. Please check switch lock on
position before turn on and make sure switch lock off before
plugging in to the power source.
♦To switch the tool on, press the variable speed switch
(3). The tool speed depends on how far you press the
switch.
♦As a general rule, use low speeds for large diameter
drill bits and high speeds for smaller diameter drill bits.
♦For continuous operation, press the lock-on button (2)
and release the variable speed switch.
♦To switch the tool off, release the variable speed switch.
To switch the tool off when in continuous operation,
press the variable speed switch once more and release
it.
WARNING! When the user leaves, or pick up, transport,
manner and position the tool, make sure that tool is
switched off and unplugged.
Fitting drill chuck (NQCC, Fig E)
Optional accessory
♦Insert the drill chuck (16) into the tool chuck (6)
according to the instructions for installing attachments.
♦Turn the drill chuck to loosen the clamps at the front-end
of the drill-clamp, and insert the accessory bar (17) into
the clamps and turn the chuck in the opposite direction.
♦You may also use the drill chuck key to tighten the
clamp.
Warning: Never use standard chucks in the
hammer-drilling mode
Replacing the SDS Plus Tool Holder with the
Keyless Chuck (QCC, Fig. D)
1. Turn the locking collar (5) into the unlocking position
and pull the SDS Plus Tool Holder (10) off.
2. Push the keyless chuck (12) onto the spindle and turn
the locking collar (5) to the locking position
To replace the keyless chuck with the SDS Plus tool holder,
first remove the keyless chuck the same way the tool holder
was removed. Then place the tool holder the same way the
keyless chuck was placed making sure to turn the locking
collar to the locking position.
Warning: Never use standard chucks in the
hammer-drilling mode
Selecting the Operating Mode (Fig. B)
The tool can be used in the following operating modes:
Rotary drilling: for screw driving and for drilling
into steel, wood and plastics
Hammer drilling: for concrete and masonry
drilling operations. Bit rotation: non-working
position used only to rotate a flat chisel into the
desired position
Hammering only: for light chipping, chiselling
and demolition applications. In this mode the tool
can also be used as a lever to free a jammed drill bit.
1. To select the operating mode, press the mode selector
button and rotate the mode selector switch (5) until it
points to the symbol of the required mode.
2. Release the mode selector button and check that the
mode selector switch is locked in place.
WARNING! Do not select the operating mode when
the tool is running.
Proper Hand Position (Fig. A, Fig. E)
WARNING! To reduce the risk of serious personal
injury, ALWAYS use proper hand position as shown.
WARNING! To reduce the risk of serious personal
injury, ALWAYS hold securely in anticipation of a
sudden reaction.
Proper hand position requires one hand on the side handle
(8), with the other hand on the main handle (14).
Rotary drilling (Fig. B, Fig. D, Fig. C1/C2)
♦For drilling in steel, wood and plastics, or for screw
driving set the operating mode selector (4) to the
position.
♦Depending on your tool, follow either of the following
instructions:
QCC: Replace the SDS Plus tool holder (12) with the
keyless chuck (14).
NQCC: Fit the drill chuck assembly.
♦insert the appropriate bits. When driving slotted head
screws always use bits with a finder sleeve.
♦For drilling in steel, wood and plastics, set the forward/
reverse lever(4) to the forward position(Fig C1). When
use for screw driver function, tighten screws set the
forward/reverse lever (4) to the forward position(Fig C1)
and loose screws set the forward/reverse lever (4) to
the reverse position(Fig C2).
WARNING! Never use drill chucks in the hammer drilling
mode.
Hammer drilling (Fig. B)
♦For hammer drilling in masonry and concrete, set the
operating mode selector (5) to the position.
♦The drill bit has to be placed accurately onto the drill
hole position. After that, pull the switch for optimal
effects. Make sure the tool is in the correct position to
prevent the drill from deviating from the hole.
♦When the drill hole is clogged with debris or fine powder,
please don’t exert any more pressure. Tool should be
put in free-running state before removing part of the drill
bit from the hole. If repeated a few times, the blockage
in the hole would be cleared, and normal drilling can
always use bits with a nder sleeve.
For drilling in steel, wood and plastics, set the forward/ re-
verse lever (4) to the forward position(Fig C1). When use for
screw driver function, tighten screws set the forward/reverse
lever (4) to the forward position(Fig C1) and loose screws set
the forward/reverse lever (4) to the reverse position(Fig C2).
WARNING! Never use drill chucks in the hammer drilling
mode.
Hammer drilling (Fig. B)
For hammer drilling in masonry and concrete, set the
operating mode selector (5) to the
ENGLISH (Original Instructions)
6
WARNING! Before drilling into walls, floors or ceilings,
check for the location of wiring and pipes.
Setting the drilling depth (FIG. A)
The depth stop is a convenient feature to ensure uniformity
in drilling depth. Loosen the side handle to adjust the depth
gauge according to the required depth. After that, tighten
the side handle.
♦Slacken the side handle (9) by turning the grip
counter-clockwise.
♦Set the depth stop (8) to the required position. The
maximum drilling depth is equal to the distance between
the tip of the drill bit and the front end of the depth stop.
♦Tighten the side handle by turning the grip clockwise.
Switching on and off (FIG. A)
WARNING! Before plugging in to the power source, make
sure the variable speed switch can be flipped freely, and
can return to its original position once released. Please
check switch lock on position before turn on and make sure
switch lock off before plugging in to the power source.
♦To switch the tool on, press the variable speed switch (3).
The tool speed depends on how far you press the switch.
♦As a general rule, use low speeds for large diameter
drill bits and high speeds for smaller diameter drill bits.
♦For continuous operation, press the lock-on button (2)
and release the variable speed switch.
♦To switch the tool off, release the variable speed switch.
To switch the tool off when in continuous operation, press
the variable speed switch once more and release it.
WARNING! When the user leaves, or pick up, transport,
manner and position the tool, make sure that tool is
switched off and unplugged.
Fitting drill chuck (NQCC, FIG. E)
Optional accessory
♦Insert the drill chuck (16) into the tool clamp (7)
according to the instructions for installing attachments.
♦Turn the drill chuck to loosen the clamps at the front-
end of the drill-clamp, and insert the drill bit (17) into
the clamps and turn the chuck in the opposite direction.
♦You may also use the drill chuck key to tighten the
clamp.
Warning: Never use standard chucks in the
hammer-drilling mode
Replacing the SDS Plus Tool Holder with the
Keyless Chuck (QCC, FIG. D)
1. Turn the locking collar (11) into the unlocking position
and pull the SDS Plus Tool Holder (12) off.
2. Push the keyless chuck (14) onto the spindle and turn
the locking collar (11) to the locking position
To replace the keyless chuck with the SDS Plus tool holder,
first remove the keyless chuck the same way the tool holder
was removed. Then place the tool holder the same way the
keyless chuck was placed making sure to turn the locking
collar to the locking position.
Warning: Never use standard chucks in the
hammer-drilling mode
Selecting the Operating Mode (FIG. B)
The tool can be used in the following operating modes:
Rotary drilling: for screw driving and for drilling
into steel, wood and plastics
Hammer drilling: for concrete and masonry
drilling operations. Bit rotation: non-working
position used only to rotate a flat chisel into the
desired position
Hammering only: for light chipping, chiselling and
demolition applications. In this mode the tool can
also be used as a lever to free a jammed drill bit.
1. To select the operating mode, press the mode selector
button and rotate the mode selector switch (5) until it
points to the symbol of the required mode.
2. Release the mode selector button and check that the
mode selector switch is locked in place.
WARNING! Do not select the operating mode when
the tool is running.
Proper Hand Position (FIG. A, FIG. F)
WARNING! To reduce the risk of serious personal
injury, ALWAYS use proper hand position as shown.
WARNING! To reduce the risk of serious personal
injury, ALWAYS hold securely in anticipation of a
sudden reaction.
Proper hand position requires one hand on the side handle
(9), with the other hand on the main handle (1).
Rotary drilling (FIG. B, FIG. D, FIG. C1/C2)
♦For drilling in steel, wood and plastics, or for screw
driving set the operating mode selector (5) to the
position.
♦Depending on your tool, follow either of the following
instructions:
QCC: Replace the SDS Plus tool holder (12) with the
keyless chuck (14).
NQCC: Fit the drill chuck assembly.
♦Insert the appropriate bits. When driving slotted head
screws always use bits with a finder sleeve.
♦For drilling in steel, wood and plastics, set the forward/
reverse lever(4) to the forward position(Fig C1). When
use for screw driver function, tighten screws set the
forward/reverse lever (4) to the forward position(Fig C1)
and loose screws set the forward/reverse lever (4) to
the reverse position(Fig C2).
WARNING! Never use drill chucks in the hammer drilling
mode.
Hammer drilling (FIG. B)
♦For hammer drilling in masonry and concrete, set the
operating mode selector (5) to the position.
♦The drill bit has to be placed accurately onto the drill
hole position. After that, pull the switch for optimal
effects. Make sure the tool is in the correct position to
prevent the drill from deviating from the hole.
♦When the drill hole is clogged with debris or fine powder,
please don’t exert any more pressure. Tool should be
put in free-running state before removing part of the drill
position.
The drill bit has to be placed accurately onto the drill
hole position. After that, pull the switch for optimal
effects. Make sure the tool is in the correct position to
prevent the drill from deviating from the hole.
When the drill hole is clogged with debris or ne pow-
der, please don’t exert any more pressure. Tool should
be put in free-running state before removing part of
the drill bit from the hole. If repeated a few times, the
blockage in the hole would be cleared, and normal
drilling can resume.
WARNING! When the drill bit hits cement or the steel rebar
in the cement, the tool may recoil dangerously. Please hold
the tool tightly in a balanced and stable position at all times
to prevent it from recoiling dangerously.
Overload coupling device
If the drill bit is caught or hooked, the driving force trans-
mitted to the drill shaft will be cut off. This would generate
a strong recoil, so it would be necessary to hold the tool
tightly with both hands to remain in a stable position.
Chipping and chiselling (FIG.B)
Set the mode selector switch (5) to the “hammering
only”
ENGLISH (Original Instructions)
6
gauge according to the required depth. After that, tighten
the side handle.
♦Slacken the side handle (9) by turning the grip counter-
clockwise.
♦Set the depth stop (8) to the required position. The
maximum drilling depth is equal to the distance between
the tip of the drill bit and the front end of the depth stop.
♦Tighten the side handle by turning the grip clockwise.
Switching on and off
WARNING! Before plugging in to the power source, make
sure the switch can be flipped freely, and can return to its
original position once released. Please check switch lock on
position before turn on and make sure switch lock off before
plugging in to the power source.
♦To switch the tool on, press the variable speed switch
(3). The tool speed depends on how far you press the
switch.
♦As a general rule, use low speeds for large diameter
drill bits and high speeds for smaller diameter drill bits.
♦For continuous operation, press the lock-on button (2)
and release the variable speed switch.
♦To switch the tool off, release the variable speed switch.
To switch the tool off when in continuous operation,
press the variable speed switch once more and release
it.
WARNING! When the user leaves, or pick up, transport,
manner and position the tool, make sure that tool is
switched off and unplugged.
Fitting drill chuck (NQCC, Fig E)
Optional accessory
♦Insert the drill chuck (16) into the tool chuck (6)
according to the instructions for installing attachments.
♦Turn the drill chuck to loosen the clamps at the front-end
of the drill-clamp, and insert the accessory bar (17) into
the clamps and turn the chuck in the opposite direction.
♦You may also use the drill chuck key to tighten the
clamp.
Warning: Never use standard chucks in the
hammer-drilling mode
Replacing the SDS Plus Tool Holder with the
Keyless Chuck (QCC, Fig. D)
1. Turn the locking collar (5) into the unlocking position
and pull the SDS Plus Tool Holder (10) off.
2. Push the keyless chuck (12) onto the spindle and turn
the locking collar (5) to the locking position
To replace the keyless chuck with the SDS Plus tool holder,
first remove the keyless chuck the same way the tool holder
was removed. Then place the tool holder the same way the
keyless chuck was placed making sure to turn the locking
collar to the locking position.
Warning: Never use standard chucks in the
hammer-drilling mode
Selecting the Operating Mode (Fig. B)
The tool can be used in the following operating modes:
Rotary drilling: for screw driving and for drilling
into steel, wood and plastics
Hammer drilling: for concrete and masonry
drilling operations. Bit rotation: non-working
position used only to rotate a flat chisel into the
desired position
Hammering only: for light chipping, chiselling
and demolition applications. In this mode the tool
can also be used as a lever to free a jammed drill bit.
1. To select the operating mode, press the mode selector
button and rotate the mode selector switch (5) until it
points to the symbol of the required mode.
2. Release the mode selector button and check that the
mode selector switch is locked in place.
WARNING! Do not select the operating mode when
the tool is running.
Proper Hand Position (Fig. A, Fig. E)
WARNING! To reduce the risk of serious personal
injury, ALWAYS use proper hand position as shown.
WARNING! To reduce the risk of serious personal
injury, ALWAYS hold securely in anticipation of a
sudden reaction.
Proper hand position requires one hand on the side handle
(8), with the other hand on the main handle (14).
Rotary drilling (Fig. B, Fig. D, Fig. C1/C2)
♦For drilling in steel, wood and plastics, or for screw
driving set the operating mode selector (4) to the
position.
♦Depending on your tool, follow either of the following
instructions:
QCC: Replace the SDS Plus tool holder (12) with the
keyless chuck (14).
NQCC: Fit the drill chuck assembly.
♦insert the appropriate bits. When driving slotted head
screws always use bits with a finder sleeve.
♦For drilling in steel, wood and plastics, set the forward/
reverse lever(4) to the forward position(Fig C1). When
use for screw driver function, tighten screws set the
forward/reverse lever (4) to the forward position(Fig C1)
and loose screws set the forward/reverse lever (4) to
the reverse position(Fig C2).
WARNING! Never use drill chucks in the hammer drilling
mode.
Hammer drilling (Fig. B)
♦For hammer drilling in masonry and concrete, set the
operating mode selector (5) to the position.
♦The drill bit has to be placed accurately onto the drill
hole position. After that, pull the switch for optimal
effects. Make sure the tool is in the correct position to
prevent the drill from deviating from the hole.
♦When the drill hole is clogged with debris or fine powder,
please don’t exert any more pressure. Tool should be
put in free-running state before removing part of the drill
bit from the hole. If repeated a few times, the blockage
in the hole would be cleared, and normal drilling can
position.
Insert the appropriate chisel and rotate it by hand to
lock it into positions.
Adjust the side handle (9) as required.
Switch on the tool and start working.
Always switch off the tool when work is nished and
before unplugging.
WARNING! Do not use this tool to mix or pump
easily combustible or explosive uids (benzine,
alcohol, etc.). Do not mix or stir inammable
liquids labelled accordingly.
Accessories
The performance of your tool depends on the accessory used.
7
ENGLISH (Original Instructions)
resume.
WARNING! When the drill bit hits cement or the steel rebar
in the cement, the tool may recoil dangerously. Please hold
the tool tightly in a balanced and stable position at all times
to prevent it from recoiling dangerously.
Overload coupling device
If the drill bit is caught or hooked, the driving force
transmitted to the drill shaft will be cut off. This would
generate a strong recoil, so it would be necessary to hold
the tool tightly with both hands to remain in a stable position.
Chipping and chiselling (fig. B)
♦Set the mode selector switch (5) to the“hammering only”
position.
♦Insert the appropriate chisel and rotate it by hand to lock
it into positions.
♦Adjust the side handle (9) as required.
♦Switch on the tool and start working.
♦Always switch off the tool when work is finished and
before unplugging.
WARNING! Do not use this tool to mix or pump
easily combustible or explosive fluids (benzine,
alcohol, etc.). Do not mix or stir inflammable liquids
labelled accordingly.
Accessories
The performance of your tool depends on the accessory
used. Stanley accessories are engineered to high quality
standards and designed to enhance the performance of
your tool. By using these accessories you will get the very
best from your tool.
MAINTENANCE
Your Stanley corded/cordless appliance/tool has been
designed to operate over a long period of time with a
minimum of maintenance. To ensure satisfactory operations,
the tool must be maintained and cleaned regularly
WARNING: To reduce the risk of injury, turn
unit off and disconnect machine from power
source before installing and removing accessories,
before adjusting or changing set-ups or when making
repairs. Be sure the trigger switch is in the OFF position.
An accidental start-up can cause injury.
♦This machine is not user-serviceable. If problems occur
contact an authorised repair agent.
♦The tool will automatically switch off when the carbon
brushes are worn.
WARNING! Before performing any maintenance on corded/
cordless power tools:
♦Switch off and unplug the appliance/tool.
♦Or switch off and remove the battery from the appliance/
tool if the appliance/tool has a separate battery pack.
♦Or run the battery down completely if it is integral and
then switch off.
♦Unplug the charger before cleaning it. Your charger
does not require any maintenance apart from regular
cleaning.
♦Regularly clean the ventilation slots in your appliance/
tool/ charger using a soft brush or dry cloth.
♦Regularly clean the motor housing using a damp cloth.
Do not use any abrasive or solvent-based cleaner.
♦Regularly open the chuck and tap it to remove any dust
from the interior (when fitted).
Lubrication
Your power tool requires no additional lubrication.
Accessories and attachments used must be
regularly lubrication around the SDS Plus fitment.
Cleaning
WARNING! Blow dirt and dust out of the
main housing with dry air as often as dirt is
seen collecting in and around the air vents.
Wear approved eye protection and approved dust
mask when performing this procedure.
WARNING! Never use solvents or other
harsh chemicals for cleaning the non-
metallic parts of the tool. These chemicals may
weaken the material of the parts. Use only mild
soap and damp cloth to clean the tool. Never let any
liquid get inside the tool,cleaning of gasoline or
other chemicals, never immerse any part of the tool
into liquid.
Optional Accessories
WARNING! Since accessories, other than those
offered by Stanley, have not been tested with this
product, use of such accessories with this tool could be
hazardous. To reduce the risk of injury, only Stanley,
recommended accessories should be used with this
product.
Various types of SDS Plus drill bits and chisels are available
as an option.
Consult your dealer for further information on the
appropriate accessories.
Protecting The Environment
Separate collection. This product must not be
disposed of with normal household waste.
Should you find one day that your Stanley product
needs replacement, or if it is of no further use to you, do
not dispose of it with household waste. Please sort it out for
separate recycling.
Separate collection of used products and packaging
allows materials to be recycled and used again. Re-
use of recycled materials helps prevent environmental
pollution and reduces the demand for raw materials.
Some local governments may require the local or municipal
waste disposal centers or retailers of new products to
provide households with electronic product recycling
services.
Notes
STANLEY’s policy is one of continuous improvement to
our products and as such, we reserve the right to change
product specifications without prior notice.
Standard equipment and accessories may vary by country.
ENGLISH
9
Stanley accessories are engineered to high quality standards
and designed to enhance the performance of your tool. By us-
ing these accessories you will get the very best from your tool.
MAINTENANCE
Your Stanley corded/cordless appliance/tool has been
designed to operate over a long period of time with a min-
imum of maintenance. To ensure satisfactory operations,
the tool must be maintained and cleaned regularly
ENGLISH (Original Instructions)
6
gauge according to the required depth. After that, tighten
the side handle.
♦Slacken the side handle (9) by turning the grip counter-
clockwise.
♦Set the depth stop (8) to the required position. The
maximum drilling depth is equal to the distance between
the tip of the drill bit and the front end of the depth stop.
♦Tighten the side handle by turning the grip clockwise.
Switching on and off
WARNING! Before plugging in to the power source, make
sure the switch can be flipped freely, and can return to its
original position once released. Please check switch lock on
position before turn on and make sure switch lock off before
plugging in to the power source.
♦To switch the tool on, press the variable speed switch
(3). The tool speed depends on how far you press the
switch.
♦As a general rule, use low speeds for large diameter
drill bits and high speeds for smaller diameter drill bits.
♦For continuous operation, press the lock-on button (2)
and release the variable speed switch.
♦To switch the tool off, release the variable speed switch.
To switch the tool off when in continuous operation,
press the variable speed switch once more and release
it.
WARNING! When the user leaves, or pick up, transport,
manner and position the tool, make sure that tool is
switched off and unplugged.
Fitting drill chuck (NQCC, Fig E)
Optional accessory
♦Insert the drill chuck (16) into the tool chuck (6)
according to the instructions for installing attachments.
♦Turn the drill chuck to loosen the clamps at the front-end
of the drill-clamp, and insert the accessory bar (17) into
the clamps and turn the chuck in the opposite direction.
♦You may also use the drill chuck key to tighten the
clamp.
Warning: Never use standard chucks in the
hammer-drilling mode
Replacing the SDS Plus Tool Holder with the
Keyless Chuck (QCC, Fig. D)
1. Turn the locking collar (5) into the unlocking position
and pull the SDS Plus Tool Holder (10) off.
2. Push the keyless chuck (12) onto the spindle and turn
the locking collar (5) to the locking position
To replace the keyless chuck with the SDS Plus tool holder,
first remove the keyless chuck the same way the tool holder
was removed. Then place the tool holder the same way the
keyless chuck was placed making sure to turn the locking
collar to the locking position.
Warning: Never use standard chucks in the
hammer-drilling mode
Selecting the Operating Mode (Fig. B)
The tool can be used in the following operating modes:
Rotary drilling: for screw driving and for drilling
into steel, wood and plastics
Hammer drilling: for concrete and masonry
drilling operations. Bit rotation: non-working
position used only to rotate a flat chisel into the
desired position
Hammering only: for light chipping, chiselling
and demolition applications. In this mode the tool
can also be used as a lever to free a jammed drill bit.
1. To select the operating mode, press the mode selector
button and rotate the mode selector switch (5) until it
points to the symbol of the required mode.
2. Release the mode selector button and check that the
mode selector switch is locked in place.
WARNING! Do not select the operating mode when
the tool is running.
Proper Hand Position (Fig. A, Fig. E)
WARNING! To reduce the risk of serious personal
injury, ALWAYS use proper hand position as shown.
WARNING! To reduce the risk of serious personal
injury, ALWAYS hold securely in anticipation of a
sudden reaction.
Proper hand position requires one hand on the side handle
(8), with the other hand on the main handle (14).
Rotary drilling (Fig. B, Fig. D, Fig. C1/C2)
♦For drilling in steel, wood and plastics, or for screw
driving set the operating mode selector (4) to the
position.
♦Depending on your tool, follow either of the following
instructions:
QCC: Replace the SDS Plus tool holder (12) with the
keyless chuck (14).
NQCC: Fit the drill chuck assembly.
♦insert the appropriate bits. When driving slotted head
screws always use bits with a finder sleeve.
♦For drilling in steel, wood and plastics, set the forward/
reverse lever(4) to the forward position(Fig C1). When
use for screw driver function, tighten screws set the
forward/reverse lever (4) to the forward position(Fig C1)
and loose screws set the forward/reverse lever (4) to
the reverse position(Fig C2).
WARNING! Never use drill chucks in the hammer drilling
mode.
Hammer drilling (Fig. B)
♦For hammer drilling in masonry and concrete, set the
operating mode selector (5) to the position.
♦The drill bit has to be placed accurately onto the drill
hole position. After that, pull the switch for optimal
effects. Make sure the tool is in the correct position to
prevent the drill from deviating from the hole.
♦When the drill hole is clogged with debris or fine powder,
please don’t exert any more pressure. Tool should be
put in free-running state before removing part of the drill
bit from the hole. If repeated a few times, the blockage
in the hole would be cleared, and normal drilling can
WARNING: To reduce the risk of injury, turn unit
off and disconnect machine from power source
before installing and removing accessories,
before adjusting or changing set-ups or when making
repairs. Be sure the trigger switch is in the OFF position.
An accidental start-up can cause injury.
This machine is not user-serviceable. If problems
occur contact an authorised repair agent.
The tool will automatically switch off when the carbon
brushes are worn.
WARNING! Before performing any maintenance on corded/
cordless power tools:
Switch off and unplug the appliance/tool.
Or switch off and remove the battery from the appli-
ance/ tool if the appliance/tool has a separate battery
pack.
Or run the battery down completely if it is integral and
then switch off.
Unplug the charger before cleaning it. Your charger
does not require any maintenance apart from regular
cleaning.
Regularly clean the ventilation slots in your appliance/
tool/ charger using a soft brush or dry cloth.
Regularly clean the motor housing using a damp cloth.
Do not use any abrasive or solvent-based cleaner.
Regularly open the chuck and tap it to remove any
dust from the interior (when tted).
Lubrication
Your power tool requires no additional lubrication.
Accessories and attachments used must be regu-
larly lubrication around the SDS Plus tment.
Cleaning
ENGLISH (Original Instructions)
6
gauge according to the required depth. After that, tighten
the side handle.
♦Slacken the side handle (9) by turning the grip counter-
clockwise.
♦Set the depth stop (8) to the required position. The
maximum drilling depth is equal to the distance between
the tip of the drill bit and the front end of the depth stop.
♦Tighten the side handle by turning the grip clockwise.
Switching on and off
WARNING! Before plugging in to the power source, make
sure the switch can be flipped freely, and can return to its
original position once released. Please check switch lock on
position before turn on and make sure switch lock off before
plugging in to the power source.
♦To switch the tool on, press the variable speed switch
(3). The tool speed depends on how far you press the
switch.
♦As a general rule, use low speeds for large diameter
drill bits and high speeds for smaller diameter drill bits.
♦For continuous operation, press the lock-on button (2)
and release the variable speed switch.
♦To switch the tool off, release the variable speed switch.
To switch the tool off when in continuous operation,
press the variable speed switch once more and release
it.
WARNING! When the user leaves, or pick up, transport,
manner and position the tool, make sure that tool is
switched off and unplugged.
Fitting drill chuck (NQCC, Fig E)
Optional accessory
♦Insert the drill chuck (16) into the tool chuck (6)
according to the instructions for installing attachments.
♦Turn the drill chuck to loosen the clamps at the front-end
of the drill-clamp, and insert the accessory bar (17) into
the clamps and turn the chuck in the opposite direction.
♦You may also use the drill chuck key to tighten the
clamp.
Warning: Never use standard chucks in the
hammer-drilling mode
Replacing the SDS Plus Tool Holder with the
Keyless Chuck (QCC, Fig. D)
1. Turn the locking collar (5) into the unlocking position
and pull the SDS Plus Tool Holder (10) off.
2. Push the keyless chuck (12) onto the spindle and turn
the locking collar (5) to the locking position
To replace the keyless chuck with the SDS Plus tool holder,
first remove the keyless chuck the same way the tool holder
was removed. Then place the tool holder the same way the
keyless chuck was placed making sure to turn the locking
collar to the locking position.
Warning: Never use standard chucks in the
hammer-drilling mode
Selecting the Operating Mode (Fig. B)
The tool can be used in the following operating modes:
Rotary drilling: for screw driving and for drilling
into steel, wood and plastics
Hammer drilling: for concrete and masonry
drilling operations. Bit rotation: non-working
position used only to rotate a flat chisel into the
desired position
Hammering only: for light chipping, chiselling
and demolition applications. In this mode the tool
can also be used as a lever to free a jammed drill bit.
1. To select the operating mode, press the mode selector
button and rotate the mode selector switch (5) until it
points to the symbol of the required mode.
2. Release the mode selector button and check that the
mode selector switch is locked in place.
WARNING! Do not select the operating mode when
the tool is running.
Proper Hand Position (Fig. A, Fig. E)
WARNING! To reduce the risk of serious personal
injury, ALWAYS use proper hand position as shown.
WARNING! To reduce the risk of serious personal
injury, ALWAYS hold securely in anticipation of a
sudden reaction.
Proper hand position requires one hand on the side handle
(8), with the other hand on the main handle (14).
Rotary drilling (Fig. B, Fig. D, Fig. C1/C2)
♦For drilling in steel, wood and plastics, or for screw
driving set the operating mode selector (4) to the
position.
♦Depending on your tool, follow either of the following
instructions:
QCC: Replace the SDS Plus tool holder (12) with the
keyless chuck (14).
NQCC: Fit the drill chuck assembly.
♦insert the appropriate bits. When driving slotted head
screws always use bits with a finder sleeve.
♦For drilling in steel, wood and plastics, set the forward/
reverse lever(4) to the forward position(Fig C1). When
use for screw driver function, tighten screws set the
forward/reverse lever (4) to the forward position(Fig C1)
and loose screws set the forward/reverse lever (4) to
the reverse position(Fig C2).
WARNING! Never use drill chucks in the hammer drilling
mode.
Hammer drilling (Fig. B)
♦For hammer drilling in masonry and concrete, set the
operating mode selector (5) to the position.
♦The drill bit has to be placed accurately onto the drill
hole position. After that, pull the switch for optimal
effects. Make sure the tool is in the correct position to
prevent the drill from deviating from the hole.
♦When the drill hole is clogged with debris or fine powder,
please don’t exert any more pressure. Tool should be
put in free-running state before removing part of the drill
bit from the hole. If repeated a few times, the blockage
in the hole would be cleared, and normal drilling can
WARNING! Blow dirt and dust out of the main
housing with dry air as often as dirt is seen
collecting in and around the air vents.
7
ENGLISH (Original Instructions)
resume.
WARNING! When the drill bit hits cement or the steel rebar
in the cement, the tool may recoil dangerously. Please hold
the tool tightly in a balanced and stable position at all times
to prevent it from recoiling dangerously.
Overload coupling device
If the drill bit is caught or hooked, the driving force
transmitted to the drill shaft will be cut off. This would
generate a strong recoil, so it would be necessary to hold
the tool tightly with both hands to remain in a stable position.
Chipping and chiselling (fig. B)
♦Set the mode selector switch (5) to the“hammering only”
position.
♦Insert the appropriate chisel and rotate it by hand to lock
it into positions.
♦Adjust the side handle (9) as required.
♦Switch on the tool and start working.
♦Always switch off the tool when work is finished and
before unplugging.
WARNING! Do not use this tool to mix or pump
easily combustible or explosive fluids (benzine,
alcohol, etc.). Do not mix or stir inflammable liquids
labelled accordingly.
Accessories
The performance of your tool depends on the accessory
used. Stanley accessories are engineered to high quality
standards and designed to enhance the performance of
your tool. By using these accessories you will get the very
best from your tool.
MAINTENANCE
Your Stanley corded/cordless appliance/tool has been
designed to operate over a long period of time with a
minimum of maintenance. To ensure satisfactory operations,
the tool must be maintained and cleaned regularly
WARNING: To reduce the risk of injury, turn
unit off and disconnect machine from power
source before installing and removing accessories,
before adjusting or changing set-ups or when making
repairs. Be sure the trigger switch is in the OFF position.
An accidental start-up can cause injury.
♦This machine is not user-serviceable. If problems occur
contact an authorised repair agent.
♦The tool will automatically switch off when the carbon
brushes are worn.
WARNING! Before performing any maintenance on corded/
cordless power tools:
♦Switch off and unplug the appliance/tool.
♦Or switch off and remove the battery from the appliance/
tool if the appliance/tool has a separate battery pack.
♦Or run the battery down completely if it is integral and
then switch off.
♦Unplug the charger before cleaning it. Your charger
does not require any maintenance apart from regular
cleaning.
♦Regularly clean the ventilation slots in your appliance/
tool/ charger using a soft brush or dry cloth.
♦Regularly clean the motor housing using a damp cloth.
Do not use any abrasive or solvent-based cleaner.
♦Regularly open the chuck and tap it to remove any dust
from the interior (when fitted).
Lubrication
Your power tool requires no additional lubrication.
Accessories and attachments used must be
regularly lubrication around the SDS Plus fitment.
Cleaning
WARNING! Blow dirt and dust out of the
main housing with dry air as often as dirt is
seen collecting in and around the air vents.
Wear approved eye protection and approved dust
mask when performing this procedure.
WARNING! Never use solvents or other
harsh chemicals for cleaning the non-
metallic parts of the tool. These chemicals may
weaken the material of the parts. Use only mild
soap and damp cloth to clean the tool. Never let any
liquid get inside the tool,cleaning of gasoline or
other chemicals, never immerse any part of the tool
into liquid.
Optional Accessories
WARNING! Since accessories, other than those
offered by Stanley, have not been tested with this
product, use of such accessories with this tool could be
hazardous. To reduce the risk of injury, only Stanley,
recommended accessories should be used with this
product.
Various types of SDS Plus drill bits and chisels are available
as an option.
Consult your dealer for further information on the
appropriate accessories.
Protecting The Environment
Separate collection. This product must not be
disposed of with normal household waste.
Should you find one day that your Stanley product
needs replacement, or if it is of no further use to you, do
not dispose of it with household waste. Please sort it out for
separate recycling.
Separate collection of used products and packaging
allows materials to be recycled and used again. Re-
use of recycled materials helps prevent environmental
pollution and reduces the demand for raw materials.
Some local governments may require the local or municipal
waste disposal centers or retailers of new products to
provide households with electronic product recycling
services.
Notes
STANLEY’s policy is one of continuous improvement to
our products and as such, we reserve the right to change
product specifications without prior notice.
Standard equipment and accessories may vary by country.
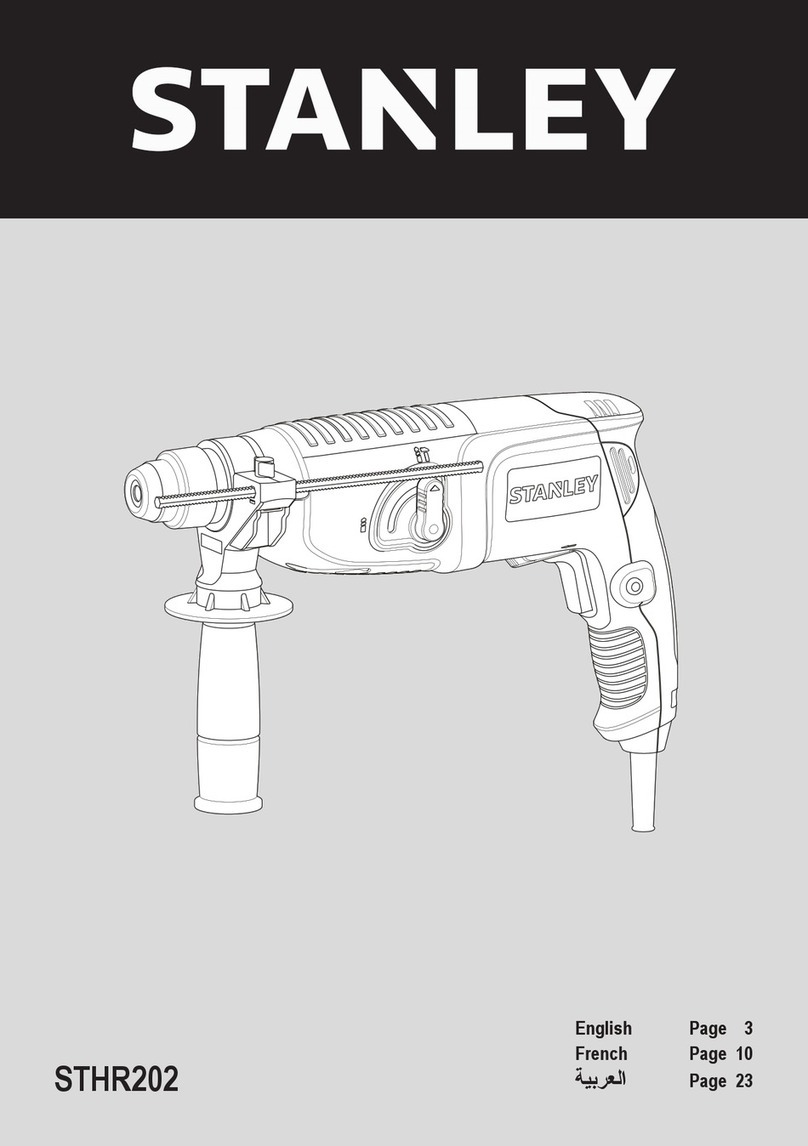
Wear approved eye protection and approved dust
mask when performing this procedure.
ENGLISH (Original Instructions)
6
gauge according to the required depth. After that, tighten
the side handle.
♦Slacken the side handle (9) by turning the grip counter-
clockwise.
♦Set the depth stop (8) to the required position. The
maximum drilling depth is equal to the distance between
the tip of the drill bit and the front end of the depth stop.
♦Tighten the side handle by turning the grip clockwise.
Switching on and off
WARNING! Before plugging in to the power source, make
sure the switch can be flipped freely, and can return to its
original position once released. Please check switch lock on
position before turn on and make sure switch lock off before
plugging in to the power source.
♦To switch the tool on, press the variable speed switch
(3). The tool speed depends on how far you press the
switch.
♦As a general rule, use low speeds for large diameter
drill bits and high speeds for smaller diameter drill bits.
♦For continuous operation, press the lock-on button (2)
and release the variable speed switch.
♦To switch the tool off, release the variable speed switch.
To switch the tool off when in continuous operation,
press the variable speed switch once more and release
it.
WARNING! When the user leaves, or pick up, transport,
manner and position the tool, make sure that tool is
switched off and unplugged.
Fitting drill chuck (NQCC, Fig E)
Optional accessory
♦Insert the drill chuck (16) into the tool chuck (6)
according to the instructions for installing attachments.
♦Turn the drill chuck to loosen the clamps at the front-end
of the drill-clamp, and insert the accessory bar (17) into
the clamps and turn the chuck in the opposite direction.
♦You may also use the drill chuck key to tighten the
clamp.
Warning: Never use standard chucks in the
hammer-drilling mode
Replacing the SDS Plus Tool Holder with the
Keyless Chuck (QCC, Fig. D)
1. Turn the locking collar (5) into the unlocking position
and pull the SDS Plus Tool Holder (10) off.
2. Push the keyless chuck (12) onto the spindle and turn
the locking collar (5) to the locking position
To replace the keyless chuck with the SDS Plus tool holder,
first remove the keyless chuck the same way the tool holder
was removed. Then place the tool holder the same way the
keyless chuck was placed making sure to turn the locking
collar to the locking position.
Warning: Never use standard chucks in the
hammer-drilling mode
Selecting the Operating Mode (Fig. B)
The tool can be used in the following operating modes:
Rotary drilling: for screw driving and for drilling
into steel, wood and plastics
Hammer drilling: for concrete and masonry
drilling operations. Bit rotation: non-working
position used only to rotate a flat chisel into the
desired position
Hammering only: for light chipping, chiselling
and demolition applications. In this mode the tool
can also be used as a lever to free a jammed drill bit.
1. To select the operating mode, press the mode selector
button and rotate the mode selector switch (5) until it
points to the symbol of the required mode.
2. Release the mode selector button and check that the
mode selector switch is locked in place.
WARNING! Do not select the operating mode when
the tool is running.
Proper Hand Position (Fig. A, Fig. E)
WARNING! To reduce the risk of serious personal
injury, ALWAYS use proper hand position as shown.
WARNING! To reduce the risk of serious personal
injury, ALWAYS hold securely in anticipation of a
sudden reaction.
Proper hand position requires one hand on the side handle
(8), with the other hand on the main handle (14).
Rotary drilling (Fig. B, Fig. D, Fig. C1/C2)
♦For drilling in steel, wood and plastics, or for screw
driving set the operating mode selector (4) to the
position.
♦Depending on your tool, follow either of the following
instructions:
QCC: Replace the SDS Plus tool holder (12) with the
keyless chuck (14).
NQCC: Fit the drill chuck assembly.
♦insert the appropriate bits. When driving slotted head
screws always use bits with a finder sleeve.
♦For drilling in steel, wood and plastics, set the forward/
reverse lever(4) to the forward position(Fig C1). When
use for screw driver function, tighten screws set the
forward/reverse lever (4) to the forward position(Fig C1)
and loose screws set the forward/reverse lever (4) to
the reverse position(Fig C2).
WARNING! Never use drill chucks in the hammer drilling
mode.
Hammer drilling (Fig. B)
♦For hammer drilling in masonry and concrete, set the
operating mode selector (5) to the position.
♦The drill bit has to be placed accurately onto the drill
hole position. After that, pull the switch for optimal
effects. Make sure the tool is in the correct position to
prevent the drill from deviating from the hole.
♦When the drill hole is clogged with debris or fine powder,
please don’t exert any more pressure. Tool should be
put in free-running state before removing part of the drill
bit from the hole. If repeated a few times, the blockage
in the hole would be cleared, and normal drilling can
WARNING! Never use solvents or other harsh
chemicals for cleaning the nonmetallic parts of
the tool. These chemicals may weaken the
material of the parts. Use only mild soap and damp
cloth to clean the tool. Never let any liquid get inside
the tool, cleaning of gasoline or other chemicals, never
immerse any part of the tool into liquid.
Optional Accessories
WARNING! Since accessories, other than those
offered by Stanley, have not been tested with this
product, use of such accessories with this tool could
be hazardous. To reduce the risk of injury, only Stanley, recom-
mended accessories should be used with this product.
Various types of SDS Plus drill bits and chisels are available
as an option.
Consult your dealer for further information on the appropriate
accessories.
Protecting The Environment
vtSeparate collection. This product must not be
disposed of with normal household waste.
Should you nd one day that your Stanley product
needs replacement, or if it is of no further use to
you, do not dispose of it with household waste.
Please sort it out for separate recycling.
Separate collection of used products and
packaging allows materials to be recycled and
used again. Reuse of recycled materials helps
prevent environmental pollution and reduces the
demand for raw materials.
Some local governments may require the local or municipal
waste disposal centers or retailers of new products to provide
households with electronic product recycling services.
Notes
STANLEY’s policy is one of continuous improvement to
our products and as such, we reserve the right to change
product specications without prior notice.
Standard equipment and accessories may vary by country.
Product specications may differ by country.
Complete product range may not be available in all
countries. Contact your local STANLEY dealers for range
availability.
ENGLISH (Original Instructions)
6
gauge according to the required depth. After that, tighten
the side handle.
♦Slacken the side handle (9) by turning the grip counter-
clockwise.
♦Set the depth stop (8) to the required position. The
maximum drilling depth is equal to the distance between
the tip of the drill bit and the front end of the depth stop.
♦Tighten the side handle by turning the grip clockwise.
Switching on and off
WARNING! Before plugging in to the power source, make
sure the switch can be flipped freely, and can return to its
original position once released. Please check switch lock on
position before turn on and make sure switch lock off before
plugging in to the power source.
♦To switch the tool on, press the variable speed switch
(3). The tool speed depends on how far you press the
switch.
♦As a general rule, use low speeds for large diameter
drill bits and high speeds for smaller diameter drill bits.
♦For continuous operation, press the lock-on button (2)
and release the variable speed switch.
♦To switch the tool off, release the variable speed switch.
To switch the tool off when in continuous operation,
press the variable speed switch once more and release
it.
WARNING! When the user leaves, or pick up, transport,
manner and position the tool, make sure that tool is
switched off and unplugged.
Fitting drill chuck (NQCC, Fig E)
Optional accessory
♦Insert the drill chuck (16) into the tool chuck (6)
according to the instructions for installing attachments.
♦Turn the drill chuck to loosen the clamps at the front-end
of the drill-clamp, and insert the accessory bar (17) into
the clamps and turn the chuck in the opposite direction.
♦You may also use the drill chuck key to tighten the
clamp.
Warning: Never use standard chucks in the
hammer-drilling mode
Replacing the SDS Plus Tool Holder with the
Keyless Chuck (QCC, Fig. D)
1. Turn the locking collar (5) into the unlocking position
and pull the SDS Plus Tool Holder (10) off.
2. Push the keyless chuck (12) onto the spindle and turn
the locking collar (5) to the locking position
To replace the keyless chuck with the SDS Plus tool holder,
first remove the keyless chuck the same way the tool holder
was removed. Then place the tool holder the same way the
keyless chuck was placed making sure to turn the locking
collar to the locking position.
Warning: Never use standard chucks in the
hammer-drilling mode
Selecting the Operating Mode (Fig. B)
The tool can be used in the following operating modes:
Rotary drilling: for screw driving and for drilling
into steel, wood and plastics
Hammer drilling: for concrete and masonry
drilling operations. Bit rotation: non-working
position used only to rotate a flat chisel into the
desired position
Hammering only: for light chipping, chiselling
and demolition applications. In this mode the tool
can also be used as a lever to free a jammed drill bit.
1. To select the operating mode, press the mode selector
button and rotate the mode selector switch (5) until it
points to the symbol of the required mode.
2. Release the mode selector button and check that the
mode selector switch is locked in place.
WARNING! Do not select the operating mode when
the tool is running.
Proper Hand Position (Fig. A, Fig. E)
WARNING! To reduce the risk of serious personal
injury, ALWAYS use proper hand position as shown.
WARNING! To reduce the risk of serious personal
injury, ALWAYS hold securely in anticipation of a
sudden reaction.
Proper hand position requires one hand on the side handle
(8), with the other hand on the main handle (14).
Rotary drilling (Fig. B, Fig. D, Fig. C1/C2)
♦For drilling in steel, wood and plastics, or for screw
driving set the operating mode selector (4) to the
position.
♦Depending on your tool, follow either of the following
instructions:
QCC: Replace the SDS Plus tool holder (12) with the
keyless chuck (14).
NQCC: Fit the drill chuck assembly.
♦insert the appropriate bits. When driving slotted head
screws always use bits with a finder sleeve.
♦For drilling in steel, wood and plastics, set the forward/
reverse lever(4) to the forward position(Fig C1). When
use for screw driver function, tighten screws set the
forward/reverse lever (4) to the forward position(Fig C1)
and loose screws set the forward/reverse lever (4) to
the reverse position(Fig C2).
WARNING! Never use drill chucks in the hammer drilling
mode.
Hammer drilling (Fig. B)
♦For hammer drilling in masonry and concrete, set the
operating mode selector (5) to the position.
♦The drill bit has to be placed accurately onto the drill
hole position. After that, pull the switch for optimal
effects. Make sure the tool is in the correct position to
prevent the drill from deviating from the hole.
♦When the drill hole is clogged with debris or fine powder,
please don’t exert any more pressure. Tool should be
put in free-running state before removing part of the drill
bit from the hole. If repeated a few times, the blockage
in the hole would be cleared, and normal drilling can
7
ENGLISH (Original Instructions)
resume.
WARNING! When the drill bit hits cement or the steel rebar
in the cement, the tool may recoil dangerously. Please hold
the tool tightly in a balanced and stable position at all times
to prevent it from recoiling dangerously.
Overload coupling device
If the drill bit is caught or hooked, the driving force
transmitted to the drill shaft will be cut off. This would
generate a strong recoil, so it would be necessary to hold
the tool tightly with both hands to remain in a stable position.
Chipping and chiselling (fig. B)
♦Set the mode selector switch (5) to the“hammering only”
position.
♦Insert the appropriate chisel and rotate it by hand to lock
it into positions.
♦Adjust the side handle (9) as required.
♦Switch on the tool and start working.
♦Always switch off the tool when work is finished and
before unplugging.
WARNING! Do not use this tool to mix or pump
easily combustible or explosive fluids (benzine,
alcohol, etc.). Do not mix or stir inflammable liquids
labelled accordingly.
Accessories
The performance of your tool depends on the accessory
used. Stanley accessories are engineered to high quality
standards and designed to enhance the performance of
your tool. By using these accessories you will get the very
best from your tool.
MAINTENANCE
Your Stanley corded/cordless appliance/tool has been
designed to operate over a long period of time with a
minimum of maintenance. To ensure satisfactory operations,
the tool must be maintained and cleaned regularly
WARNING: To reduce the risk of injury, turn
unit off and disconnect machine from power
source before installing and removing accessories,
before adjusting or changing set-ups or when making
repairs. Be sure the trigger switch is in the OFF position.
An accidental start-up can cause injury.
♦This machine is not user-serviceable. If problems occur
contact an authorised repair agent.
♦The tool will automatically switch off when the carbon
brushes are worn.
WARNING! Before performing any maintenance on corded/
cordless power tools:
♦Switch off and unplug the appliance/tool.
♦Or switch off and remove the battery from the appliance/
tool if the appliance/tool has a separate battery pack.
♦Or run the battery down completely if it is integral and
then switch off.
♦Unplug the charger before cleaning it. Your charger
does not require any maintenance apart from regular
cleaning.
♦Regularly clean the ventilation slots in your appliance/
tool/ charger using a soft brush or dry cloth.
♦Regularly clean the motor housing using a damp cloth.
Do not use any abrasive or solvent-based cleaner.
♦Regularly open the chuck and tap it to remove any dust
from the interior (when fitted).
Lubrication
Your power tool requires no additional lubrication.
Accessories and attachments used must be
regularly lubrication around the SDS Plus fitment.
Cleaning
WARNING! Blow dirt and dust out of the
main housing with dry air as often as dirt is
seen collecting in and around the air vents.
Wear approved eye protection and approved dust
mask when performing this procedure.
WARNING! Never use solvents or other
harsh chemicals for cleaning the non-
metallic parts of the tool. These chemicals may
weaken the material of the parts. Use only mild
soap and damp cloth to clean the tool. Never let any
liquid get inside the tool,cleaning of gasoline or
other chemicals, never immerse any part of the tool
into liquid.
Optional Accessories
WARNING! Since accessories, other than those
offered by Stanley, have not been tested with this
product, use of such accessories with this tool could be
hazardous. To reduce the risk of injury, only Stanley,
recommended accessories should be used with this
product.
Various types of SDS Plus drill bits and chisels are available
as an option.
Consult your dealer for further information on the
appropriate accessories.
Protecting The Environment
Separate collection. This product must not be
disposed of with normal household waste.
Should you find one day that your Stanley product
needs replacement, or if it is of no further use to you, do
not dispose of it with household waste. Please sort it out for
separate recycling.
Separate collection of used products and packaging
allows materials to be recycled and used again. Re-
use of recycled materials helps prevent environmental
pollution and reduces the demand for raw materials.
Some local governments may require the local or municipal
waste disposal centers or retailers of new products to
provide households with electronic product recycling
services.
Notes
STANLEY’s policy is one of continuous improvement to
our products and as such, we reserve the right to change
product specifications without prior notice.
Standard equipment and accessories may vary by country.
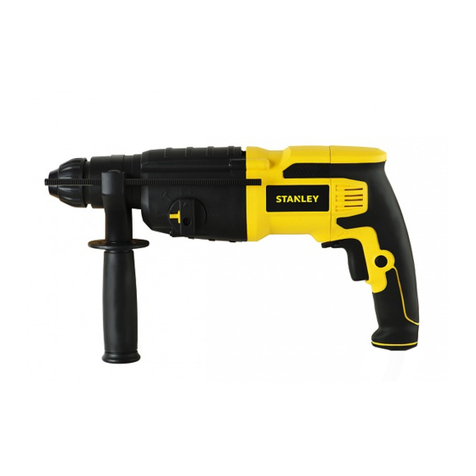
ENGLISH
10
TECHNICAL DATA
ROTARY HAMMER SHR243 SHR263 SHR264
Voltage V 220-240 220-240 220-240
Frequency Hz 50/60 50/60 50/60
Power input W 780 800 800
No-load speed min-1 0-1250 0-1150 0-1250
Impact rate bpm 0-4670 0-4300 0-4670
Impact energy (NON EPTA) J 3.1 3.4 3.4
Modes 3 3 3
Max drilling capacity mm
- Concrete 24 26 26
- Steel 13 13 13
- Wood 30 30 30
Weight kg 2.6 2.6 2.7
 繁體中文
11
設計用途
本 SHR243/SHR263/SHR264 SDS Plus 電鎚鑽專用於
在混凝土、磚石、木材和鋼材、輕型鑿切、破碎
應用中鑽孔,也用於硬合金鑽頭取芯鑽探或用於
螺絲起子。本工具僅供專業用途。
安全說明
電動工具一般安全警告
警告!請閱讀所有安全警告及指示。不
遵循這些警告及說明可能會導致觸電、
火災及 / 或嚴重傷害。
請妥善保存所有警告及指示以備將來查閱。警告
中的名詞「電動工具」是指電源驅動(插電)電
動工具,或者電池驅動(充電)電動工具。
1. 工作場地安全
a. 請保持工作場地清潔明亮。雜亂或黑暗的場
地會引發事故。
b. 請勿在易爆環境 ( 例如存在易燃液體、氣體
或粉塵的環境 ) 中操作電動工具。電動工具
產生的火花可能會引燃粉塵或煙霧。
c. 操作電動工具時,請遠離兒童與旁觀者。分
心會導致您疏於控制。
2. 2. 電氣安全
a. 電動工具插頭必須與插座相符。切勿以任何
方式改裝插頭。需接地的電動工具不能使用
任何配接器插頭。
b. 使用未經改裝的插頭與相符的插座可降低觸
電風險。避免人體接觸接地表面,如管道、
散熱片、爐竈和冰箱。若您的身體接地,會
提高觸電的風險。
c. 請勿將電動工具暴露在雨中或潮濕環境中。
水進入電動工具會提高觸電風險。
d. 請勿濫用電線。切勿使用電線來搬運、拉動
電動工具或拔出插頭。請讓電線遠離熱、油、
銳邊或活動部件。受損或纏繞的電線會提高
觸電風險。
e. 在室外操作電動工具時,請使用適合室外使
用的延長電纜。採用適合室外使用的電線可
降低觸電危險。
f. 若必須在潮濕環境中操作電動工具,請使用
受漏電保護器 (RCD) 保護的電源供應器。使
用 RCD 可降低觸電風險。註: 「漏電保護器
(RCD)」亦稱為「接地故障斷路器 (GFCI) 」或「 接
ENGLISH (Original Instructions)
6
gauge according to the required depth. After that, tighten
the side handle.
♦Slacken the side handle (9) by turning the grip counter-
clockwise.
♦Set the depth stop (8) to the required position. The
maximum drilling depth is equal to the distance between
the tip of the drill bit and the front end of the depth stop.
♦Tighten the side handle by turning the grip clockwise.
Switching on and off
WARNING! Before plugging in to the power source, make
sure the switch can be flipped freely, and can return to its
original position once released. Please check switch lock on
position before turn on and make sure switch lock off before
plugging in to the power source.
♦To switch the tool on, press the variable speed switch
(3). The tool speed depends on how far you press the
switch.
♦As a general rule, use low speeds for large diameter
drill bits and high speeds for smaller diameter drill bits.
♦For continuous operation, press the lock-on button (2)
and release the variable speed switch.
♦To switch the tool off, release the variable speed switch.
To switch the tool off when in continuous operation,
press the variable speed switch once more and release
it.
WARNING! When the user leaves, or pick up, transport,
manner and position the tool, make sure that tool is
switched off and unplugged.
Fitting drill chuck (NQCC, Fig E)
Optional accessory
♦Insert the drill chuck (16) into the tool chuck (6)
according to the instructions for installing attachments.
♦Turn the drill chuck to loosen the clamps at the front-end
of the drill-clamp, and insert the accessory bar (17) into
the clamps and turn the chuck in the opposite direction.
♦You may also use the drill chuck key to tighten the
clamp.
Warning: Never use standard chucks in the
hammer-drilling mode
Replacing the SDS Plus Tool Holder with the
Keyless Chuck (QCC, Fig. D)
1. Turn the locking collar (5) into the unlocking position
and pull the SDS Plus Tool Holder (10) off.
2. Push the keyless chuck (12) onto the spindle and turn
the locking collar (5) to the locking position
To replace the keyless chuck with the SDS Plus tool holder,
first remove the keyless chuck the same way the tool holder
was removed. Then place the tool holder the same way the
keyless chuck was placed making sure to turn the locking
collar to the locking position.
Warning: Never use standard chucks in the
hammer-drilling mode
Selecting the Operating Mode (Fig. B)
The tool can be used in the following operating modes:
Rotary drilling: for screw driving and for drilling
into steel, wood and plastics
Hammer drilling: for concrete and masonry
drilling operations. Bit rotation: non-working
position used only to rotate a flat chisel into the
desired position
Hammering only: for light chipping, chiselling
and demolition applications. In this mode the tool
can also be used as a lever to free a jammed drill bit.
1. To select the operating mode, press the mode selector
button and rotate the mode selector switch (5) until it
points to the symbol of the required mode.
2. Release the mode selector button and check that the
mode selector switch is locked in place.
WARNING! Do not select the operating mode when
the tool is running.
Proper Hand Position (Fig. A, Fig. E)
WARNING! To reduce the risk of serious personal
injury, ALWAYS use proper hand position as shown.
WARNING! To reduce the risk of serious personal
injury, ALWAYS hold securely in anticipation of a
sudden reaction.
Proper hand position requires one hand on the side handle
(8), with the other hand on the main handle (14).
Rotary drilling (Fig. B, Fig. D, Fig. C1/C2)
♦For drilling in steel, wood and plastics, or for screw
driving set the operating mode selector (4) to the
position.
♦Depending on your tool, follow either of the following
instructions:
QCC: Replace the SDS Plus tool holder (12) with the
keyless chuck (14).
NQCC: Fit the drill chuck assembly.
♦insert the appropriate bits. When driving slotted head
screws always use bits with a finder sleeve.
♦For drilling in steel, wood and plastics, set the forward/
reverse lever(4) to the forward position(Fig C1). When
use for screw driver function, tighten screws set the
forward/reverse lever (4) to the forward position(Fig C1)
and loose screws set the forward/reverse lever (4) to
the reverse position(Fig C2).
WARNING! Never use drill chucks in the hammer drilling
mode.
Hammer drilling (Fig. B)
♦For hammer drilling in masonry and concrete, set the
operating mode selector (5) to the position.
♦The drill bit has to be placed accurately onto the drill
hole position. After that, pull the switch for optimal
effects. Make sure the tool is in the correct position to
prevent the drill from deviating from the hole.
♦When the drill hole is clogged with debris or fine powder,
please don’t exert any more pressure. Tool should be
put in free-running state before removing part of the drill
bit from the hole. If repeated a few times, the blockage
in the hole would be cleared, and normal drilling can
地漏電斷路器 (ELCB) 」。
3. 人身安全
a. 操作電動工具時,請保持警覺、留意所執行的
操作並運用常識。請勿在疲倦或在受到毒品、
酒精或藥品的影響時使用電動工具。操作電動
工具時,一時的注意力分散可能會導致嚴重人
身傷害。
b. 請使用人身防護設備。始終佩戴護目裝置。防
護設備 ( 例如在適當條件下使用的防塵面具、
防滑安全鞋、安全帽或聽力保護裝置 ) 可減少
人身傷害。
c. 避免意外啟動。在連接至電源及 / 或電池組、
拾起或搬運工具之前,請確保開關處於關閉位
置。若搬運電動工具時將手指放在開關上,或
者在電動工具開關開啟時將插頭插入電源插
座,這兩種行為都會引發事故。
d. 開啟電動工具之前,請卸下所有調整鑰匙或扳
手。電動工具旋轉部件上遺留的扳手或鑰匙可
能會導致人身傷害。
e. 請勿過度伸張雙手。時刻注意腳下與身體的平
衡。如此可在意外情況下更好地控制電動工具。
f. 穿著適當。請勿穿著寬鬆衣服或佩戴飾品。讓
頭髮、衣服及手套遠離活動部件。寬鬆衣服、
佩飾或長髮可能會捲入活動部件中。
g. 若為連接除塵與集塵設備而提供裝置,請確保
妥善連接及正確使用。使用集塵設備可降低與
粉塵有關的危險。
4. 電動工具的使用與維護
a. 請勿超負荷使用電動工具。請根據您的應用
使用正確的電動工具。若使用的電動工具正
確無誤,該工具能以設計額定值更有效、更
安全地執行工作。
b. 若開關無法開啟或關閉本電動工具,請勿使
用。若開關無法控制電動工具,則電動工具
存在危險,必須予以維修。
c. 在執行任何調整、更換配件或儲存工具之前,
必須從電源上拔掉插頭及 / 或卸下電池組。此
類防護性安全措施可降低電動工具意外啟動
的風險。
d. 請將閒置的電動工具存放在兒童無法接觸的
地方,請勿讓不熟悉電動工具或這些指示的
人員操作電動工具。未經訓練的使用者操作
電動工具會發生危險。
e. 維護電動工具。檢查活動部件是否對準或卡
住、破損情況以及是否存在影響電動工具運
行的其他情況。若電動工具有損傷,請先維修,
 繁體中文
12
後使用。/ 許多事故都因電動工具維護不善所
導致。
f. 請保持刀具鋒利清潔。妥善維護、刀刃鋒利的
刀具卡住的可能性更低,更易於控制。
g. 遵循使用指示以及工作條件和所要執行的工作
使用電動工具、配件和工具刀頭等。若使用電
動工具執行與設計用途不相符的操作,會導致
危險。
5. 維修
a. 電動工具之修理,僅可由認證的技術人員執行。
請勿交由非百得認證服務中心的認證技術人員
進行修理、維護、調整。若產品經由非百得認
證的維修工程師拆解、組裝、調整,恕無法適
用百得一年家用保修條款。為充份發揮其功能,
修理、維護、調整請務必使用原廠零件。
電鎚安全警告
警告! 電鎚之附加安全警告
請佩戴聽力保護器。噪音會使聽力受損。
請使用工具隨附的輔助手柄。工具失控會導致
人身傷害。
若在執行操作時切割配件可能會接觸隱藏的電
線或它本身的電線,則只能從絕緣手柄表面握
住電動工具。若切削配件接觸到「帶電」導線,
電動工具金屬部件表面就會「帶電」,從而導
致操作人員觸電。
請勿在旋轉模式使用鑿子配件。配件將卡在材
料中並旋轉電鑽。
使用夾具或採取其他可行的方法,將工件固定、
支撐到穩定的平台上。手持工件或用身體抵住
工件會導致工件不穩定,可能會導致失去控制。
在牆上、地板和天花板上鑽孔之前,請檢查電
線和鋼管位置。
不要在鑽孔後立刻碰觸鑽頭尖端以免燙傷。
設計用途已在本使用說明手冊中載明。若使用
的配件或附件,或使用本工具執行的操作與本
使用說明手冊中的建議不相符,可能會招致人
身傷害及 / 或財損失的風險。
注意: 主電壓: 連接電源時,務必驗證電源電壓
是否與電動工具的電壓相符。若電源超出電動工具
上標示的電壓,使用者可能會發生嚴重傷害事故,
並且導致工具損壞。相反,如果電源電壓低於工具
ENGLISH (Original Instructions)
4
g. Use the power tool, accessories and tool bits etc.
in accordance with these instructions, taking into
account the working conditions and the work to
be performed. Use of the power tool for operations
different from those intended could result in a hazardous
situation.
5. Service
a. Have your power tool serviced by a qualified
repair person using only identical replacement
parts. This will ensure that the safety of the power tool
is maintained.
ROTARY HAMMER SAFETY WARNINGS
Warning! Additional safety warnings for Hammer
♦Wear ear protectors. Exposure to noise can cause
hearing loss.
♦Use auxiliary handle(s), if supplied with the tool.
Loss of control can cause personal injury.
♦Hold power tool by insulated gripping surfaces,
when performing an operation where the cutting
accessory may contact hidden wiring or its own
cord. Cutting accessory contacting a “live” wire may
make exposed metal parts of the power tool “live” and
could give the operator an electric shock.
♦Never use a chisel accessory in rotary mode. The
accessory will bind in the material and rotate the drill.
♦Use clamps or another practical way to secure and
support the work piece to a stable platform. Holding the
work by hand or against your body leaves it unstable
and may lead to loss of control.
♦ Before drilling into walls, floors or ceilings, check for the
location of wiring and pipes.
♦Avoid touching the tip of the drill bit after drilling so as
to avoid scalding.
♦The intended use is described in this instruction
manual. The use of any accessory or attachment or
performance of any operation with this tool other than
those recommended in this instruction manual may
present a risk of personal injury and/or damage to
property.
Note: Mains voltage: When connecting to the mains, it is
imperative to verify if the voltage of the mains matches that
of the power tool. If the mains voltage exceeds the voltage
indicated on the power tool, the user may become severely
injured in an accident, and the tool may be damaged. On
the contrary, if the mains voltage is lower than the voltage
required by the tool, the motor may be damaged as a result.
Thus, if it is not possible to verify the voltage, it is imperative
not to plug in to the power source.
RESIDUAL RISKS
Additional residual risks may arise when using the tool
which may not be included in the enclosed safety warnings.
These risks can arise from misuse, prolonged use etc. In
spite of the application of the relevant safety regulations and
the implementation of safety devices, certain risks cannot
be avoided. These are:
♦Injuries caused by touching any rotating/moving parts.
♦Injuries caused when changing any parts, blades or
accessories.
♦Injuries caused by prolonged use of a tool. When using
any tool for prolonged periods ensure you take regular
breaks.
♦Impairment of hearing.
♦Health hazards caused by breathing dust developed
when using your tool (example:- working with wood,
especially oak, beech and MDF.)
SAFETY OF OTHERS
♦This appliance is not intended for use by persons
(including children) with reduced physical, sensory
or mental capabilities, or lack of experience and
knowledge, unless they have been given supervision or
instruction concerning use of the appliance by a person
responsible for their safety.
♦Children should be supervised to ensure that they do
not play with the appliance.
LABELS ON TOOL
The following symbols are shown on the tool along with date
code:
WARNING! To reduce the risk of injury, the user
must read the instruction manual before use.
Wear ear protection.
Wear safety glasses or goggles.
Position of Date Code (Fig. A)
The Date Code (10), which also includes the year of
manufacture, is printed into the housing.
Example:
2016 XX JN
Year of manufacturing
PACKAGE CONTENTS
The package contains:
1 Heavy-duty rotary hammerdrill
1 Side handle
1 Depth stop
1 Kitbox
1 Keyless chuck (QCC)
1 Instruction manual
♦Check for damage to the tool, parts or accessories
which may have occurred during transport.
♦Take the time to thoroughly read and understand this
manual prior to operation.
所需的電壓,可能會因此損壞電機。
因此,若無法驗證電壓,切勿將插頭插進電源中。
剩餘風險
使用本工具時,可能會出現隨附安全警告中所不
包括的其他殘餘風險。濫用、長時間使用等也會
導致這些風險。即使應用有關的安全規定並採用
安全設備,仍然還有一些無法避免的風險。危險
包括:
接觸旋轉 / 活動部件引起的傷害。
更換任何部件、刀片或配件時引起的傷害。
長時間使用工具引起的傷害。長時間使用任何
工具時,請確保定期休息。
聽力受損。
吸入使用工具時產生的塵埃引起的健康危害。
(譬如:在木材上使用時,尤其是櫟木、山毛
櫸和中密度纖維板 (MDF))
其他安全資訊
生理、感覺或心理機能不健全的人員 ( 包括兒
童 ) 或缺乏經驗及知識的人員,除非由負責其
安全的人員提供有關使用此器具的監督或指
示,否則不得使用本工具。
應對兒童進行監督,以確保其不會玩耍本器具。
工具上的標籤
本工具上具有以下圖示與日期代碼
警告! 為了降低受傷的風險,使用者在
使用前必須仔細閱讀使用手冊。
請佩戴聽力保護器
請佩戴安全防護眼鏡或護目鏡。
V 伏特 直流電
A 安培 空載轉速
Hz 赫茲 II 級結構
ENGLISH (Original Instructions)
4
g. Use the power tool, accessories and tool bits etc.
in accordance with these instructions, taking into
account the working conditions and the work to
be performed. Use of the power tool for operations
different from those intended could result in a hazardous
situation.
5. Service
a. Have your power tool serviced by a qualified
repair person using only identical replacement
parts. This will ensure that the safety of the power tool
is maintained.
ROTARY HAMMER SAFETY WARNINGS
Warning! Additional safety warnings for Hammer
♦Wear ear protectors. Exposure to noise can cause
hearing loss.
♦Use auxiliary handle(s), if supplied with the tool.
Loss of control can cause personal injury.
♦Hold power tool by insulated gripping surfaces,
when performing an operation where the cutting
accessory may contact hidden wiring or its own
cord. Cutting accessory contacting a “live” wire may
make exposed metal parts of the power tool “live” and
could give the operator an electric shock.
♦Never use a chisel accessory in rotary mode. The
accessory will bind in the material and rotate the drill.
♦Use clamps or another practical way to secure and
support the work piece to a stable platform. Holding the
work by hand or against your body leaves it unstable
and may lead to loss of control.
♦ Before drilling into walls, floors or ceilings, check for the
location of wiring and pipes.
♦Avoid touching the tip of the drill bit after drilling so as
to avoid scalding.
♦The intended use is described in this instruction
manual. The use of any accessory or attachment or
performance of any operation with this tool other than
those recommended in this instruction manual may
present a risk of personal injury and/or damage to
property.
Note: Mains voltage: When connecting to the mains, it is
imperative to verify if the voltage of the mains matches that
of the power tool. If the mains voltage exceeds the voltage
indicated on the power tool, the user may become severely
injured in an accident, and the tool may be damaged. On
the contrary, if the mains voltage is lower than the voltage
required by the tool, the motor may be damaged as a result.
Thus, if it is not possible to verify the voltage, it is imperative
not to plug in to the power source.
RESIDUAL RISKS
Additional residual risks may arise when using the tool
which may not be included in the enclosed safety warnings.
These risks can arise from misuse, prolonged use etc. In
spite of the application of the relevant safety regulations and
the implementation of safety devices, certain risks cannot
be avoided. These are:
♦Injuries caused by touching any rotating/moving parts.
♦Injuries caused when changing any parts, blades or
accessories.
♦Injuries caused by prolonged use of a tool. When using
any tool for prolonged periods ensure you take regular
breaks.
♦Impairment of hearing.
♦Health hazards caused by breathing dust developed
when using your tool (example:- working with wood,
especially oak, beech and MDF.)
SAFETY OF OTHERS
♦This appliance is not intended for use by persons
(including children) with reduced physical, sensory
or mental capabilities, or lack of experience and
knowledge, unless they have been given supervision or
instruction concerning use of the appliance by a person
responsible for their safety.
♦Children should be supervised to ensure that they do
not play with the appliance.
LABELS ON TOOL
The following symbols are shown on the tool along with date
code:
WARNING! To reduce the risk of injury, the user
must read the instruction manual before use.
Wear ear protection.
Wear safety glasses or goggles.
Position of Date Code (Fig. A)
The Date Code (10), which also includes the year of
manufacture, is printed into the housing.
Example:
2016 XX JN
Year of manufacturing
PACKAGE CONTENTS
The package contains:
1 Heavy-duty rotary hammerdrill
1 Side handle
1 Depth stop
1 Kitbox
1 Keyless chuck (QCC)
1 Instruction manual
♦Check for damage to the tool, parts or accessories
which may have occurred during transport.
♦Take the time to thoroughly read and understand this
manual prior to operation.
ENGLISH (Original Instructions)
4
g. Use the power tool, accessories and tool bits etc.
in accordance with these instructions, taking into
account the working conditions and the work to
be performed. Use of the power tool for operations
different from those intended could result in a hazardous
situation.
5. Service
a. Have your power tool serviced by a qualified
repair person using only identical replacement
parts. This will ensure that the safety of the power tool
is maintained.
ROTARY HAMMER SAFETY WARNINGS
♦Wear ear protectors. Exposure to noise can cause
hearing loss.
♦Use auxiliary handle(s), if supplied with the tool.
Loss of control can cause personal injury.
♦Hold power tool by insulated gripping surfaces,
when performing an operation where the cutting
accessory may contact hidden wiring or its own
cord. Cutting accessory contacting a “live” wire may
make exposed metal parts of the power tool “live” and
could give the operator an electric shock.
♦Never use a chisel accessory in rotary mode. The
accessory will bind in the material and rotate the drill.
♦Use clamps or another practical way to secure and
support the work piece to a stable platform. Holding the
work by hand or against your body leaves it unstable
and may lead to loss of control.
♦ Before drilling into walls, floors or ceilings, check for the
location of wiring and pipes.
♦Avoid touching the tip of the drill bit after drilling so as
to avoid scalding.
♦The intended use is described in this instruction
manual. The use of any accessory or attachment or
performance of any operation with this tool other than
those recommended in this instruction manual may
present a risk of personal injury and/or damage to
property.
Note: Mains voltage: When connecting to the mains, it is
imperative to verify if the voltage of the mains matches that
of the power tool. If the mains voltage exceeds the voltage
indicated on the power tool, the user may become severely
injured in an accident, and the tool may be damaged. On
the contrary, if the mains voltage is lower than the voltage
required by the tool, the motor may be damaged as a result.
Thus, if it is not possible to verify the voltage, it is imperative
not to plug in to the power source.
RESIDUAL RISKS
Additional residual risks may arise when using the tool
which may not be included in the enclosed safety warnings.
These risks can arise from misuse, prolonged use etc. In
spite of the application of the relevant safety regulations and
the implementation of safety devices, certain risks cannot
be avoided. These are:
♦Injuries caused by touching any rotating/moving parts.
♦Injuries caused when changing any parts, blades or
accessories.
♦Injuries caused by prolonged use of a tool. When using
any tool for prolonged periods ensure you take regular
breaks.
♦Impairment of hearing.
♦Health hazards caused by breathing dust developed
when using your tool (example:- working with wood,
especially oak, beech and MDF.)
SAFETY OF OTHERS
♦This appliance is not intended for use by persons
(including children) with reduced physical, sensory
or mental capabilities, or lack of experience and
knowledge, unless they have been given supervision or
instruction concerning use of the appliance by a person
responsible for their safety.
♦Children should be supervised to ensure that they do
not play with the appliance.
LABELS ON TOOL
The following symbols are shown on the tool along with date
code:
WARNING! To reduce the risk of injury, the user
must read the instruction manual before use.
Wear ear protection.
Wear safety glasses or goggles.
V Volts Direct Current
A Amperes n0No-Load Speed
Hz Hertz Class II Construction
W Watts Earthing Terminal
min minutes Safety Alert Symbol
Alternating
Current /min.
Revolutions or
Reciprocation per
minute
Position of Date Code (FIG. A)
The Date Code (10), which also includes the year of
manufacture, is printed into the housing.
Example:
2016 XX JN
Year of manufacturing
PACKAGE CONTENTS
The package contains:
1 Heavy-duty rotary hammerdrill
1 Side handle
1 Depth stop
1 Kitbox
1 Keyless chuck (QCC) (Optional)
1 Instruction manual
 繁體中文
13
W 瓦特 接地終端
min 分鐘 安全警告符號
交流電 / 分鐘 每分鐘旋轉或
往復次數
日期代碼的位置 ( 圖 A)
日期代碼 (10) 亦包括製造年份,已印刷在工具外
殼上。
範例:
2017 XX JN
製造年份
套裝內容
本套裝包括:
1 個輕型電鎚鑽
1 個側手柄
1 個深度尺
1 個工具箱
1電鑽夾頭 ( 選配 )
1钻头 ( 选配 )
1 本使用手冊
1 一個集塵罩
1 快換夾頭 (SHR264)
檢查工具、部件或配件有否在運送途中損壞。
操作前,請抽空徹底地閱讀和掌握本手冊的內
容。
電氣安全
本工具採用雙重絕緣,因此無需接地線。
請務必檢查電源電壓是否與銘牌一致。
若電源線受損,必須由製造商或授權的
Stanley Black and Decker 服務中心進行更
換,以避免發生危險。
使用延長電纜
若需要使用延長電源線,請使用適合本工具電源
輸入規格且經核准的延長電源線。導線的最小橫
截面積為 1.5 平方毫米。卷起電源線時請確保線
ENGLISH (Original Instructions)
4
g. Use the power tool, accessories and tool bits etc.
in accordance with these instructions, taking into
account the working conditions and the work to
be performed. Use of the power tool for operations
different from those intended could result in a hazardous
situation.
5. Service
a. Have your power tool serviced by a qualified
repair person using only identical replacement
parts. This will ensure that the safety of the power tool
is maintained.
ROTARY HAMMER SAFETY WARNINGS
♦Wear ear protectors. Exposure to noise can cause
hearing loss.
♦Use auxiliary handle(s), if supplied with the tool.
Loss of control can cause personal injury.
♦Hold power tool by insulated gripping surfaces,
when performing an operation where the cutting
accessory may contact hidden wiring or its own
cord. Cutting accessory contacting a “live” wire may
make exposed metal parts of the power tool “live” and
could give the operator an electric shock.
♦Never use a chisel accessory in rotary mode. The
accessory will bind in the material and rotate the drill.
♦Use clamps or another practical way to secure and
support the work piece to a stable platform. Holding the
work by hand or against your body leaves it unstable
and may lead to loss of control.
♦ Before drilling into walls, floors or ceilings, check for the
location of wiring and pipes.
♦Avoid touching the tip of the drill bit after drilling so as
to avoid scalding.
♦The intended use is described in this instruction
manual. The use of any accessory or attachment or
performance of any operation with this tool other than
those recommended in this instruction manual may
present a risk of personal injury and/or damage to
property.
Note: Mains voltage: When connecting to the mains, it is
imperative to verify if the voltage of the mains matches that
of the power tool. If the mains voltage exceeds the voltage
indicated on the power tool, the user may become severely
injured in an accident, and the tool may be damaged. On
the contrary, if the mains voltage is lower than the voltage
required by the tool, the motor may be damaged as a result.
Thus, if it is not possible to verify the voltage, it is imperative
not to plug in to the power source.
RESIDUAL RISKS
Additional residual risks may arise when using the tool
which may not be included in the enclosed safety warnings.
These risks can arise from misuse, prolonged use etc. In
spite of the application of the relevant safety regulations and
the implementation of safety devices, certain risks cannot
be avoided. These are:
♦Injuries caused by touching any rotating/moving parts.
♦Injuries caused when changing any parts, blades or
accessories.
♦Injuries caused by prolonged use of a tool. When using
any tool for prolonged periods ensure you take regular
breaks.
♦Impairment of hearing.
♦Health hazards caused by breathing dust developed
when using your tool (example:- working with wood,
especially oak, beech and MDF.)
SAFETY OF OTHERS
♦This appliance is not intended for use by persons
(including children) with reduced physical, sensory
or mental capabilities, or lack of experience and
knowledge, unless they have been given supervision or
instruction concerning use of the appliance by a person
responsible for their safety.
♦Children should be supervised to ensure that they do
not play with the appliance.
LABELS ON TOOL
The following symbols are shown on the tool along with date
code:
WARNING! To reduce the risk of injury, the user
must read the instruction manual before use.
Wear ear protection.
Wear safety glasses or goggles.
V Volts Direct Current
A Amperes n0No-Load Speed
Hz Hertz Class II Construction
W Watts Earthing Terminal
min minutes Safety Alert Symbol
Alternating
Current /min.
Revolutions or
Reciprocation per
minute
Position of Date Code (FIG. A)
The Date Code (10), which also includes the year of
manufacture, is printed into the housing.
Example:
2016 XX JN
Year of manufacturing
PACKAGE CONTENTS
The package contains:
1 Heavy-duty rotary hammerdrill
1 Side handle
1 Depth stop
1 Kitbox
1 Keyless chuck (QCC) (Optional)
1 Instruction manual
5
ENGLISH (Original Instructions)
ELECTRICAL SAFETY
Your tool is double insulated; therefore no earth wire
is required. Be sure to check that the power supply
corresponds to the voltage on the rating plate.
Corresponds.
♦If the supply cord is damaged, it must be replaced by
the manufacturer or an authorised Black and Decker
Service Centre in order to avoid a hazard.
USING AN EXTENSION CABLE
If it is necessary to use an extension cable, please used
an approved extension cable that fits the tool’s power input
specifications. The minimum cross-sectional area of the
conducting wire is 1.5 sq. mm. Cables should be untangled
before reeling up.
Cable cross-sectional
area (mm2) Cable rated
current (Ampere)
Cable cross-sectional
area (mm2) Cable rated
current (Ampere)
0.75 6
1.00 10
1.50 15
2.50 20
4.00 25
Cable length (m)
7.5 15 25 30 45 60
Voltage Amperes Cable rated current (Ampere)
115 0 - 2.0 6 6 6 6 6 10
2.1 - 3.4 6 6 6 6 15 15
3.5 - 5.0 6 6 10 15 20 20
5.1 - 7.0 10 10 15 20 20 25
7.1 - 12.0 15 15 20 25 25 -
12.1 - 20.0 20 20 25 - - -
230 0 - 2.0 6 6 6 6 6 6
2.1 - 3.4 6 6 6 6 6 6
3.5 - 5.0 6 6 6 6 10 15
5.1 - 7.0 10 10 10 10 15 15
7.1 - 12.0 15 15 15 15 20 20
12.1 - 20.0 20 20 20 20 25 -
FEATURES (FIG. A, FIG. D)
This tool includes some or all of the following features.
1. Main handle
2. Lock-on button
3. Variable Speed Switch
4. Forward/Reverse Lever
5. Mode Selector
6. Sleeve
7. Tool clamp
8. Depth Stop
9. Side Handle
10. Date code
11. Locking collar (QCC)
12. SDS Plus tool Holder (QCC)
13. Drill Chuck Sleeve (QCC)
14. Keyless Chuck (QCC)
15. SDS bit
16. Drill chuck (NQCC)
ASSEMBLY
WARNING! Before assembly, make sure that the tool is
switched off and unplugged.
Attaching the Side Handle (Fig. A)
WARNING! When using the tool, please use the side
handle for your safety.
The side handle can be fitted to suit both right-handed and
left-handled users.
♦Turn the grip counter-clockwise until you can slide the
side handle onto the front of the tool.
♦Rotate the side handle into the desired position.
♦Tighten the side handle by turning the grip clockwise.
WARNING! When using the tool, remember to install the
side handles properly.
Fitting an accessory (Fig.A)
♦Clean and grease the shank (15) of the accessory.
♦Insert the accessory bar into the tool clamp(7).
♦ Push the accessory down and turn it slightly until it fits
into the slots.
♦Pull on the accessory to check if it is properly locked. The
hammering and drilling function requires the accessory
to be able to move axially several centimetres when
locked in the tool clamp.
♦To remove the accessory, pull back the sleeve (6) and
pull out the accessory from the tool clamp.
USE
WARNING! Always wear glaves when you change
accessories. The exposed metal parts on the tool and
accessory may become extremely hot during operation.
Please operate tool with normal load. Do not overload. Do
not abuse the tool, please refer instruction manual to use
the tool correctly.
WARNING! Before drilling into walls, floors or ceilings,
check for the location of wiring and pipes.
Setting the drilling depth (Fig. A)
The depth stop is a convenient feature to ensure uniformity
in drilling depth. Loosen the side handle to adjust the depth
ENGLISH (Original Instructions)
6
gauge according to the required depth. After that, tighten
the side handle.
♦Slacken the side handle (9) by turning the grip counter-
clockwise.
♦Set the depth stop (8) to the required position. The
maximum drilling depth is equal to the distance between
the tip of the drill bit and the front end of the depth stop.
♦Tighten the side handle by turning the grip clockwise.
Switching on and off
WARNING! Before plugging in to the power source, make
sure the switch can be flipped freely, and can return to its
original position once released. Please check switch lock on
position before turn on and make sure switch lock off before
plugging in to the power source.
♦To switch the tool on, press the variable speed switch
(3). The tool speed depends on how far you press the
switch.
♦As a general rule, use low speeds for large diameter
drill bits and high speeds for smaller diameter drill bits.
♦For continuous operation, press the lock-on button (2)
and release the variable speed switch.
♦To switch the tool off, release the variable speed switch.
To switch the tool off when in continuous operation,
press the variable speed switch once more and release
it.
WARNING! When the user leaves, or pick up, transport,
manner and position the tool, make sure that tool is
switched off and unplugged.
Fitting drill chuck (NQCC, Fig E)
Optional accessory
♦Insert the drill chuck (16) into the tool chuck (6)
according to the instructions for installing attachments.
♦Turn the drill chuck to loosen the clamps at the front-end
of the drill-clamp, and insert the accessory bar (17) into
the clamps and turn the chuck in the opposite direction.
♦You may also use the drill chuck key to tighten the
clamp.
Warning: Never use standard chucks in the
hammer-drilling mode
Replacing the SDS Plus Tool Holder with the
Keyless Chuck (QCC, Fig. D)
1. Turn the locking collar (5) into the unlocking position
and pull the SDS Plus Tool Holder (10) off.
2. Push the keyless chuck (12) onto the spindle and turn
the locking collar (5) to the locking position
To replace the keyless chuck with the SDS Plus tool holder,
first remove the keyless chuck the same way the tool holder
was removed. Then place the tool holder the same way the
keyless chuck was placed making sure to turn the locking
collar to the locking position.
Warning: Never use standard chucks in the
hammer-drilling mode
Selecting the Operating Mode (Fig. B)
The tool can be used in the following operating modes:
Rotary drilling: for screw driving and for drilling
into steel, wood and plastics
Hammer drilling: for concrete and masonry
drilling operations. Bit rotation: non-working
position used only to rotate a flat chisel into the
desired position
Hammering only: for light chipping, chiselling
and demolition applications. In this mode the tool
can also be used as a lever to free a jammed drill bit.
1. To select the operating mode, press the mode selector
button and rotate the mode selector switch (5) until it
points to the symbol of the required mode.
2. Release the mode selector button and check that the
mode selector switch is locked in place.
WARNING! Do not select the operating mode when
the tool is running.
Proper Hand Position (Fig. A, Fig. E)
WARNING! To reduce the risk of serious personal
injury, ALWAYS use proper hand position as shown.
WARNING! To reduce the risk of serious personal
injury, ALWAYS hold securely in anticipation of a
sudden reaction.
Proper hand position requires one hand on the side handle
(8), with the other hand on the main handle (14).
Rotary drilling (Fig. B, Fig. D, Fig. C1/C2)
♦For drilling in steel, wood and plastics, or for screw
driving set the operating mode selector (4) to the
position.
♦Depending on your tool, follow either of the following
instructions:
QCC: Replace the SDS Plus tool holder (12) with the
keyless chuck (14).
NQCC: Fit the drill chuck assembly.
♦insert the appropriate bits. When driving slotted head
screws always use bits with a finder sleeve.
♦For drilling in steel, wood and plastics, set the forward/
reverse lever(4) to the forward position(Fig C1). When
use for screw driver function, tighten screws set the
forward/reverse lever (4) to the forward position(Fig C1)
and loose screws set the forward/reverse lever (4) to
the reverse position(Fig C2).
WARNING! Never use drill chucks in the hammer drilling
mode.
Hammer drilling (Fig. B)
♦For hammer drilling in masonry and concrete, set the
operating mode selector (5) to the position.
♦The drill bit has to be placed accurately onto the drill
hole position. After that, pull the switch for optimal
effects. Make sure the tool is in the correct position to
prevent the drill from deviating from the hole.
♦When the drill hole is clogged with debris or fine powder,
please don’t exert any more pressure. Tool should be
put in free-running state before removing part of the drill
bit from the hole. If repeated a few times, the blockage
in the hole would be cleared, and normal drilling can
纜無纏繞。
電源線橫截面積 (mm2) 電源線額定電流 ( 安培 )
0.75 6
1.10
1.50 15
2.50 20
4.00 25
電壓 安培 電源線額定電流 ( 安培 )
115 0 - 2.- 6 6 6 6 6 10
2.1 - 3.4 6 6 6 6 15 15
3.5 - 5.0 6 6 10 15 20 20
5.1 - 7.0 10 10 15 20 20 25
7.1 - 12.0 15 15 20 25 25 -
12.1 - 20.0 20 20 25 - - -
230 0 - 2.0 666666
2.1 - 3.4 666666
3.5 - 5.0 6 6 6 6 10 15
5.1 - 7.0 10 10 10 10 15 15
7.1 - 12.0 15 15 15 15 20 20
12.1 - 20.0 20 20 20 20 25 -
功 能 部 件( 圖 A,圖 D,圖 F,圖 G)
本工具包括以下部分或全部功能部件
1. 主手柄
2. 鎖定按鈕
3. 變速開關
4. 正 / 反轉桿
5. 模式選擇器
6. 套管
7. 工具夾頭
8. 深度尺
9. 側手柄
10. 日期代碼
11. SDS 鑽頭
 繁體中文
14
12. 電鑽夾頭
13. 鑽頭
14. 集塵罩
15. 鎖定環
16. SDS Plus 工具夾持器
17. 快換夾頭
裝配
警告! 裝配之前,請確定已關閉工具電源並拔出
插頭。
安裝側手柄 ( 圖 A)
警告!為確保您的安全,請在操作本工具時使用
側手把 (9)。
可調整側手柄,以適合右手操作與左手操作使用
者的需求。
逆時針轉動握柄直到您可將側手柄滑動至工具
前面為止。
將側手柄旋轉至所需位置。
順時針轉動手柄,將側手柄轉緊。
警告! 使用工具時,請切記正確地安裝側手柄。
安裝配件(圖 A)
清潔配件的軸 (11) 並塗上潤滑油。
將配件桿插入工具的夾頭 (7) 中。
將配件向下推,輕輕旋轉直到安裝到槽內。
拉一拉配件檢查是否已正確地鎖住。敲擊與鑽
孔功能需要配件能在工具夾頭中鎖定時軸向移
動數公分。
若要卸下配件,將套管 (6) 向後拉並將配件從
工具夾頭中拉出。
安裝集塵器(圖 F)
將配件桿 (11) 插入集塵器 (14),然後將配件
桿 (11) 和集塵器一起插入工具夾頭 (7)。
如圖 F 所示向上使用裝置以使用集塵器。
使用
警告!更換配件時請務必佩帶手套。在操
作期間,本工具與配件的裸金屬部件可能
會非常燙。
請在正常負載下使用本工具。請勿使它過
載。請勿濫用本工具,請參閱說明手冊以
正確使用本工具。
警告!在牆上、地板和天花板上鑽孔之前,
請檢查電線和鋼管位置。
設定鑽孔深度 ( 圖 A)
深度尺是方便的功能部件,可確保鑽孔深度的一
致性。鬆開側手柄,根據所需深度調整深度計,
然後擰緊側手柄。
透過逆時針轉動手柄,將側手柄 (9) 轉鬆。
將深度尺 (8) 設定到所需位置。最大鑽孔深度
相等於鑽頭尖端和深度尺前端之間的距離。
順時針轉動手柄,將側手柄轉緊。
開啟與關閉 ( 圖 A)
警告! 插入插頭前,請確認開關是否可以自由按
下和釋放,釋放後是否能回復原位。請在開啟前
檢查開關鎖定位置,並確保在將插頭插入電源之
前,開關處於釋放狀態。
若要開啟工具,請按下變速開關 (3)。工具轉
速取決於您按下開關的程度。
一般原則是,使用大直徑鑽頭時會採用低速,
使用小直徑鑽頭時則會採用高速。
若要執行持續操作,請按下鎖定按鈕 (2) 並釋
放變速開關。
若要關閉工具,請鬆開變速開關。
若要在持續操作時關閉工具電源,請再次按下
並鬆開變速開關。
警告! 使用者在離開時,或在拾起、運輸、操縱
及放置工具時,請確保已關閉工具電源並拔出插
頭。
安裝電鑽夾頭(圖 D)(SHR243,
SHR263)
選購配件
根據配件安裝說明,將電鎚鑽夾頭 (12) 插入
工具夾頭 (7)。
轉動電鎚鑽夾頭,以便在電鎚鑽夾具的前端鬆
開夾具,將配件桿 (13) 插入夾具,然後反方
向轉動夾頭。
您還可使用電鎚鑽夾頭匙來擰緊夾具。
警告: 請勿在錘鑽模式使用標準夾頭
將 SDS Plus 工具夾持器更換為快換夾
頭(圖 G)(SHR264)
ENGLISH (Original Instructions)
6
gauge according to the required depth. After that, tighten
the side handle.
♦Slacken the side handle (9) by turning the grip counter-
clockwise.
♦Set the depth stop (8) to the required position. The
maximum drilling depth is equal to the distance between
the tip of the drill bit and the front end of the depth stop.
♦Tighten the side handle by turning the grip clockwise.
Switching on and off
WARNING! Before plugging in to the power source, make
sure the switch can be flipped freely, and can return to its
original position once released. Please check switch lock on
position before turn on and make sure switch lock off before
plugging in to the power source.
♦To switch the tool on, press the variable speed switch
(3). The tool speed depends on how far you press the
switch.
♦As a general rule, use low speeds for large diameter
drill bits and high speeds for smaller diameter drill bits.
♦For continuous operation, press the lock-on button (2)
and release the variable speed switch.
♦To switch the tool off, release the variable speed switch.
To switch the tool off when in continuous operation,
press the variable speed switch once more and release
it.
WARNING! When the user leaves, or pick up, transport,
manner and position the tool, make sure that tool is
switched off and unplugged.
Fitting drill chuck (NQCC, Fig E)
Optional accessory
♦Insert the drill chuck (16) into the tool chuck (6)
according to the instructions for installing attachments.
♦Turn the drill chuck to loosen the clamps at the front-end
of the drill-clamp, and insert the accessory bar (17) into
the clamps and turn the chuck in the opposite direction.
♦You may also use the drill chuck key to tighten the
clamp.
Warning: Never use standard chucks in the
hammer-drilling mode
Replacing the SDS Plus Tool Holder with the
Keyless Chuck (QCC, Fig. D)
1. Turn the locking collar (5) into the unlocking position
and pull the SDS Plus Tool Holder (10) off.
2. Push the keyless chuck (12) onto the spindle and turn
the locking collar (5) to the locking position
To replace the keyless chuck with the SDS Plus tool holder,
first remove the keyless chuck the same way the tool holder
was removed. Then place the tool holder the same way the
keyless chuck was placed making sure to turn the locking
collar to the locking position.
Warning: Never use standard chucks in the
hammer-drilling mode
Selecting the Operating Mode (Fig. B)
The tool can be used in the following operating modes:
Rotary drilling: for screw driving and for drilling
into steel, wood and plastics
Hammer drilling: for concrete and masonry
drilling operations. Bit rotation: non-working
position used only to rotate a flat chisel into the
desired position
Hammering only: for light chipping, chiselling
and demolition applications. In this mode the tool
can also be used as a lever to free a jammed drill bit.
1. To select the operating mode, press the mode selector
button and rotate the mode selector switch (5) until it
points to the symbol of the required mode.
2. Release the mode selector button and check that the
mode selector switch is locked in place.
WARNING! Do not select the operating mode when
the tool is running.
Proper Hand Position (Fig. A, Fig. E)
WARNING! To reduce the risk of serious personal
injury, ALWAYS use proper hand position as shown.
WARNING! To reduce the risk of serious personal
injury, ALWAYS hold securely in anticipation of a
sudden reaction.
Proper hand position requires one hand on the side handle
(8), with the other hand on the main handle (14).
Rotary drilling (Fig. B, Fig. D, Fig. C1/C2)
♦For drilling in steel, wood and plastics, or for screw
driving set the operating mode selector (4) to the
position.
♦Depending on your tool, follow either of the following
instructions:
QCC: Replace the SDS Plus tool holder (12) with the
keyless chuck (14).
NQCC: Fit the drill chuck assembly.
♦insert the appropriate bits. When driving slotted head
screws always use bits with a finder sleeve.
♦For drilling in steel, wood and plastics, set the forward/
reverse lever(4) to the forward position(Fig C1). When
use for screw driver function, tighten screws set the
forward/reverse lever (4) to the forward position(Fig C1)
and loose screws set the forward/reverse lever (4) to
the reverse position(Fig C2).
WARNING! Never use drill chucks in the hammer drilling
mode.
Hammer drilling (Fig. B)
♦For hammer drilling in masonry and concrete, set the
operating mode selector (5) to the position.
♦The drill bit has to be placed accurately onto the drill
hole position. After that, pull the switch for optimal
effects. Make sure the tool is in the correct position to
prevent the drill from deviating from the hole.
♦When the drill hole is clogged with debris or fine powder,
please don’t exert any more pressure. Tool should be
put in free-running state before removing part of the drill
bit from the hole. If repeated a few times, the blockage
in the hole would be cleared, and normal drilling can
 繁體中文
15
將鎖定環 (15) 旋轉至解鎖位置並將 SDS Plus
工具夾持器 (16) 拉出。
將快換夾頭 (17) 推向主軸並將鎖定環 (15) 旋
轉至鎖定位置。若要將快換夾頭更換為 SDS
Plus 工具夾持器,請先以卸下工具夾持器同
樣的方式卸下快換夾頭。然後依放置快換夾頭
的方式放置工具夾持器,並確保將鎖定環旋轉
到鎖定位置。
警告: 請勿在錘鑽模式使用標準夾頭
選擇操作模式 ( 圖 B)
本工具可用於以下操作模式:
鑽孔:用於螺旋以及在鋼材、木材和塑
膠上鑽孔。
錘 鑽:用於在混凝土和磚石上鑽孔作業。
鑽頭旋轉:非工作位置,僅用於將平鑿
旋轉到所需的位置。
僅敲擊:用於輕型鑿切、鑿打及破碎應
用。在此模式下,工具還可用作撬桿,
以便於取出卡住的鑽頭。
1. 若要選擇操作模式,請按下模式選擇器按鈕,
並旋轉模式選擇器開關 (5) 直到其指向所需的
模式符號為止。
2. 鬆開模式選擇器按鈕,並檢查模式選擇器開關
是否鎖定到位。
警告! 工具運行時請勿選擇操作模式。
手的正確位置 ( 圖 A,圖 E)
警告! 為了減低造成嚴重人身傷害的風
險,務必如圖示那樣正確放置雙手。
警告! 為了減低造成嚴重人身傷害的風
險,預期有突然反應時務必握緊。
正確的雙手放置位置是一隻手放在側手柄 (9) 上,
另一隻手握住主手柄 (1)。
旋轉鑽孔 ( 圖 B、圖 C1/C2 、圖 D、圖 G)
若要在鋼材、木材與塑膠上鑽孔,或執行螺絲螺旋
操作,請將操作模式選擇器 (5) 設定到其應處
位置。
請根據工具的型號執行以下任一指示:
SHR264: 將 SDS Plus 工具夾持器 (16) 更換為快換
ENGLISH (Original Instructions)
6
gauge according to the required depth. After that, tighten
the side handle.
♦Slacken the side handle (9) by turning the grip counter-
clockwise.
♦Set the depth stop (8) to the required position. The
maximum drilling depth is equal to the distance between
the tip of the drill bit and the front end of the depth stop.
♦Tighten the side handle by turning the grip clockwise.
Switching on and off
WARNING! Before plugging in to the power source, make
sure the switch can be flipped freely, and can return to its
original position once released. Please check switch lock on
position before turn on and make sure switch lock off before
plugging in to the power source.
♦To switch the tool on, press the variable speed switch
(3). The tool speed depends on how far you press the
switch.
♦As a general rule, use low speeds for large diameter
drill bits and high speeds for smaller diameter drill bits.
♦For continuous operation, press the lock-on button (2)
and release the variable speed switch.
♦To switch the tool off, release the variable speed switch.
To switch the tool off when in continuous operation,
press the variable speed switch once more and release
it.
WARNING! When the user leaves, or pick up, transport,
manner and position the tool, make sure that tool is
switched off and unplugged.
Fitting drill chuck (NQCC, Fig E)
Optional accessory
♦Insert the drill chuck (16) into the tool chuck (6)
according to the instructions for installing attachments.
♦Turn the drill chuck to loosen the clamps at the front-end
of the drill-clamp, and insert the accessory bar (17) into
the clamps and turn the chuck in the opposite direction.
♦You may also use the drill chuck key to tighten the
clamp.
Warning: Never use standard chucks in the
hammer-drilling mode
Replacing the SDS Plus Tool Holder with the
Keyless Chuck (QCC, Fig. D)
1. Turn the locking collar (5) into the unlocking position
and pull the SDS Plus Tool Holder (10) off.
2. Push the keyless chuck (12) onto the spindle and turn
the locking collar (5) to the locking position
To replace the keyless chuck with the SDS Plus tool holder,
first remove the keyless chuck the same way the tool holder
was removed. Then place the tool holder the same way the
keyless chuck was placed making sure to turn the locking
collar to the locking position.
Warning: Never use standard chucks in the
hammer-drilling mode
Selecting the Operating Mode (Fig. B)
The tool can be used in the following operating modes:
Rotary drilling: for screw driving and for drilling
into steel, wood and plastics
Hammer drilling: for concrete and masonry
drilling operations. Bit rotation: non-working
position used only to rotate a flat chisel into the
desired position
Hammering only: for light chipping, chiselling
and demolition applications. In this mode the tool
can also be used as a lever to free a jammed drill bit.
1. To select the operating mode, press the mode selector
button and rotate the mode selector switch (5) until it
points to the symbol of the required mode.
2. Release the mode selector button and check that the
mode selector switch is locked in place.
WARNING! Do not select the operating mode when
the tool is running.
Proper Hand Position (Fig. A, Fig. E)
WARNING! To reduce the risk of serious personal
injury, ALWAYS use proper hand position as shown.
WARNING! To reduce the risk of serious personal
injury, ALWAYS hold securely in anticipation of a
sudden reaction.
Proper hand position requires one hand on the side handle
(8), with the other hand on the main handle (14).
Rotary drilling (Fig. B, Fig. D, Fig. C1/C2)
♦For drilling in steel, wood and plastics, or for screw
driving set the operating mode selector (4) to the
position.
♦Depending on your tool, follow either of the following
instructions:
QCC: Replace the SDS Plus tool holder (12) with the
keyless chuck (14).
NQCC: Fit the drill chuck assembly.
♦insert the appropriate bits. When driving slotted head
screws always use bits with a finder sleeve.
♦For drilling in steel, wood and plastics, set the forward/
reverse lever(4) to the forward position(Fig C1). When
use for screw driver function, tighten screws set the
forward/reverse lever (4) to the forward position(Fig C1)
and loose screws set the forward/reverse lever (4) to
the reverse position(Fig C2).
WARNING! Never use drill chucks in the hammer drilling
mode.
Hammer drilling (Fig. B)
♦For hammer drilling in masonry and concrete, set the
operating mode selector (5) to the position.
♦The drill bit has to be placed accurately onto the drill
hole position. After that, pull the switch for optimal
effects. Make sure the tool is in the correct position to
prevent the drill from deviating from the hole.
♦When the drill hole is clogged with debris or fine powder,
please don’t exert any more pressure. Tool should be
put in free-running state before removing part of the drill
bit from the hole. If repeated a few times, the blockage
in the hole would be cleared, and normal drilling can
夾頭 (17)。
SHR243/SHR263: 安裝電鑽夾頭組件 (12)。
插入相應的鑽頭。旋轉平頭螺絲時務必使用安
裝了探測套管的鑽頭。
若要在鋼材、木材及塑膠上鑽孔,請將正 / 反轉
桿(
4) 設為正向位置 ( 圖 C1)。若使用螺絲起子
功能,擰緊螺絲會將正 / 反轉桿 (4) 設為正向位
置 ( 圖 C1),擰鬆螺絲會將正 / 反轉桿 (4) 設為
反向位置 ( 圖 C2)。
警告! 切勿在敲擊鑽孔模式中使用電鎚鑽夾頭。
錘鑽 ( 圖 B)
若要在磚石與混凝土上進行敲擊鑽孔,請將操
作模式選擇器 (5) 設定到 位置。
鑽頭必須對準鑽孔的位置。對準後再扣動開關
可得到最佳效果。確保工具放置在正確的位置,
以防止電鎚鑽偏離鑽孔。
當鑽孔堵塞了碎屑或粉末時,請勿再施加任何
壓力。從孔中移下鑽頭部分之前,工具應處於
自由運轉狀態。若重複執行數次,可以清除孔
中的堵塞物,然後恢復正常的鑽孔。
警告! 若鑽頭觸到水泥或水泥中的鋼筋,工具可
能發生危險的反衝。請隨時保持平衡、穩固的站姿,
並緊緊握持工具以防止危險的反衝。
重載耦合裝置
若鑽頭卡住或鉤住,將會截斷傳輸至鑽頭軸的驅
動力。這可能會產生強烈反衝,因此必須雙手緊
緊握持工具以保持穩固的姿勢。
鑿切與鑿打 ( 圖 B)
將模式選擇器 (5) 設定為「錘擊」 位置。
插入相應的鑿子,然後手動旋轉直到鑿子鎖定
到位置。
按需要調整側手柄 (9)。
開啟工具以開始操作。
工作完成後以及拔出插頭前,請務必關閉工具。
警告! 請勿使用本工具來混合或泵打易燃或
易爆液體(揮發油、酒精等等)。請勿使用本
工具來混合或攪拌標有易燃標記的液體。
配件
本工具的效能取決於所使用的配件。Stanley 配件依
據高品質標準進行規劃,專為增強本工具的效能而
設計。透過使用這些配件,工具將提供極佳效能。
ENGLISH (Original Instructions)
6
gauge according to the required depth. After that, tighten
the side handle.
♦Slacken the side handle (9) by turning the grip counter-
clockwise.
♦Set the depth stop (8) to the required position. The
maximum drilling depth is equal to the distance between
the tip of the drill bit and the front end of the depth stop.
♦Tighten the side handle by turning the grip clockwise.
Switching on and off
WARNING! Before plugging in to the power source, make
sure the switch can be flipped freely, and can return to its
original position once released. Please check switch lock on
position before turn on and make sure switch lock off before
plugging in to the power source.
♦To switch the tool on, press the variable speed switch
(3). The tool speed depends on how far you press the
switch.
♦As a general rule, use low speeds for large diameter
drill bits and high speeds for smaller diameter drill bits.
♦For continuous operation, press the lock-on button (2)
and release the variable speed switch.
♦To switch the tool off, release the variable speed switch.
To switch the tool off when in continuous operation,
press the variable speed switch once more and release
it.
WARNING! When the user leaves, or pick up, transport,
manner and position the tool, make sure that tool is
switched off and unplugged.
Fitting drill chuck (NQCC, Fig E)
Optional accessory
♦Insert the drill chuck (16) into the tool chuck (6)
according to the instructions for installing attachments.
♦Turn the drill chuck to loosen the clamps at the front-end
of the drill-clamp, and insert the accessory bar (17) into
the clamps and turn the chuck in the opposite direction.
♦You may also use the drill chuck key to tighten the
clamp.
Warning: Never use standard chucks in the
hammer-drilling mode
Replacing the SDS Plus Tool Holder with the
Keyless Chuck (QCC, Fig. D)
1. Turn the locking collar (5) into the unlocking position
and pull the SDS Plus Tool Holder (10) off.
2. Push the keyless chuck (12) onto the spindle and turn
the locking collar (5) to the locking position
To replace the keyless chuck with the SDS Plus tool holder,
first remove the keyless chuck the same way the tool holder
was removed. Then place the tool holder the same way the
keyless chuck was placed making sure to turn the locking
collar to the locking position.
Warning: Never use standard chucks in the
hammer-drilling mode
Selecting the Operating Mode (Fig. B)
The tool can be used in the following operating modes:
Rotary drilling: for screw driving and for drilling
into steel, wood and plastics
Hammer drilling: for concrete and masonry
drilling operations. Bit rotation: non-working
position used only to rotate a flat chisel into the
desired position
Hammering only: for light chipping, chiselling
and demolition applications. In this mode the tool
can also be used as a lever to free a jammed drill bit.
1. To select the operating mode, press the mode selector
button and rotate the mode selector switch (5) until it
points to the symbol of the required mode.
2. Release the mode selector button and check that the
mode selector switch is locked in place.
WARNING! Do not select the operating mode when
the tool is running.
Proper Hand Position (Fig. A, Fig. E)
WARNING! To reduce the risk of serious personal
injury,ALWAYS use proper hand position as shown.
WARNING! To reduce the risk of serious personal
injury, ALWAYS hold securely in anticipation of a
sudden reaction.
Proper hand position requires one hand on the side handle
(8), with the other hand on the main handle (14).
Rotary drilling (Fig. B, Fig. D, Fig. C1/C2)
♦For drilling in steel, wood and plastics, or for screw
driving set the operating mode selector (4) to the
position.
♦Depending on your tool, follow either of the following
instructions:
QCC: Replace the SDS Plus tool holder (12) with the
keyless chuck (14).
NQCC: Fit the drill chuck assembly.
♦insert the appropriate bits. When driving slotted head
screws always use bits with a finder sleeve.
♦For drilling in steel, wood and plastics, set the forward/
reverse lever(4) to the forward position(Fig C1). When
use for screw driver function, tighten screws set the
forward/reverse lever (4) to the forward position(Fig C1)
and loose screws set the forward/reverse lever (4) to
the reverse position(Fig C2).
WARNING! Never use drill chucks in the hammer drilling
mode.
Hammer drilling (Fig. B)
♦For hammer drilling in masonry and concrete, set the
operating mode selector (5) to the position.
♦The drill bit has to be placed accurately onto the drill
hole position. After that, pull the switch for optimal
effects. Make sure the tool is in the correct position to
prevent the drill from deviating from the hole.
♦When the drill hole is clogged with debris or fine powder,
please don’t exert any more pressure. Tool should be
put in free-running state before removing part of the drill
bit from the hole. If repeated a few times, the blockage
in the hole would be cleared, and normal drilling can
ENGLISH (Original Instructions)
6
gauge according to the required depth. After that, tighten
the side handle.
♦Slacken the side handle (9) by turning the grip counter-
clockwise.
♦Set the depth stop (8) to the required position. The
maximum drilling depth is equal to the distance between
the tip of the drill bit and the front end of the depth stop.
♦Tighten the side handle by turning the grip clockwise.
Switching on and off
WARNING! Before plugging in to the power source, make
sure the switch can be flipped freely, and can return to its
original position once released. Please check switch lock on
position before turn on and make sure switch lock off before
plugging in to the power source.
♦To switch the tool on, press the variable speed switch
(3). The tool speed depends on how far you press the
switch.
♦As a general rule, use low speeds for large diameter
drill bits and high speeds for smaller diameter drill bits.
♦For continuous operation, press the lock-on button (2)
and release the variable speed switch.
♦To switch the tool off, release the variable speed switch.
To switch the tool off when in continuous operation,
press the variable speed switch once more and release
it.
WARNING! When the user leaves, or pick up, transport,
manner and position the tool, make sure that tool is
switched off and unplugged.
Fitting drill chuck (NQCC, Fig E)
Optional accessory
♦Insert the drill chuck (16) into the tool chuck (6)
according to the instructions for installing attachments.
♦Turn the drill chuck to loosen the clamps at the front-end
of the drill-clamp, and insert the accessory bar (17) into
the clamps and turn the chuck in the opposite direction.
♦You may also use the drill chuck key to tighten the
clamp.
Warning: Never use standard chucks in the
hammer-drilling mode
Replacing the SDS Plus Tool Holder with the
Keyless Chuck (QCC, Fig. D)
1. Turn the locking collar (5) into the unlocking position
and pull the SDS Plus Tool Holder (10) off.
2. Push the keyless chuck (12) onto the spindle and turn
the locking collar (5) to the locking position
To replace the keyless chuck with the SDS Plus tool holder,
first remove the keyless chuck the same way the tool holder
was removed. Then place the tool holder the same way the
keyless chuck was placed making sure to turn the locking
collar to the locking position.
Warning: Never use standard chucks in the
hammer-drilling mode
Selecting the Operating Mode (Fig. B)
The tool can be used in the following operating modes:
Rotary drilling: for screw driving and for drilling
into steel, wood and plastics
Hammer drilling: for concrete and masonry
drilling operations. Bit rotation: non-working
position used only to rotate a flat chisel into the
desired position
Hammering only: for light chipping, chiselling
and demolition applications. In this mode the tool
can also be used as a lever to free a jammed drill bit.
1. To select the operating mode, press the mode selector
button and rotate the mode selector switch (5) until it
points to the symbol of the required mode.
2. Release the mode selector button and check that the
mode selector switch is locked in place.
WARNING! Do not select the operating mode when
the tool is running.
Proper Hand Position (Fig. A, Fig. E)
WARNING! To reduce the risk of serious personal
injury, ALWAYS use proper hand position as shown.
WARNING! To reduce the risk of serious personal
injury, ALWAYS hold securely in anticipation of a
sudden reaction.
Proper hand position requires one hand on the side handle
(8), with the other hand on the main handle (14).
Rotary drilling (Fig. B, Fig. D, Fig. C1/C2)
♦For drilling in steel, wood and plastics, or for screw
driving set the operating mode selector (4) to the
position.
♦Depending on your tool, follow either of the following
instructions:
QCC: Replace the SDS Plus tool holder (12) with the
keyless chuck (14).
NQCC: Fit the drill chuck assembly.
♦insert the appropriate bits. When driving slotted head
screws always use bits with a finder sleeve.
♦For drilling in steel, wood and plastics, set the forward/
reverse lever(4) to the forward position(Fig C1). When
use for screw driver function, tighten screws set the
forward/reverse lever (4) to the forward position(Fig C1)
and loose screws set the forward/reverse lever (4) to
the reverse position(Fig C2).
WARNING! Never use drill chucks in the hammer drilling
mode.
Hammer drilling (Fig. B)
♦For hammer drilling in masonry and concrete, set the
operating mode selector (5) to the position.
♦The drill bit has to be placed accurately onto the drill
hole position. After that, pull the switch for optimal
effects. Make sure the tool is in the correct position to
prevent the drill from deviating from the hole.
♦When the drill hole is clogged with debris or fine powder,
please don’t exert any more pressure. Tool should be
put in free-running state before removing part of the drill
bit from the hole. If repeated a few times, the blockage
in the hole would be cleared, and normal drilling can
7
ENGLISH (Original Instructions)
resume.
WARNING! When the drill bit hits cement or the steel rebar
in the cement, the tool may recoil dangerously. Please hold
the tool tightly in a balanced and stable position at all times
to prevent it from recoiling dangerously.
Overload coupling device
If the drill bit is caught or hooked, the driving force
transmitted to the drill shaft will be cut off. This would
generate a strong recoil, so it would be necessary to hold
the tool tightly with both hands to remain in a stable position.
Chipping and chiselling (fig. B)
♦Set the mode selector switch (5) to the“hammering only”
position.
♦Insert the appropriate chisel and rotate it by hand to lock
it into positions.
♦Adjust the side handle (9) as required.
♦Switch on the tool and start working.
♦Always switch off the tool when work is finished and
before unplugging.
WARNING! Do not use this tool to mix or pump
easily combustible or explosive fluids (benzine,
alcohol, etc.). Do not mix or stir inflammable liquids
labelled accordingly.
Accessories
The performance of your tool depends on the accessory
used. Stanley accessories are engineered to high quality
standards and designed to enhance the performance of
your tool. By using these accessories you will get the very
best from your tool.
MAINTENANCE
Your Stanley corded/cordless appliance/tool has been
designed to operate over a long period of time with a
minimum of maintenance. To ensure satisfactory operations,
the tool must be maintained and cleaned regularly
WARNING: To reduce the risk of injury, turn
unit off and disconnect machine from power
source before installing and removing accessories,
before adjusting or changing set-ups or when making
repairs. Be sure the trigger switch is in the OFF position.
An accidental start-up can cause injury.
♦This machine is not user-serviceable. If problems occur
contact an authorised repair agent.
♦The tool will automatically switch off when the carbon
brushes are worn.
WARNING! Before performing any maintenance on corded/
cordless power tools:
♦Switch off and unplug the appliance/tool.
♦Or switch off and remove the battery from the appliance/
tool if the appliance/tool has a separate battery pack.
♦Or run the battery down completely if it is integral and
then switch off.
♦Unplug the charger before cleaning it. Your charger
does not require any maintenance apart from regular
cleaning.
♦Regularly clean the ventilation slots in your appliance/
tool/ charger using a soft brush or dry cloth.
♦Regularly clean the motor housing using a damp cloth.
Do not use any abrasive or solvent-based cleaner.
♦Regularly open the chuck and tap it to remove any dust
from the interior (when fitted).
Lubrication
Your power tool requires no additional lubrication.
Accessories and attachments used must be
regularly lubrication around the SDS Plus fitment.
Cleaning
WARNING! Blow dirt and dust out of the
main housing with dry air as often as dirt is
seen collecting in and around the air vents.
Wear approved eye protection and approved dust
mask when performing this procedure.
WARNING! Never use solvents or other
harsh chemicals for cleaning the non-
metallic parts of the tool. These chemicals may
weaken the material of the parts. Use only mild
soap and damp cloth to clean the tool. Never let any
liquid get inside the tool,cleaning of gasoline or
other chemicals, never immerse any part of the tool
into liquid.
Optional Accessories
WARNING! Since accessories, other than those
offered by Stanley, have not been tested with this
product, use of such accessories with this tool could be
hazardous. To reduce the risk of injury, only Stanley,
recommended accessories should be used with this
product.
Various types of SDS Plus drill bits and chisels are available
as an option.
Consult your dealer for further information on the
appropriate accessories.
Protecting The Environment
Separate collection. This product must not be
disposed of with normal household waste.
Should you find one day that your Stanley product
needs replacement, or if it is of no further use to you, do
not dispose of it with household waste. Please sort it out for
separate recycling.
Separate collection of used products and packaging
allows materials to be recycled and used again. Re-
use of recycled materials helps prevent environmental
pollution and reduces the demand for raw materials.
Some local governments may require the local or municipal
waste disposal centers or retailers of new products to
provide households with electronic product recycling
services.
Notes
STANLEY’s policy is one of continuous improvement to
our products and as such, we reserve the right to change
product specifications without prior notice.
Standard equipment and accessories may vary by country.
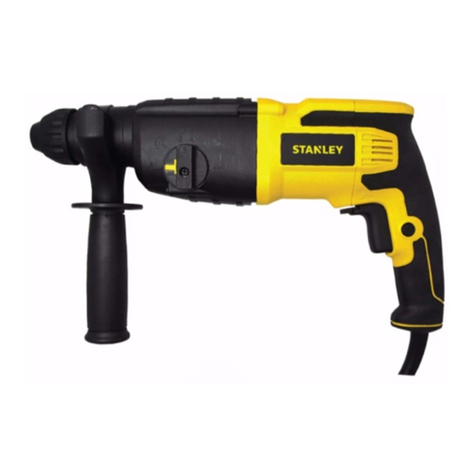
 繁體中文
16
Stanley 插電式 / 充電式裝置 / 工具採用卓越的設計,
能夠長時間使用,並且只需最少的維護。為了獲
得滿意的操作效果,必須定期對工具進行維護和
清潔。
警告: 若要降低傷害危險,請在安裝和移
除配件前、調整或變更設定前或進行修理
時關閉工具並斷開電源。請確保觸發開關處於關
閉 (OFF) 位置。意外啟動工具可能會造成傷害。
本機器不是使用者可檢修的裝置。如果發生問
題,請聯絡授權維修機構。
當碳刷磨損時,工具將自動關閉。
警告! 在插電 / 充電電動工具上執行任何維護工
作之前:
關閉電源並拔下器具 / 工具的插頭。
或者,若器具 / 工具使用獨立電池組,請關閉
電源並將電池從器具 / 工具中卸下。
又或者,若電池是內建電池,請將電池完全放
電,然後再關閉電源。
清潔之前請拔下充電器的插頭。您的充電器除
了定期清潔之外,並不需要執行任何維護操作。
定期使用軟刷或乾布清潔器具 / 工具 / 充電器
內的通風槽。
請定期使用濕布清潔電動機外殼。
請勿使用任何研磨性或基於溶劑的清潔劑。
請定期打開夾頭並輕敲以清除內部的任何塵埃
(如安裝)。
潤滑
本電動工具無需額外潤滑。必須定期潤滑
SDS Plus 裝置的配件和附件。
清潔
警告! 一旦通風口及其周圍積聚
可見的粉塵,請立即使用乾燥的壓
縮空氣吹掉主機外殼內的粉塵和灰
塵。執行此步驟時,請佩戴經認可的護目
裝備和防塵面罩。
ENGLISH (Original Instructions)
6
gauge according to the required depth. After that, tighten
the side handle.
♦Slacken the side handle (9) by turning the grip counter-
clockwise.
♦Set the depth stop (8) to the required position. The
maximum drilling depth is equal to the distance between
the tip of the drill bit and the front end of the depth stop.
♦Tighten the side handle by turning the grip clockwise.
Switching on and off
WARNING! Before plugging in to the power source, make
sure the switch can be flipped freely, and can return to its
original position once released. Please check switch lock on
position before turn on and make sure switch lock off before
plugging in to the power source.
♦To switch the tool on, press the variable speed switch
(3). The tool speed depends on how far you press the
switch.
♦As a general rule, use low speeds for large diameter
drill bits and high speeds for smaller diameter drill bits.
♦For continuous operation, press the lock-on button (2)
and release the variable speed switch.
♦To switch the tool off, release the variable speed switch.
To switch the tool off when in continuous operation,
press the variable speed switch once more and release
it.
WARNING! When the user leaves, or pick up, transport,
manner and position the tool, make sure that tool is
switched off and unplugged.
Fitting drill chuck (NQCC, Fig E)
Optional accessory
♦Insert the drill chuck (16) into the tool chuck (6)
according to the instructions for installing attachments.
♦Turn the drill chuck to loosen the clamps at the front-end
of the drill-clamp, and insert the accessory bar (17) into
the clamps and turn the chuck in the opposite direction.
♦You may also use the drill chuck key to tighten the
clamp.
Warning: Never use standard chucks in the
hammer-drilling mode
Replacing the SDS Plus Tool Holder with the
Keyless Chuck (QCC, Fig. D)
1. Turn the locking collar (5) into the unlocking position
and pull the SDS Plus Tool Holder (10) off.
2. Push the keyless chuck (12) onto the spindle and turn
the locking collar (5) to the locking position
To replace the keyless chuck with the SDS Plus tool holder,
first remove the keyless chuck the same way the tool holder
was removed. Then place the tool holder the same way the
keyless chuck was placed making sure to turn the locking
collar to the locking position.
Warning: Never use standard chucks in the
hammer-drilling mode
Selecting the Operating Mode (Fig. B)
The tool can be used in the following operating modes:
Rotary drilling: for screw driving and for drilling
into steel, wood and plastics
Hammer drilling: for concrete and masonry
drilling operations. Bit rotation: non-working
position used only to rotate a flat chisel into the
desired position
Hammering only: for light chipping, chiselling
and demolition applications. In this mode the tool
can also be used as a lever to free a jammed drill bit.
1. To select the operating mode, press the mode selector
button and rotate the mode selector switch (5) until it
points to the symbol of the required mode.
2. Release the mode selector button and check that the
mode selector switch is locked in place.
WARNING! Do not select the operating mode when
the tool is running.
Proper Hand Position (Fig. A, Fig. E)
WARNING! To reduce the risk of serious personal
injury, ALWAYS use proper hand position as shown.
WARNING! To reduce the risk of serious personal
injury, ALWAYS hold securely in anticipation of a
sudden reaction.
Proper hand position requires one hand on the side handle
(8), with the other hand on the main handle (14).
Rotary drilling (Fig. B, Fig. D, Fig. C1/C2)
♦For drilling in steel, wood and plastics, or for screw
driving set the operating mode selector (4) to the
position.
♦Depending on your tool, follow either of the following
instructions:
QCC: Replace the SDS Plus tool holder (12) with the
keyless chuck (14).
NQCC: Fit the drill chuck assembly.
♦insert the appropriate bits. When driving slotted head
screws always use bits with a finder sleeve.
♦For drilling in steel, wood and plastics, set the forward/
reverse lever(4) to the forward position(Fig C1). When
use for screw driver function, tighten screws set the
forward/reverse lever (4) to the forward position(Fig C1)
and loose screws set the forward/reverse lever (4) to
the reverse position(Fig C2).
WARNING! Never use drill chucks in the hammer drilling
mode.
Hammer drilling (Fig. B)
♦For hammer drilling in masonry and concrete, set the
operating mode selector (5) to the position.
♦The drill bit has to be placed accurately onto the drill
hole position. After that, pull the switch for optimal
effects. Make sure the tool is in the correct position to
prevent the drill from deviating from the hole.
♦When the drill hole is clogged with debris or fine powder,
please don’t exert any more pressure. Tool should be
put in free-running state before removing part of the drill
bit from the hole. If repeated a few times, the blockage
in the hole would be cleared, and normal drilling can
警告! 切勿使用溶劑或其他刺激
性化學品來清潔工具的非金屬部
件。這些化學品可能會削弱部件的
材料。請僅使用中性肥皂與濕布來清潔工
具。切勿讓任何液體進入工具,請勿使用
汽油或其他化學品進行清潔,切勿將工具
的任何部分浸入液體中。
ENGLISH (Original Instructions)
6
gauge according to the required depth. After that, tighten
the side handle.
♦Slacken the side handle (9) by turning the grip counter-
clockwise.
♦Set the depth stop (8) to the required position. The
maximum drilling depth is equal to the distance between
the tip of the drill bit and the front end of the depth stop.
♦Tighten the side handle by turning the grip clockwise.
Switching on and off
WARNING! Before plugging in to the power source, make
sure the switch can be flipped freely, and can return to its
original position once released. Please check switch lock on
position before turn on and make sure switch lock off before
plugging in to the power source.
♦To switch the tool on, press the variable speed switch
(3). The tool speed depends on how far you press the
switch.
♦As a general rule, use low speeds for large diameter
drill bits and high speeds for smaller diameter drill bits.
♦For continuous operation, press the lock-on button (2)
and release the variable speed switch.
♦To switch the tool off, release the variable speed switch.
To switch the tool off when in continuous operation,
press the variable speed switch once more and release
it.
WARNING! When the user leaves, or pick up, transport,
manner and position the tool, make sure that tool is
switched off and unplugged.
Fitting drill chuck (NQCC, Fig E)
Optional accessory
♦Insert the drill chuck (16) into the tool chuck (6)
according to the instructions for installing attachments.
♦Turn the drill chuck to loosen the clamps at the front-end
of the drill-clamp, and insert the accessory bar (17) into
the clamps and turn the chuck in the opposite direction.
♦You may also use the drill chuck key to tighten the
clamp.
Warning: Never use standard chucks in the
hammer-drilling mode
Replacing the SDS Plus Tool Holder with the
Keyless Chuck (QCC, Fig. D)
1. Turn the locking collar (5) into the unlocking position
and pull the SDS Plus Tool Holder (10) off.
2. Push the keyless chuck (12) onto the spindle and turn
the locking collar (5) to the locking position
To replace the keyless chuck with the SDS Plus tool holder,
first remove the keyless chuck the same way the tool holder
was removed. Then place the tool holder the same way the
keyless chuck was placed making sure to turn the locking
collar to the locking position.
Warning: Never use standard chucks in the
hammer-drilling mode
Selecting the Operating Mode (Fig. B)
The tool can be used in the following operating modes:
Rotary drilling: for screw driving and for drilling
into steel, wood and plastics
Hammer drilling: for concrete and masonry
drilling operations. Bit rotation: non-working
position used only to rotate a flat chisel into the
desired position
Hammering only: for light chipping, chiselling
and demolition applications. In this mode the tool
can also be used as a lever to free a jammed drill bit.
1. To select the operating mode, press the mode selector
button and rotate the mode selector switch (5) until it
points to the symbol of the required mode.
2. Release the mode selector button and check that the
mode selector switch is locked in place.
WARNING! Do not select the operating mode when
the tool is running.
Proper Hand Position (Fig. A, Fig. E)
WARNING! To reduce the risk of serious personal
injury, ALWAYS use proper hand position as shown.
WARNING! To reduce the risk of serious personal
injury, ALWAYS hold securely in anticipation of a
sudden reaction.
Proper hand position requires one hand on the side handle
(8), with the other hand on the main handle (14).
Rotary drilling (Fig. B, Fig. D, Fig. C1/C2)
♦For drilling in steel, wood and plastics, or for screw
driving set the operating mode selector (4) to the
position.
♦Depending on your tool, follow either of the following
instructions:
QCC: Replace the SDS Plus tool holder (12) with the
keyless chuck (14).
NQCC: Fit the drill chuck assembly.
♦insert the appropriate bits. When driving slotted head
screws always use bits with a finder sleeve.
♦For drilling in steel, wood and plastics, set the forward/
reverse lever(4) to the forward position(Fig C1). When
use for screw driver function, tighten screws set the
forward/reverse lever (4) to the forward position(Fig C1)
and loose screws set the forward/reverse lever (4) to
the reverse position(Fig C2).
WARNING! Never use drill chucks in the hammer drilling
mode.
Hammer drilling (Fig. B)
♦For hammer drilling in masonry and concrete, set the
operating mode selector (5) to the position.
♦The drill bit has to be placed accurately onto the drill
hole position. After that, pull the switch for optimal
effects. Make sure the tool is in the correct position to
prevent the drill from deviating from the hole.
♦When the drill hole is clogged with debris or fine powder,
please don’t exert any more pressure. Tool should be
put in free-running state before removing part of the drill
bit from the hole. If repeated a few times, the blockage
in the hole would be cleared, and normal drilling can
7
ENGLISH (Original Instructions)
resume.
WARNING! When the drill bit hits cement or the steel rebar
in the cement, the tool may recoil dangerously. Please hold
the tool tightly in a balanced and stable position at all times
to prevent it from recoiling dangerously.
Overload coupling device
If the drill bit is caught or hooked, the driving force
transmitted to the drill shaft will be cut off. This would
generate a strong recoil, so it would be necessary to hold
the tool tightly with both hands to remain in a stable position.
Chipping and chiselling (fig. B)
♦Set the mode selector switch (5) to the“hammering only”
position.
♦Insert the appropriate chisel and rotate it by hand to lock
it into positions.
♦Adjust the side handle (9) as required.
♦Switch on the tool and start working.
♦Always switch off the tool when work is finished and
before unplugging.
WARNING! Do not use this tool to mix or pump
easily combustible or explosive fluids (benzine,
alcohol, etc.). Do not mix or stir inflammable liquids
labelled accordingly.
Accessories
The performance of your tool depends on the accessory
used. Stanley accessories are engineered to high quality
standards and designed to enhance the performance of
your tool. By using these accessories you will get the very
best from your tool.
MAINTENANCE
Your Stanley corded/cordless appliance/tool has been
designed to operate over a long period of time with a
minimum of maintenance. To ensure satisfactory operations,
the tool must be maintained and cleaned regularly
WARNING: To reduce the risk of injury, turn
unit off and disconnect machine from power
source before installing and removing accessories,
before adjusting or changing set-ups or when making
repairs. Be sure the trigger switch is in the OFF position.
An accidental start-up can cause injury.
♦This machine is not user-serviceable. If problems occur
contact an authorised repair agent.
♦The tool will automatically switch off when the carbon
brushes are worn.
WARNING! Before performing any maintenance on corded/
cordless power tools:
♦Switch off and unplug the appliance/tool.
♦Or switch off and remove the battery from the appliance/
tool if the appliance/tool has a separate battery pack.
♦Or run the battery down completely if it is integral and
then switch off.
♦Unplug the charger before cleaning it. Your charger
does not require any maintenance apart from regular
cleaning.
♦Regularly clean the ventilation slots in your appliance/
tool/ charger using a soft brush or dry cloth.
♦Regularly clean the motor housing using a damp cloth.
Do not use any abrasive or solvent-based cleaner.
♦Regularly open the chuck and tap it to remove any dust
from the interior (when fitted).
Lubrication
Your power tool requires no additional lubrication.
Accessories and attachments used must be
regularly lubrication around the SDS Plus fitment.
Cleaning
WARNING! Blow dirt and dust out of the
main housing with dry air as often as dirt is
seen collecting in and around the air vents.
Wear approved eye protection and approved dust
mask when performing this procedure.
WARNING! Never use solvents or other
harsh chemicals for cleaning the non-
metallic parts of the tool. These chemicals may
weaken the material of the parts. Use only mild
soap and damp cloth to clean the tool. Never let any
liquid get inside the tool,cleaning of gasoline or
other chemicals, never immerse any part of the tool
into liquid.
Optional Accessories
WARNING! Since accessories, other than those
offered by Stanley, have not been tested with this
product, use of such accessories with this tool could be
hazardous. To reduce the risk of injury, only Stanley,
recommended accessories should be used with this
product.
Various types of SDS Plus drill bits and chisels are available
as an option.
Consult your dealer for further information on the
appropriate accessories.
Protecting The Environment
Separate collection. This product must not be
disposed of with normal household waste.
Should you find one day that your Stanley product
needs replacement, or if it is of no further use to you, do
not dispose of it with household waste. Please sort it out for
separate recycling.
Separate collection of used products and packaging
allows materials to be recycled and used again. Re-
use of recycled materials helps prevent environmental
pollution and reduces the demand for raw materials.
Some local governments may require the local or municipal
waste disposal centers or retailers of new products to
provide households with electronic product recycling
services.
Notes
STANLEY’s policy is one of continuous improvement to
our products and as such, we reserve the right to change
product specifications without prior notice.
Standard equipment and accessories may vary by country.
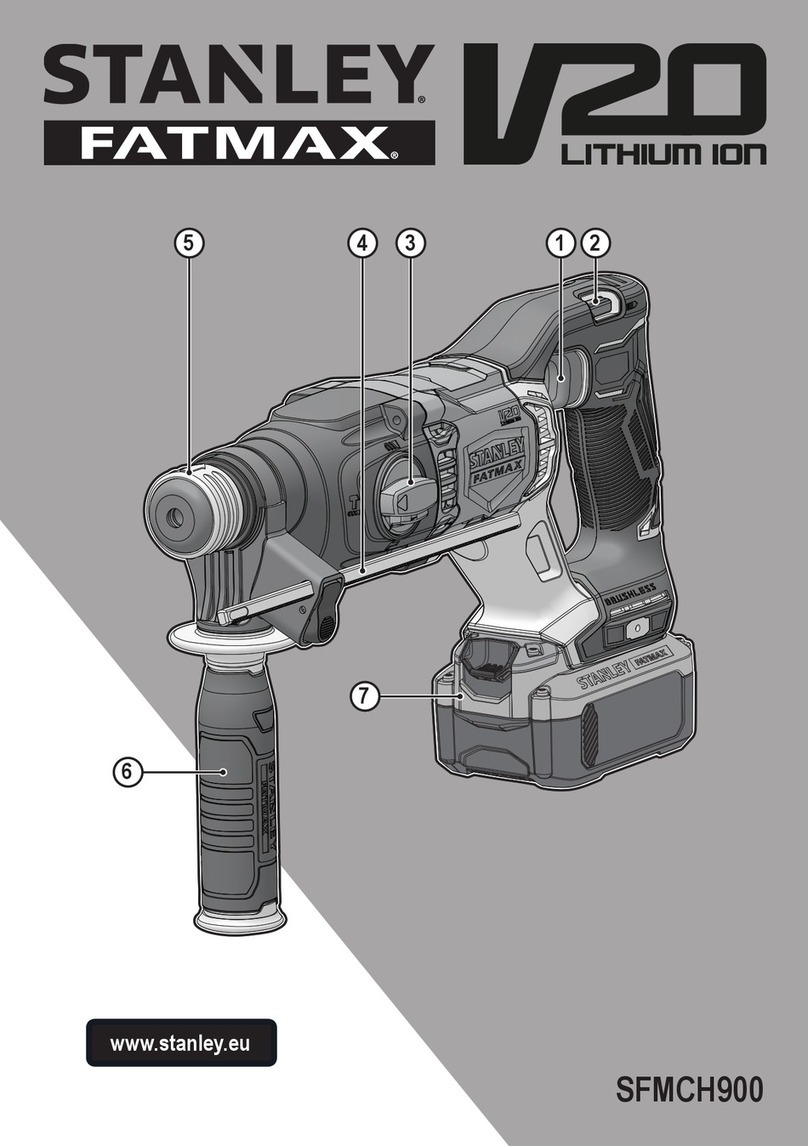
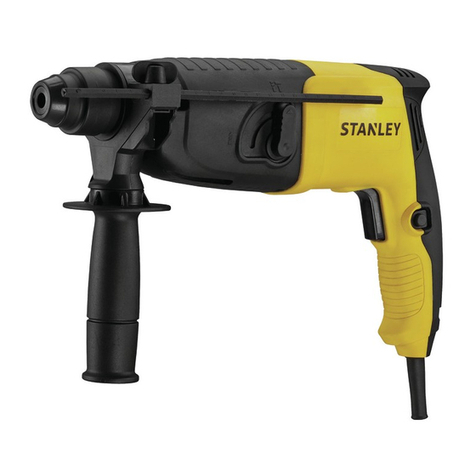
ENGLISH (Original Instructions)
6
gauge according to the required depth. After that, tighten
the side handle.
♦Slacken the side handle (9) by turning the grip counter-
clockwise.
♦Set the depth stop (8) to the required position. The
maximum drilling depth is equal to the distance between
the tip of the drill bit and the front end of the depth stop.
♦Tighten the side handle by turning the grip clockwise.
Switching on and off
WARNING! Before plugging in to the power source, make
sure the switch can be flipped freely, and can return to its
original position once released. Please check switch lock on
position before turn on and make sure switch lock off before
plugging in to the power source.
♦To switch the tool on, press the variable speed switch
(3). The tool speed depends on how far you press the
switch.
♦As a general rule, use low speeds for large diameter
drill bits and high speeds for smaller diameter drill bits.
♦For continuous operation, press the lock-on button (2)
and release the variable speed switch.
♦To switch the tool off, release the variable speed switch.
To switch the tool off when in continuous operation,
press the variable speed switch once more and release
it.
WARNING! When the user leaves, or pick up, transport,
manner and position the tool, make sure that tool is
switched off and unplugged.
Fitting drill chuck (NQCC, Fig E)
Optional accessory
♦Insert the drill chuck (16) into the tool chuck (6)
according to the instructions for installing attachments.
♦Turn the drill chuck to loosen the clamps at the front-end
of the drill-clamp, and insert the accessory bar (17) into
the clamps and turn the chuck in the opposite direction.
♦You may also use the drill chuck key to tighten the
clamp.
Warning: Never use standard chucks in the
hammer-drilling mode
Replacing the SDS Plus Tool Holder with the
Keyless Chuck (QCC, Fig. D)
1. Turn the locking collar (5) into the unlocking position
and pull the SDS Plus Tool Holder (10) off.
2. Push the keyless chuck (12) onto the spindle and turn
the locking collar (5) to the locking position
To replace the keyless chuck with the SDS Plus tool holder,
first remove the keyless chuck the same way the tool holder
was removed. Then place the tool holder the same way the
keyless chuck was placed making sure to turn the locking
collar to the locking position.
Warning: Never use standard chucks in the
hammer-drilling mode
Selecting the Operating Mode (Fig. B)
The tool can be used in the following operating modes:
Rotary drilling: for screw driving and for drilling
into steel, wood and plastics
Hammer drilling: for concrete and masonry
drilling operations. Bit rotation: non-working
position used only to rotate a flat chisel into the
desired position
Hammering only: for light chipping, chiselling
and demolition applications. In this mode the tool
can also be used as a lever to free a jammed drill bit.
1. To select the operating mode, press the mode selector
button and rotate the mode selector switch (5) until it
points to the symbol of the required mode.
2. Release the mode selector button and check that the
mode selector switch is locked in place.
WARNING! Do not select the operating mode when
the tool is running.
Proper Hand Position (Fig. A, Fig. E)
WARNING! To reduce the risk of serious personal
injury, ALWAYS use proper hand position as shown.
WARNING! To reduce the risk of serious personal
injury, ALWAYS hold securely in anticipation of a
sudden reaction.
Proper hand position requires one hand on the side handle
(8), with the other hand on the main handle (14).
Rotary drilling (Fig. B, Fig. D, Fig. C1/C2)
♦For drilling in steel, wood and plastics, or for screw
driving set the operating mode selector (4) to the
position.
♦Depending on your tool, follow either of the following
instructions:
QCC: Replace the SDS Plus tool holder (12) with the
keyless chuck (14).
NQCC: Fit the drill chuck assembly.
♦insert the appropriate bits. When driving slotted head
screws always use bits with a finder sleeve.
♦For drilling in steel, wood and plastics, set the forward/
reverse lever(4) to the forward position(Fig C1). When
use for screw driver function, tighten screws set the
forward/reverse lever (4) to the forward position(Fig C1)
and loose screws set the forward/reverse lever (4) to
the reverse position(Fig C2).
WARNING! Never use drill chucks in the hammer drilling
mode.
Hammer drilling (Fig. B)
♦For hammer drilling in masonry and concrete, set the
operating mode selector (5) to the position.
♦The drill bit has to be placed accurately onto the drill
hole position. After that, pull the switch for optimal
effects. Make sure the tool is in the correct position to
prevent the drill from deviating from the hole.
♦When the drill hole is clogged with debris or fine powder,
please don’t exert any more pressure. Tool should be
put in free-running state before removing part of the drill
bit from the hole. If repeated a few times, the blockage
in the hole would be cleared, and normal drilling can
選購配件
警告! 由於非 Stanley 所提供的配件未在本
產品上進行過使用測試,在本產品上使用
這些配件可能會導致危險。為降低傷害風險,在
本產品上只應使用 Stanley 所推薦的配件。
您可選購不同種類的 SDS Plus 鑽頭以及鑿子。
如需進一步瞭解適用配件的相關資訊,請洽詢代理商。
保護環境
分開收集。本產品必須與一般家庭廢物分
開處置。
若您發現本 Stanley 產品需要更換或再無用處,請
勿將其與家庭廢物一併處置。請將其分類以進行
單獨回收。
7
ENGLISH (Original Instructions)
resume.
WARNING! When the drill bit hits cement or the steel rebar
in the cement, the tool may recoil dangerously. Please hold
the tool tightly in a balanced and stable position at all times
to prevent it from recoiling dangerously.
Overload coupling device
If the drill bit is caught or hooked, the driving force
transmitted to the drill shaft will be cut off. This would
generate a strong recoil, so it would be necessary to hold
the tool tightly with both hands to remain in a stable position.
Chipping and chiselling (fig. B)
♦Set the mode selector switch (5) to the“hammering only”
position.
♦Insert the appropriate chisel and rotate it by hand to lock
it into positions.
♦Adjust the side handle (9) as required.
♦Switch on the tool and start working.
♦Always switch off the tool when work is finished and
before unplugging.
WARNING! Do not use this tool to mix or pump
easily combustible or explosive fluids (benzine,
alcohol, etc.). Do not mix or stir inflammable liquids
labelled accordingly.
Accessories
The performance of your tool depends on the accessory
used. Stanley accessories are engineered to high quality
standards and designed to enhance the performance of
your tool. By using these accessories you will get the very
best from your tool.
MAINTENANCE
Your Stanley corded/cordless appliance/tool has been
designed to operate over a long period of time with a
minimum of maintenance. To ensure satisfactory operations,
the tool must be maintained and cleaned regularly
WARNING: To reduce the risk of injury, turn
unit off and disconnect machine from power
source before installing and removing accessories,
before adjusting or changing set-ups or when making
repairs. Be sure the trigger switch is in the OFF position.
An accidental start-up can cause injury.
♦This machine is not user-serviceable. If problems occur
contact an authorised repair agent.
♦The tool will automatically switch off when the carbon
brushes are worn.
WARNING! Before performing any maintenance on corded/
cordless power tools:
♦Switch off and unplug the appliance/tool.
♦Or switch off and remove the battery from the appliance/
tool if the appliance/tool has a separate battery pack.
♦Or run the battery down completely if it is integral and
then switch off.
♦Unplug the charger before cleaning it. Your charger
does not require any maintenance apart from regular
cleaning.
♦Regularly clean the ventilation slots in your appliance/
tool/ charger using a soft brush or dry cloth.
♦Regularly clean the motor housing using a damp cloth.
Do not use any abrasive or solvent-based cleaner.
♦Regularly open the chuck and tap it to remove any dust
from the interior (when fitted).
Lubrication
Your power tool requires no additional lubrication.
Accessories and attachments used must be
regularly lubrication around the SDS Plus fitment.
Cleaning
WARNING! Blow dirt and dust out of the
main housing with dry air as often as dirt is
seen collecting in and around the air vents.
Wear approved eye protection and approved dust
mask when performing this procedure.
WARNING! Never use solvents or other
harsh chemicals for cleaning the non-
metallic parts of the tool. These chemicals may
weaken the material of the parts. Use only mild
soap and damp cloth to clean the tool. Never let any
liquid get inside the tool,cleaning of gasoline or
other chemicals, never immerse any part of the tool
into liquid.
Optional Accessories
WARNING! Since accessories, other than those
offered by Stanley, have not been tested with this
product, use of such accessories with this tool could be
hazardous. To reduce the risk of injury, only Stanley,
recommended accessories should be used with this
product.
Various types of SDS Plus drill bits and chisels are available
as an option.
Consult your dealer for further information on the
appropriate accessories.
Protecting The Environment
Separate collection. This product must not be
disposed of with normal household waste.
Should you find one day that your Stanley product
needs replacement, or if it is of no further use to you, do
not dispose of it with household waste. Please sort it out for
separate recycling.
Separate collection of used products and packaging
allows materials to be recycled and used again. Re-
use of recycled materials helps prevent environmental
pollution and reduces the demand for raw materials.
Some local governments may require the local or municipal
waste disposal centers or retailers of new products to
provide households with electronic product recycling
services.
Notes
STANLEY’s policy is one of continuous improvement to
our products and as such, we reserve the right to change
product specifications without prior notice.
Standard equipment and accessories may vary by country.
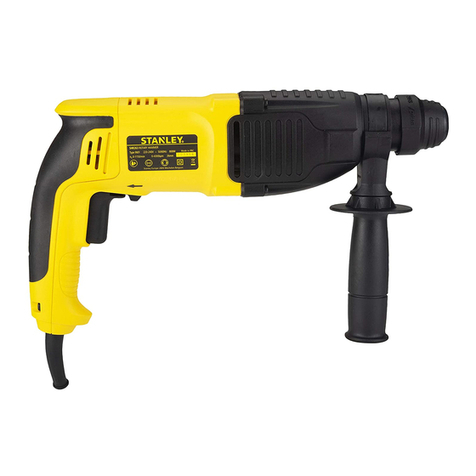
透過分開收集用過的產品與包裝,可以實
現材料的循環再生利用。重新使用回收的
材料有助於防止環境污染,並降低對原材料的需求。
某些當地政府可能要求當地或市政廢物回收中心,
或新產品的零售商提供電子家用產品的回收服務。
備註
STANLEY 的政策是持續改善我們的產品,因此,我
們保留隨時變更產品規格的權利,恕不另行通知。
標準裝置和配件可能會根據不同的國家 / 地區而
有所不同。
產品規格可能會根據不同的國家而有所不同。
並非所有的國家 / 地區都將提供完整的產品系列。
如需瞭解產品系列的供應情況,請聯絡您當地的
STANLEY 代理商。
ENGLISH (Original Instructions)
6
gauge according to the required depth. After that, tighten
the side handle.
♦Slacken the side handle (9) by turning the grip counter-
clockwise.
♦Set the depth stop (8) to the required position. The
maximum drilling depth is equal to the distance between
the tip of the drill bit and the front end of the depth stop.
♦Tighten the side handle by turning the grip clockwise.
Switching on and off
WARNING! Before plugging in to the power source, make
sure the switch can be flipped freely, and can return to its
original position once released. Please check switch lock on
position before turn on and make sure switch lock off before
plugging in to the power source.
♦To switch the tool on, press the variable speed switch
(3). The tool speed depends on how far you press the
switch.
♦As a general rule, use low speeds for large diameter
drill bits and high speeds for smaller diameter drill bits.
♦For continuous operation, press the lock-on button (2)
and release the variable speed switch.
♦To switch the tool off, release the variable speed switch.
To switch the tool off when in continuous operation,
press the variable speed switch once more and release
it.
WARNING! When the user leaves, or pick up, transport,
manner and position the tool, make sure that tool is
switched off and unplugged.
Fitting drill chuck (NQCC, Fig E)
Optional accessory
♦Insert the drill chuck (16) into the tool chuck (6)
according to the instructions for installing attachments.
♦Turn the drill chuck to loosen the clamps at the front-end
of the drill-clamp, and insert the accessory bar (17) into
the clamps and turn the chuck in the opposite direction.
♦You may also use the drill chuck key to tighten the
clamp.
Warning: Never use standard chucks in the
hammer-drilling mode
Replacing the SDS Plus Tool Holder with the
Keyless Chuck (QCC, Fig. D)
1. Turn the locking collar (5) into the unlocking position
and pull the SDS Plus Tool Holder (10) off.
2. Push the keyless chuck (12) onto the spindle and turn
the locking collar (5) to the locking position
To replace the keyless chuck with the SDS Plus tool holder,
first remove the keyless chuck the same way the tool holder
was removed. Then place the tool holder the same way the
keyless chuck was placed making sure to turn the locking
collar to the locking position.
Warning: Never use standard chucks in the
hammer-drilling mode
Selecting the Operating Mode (Fig. B)
The tool can be used in the following operating modes:
Rotary drilling: for screw driving and for drilling
into steel, wood and plastics
Hammer drilling: for concrete and masonry
drilling operations. Bit rotation: non-working
position used only to rotate a flat chisel into the
desired position
Hammering only: for light chipping, chiselling
and demolition applications. In this mode the tool
can also be used as a lever to free a jammed drill bit.
1. To select the operating mode, press the mode selector
button and rotate the mode selector switch (5) until it
points to the symbol of the required mode.
2. Release the mode selector button and check that the
mode selector switch is locked in place.
WARNING! Do not select the operating mode when
the tool is running.
Proper Hand Position (Fig. A, Fig. E)
WARNING! To reduce the risk of serious personal
injury, ALWAYS use proper hand position as shown.
WARNING! To reduce the risk of serious personal
injury, ALWAYS hold securely in anticipation of a
sudden reaction.
Proper hand position requires one hand on the side handle
(8), with the other hand on the main handle (14).
Rotary drilling (Fig. B, Fig. D, Fig. C1/C2)
♦For drilling in steel, wood and plastics, or for screw
driving set the operating mode selector (4) to the
position.
♦Depending on your tool, follow either of the following
instructions:
QCC: Replace the SDS Plus tool holder (12) with the
keyless chuck (14).
NQCC: Fit the drill chuck assembly.
♦insert the appropriate bits. When driving slotted head
screws always use bits with a finder sleeve.
♦For drilling in steel, wood and plastics, set the forward/
reverse lever(4) to the forward position(Fig C1). When
use for screw driver function, tighten screws set the
forward/reverse lever (4) to the forward position(Fig C1)
and loose screws set the forward/reverse lever (4) to
the reverse position(Fig C2).
WARNING! Never use drill chucks in the hammer drilling
mode.
Hammer drilling (Fig. B)
♦For hammer drilling in masonry and concrete, set the
operating mode selector (5) to the position.
♦The drill bit has to be placed accurately onto the drill
hole position. After that, pull the switch for optimal
effects. Make sure the tool is in the correct position to
prevent the drill from deviating from the hole.
♦When the drill hole is clogged with debris or fine powder,
please don’t exert any more pressure. Tool should be
put in free-running state before removing part of the drill
bit from the hole. If repeated a few times, the blockage
in the hole would be cleared, and normal drilling can
7
ENGLISH (Original Instructions)
resume.
WARNING! When the drill bit hits cement or the steel rebar
in the cement, the tool may recoil dangerously. Please hold
the tool tightly in a balanced and stable position at all times
to prevent it from recoiling dangerously.
Overload coupling device
If the drill bit is caught or hooked, the driving force
transmitted to the drill shaft will be cut off. This would
generate a strong recoil, so it would be necessary to hold
the tool tightly with both hands to remain in a stable position.
Chipping and chiselling (fig. B)
♦Set the mode selector switch (5) to the“hammering only”
position.
♦Insert the appropriate chisel and rotate it by hand to lock
it into positions.
♦Adjust the side handle (9) as required.
♦Switch on the tool and start working.
♦Always switch off the tool when work is finished and
before unplugging.
WARNING! Do not use this tool to mix or pump
easily combustible or explosive fluids (benzine,
alcohol, etc.). Do not mix or stir inflammable liquids
labelled accordingly.
Accessories
The performance of your tool depends on the accessory
used. Stanley accessories are engineered to high quality
standards and designed to enhance the performance of
your tool. By using these accessories you will get the very
best from your tool.
MAINTENANCE
Your Stanley corded/cordless appliance/tool has been
designed to operate over a long period of time with a
minimum of maintenance. To ensure satisfactory operations,
the tool must be maintained and cleaned regularly
WARNING: To reduce the risk of injury, turn
unit off and disconnect machine from power
source before installing and removing accessories,
before adjusting or changing set-ups or when making
repairs. Be sure the trigger switch is in the OFF position.
An accidental start-up can cause injury.
♦This machine is not user-serviceable. If problems occur
contact an authorised repair agent.
♦The tool will automatically switch off when the carbon
brushes are worn.
WARNING! Before performing any maintenance on corded/
cordless power tools:
♦Switch off and unplug the appliance/tool.
♦Or switch off and remove the battery from the appliance/
tool if the appliance/tool has a separate battery pack.
♦Or run the battery down completely if it is integral and
then switch off.
♦Unplug the charger before cleaning it. Your charger
does not require any maintenance apart from regular
cleaning.
♦Regularly clean the ventilation slots in your appliance/
tool/ charger using a soft brush or dry cloth.
♦Regularly clean the motor housing using a damp cloth.
Do not use any abrasive or solvent-based cleaner.
♦Regularly open the chuck and tap it to remove any dust
from the interior (when fitted).
Lubrication
Your power tool requires no additional lubrication.
Accessories and attachments used must be
regularly lubrication around the SDS Plus fitment.
Cleaning
WARNING! Blow dirt and dust out of the
main housing with dry air as often as dirt is
seen collecting in and around the air vents.
Wear approved eye protection and approved dust
mask when performing this procedure.
WARNING! Never use solvents or other
harsh chemicals for cleaning the non-
metallic parts of the tool. These chemicals may
weaken the material of the parts. Use only mild
soap and damp cloth to clean the tool. Never let any
liquid get inside the tool,cleaning of gasoline or
other chemicals, never immerse any part of the tool
into liquid.
Optional Accessories
WARNING! Since accessories, other than those
offered by Stanley, have not been tested with this
product, use of such accessories with this tool could be
hazardous. To reduce the risk of injury, only Stanley,
recommended accessories should be used with this
product.
Various types of SDS Plus drill bits and chisels are available
as an option.
Consult your dealer for further information on the
appropriate accessories.
Protecting The Environment
Separate collection. This product must not be
disposed of with normal household waste.
Should you find one day that your Stanley product
needs replacement, or if it is of no further use to you, do
not dispose of it with household waste. Please sort it out for
separate recycling.
Separate collection of used products and packaging
allows materials to be recycled and used again. Re-
use of recycled materials helps prevent environmental
pollution and reduces the demand for raw materials.
Some local governments may require the local or municipal
waste disposal centers or retailers of new products to
provide households with electronic product recycling
services.
Notes
STANLEY’s policy is one of continuous improvement to
our products and as such, we reserve the right to change
product specifications without prior notice.
Standard equipment and accessories may vary by country.
 繁體中文
17
技術資料
電鎚鑽 SHR243 SHR263 SHR264
電壓 V110 110 110
頻率 Hz 50/60 50/60 50/60
輸入功率 W 780 800 800
空載轉速 min-1 0-1250 0-1150 0-1250
衝擊率 bpm 0-4670 0-4300 0-4670
衝擊能量 (NON EPTA) J 3.1 3.4 3.4
模式 3 3 3
最大鑽孔能力 mm
- 混凝土 24 26 26
- 鋼材 13 13 13
- 木材 30 30 30
重量 kg 2.6 2.6 2.7
設備名稱:電鎚鑽 型號(型式):SHR263, SHR264
Equipment name Type designation (Type)
單元Unit
限用物質及其化學符號
Restricted substances and its chemical symbols
鉛Lead
(Pb)
汞Mercury
(Hg)
鎘Cadmium
(Cd)
六價鉻Hexavalent
chromium
(Cr+6)
多溴聯苯
Polybrominated
biphenyls
(PBB)
多溴二苯醚
Polybrominated
diphenyl ethers
(PBDE)
外殼 〇 〇 〇 〇 〇 〇
馬達 超出0.1 wt % 〇 〇 〇 〇 〇
電源線 〇 〇 〇 〇 〇 〇
電源開關 超出0.1 wt % 〇 〇 〇 〇 〇
內部配線 〇 〇 〇 〇 〇 〇
電源板 〇 〇 〇 〇 〇 〇
備考1.〝超出0.1 wt %〞及〝超出0.01 wt %〞係指限用物質之百分比含量超出百分比含量基準值。
Note 1:“Exceeding 0.1 wt %”and “exceeding 0.01 wt %”indicate that the percentage content of the restricted substance
exceeds the reference percentage value of presence condition.
備考2.〝○〞係指該項限用物質之百分比含量未超出百分比含量基準值。
Note 2:“○” indicates that the percentage content of the restricted substance does not exceed the percentage of reference
value of presence.
備考3.〝-〞係指該項限用物質為排除項目。
Note 3:The “—” indicates that the restricted substance corresponds to the exemption.
進口商 :
新加坡商百得電動工具 ( 股 ) 公司台灣分公司
地址 : 台北市士林區德行西路 33 號 2 樓
電話 : 02-28341741
總經銷商 : 永安實業股份有限公司
地址 : 新北市三重區新北大道二段 137 號
電話 : 02-29994633
 한국어
18
용도
스탠리 SHR243/SHR263/SHR264 SDS 플러스 로터리
햄머는 콘크리트, 벽돌, 목재 및 철재에서 구멍을 뚫
고, 카바이드 팁이 달린 코어 드릴 작업 또는 드라이
버로 사용하거나 가벼운 치핑, 치즐링 및 폭파용으
로 설계되었습니다. 본 공구는 전문가용입니다.
안전 지침
전동 공구에 관한 일반 안전 경고
경고! 안전 경고와 지시 사항을 모두 읽으
십시오. 경고와 지시 사항을 준수하지 않으
면 감전, 화재 및/또는 심각한 부상을 초래
할 수 있습니다.
향후 참고할 수 있도록 모든 경고 및 지시 사항을
보관해두십시오. 경고에서 사용된“전동 공구”
라는 용어는 주 공급 전원에 의해 전기가 공급되는
(유선) 전동 공구 또는 충전식 (무선) 전동 공구를 의
미합니다.
1. 작업장 안전
a. 작업 영역을 청결하고 밝게 유지하십시오. 혼잡
하거나 어두운 작업장에서는 사고가 발생하기
쉽습니다.
b. 가연성 액체, 가스 또는 먼지 등이 있는 폭발성
대기에서 전동 공구를 사용하지 마십시오. 전동
공구에서 먼지나 가스를 발화시킬 수 있는 불꽃
이 튈 수 있습니다.
c. 전동 공구로 작업하는 동안에는 어린이와 주변
사람들이 작업 영역에 가까이 들어오지 못하도
록 하십시오. 주변이 산만해져 통제력을 잃을
수 있습니다.
2. 전기 안전
a. 전동 공구의 플러그는 콘센트와 형식이 일치해
야 합니다. 플러그를 어떤 방식으로든 절대 개
조하지 마십시오. 접지된 (지면 접지) 전동 공
구에 어떤 어댑터 플러그도 사용하지 마십시오.
개조되지 않은 플러그 및 형식이 일치하는 콘센
트를 사용하면 감전 위험이 줄어듭니다.
b. 파이프, 라디에이터, 렌지 및 냉장고 등과 같이
접지된 표면에 신체가 접촉하지 않도록 하십시
오. 신체가 접지되어 있으면 감전 위험이 높아
집니다.
c. 전동 공구를 비 또는 습한 환경에 노출하지 않
도록 주의하십시오. 전동 공구에 물이 들어가면
ENGLISH (Original Instructions)
6
gauge according to the required depth. After that, tighten
the side handle.
♦Slacken the side handle (9) by turning the grip counter-
clockwise.
♦Set the depth stop (8) to the required position. The
maximum drilling depth is equal to the distance between
the tip of the drill bit and the front end of the depth stop.
♦Tighten the side handle by turning the grip clockwise.
Switching on and off
WARNING! Before plugging in to the power source, make
sure the switch can be flipped freely, and can return to its
original position once released. Please check switch lock on
position before turn on and make sure switch lock off before
plugging in to the power source.
♦To switch the tool on, press the variable speed switch
(3). The tool speed depends on how far you press the
switch.
♦As a general rule, use low speeds for large diameter
drill bits and high speeds for smaller diameter drill bits.
♦For continuous operation, press the lock-on button (2)
and release the variable speed switch.
♦To switch the tool off, release the variable speed switch.
To switch the tool off when in continuous operation,
press the variable speed switch once more and release
it.
WARNING! When the user leaves, or pick up, transport,
manner and position the tool, make sure that tool is
switched off and unplugged.
Fitting drill chuck (NQCC, Fig E)
Optional accessory
♦Insert the drill chuck (16) into the tool chuck (6)
according to the instructions for installing attachments.
♦Turn the drill chuck to loosen the clamps at the front-end
of the drill-clamp, and insert the accessory bar (17) into
the clamps and turn the chuck in the opposite direction.
♦You may also use the drill chuck key to tighten the
clamp.
Warning: Never use standard chucks in the
hammer-drilling mode
Replacing the SDS Plus Tool Holder with the
Keyless Chuck (QCC, Fig. D)
1. Turn the locking collar (5) into the unlocking position
and pull the SDS Plus Tool Holder (10) off.
2. Push the keyless chuck (12) onto the spindle and turn
the locking collar (5) to the locking position
To replace the keyless chuck with the SDS Plus tool holder,
first remove the keyless chuck the same way the tool holder
was removed. Then place the tool holder the same way the
keyless chuck was placed making sure to turn the locking
collar to the locking position.
Warning: Never use standard chucks in the
hammer-drilling mode
Selecting the Operating Mode (Fig. B)
The tool can be used in the following operating modes:
Rotary drilling: for screw driving and for drilling
into steel, wood and plastics
Hammer drilling: for concrete and masonry
drilling operations. Bit rotation: non-working
position used only to rotate a flat chisel into the
desired position
Hammering only: for light chipping, chiselling
and demolition applications. In this mode the tool
can also be used as a lever to free a jammed drill bit.
1. To select the operating mode, press the mode selector
button and rotate the mode selector switch (5) until it
points to the symbol of the required mode.
2. Release the mode selector button and check that the
mode selector switch is locked in place.
WARNING! Do not select the operating mode when
the tool is running.
Proper Hand Position (Fig. A, Fig. E)
WARNING! To reduce the risk of serious personal
injury, ALWAYS use proper hand position as shown.
WARNING! To reduce the risk of serious personal
injury, ALWAYS hold securely in anticipation of a
sudden reaction.
Proper hand position requires one hand on the side handle
(8), with the other hand on the main handle (14).
Rotary drilling (Fig. B, Fig. D, Fig. C1/C2)
♦For drilling in steel, wood and plastics, or for screw
driving set the operating mode selector (4) to the
position.
♦Depending on your tool, follow either of the following
instructions:
QCC: Replace the SDS Plus tool holder (12) with the
keyless chuck (14).
NQCC: Fit the drill chuck assembly.
♦insert the appropriate bits. When driving slotted head
screws always use bits with a finder sleeve.
♦For drilling in steel, wood and plastics, set the forward/
reverse lever(4) to the forward position(Fig C1). When
use for screw driver function, tighten screws set the
forward/reverse lever (4) to the forward position(Fig C1)
and loose screws set the forward/reverse lever (4) to
the reverse position(Fig C2).
WARNING! Never use drill chucks in the hammer drilling
mode.
Hammer drilling (Fig. B)
♦For hammer drilling in masonry and concrete, set the
operating mode selector (5) to the position.
♦The drill bit has to be placed accurately onto the drill
hole position. After that, pull the switch for optimal
effects. Make sure the tool is in the correct position to
prevent the drill from deviating from the hole.
♦When the drill hole is clogged with debris or fine powder,
please don’t exert any more pressure. Tool should be
put in free-running state before removing part of the drill
bit from the hole. If repeated a few times, the blockage
in the hole would be cleared, and normal drilling can
감전 위험이 높아집니다.
d. 코드를 함부로 다루지 마십시오. 코드를 사용하
여 전동 공구를 운반하거나 잡아당기거나 플러
그를 뽑지 마십시오. 열, 오일, 날카로운 모서리
또는 움직이는 부품에서 멀리 떨어진 장소에 코
드를 보관하십시오. 코드가 손상되거나 얽혀 있
으면 감전 위험이 높아집니다.
e. 전동 공구를 실외에서 사용할 때는 실외 사용에
적합한 연장 코드를 사용하십시오. 실외 사용에
적합한 코드를 사용하면 감전 위험이 줄어듭니
다.
f. 어쩔 수 없이 습한 장소에서 전동 공구를 사용
해야 하는 경우에는 누전 차단기 (RCD) 로 보호
된 전원을 공급하십시오. RCD를 사용하면 감전
위험이 줄어듭니다. 참고:“RCD (residual current
device) ”라는 용어는“GFCI (ground fault circuit
interrupter) ”또는“ELCB (earth leakage circuit
breaker) ”용어로 대체할 수 있습니다.
3. 신체 안전 사항
a. 전동 공구로 작업할 때는 방심하지 말고 작업에
주의하면서 상식에 따르십시오. 피곤한 상태이거
나 약물, 술, 치료제를 복용한 상태에서는 전동
공구를 사용하지 마십시오. 전동 공구를 사용하
는 중에 주의력을 잃어 순간적으로 부상을 당할
수 있습니다.
b. 신체 보호 장비를 착용하십시오. 항상 보안경을
착용하십시오. 적합한 상황에서 방진 마스크, 미
끄럼 방지 안전화, 안전모 또는 청력 보호 기구
등의 보호 장비를 사용하면 신체 부상 위험이 줄
어듭니다.
c. 갑작스러운 장비 가동을 방지하십시오. 전원 및/
또는 배터리 팩에 연결한 상태로 공구를 선택 또
는 운반할 때는 사전에 스위치가 꺼짐 위치에 있
는지 반드시 확인하십시오. 스위치가 켜짐 위치
에 있는 상태에서 스위치에 손가락이 닿은 상태
로 전동 공구를 운반하거나 전동 공구에 전원을
공급하면 사고가 발생합니다.
d. 전동 공구를 켜기 전에 모든 조정 키 또는 렌치를
제거하십시오. 전동 공구의 회전 부품에 렌치나
키가 부착되어 있으면 부상을 당할 수 있습니다.
e. 무리하게 팔을 뻗지 마십시오. 항상 올바른 자세로
서서 균형을 유지하십시오. 그러면 예기치 않은 상
황에서의 전동 공구 제어 능력이 향상됩니다.
f. 적절한 의복을 착용하십시오. 헐렁한 옷이나 장
신구를 착용하지 마십시오. 머리카락, 옷 및 장갑
이 움직이는 부품에 닿지 않도록 유의하십시오.
헐렁한 옷, 장신구 또는 긴 머리가 움직이는 부품
 한국어
19
에 낄 수 있습니다.
g. 먼지 배출 및 집진 시설 연결을 위한 장치가 제공
된 경우, 이들 장치가 연결되어 적절히 사용되고
있는지 반드시 확인하십시오. 집진 장치를 사용하
면 먼지와 관련된 위험을 줄일 수 있습니다.
4. 전동 공구 사용 및 관리
a. 전동 공구에 무리한 힘을 가하지 마십시오. 해당
용도에 맞는 올바른 전동 공구를 사용하십시오.
올바른 전동 공구를 사용해야 설계된 속도로 작업
을 더욱 안전하고 정확하게 수행할 수 있습니다.
b. 스위치 켜짐/꺼짐이 되지 않는 전동 공구는 사
용하지 마십시오. 스위치로 제어되지 않는 전동
공구는 위험하므로 수리해야 합니다.
c. 전동 공구를 조정하거나 액세서리를 변경하거나
보관하기 전에 전원 및/또는 배터리 팩에서 플러
그를 빼십시오. 이러한 예방적 안전 조치를 따라야
전동 공구가 갑자기 작동할 위험이 줄어듭니다.
d. 사용하지 않는 전동 공구는 어린이의 손이 닿지
않는 곳에 보관하고, 전동 공구나 본 지시 사항
에 익숙하지 않은 사람이 전동 공구를 절대 사용
하지 못하게 하십시오. 전동 공구는 훈련을 받지
않은 사용자가 다루면 위험합니다.
e. 전동 공구 유지 보수. 움직이는 부품의 잘못된 정
렬이나 바인딩, 부품 파손 및 기타 전동 공구의 작
동에 영향을 미칠 수 있는 기타 모든 상태를 확인
하십시오. 손상된 부분이 있는 경우 사용하기 전에
전동 공구를 수리하십시오. 많은 사고는 전동 공구
를 제대로 유지 보수하지 않아 발생합니다.
f. 공구를 깨끗한 상태로 유지하십시오. 절삭 가장
자리를 예리하게 잘 유지하면 절삭기를 사용할
때 바인딩이 적고 다루기가 용이합니다.
g. 작업 환경과 수행할 작업을 고려하여, 본 지시
사항에 따라 전동 공구, 액세서리 및 툴 비트 등
을 사용하십시오. 본 사용 설명서의 내용과 다른
용도로 전동 공구를 사용하면 위험한 상황이 발
생할 수 있습니다.
5. 정비
a. 자격을 갖춘 기술자가 동일 교체 부품을 사용하
여 정비 작업을 수행해야 합니다. 그래야 전동
공구의 안전이 보장됩니다.
로타리 햄머 안전 경고
경고! 햄머에 대한 추가 안전 경고
 귀 보호 장구를 착용하십시오. 소음에 노출되면
ENGLISH (Original Instructions)
4
g. Use the power tool, accessories and tool bits etc.
in accordance with these instructions, taking into
account the working conditions and the work to
be performed. Use of the power tool for operations
different from those intended could result in a hazardous
situation.
5. Service
a. Have your power tool serviced by a qualified
repair person using only identical replacement
parts. This will ensure that the safety of the power tool
is maintained.
ROTARY HAMMER SAFETY WARNINGS
Warning! Additional safety warnings for Hammer
♦Wear ear protectors. Exposure to noise can cause
hearing loss.
♦Use auxiliary handle(s), if supplied with the tool.
Loss of control can cause personal injury.
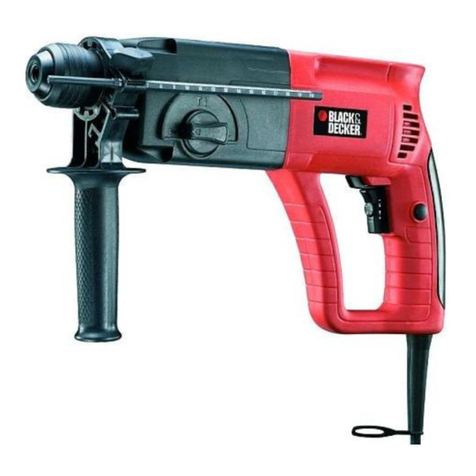
♦Hold power tool by insulated gripping surfaces,
when performing an operation where the cutting
accessory may contact hidden wiring or its own
cord. Cutting accessory contacting a “live” wire may
make exposed metal parts of the power tool “live” and
could give the operator an electric shock.
♦Never use a chisel accessory in rotary mode. The
accessory will bind in the material and rotate the drill.
♦Use clamps or another practical way to secure and
support the work piece to a stable platform. Holding the
work by hand or against your body leaves it unstable
and may lead to loss of control.
♦ Before drilling into walls, floors or ceilings, check for the
location of wiring and pipes.
♦Avoid touching the tip of the drill bit after drilling so as
to avoid scalding.
♦The intended use is described in this instruction
manual. The use of any accessory or attachment or
performance of any operation with this tool other than
those recommended in this instruction manual may
present a risk of personal injury and/or damage to
property.
Note: Mains voltage: When connecting to the mains, it is
imperative to verify if the voltage of the mains matches that
of the power tool. If the mains voltage exceeds the voltage
indicated on the power tool, the user may become severely
injured in an accident, and the tool may be damaged. On
the contrary, if the mains voltage is lower than the voltage
required by the tool, the motor may be damaged as a result.
Thus, if it is not possible to verify the voltage, it is imperative
not to plug in to the power source.
RESIDUAL RISKS
Additional residual risks may arise when using the tool
which may not be included in the enclosed safety warnings.
These risks can arise from misuse, prolonged use etc. In
spite of the application of the relevant safety regulations and
the implementation of safety devices, certain risks cannot
be avoided. These are:
♦Injuries caused by touching any rotating/moving parts.
♦Injuries caused when changing any parts, blades or
accessories.
♦Injuries caused by prolonged use of a tool. When using
any tool for prolonged periods ensure you take regular
breaks.
♦Impairment of hearing.
♦Health hazards caused by breathing dust developed
when using your tool (example:- working with wood,
especially oak, beech and MDF.)
SAFETY OF OTHERS
♦This appliance is not intended for use by persons
(including children) with reduced physical, sensory
or mental capabilities, or lack of experience and
knowledge, unless they have been given supervision or
instruction concerning use of the appliance by a person
responsible for their safety.
♦Children should be supervised to ensure that they do
not play with the appliance.
LABELS ON TOOL
The following symbols are shown on the tool along with date
code:
WARNING! To reduce the risk of injury, the user
must read the instruction manual before use.
Wear ear protection.
Wear safety glasses or goggles.
Position of Date Code (Fig. A)
The Date Code (10), which also includes the year of
manufacture, is printed into the housing.
Example:
2016 XX JN
Year of manufacturing
PACKAGE CONTENTS
The package contains:
1 Heavy-duty rotary hammerdrill
1 Side handle
1 Depth stop
1 Kitbox
1 Keyless chuck (QCC)
1 Instruction manual
♦Check for damage to the tool, parts or accessories
which may have occurred during transport.
♦Take the time to thoroughly read and understand this
manual prior to operation.
청력이 손상될 수 있습니다.
 보조 핸들 (공구와 함께 제공된 경우) 을 사용하
십시오. 제어력을 잃으면 신체 부상을 당할 수
있습니다.
 절삭 액세서리가 숨겨진 배선 또는 자체 코드에 접
촉할 수 있는 작업을 수행할 때는 절연된 손잡이
표면만 닿도록 하여 전동 공구를 잡으십시오.“전
류가 흐르는”전선에 접촉된 절삭 액세서리는 전
동 공구의 노출된 금속 부품을“전류가 흐르는”
상태로 만들어 작업자를 감전시킬 수 있습니다.
 치즐 액세서리를 절대 회전 모드로 사용하지 마십시
오. 액세서리가 작업물에 끼어 드릴을 회전시킵니다.
 클램프 또는 다른 적절한 방식을 이용하여 안정
된 작업대에 작업 공구들을 고정 및 지지하십시
오. 작업물을 손으로 잡거나 몸으로 지탱하는 행
동은 불안정하여 제어력을 잃을 수 있습니다.
 벽, 바닥 또는 천장에 드릴 작업을 하기 전에 배
선 및 파이프의 위치를 확인하십시오.
 데지 않으려면 드릴 작업 후에 드릴 비트의 끝을
만지지 마십시오.
 본 사용 설명서에 제품의 용도가 설명되어 있습
니다. 본 사용 설명서에서 권장하는 방식 이외의
다른 방식으로 본 공구를 조작하거나 액세서리
또는 부착물을 사용하는 경우 신체 부상의 위험
이 있거나 재산상의 손해가 발생할 수 있습니다.
참고: 전원 전압: 본체에 연결할 때 전원의 전압이
전동 공구의 전압과 일치하는지 확인해야 합니다.
전원 전압이 전동 공구에 표시된 전압을 초과하는
경우, 사용자가 사고로 심각하게 부상당할 수 있고
공구가 손상될 수 있습니다. 그와 반대로 전원 전압
이 공구에서 필요한 전압보다 낮은 경우, 모터가 손
상될 수 있습니다.
이와 같이 전압 확인이 가능하지 않은 경우, 전원 장
치에 플러그를 꽂지 않아야 합니다.
기타 발생 가능한 위험
공구를 사용할 때 동봉된 안전 경고에 포함되어 있지
않은 기타 발생 가능한 위험들이 발생할 수 있습니다.
이러한 위험은 오용, 장시간 사용 등으로 인해 발생
할 수 있습니다. 관련된 안전 규정을 준수하고 안전
장치를 사용한다고 해도 특정한 위험은 피할 수 없
습니다. 이러한 위험은 다음과 같습니다.
 회전 부품이나 작동 부품을 만져 발생하는 부상.
 부품, 톱날 또는 액세서리 변경으로 인한 부상.
 장시간에 걸친 공구 사용으로 인한 부상. 어떤
 한국어
20
공구이든 장시간에 걸쳐 사용할 때는 반드시 정
기적인 휴식을 취하십시오.
 청력 손상.
 공구 사용 중에 발생하는 먼지를 호흡하여 유발
되는 건강 위해성 (예: 목재, 특히 오크, 너도밤
나무 및 MDF 가공 작업).
다른 사람들의 안전
♦ 이 제품은 신체, 지각 또는 정신 능력이 낮거나
경험 및 지식이 부족한 사람 (어린이 포함) 이 사
용하도록 설계되지 않았습니다. 이러한 사람이
사용할 때는 안전 책임자의 감독 또는 제품 사용
과 관련된 지시 사항이 필요합니다.
♦ 어린이가 본 제품을 가지고 놀지 못하도록 항상
주시해야 합니다.
공구 라벨
공구에는 날짜 코드와 함께 다음과 같은 기호가 표
시되어 있습니다.
경고! 부상 위험을 줄이려면 사용자는 사용
전에 사용 설명서를 주의 깊게 읽어야 합니
다.
귀 보호 장구를 착용하십시오.
항상 보호 안경 또는 고글을 착용하십시
오.
V Volts Direcet urrent
A Amperes No-Load Speed
Hz Hertz Class II Con-
struction
W Watts Earthing Terminal
min minutes Safety Alert
Symbol
Alter-
nating
Current
/min.
Revolutions or
Reciprocation per
minute
ENGLISH (Original Instructions)
4
g. Use the power tool, accessories and tool bits etc.
in accordance with these instructions, taking into
account the working conditions and the work to
be performed. Use of the power tool for operations
different from those intended could result in a hazardous
situation.
5. Service
a. Have your power tool serviced by a qualified
repair person using only identical replacement
parts. This will ensure that the safety of the power tool
is maintained.
ROTARY HAMMER SAFETY WARNINGS
Warning! Additional safety warnings for Hammer
♦Wear ear protectors. Exposure to noise can cause
hearing loss.
♦Use auxiliary handle(s), if supplied with the tool.
Loss of control can cause personal injury.
♦Hold power tool by insulated gripping surfaces,
when performing an operation where the cutting
accessory may contact hidden wiring or its own
cord. Cutting accessory contacting a “live” wire may
make exposed metal parts of the power tool “live” and
could give the operator an electric shock.
♦Never use a chisel accessory in rotary mode. The
accessory will bind in the material and rotate the drill.
♦Use clamps or another practical way to secure and
support the work piece to a stable platform. Holding the
work by hand or against your body leaves it unstable
and may lead to loss of control.
♦ Before drilling into walls, floors or ceilings, check for the
location of wiring and pipes.
♦Avoid touching the tip of the drill bit after drilling so as
to avoid scalding.
♦The intended use is described in this instruction
manual. The use of any accessory or attachment or
performance of any operation with this tool other than
those recommended in this instruction manual may
present a risk of personal injury and/or damage to
property.
Note: Mains voltage: When connecting to the mains, it is
imperative to verify if the voltage of the mains matches that
of the power tool. If the mains voltage exceeds the voltage
indicated on the power tool, the user may become severely
injured in an accident, and the tool may be damaged. On
the contrary, if the mains voltage is lower than the voltage
required by the tool, the motor may be damaged as a result.
Thus, if it is not possible to verify the voltage, it is imperative
not to plug in to the power source.
RESIDUAL RISKS
Additional residual risks may arise when using the tool
which may not be included in the enclosed safety warnings.
These risks can arise from misuse, prolonged use etc. In
spite of the application of the relevant safety regulations and
the implementation of safety devices, certain risks cannot
be avoided. These are:
♦Injuries caused by touching any rotating/moving parts.
♦Injuries caused when changing any parts, blades or
accessories.
♦Injuries caused by prolonged use of a tool. When using
any tool for prolonged periods ensure you take regular
breaks.
♦Impairment of hearing.
♦Health hazards caused by breathing dust developed
when using your tool (example:- working with wood,
especially oak, beech and MDF.)
SAFETY OF OTHERS
♦This appliance is not intended for use by persons
(including children) with reduced physical, sensory
or mental capabilities, or lack of experience and
knowledge, unless they have been given supervision or
instruction concerning use of the appliance by a person
responsible for their safety.
♦Children should be supervised to ensure that they do
not play with the appliance.
LABELS ON TOOL
The following symbols are shown on the tool along with date
code:
WARNING! To reduce the risk of injury, the user
must read the instruction manual before use.
Wear ear protection.
Wear safety glasses or goggles.
Position of Date Code (Fig. A)
The Date Code (10), which also includes the year of
manufacture, is printed into the housing.
Example:
2016 XX JN
Year of manufacturing
PACKAGE CONTENTS
The package contains:
1 Heavy-duty rotary hammerdrill
1 Side handle
1 Depth stop
1 Kitbox
1 Keyless chuck (QCC)
1 Instruction manual
♦Check for damage to the tool, parts or accessories
which may have occurred during transport.
♦Take the time to thoroughly read and understand this
manual prior to operation.
ENGLISH (Original Instructions)
4
g. Use the power tool, accessories and tool bits etc.
in accordance with these instructions, taking into
account the working conditions and the work to
be performed. Use of the power tool for operations
different from those intended could result in a hazardous
situation.
5. Service
a. Have your power tool serviced by a qualified
repair person using only identical replacement
parts. This will ensure that the safety of the power tool
is maintained.
ROTARY HAMMER SAFETY WARNINGS
♦Wear ear protectors. Exposure to noise can cause
hearing loss.
♦Use auxiliary handle(s), if supplied with the tool.
Loss of control can cause personal injury.
♦Hold power tool by insulated gripping surfaces,
when performing an operation where the cutting
accessory may contact hidden wiring or its own
cord. Cutting accessory contacting a “live” wire may
make exposed metal parts of the power tool “live” and
could give the operator an electric shock.
♦Never use a chisel accessory in rotary mode. The
accessory will bind in the material and rotate the drill.
♦Use clamps or another practical way to secure and
support the work piece to a stable platform. Holding the
work by hand or against your body leaves it unstable
and may lead to loss of control.
♦ Before drilling into walls, floors or ceilings, check for the
location of wiring and pipes.
♦Avoid touching the tip of the drill bit after drilling so as
to avoid scalding.
♦The intended use is described in this instruction
manual. The use of any accessory or attachment or
performance of any operation with this tool other than
those recommended in this instruction manual may
present a risk of personal injury and/or damage to
property.
Note: Mains voltage: When connecting to the mains, it is
imperative to verify if the voltage of the mains matches that
of the power tool. If the mains voltage exceeds the voltage
indicated on the power tool, the user may become severely
injured in an accident, and the tool may be damaged. On
the contrary, if the mains voltage is lower than the voltage
required by the tool, the motor may be damaged as a result.
Thus, if it is not possible to verify the voltage, it is imperative
not to plug in to the power source.
RESIDUAL RISKS
Additional residual risks may arise when using the tool
which may not be included in the enclosed safety warnings.
These risks can arise from misuse, prolonged use etc. In
spite of the application of the relevant safety regulations and
the implementation of safety devices, certain risks cannot
be avoided. These are:
♦Injuries caused by touching any rotating/moving parts.
♦Injuries caused when changing any parts, blades or
accessories.
♦Injuries caused by prolonged use of a tool. When using
any tool for prolonged periods ensure you take regular
breaks.
♦Impairment of hearing.
♦Health hazards caused by breathing dust developed
when using your tool (example:- working with wood,
especially oak, beech and MDF.)
SAFETY OF OTHERS
♦This appliance is not intended for use by persons
(including children) with reduced physical, sensory
or mental capabilities, or lack of experience and
knowledge, unless they have been given supervision or
instruction concerning use of the appliance by a person
responsible for their safety.
♦Children should be supervised to ensure that they do
not play with the appliance.
LABELS ON TOOL
The following symbols are shown on the tool along with date
code:
WARNING! To reduce the risk of injury, the user
must read the instruction manual before use.
Wear ear protection.
Wear safety glasses or goggles.
V Volts Direct Current
A Amperes n0No-Load Speed
Hz Hertz Class II Construction
W Watts Earthing Terminal
min minutes Safety Alert Symbol
Alternating
Current /min.
Revolutions or
Reciprocation per
minute
Position of Date Code (FIG. A)
The Date Code (10), which also includes the year of
manufacture, is printed into the housing.
Example:
2016 XX JN
Year of manufacturing
PACKAGE CONTENTS
The package contains:
1 Heavy-duty rotary hammerdrill
1 Side handle
1 Depth stop
1 Kitbox
1 Keyless chuck (QCC) (Optional)
1 Instruction manual
데이터 코드 위치 (그림 A)
날짜 코드 (10) 에는 제조년도도 포함되며 케이스에
인쇄되어 있습니다.
예:
2017 XX JN
제조년도
포장 내용물
포장에는 다음 내용물이 들어 있습니다.
고성능 로타리 햄머드릴 1개
1 사이드 핸들
1 깊이조절 가이드
1 공구박스
1 드릴 척(선택)
1 비트(선택)
1 사용 설명서
1 집진기
1 키리스 척 (SHR264)
♦ 운반 중에 발생할 수 있는 공구, 부품 또는 액세
서리의 손상 여부를 확인하십시오.
♦ 작동 전에 시간을 내어 본 사용 설명서를 읽고
숙지하십시오.
전기 안전
이 공구는 이중으로 절연되어 있으므로 접지
선이 필요 없습니다. 전원이 전동기 라벨에
기재된 전압과 일치하는지 확인하십시오.
전원 코드가 손상된 경우 사고가 발생하지
않도록 제조업체 또는 공인 스탠리 서비스
센터에서 교체해야 합니다 .
연장 케이블 이용
연장 케이블을 사용해야 할 경우 이 공구의 소비전
력 사양에 맞는 승인된 연장 케이블을 사용하십시
오. 도선의 최소 횡단면은 1.5 sq. mm입니다. 케이블
은 감아 올리기 전에 풀어야 합니다.
케이블 단면적 (mm2) 케이블 정격 전류 ( 암페어 )
0.75 6
1.0 0 10
5
ENGLISH (Original Instructions)
ELECTRICAL SAFETY
Your tool is double insulated; therefore no earth wire
is required. Be sure to check that the power supply
corresponds to the voltage on the rating plate.
Corresponds.
♦If the supply cord is damaged, it must be replaced by
the manufacturer or an authorised Black and Decker
Service Centre in order to avoid a hazard.
USING AN EXTENSION CABLE
If it is necessary to use an extension cable, please used
an approved extension cable that fits the tool’s power input
specifications. The minimum cross-sectional area of the
conducting wire is 1.5 sq. mm. Cables should be untangled
before reeling up.
Cable cross-sectional
area (mm2) Cable rated
current (Ampere)
Cable cross-sectional
area (mm2) Cable rated
current (Ampere)
0.75 6
1.00 10
1.50 15
2.50 20
4.00 25
Cable length (m)
7.5 15 25 30 45 60
Voltage Amperes Cable rated current (Ampere)
115 0 - 2.0 6 6 6 6 6 10
2.1 - 3.4 6 6 6 6 15 15
3.5 - 5.0 6 6 10 15 20 20
5.1 - 7.0 10 10 15 20 20 25
7.1 - 12.0 15 15 20 25 25 -
12.1 - 20.0 20 20 25 - - -
230 0 - 2.0 6 6 6 6 6 6
2.1 - 3.4 6 6 6 6 6 6
3.5 - 5.0 6 6 6 6 10 15
5.1 - 7.0 10 10 10 10 15 15
7.1 - 12.0 15 15 15 15 20 20
12.1 - 20.0 20 20 20 20 25 -
FEATURES (FIG. A, FIG. D)
This tool includes some or all of the following features.
1. Main handle
2. Lock-on button
3. Variable Speed Switch
4. Forward/Reverse Lever
5. Mode Selector
6. Sleeve
7. Tool clamp
8. Depth Stop
9. Side Handle
10. Date code
11. Locking collar (QCC)
12. SDS Plus tool Holder (QCC)
13. Drill Chuck Sleeve (QCC)
14. Keyless Chuck (QCC)
15. SDS bit
16. Drill chuck (NQCC)
ASSEMBLY
WARNING! Before assembly, make sure that the tool is
switched off and unplugged.
Attaching the Side Handle (Fig. A)
WARNING! When using the tool, please use the side
handle for your safety.
The side handle can be fitted to suit both right-handed and
left-handled users.
♦Turn the grip counter-clockwise until you can slide the
side handle onto the front of the tool.
♦Rotate the side handle into the desired position.
♦Tighten the side handle by turning the grip clockwise.
WARNING! When using the tool, remember to install the
side handles properly.
Fitting an accessory (Fig.A)
♦Clean and grease the shank (15) of the accessory.
♦Insert the accessory bar into the tool clamp(7).
♦ Push the accessory down and turn it slightly until it fits
into the slots.
♦Pull on the accessory to check if it is properly locked. The
hammering and drilling function requires the accessory
to be able to move axially several centimetres when
locked in the tool clamp.
♦To remove the accessory, pull back the sleeve (6) and
pull out the accessory from the tool clamp.
USE
WARNING! Always wear glaves when you change
accessories. The exposed metal parts on the tool and
accessory may become extremely hot during operation.
Please operate tool with normal load. Do not overload. Do
not abuse the tool, please refer instruction manual to use
the tool correctly.
WARNING! Before drilling into walls, floors or ceilings,
check for the location of wiring and pipes.
Setting the drilling depth (Fig. A)
The depth stop is a convenient feature to ensure uniformity
in drilling depth. Loosen the side handle to adjust the depth
ENGLISH (Original Instructions)
6
gauge according to the required depth. After that, tighten
the side handle.
♦Slacken the side handle (9) by turning the grip counter-
clockwise.
♦Set the depth stop (8) to the required position. The
maximum drilling depth is equal to the distance between
the tip of the drill bit and the front end of the depth stop.
♦Tighten the side handle by turning the grip clockwise.
Switching on and off
WARNING! Before plugging in to the power source, make
sure the switch can be flipped freely, and can return to its
original position once released. Please check switch lock on
position before turn on and make sure switch lock off before
plugging in to the power source.
♦To switch the tool on, press the variable speed switch
(3). The tool speed depends on how far you press the
switch.
♦As a general rule, use low speeds for large diameter
drill bits and high speeds for smaller diameter drill bits.
♦For continuous operation, press the lock-on button (2)
and release the variable speed switch.
♦To switch the tool off, release the variable speed switch.
To switch the tool off when in continuous operation,
press the variable speed switch once more and release
it.
WARNING! When the user leaves, or pick up, transport,
manner and position the tool, make sure that tool is
switched off and unplugged.
Fitting drill chuck (NQCC, Fig E)
Optional accessory
♦Insert the drill chuck (16) into the tool chuck (6)
according to the instructions for installing attachments.
♦Turn the drill chuck to loosen the clamps at the front-end
of the drill-clamp, and insert the accessory bar (17) into
the clamps and turn the chuck in the opposite direction.
♦You may also use the drill chuck key to tighten the
clamp.
Warning: Never use standard chucks in the
hammer-drilling mode
Replacing the SDS Plus Tool Holder with the
Keyless Chuck (QCC, Fig. D)
1. Turn the locking collar (5) into the unlocking position
and pull the SDS Plus Tool Holder (10) off.
2. Push the keyless chuck (12) onto the spindle and turn
the locking collar (5) to the locking position
To replace the keyless chuck with the SDS Plus tool holder,
first remove the keyless chuck the same way the tool holder
was removed. Then place the tool holder the same way the
keyless chuck was placed making sure to turn the locking
collar to the locking position.
Warning: Never use standard chucks in the
hammer-drilling mode
Selecting the Operating Mode (Fig. B)
The tool can be used in the following operating modes:
Rotary drilling: for screw driving and for drilling
into steel, wood and plastics
Hammer drilling: for concrete and masonry
drilling operations. Bit rotation: non-working
position used only to rotate a flat chisel into the
desired position
Hammering only: for light chipping, chiselling
and demolition applications. In this mode the tool
can also be used as a lever to free a jammed drill bit.
1. To select the operating mode, press the mode selector
button and rotate the mode selector switch (5) until it
points to the symbol of the required mode.
2. Release the mode selector button and check that the
mode selector switch is locked in place.
WARNING! Do not select the operating mode when
the tool is running.
Proper Hand Position (Fig. A, Fig. E)
WARNING! To reduce the risk of serious personal
injury, ALWAYS use proper hand position as shown.
WARNING! To reduce the risk of serious personal
injury, ALWAYS hold securely in anticipation of a
sudden reaction.
Proper hand position requires one hand on the side handle
(8), with the other hand on the main handle (14).
Rotary drilling (Fig. B, Fig. D, Fig. C1/C2)
♦For drilling in steel, wood and plastics, or for screw
driving set the operating mode selector (4) to the
position.
♦Depending on your tool, follow either of the following
instructions:
QCC: Replace the SDS Plus tool holder (12) with the
keyless chuck (14).
NQCC: Fit the drill chuck assembly.
♦insert the appropriate bits. When driving slotted head
screws always use bits with a finder sleeve.
♦For drilling in steel, wood and plastics, set the forward/
reverse lever(4) to the forward position(Fig C1). When
use for screw driver function, tighten screws set the
forward/reverse lever (4) to the forward position(Fig C1)
and loose screws set the forward/reverse lever (4) to
the reverse position(Fig C2).
WARNING! Never use drill chucks in the hammer drilling
mode.
Hammer drilling (Fig. B)
♦For hammer drilling in masonry and concrete, set the
operating mode selector (5) to the position.
♦The drill bit has to be placed accurately onto the drill
hole position. After that, pull the switch for optimal
effects. Make sure the tool is in the correct position to
prevent the drill from deviating from the hole.
♦When the drill hole is clogged with debris or fine powder,
please don’t exert any more pressure. Tool should be
put in free-running state before removing part of the drill
bit from the hole. If repeated a few times, the blockage
in the hole would be cleared, and normal drilling can

Other manuals for SHR243

2

This manual suits for next models

2

Other Stanley Rotary Hammer manuals

Stanley Fatmax SFMCH900 Series User manual

Stanley

Stanley Fatmax SFMCH900 Series User manual

Stanley STHR221 User manual

Stanley

Stanley STHR221 User manual

Stanley STHR271 User manual

Stanley

Stanley STHR271 User manual

Stanley SDS plus STHR202K User manual

Stanley

Stanley SDS plus STHR202K User manual

Stanley Fatmax FMER524 User manual

Stanley

Stanley Fatmax FMER524 User manual

Stanley SDS plus STHR202 User manual

Stanley

Stanley SDS plus STHR202 User manual

Stanley STEL506 User manual

Stanley

Stanley STEL506 User manual

Stanley STHR272K User manual

Stanley

Stanley STHR272K User manual

Stanley SBR20D1K User manual

Stanley

Stanley SBR20D1K User manual

Stanley STHR263 User manual

Stanley

Stanley STHR263 User manual

Stanley SHR264 User manual

Stanley

Stanley SHR264 User manual

Stanley STHR263 User manual

Stanley

Stanley STHR263 User manual

Stanley Fatmax FMCD900 User manual

Stanley

Stanley Fatmax FMCD900 User manual

Stanley SHR263 User manual

Stanley

Stanley SHR263 User manual

Stanley FATMAX SFMEH200 User manual

Stanley

Stanley FATMAX SFMEH200 User manual

Stanley SHR243 Operation instructions

Stanley

Stanley SHR243 Operation instructions

Stanley FATMAX SFMEH210 User manual

Stanley

Stanley FATMAX SFMEH210 User manual

Stanley Fatmax SFMCH900 Series User manual

Stanley

Stanley Fatmax SFMCH900 Series User manual

Stanley STEL505K User manual

Stanley

Stanley STEL505K User manual

Stanley STEL503 User manual

Stanley

Stanley STEL503 User manual

Stanley STHR272 User manual

Stanley

Stanley STHR272 User manual

Stanley SDS plus STHR202 User manual

Stanley

Stanley SDS plus STHR202 User manual

Stanley SHR263 User manual

Stanley

Stanley SHR263 User manual

Stanley SHR263 User manual

Stanley

Stanley SHR263 User manual

Popular Rotary Hammer manuals by other brands

HIKOKI DH3628DC Handling instructions

HIKOKI

HIKOKI DH3628DC Handling instructions

Worx Professional WU343 Original instructions

Worx Professional

Worx Professional WU343 Original instructions

Hitachi Koki DH 24PH Handling instructions

Hitachi Koki

Hitachi Koki DH 24PH Handling instructions

MSW BOH-1050-2 user manual

MSW

MSW BOH-1050-2 user manual

Bosch HSH 10 operating instructions

Bosch

Bosch HSH 10 operating instructions

Makita DHR171 instruction manual

Makita

Makita DHR171 instruction manual

Makita HR005G instruction manual

Makita

Makita HR005G instruction manual

Makita DHR171 instruction manual

Makita

Makita DHR171 instruction manual

Milwaukee 5264-59 Operator's manual

Milwaukee

Milwaukee 5264-59 Operator's manual

Makita HR4030C instruction manual

Makita

Makita HR4030C instruction manual

Skil 1764 MANUAL ORIGINAL

Skil

Skil 1764 MANUAL ORIGINAL

Hitachi DH 30PC2 Handing instructions

Hitachi

Hitachi DH 30PC2 Handing instructions

Makita HR4003C instruction manual

Makita

Makita HR4003C instruction manual

DeWalt D25413 Original instructions

DeWalt

DeWalt D25413 Original instructions

Kobalt K7RH-03 manual

Kobalt

Kobalt K7RH-03 manual

Makita HR4002 Specifications

Makita

Makita HR4002 Specifications

DeWalt XR DCH143 Original instructions

DeWalt

DeWalt XR DCH143 Original instructions

DeWalt D25413 Original instructions

DeWalt

DeWalt D25413 Original instructions

manuals.online logo
manuals.online logoBrands
  • About & Mission
  • Contact us
  • Privacy Policy
  • Terms and Conditions

Copyright 2025 Manuals.Online. All Rights Reserved.