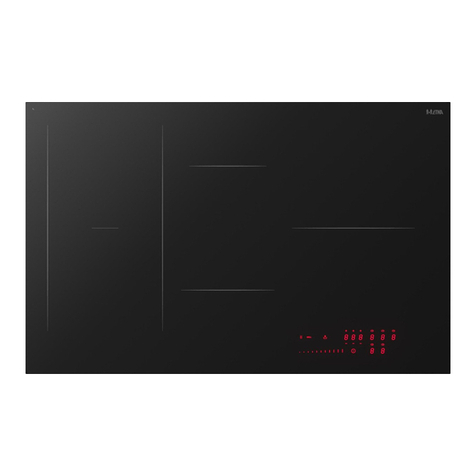
STATESMAN ECH77TC User manual

Please read these instructions carefully before use and retain for future reference.
Before switching on your appliance – Always check for any damage that may have been caused in transit.
Instruction Manual
ECH77TC
77cm 5 ZONE CERAMIC HOB
Serial number:

2
CONTENTS
Important Safety Instructions ........................................3
Specication..................................................................4
Appliance Overview.......................................................5
Installation ................................................................. 6-8
Operating Instructions............................................. 8-11
Cleaning and Maintenance..........................................12
Trouble Shooting Guide...............................................13
Disposal Information ...................................................14

3
IMPORTANT SAFETY INSTRUCTIONS
Read and follow all of the instructions even if you feel you are familiar with the product, and nd a
place to keep this manual handy for future reference.
Important: This product is intended for domestic household use only.
When using electrical appliances, basic safety precautions should always be followed:
1. Only a qualied electrician can install, connect or repair this appliance. Do not install or operate
the appliance if it has been damaged.
2. Ensure the appliance is installed according to the installation instructions provided.
3. Do not change the specications or modify this appliance.
4. Check the voltage of the appliance matches the household voltage, which is located on the
rating label.
5. The appliance is not intended to be operated by means of an external timer or remote control.
6. This appliance can be used by children aged from 8 years and above if they have been given
supervision or instruction concerning the use of the appliance in a safe way and understand the
hazards involved.
7. Cleaning and user maintenance shall not be made by children.
8. Children shall not play with the appliance.
9. This appliance can be used by persons with reduced physical, sensory or mental capabilities or
lack of experience and knowledge if they have been given supervision or instruction concerning
use of the appliance in a safe way and understand the hazards involved.
10. Never leave the appliance unattended when in use.
11. Always ensure children are not left alone or unattended in the area of the appliance.
12. Persons with cardiac pacemakers or other electrical implants are recommended to keep 50cm
from the cooking zones.
13. It is not recommended to leave any magnetisable objects (e.g. credit cards, memory cards) or
electronic devices (e.g. computers, MP3 players) near the appliance, as they may be aected
by its electromagnetic eld.
14. Do not allow anyone to sit, stand or climb on the appliance.
15. This appliance should not be used to warm or heat the room.
16. No combustible material or products should be placed on this appliance at any time.
17. Care should be taken as the appliance has sharp edges and could result in cuts or injuries.
18. Ensure that any stickers or protective lm that may be present on delivery is removed
before rst use.
19. Metallic, sharp or heavy objects such as cutlery should not be placed on the cooker top as
they can become extremely hot and may cause damage.
20. If the cooker top becomes damaged in any way, switch the appliance o at the mains
supply and contact a qualied electrician.
21. Care should be taken when using this appliance as the cooker top can become extremely hot.
22. Do not allow clothing or any items other than suitable cookware contact with the appliance.
23. Ensure saucepan handles do not overhang cooking zones that are switched on as they
may become hot.
24. It is not recommended to store anything on top of the appliance.
25. After use, always ensure the cooking zones are switched o.
26. It is not recommended to use a steam cleaner to clean the appliance.
27. Do not store ammable liquids and materials on or near the appliance.

4
TECHNICAL SPECIFICATION
Supplier Name / Trade Mark Statesman
Model Number ECH77TC
Type of Hob Ceramic
Number of Cooking Zones 5
Heating Technology Radiation
For circular cooking zones or area: Diameter of
useful surface area per cooking zone, rounded
to the nearest 5mm
Zone 1: 165mm
Zone 2: 200mm
Zone 3: 140mm (Multiple) 230mm
Zone 4: 200mm
Zone 5: 165mm
For non-circular cooking zones or area: length and
width of useful surface area per cooking zone,
rounded to the nearest 5mm
N/A
Energy consumption per cooking zone of
test per kg of water (Wh/kg)
Zone 1: 192.9
Zone 2: 180.7
Zone 3: 205.1
Zone 4: 177.5
Zone 5: 209.1

5
APPLIANCE OVERVIEW
1. Maximum 1200 W Zone
2. Maximum 1800 W Zone
3. Maximum 1000/ 2200 W Zone
4. Maximum 1800 W Zone
5. Maximum 1200 W Zone
6. Glass Plate
7. Control Panel
1.
2.
3.
4.
5.
7.
6.
1. Heating Zone Controls
2. Power/Timer Slider Control
3. Dual Zone Control
4. Lock Control
5. ON/OFF Control
6. Timer Control
Control Panel
Fig 1.
Fig 2.

6
INSTALLATION
This appliance should only
be installed by a qualied
technician. Before installing
the appliance ensure that the
area that you have selected
is suitable and allows enough
ventilation for the appliance.
Important: Always ensure the appliance is well ventilated and the air inlet and outlet are not blocked.
A (mm) 760
B (mm) 50 min.
C (mm) 20 min.
D Air Inlet
E Air Outlet (5mm)
770mm 520mm
D 51mm
H 55mm
750mm + 5
495mm + 5 50mm min.
50mm min.
50mm min.
50mm min.
5mm
1. Cut a hole in the worktop that corresponds with the above diagram. Ensure a 5cm space is
kept around the hole and the thickness of the worktop is at least 30mm.
Important: Ensure the worktop is heat-resistant to avoid deformation caused by the heat radiation
from the cooking zones (Fig. 4).
2. To secure the appliance to the worktop you will need to add the four xing brackets.
3. Place the appliance on a smooth stable surface (use the packaging to protect the appliance)
upside down to locate the four xing holes.
4. Screw each bracket into the located holes with the screws provided.
Important: Bracket positions may need to be adjusted slightly depending on the worktop thickness
(Fig. 5).
Fig 3.
Fig 4.

7
Fig 5.
A Screw
B Bracket
C Screw Hole
D Base
5. The appliance can now be inserted into the cut hole and secured to the worktop (Fig. 6).
Fig 6.
HOB
BRACKET BRACKET
WORK TOP
HOB
WORK TOP
Connecting to the Mains Power Supply
The power supply should be connected in compliance with the relevant standard, or a single-pole
circuit breaker. The method of connection is shown below.
Installation Diagram Internal Wiring
Wiring Instructions
• The Earth wire coloured Green/Yellow must be connected to the Earth terminal marked .
• The Live wire coloured Brown must be connected to the Live terminal marked L2.
• The Neutral wire coloured Blue must be connected to the Neutral terminal marked N.
• If the cable is damaged or needs replacing, this should be done by a qualied electrician using
the proper tools, so as to avoid any accidents.
• If the appliance is being connected directly to the mains supply, an Omni polar circuit breaker
must be installed with a minimum gap of 3mm between the contacts.
• The qualied technician must ensure that the correct electrical connection has been made
and that it complies with safety regulations.
• The cable must not be bent or compressed.
Fig 7.

8
• The cable must be checked regularly and only replaced by a properly qualied technician.
• Ensure the appliance is connected to an isolating switch providing full disconnection from the
mains supply. The appliance must not be connected to the mains supply by means of a 13A
plug and socket.
• The qualied technician must to use a H05GG-F power cord.
OPERATING INSTRUCTIONS
The controls respond to touch, so you do not need
to apply pressure and for best response use the ball
of your nger, not the tip. (Fig. 8)
Fig 8.
1. Switch on at the mains supply, the appliance will
beep once and the indicators will show for
1 second. This indicates that the appliance has
entered “Stand By” mode.
2. Touch the ON/OFF Control , all indicators will
show “-” (Fig. 9).
3. Place a suitable pan on the cooking zone
required, ensuring the cooking zone and pan are
clean and dry (Fig. 10).
4. Touch the required Heating Zone Control.
Fig 9.
Fig 10.
5. Adjust the heat setting by touching and sliding the
Slider Control to the required setting (Fig. 11).
6. To switch o a cooking zone, touch the required Heating
Zone Control (Fig. 12).
7. Touch and slide the Slider Control to Setting “I“and ensure
the display shows “0” (Fig. 13).
Fig 11.
Fig 12.
Fig 13.

9
Fig 14.
8. To switch the appliance o touch the ON/OFF Control (Fig. 14).
Important: If a heat setting is not chosen within 1 minute then the
appliance will automatically switch o.
Important: The heat setting can be modied at any point during
cooking.
WARNING: “H” indicates that a particular cooking zone is too hot to touch, when
the cooking zone has cooled down to a safe temperature the “H” will disappear.
Locking the Controls
You can lock the controls to prevent any unintended use or misuse by children, when locked all
controls will be disabled except for the ON/OFF Control .
1. Touch the Lock Control , the timer indicator will show “Lo”.
2. To unlock the controls ensure the appliance is switched on and touch and hold the Lock
Control for a couple of seconds.
Using the Double Zone Function
This function only works on cooking zone 3.
1. The dual cooking zone has two cooking areas.
The inner ring of the heating element (A) can be
controlled separately or both sections at once (B) (Fig. 15).
•
•
Fig 15.
2. Touch the Heating Zone Control for cooking zone 3. (Fig. 16)
3. The power lever indicator will ash, press Dual Zone
Control after 5 seconds the power level indicator will
stop ashing (Fig. 17).
Fig 16. Fig 17.
4. The double zone function is now activate and the display will
show the power level “6” and “=” alternately. (Fig. 18)
5. The power level can now be adjusted by touching and sliding
the Slider Control to the required setting (1 to 9). (Fig. 19)
Fig 18.
Fig 19.
6. To deactivate the double cooking zone, touch the Heating
Zone Control for cooking zone 3.
7. Press Dual Zone Control , the double zone function is
now disabled and the power level will return to 6 (Fig. 20).
Fig 20.

10
Timer Control
The timer can be used in two dierent ways:
a) Minute Minder (countdown mode): in this case the timer will not switch o any cooking zones
when the time is up.
b) Cooking Timer (switching a zone o): once the set time is up the selected cooking zone will
switch o (maximum is 99 minutes).
To Set the Minute Minder (countdown mode)
1. Turn on the appliance
2. Touch the Timer Control, “10” will show in the timer display,
“0” will ash (Fig. 21).
Fig 21.
3. Set the time by touching the Slider
Control e.g. 5 (Fig. 22).
4. Touch the Timer Control again and “1”
will ash (Fig. 23). Insert Fig. 23
Fig 22.
5. Set the time by touching the Slider
Control e.g. 9, the time that has been
set is 95 minutes (Fig. 24).
6. The timer count down will start
immediately and the display will
show the time remaining. Fig 23.
Fig 24.
7. A buzzer will beep for 30 seconds when the time is up
and the timer indicator will display “_ _ ” (Fig. 25). Fig 25.
To Select the Cooking Timer (switching a zone o)
1. Touch the Heating Zone Control that you want to set, once selected a red dot will display next
to the selected zone.
2. Touch the Timer Control, “10” will show in the timer display, “0”
will ash (Fig. 26).
Fig 26.
3. Set the time by touching the Slider Control e.g. 5 (Fig. 27).
4. Touch the Timer Control again and “1” will ash (Fig. 28). Fig 27.

11
5. Set the time by touching the Slider
Control e.g. 9, the time that has been set
is 95 minutes (Fig. 29). Insert Fig. 29
6. The timer count down will start
immediately and the display will show the
time remaining. Fig 28.
Fig 29.
7. When the cooking timer expires the selected cooking zone will switch o.
8. To change the time after the timer has been set you will need to start from the rst step.
Choosing the Correct Cookware
Do not use cookware with jagged edges or a curved base.
Ensure the base of the cookware is smooth, sits at against the glass and is the same size as the
cooking zone, ensuring the cookware is central on the cooking zone.
Always lift pans o the appliance, do not slide as this may scratch the glass.
Overheating Protection
The appliance is equipped with a temperature sensor that will monitor the temperature of the
appliance and if excessive temperatures are reached will automatically switch the appliance o.
Residual Heat Warning
When the appliance has been in operation there will be some residual heat left on the cooking zone
after switch o. The letter H will appear on the indicator to warn you that the appliance is still hot.
Automatic Shut O
A safety feature of this appliance is automatic shut o; this will occur if you forget to switch o a
cooking zone:
Power level 1 2 3 4 5 6 7 8 9
Default working timer (hour) 8 8 8 4 4 4 2 2 2

Regular cleaning will prevent any salts or minerals from accumulating on the hob and discolouring
the glass.
It is recommended to use a specialist ceramic cleaner to restore the surface, but use sparingly to
avoid coating the hob top too thickly. Too much cream cleaner will lead to discolouration. Use a dry,
clean cloth to polish the surface.
CLEANING AND MAINTENANCE
Everyday
soiling on glass
(ngerprints,
marks, stains left
by food or non-
sugary spills on
the glass)
1. Switch the main power supply o to
the appliance.
2. Apply a cooker top cleaner (suitable
for ceramic hobs) while the glass is still
warm (but not hot!)
• When the power to the cooktop is
switched o, there will be no ‘hot surface’
indication but the cooking zone may still
be hot! Take extreme care.
• Heavy-duty scourers, some nylon
scourers and harsh /abrasive cleaning
agents may scratch the glass. Always
read the label to check if you’re cleaner or
scourer is suitable.
• Never leave cleaning residue on the
appliance; the glass may become stained.
What How Important
Boil overs, melts,
and hot sugary
spills on the
glass
3. Rinse and wipe dry with a clean cloth
or paper towel.
Remove these immediately with a
ceramic hob scraper suitable for
ceramic glass cooktops, but beware of
hot cooking zone surfaces:
1. Switch the main power supply o to
the appliance.
2. Hold the blade or utensil at a 30°
angle and scrape the soiling or spill to
a cool area of the cooktop, taking care
not to scratch the glass.
3. Clean the soiling or spill up with a
dish cloth or paper towel.
• Remove stains left by melts and sugary
food or spills as soon as possible. If left to
cool on the glass, they may be dicult to
remove or even permanently damage the
glass surface.
• Cut hazard: when the safety cover is
retracted, the blade in a scraper is
razor-sharp. Use with extreme care and
always store safely and out of reach of
children.
12
Spills on the
touch controls
1. Switch the main power supply o
to the appliance.
2. Soak up the spill
3. Wipe the touch control area with a
clean damp sponge or cloth.
4. Wipe the area completely dry with
a paper towel.
• The appliance may beep and turn itself
o, and the touch controls may not
function while there is liquid on them.
• Make sure you wipe the touch control
area dry before turning the appliance
back on.

13
TROUBLESHOOTING
If you are having problems with your appliance, please use our troubleshooting guide below. If you
are unable to resolve the issue using this guide please ring our Customer Service Department on
0844 848 5861. Please have the model code and purchase information available.
The cooktop
cannot be turned
on.
Check that the mains power
supply is switched on.
Power cut. Check with your neighbours that
there hasn’t been a power cut.
Fuse box tripped. Check that the fuse box hasn’t
tripped.
The controls are locked.
There may be a slight lm of water
over the controls or you may be
using the tip of your nger when
touching the controls.
Make sure the touch control area
is dry and use the ball of your
nger when touching the controls.
Rough-edged cookware. Check all your cookware has at
and smooth bases see ‘Choosing
the Correct Cookware’.
Unsuitable, abrasive scourers or
cleaning products being used.
See ‘Cleaning and
Maintenance’.
Switch on at the mains power
supply.
Fault Possible cause Solution
The touch controls
are unresponsive.
Unlock the controls. See section
‘Locking the Controls’ for
instructions.
The touch controls
are dicult to
operate.
The glass is being
scratched.
Some pans make
crackling or clicking
noises.
This may be caused by the
construction of your cookware
(layers of dierent metals vibrating
dierently).
This is normal for cookware and
does not indicate a fault.

14
DISPOSAL
The European Directive 2012/19/EU on Waste Electrical and Electronic Equipment
(WEEE), requires that old household electrical appliances must not be disposed of in
normal unsorted municipal waste.
Old appliances must be collected separately in order to optimise the recovery and
recycling of the materials they contain and reduce the impact on human health and the
environment.
The crossed out “wheeled bin” symbol on the product reminds you of your obligation,
that when you dispose of the appliance it must be separately collected. Consumers
should contact their local authority or retailer for information concerning the correct
disposal of their old appliance.

15

0844 848 5861
38 Bluestem Road,
Ransomes Europark
Ipswich, IP3 9RR
Disclaimer: Statesman operate a policy of continual improvement and development.
We therefore reserve the right to change/alter the specication and appearance of our appliances without prior notice.
All diagrams and images shown in this manual are for illustration purposes only.
Table of contents
Other STATESMAN Hob manuals

STATESMAN
STATESMAN GH60WH User manual
STATESMAN
STATESMAN ECH60DC User manual

STATESMAN
STATESMAN GH75SS User manual

STATESMAN
STATESMAN GH61SS User manual

STATESMAN
STATESMAN ESH60SS User manual
STATESMAN
STATESMAN ECH60TC User manual

STATESMAN
STATESMAN GH60GB User manual

STATESMAN
STATESMAN ECH30TC User manual
STATESMAN
STATESMAN GH75GB User manual
