Stealth DIGI-TIG200PD User manual

DC INVERTER • AC TIG / DC TIG • DC MMA • WELDING MACHINE
Part No. 9011
DIGI-TIG200PD
OPERATING
INSTRUCTIONS
Suitable for
110V or 240V

SAFETY PRECAUTIONS
Follow these precautions carefully. Improper use of any welder can result in injury or death.
1. ONLY CONNECT WELDER TO A POWER SOURCE FOR WHICH IT WAS DESIGNED.
THE SPECIFICATION PLATE ON THE MACHINE LISTS THIS INFORMATION. WHEN
WELDING OUTDOORS ONLY USE AN EXTENSION CORD INTENDED FOR SUCH USE.
2. ONLY OPERATE WELDER IN DRY LOCATIONS AND ON CEMENT OR MASONRY FLOOR.
KEEP AREA CLEAN AND UNCLUTTERED.
3. KEEP ALL COMBUSTIBLES AWAY FROM WORK SITE.
4. DO NOT WEAR CLOTHING THAT HAS BEEN CONTAMINATED WITH GREASE OR OIL.
5. KEEP CABLES DRY AND FREE FROM OIL AND GREASE AND NEVER COIL AROUND
SHOULDERS.
6. SECURE WORK WITH CLAMPS OR OTHER MEANS – DON’T OVER-REACH WHEN
WORKING.
7. NEVER STRIKE AN ARC OVER A COMPRESSED GAS CYLINDER.
8. DON’T ALLOW THE INSULATED PORTION OF THE ELECTRODE HOLDER TO TOUCH
THE GROUND WHILE CURRENT IS FLOWING.
9. SHUT OFF POWER AND UNPLUG MACHINE WHEN REPAIRING OR ADJUSTING.
INSPECT BEFORE EVERY USE. ONLY USE IDENTICAL REPLACEMENT PARTS.
10. FOLLOW ALL MANUFACTURER’S RULES ON OPERATING SWITCHES AND MAKING
ADJUSTMENTS.
11. ALWAYS WEAR PROTECTIVE CLOTHING WHEN WELDING. THIS INCLUDES: LONG
SLEEVED SHIRT (LEATHER SLEEVES), PROTECTIVE APRON WITHOUT POCKETS, LONG
PROTECTIVE TROUSERS, BOOTS AND GLOVES WHEN HANDLING HOT MATERIALS.
12. ALWAYS WEAR A WELDER’S HELMET WITH PROTECTIVE EYE PIECE WHEN WELDING.
WEAR A PROTECTIVE CAP UNDERNEATH THE HELMET.
13. WHEN WELDING OVERHEAD, BEWARE OF HOT METAL DROPPINGS. ALWAYS PROTECT
THE HEAD, HAND, FEET AND BODY.
14. KEEP A FIRE EXTINGUISHER CLOSE BY AT ALL TIMES.
15. DO NOT EXCEED THE DUTY CYCLE OF THE MACHINE. THE RATED CYCLE OF A
WELDING MACHINE IS THE PERCENTAGE OF A TEN MINUTE PERIOD THAT THE
MACHINE CAN OPERATE SAFELY AT A GIVEN OUTPUT SETTING.
16. KEEP ALL CHILDREN AWAY FROM WORK AREA. WHEN STORING EQUIPMENT, MAKE
SURE IT IS OUT OF REACH OF CHILDREN.
17. GUARD AGAINST ELECTRIC SHOCK. DO NOT WORK WHEN TIRED. DO NOT LET BODY
COME IN CONTACT WITH GROUNDED SURFACES.
STEALTH DIGI-TIG200PD

1 MAIN USE AND RANGE
STEALTH DIGI-TIG200PD welding machine has three functions and can be used as DC
MMA, AC TIG, or DC/PULSE TIG welder.
All metals: copper, aluminium, titanium and stainless steel materials etc, can be welded
in all positions. The welding current is stable with stepless adjustments. The machine is
compact, lightweight and easily transported. It is particularly suited to pressure vessel,
building, shipping and petrochemical works.
2 TECHNICAL SPECIFICATIONS
STEALTH DIGI-TIG200PD
MODEL: DIGI-TIG200PD
INPUT Voltage 1 x AC110V~120V 50Hz 1 x AC220V~240V 50HZ
No-load Voltage 70V
DC Current Adjusting Range 5~95A 5~160A
MMA Rated Output Current 95A 160A
Rated Duty Cycle 35%
No-load Voltage 70V
AC Current Adjusting Range 5~120A 5~200A
TIG SP % (AC balance) 10~70
AC Square Wave Frequency 30~250Hz
Rated Duty Cycle 60%
DC Current Adjusting Range 5~120A 5~200A
TIG Rated Duty Cycle 60%
Peak Current 5~120A 5~200A
Standard Base/Peak Current Ratio 5~95%
PULSE Rated Duty Cycle 60%
TIG Pulse Width 5%~95%
Pulse Frequency 0.1~500Hz@DC
0.1~250Hz@AC
Current UP / DOWN Slope Time 0~10S
Initial Current / Welding Current 5~150%
Crater-Fill Current / Welding Current 5~95%
Pre Gas Flow Time 0~25s
Post Gas Flow Time 0~25s
Arc starting Mode HF/LIFT TIG
Efficiency ≥80%
Weight 25kg
Protection Class of Enclosure IP21S

STEALTH DIGI-TIG200PD
3 OPERATING CONDITIONS AND WORK SURROUNDINGS
3.1 OPERATING CONDITIONS
Voltage of power source: 1~AC 110V or AC 240V
Frequency: 50/60Hz
Reliable grounding protection
3.2 WORK SURROUNDINGS
3.2.1 Relative humidity: not more than 90% (average monthly temperature not more
than 20ºC)
3.2.2 Ambient temperature: –10ºC ~ 40ºC
3.2.3 The welding site should have no harmful gas, chemicals, moulds and
inflammable matter, explosive and corrosive medium.
3.2.4 Operating in rain is not permitted.
4 PRODUCT DESCRIPTION
• Before welding, the operator should read the operating instructions.
• Checkthemachineappearancefordeformationanddamage.
• Forthesafetyoftheequipmenttheoperatormustmakeanappropriateearthaccording
to the power supply system.
• Theweldingoperationshouldbecarriedoutinadryandwellventilatedarea.
• Checkthemachineoutputconnection.
• Themachineshouldnotbemovedorthecoveropenedwhenthepowerisonand
during the welding operation.
• Themachineshouldbemaintained,operatedandmanagedbyaqualiedperson.
• Thecurrentofthedistributionboardshouldbenolessthan40A.
5 PANEL FUNCTION DIAGRAMS
Ⅲ. OPERATING CONDITION AND WORK SURROUNDING
1. Operating condition:
。
Voltage of power source: 1~AC110V or AC 240V
Frequency: 50/60Hz
Reliable grounding protection
2.Work surrounding
① ℃
. relative humidity: not more than 90 %( average monthly temperature not more than 20 )
② ℃℃
. ambient temperature:-10 ~ 40
③. The welding site should have no harmful gas, Chemicals, molds and inflammable matter,
explosive and corrosive medium, no big vibration and bump to the welder.
④. Avoiding rain water. Operating in rain is not allowed.
Ⅳ. DESCRIPTION OF THE ERECTION
1. Before welding, the operator should read the operation instructions.
2.Check the welder appearance for deformation and damage.
3.For the safety of the equipment and the persons, the customer must correctly make grounding
or protection according to the power supply system:using 4mm2lead to connect the protection
grounding of the welder
4. Welding operation should be carried out in dry and good ventilating area.The surrounding
objects should be not less than 0. 5m away from the welder.
5.Checking the welder output connector for tightness.
6.The welder can not be moved and the cover can not be opened during the power is on and
welding operation is carried out.
7.The welder should be cared, used and managed by specialized person.
8.Current of the distribution board:not less than 40A
Ⅴ.SKETCH SKETCH THE PANEL FUNCTION
1. FRONT PANEL 2. BACK PANEL
20
24
21 22
7 8
4
910
1113
3
5
615
15
16
17 18 16
112
19
26
23
FRONT PANEL BACK PANEL

STEALTH DIGI-TIG200PD
1.Memory chanel LED 2. Data Display meter 3. Parameter Select function 4.indicating light of power
5. S -- unit of up & downslope time & pre& post flow time
% -- unit of AC balance &peak time on
Hz-- unit of pulse freq.&AC freq.
((
6. indicating light of Parameter Select function Pre-flow /Start current/Up slope/Welding Amps Pulse peak
)
amps /peak time on/ pulse freq./base Amps/down slope/end current/post flow/AC freq./ AC balance/)
7.AC
slector
AC WAVE FORM: advanced square/soft square/triangular square / sine square
8.warning indicating light
9. MMA slector
DC-/DC+
10.TIG PULSE slector
11.TIG slector
DC TIG/AC TIG
12. 2 T/ 4 T slector
( ) ()
13. Data Display Adjustment Knob 15. output"+" Welding holder 16. output"-" Ground clamp
17.argon out 18.argon arc control (or remote control)
19.Amp Adjustment slector (remote control)
panel/ pedal /finger torch
20. power switch
21.argon inlet 22.power supply 23.safety earthing column 24.fan
25.HF/Lift TIG slector
1
2
3
43
7
10
11
12
85
25
13
9
6
6
19
1. Memory channel LED
2. Data Display meter
3. Parameter Select function
4. Power light indicator
5. S = Unit of up and downslope time and
pre and post flow time
% = unit of AC balance and peak time on
Hz = unit of pulse frequency and AC
frequency
6. Parameter Select function: Pre-Flow, Start
Current, Up Slope, Welding Amps, Pulse
Peak Amps, Peak Time on, Pulse
Frequency, Base Amps, Down Slope,
End Current, Post Flow, AC frequency,
AC balance
7. AC selector
8. Warning indicating light
9. MMA selector: DC– / DC+
10. TIG PULSE selector
11. TIG selector: DC TIG / AC TIG
12. 2T / 4T selector
13. Data Display adjustment knob
15. Output Positve (welding holder)
16. Output Negative (ground clamp)
17. Argon out
18. Argon arc control (or remote control)
19. Amp Adjustment Selector (remote control):
Panel, Pedal, Torch
20. Power switch
21. Argon inlet
22. Power supply
23. Safety earthing column
24. Cooling fan
25. HF/Lift TIG selector

STEALTH DIGI-TIG200PD
Ⅵ.METHOD OF THE OPERATION
1.ARGON ARC WELDING(TIG)
a. FRONT OF WELDER b. BACK OF WELDER
1.1 CLEARING BEFORE WELDING
Tungsten argon an welding is very sensitive to surface contamination of filled metal.
Therefore before welding is carried out, grease, paint and coating on the surface,lubricant for
machining and oxidized film should be removed.
1.2 DC ARGON ARC WELDING
①
.selector "11" onto the position " DC TIG "or "AC TIG", selector "10" onto the position " pulse
off " ,Connecting the gas inlet pipe to inlet "21" of the welding.
②
.Connecting gas inlet pipe of the welding torch to argon output of welder "17".
③
.Putting the aerial plug of the welding torch in the argon arc control socket "18".
④
.Testing gas: get the power of the welder ready and switch on the power "2", open the argon
bottle switch and switch on the flow meter, press the torch switch, select suitable argon flow.
⑤
. .Regulating the knob " 3 &13". Selecting suitable welding current according to thickness
of the workpiece to be welded.. Selecting suitable current down slope time and post flow
time according to the current.
Notice 1:
The current indicating meter on the front panel is used to display the preset output
current level before welding, and actual output level while welding: A lit display indicates input
power is turned on.
Notice 2:
When using
'Adjustable foot control '.regulating the current with sole. selector "12" onto
the position " PEDAL "welding current will increase gradually when you step at full tilt the 'Adjus
table foot control
'with sole.
Notice 3:
When using
' Adjustable finger control torch '.regulating the current with finger.
selector "19" onto the position " Panel " or " PEDAL "or"
finger torch",, then begin to weld.
⑥
. Tungsten electrode end is 2-3mm away from the welding workpiece. Press the torch
oo
workpiece
torch
21
argon
bottle
switch
flow meter
gas inlet pipe
20
24
23 22
7 8
4
910
1113
3
5
615
15
16
17 18 16
112
19
26
FRONT PANEL BACK PANEL
6 MACHINE OPERATION
6.1 ARGON ARC WELDING (TIG)
6.2 CLEANING BEFORE WELDING
Tungsten argon welding is very sensitive to surface contamination. Therefore, before
welding is carried out remove grease, paint, surface coatings, lubricants and oxidized
film.
6.3 DC ARGON ARC WELDING (refer to diagram on page 5)
6.3.1 Select 11 to the position DC TIG, select 10 to the position PULSE OFF, connect
the gas inlet pipe to inlet 21.
6.3.2 Connect welding torch gas inlet pipe to argon output 17.
6.3.3 Connect the torch control plug to the argon arc control socket 18.
6.3.4 Testing gas: Switch on the power 2. Open the argon bottle. Press the torch
switch and select suitable argon flow.
6.3.5 Regulating knobs 3 & 13. Select suitable welding current according to
thickness of the workpiece to be welded. Select suitable current down slope
time and post flow time according to the current.
Note 1: The current indicating meter on the front panel is used to display the
preset output current level before welding, and actual output level while
welding: A lit display indicates input power is turned on.
Note 2: Select 12 to the position PEDAL and regulate welding current with
the foot control.
Note 3: When using Adjustable Finger Control torch, select 19 to position
PANEL or PEDAL or FINGER TORCH then start welding.
6.3.6 Ensure tungsten electrode end is 2-3mm away from the workpiece. Press
the torch switch, arc striking will occur. Notice: During welding, when the
2T/4T switch 12 is on 2T the switch of the torch must be pressed and
should not be released, otherwise the arc will be broken.

STEALTH DIGI-TIG200PD
6.3.7 Release the switch of the torch and the welding current will reduce
gradually (time is adjustable) until the arc extinguishes. The welding torch
should not be removed as soon as the arc extinguishes to allow the gas to
flow over the weld, in order to prevent oxidisation.
6.4 PULSE ARGON ARC WELDING
6.4.1 Selection of peak current and base current:
6.4.2 Select 11 to position DC TIG or AC TIG and selector 10 to the ON position.
6.4.3 Select peak time in ratio: It can be selected between 5%-95%.
6.4.4 Select UP SLOPE / DOWN SLOPE time: It can be selected between 0-10S.
6.5 PULSE ARGON TUNGSTEN WELDING PROCESS (for reference only)
switch,arc striking will occur.
Notice: During welding, when the" 12. 2T/4Tswitch"on "2T", switch of the torch must be
pressed and can not be released.otherwise the arc will be broken.
⑦
.Releasing the switch of the torch, welding current will reduce gradually (time is adjustive)
and arc extinguishes.The welding torch can not be removed as soon as the arc extinguishing. Let
the protection gas cooling down for the welding seam not to be oxidized.
⑧
.When the welding operation is finished, turn off argon bottle switch and cut off input power
of the welder.
1.3 PULSE ARGON ARC WELDING
①
. Selection of peak current and base current:
②
. selector "11" onto the position " DC TIG " or "AC TIG "and selector "10" onto the position
" on",
③
.select peak time on ratio: It can be selected between 5%-95%.
④
.select up-slope&down slope time: It can be selected between 0-10S.
⑤
.Gas connecting and testing,are generating and are blowing off etc. are all the same as DC
are welding.
1.4 PULSE ARGON TUNGSTEN WElDING PROCESS (only for reference)
①.Features and application scope of the process .
The pulse type argon tungsten are welding is different from the continuous(DC) argon are
welding.The welding current is pulsed.The wave form of the current is shown in the following
sketch.Ip and Ib and their continuous time tp and tb can be regulated according to
requirements of the process. The amplitude value of electric current changes periodically with
certain frequency in case of the pulse current, molten base will be formed in the workpiece and
the molten bath will be solidified in care of base current.The welding seam is formed by
reciprocal overlaps. Welding heat input can be controlled by regulating pulse frequency, pulse
current amplitude, size of base current,continuous time of pulse current and base current and
therefore the welding seam,size and quality of the zone influenced from heat can be controlled.
②
.Advantages and application scope of pulse argon gas tungsten arc welding
a. Precisely control the size of the bath inputting heat to workpiece to increase penetration
tp--width time of pulse current
width time of base current
tb--
tp+tb=T
tb
--- = D pulse width
CUR.
(A)
T (s)
t1
gas pre flow
arcing
up-slope
welding process
down-slope
arcing off
post Flow
tp tb
T
Ip
Ib
Ip--pulse current
Ib--base current
tp
Start Amps End Amps
Features and application scope of the process
The pulse type argon tungsten arc welding is different from the continuous
(DC) argon are welding. The welding current is pulsed. The wave form of the
current is shown in the diagram above. Ip and Ib and their continuous time
tp and tb can be regulated according to requirements of the process. The
amplitude value of electric current changes periodically with certain frequency
in case of the pulse current, molten base will be formed in the workpiece and
the molten bath will be solidified in care of base current.The welding seam is
formed by reciprocal overlaps. Welding heat input can be controlled by
regulating pulse frequency, pulse current amplitude, size of base current,
continuous time of pulse current and base current and therefore the welding
seam, size and quality of the zone influenced from heat can be controlled.
Advantages and application scope of pulse argon gas tungsten arc welding
• Preciselycontrolthesizeofthebathinputtingheattoworkpiecetoincrease
penetration resistance of molten seam and preservation of bath. It is easy to obtain
even fusing depth. This process is specially applicable to omni-bearing welding of
sheet and formation with both sides through one side welding.
• Pulsearccanobtaingreaterfusingdepthwithlowerheatinput.Thereforeunderthe
same condition, the zone influenced from welding heat and deformation from welding
can be reduced. This is very important for sheet and ultra-thin sheet welding.
• Fastcoolingofthebathmetalandshortdurationtimeofhightemperatureduring
welding can reduce cracks caused to the thermo-sensitive materials.

STEALTH DIGI-TIG200PD
5. The Method of the welding same as 1.1
2.Hand welding with electrode
①
.selector "9" onto the position " DC+ " or "DC-"
②
. select right welding current
select empiric formula:I=40d, d is dia. of the electrode.
③
.Notice positive and negative connection during welding.
④
.Connecting input power for the welder, then switch on the power and current indicating
light "4" is on .
⑤
.Pay attention to rated welding current and rated duty cycle of the welder. Overload is not
allowed.
⑥
.After the welding operation is finished, let the welder be ventilated for a few minutes and
then cut off the power switch.
Ⅶ.SYSTEMATIC BLOCK DIAGRAM
OUTPUT
AC/DC
Rectifier &
Filter
INPUT
Inverse
Circuit
25KHz
OUTPUT
Rectifier
Filter
input
Control Circuit H.F.
+
TORCH
-
ELECTRODE
HOLDER
WORKPIECE
WELDER
6.6 SELECTION OF WELDING PARAMETERS
Except for pulse current and the width time (width ratio) as well as pulse frequency,
welding parameters of pulse argon gas tungsten arc welding are the same as general
tungsten DC argon arc welding. Pulse current increasing means electric arc can obtain
greater penetration ability.
Too much current can cause local melting of tungsten electrode. Generally, welding
current required for DC tungsten argon arc welding or greater current is used. Arc
holding current and base current influences cooling and crystallizing of the metal in
the bath. The range is determined by performance of the welding materials. When sheet
is welded, smaller arc holding current (base current) is usually used in order to reduce
welding through and deformation. When pulse width ratio (holding time of pulse current
and base current) is selected, both the heat input and features of pulse welding should
be considered. Usually, it can be selected between 10%-90%. Selection of pulse
frequency (periodical change time of pulse current) mainly depends on thickness of
sheet and welding speed and operation custom of the operator should be also
considered
6.7 AC ARGON ARC WELDING
6.7.1 Select 11 to position AC TIG, select 25 to position HF TIG, select 10 to position
OFF or ADVANCED AC connecting the gas inlet pipe to inlet 21 of the welding.
6.7.2 Connection method same as 2.
6.7.3 Select correct SP (AC balance).
SP = tp
tn 100%
tp = the time of I2at positive.
tn = the time of In at negative.
6.7.4 Select correct AC square wave frequency and AC balance.
6.7.5 Welding method same as 2.
7 SYSTEMATIC DIAGRAM
8 PRODUCT DESCRIPTION
This product is sold subject to the understanding that if any defect in manufacture or
material shall appear within 24 months from date of consumer sale, the supplier will
arrange for such defect to be rectied without charge (except for any damage due to
misuse).

STEALTH DIGI-TIG200PD
Problems Causes Solutions
Power lamp not light 1. No electricity input 1. Check incoming line
2. Switch of welder fails 2. Replace the switch
Fan not rotating 1. Fan power line is off 1. Reconnect the line
2. Enclosure blocks the fan 2. Reform the enclosure
due to deformation 3. Replace the fan
3. The fan fails
Warning lamp lights 1. Over heat (yellow lamp lights) 1. Welding after cooling
2. Over current (Green lamp lights) 2. Input voltage too low or the
machine fails
No output of welder 1. Over current protection 1. Over load using
2. Welder fails 2. Maintenance in manufacturer
or service centre
Output current 1. Input Voltage is low 2. Power line is thickened
decreased 2. Input line is too thin
Current cannot be 1. Connecting line of the 1. Reconnect the line
regulated potentiometer is off 2. Replace potentiometer
2. Potentiometer for current
regulation fails
High frequency 1. The switch fails 1. Replace torch switch
cannot be generated 2. Interval of high frequency 2. Regulating discharging interval
discharging is too big to 0.8-1.0mm
3. Distance of the torch and 3. Put torch tungsten electrode
workpiece is too far high close to workpiece
frequency arc generator fails 4. Replace high frequency arc
generator
Arc of argon welding 1. Argon gas flow not well regulated 1. Regulate well
is broken or 2. Tungsten electrode fails 2. Replace or sharpen
tungsten electrode 3. Value of current does not match 3. Select the electrode diagram
is burnt with tungsten electrode diagram and current correctly
4. After flow time too short 4. Enlarge the time
Welding torch 1. Not use the water cooling when 1. Use water cooling
overheats current is more than 160A 2. Enlarge the argon flow
2. The argon flow is the low current
Welding stops, and Self-protection has engaged
warning light is on 1. Display 801 1. Over-voltage, lower-voltage
2. Display 802 2. Over-current
3. Display 804 3. Over-temperature
4. Display 805 4. Torch switch always close
9 TROUBLESHOOTING

STEALTH DIGI-TIG200PD
WARNING
AVISO DE
PRECAUCION
ATTENTION
WARNUNG
ATENÇÃO
Spanish
French
German
Portuguese
Japanese
Chinese
Korean
Arabic
READ AND UNDERSTAND THE MANUFACTURER’S INSTRUCTION FOR THIS EQUIPMENT AND THE CONSUMABLES TO BE
USED AND FOLLOW YOUR EMPLOYER’S SAFETY PRACTICES.
SE RECOMIENDA LEER Y ENTENDER LAS INSTRUCCIONES DEL FABRICANTE PARA EL USO DE ESTE EQUIPO Y LOS
CONSUMIBLES QUE VA A UTILIZAR, SIGA LAS MEDIDAS DE SEGURIDAD DE SU SUPERVISOR.
LISEZ ET COMPRENEZ LES INSTRUCTIONS DU FABRICANT EN CE QUI REGARDE CET EQUIPMENT ET LES PRODUITS A
ETRE EMPLOYES ET SUIVEZ LES PROCEDURES DE SECURITE DE VOTRE EMPLOYEUR.
LESEN SIE UND BEFOLGEN SIE DIE BETRIEBSANLEITUNG DER ANLAGE UND DEN ELEKTRODENEINSATZ DES HER-
STELLERS. DIE UNFALLVERHÜTUNGSVORSCHRIFTEN DES ARBEITGEBERS SIND EBENFALLS ZU BEACHTEN.
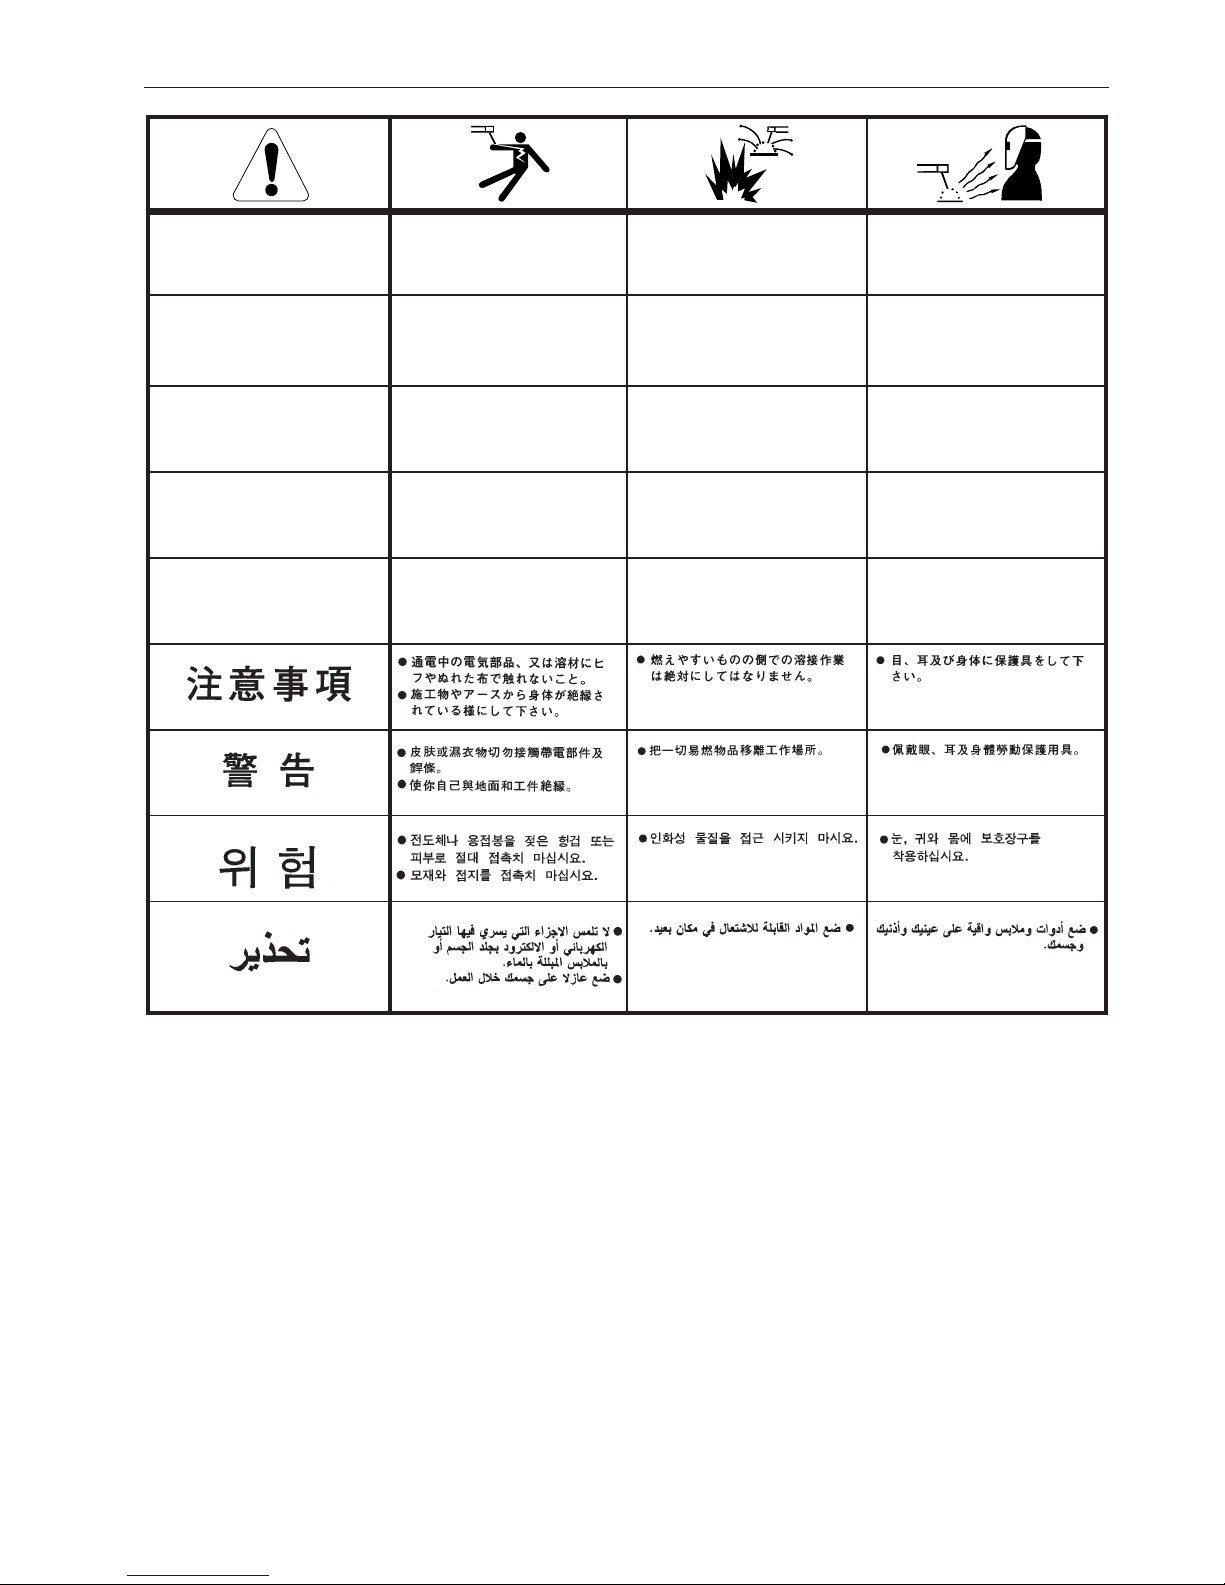
●Do not touch electrically live parts or
electrode with skin or wet clothing.
●Insulate yourself from work and
ground.
●No toque las partes o los electrodos
bajo carga con la piel o ropa moja-
da.
●Aislese del trabajo y de la tierra.
●Ne laissez ni la peau ni des vête-
ments mouillés entrer en contact
avec des pièces sous tension.
●Isolez-vous du travail et de la terre.
●Berühren Sie keine stromführenden
Teile oder Elektroden mit Ihrem
Körper oder feuchter Kleidung!
●Isolieren Sie sich von den
Elektroden und dem Erdboden!
●Não toque partes elétricas e elec-
trodos com a pele ou roupa molha-
da.
●Isole-se da peça e terra.
●Keep flammable materials away.
●Mantenga el material combustible
fuera del área de trabajo.
●Gardez à l’écart de tout matériel
inflammable.
●Entfernen Sie brennbarres Material!
●Mantenha inflamáveis bem guarda-
dos.
●Wear eye, ear and body protection.
●Protéjase los ojos, los oídos y el
cuerpo.
●Protégez vos yeux, vos oreilles et
votre corps.
●Tragen Sie Augen-, Ohren- und Kör-
perschutz!
●Use proteção para a vista, ouvido e
corpo.

STEALTH DIGI-TIG200PD
WARNING
AVISO DE
PRECAUCION
ATTENTION
WARNUNG
ATENÇÃO
Spanish
French
German
Portuguese
Japanese
Chinese
Korean
Arabic
LEIA E COMPREENDA AS INSTRUÇÕES DO FABRICANTE PARA ESTE EQUIPAMENTO E AS PARTES DE USO, E SIGA AS
PRÁTICAS DE SEGURANÇA DO EMPREGADOR.
●Keep your head out of fumes.
●Use ventilation or exhaust to
remove fumes from breathing zone.
●Los humos fuera de la zona de res-
piración.
●Mantenga la cabeza fuera de los
humos. Utilice ventilación o
aspiración para gases.
●Gardez la tête à l’écart des fumées.
●Utilisez un ventilateur ou un aspira-
teur pour ôter les fumées des zones
de travail.
●Vermeiden Sie das Einatmen von
Schweibrauch!
●Sorgen Sie für gute Be- und
Entlüftung des Arbeitsplatzes!
●Mantenha seu rosto da fumaça.
●Use ventilação e exhaustão para
remover fumo da zona respiratória.
●Turn power off before servicing.
●Desconectar el cable de ali-
mentación de poder de la máquina
antes de iniciar cualquier servicio.
●Débranchez le courant avant l’entre-
tien.
●Strom vor Wartungsarbeiten
abschalten! (Netzstrom völlig öff-
nen; Maschine anhalten!)
●Não opere com as tampas removidas.
●Desligue a corrente antes de fazer
serviço.
●Não toque as partes elétricas nuas.
●Do not operate with panel open or
guards off.
●No operar con panel abierto o
guardas quitadas.
●N’opérez pas avec les panneaux
ouverts ou avec les dispositifs de
protection enlevés.
●Anlage nie ohne Schutzgehäuse
oder Innenschutzverkleidung in
Betrieb setzen!
●Mantenha-se afastado das partes
moventes.
●Não opere com os paineis abertos
ou guardas removidas.

STEALTH DIGI-TIG200PD
Specialised Welding Products Ltd
Unit 1, Farringdon Industrial Centre, Farringdon, Nr Alton, Hampshire GU34 3DD, UK
Table of contents
Other Stealth Welding System manuals

Stealth
Stealth DIGI-TIG 320 AC/DC PULSE User manual

Stealth
Stealth DIGI-ARC140ST DV User manual

Stealth
Stealth DIGI-ARC 160PFC MV User manual

Stealth
Stealth DIGI-CUT 60-1 User manual

Stealth
Stealth DIGI-MIG 200 LCD User manual

Stealth
Stealth digi-arc200c dv User manual

Stealth
Stealth 9000H User manual

Stealth
Stealth digi-cut45pfc User manual